Project Journals
create a diary for your project and show us your progress, with up to 100 photos!
|
MGST Andrew Metford Perth, Western Australia, & Auckland, New Zealand (2 posts) Registered: 10/19/2009 05:42AM Main British Car: 1973 MG BGT, 1974 MG BGT 1798, 1950 |
Andrew Metford's '74 MG BGT 1950cc race car
Owner: Andrew Metford
City: Auckland, New Zealand Car Model: 1974 MG BGT Engine: 1798 BMC "B" series inline 4 cylinder Engine: Built by Lynn Rogers Automotive, Auckland, New Zealand. 18v 5 bearing cast iron block / head. Block bored to 1950cc and o-ringed. Cylinder head ported, polished, combustion chambers reshaped, 1.690” inlet valves, 1.440” exhaust valves. Forged steel flat-plane crankshaft ( nitrided ), Carrillo steel con rods with ARP conrod bolts, Proturn forged pistons, Japanese motorcycle racing piston rings, Kent 719 scatter pattern billet camshaft, duplex timing chain, Titan 1.625 alloy roller rockers, steel sprocket flywheel with ARP flywheel bolts. Competition head gasket ( Paul Walbran ). Weber DCO SP 48 side draught carburettor on a Warneford 6" inlet manifold. Crane XR700 electronic ignition, Mocal 16 row oil cooler, Basil Adams one piece alloy side plate. Sump deepened 1 inch and baffled. Engine / flywheel / clutch / crankshaft pulley all balanced. Cooling: Standard MG B radiator, recored and painted, electric fan. Exhaust: Factory-specification big-bore ( 1 ¾” ) tubular steel extractors, going into a custom-made ( by me at home ) 1 ¾” exhaust system fabricated with straight pipe and mandrel bends, tig welded, and HPC coated. 1 muffler at the back. Clutch / Gearbox: MGB cover with Lotus Twincam sprung centre. Paddle friction plate with kevlar and ceramic linings. 4 synchromesh manual overdrive. Standard gearset re-machined to achieve close ratio gearset. Ratios 1st 2.746, 2nd 1.76, 3rd 1.25, 4th 1.00, overdrive 0.82 Rear Axle: Banjo axle casing with Quaife ATB unit. Ratios available 3.9, 4.1, 4.3, 4.55, 4.875 Front Suspension: Modified front cross member to accept Paul Walbran Bilstein telescopic kit, which includes new top arm mount ( adjustable for castor and camber ). ¾” sway bar with 9/16” secondary bar, giving a 380% increase in total bar stiffness over standard 9/16” bar. Double-width Nolathane sway bar mounts. 550lb competition springs. Rear Suspension: Standard leaf springs and 1" lowering blocks. Paul Walbran Bilstein telescopic shock kit. Brakes: (master) Wilwood 7/8" master cylinder (front) Nissan 272mm x 20mm ventilated discs with Austin Princess 4 piston callipers and Mintex M1166 pads. (rear) standard MGB 10” drums with Ferodo VG95 linings Wheels/Tires: Dry - 15” x 6” Cheviot minilites with 205/50R15 Toyo R888 race tyres. Wet - 14” x 5.5” early MGB steel disc wheels with 195/60/R14 Bridgestone GIII tyres Body Mods: Standard, all steel bodywork, all trim, carpet, grill, and steel bumpers fitted, all lights fitted and working. Interior: Racetech 4009 drivers seat, Willans 6 point 3” FIA harness ( driver and passenger ). Momo Model 78 steering wheel with Sparco quick release adaptor. Custom-made panel fitted to centre console in place of radio, containing oil temperature gauge ( Smiths, matching the original gauges), and low oil pressure warning light. Complete with full trim, carpeting and insulation, seating, sun visors, headlining etc. Electrical: MGCCARS.com 100 amp alternator Everyone's got a story, so here's mine :) In 1998(?) I bought a 1966 MG B racecar off a guy in the car club. It had been raced for about 5 years, starting off as a pretty basic club car, and ending up as a pretty quick race car. Anyway, he was selling it as he was building a BGT V8 race car. The roadster got me started in racing proper, my first race was the last Wings and Wheels meeting at Whenuapai Air Force base in Auckland in the year 2000, on my 23rd birthday. Here is the car in action at the last event the car ever did ( we didn't know that at the time though ), the 2001 Dunlop Targa NZ Bambina, with my brother David as co-driver. This was our first road rally as competitors, I had been service crew for an MG BGT V8 in the 5 day Targa NZ for the past 3 years, and my brother had crewed with me the first year, and was the co-driver the next 2 years. On our Targa Bambina, we were 3rd in class at lunch, but dropped down the order at a service stop after we had trouble getting the car to start due to heat soak after stopping for more gas. After a long day, we finished the event, didn't put a mark on the car, and got our first finisher's medals :) 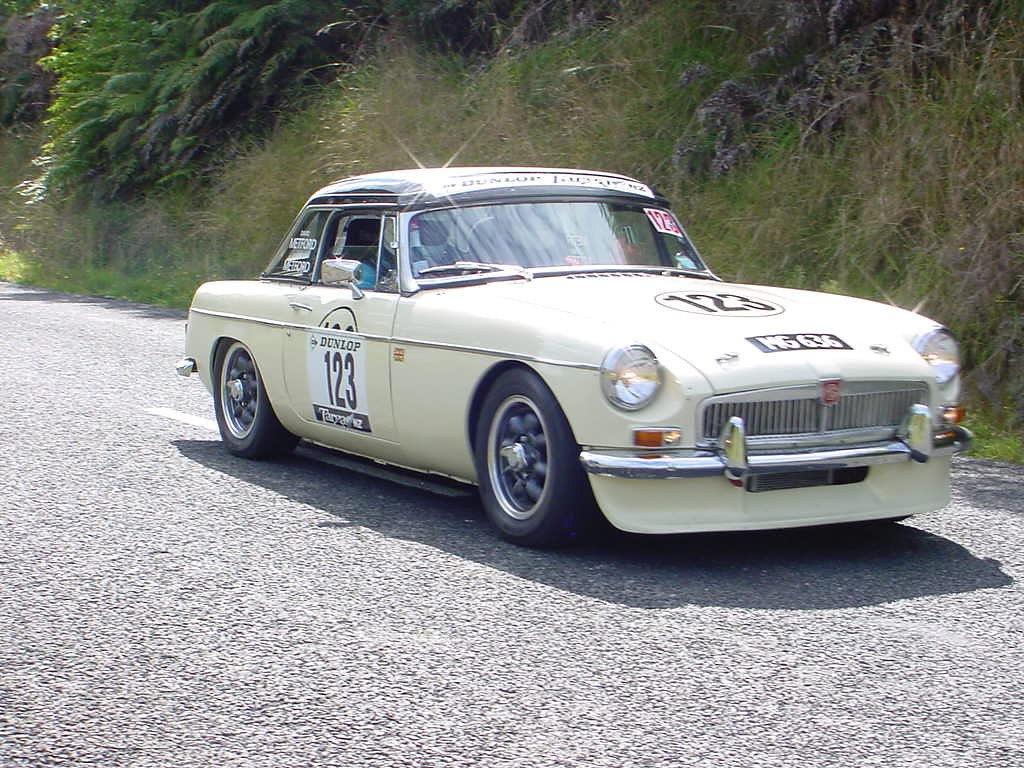 Targa Bambina 2001.3 by Andrew Metford, on Flickr Targa Bambina 2001.3 by Andrew Metford, on Flickr
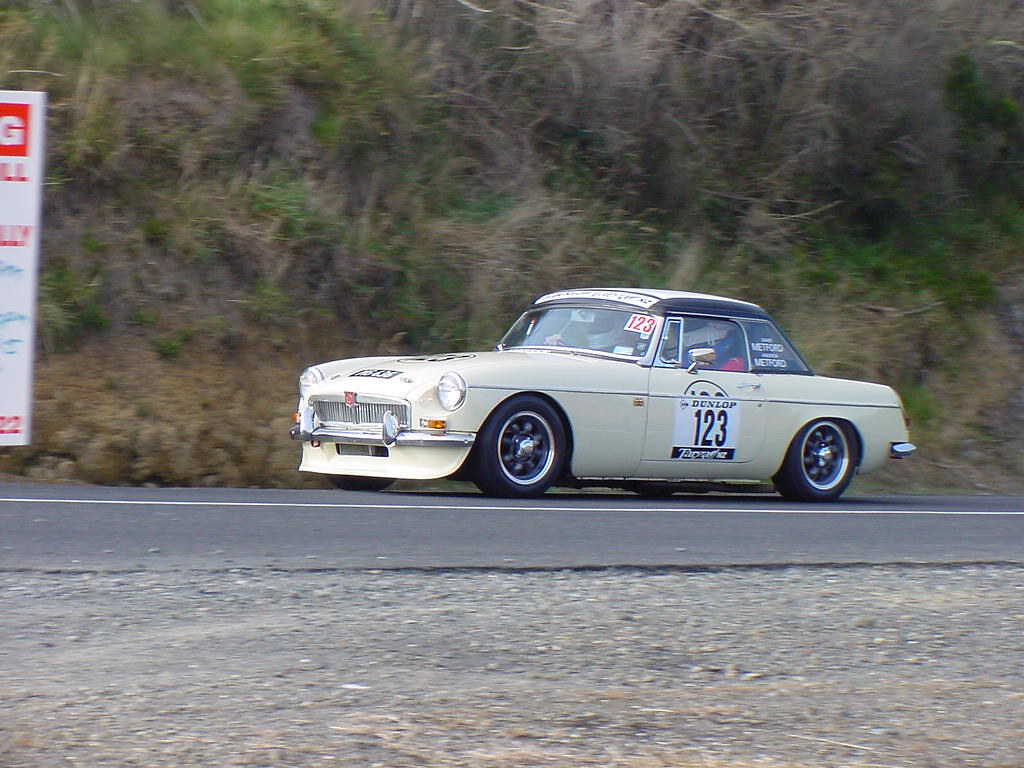 DSC00738 by Andrew Metford, on Flickr DSC00738 by Andrew Metford, on Flickr
After a season, the engine was ready for a freshen, so out it came and off it went to Lynn Rogers. While the engine was out, I thought now was a good a time as any to clean up the engine bay, as it was pretty average, so I stripped it back to the steel. Then I thought seeing as we're getting the paint out, we might as well do inside the boot too because that is a bit tired as well. So that got stripped. Then I thought I might as well re-do around the rear guards where they had be "eased" to clear the tyres ( the car was pretty low ), so the rear guards got stripped. I imagine you all know how this is going to end :) Anyway, the more I stripped, the more I didn't like what I saw, and some answers to continuing problems came to light. I had never been able to get the wheel alignment right, especially in the front. It turns out when the car came to an abrupt halt against a rather large rock in a tarmac rally with the previous owner, the front right chassis rail was replaced, but only half the rail, and they joined it on the bend at the front of the floor where it comes up into the engine bay. Of course it was not straight, so that explained the wheel alignment problems. Similarly, when stripping the rear guards, there was up to 1/2" of body filler in the dogleg area on the right hand side, and a good 1/8" over the rest of both rear guards. There were also a few other less than average repairs around the car. Now just to clarify, none of this was the previous owner's fault, he got the car looked after by a shop of supposedly good repute, and he would have been mortified if he had known the real state the car was in and never sold it to me, as he is a top bloke, and I hold nothing against him. I built a rotissorie and put the car on it and stripped the rest of it. It needed a new boot floor, new complete front right chassis rail ( and the right front corner pulled straight ), 2 new rear guards, below the chrome strip of both front guards, new radiator and slam panels, and the rest was repairable. Some months later, an ad appeared the car club magazine for 2 BGT's, 1 rolling shell '67 stripped with most of the parts in boxes, and 1 '66 complete for parts. I ended up buying them, wrecking the parts car ( I would have bought that car anyway just for the 5 early GT 5" disc wheels, which are like hen's teeth ), and took the stripped shell to get put on a chassis machine to measure it as it had had a hit in the left rear corner. Not good news, the shell was bent and buckled all over the place, a tip job, so that's where it ended up. It's probably rebar in someone's driveway now :) So now I had given the original '66 roadster away to an MG panel shop to use what he could salvage off it to keep other cars going, sent the '66 and '67 GT's to the tip, and was left with 3 cars worth of everything but no shell to put any of it into. These parts were added to the parts from another "67 GT I wrecked ( again, body rusted / damaged beyond economic repair ), and a "71 GT I bought for parts from under some trees off Scenic Drive in Laingholm in West Auckland ( rusted to hell, everything seized, luckily the tow truck I borrowed to get it had a good strong winch!! ). 5 cars worth of parts, 0 body shells. Dad's paitence ( and storage space at home ) was starting to wear very thin. A guy whose mate ( a Jaguar man ) lived down our road always stopped by to chat about our cars, and one day he turned up in a Blaze '71 MGB. He tidied it up a bit, then sold it and bought an MG F. One Saturday morning he stopped by and asked if we'd seen the nice BGT for sale in the car yard in Greenlane? We hadn't, so that afternoon I was at a loose end, so went for a drive and stopped by the car yard. Here, looking totally out of place in a yard full of late model European and Japanese luxury cars, was a '74 BGT in Bracken, totally standard, in pretty good nick, with 140,000km on the clock and $9995 on the window. An older gentleman had traded it in on a limited edition MG F. He had owned the GT for 19 years ( this was in 2004 ) and there was a pile of receipts a good 3/4" thick for everything done in that 19 years. So after a test drive and a check over by the local MG expert on Monday morning ( plus a wheel alignment check to see if it measured up - I've learnt my lessons the expensive way! ), I drove it home on the 10th of April 2004 ( my Uncle's birthday - he's got a '54 TF 1250 ) after departing with $9K. The car was good enough to have gone for $11 - $12K at that time, but the car dealer didn't know the first thing about old cars, so luck was finally on my side for once. 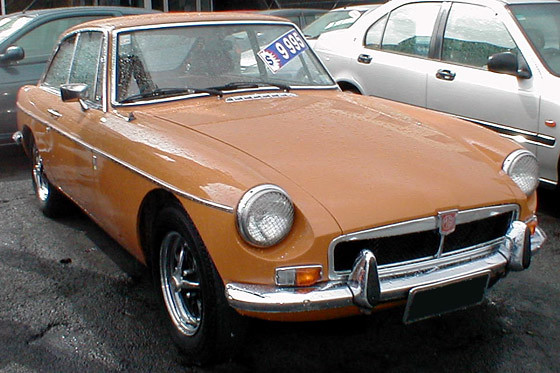 1 18 April 2004 1 by Andrew Metford, on Flickr 1 18 April 2004 1 by Andrew Metford, on Flickr
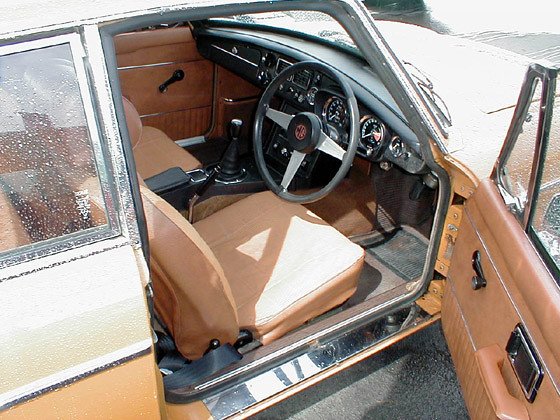 5 18 April 2004 5 by Andrew Metford, on Flickr 5 18 April 2004 5 by Andrew Metford, on Flickr
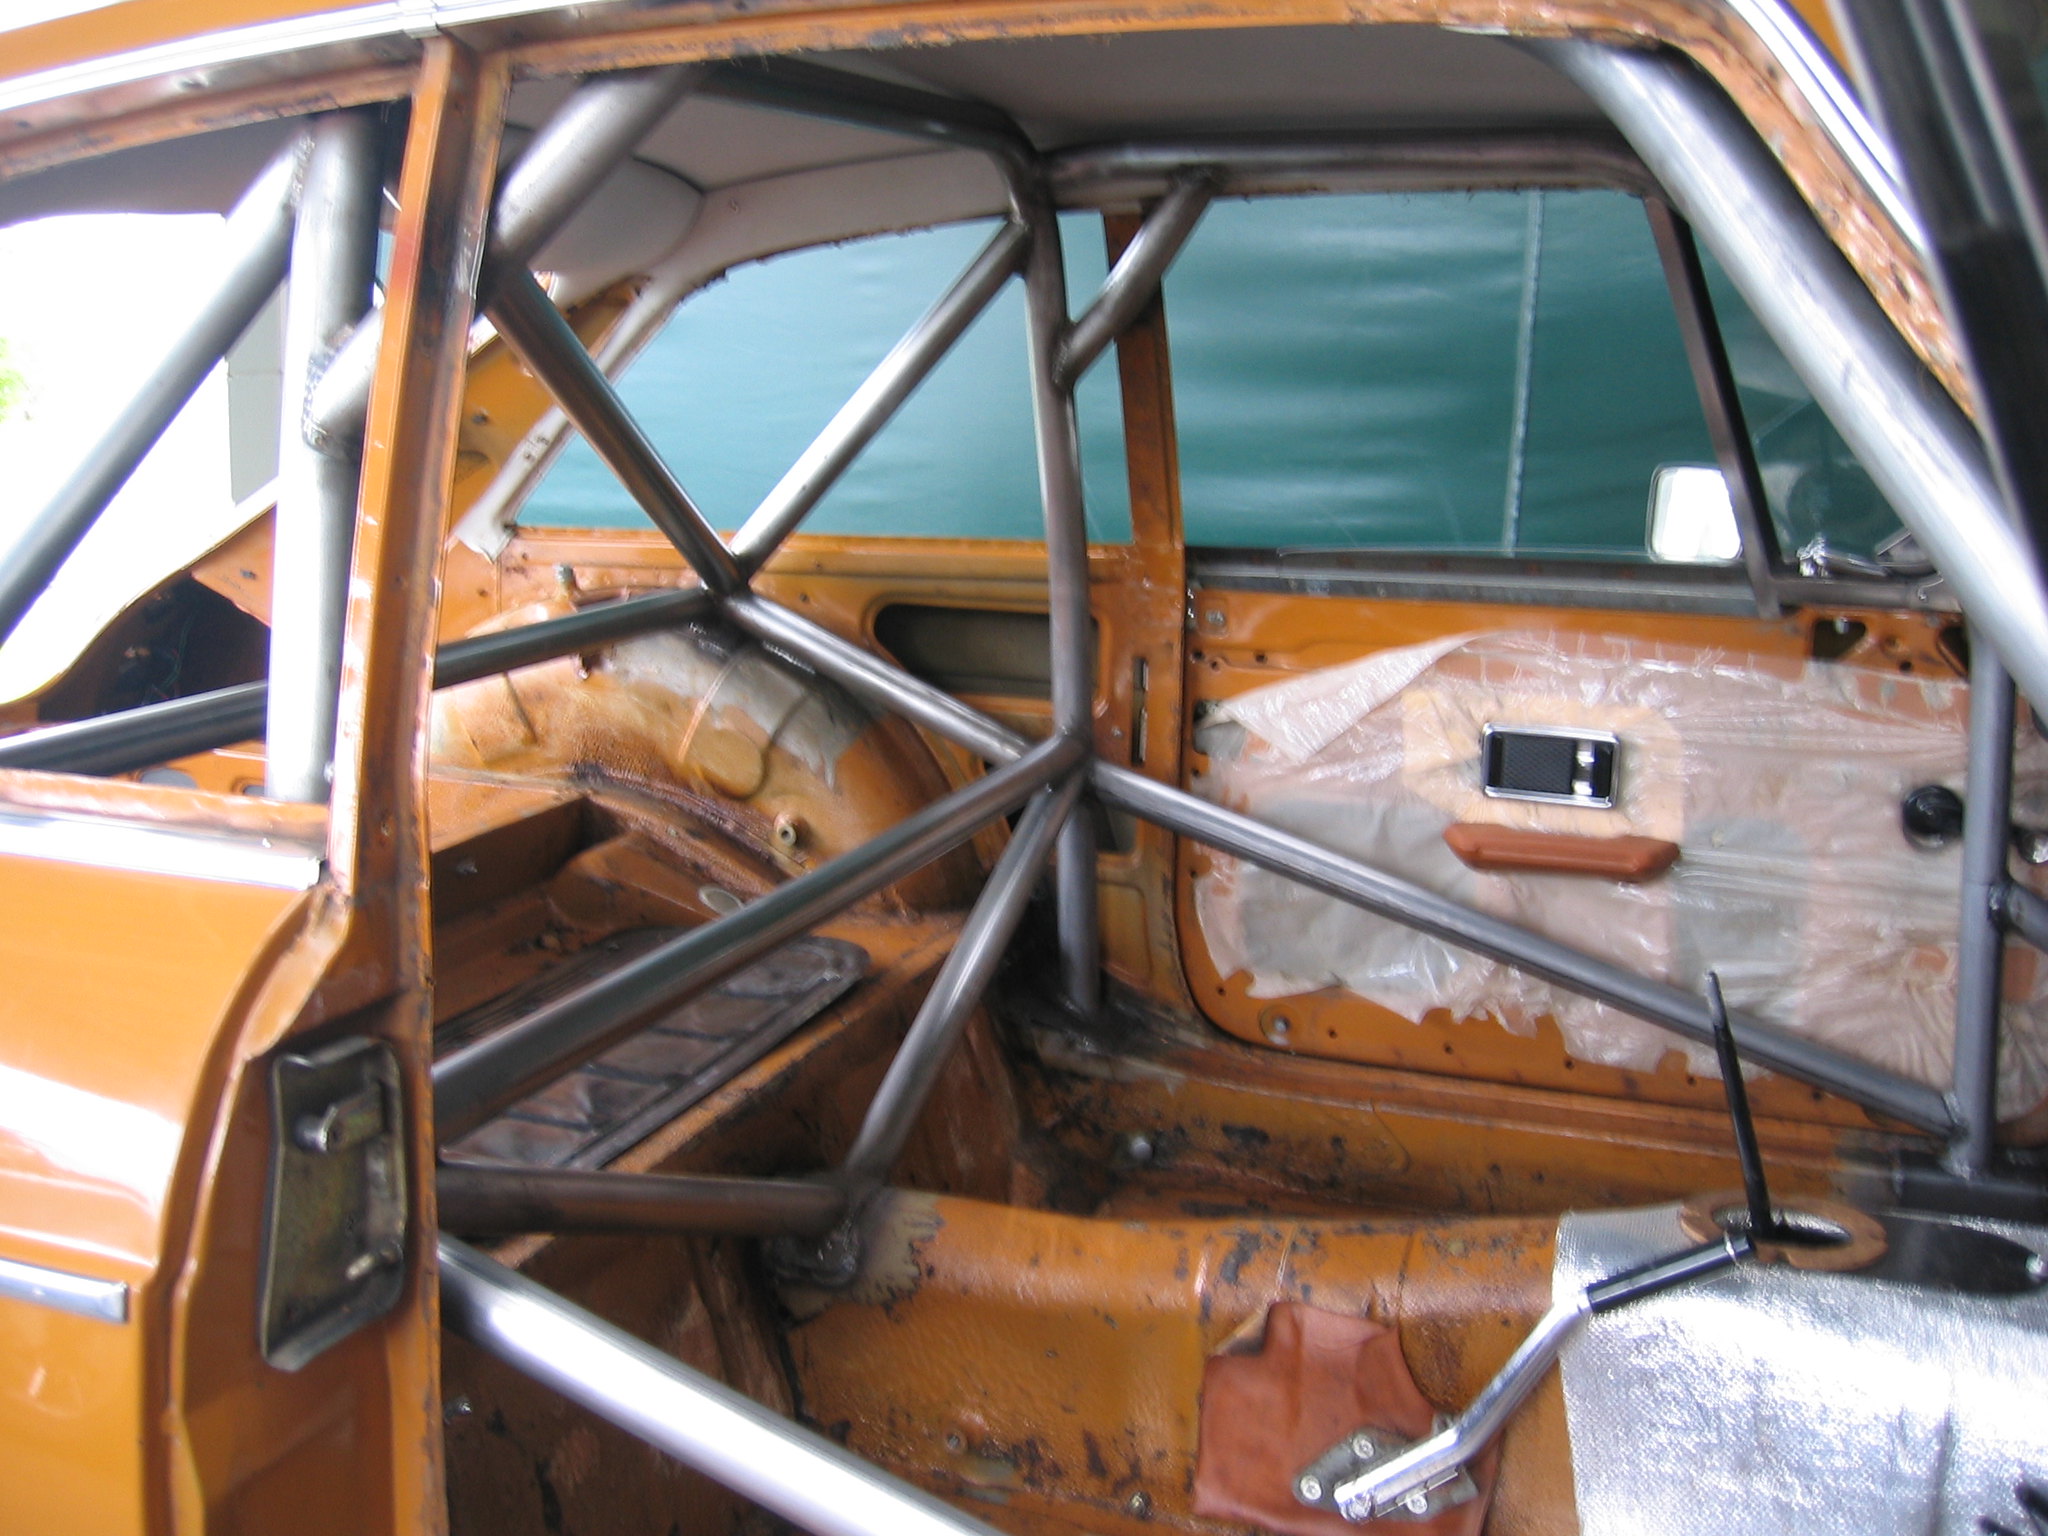
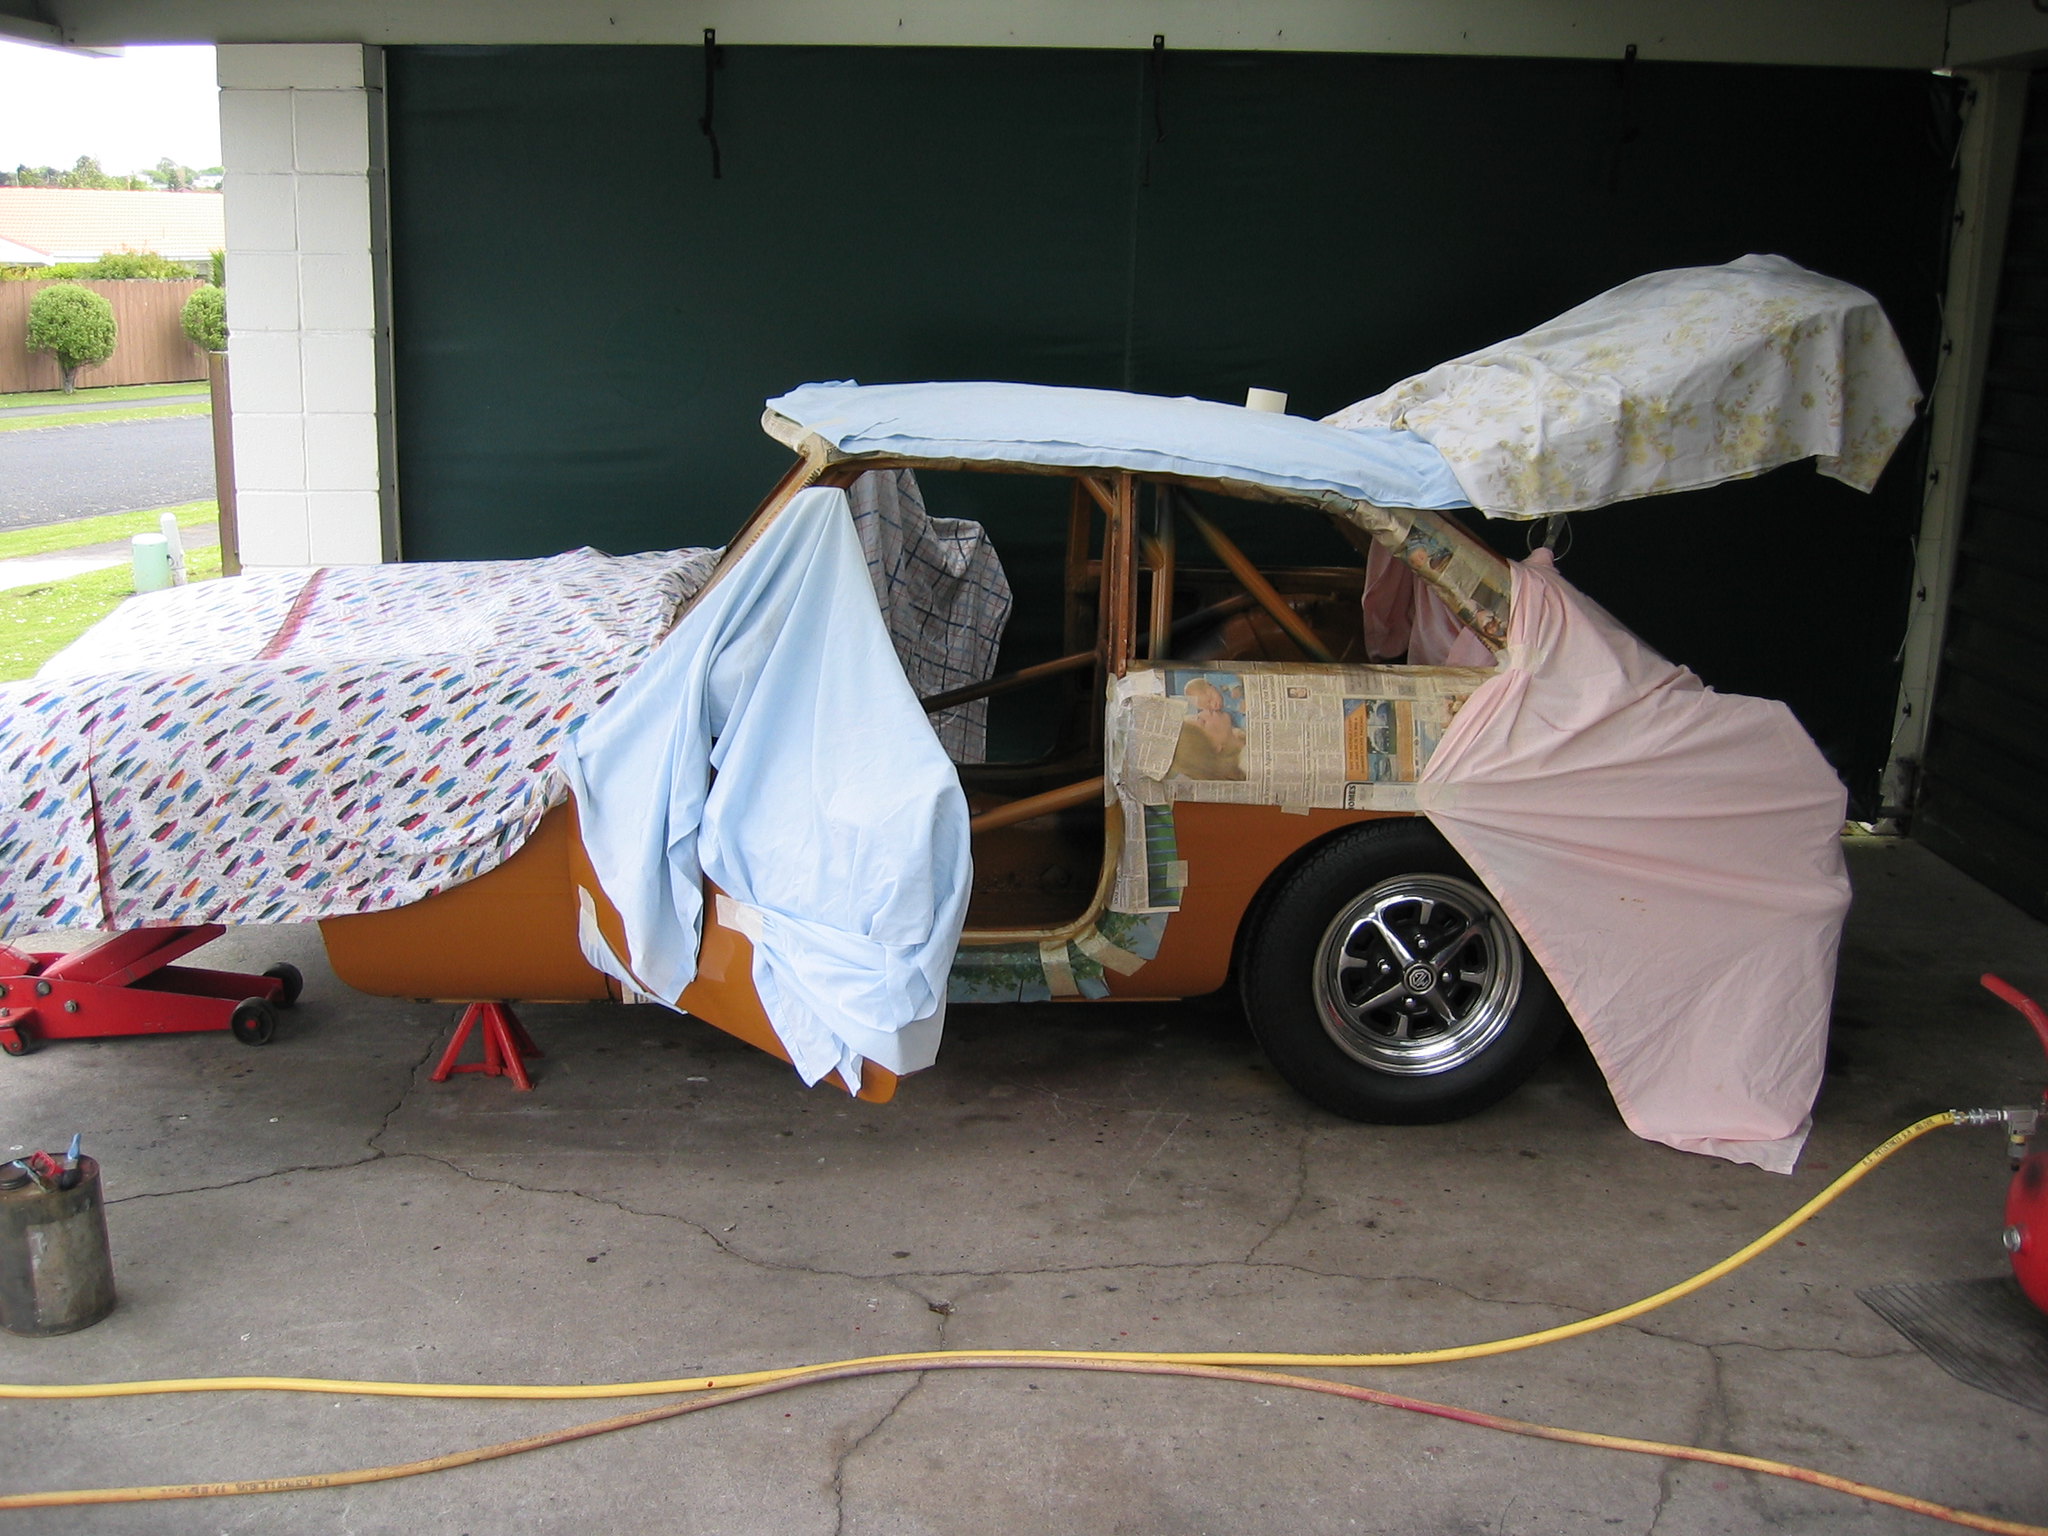
I drove the car around the street for 2 weeks while waiting for a spot to clear at the rollcage shop, and then stripped the interior out. I fitted spare door waist rails and seats, which the rollcage had to fit around, and removed the front windscreen and rear side windows to allow better access for welding the cage. I gave them a plan of what I wanted, which they executed superbly, plus a bit extra. The only problem was when it came time to drive the car home, it was 5pm on a wet winter's night, with no windscreen!! Once home, the interior was stripped once again, and everything masked up ready for painting the cage. 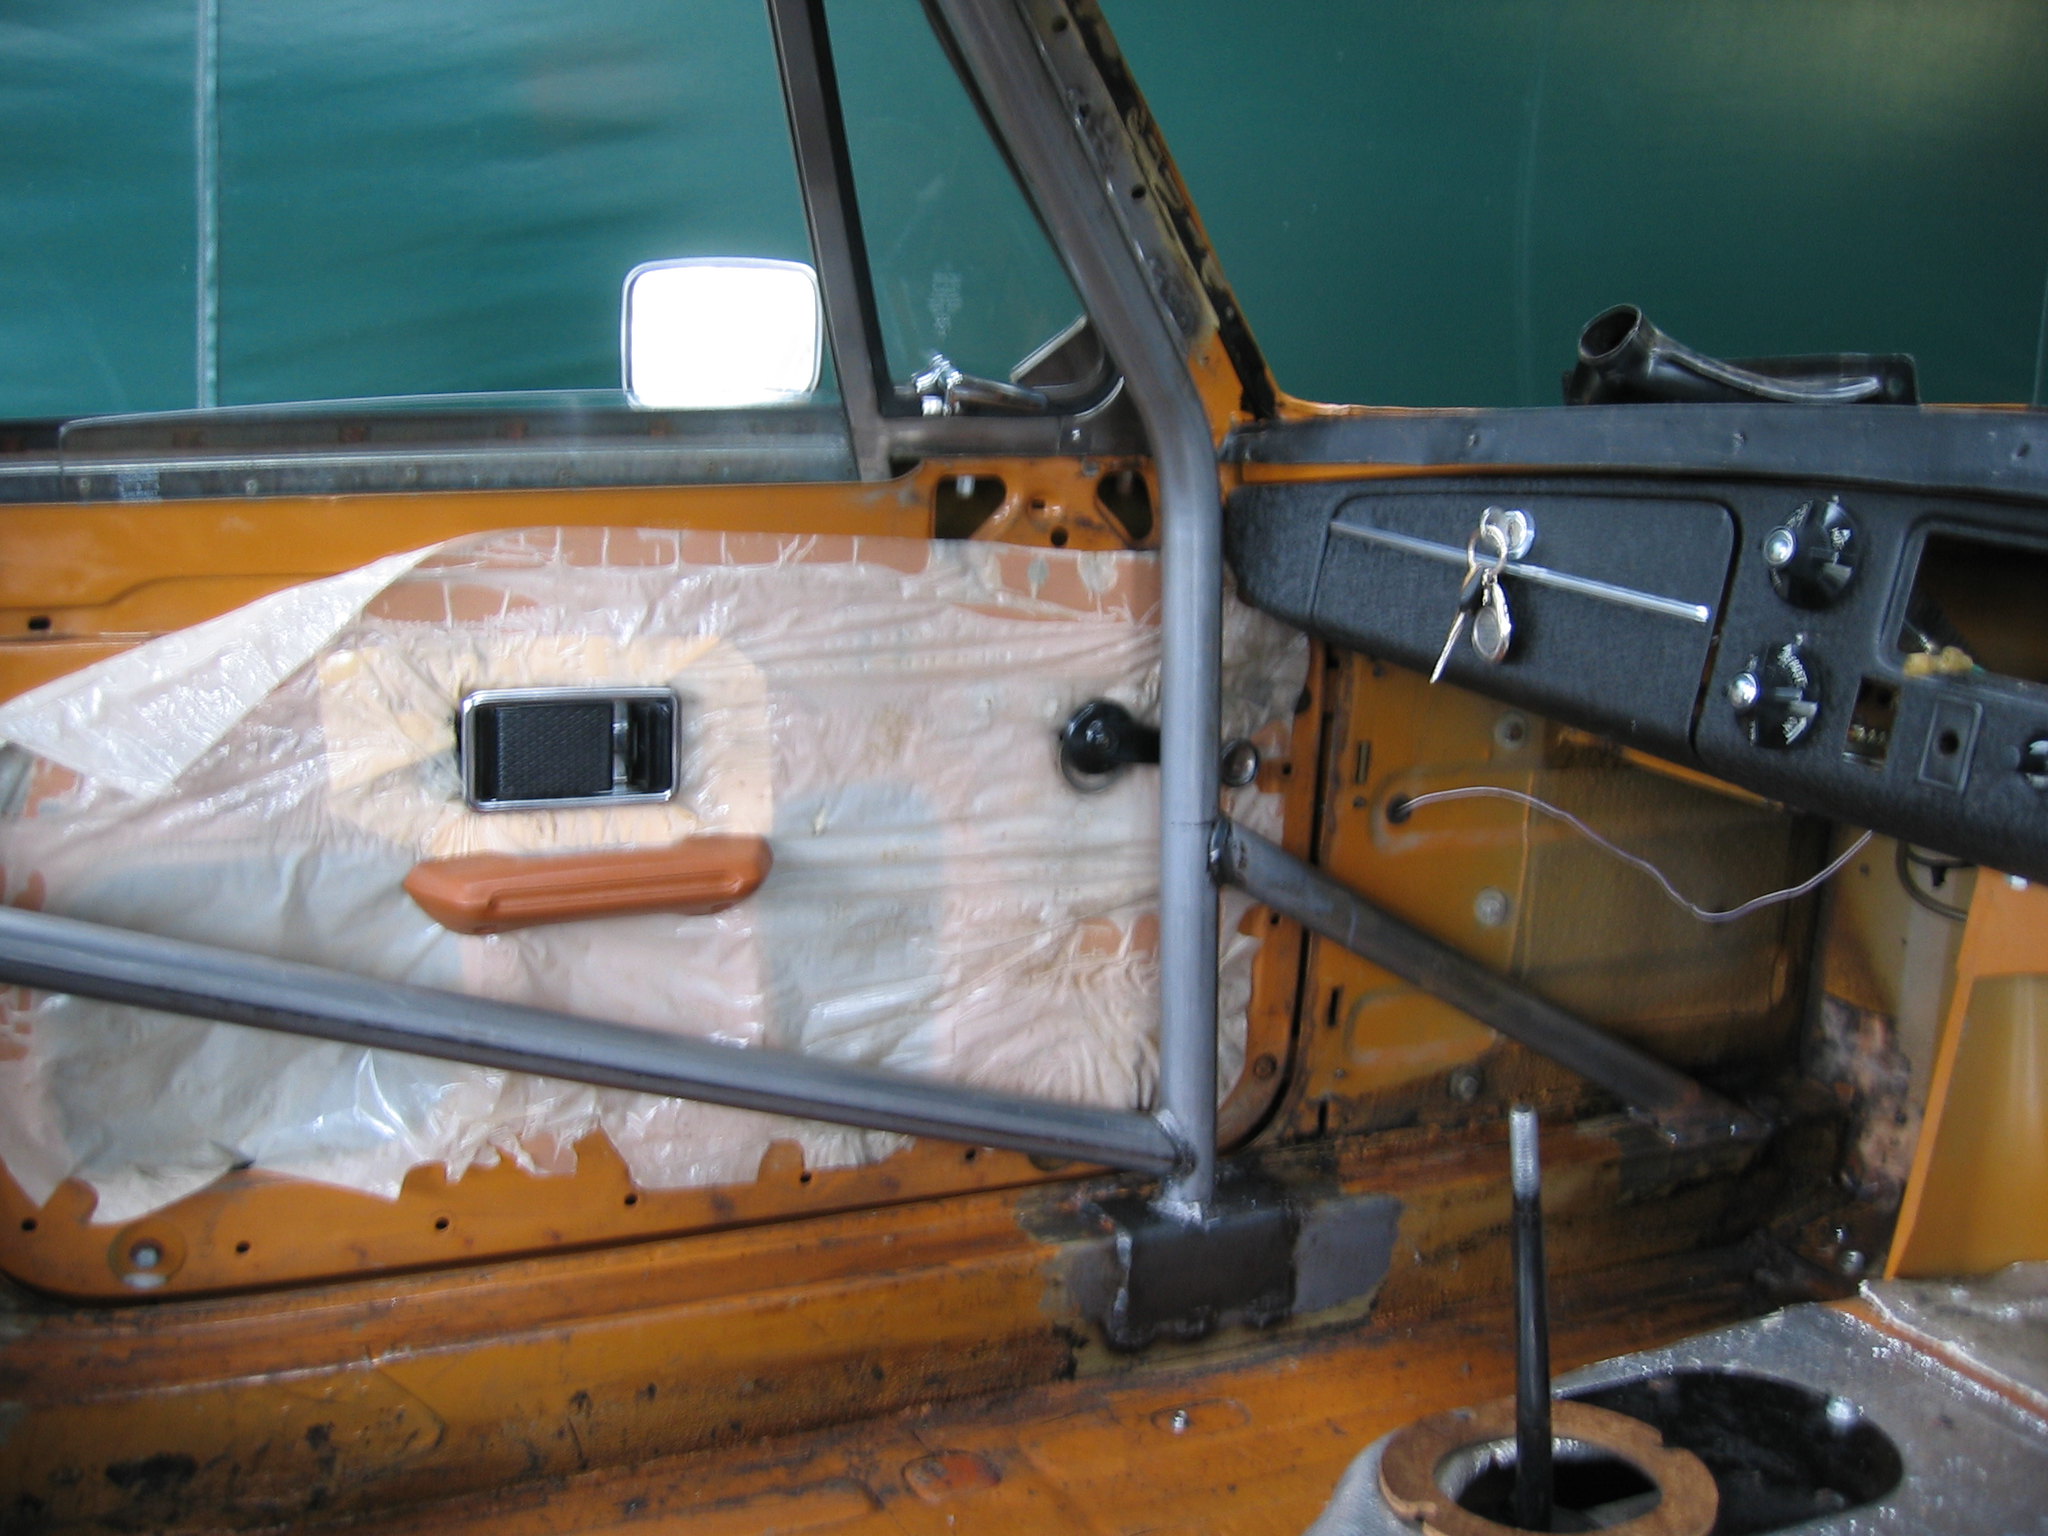 15 30 May 2004 2 by Andrew Metford, on Flickr 15 30 May 2004 2 by Andrew Metford, on Flickr
 20 30 May 2004 7 by Andrew Metford, on Flickr 20 30 May 2004 7 by Andrew Metford, on Flickr
 21 23 October 2004 1 by Andrew Metford, on Flickr 21 23 October 2004 1 by Andrew Metford, on Flickr
I got some Bracken paint made up from the paint codes that are in the Clasuager Original MGB book, and Dad painted the cage. We did it in Dulon, in hindsight we should have done it in 2pac, but never mind. It was pretty good straight off the gun, but had a few runs on it which I sanded out ( hence the black etch in places ), then lightly sanded the whole cage and we repainted the whoIe cage again. Then I let it harden for a few weeks and polished it. I then refitted all the original interior, got the windscreen refitted with a new rubber seal, and it was starting to look half decent again. Now it was time to prepare the car to receive the old roadster racecars' mechanicals. We removed the engine and gearbox, and the complete front suspension and cross member. Then I removed all the brackets and fittings, and stripped the engine bay back to the steel. 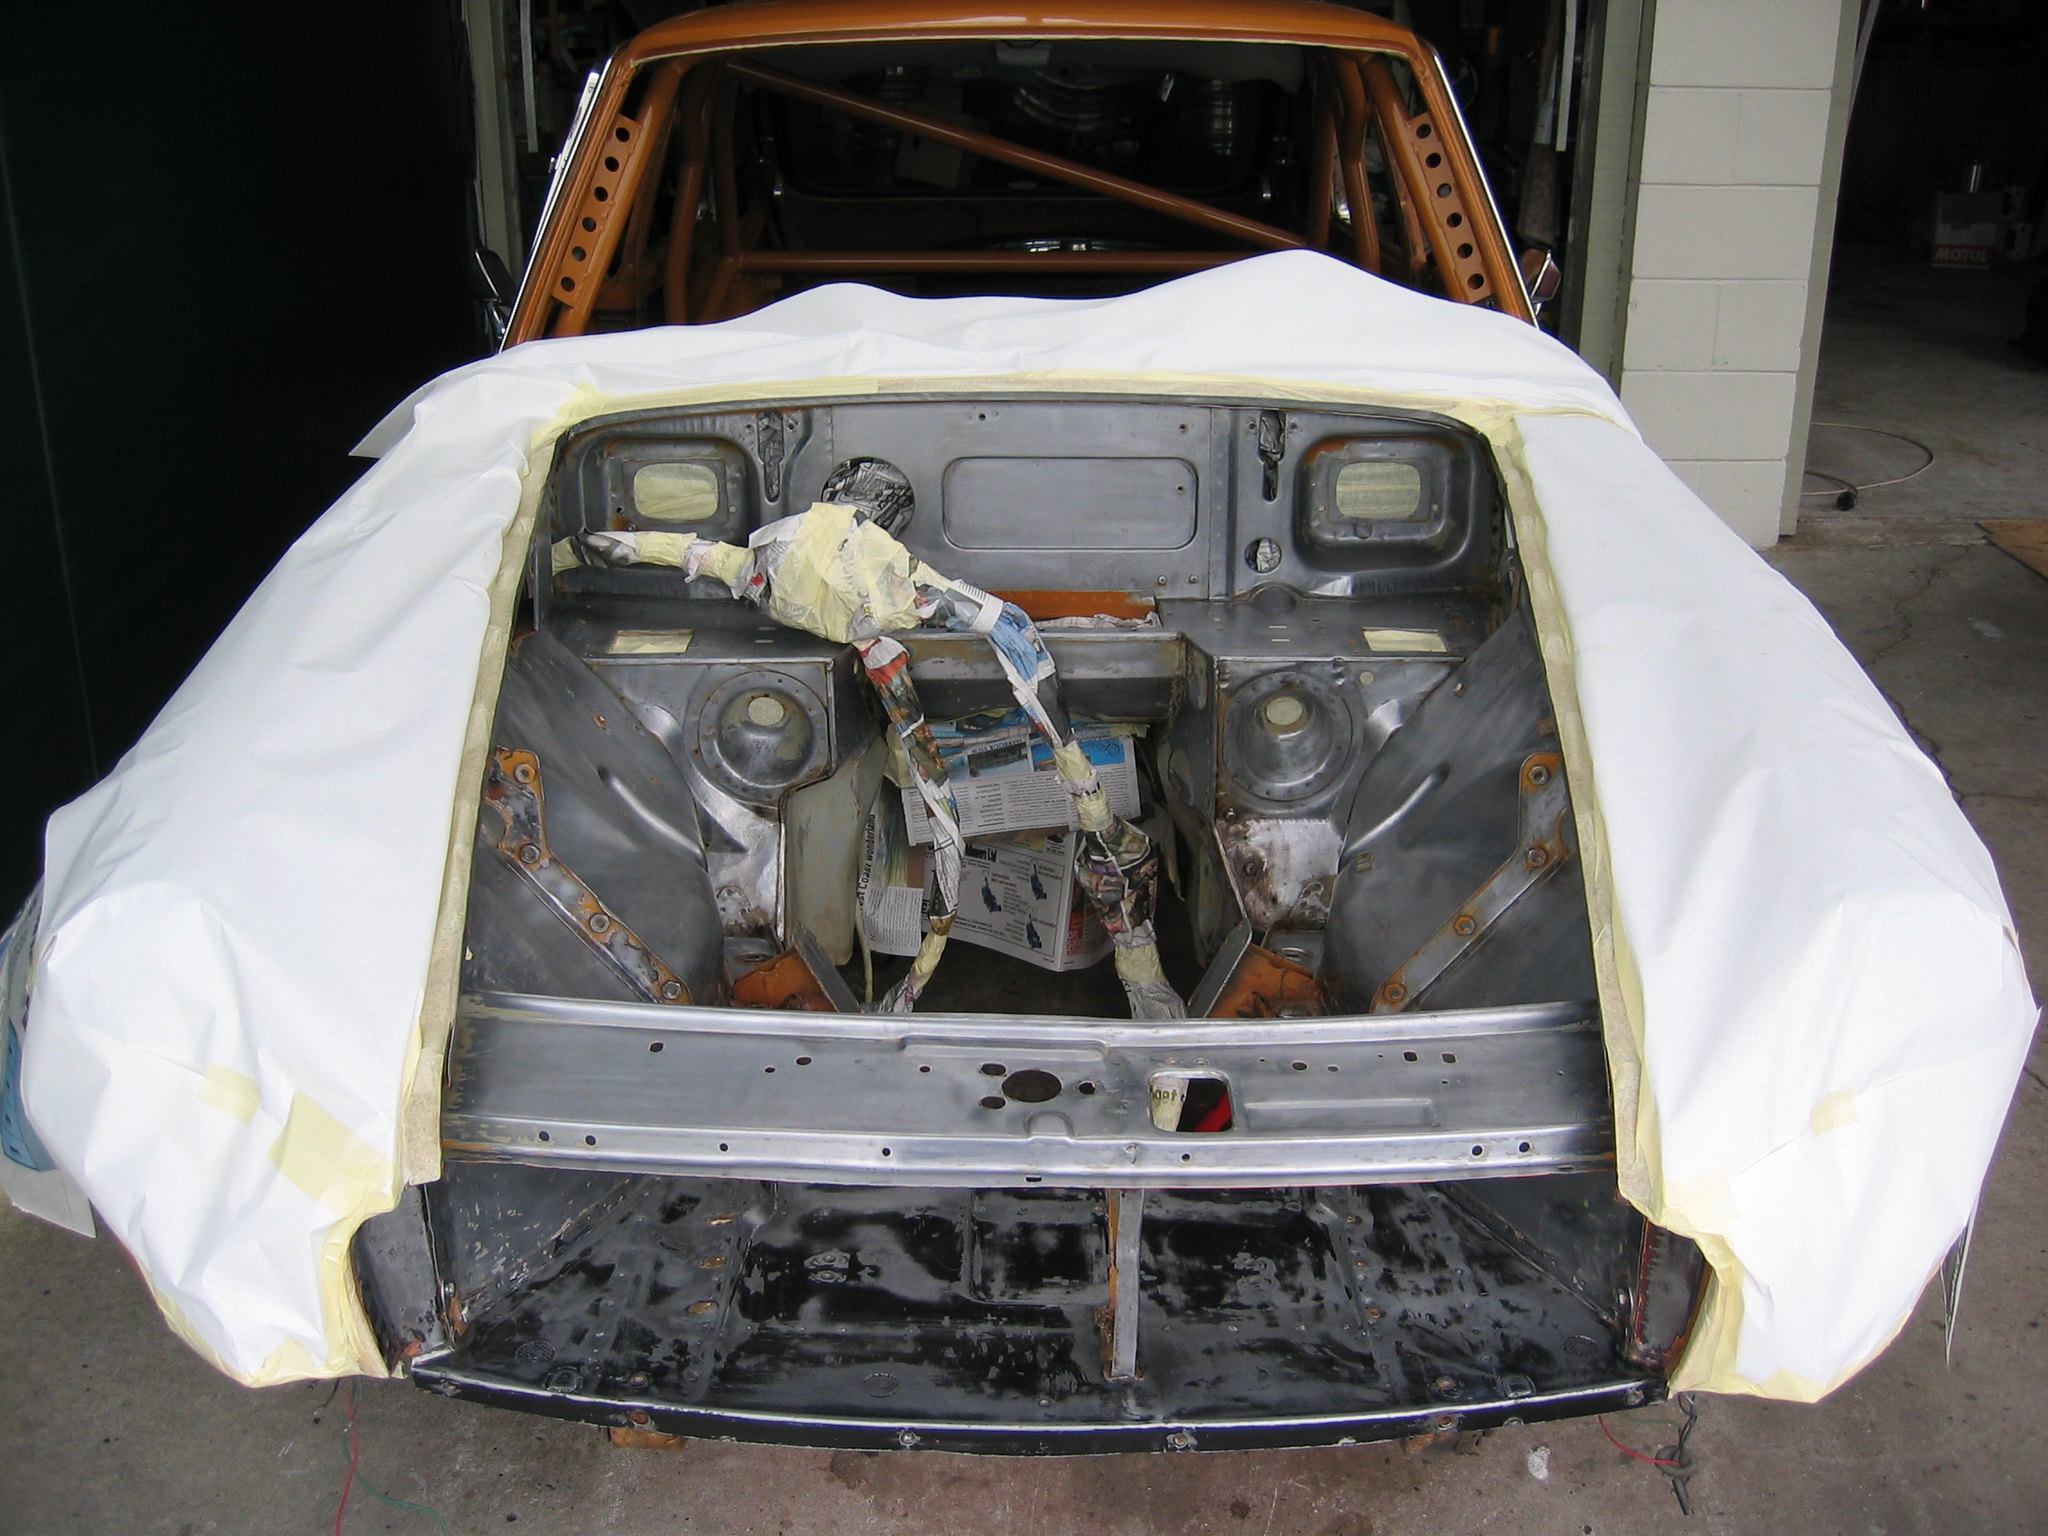 25 25 October 2004 1 by Andrew Metford, on Flickr 25 25 October 2004 1 by Andrew Metford, on Flickr
Dad then painted it in black etch primer / surfacer, 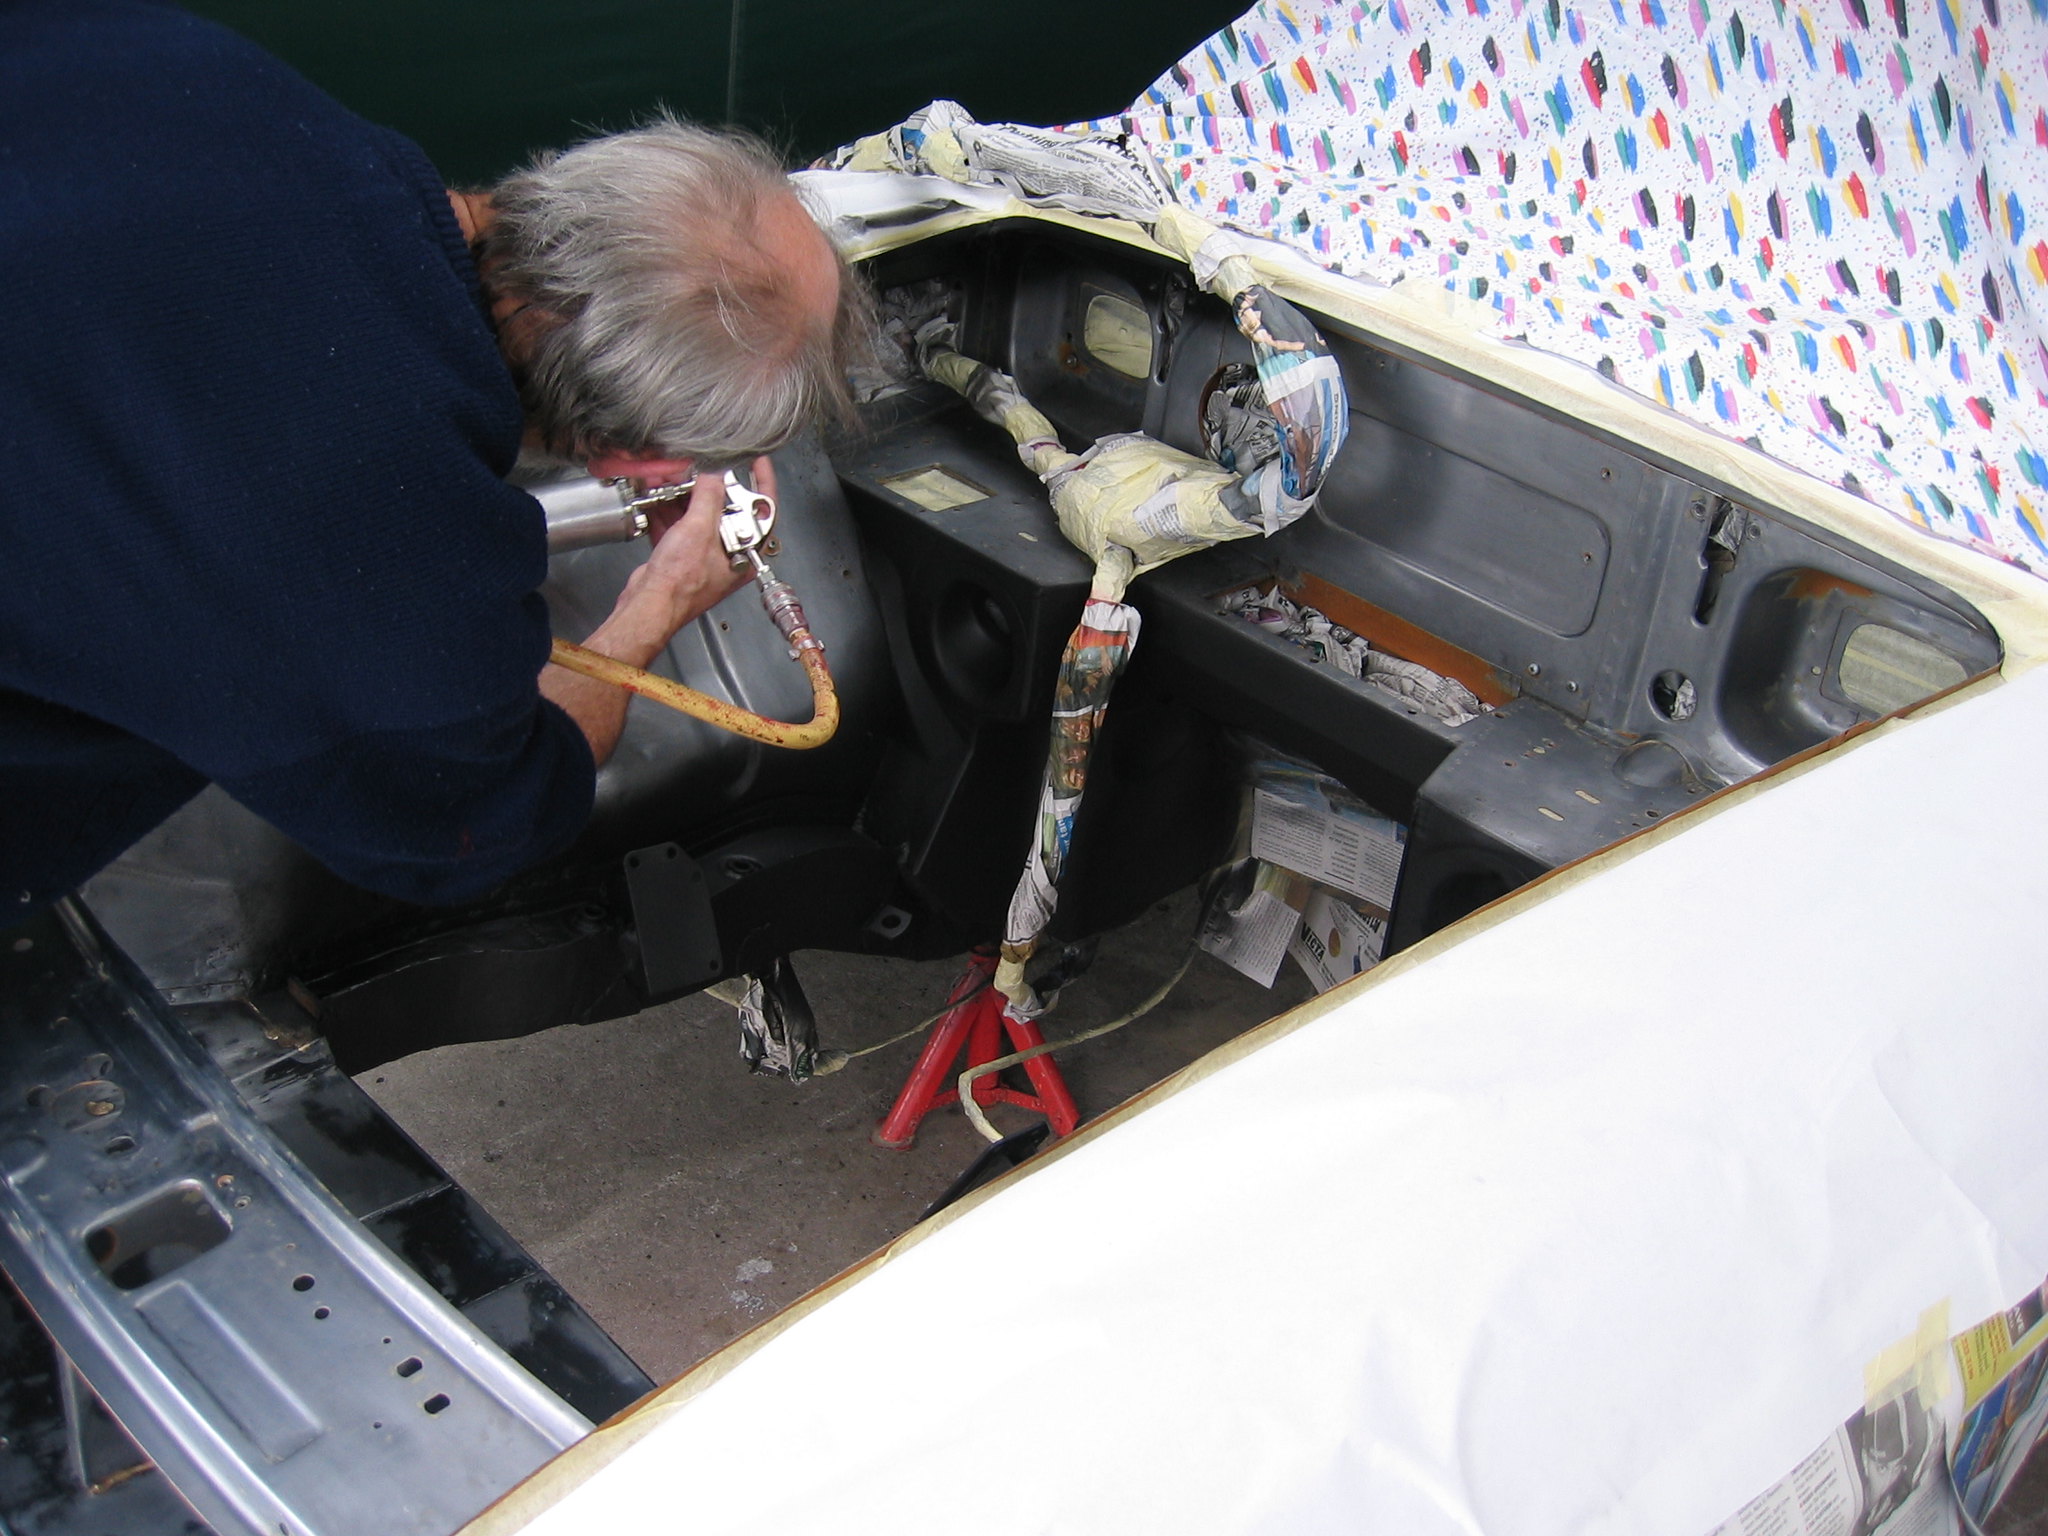 26 25 October 2004 2 by Andrew Metford, on Flickr 26 25 October 2004 2 by Andrew Metford, on Flickr
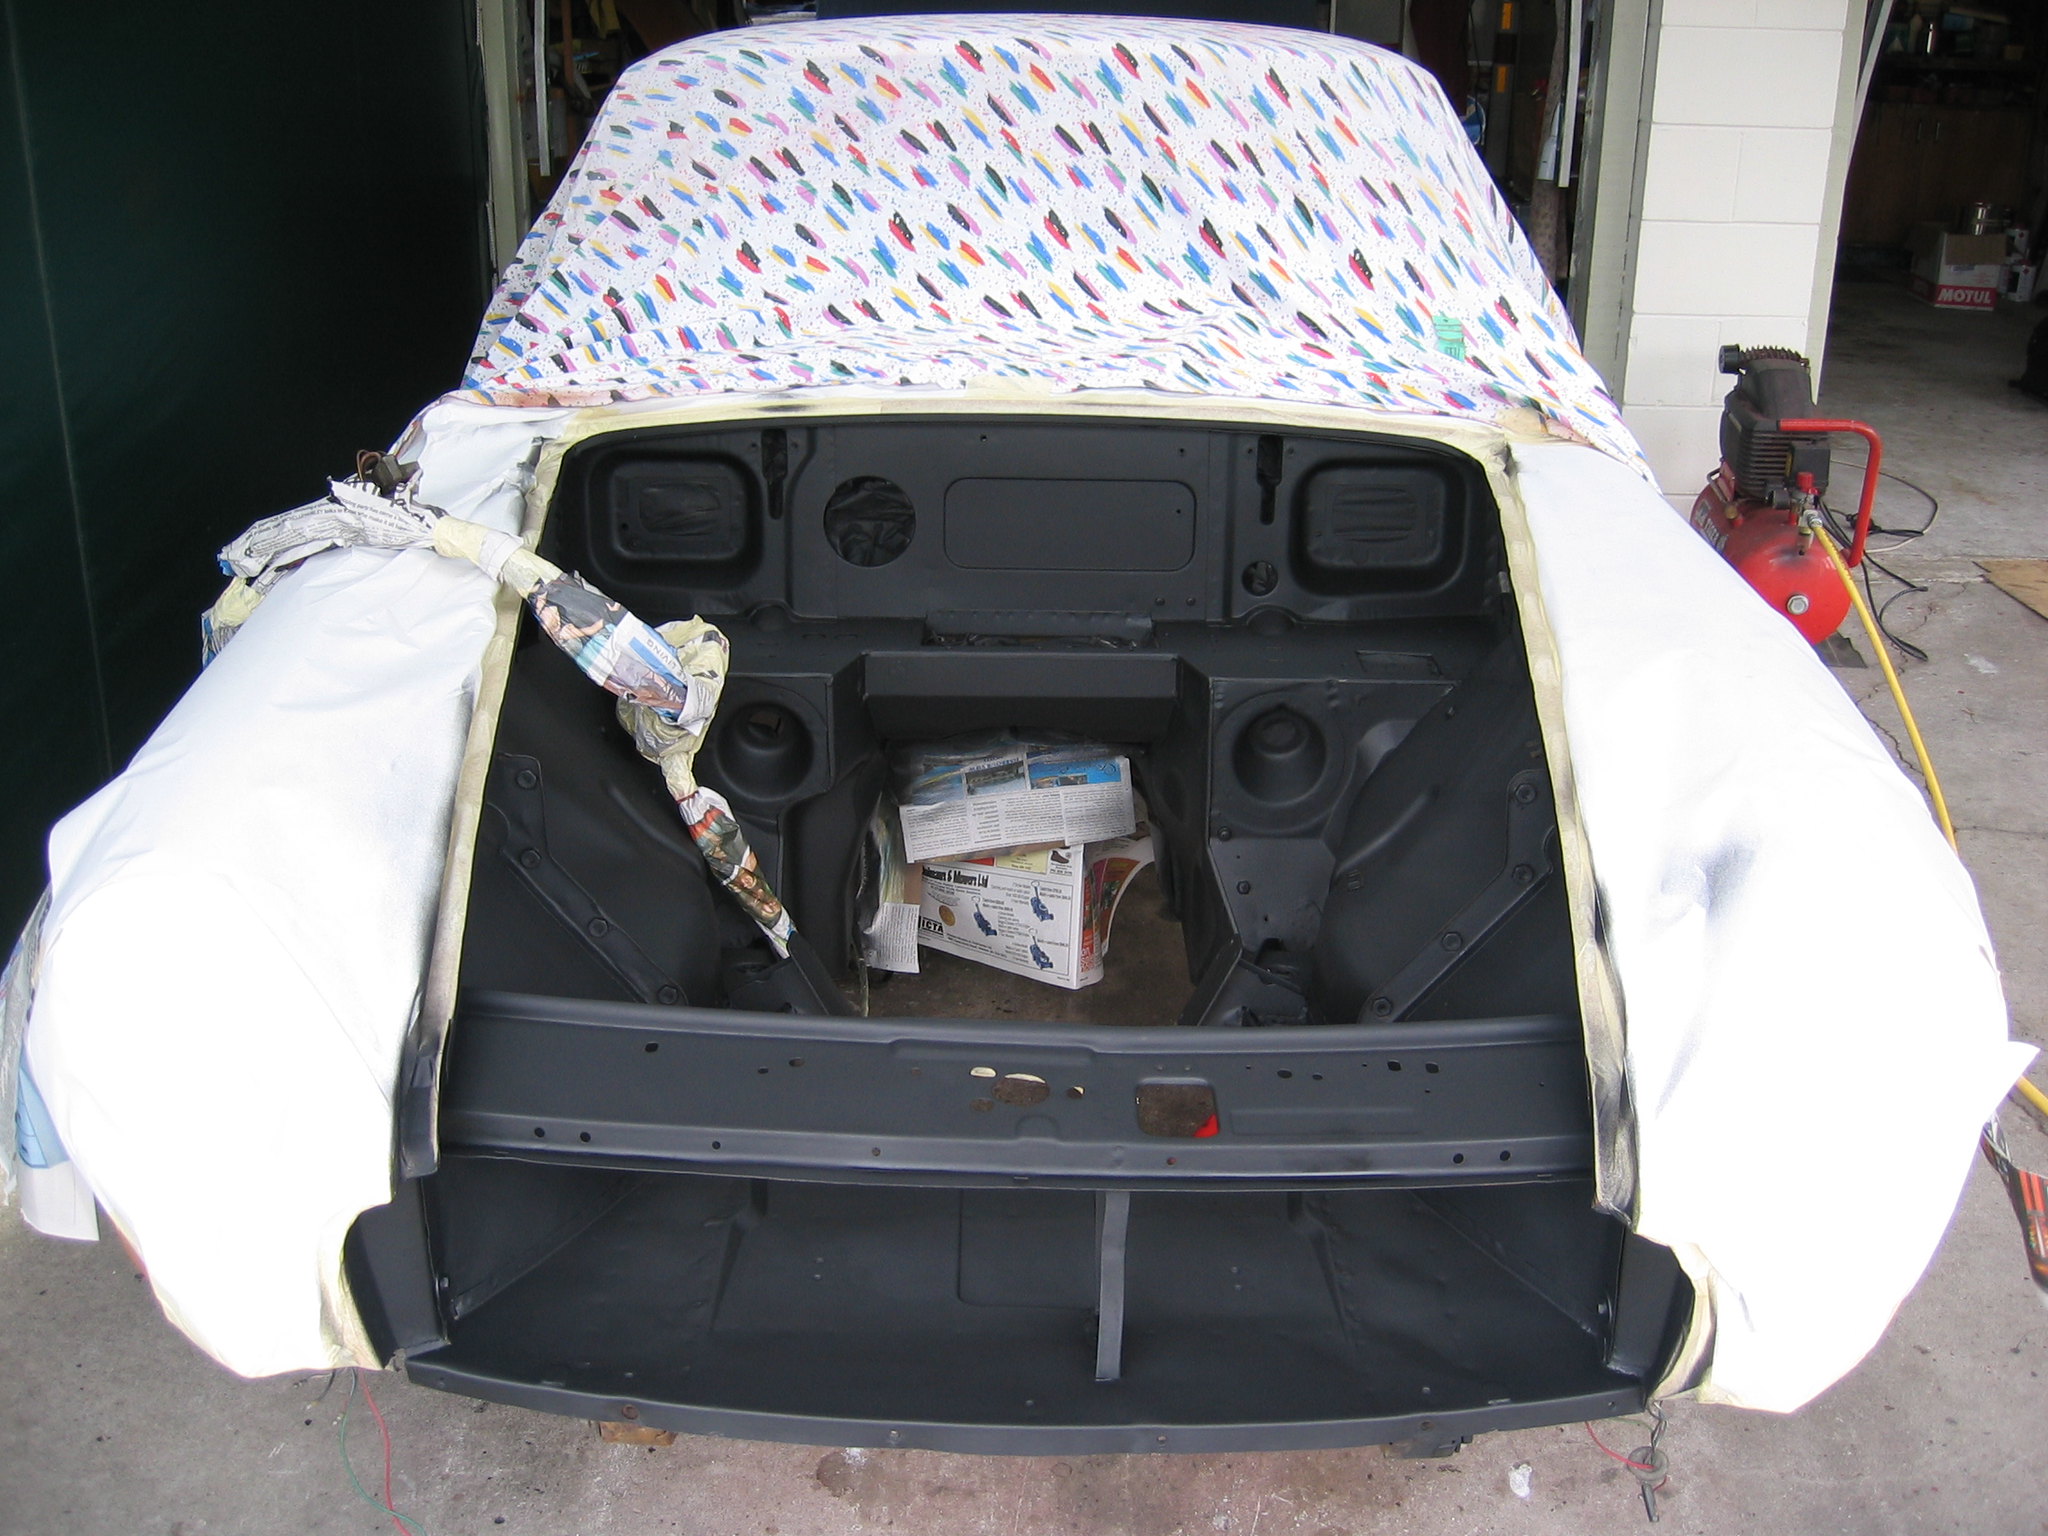 27 25 October 2004 3 by Andrew Metford, on Flickr 27 25 October 2004 3 by Andrew Metford, on Flickr
then light grey primer, 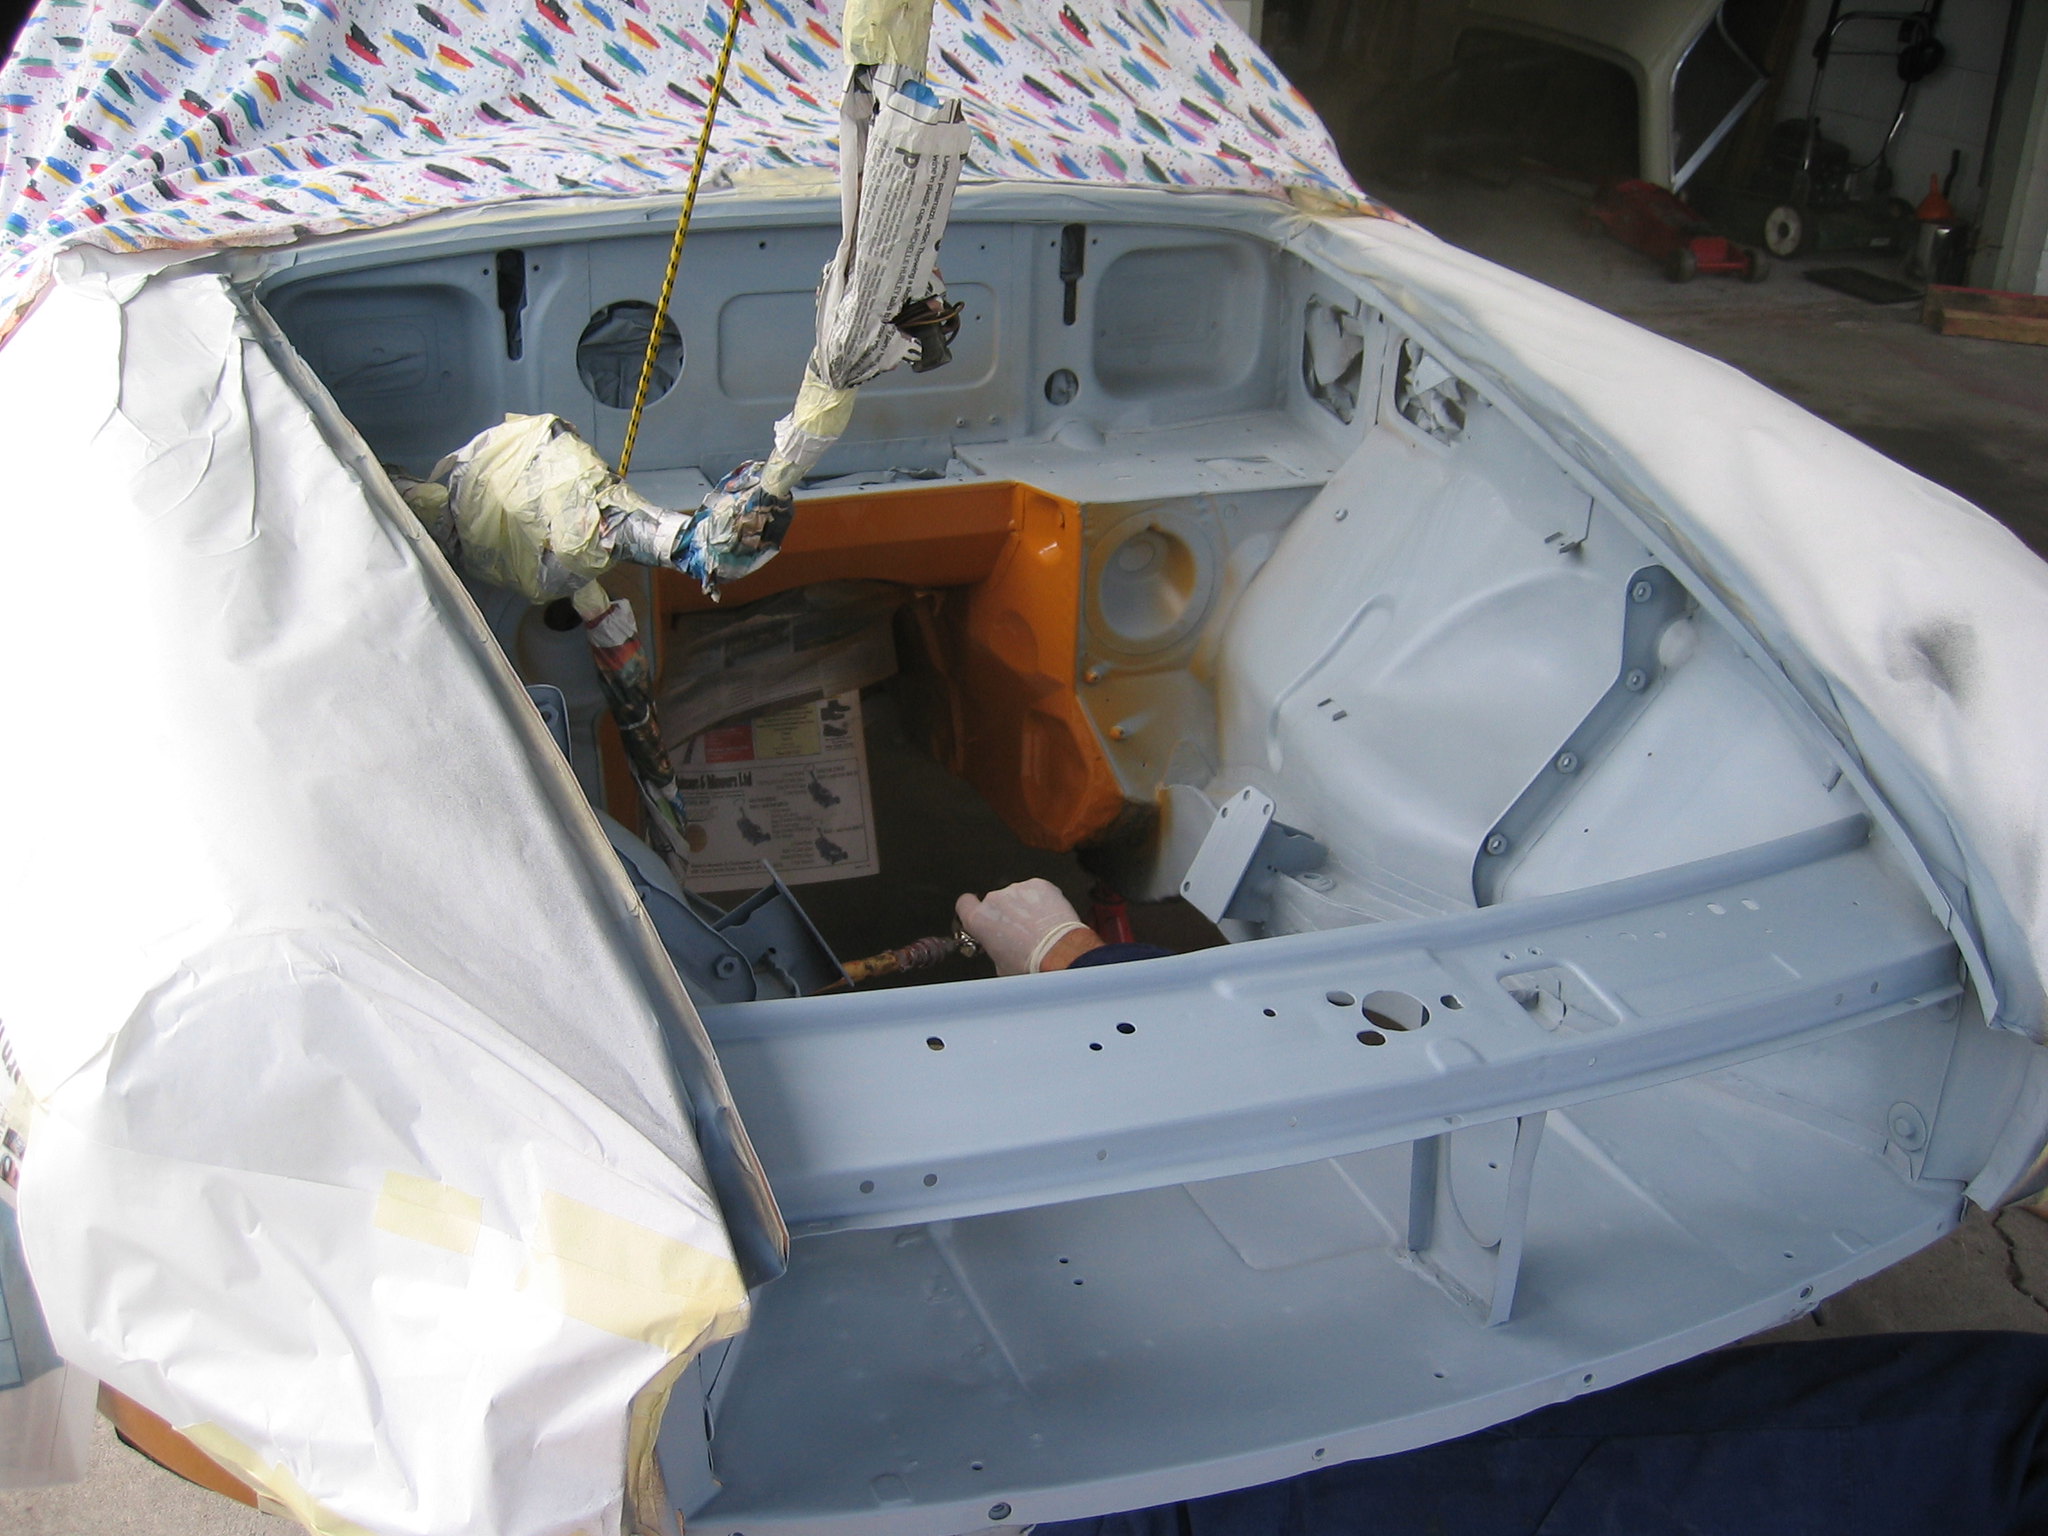 31 25 October 2004 7 by Andrew Metford, on Flickr 31 25 October 2004 7 by Andrew Metford, on Flickr
then in Bracken 2 Pac. Wow what a difference that made!! :) 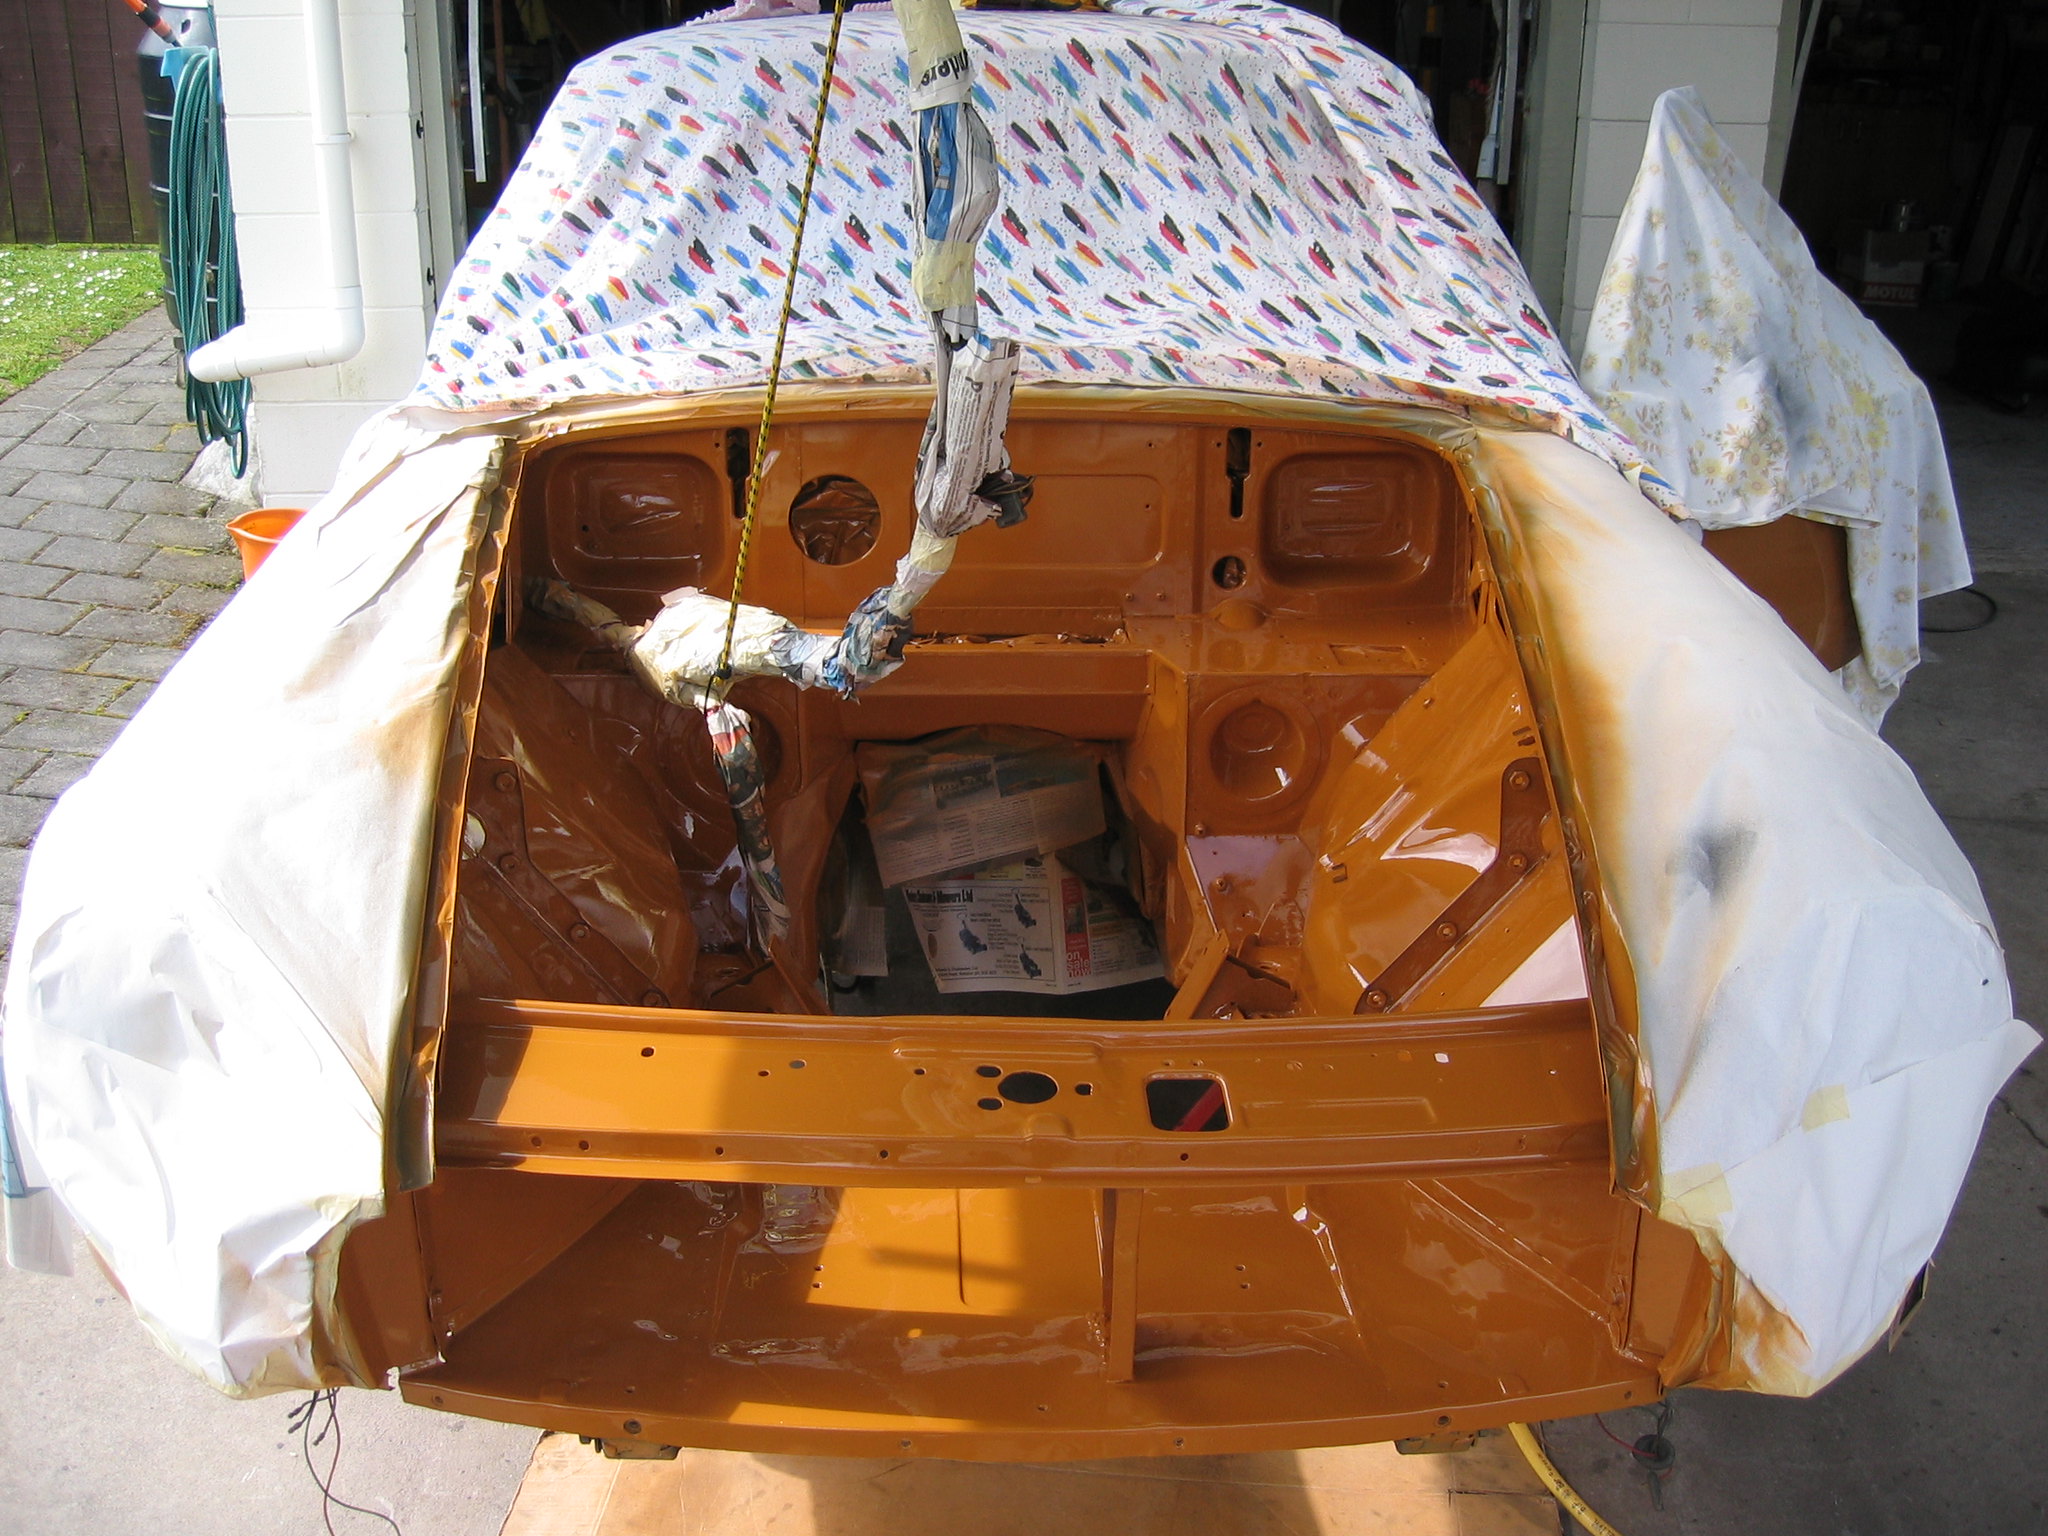 32 25 October 2004 8 by Andrew Metford, on Flickr 32 25 October 2004 8 by Andrew Metford, on Flickr
Next I pulled the whole front suspension to bits and took all the pieces, the front cross member, heater box, the pedal box and cover, radiator support panel, steering column mount brackets, and all the other small engine bay brackets down the road to the sand blaster and got the whole lot blasted clean. I also took the steering rack to be reconditioned. I got the suspension, engine bay bits and steering rack back the next week, and then Dad painted everything in black etch and then black 2 Pac. Photo Bucket lost that photo, so nothing to see here. Next, the underside of the bonnet got the same treatment as the engine bay had received ( stripped to bare steel and painted with black etch / light grey primer / Bracken 2 Pac ). I finished stripping it on Christmas Day 2004, and Dad painted it on Boxing Day :) 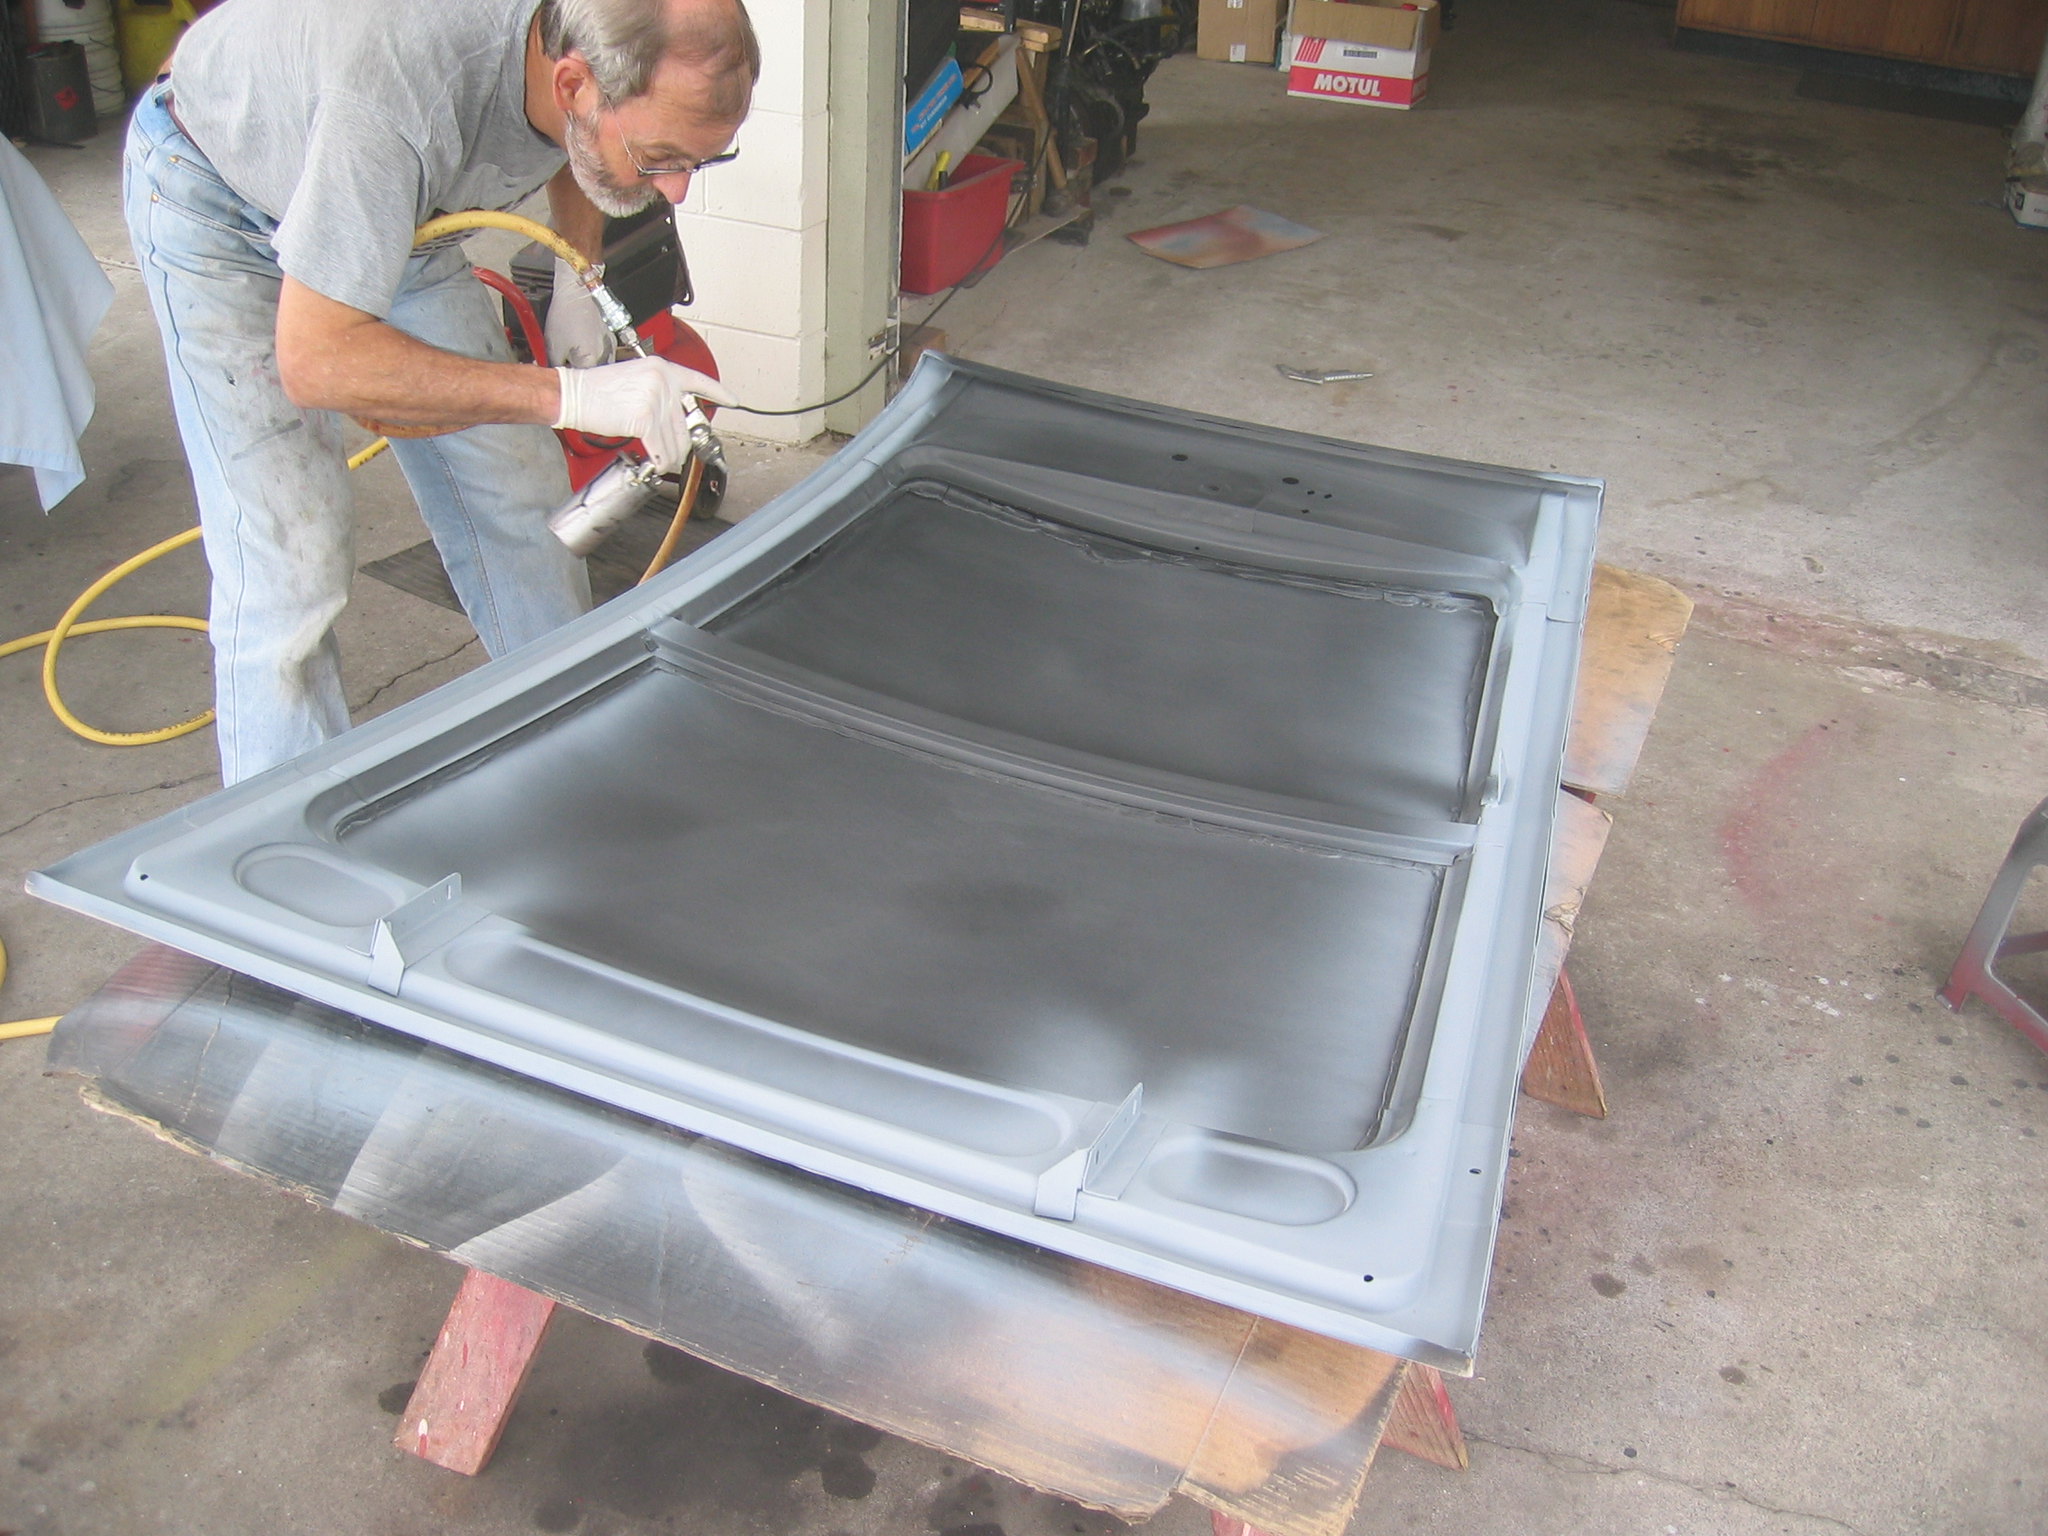 47 26 December 2004 2 by Andrew Metford, on Flickr 47 26 December 2004 2 by Andrew Metford, on Flickr
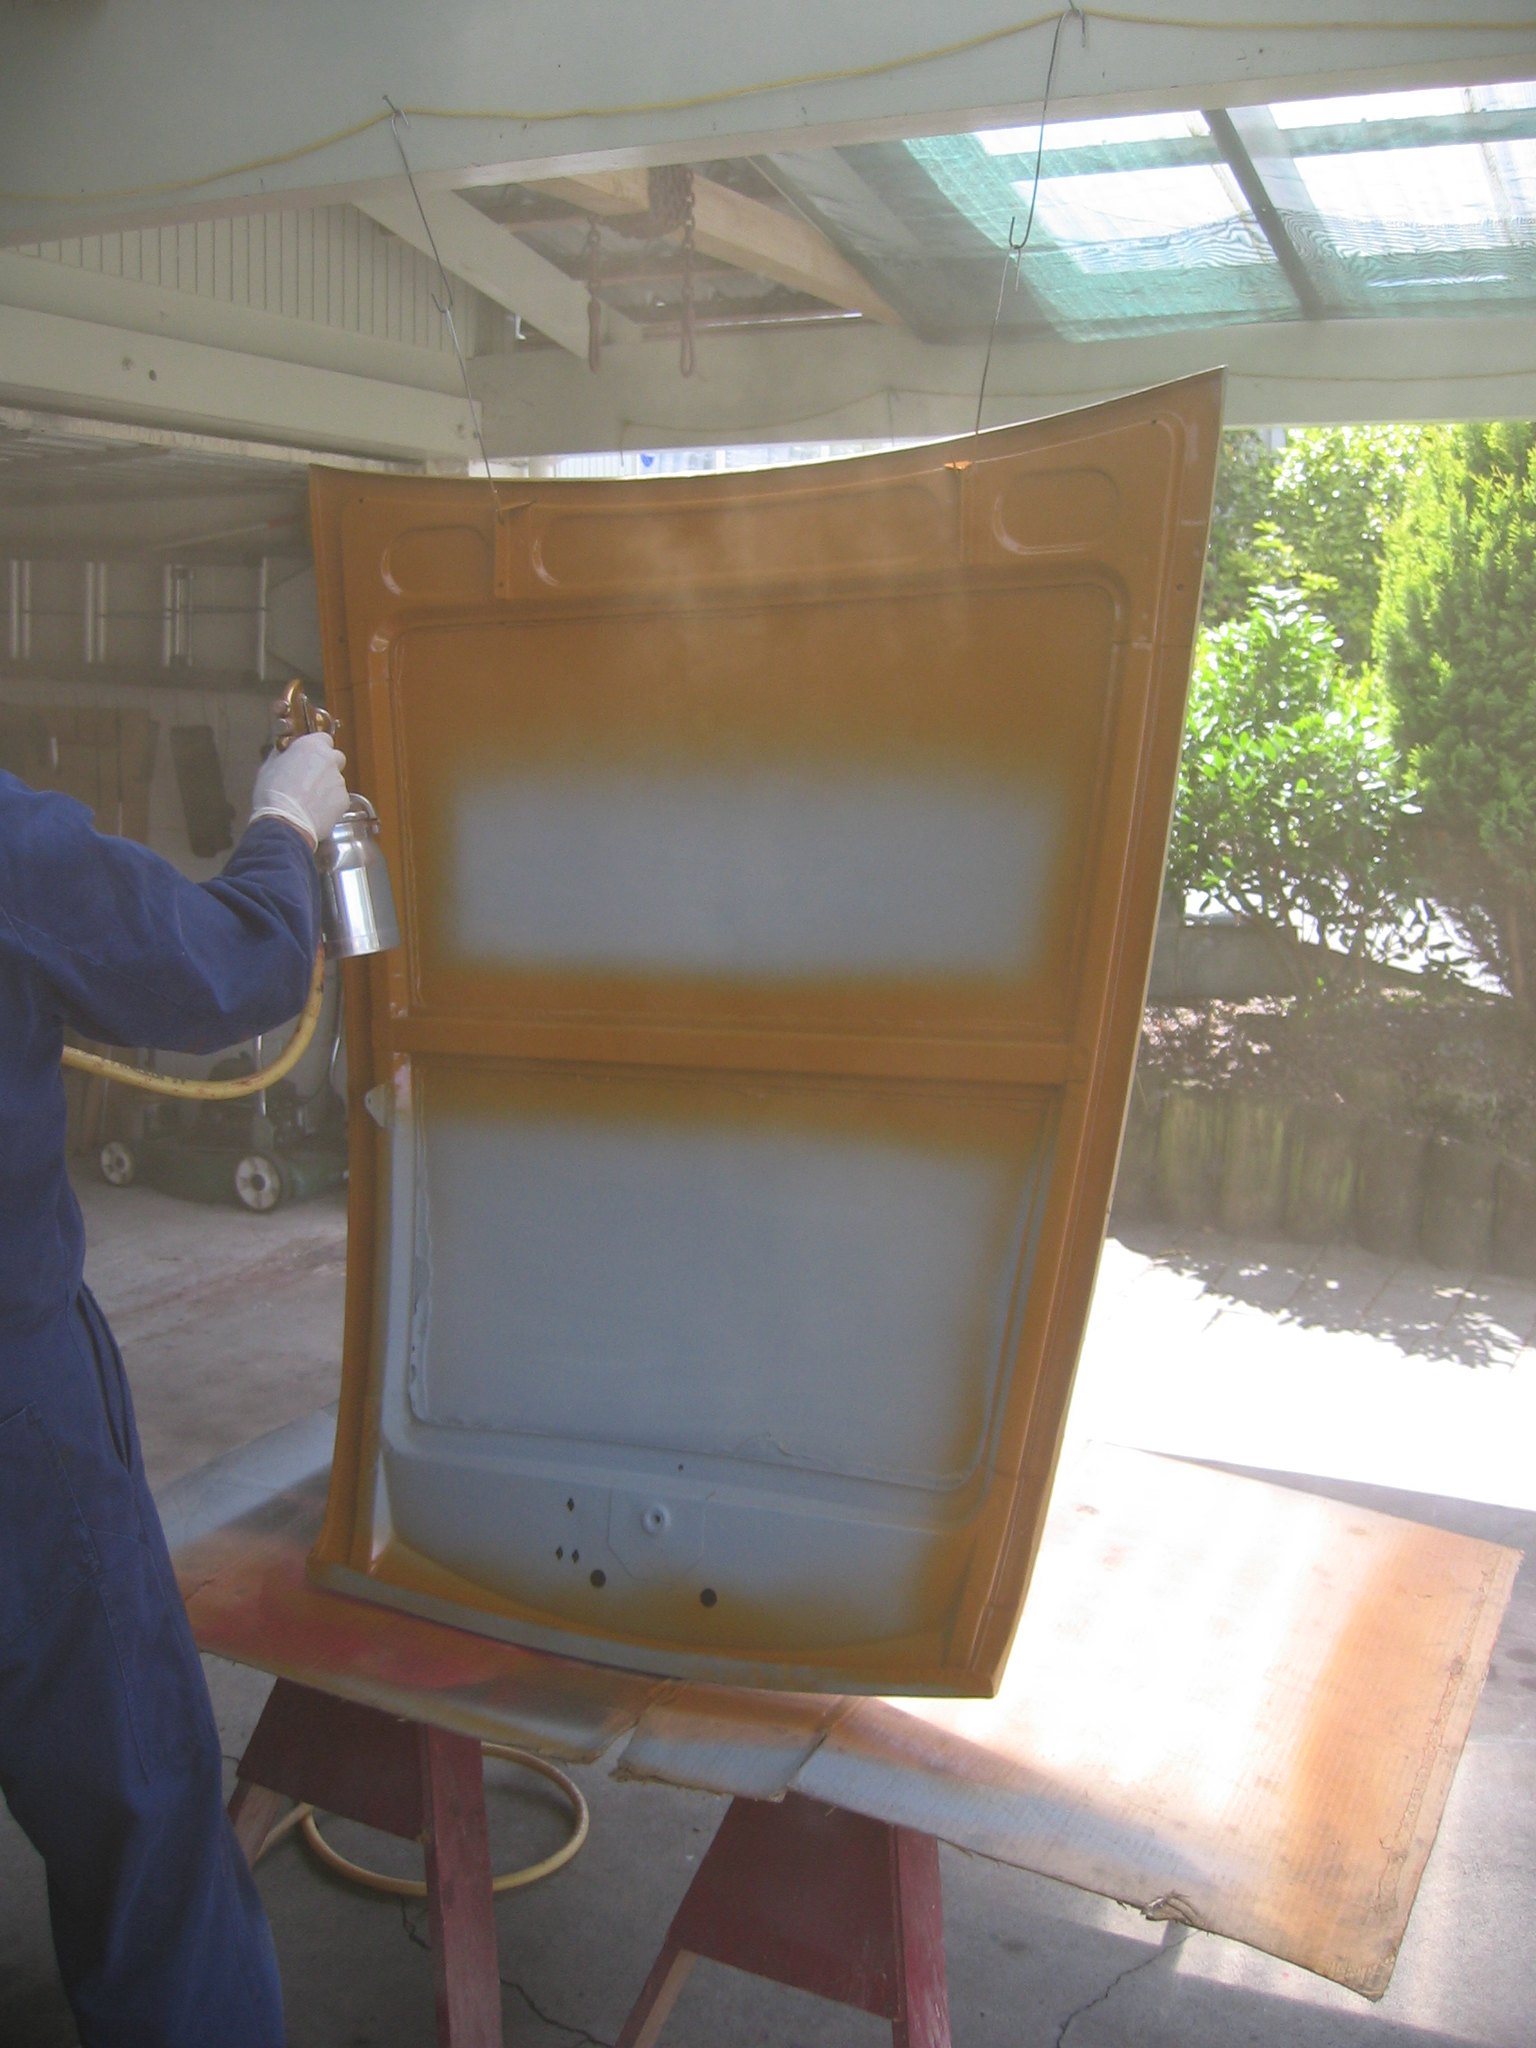 51 27 December 2004 2 by Andrew Metford, on Flickr 51 27 December 2004 2 by Andrew Metford, on Flickr
Now it was at the stage that I could actually start putting stuff back on the car. The front suspension was the first thing back in, so I could move the car in and out of the garage more easily. Then the pedal box went back on and the brakes were bled. This is how it looked on New Years' eve 2004: 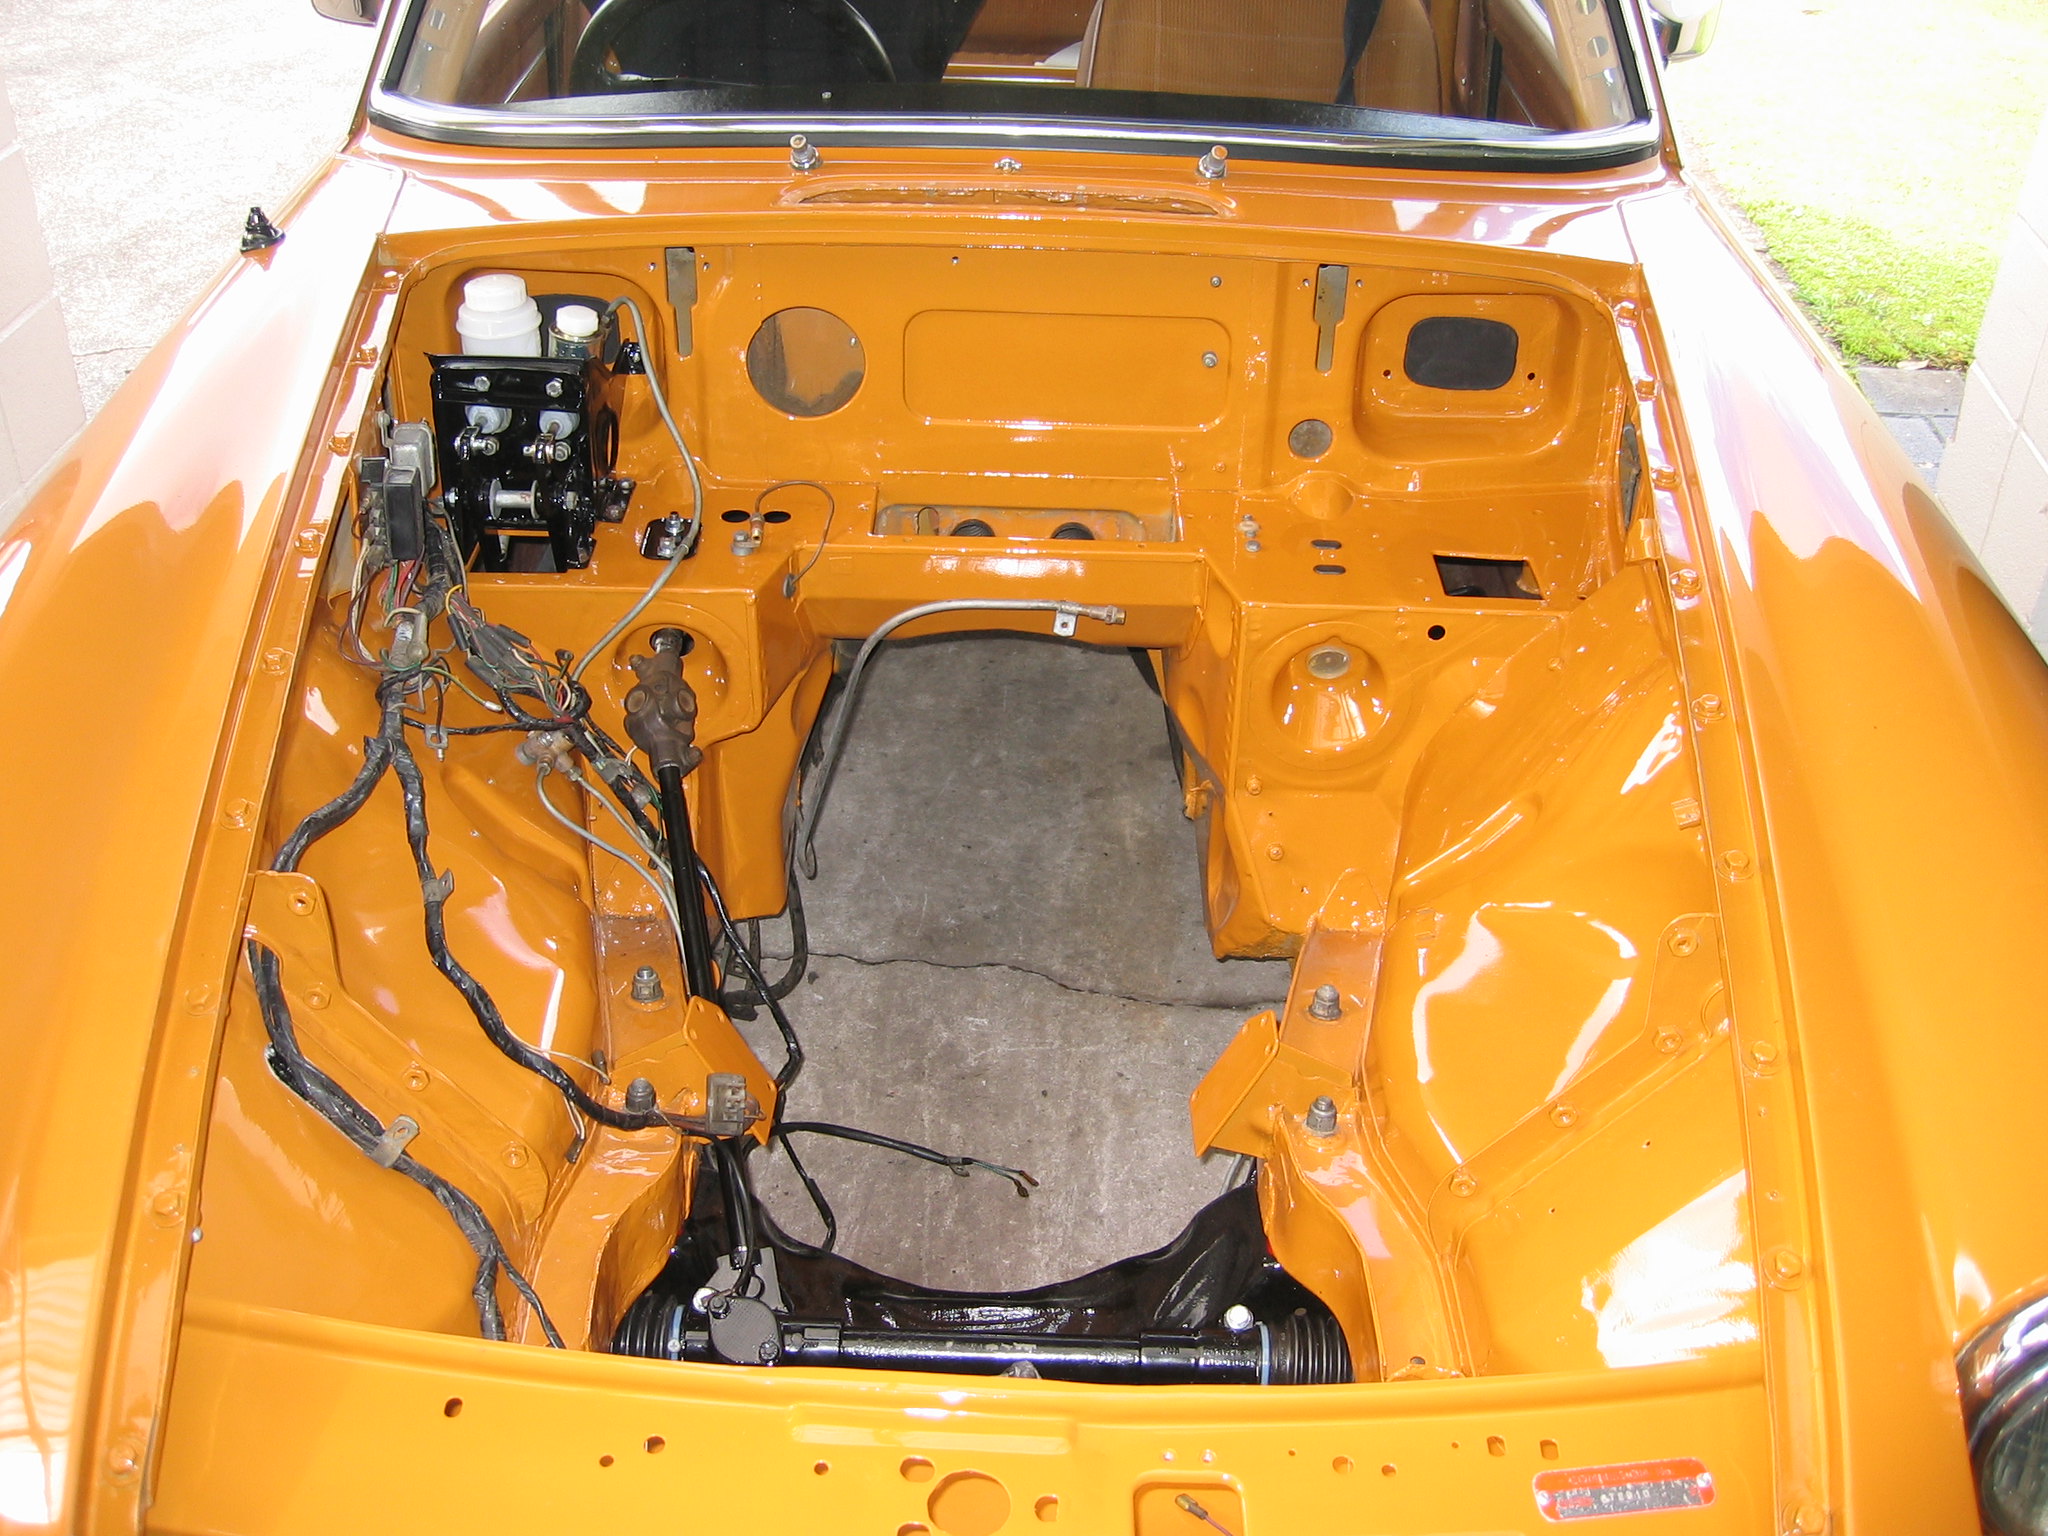 54 31 December 2004 2 by Andrew Metford, on Flickr 54 31 December 2004 2 by Andrew Metford, on Flickr
Then I started refitting all the brackets and fittings in the engine bay. One Saturday morning I took the race engine, which I had had rebuilt about year before, out to Lynn Rogers to get a bigger camshaft. I had to end up changing the cam with the engine on the back of the trailer in the carpark as all the bench space in his shop was being used that day. Anyway, I got it done and made a new offset cam key to get the timing right, and took it all back home, painted the engine in black Smoothrite, bolted the gearbox up to it, and put the whole lot into it's new home. Quite some time later I pruchased and installed one of Basil Adams' one piece alloy side covers. It looks really good, does an excellent job ( ie: doesn't leak!! ), and was very nicely machined. When I originally pulled the engine and gearbox from the roadster racecar for a freshen, I wanted to change the gearset to close ratio. At the time, to get the factory 4 sync close ratio gearset from England would have cost me NZD$3500, and then I would have had to get them into the gearbox with new bearings, seals etc ( about NZD$1200 ). I couldn't afford that, so being a Toolmaker and Machinist, and having an aquaintance who was a gearcutter, thought it can't be that hard to make a set myself, so I started doing my homework to make my own close ratio gearset. After talking to my mate, I settled on the best option for the least $$. I got another non O/D gearbox and stripped it just to get the gearset out of it. I machined the teeth of the input shaft gear, 3rd gear, and their 2 mating gears on the layshaft. Then I made up new rings, sweated them on, tig tacked tham on, and took them to my mate, who cut the new gears to what I had worked out for the ratios I wanted. He then sent them off to get heat treated, and I got them back. The whole lot all finished, including the material cost, my mate's charge plus hardening, ending up coming to $900. I then got Garth Bagnall ( a top man ) of MG Shop in New Lynn to rebuild my gearbox and install the new gearset. That cost me $1200, so to get a fully reconditioned close ratio gearbox ended up costing my $2100, instead of $4700 if I had got the factory gearset from England!! I was pretty happy with that to say the least :) Standard factory ratios are 3.44 first, 2.167 second, 1.382 third. The ratios I achieved are 2.74, 1.725, 1.25. Factory close ratio is 2.34, 1.67, 1.25. So I have exactly the same third gear as factory C/R, my second is 0.055 lower than factory C/R, and first is about halfway between standard and facatory C/R. For the type of racing and tracks we have in New Zealand, I think the first gear I have ended up with will be better than the factory C/R first gear anyway, as we have standing starts at all our race meets, and I also do hillclimbs etc again with standing starts. When I had the old roadster pulled to bits, I set about getting ventilated discs for the front. As usual, on a budget of nothing, It was a case of trying to find something from another car that would fit or could be made to fit with a little modification. I worked out a window of measurements that the discs needed to fit within to be at least close to fitting, and then spent hours looking through every brake disc book at the local brake shop. Eventually I settled on a disc from a Nissan Skyline. I had to get the hub hole on the disc opened out 5mm, and the stud pattern re-drilled to 4 stud ( Skylines are 5 stud ). I also had to space the calliper inwards 3mm to get it centred over the Skyline disc. I made up spacers to go between the caliper halves, as the discs are 22mm thick. So now I have 4 piston calipers and ventilated discs, and it's all bolt on bolt off. I struggled for a long time with the brake pedal after putting the ventilated setup on the car, having excessive pedal travel. Eventually I put a bigger ( 2 sizes bigger, 7/8" I think it is now ) master cylinder on, and that bought the pedal back up, and now the brakes are very good. I have Mintex 1166 pads on the front and Ferodo DS11 linings on the drum shoes at the rear on the stock MGB drums. I got the new car all back together after the roll cage and engine bay paint jobs, put the race seat in the car, and took it down to Pukekohe Park Raceway for a test day. It was a bit of a funny day really. Started off wet and raining, and in the first session it was raining on and off. I was taking it easy, making sure everything was alright, and getting everything up to temperature. The car seemed flat, and didn't have the outright performance I remembered it had the last time I had run the old car. Back in the pits we were poking around and found the accelerator cable had slipped on the clamp so I wasn't getting full travel, only about 80%, so that's probably why the car felt flat and slow. The carb was also not behaving, which turned out to be a split diaphragm when I took the carb to the shop sometime later. I've never been that pleased with the carb, and you can't get decent linkages for Dellortos, so I might look at getting a Weber. Towards the end of the day there was a fine mist of oil over the back of the car, which was down to a leaking rocker cover gasket because the aluminium rocker cover doesn't have the tabs inside it to hold the gasket in the right place like the original steel rocker cover does. I never really liked the aluminium one either, so that's going in the paper for sale and Dad will paint up one of my nice standard covers and I'll put that on. I had got a wheel alignment late in the afternoon the day before, and I didn't think it looked right - looked like too much toe out. So when we had it up on the trailer at the track I measured it and sure enough the alignment shop had set it to 1/16" toe out PER SIDE instead of 1/16" total. So that will be fixed before the next test day. The rest of the day was uneventful, the car ran ok otherwise, and we took it home for a degrease underneath and at the back, then I put it away and went back overseas for work. 2 years later I was home again for a short spell, and did a bit more work on the car. I had found out in between times from reading Sean Brown's www.flowspeed.com site that the Titan roller rockers on the car need to be measured and shimmed up to get the rocker shaft at the correct height in order to get the full 1.625 lift from them. The rockers were just bolted straight on the head when I got it. So I pulled the head off, took the head, rockers, and pushrods home and measured it all up. Turns out that the rocker shaft needs to be lifted 0.194". Also, the adjusting screws to set the tappet clearances, should be centrally located in the rocker with approximately 2 threads showing out of the rocker top and bottom. Mine were wound most of the way out the top, with 7 threads out the top, which meant the ball which sits in the top of the pushrod was right up inside the rocker. The rockers have wear marks on them where the top of the pushrod has been hitting the underside of the rocker because the adjusting screw is so far up that the ball isn't actually fulling sitting in the pushrod. So 5 threads on the adjusting screws with the thread and pitch worked out to be 0.208", so the adjusting screws need to come down 0.208". So halving the difference between how much the rocker shaft needs to come up, and how much the adjusting screws need to go down, 0.200" is the size of the shim I will start with under the rocker pedestal. I wound the adjusting screw down to where it should be, and funnily enough the ball sits out of the rocker and will sit in the pushrod properly. Here's a pic of how it was ( on the left ) and how it should be ( on the right ): 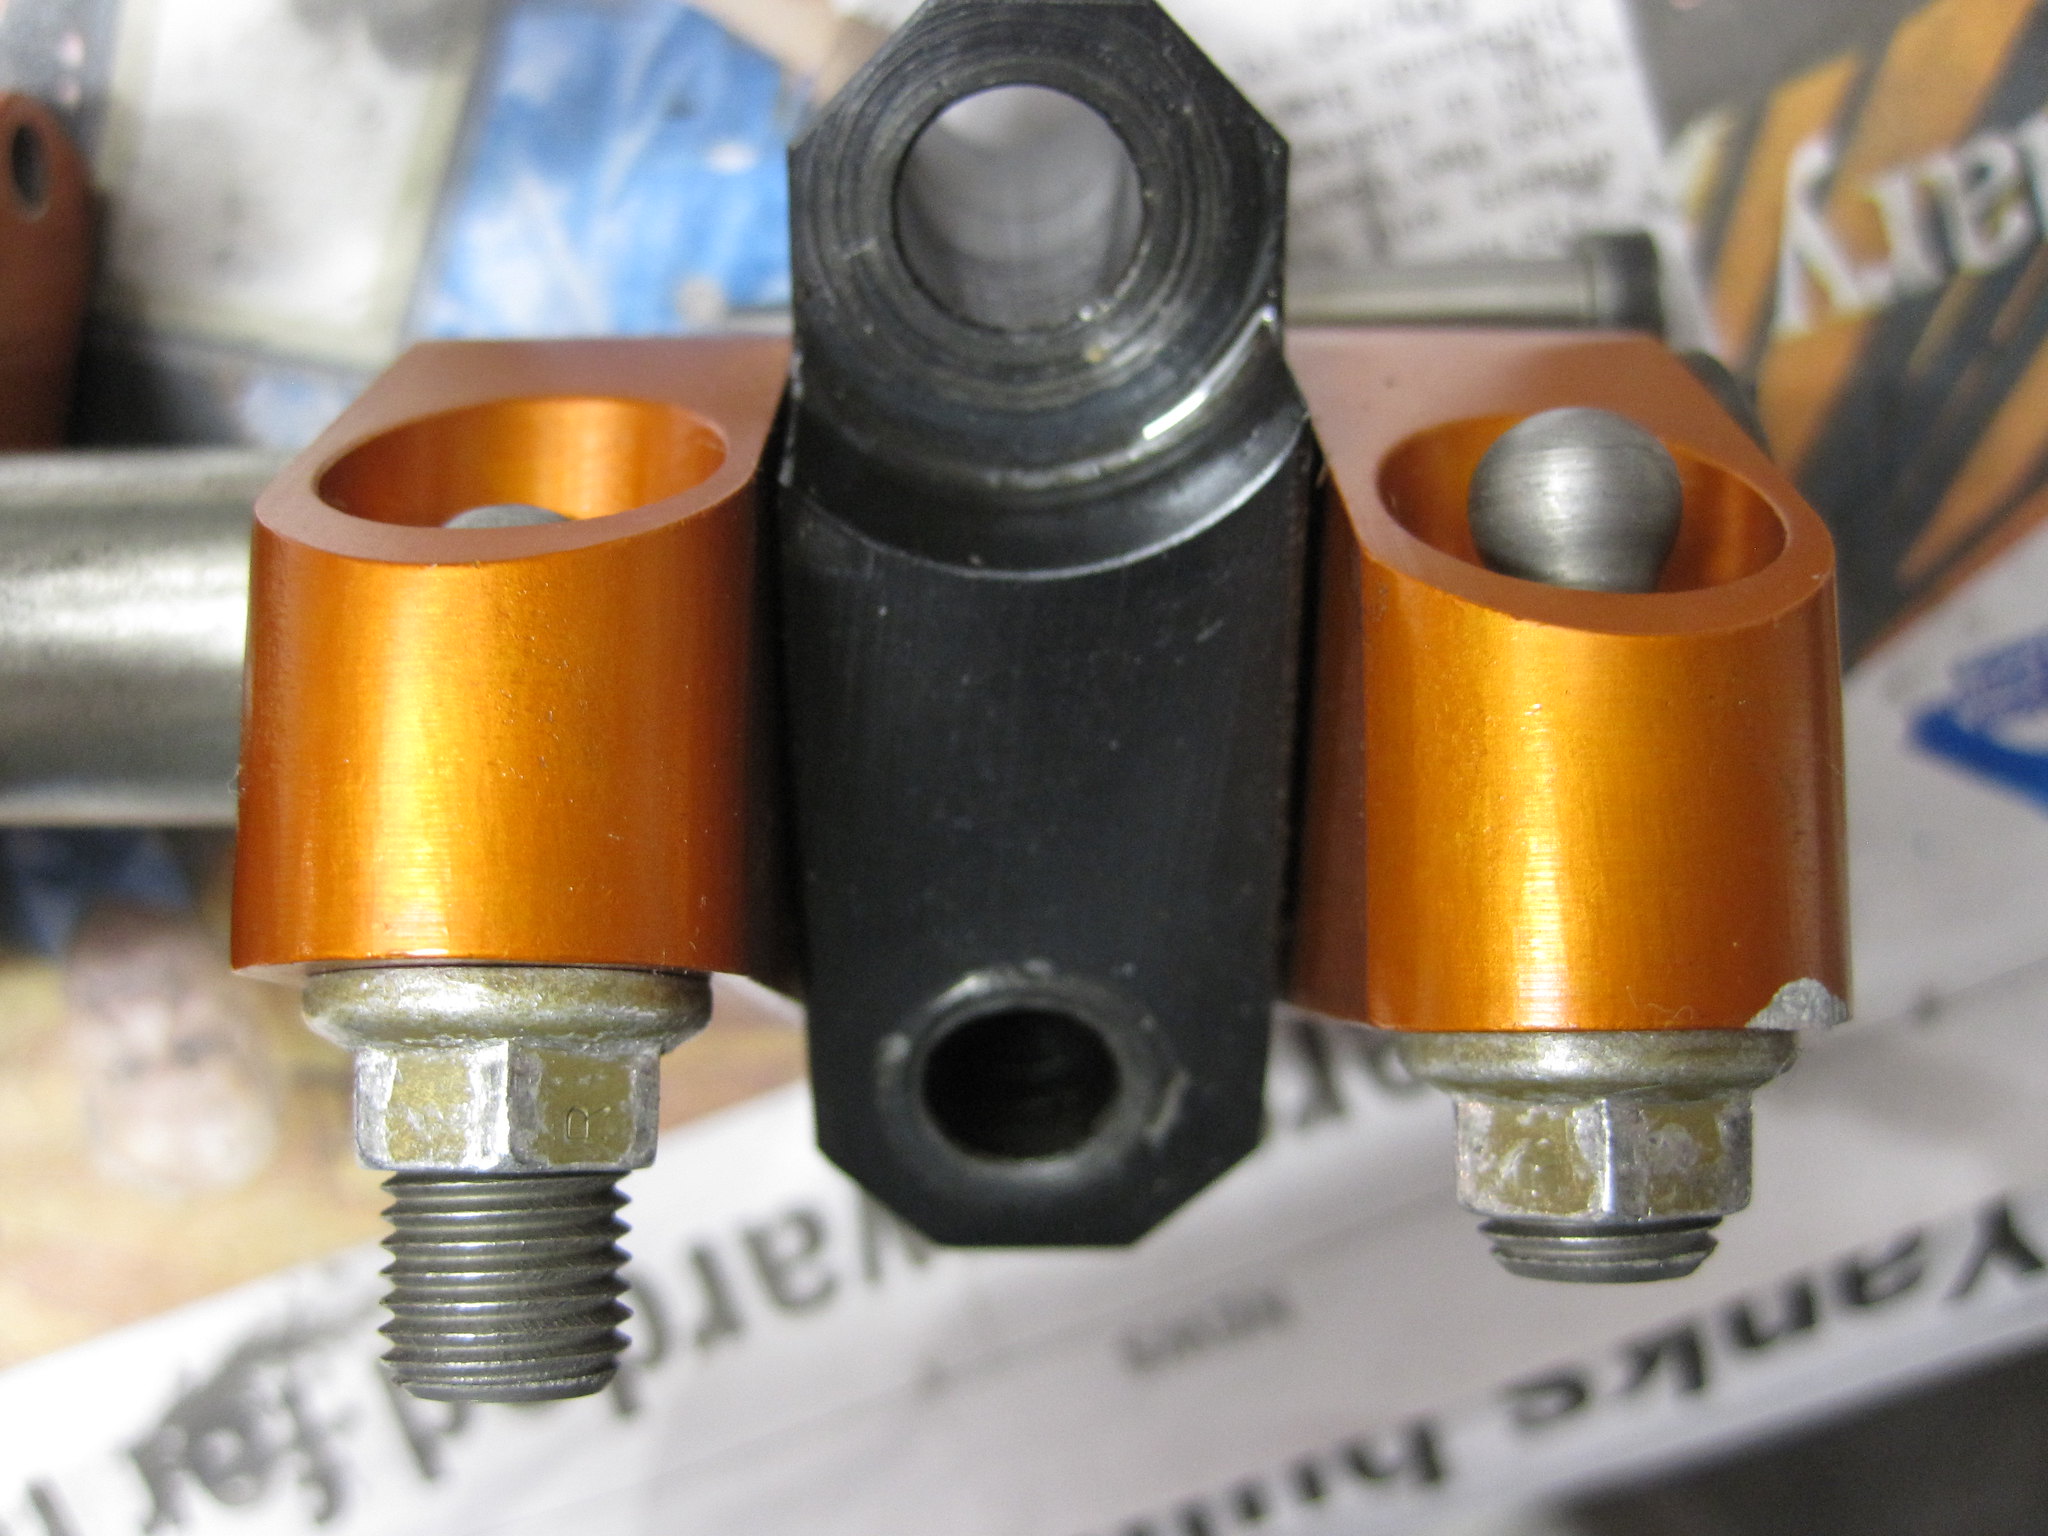 102 16 September 2012 2 by Andrew Metford, on Flickr 102 16 September 2012 2 by Andrew Metford, on Flickr
And from the top, again how it was on the left, how it should be on the right: 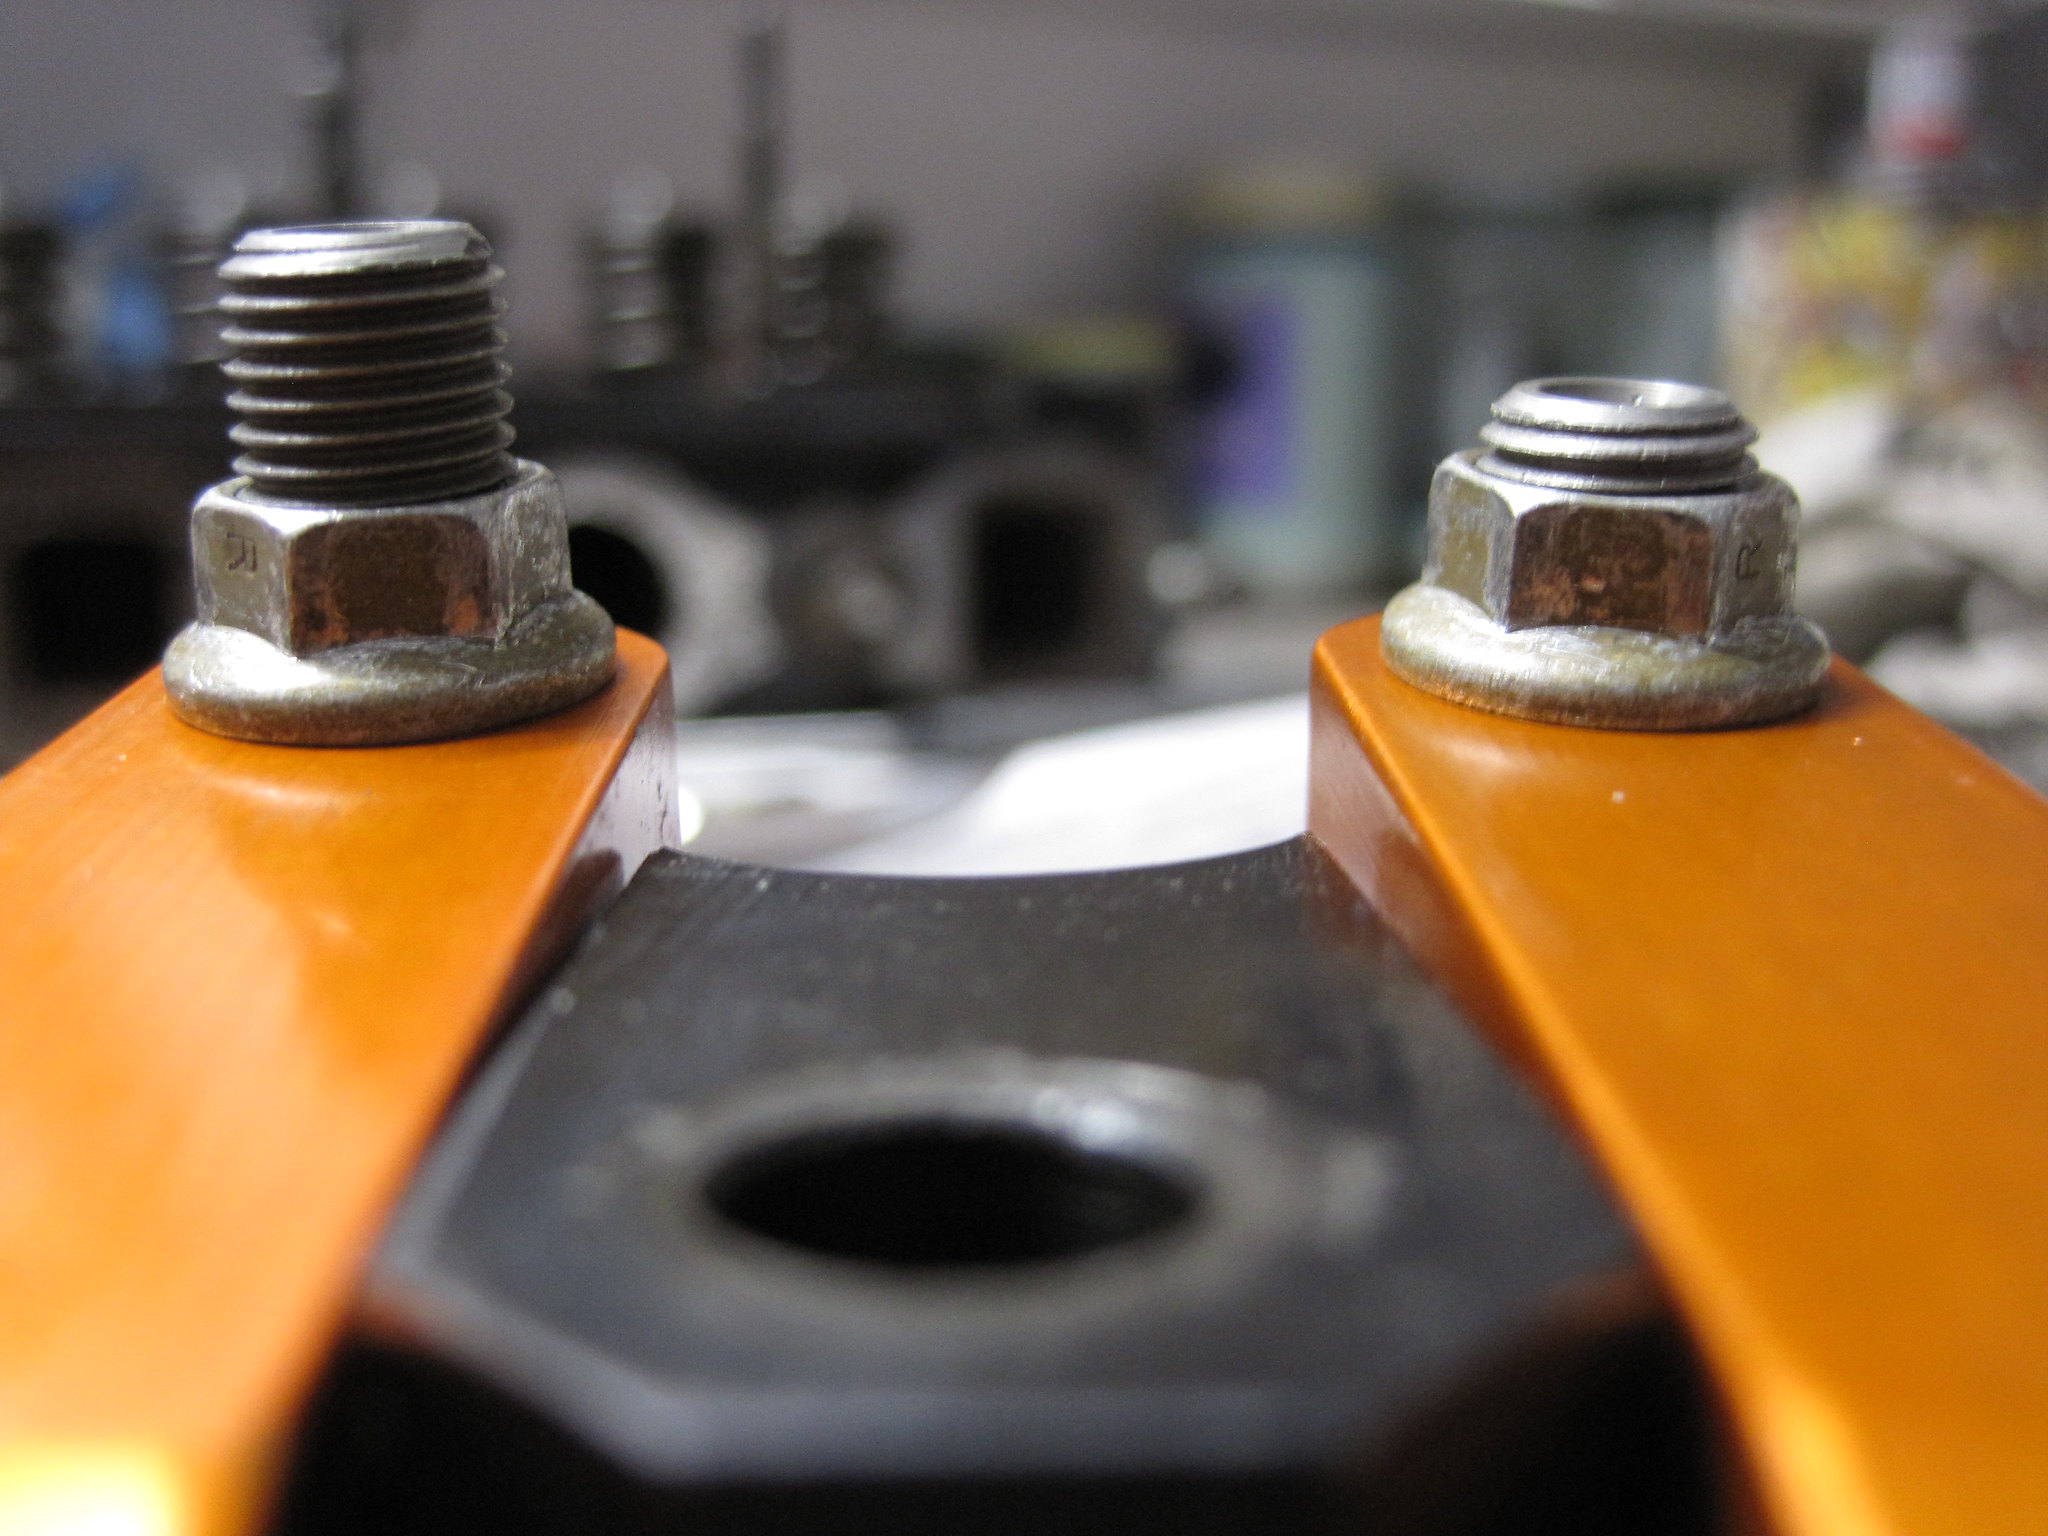 101 16 September 2012 1 by Andrew Metford, on Flickr 101 16 September 2012 1 by Andrew Metford, on Flickr
The engine was set up like this when I got it, and for however long the previous owner had it, so really it's only luck that it hasn't bent a pushrod or worse. 6 of the 8 pushrods have damage on the top of them - there are little chips out of the top, but not enough to effect them so I'm lucky there. Also, because the rocker shaft needs to go up the same amount the adjusting screws need to come down, means that hopefully I shouldn't need different length pushrods. So I ordered the rocker pedestal shims and now they are all ready and waiting for me to get back home to fit them. I took the Dellorto DHLA 45 carb to Murray Johnson at Weber Specialities in Silverdale when I was home too, to get that looked at. He said really I want a Weber 48 DCO SP to get the most out of my particular engine. He said he originally supplied and fitted a 48 DCO SP to the engine when the previous owner had it, when the SP carbs first came out. So somewhere along the way the carb has been replaced with a Dellorto DHLA 45, which wasn't really a good move. Anyway, long story short, I've ordered a brand new 48 DCO SP. Murray also managed to find me a brand new Warneford 6" inlet manifold ( 152.4mm, the current one with the Dellorto on it is 97mm long ). So now that is waiting at home for me too. 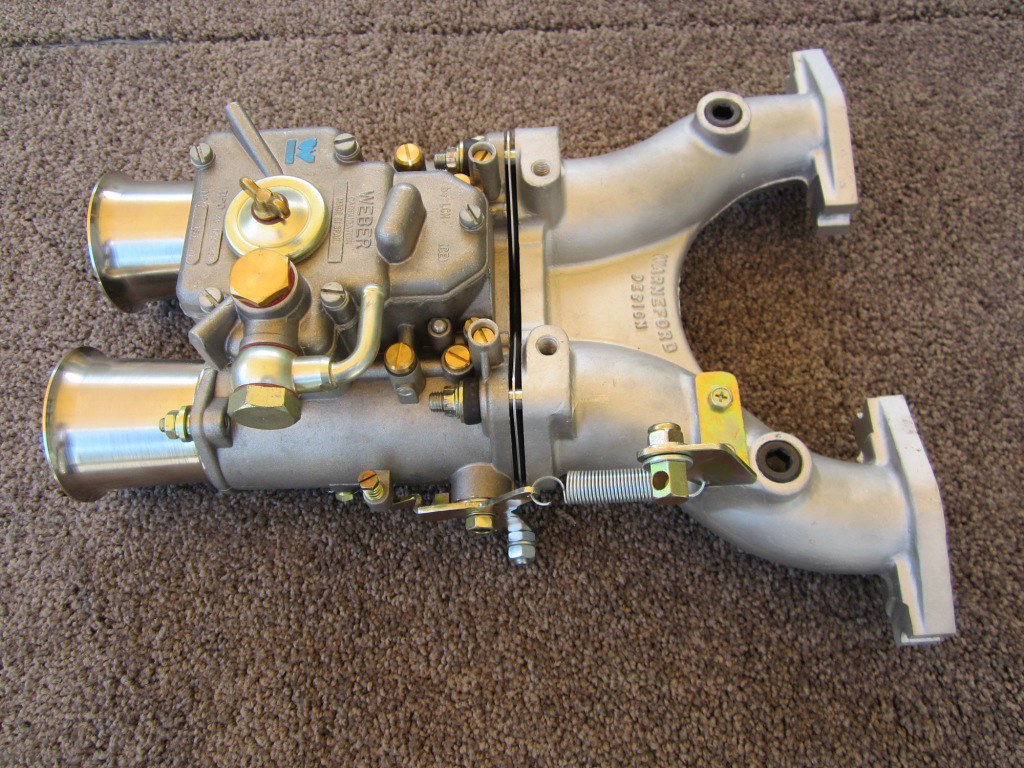 117 22 December 2012 9 by Andrew Metford, on Flickr 117 22 December 2012 9 by Andrew Metford, on Flickr
So between getting the rocker shaft and pushrods set up properly, and the new bigger carb and better linkage and manifold, I'm hoping for a bit of extra performance out of the old girl. To be continued... Edited 39 time(s). Last edit at 12/11/2017 12:10AM by MGST. |
Sorry, you do not have permission to post/reply in this forum.


