

Project Journals
create a diary for your project and show us your progress, with up to 100 photos!
|
qwaii tom lilley Haida Gwaii (22 posts) Registered: 09/24/2010 11:22PM Main British Car: 1970 GT6 5.3l jaguar V12 |
'70 GT12
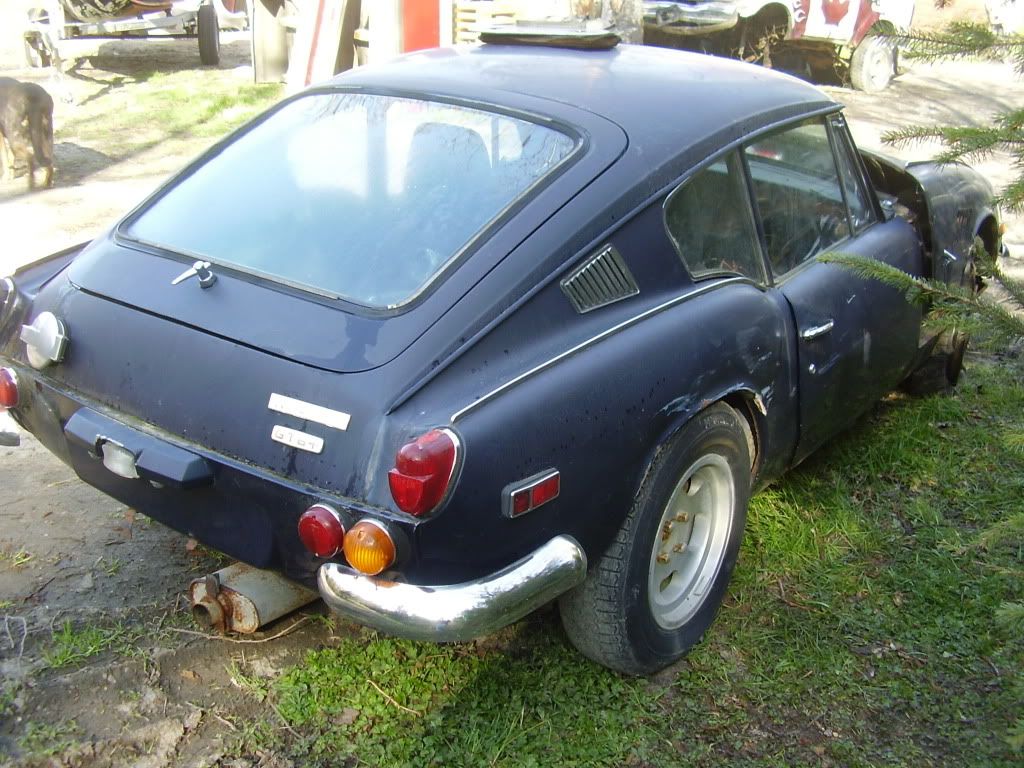
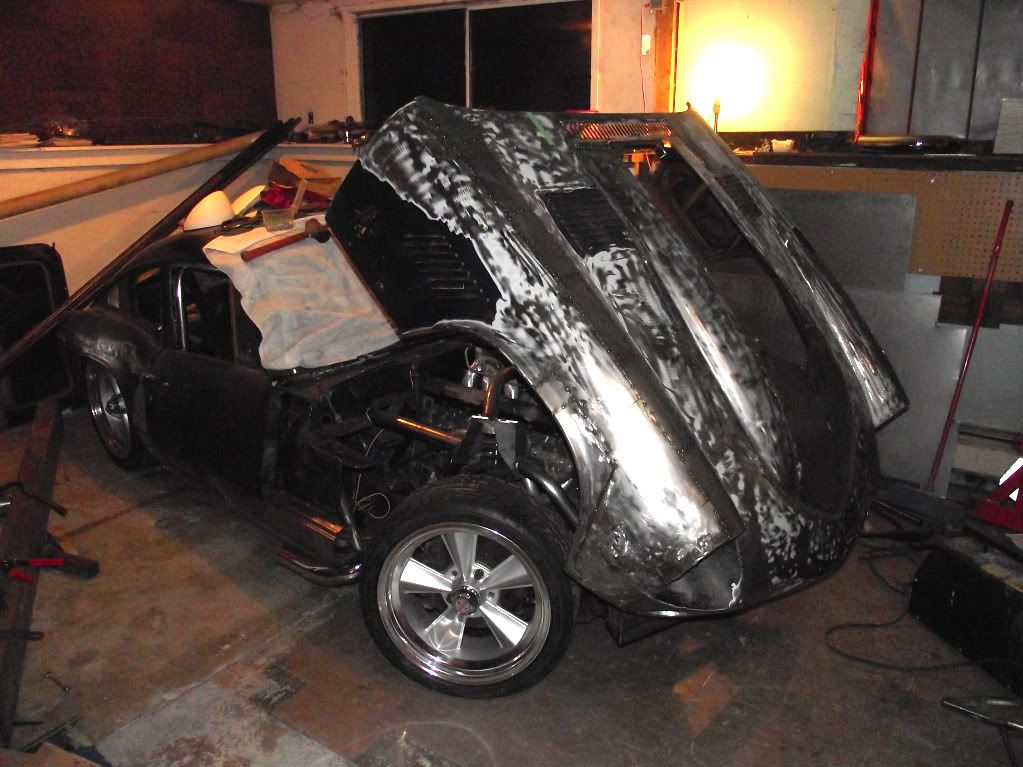
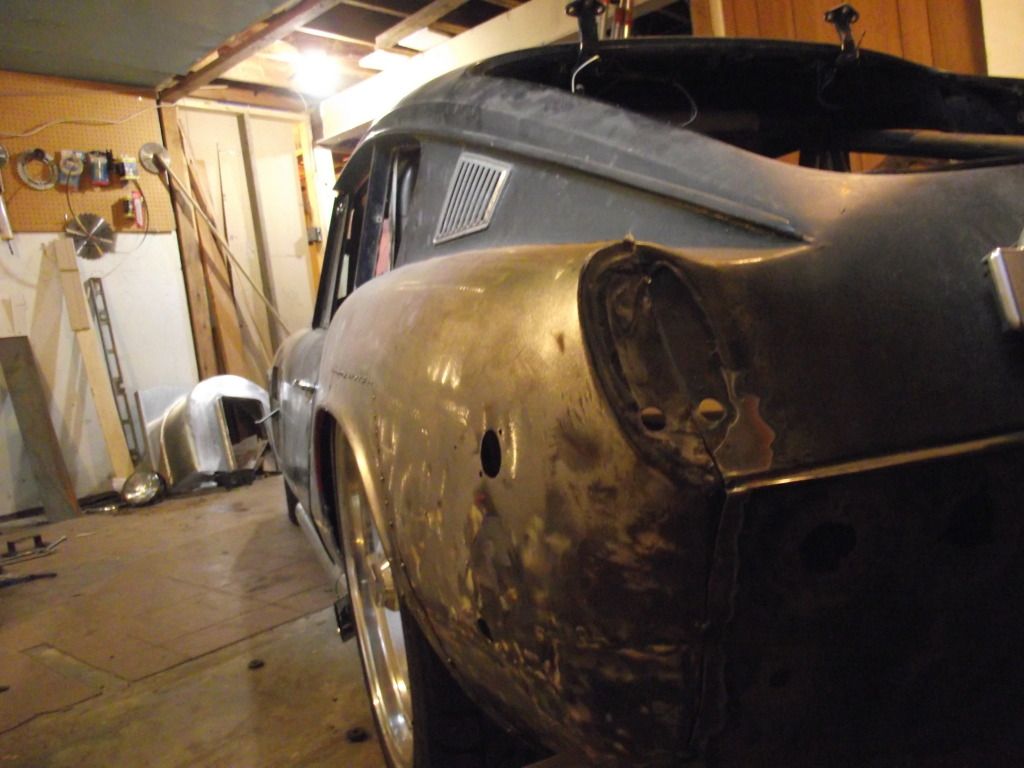
this was going to be sent for scrap...i had to save it.it's too far gone to be feasible as a restoration project,but has lots of potential as a hot rod. 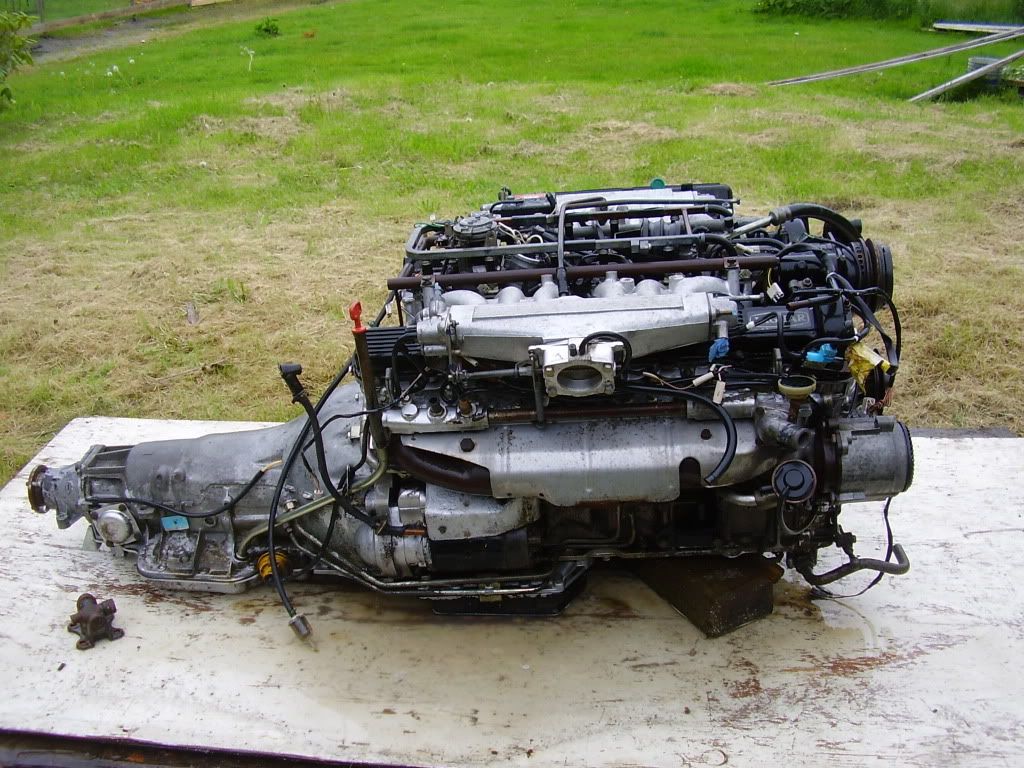
this was sitting in the yard of a good old guy that was dying of cancer.he was liquidating his possesions,and didn't want this to go to waste.he had heard of some of my other projects,and said i could have it if i did something interesting with it.i actually got the v12 before the gt6,but knew i would find a suitable home for it. though i still didn't have a home for it,i knew i wanted it to be a hotrod engine,and also knew that the reason it was pulled from the xj12 was that the fuel injection was so unreliable.i could modify ford injection systems to work on this,but nothing screams hotrod like a pair of 4 barrels sticking out of the hood....so i got an idea.. 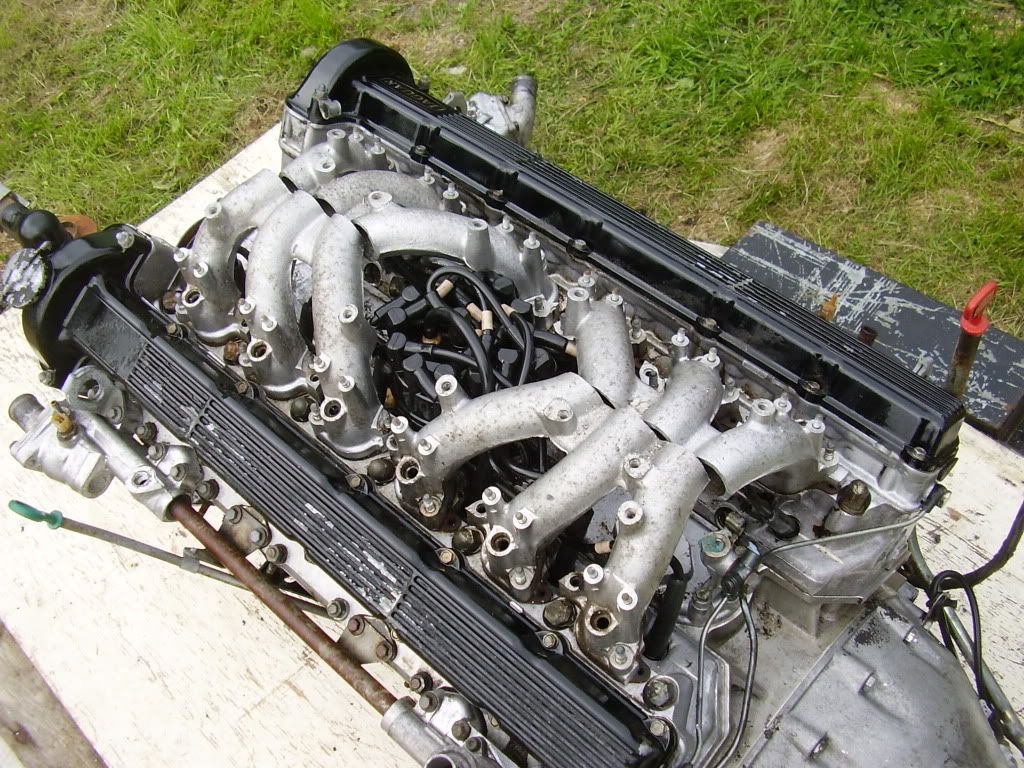
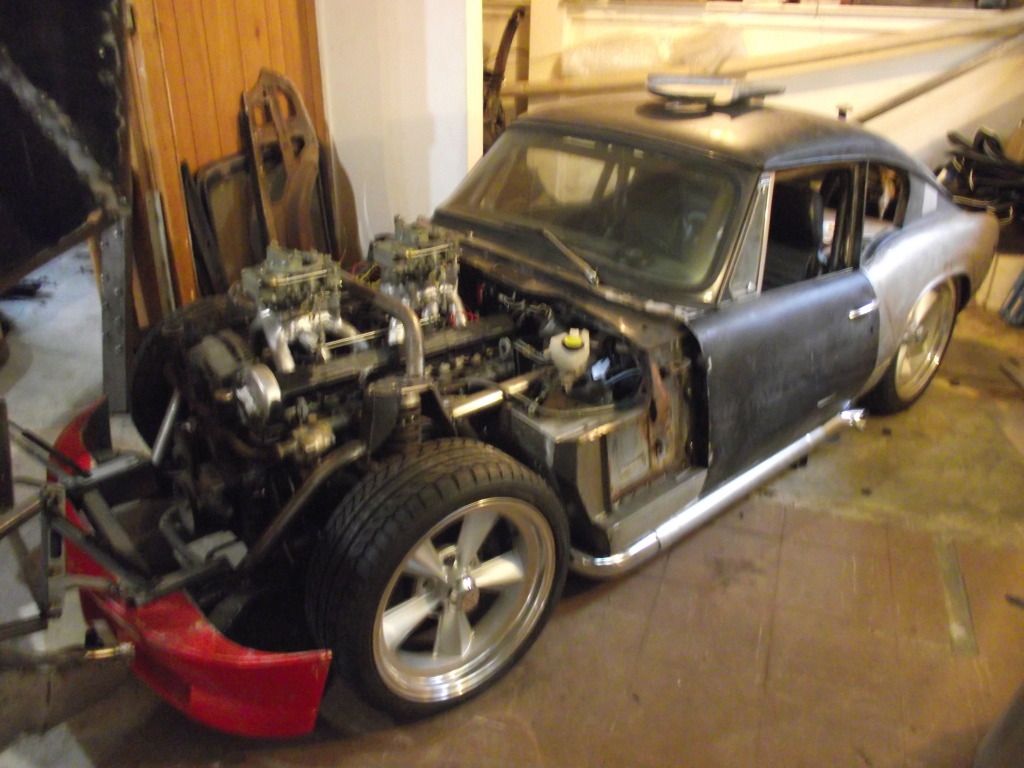
i cut up the stock intakes and turned the tubes around.this put them in a good position to build a plenum off them. here it is with the carbs just sitting on the tubes to see how it looks...i like it 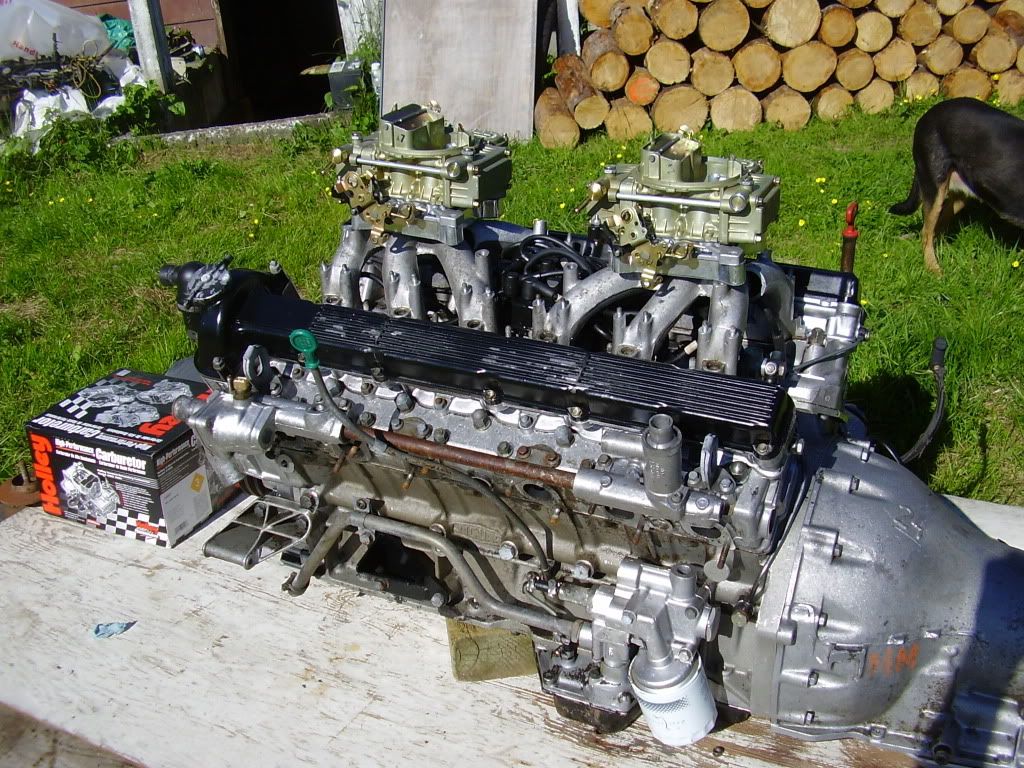
i also know that i don't want to run the stock exhaust manifolds,so i'll need to make some headers. 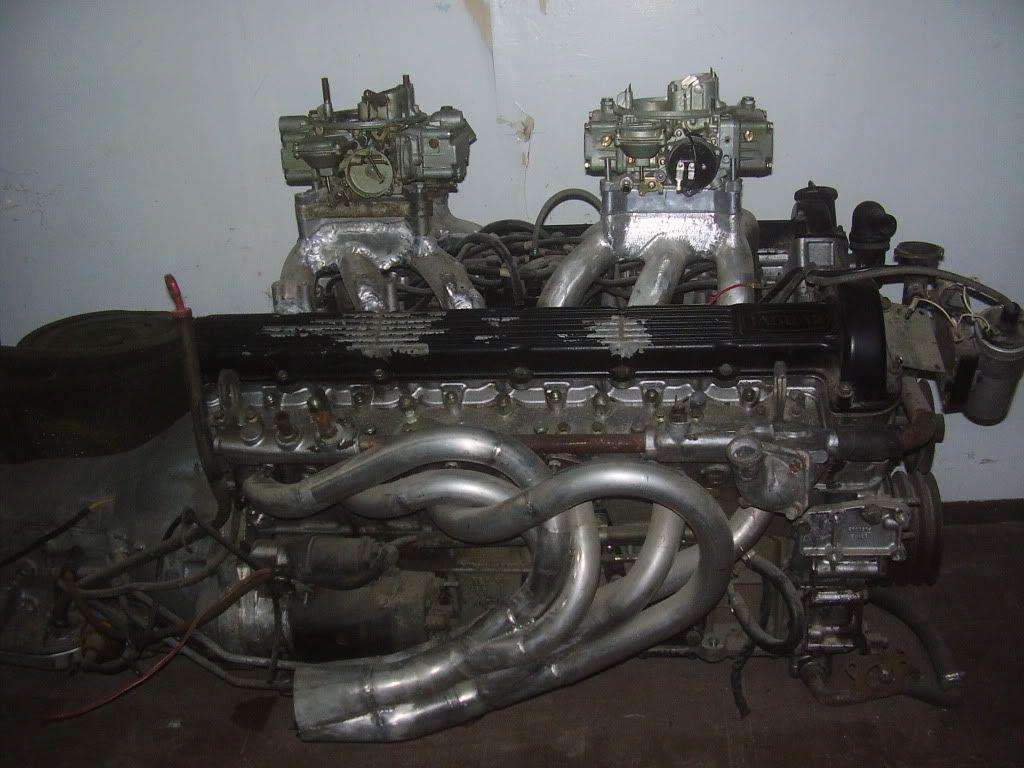
still some work to do,but it's taking shape. 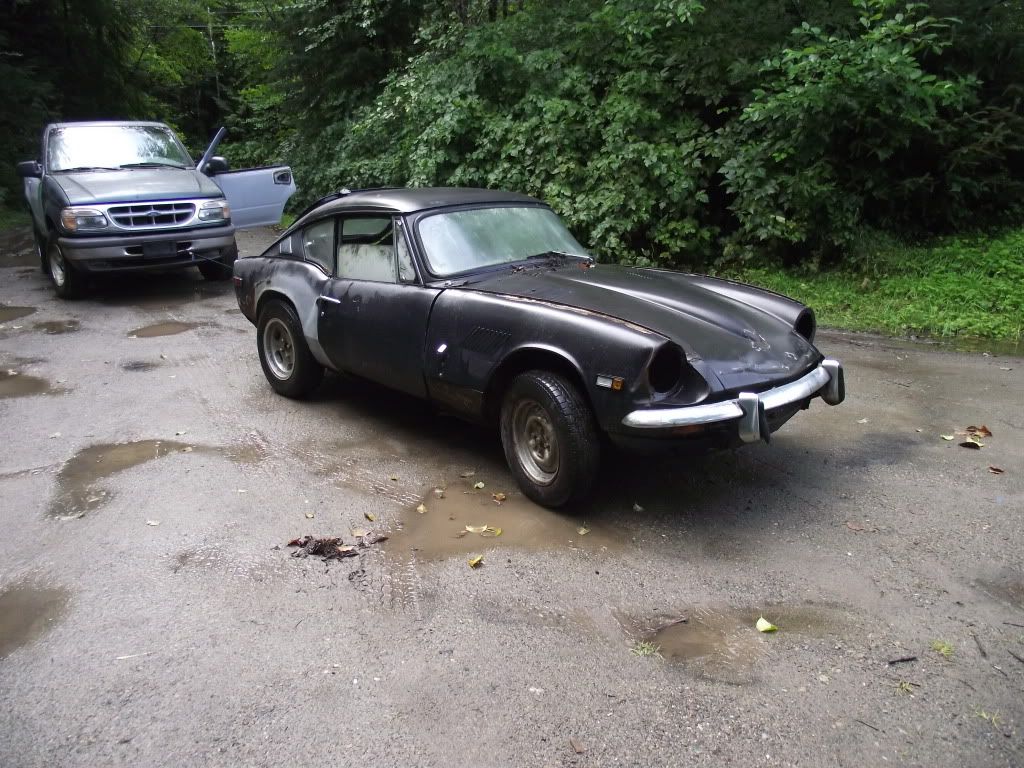
getting ready for the big strip. 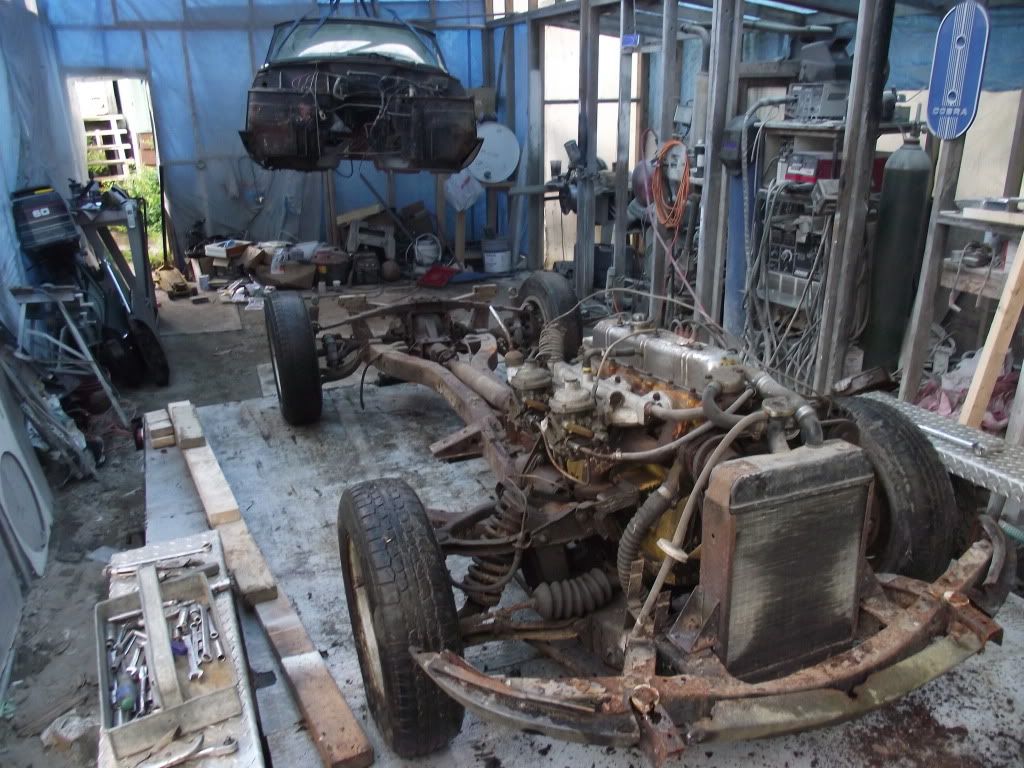
so i knew i needed to strip the car to the frame,and build up from there,and while it might have been easier to build a frame from scratch,i like having the original to build on.so out come the tools. stripped and cleaned,i dragged it into the house(yes,i'm building this thing in my basement) 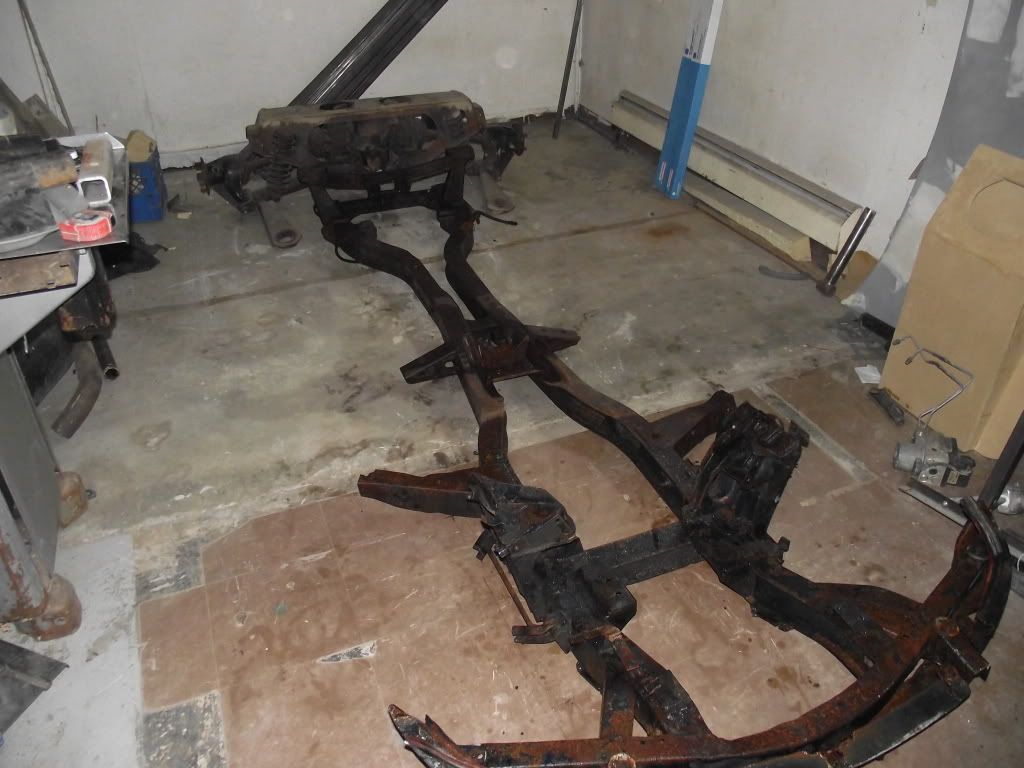
now i can see where things will(or won't)fit. so i put the engine onto the frame....won't fit. 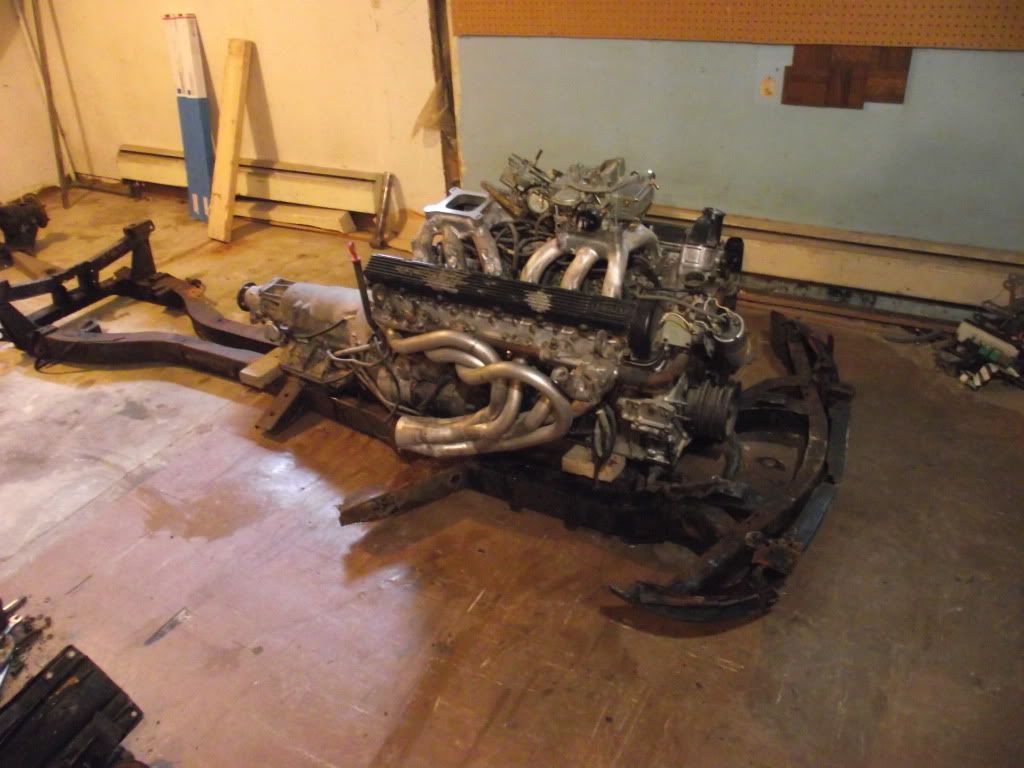
the oil pan is wider than the space between the frame rails,and the tranny has nowhere to go.it has to sit down as low as possible,as there is very limited vertical space in this car to begin with.i don't want anything hanging below the frame,but i don't want it above it either. so i made the frame wider 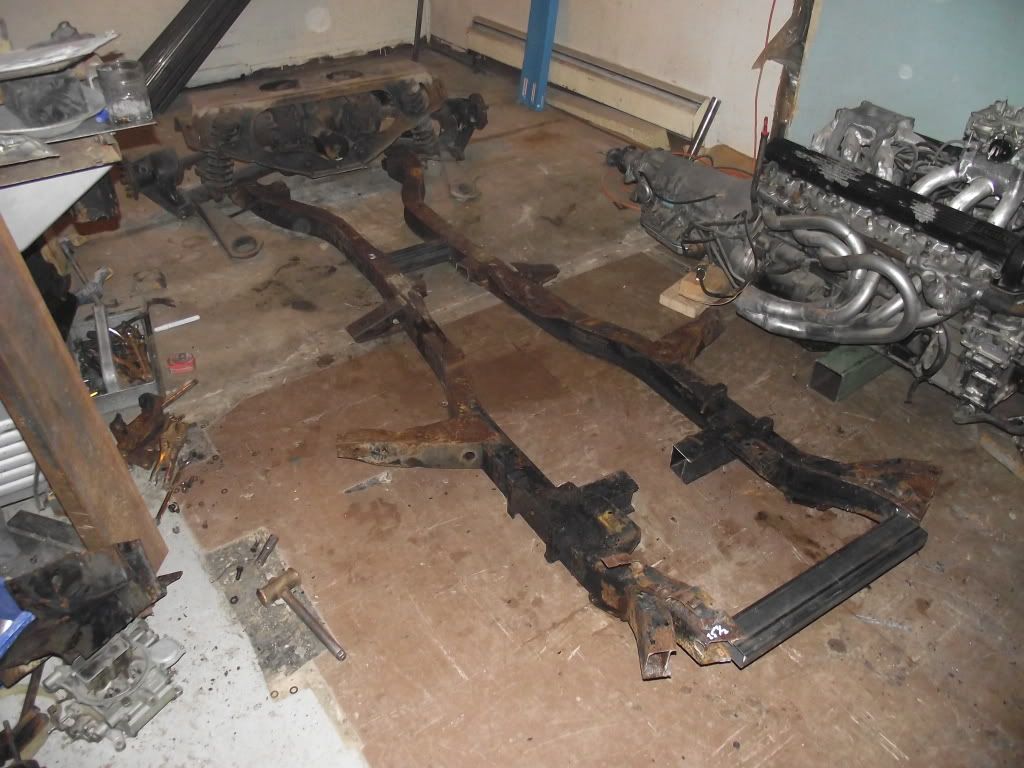
i cut it in half,and made it exactly 6" wider.i left the original stubs of the crossmembers in place for reference,but they will be deleted as needed. there...sits much better now. 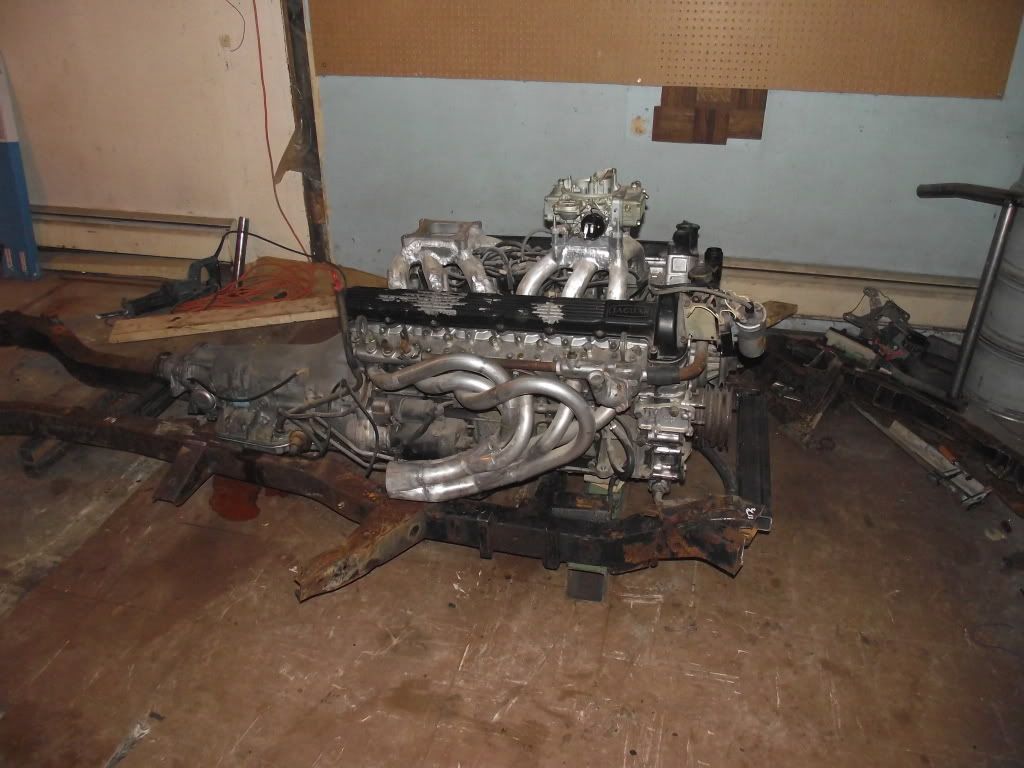
i'll deal with the consequences of this as they come. a handy thing was that the recess put in for clearance on the transmission,when widened,worked well on the jag(gm th400)trans pan. 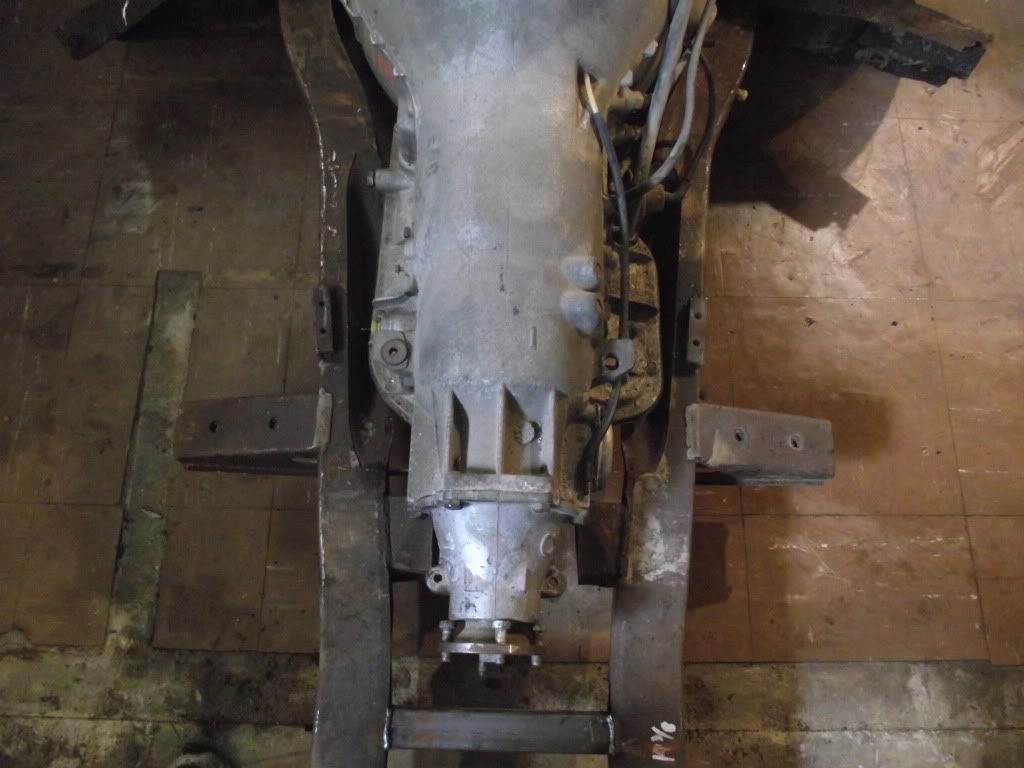
still,i can already see that the interior of this tiny car will be losing a fair bit of real estate. laying out the perimeter frame. 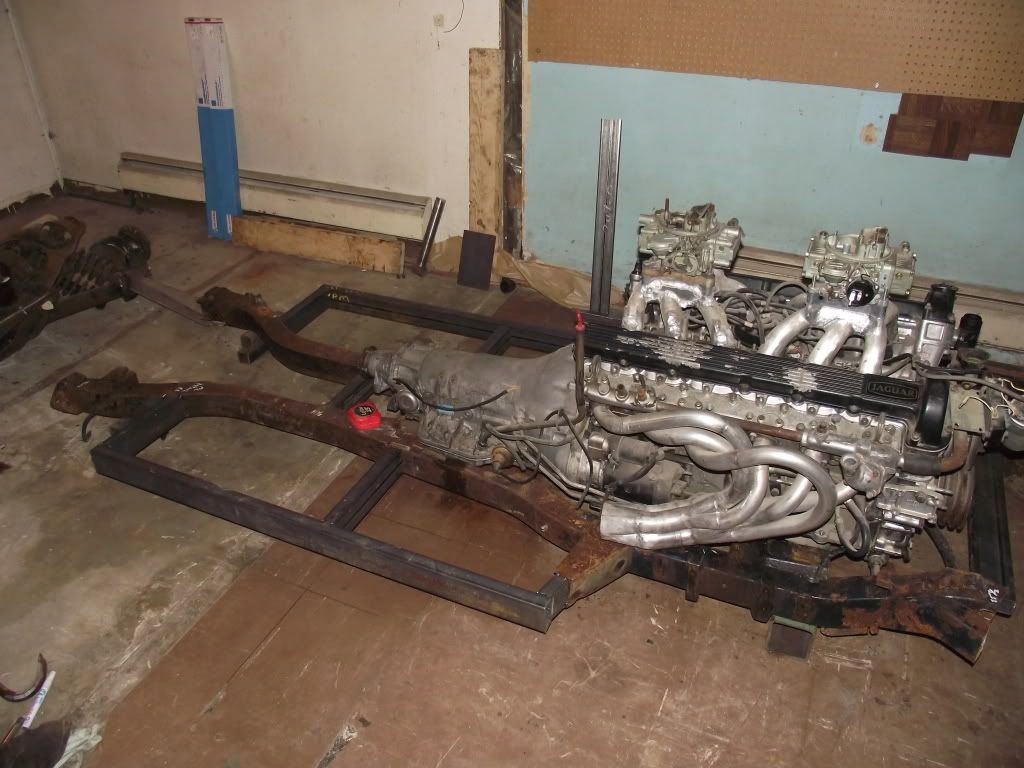
my plan is to build the full running car,including the cage,floors and firewall off the frame,then drop the body shell over it when complete.so a good perimeter is what it all gets built off of. the first hoop. 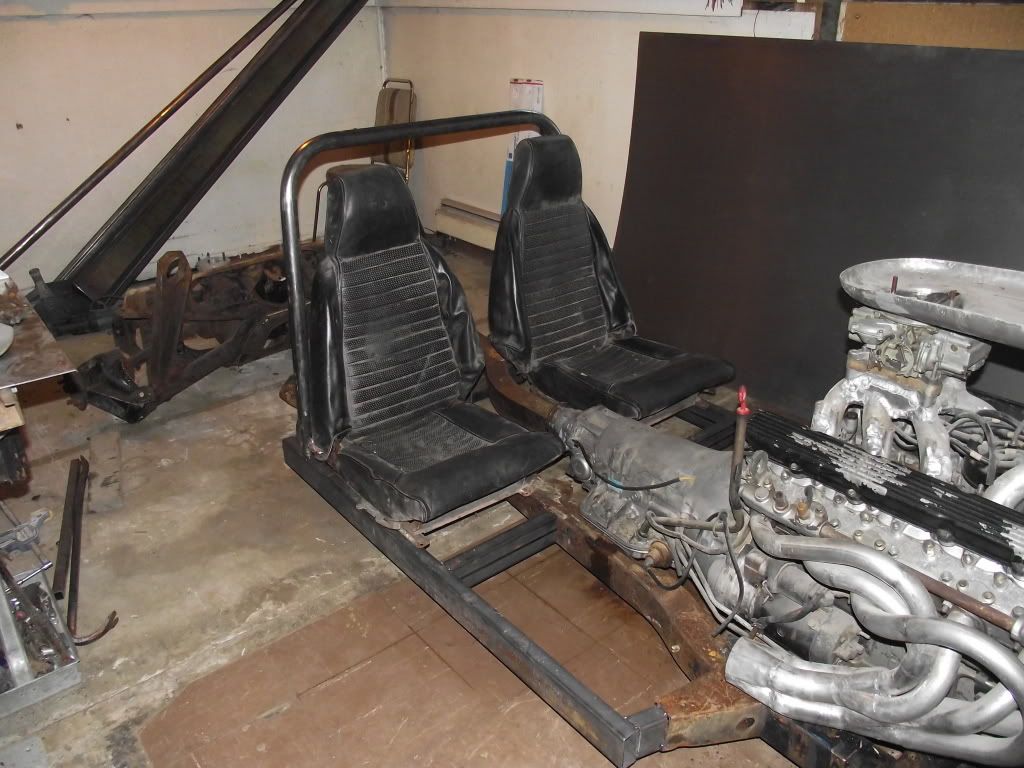
widening the frame is starting to rear it's ugly head now.the seats need to sit down into the framed out openings,but there is not enough room anymore.i'll have to come up with a plan for this. got some more tubes placed. 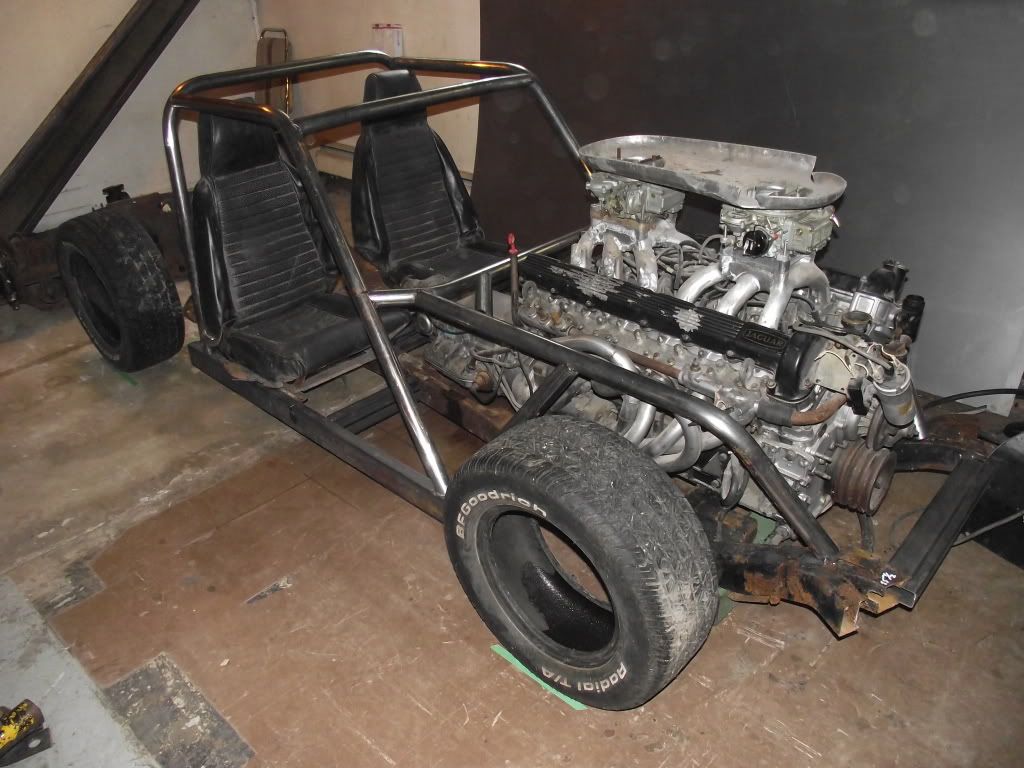
starting to look like something now...the tires are placed there as reference. stripping down the jag rear-this needs to lose 18" of width to work in this car. 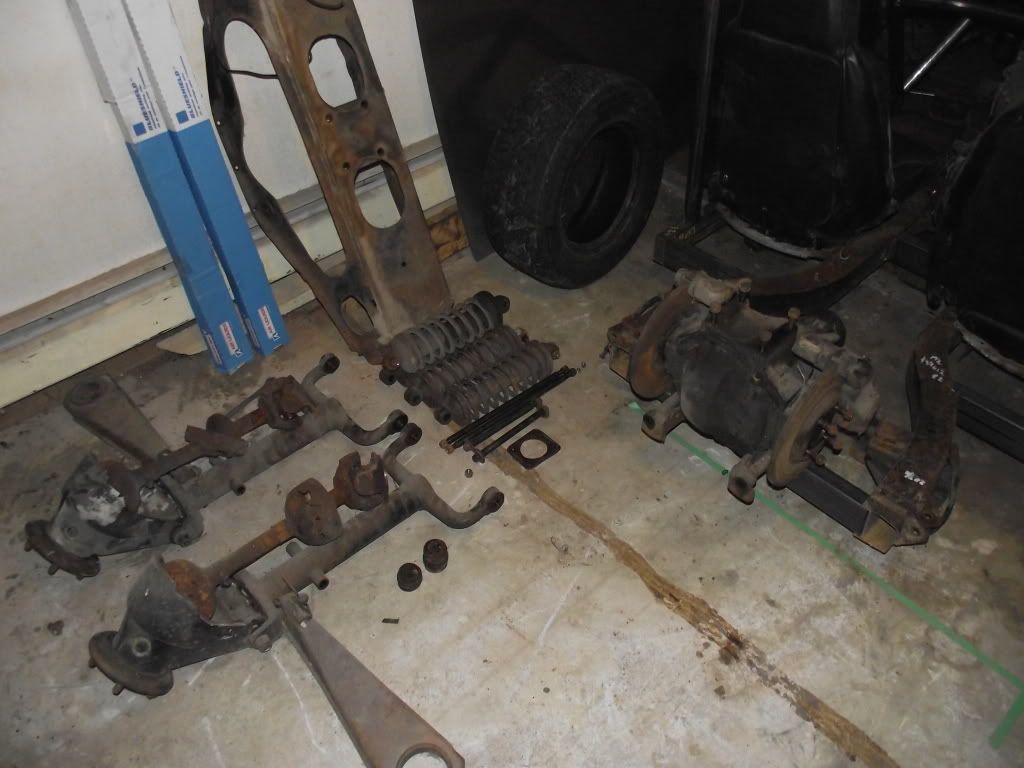
that's going to take some work.i still need this thing to operate in a suitable fashion. 
note the difference in length between the stock arm and the modified one. the axles are the upper arms in this system,and there is very little room for error in the length. 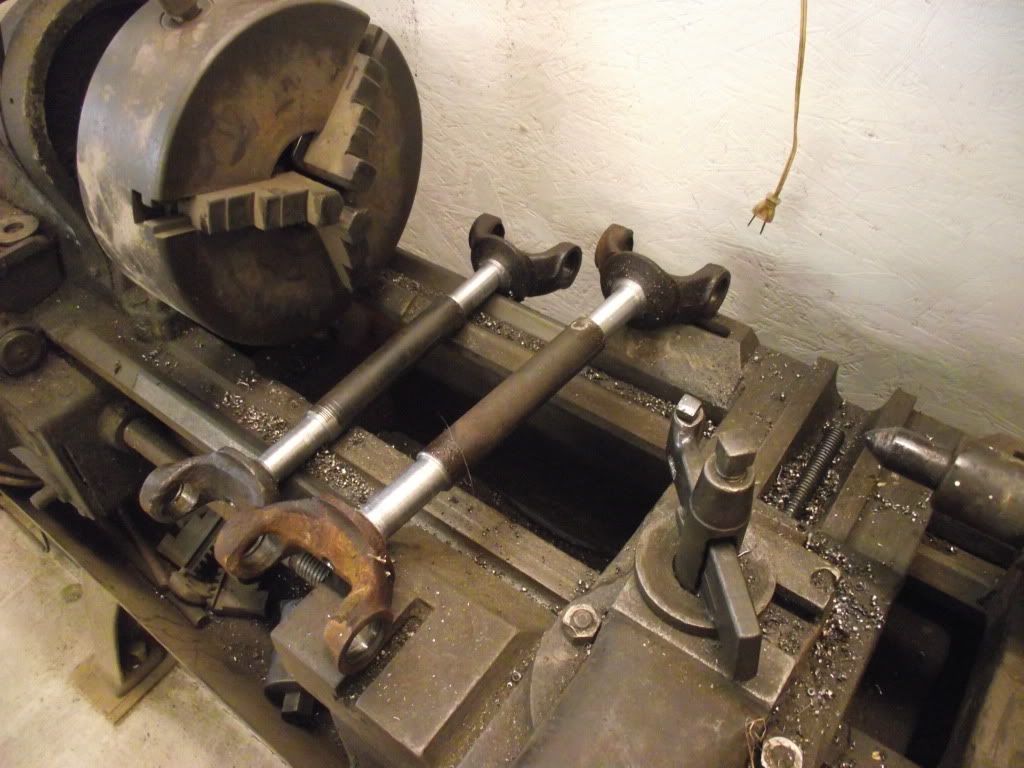
i started by turning the ends down to fit in 1 1/2" .250 wall dom with a 6thou press fit. 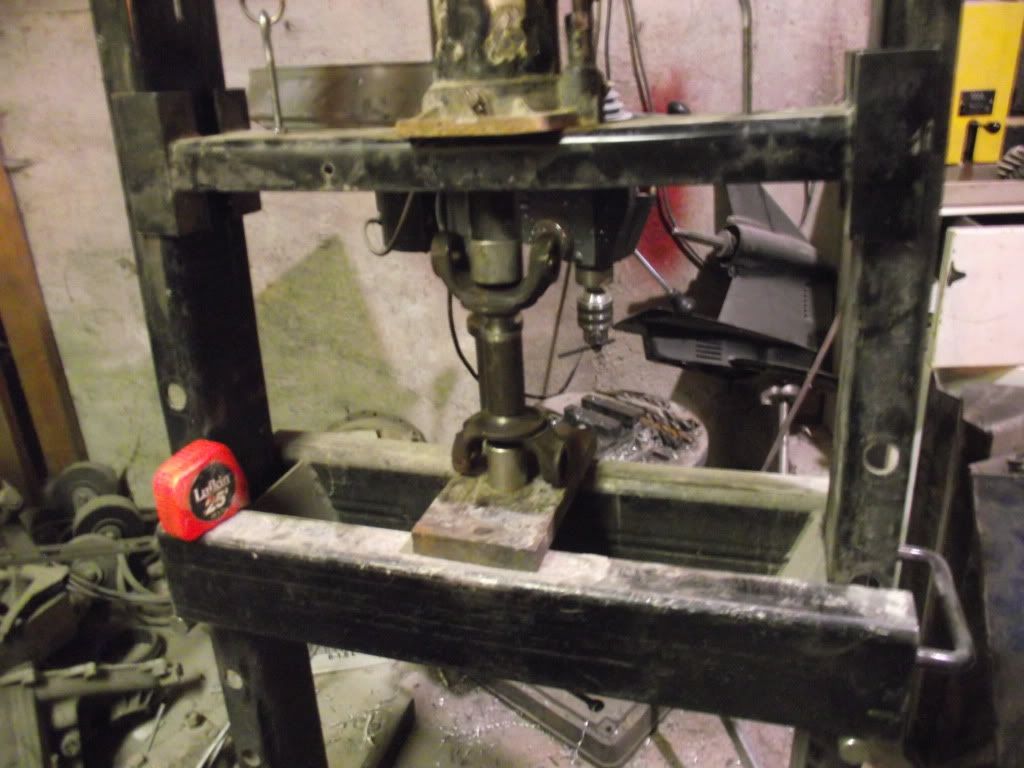
20 tons is enough to put the pieces together.careful measurements are taken as it goes,it's hard to pull them back out. 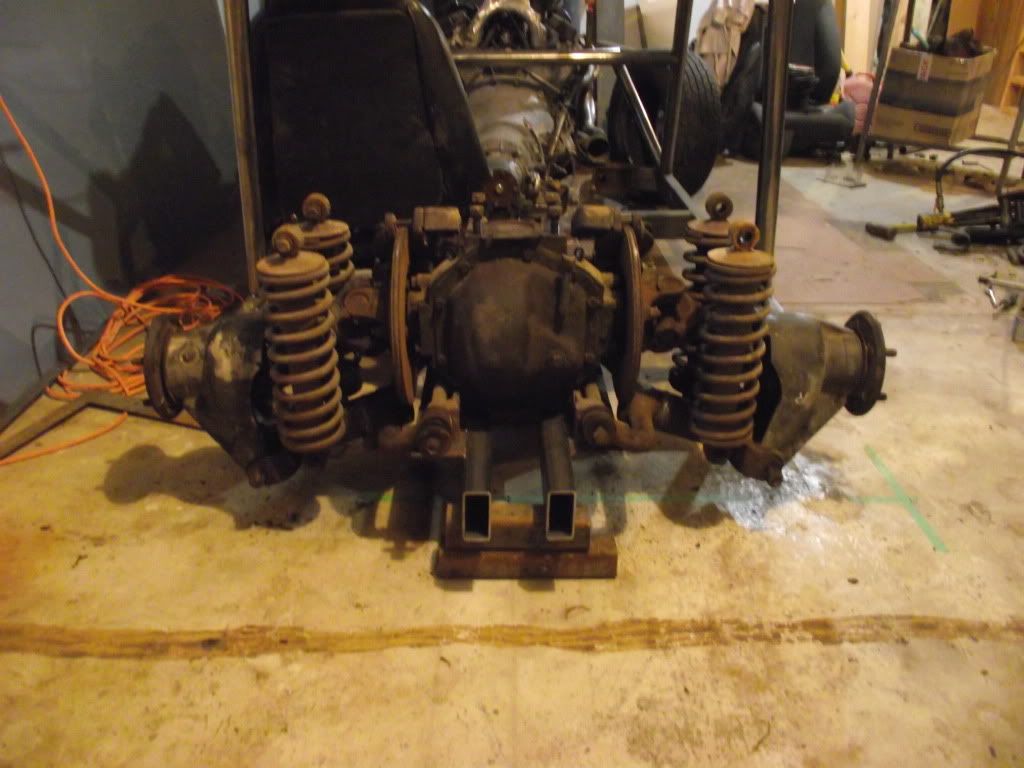
the whole thing roughed in. bent up some tubes to hook the upper mounts to 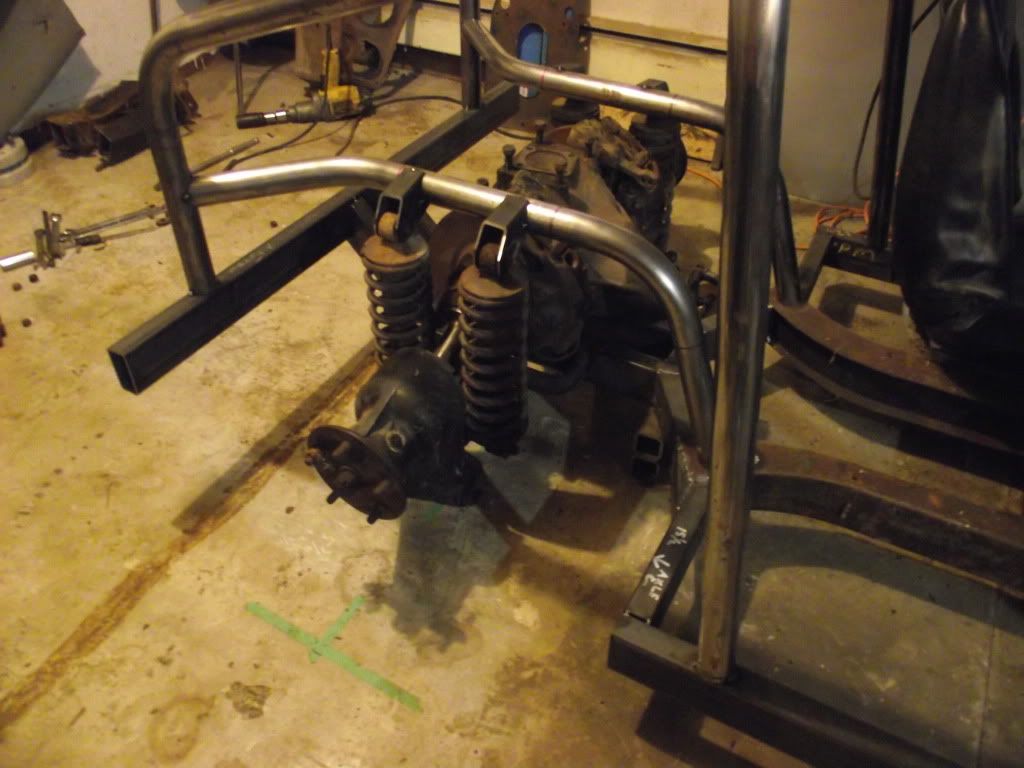
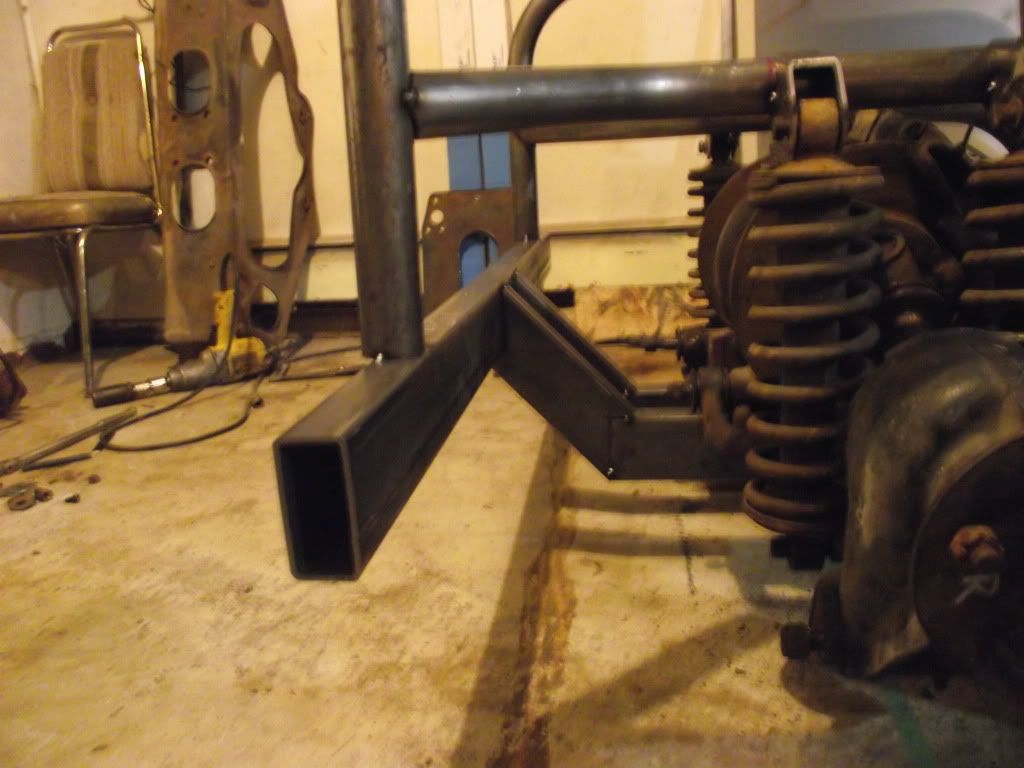
the rear of the frame. the wheels showed up-still waiting on the tires 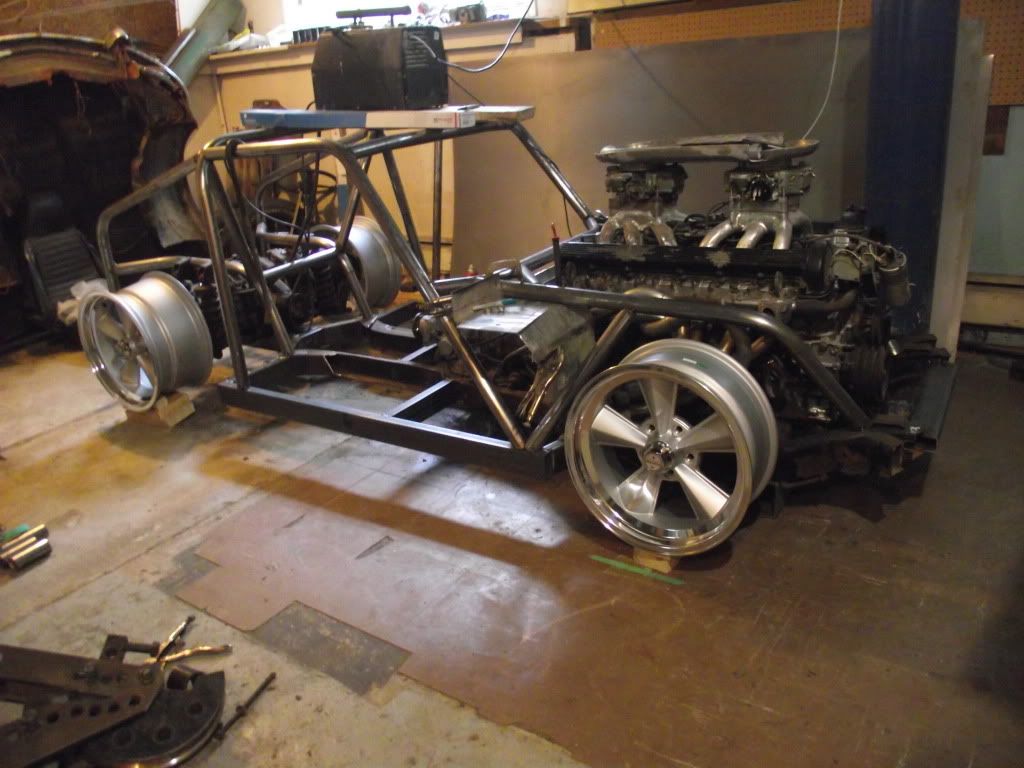
the headers needed a little modification to work with this car-they were made before i knew what i was using this engine in. 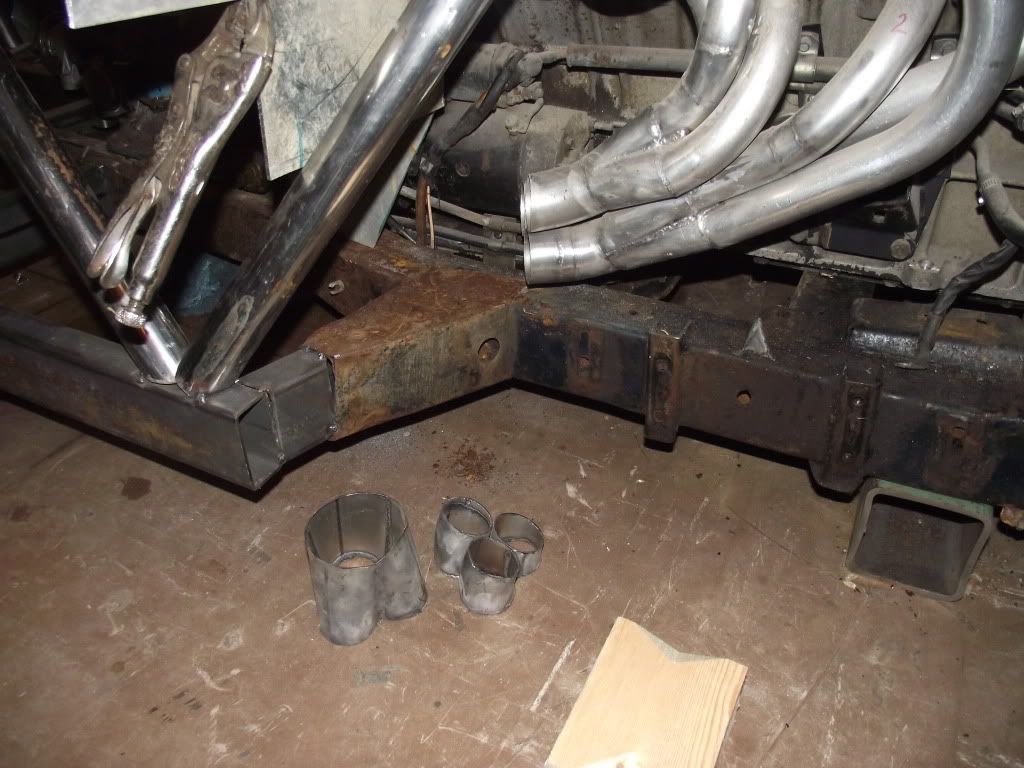
this allows them to turn out between the footboxes and the front tire,a sidepipe exhaust will be used. some progress is being made in the firewall area as well. 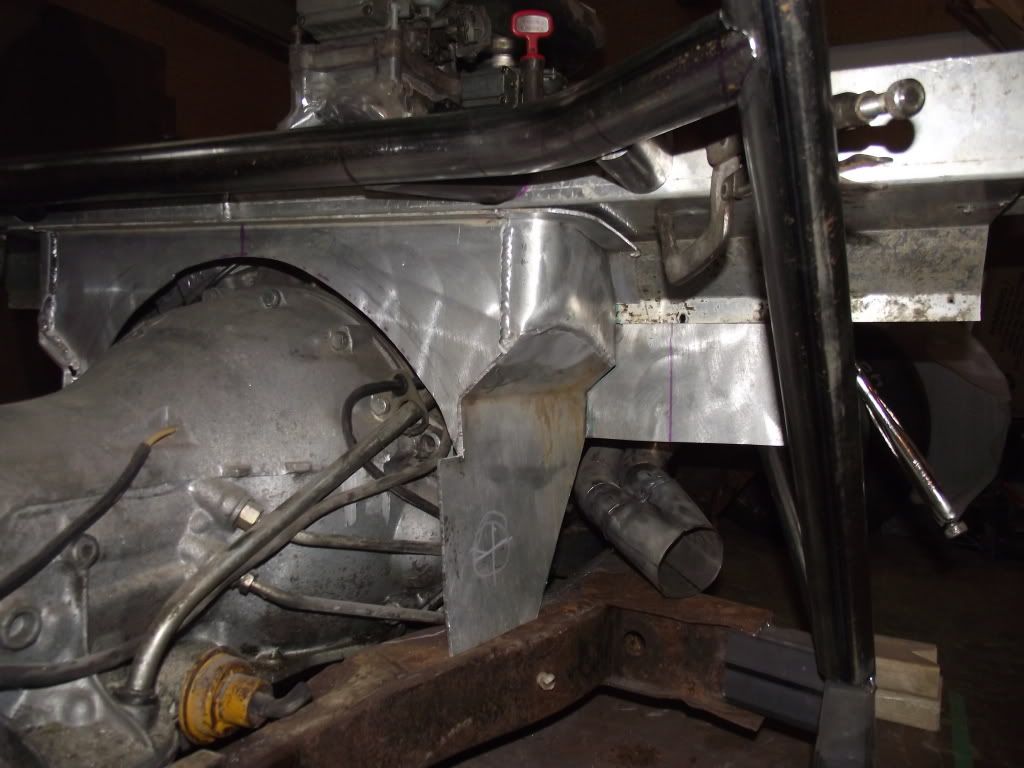
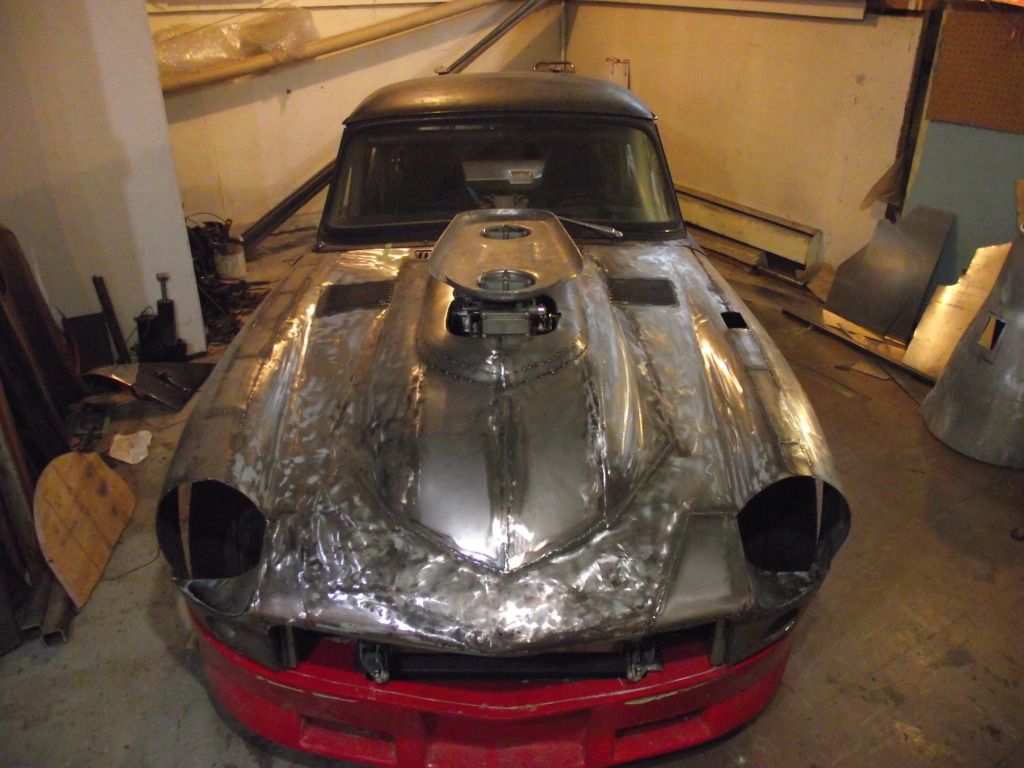
time for some hood surgery 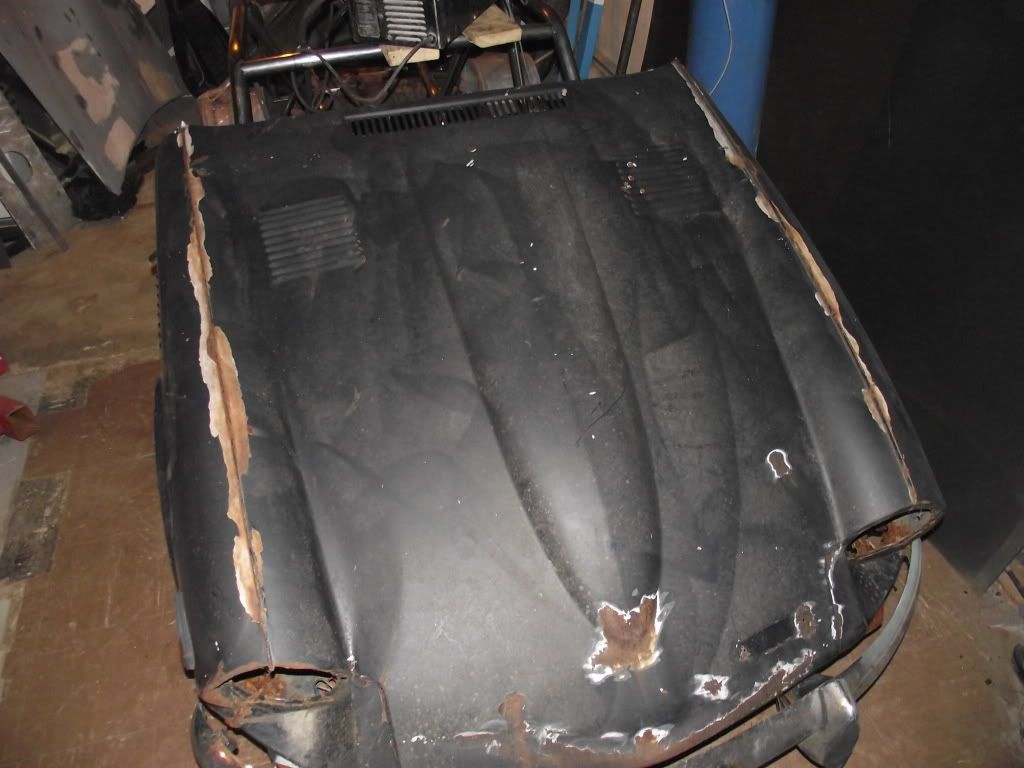
the hood clears all but the timing chains(and the carbs,of course)so will need a bit of modifying. 
marked for the big cut. 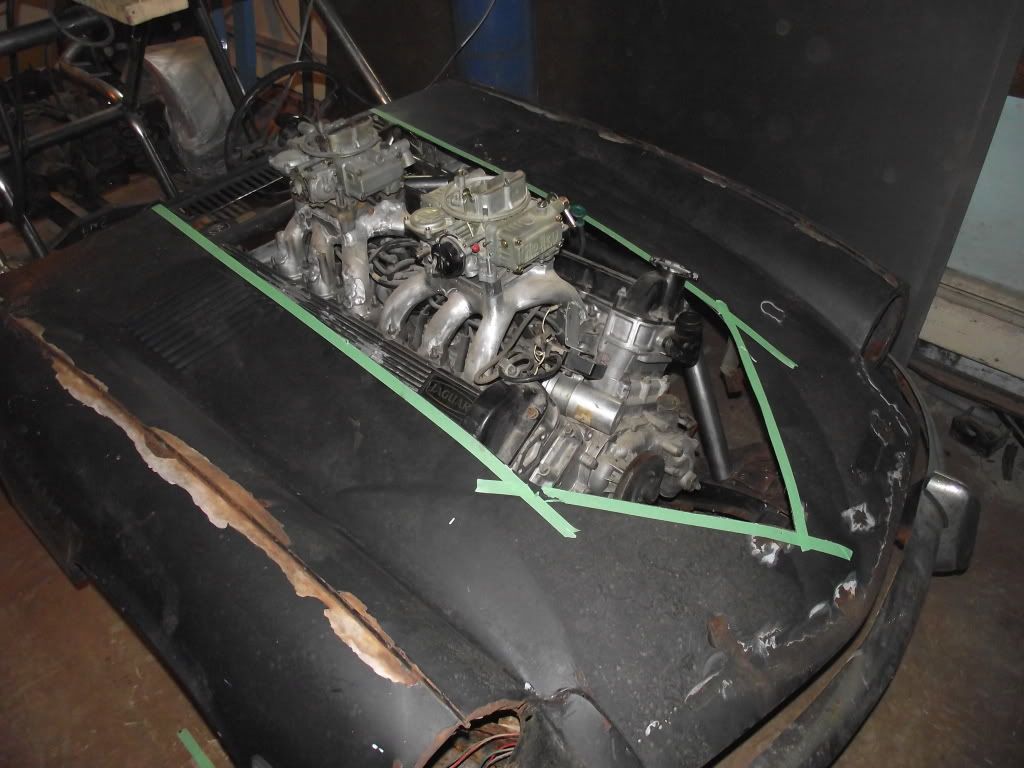
fits over the motor,but that's not good enough. 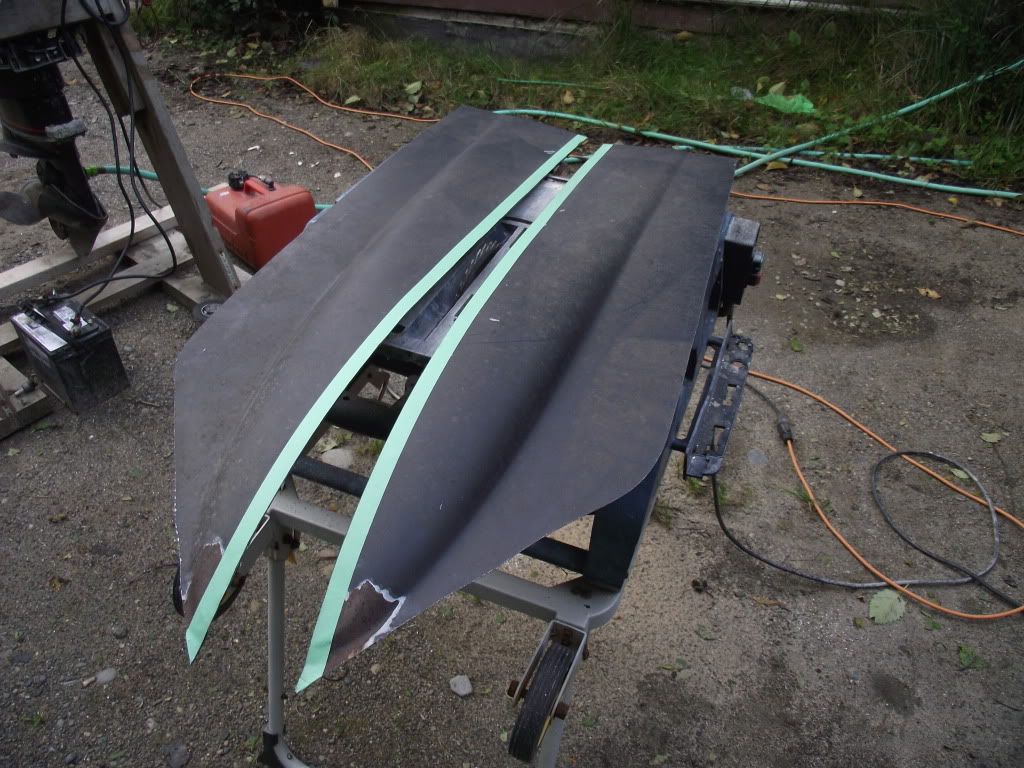
so i split the hump that the gt6 uses to clear the engine. 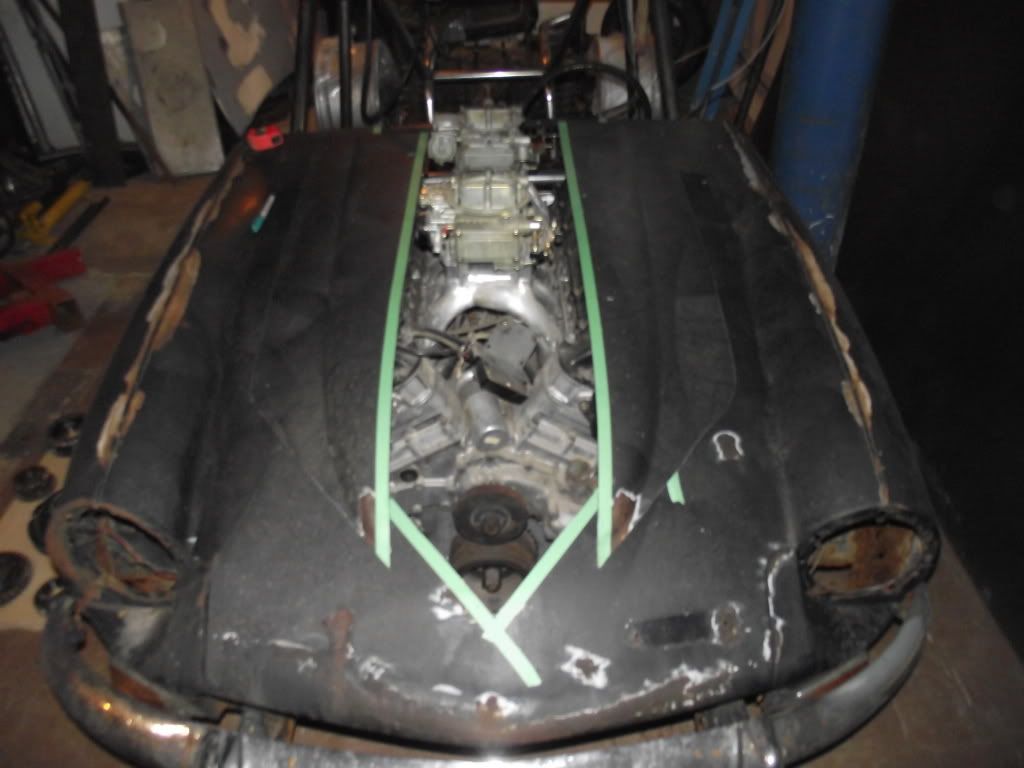
by widening it out i can clear the timing chains. 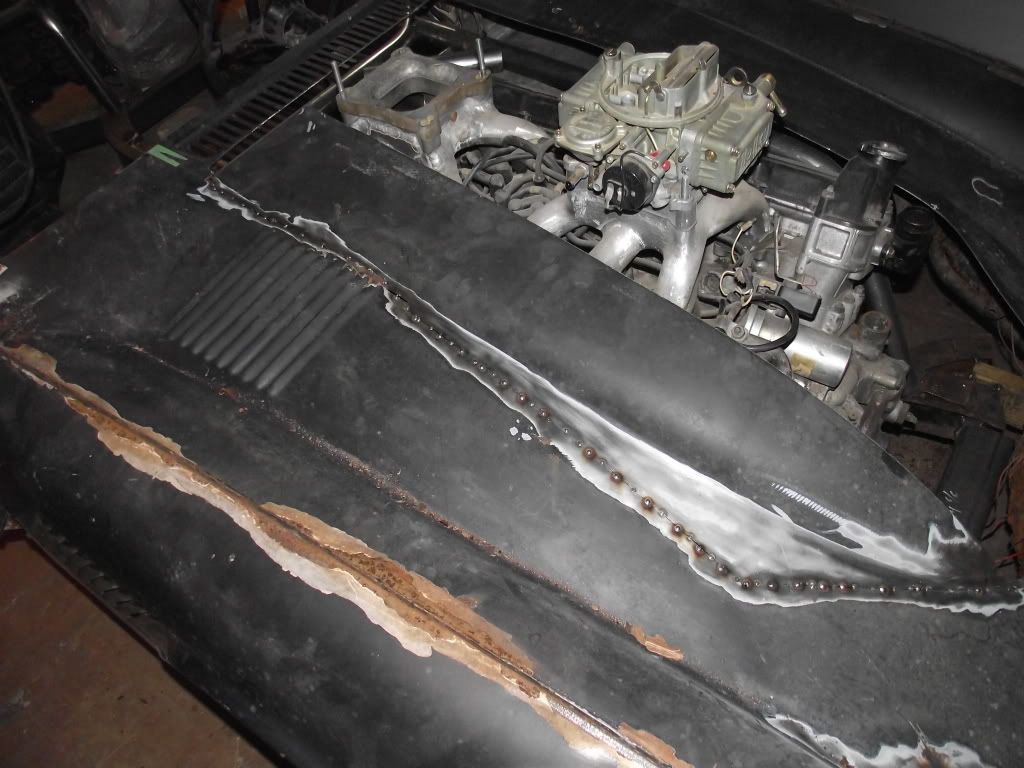
some trimming and welding. 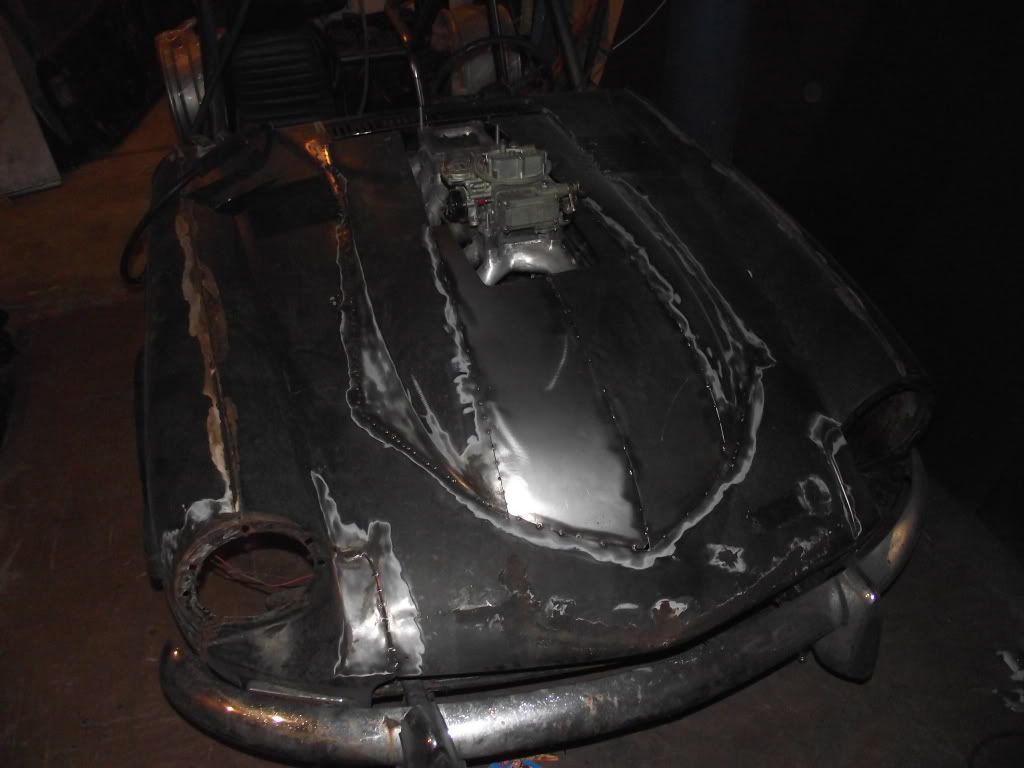
filling the space in the middle. 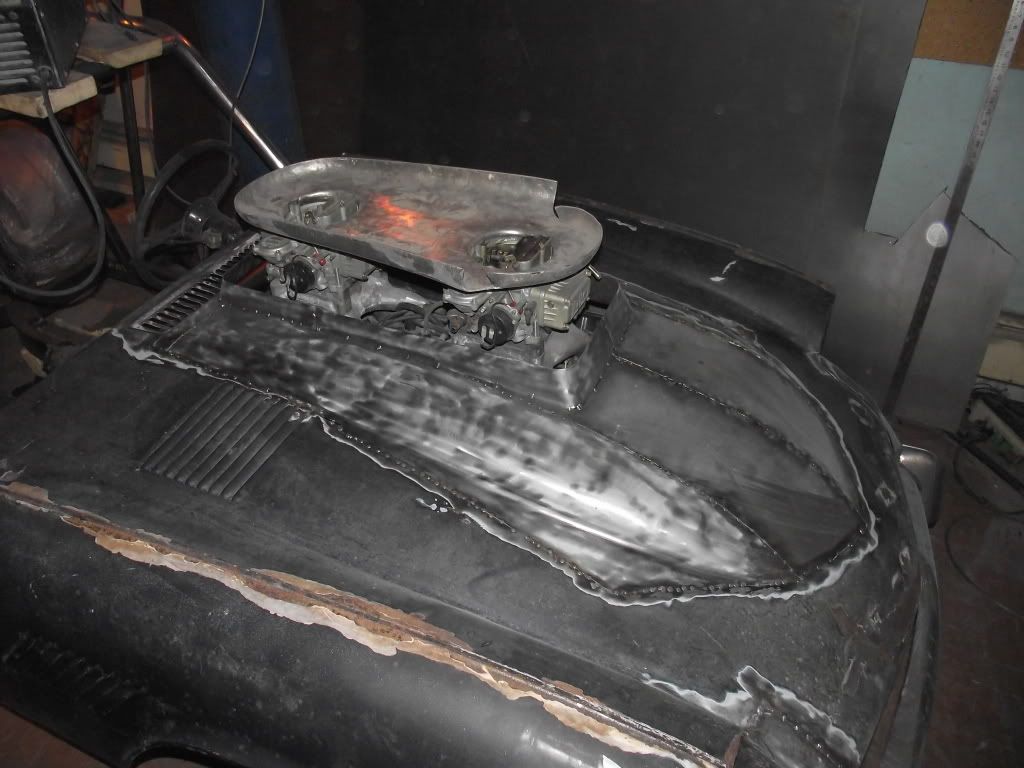
and a bit of finishing around the carbs. 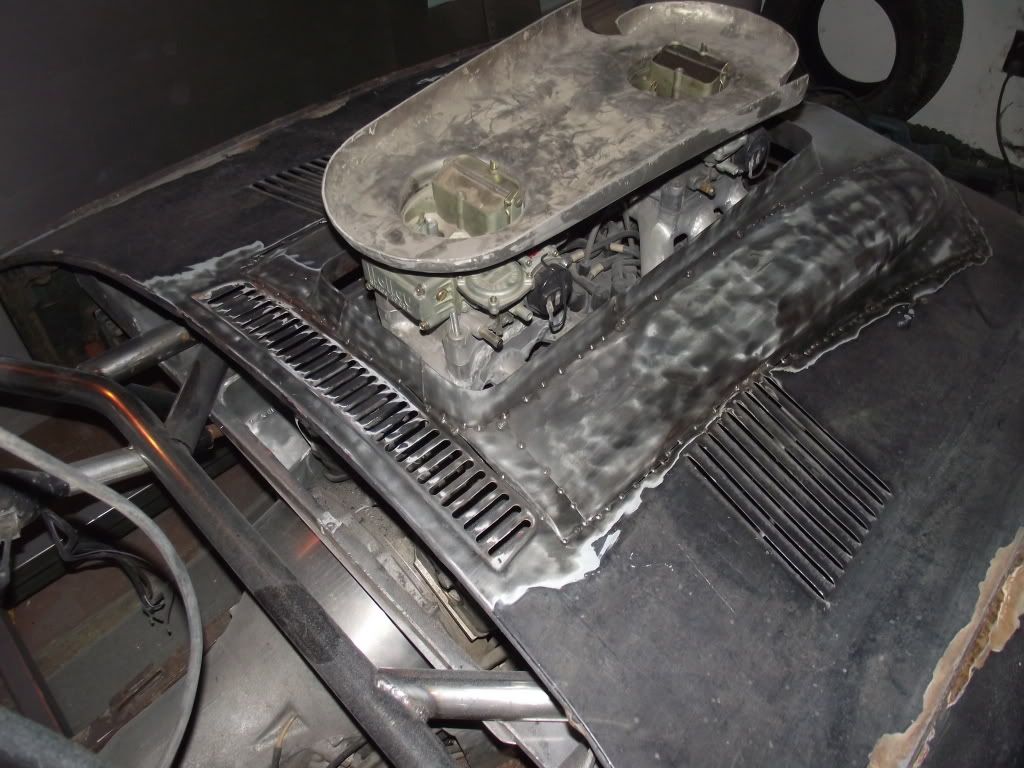
now that the hood sits down i can measure how much room there is under it for suspension. 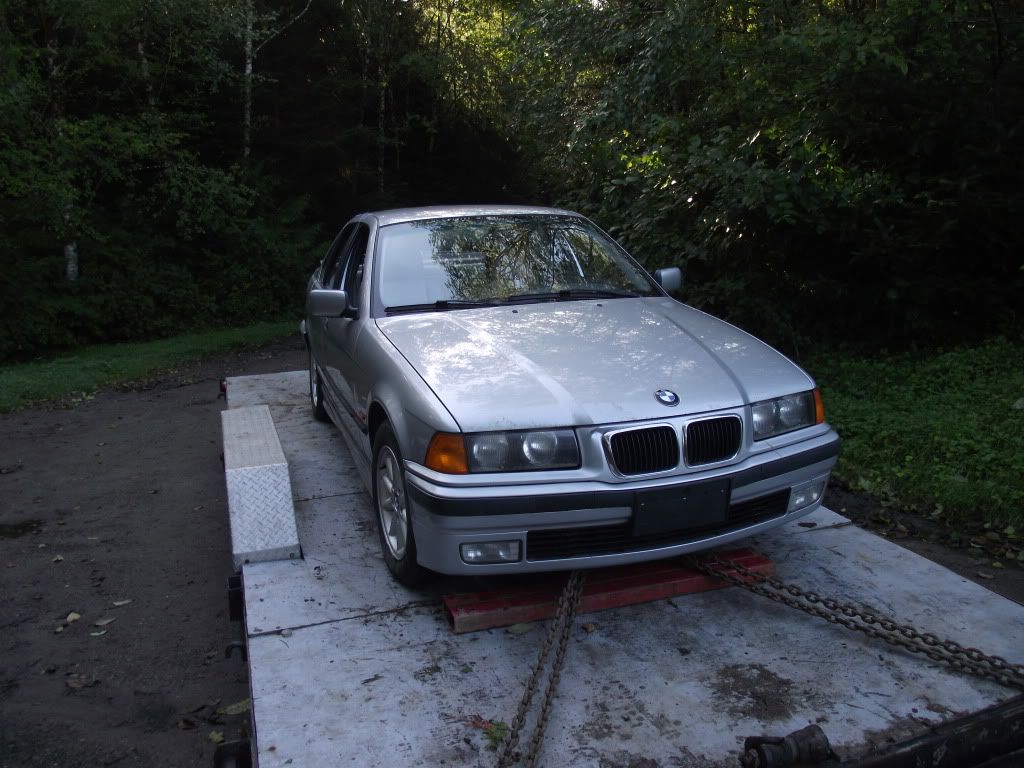
this is donating suspension parts for the gt.some modifications will be needed,but the hubs use the same 120mm lug pattern as the jag rear. 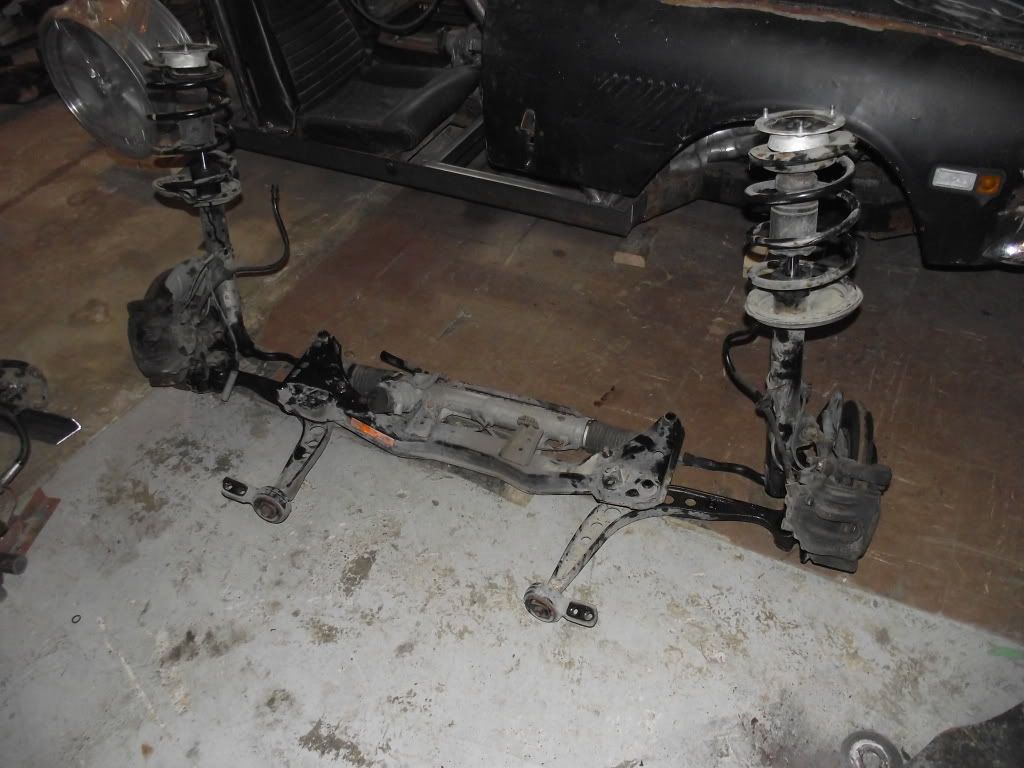
the bmw suspension out of the car. 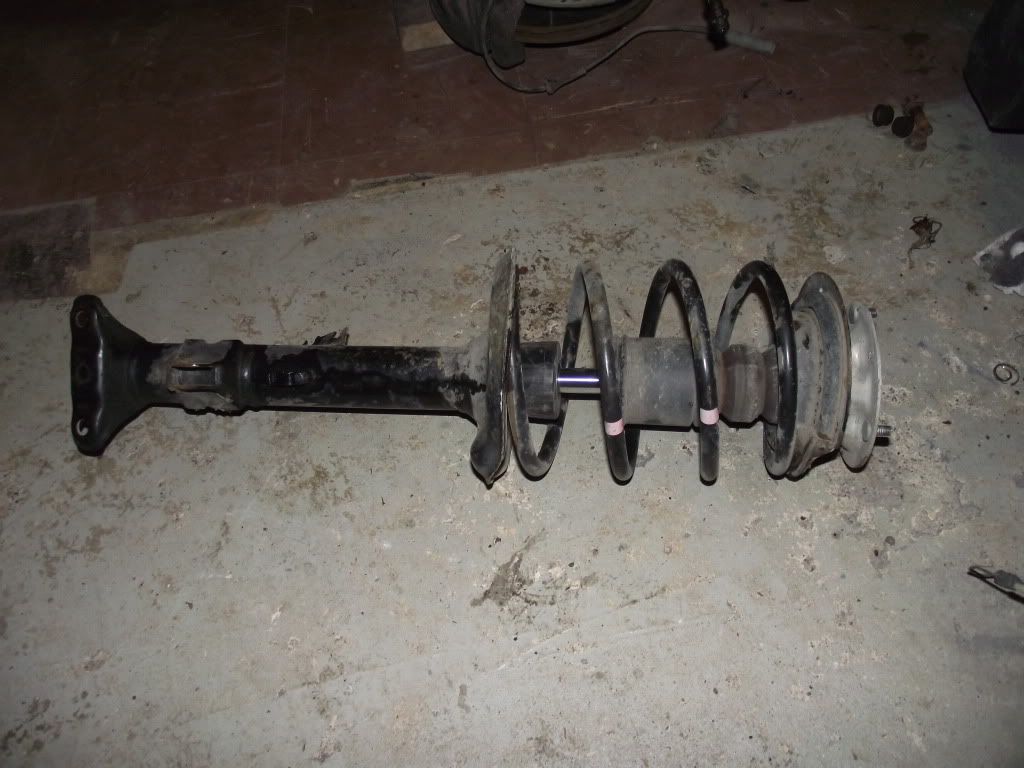
these struts are too long,and the springs too big around to work. 
stripped down,the innards are pretty simple.measurements have determined that if i take 4 1/4'' off the length they will work. 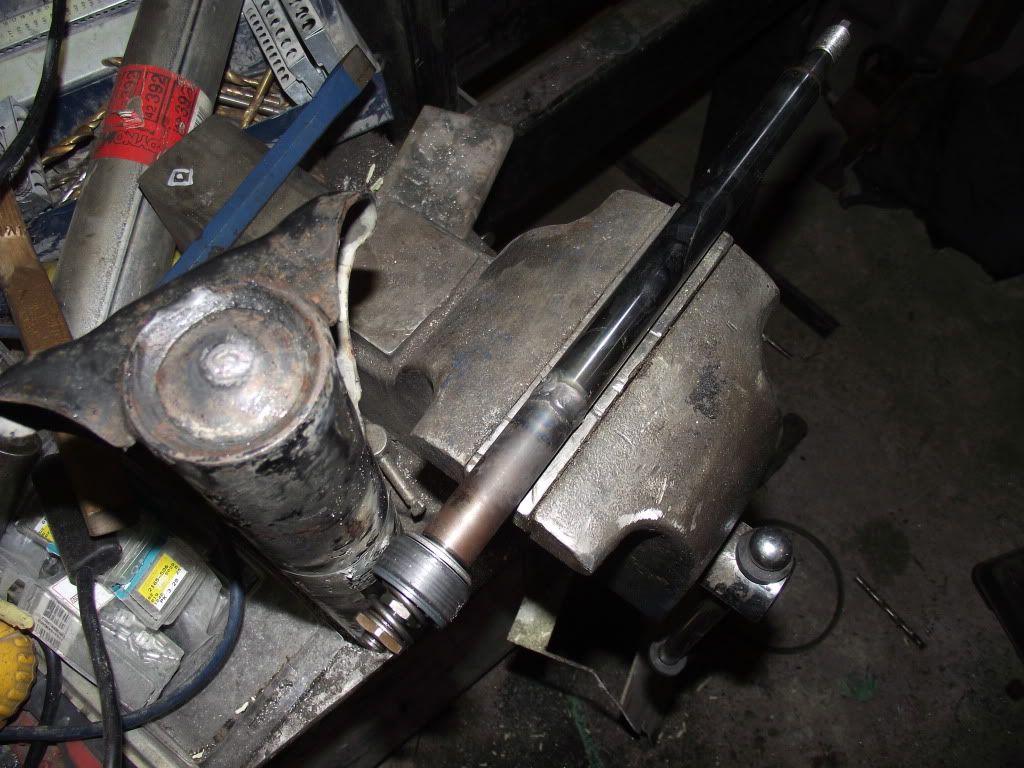
for the shafts i simply cut them in a location that would not interfere with the operation,and welded them back together.the inner and outer tubes were simply cut to length. 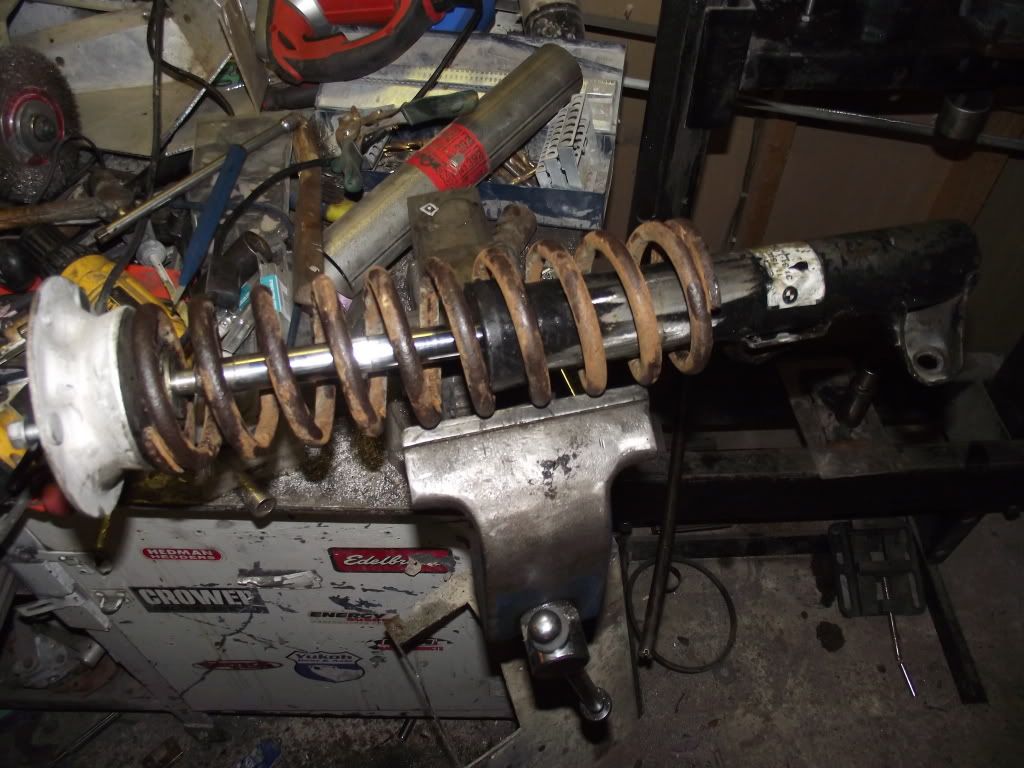
reassembled,and test fitting the original gt6 spring.pads will need to be made for these springs,but they fit in the space i have available. 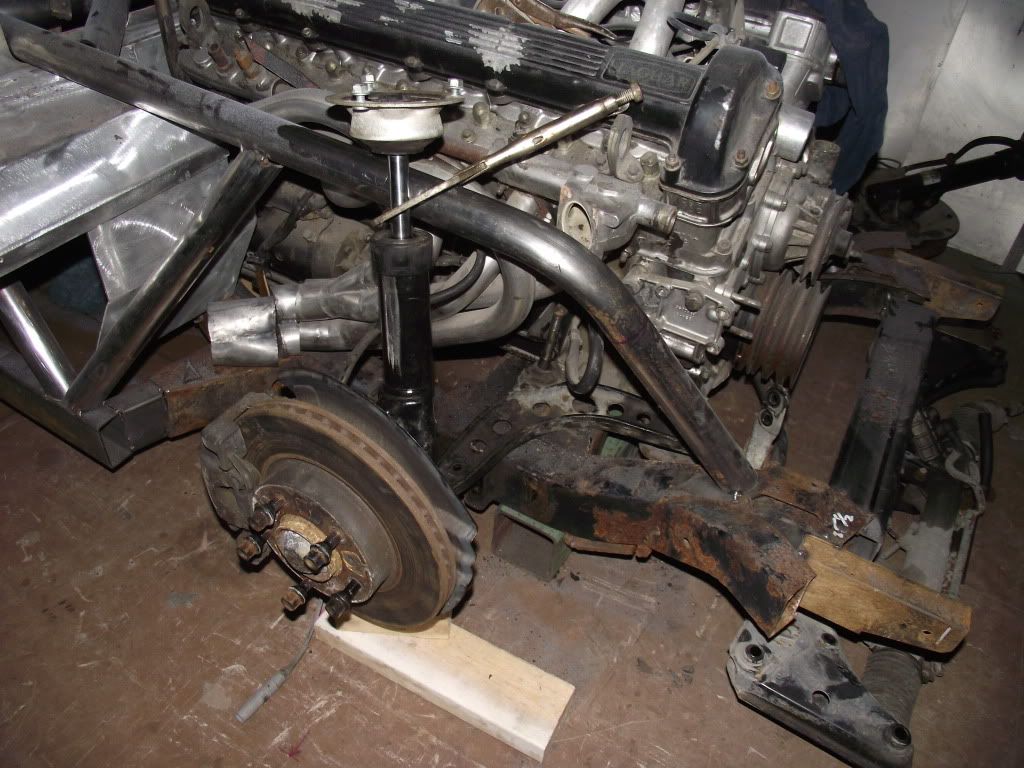
the parts rough clamped in position,to see what else needs to be done to make this work. the bmw lower arms needed to be turned around,so the leg pointed forward,rather than to the rear as in the bmw.for this i swapped the left and right arms side to side. 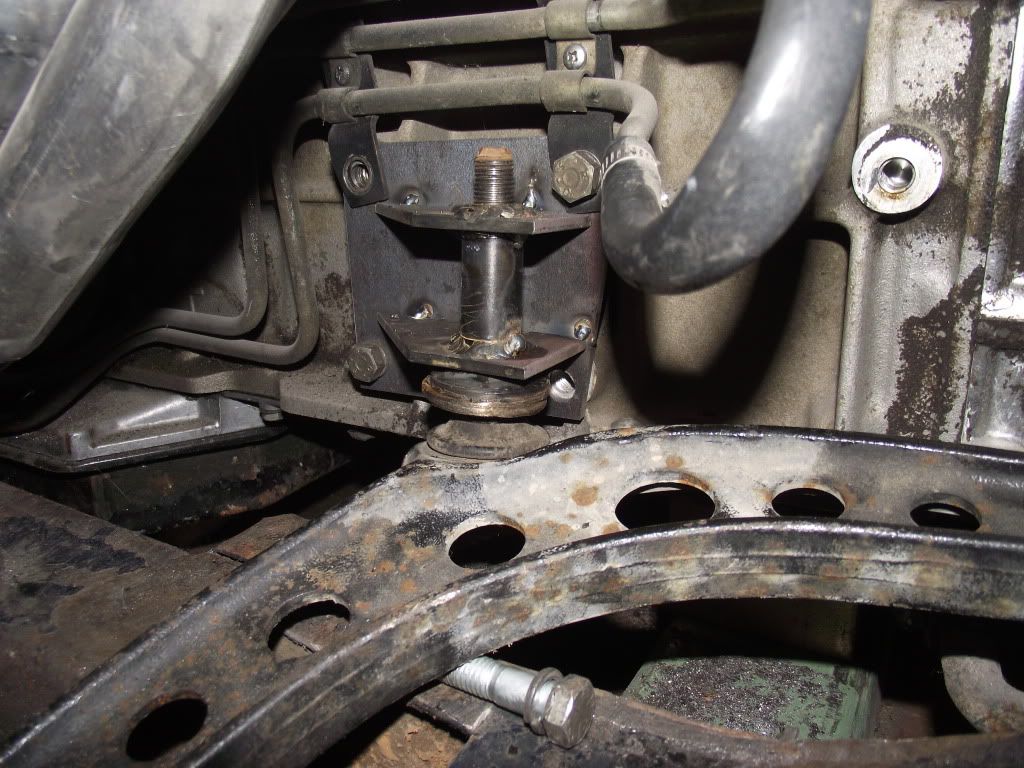
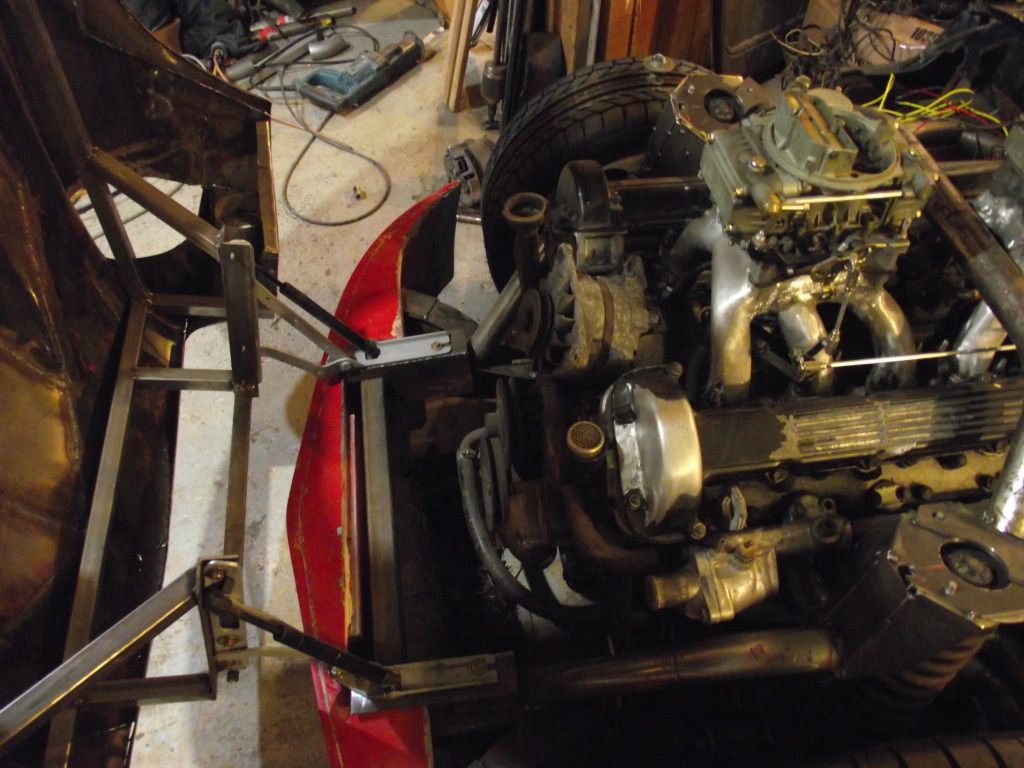
for the inner pivot,i decided to mount it right to the engine block as it was right beside it.i cut the sleeves from the bmw crossmember and made mounts for them to bolt into the engine mount location on the block. 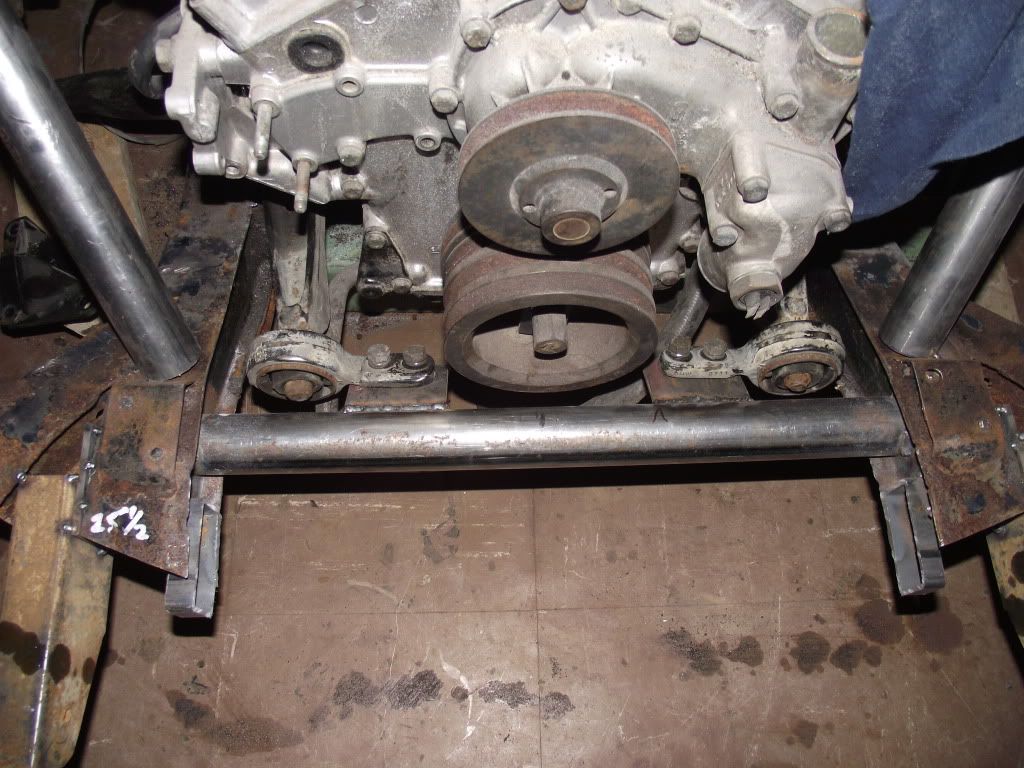
a crossmember was made to hold the front mounts on the arms. 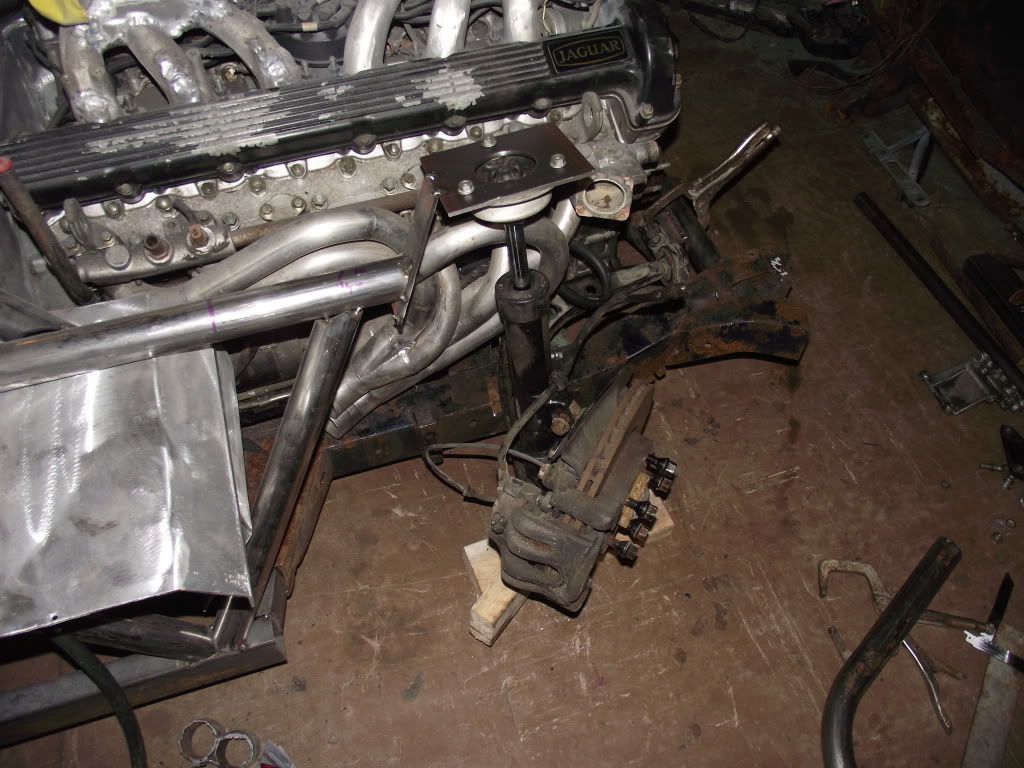
top mount for the strut rough tacked in position. 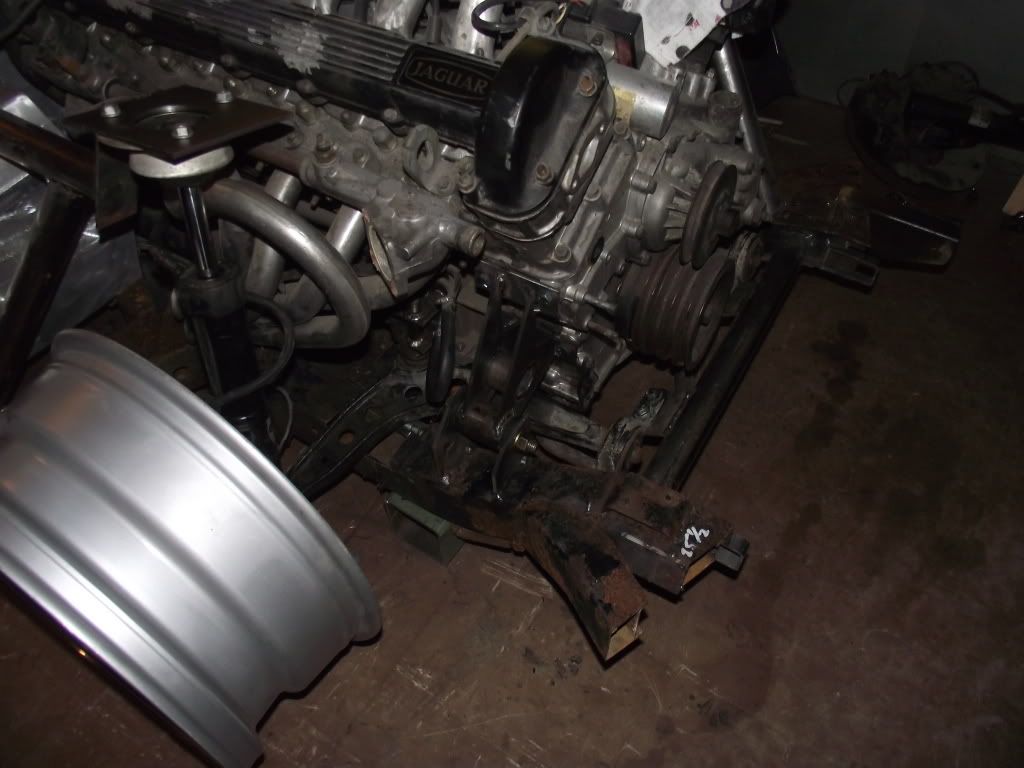
since i'm attatching suspension pivots to the motor,it was time to get it bolted to the frame,so some mounts were fabbed up. 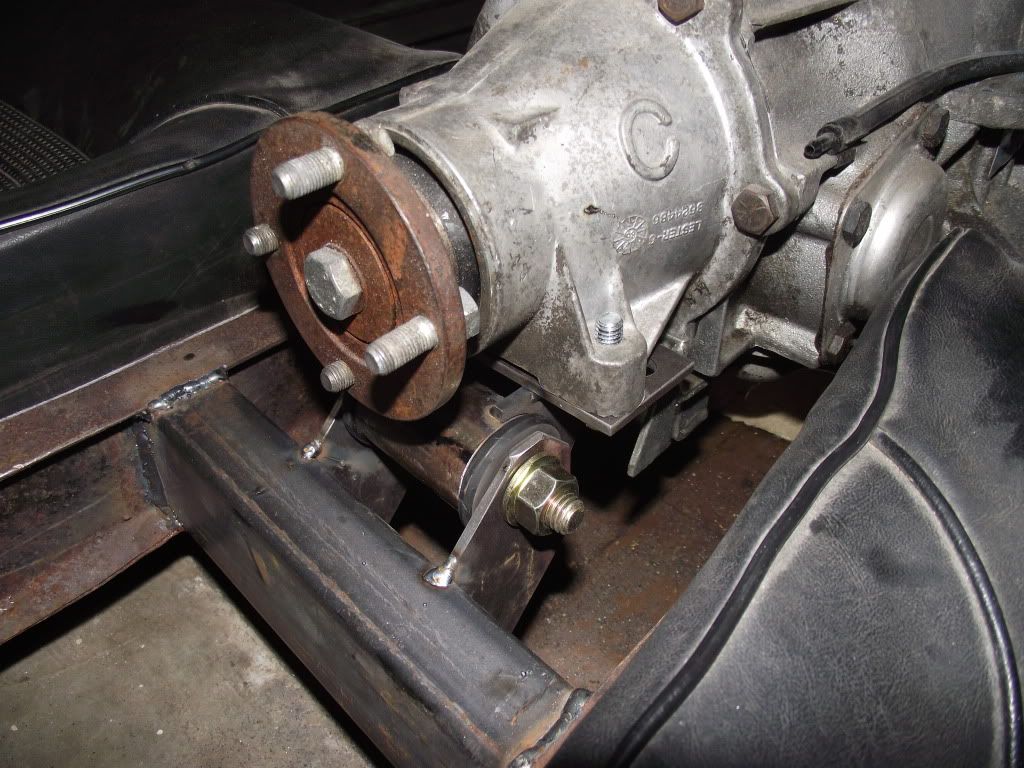
transmission end too. 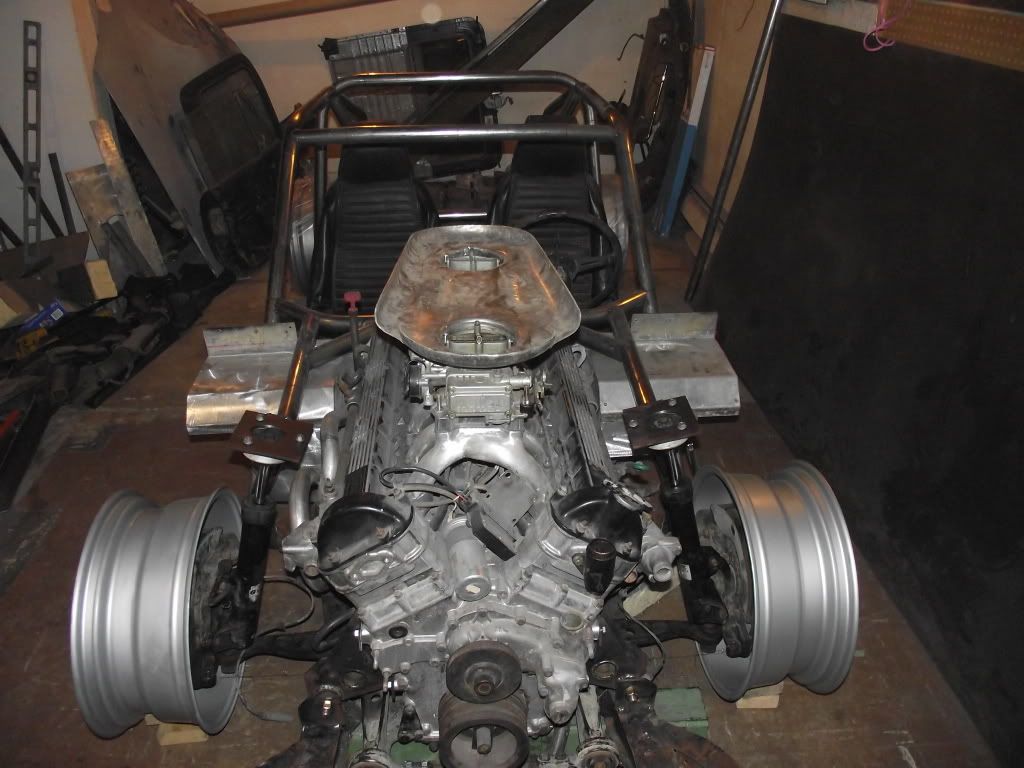
starting to look interesting... 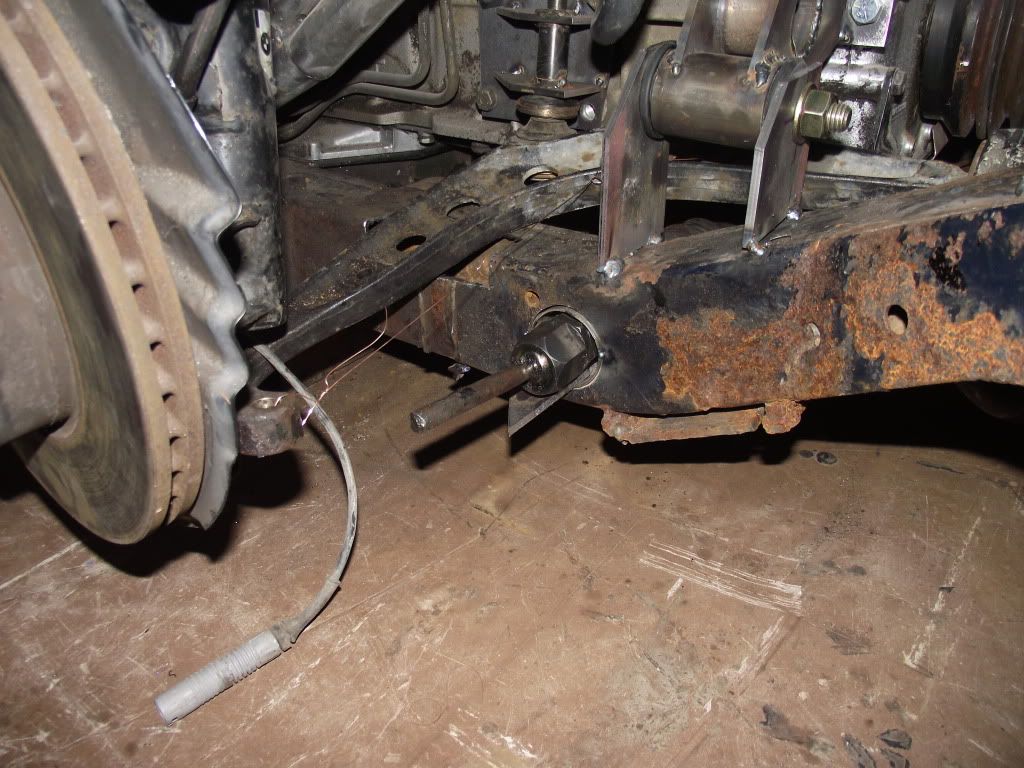
for the steering i decided to use the stock gt6 rack.there was no room to put it above the frame,as this space is occupied by engine.it can't go below the frame,as it would drag on the ground.theres just enough room under the front of the oil pan that by running it through the frame rail i can get it to fit.i cut holes through and sleeved them with tube. 
this presented another problem that i knew would be there,but i didn't want to think about how bad it would be.that's bump steer.anyone who knows anything about steering can take one look at this photo and see how bad it will be. 
on the plus side,the steering shaft still has a straight shot at the column.i was thinking i would need to use a bunch of u-joints to make this work. so while i put my mid to work on what to do about the steering,i figured i'd turn my attention to other things.as i mentioned at the beginning of this post,i am building this thing in the basement,and i can't fit the body in...but i just might be able to fit the cowl,and this is the most important part as everything references off it. 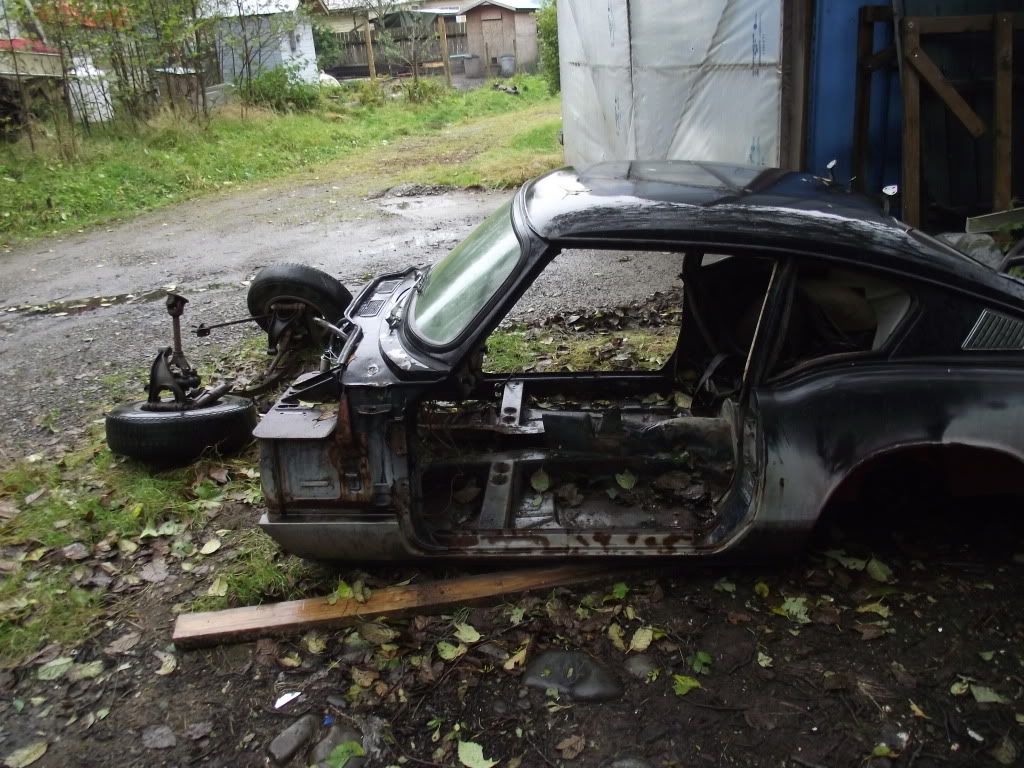
the windshield frame bolts in,so breaking this connection is easy.i'm not using the floors from the car,so that just leaves the rockers holding it on.they are pretty rusty,so cutting them is no problem. 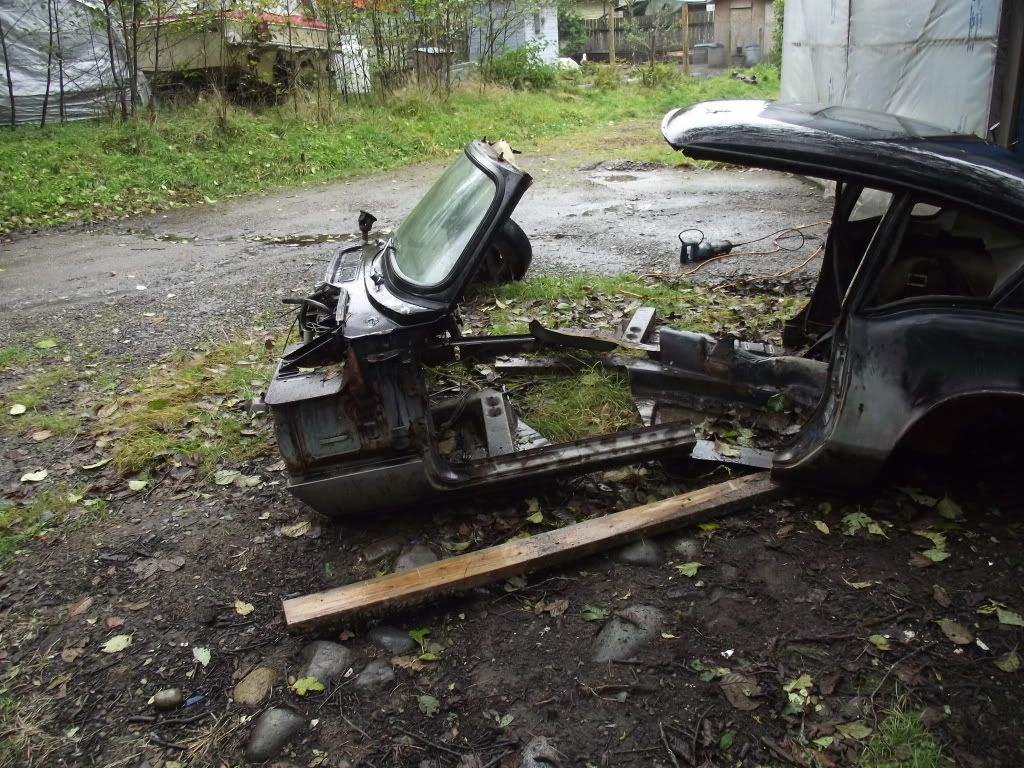
that was easy.i was surprised that there are only two bolts holding the top of the frame to the roof. 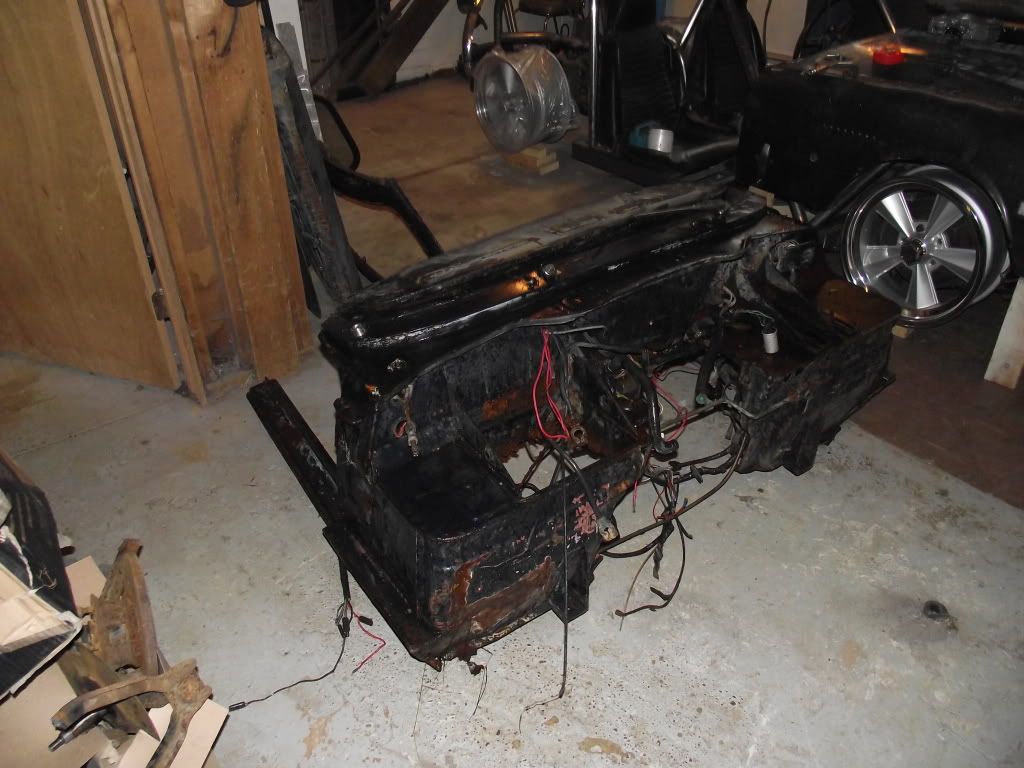
after dragging it into the house,i can start stripping it down. 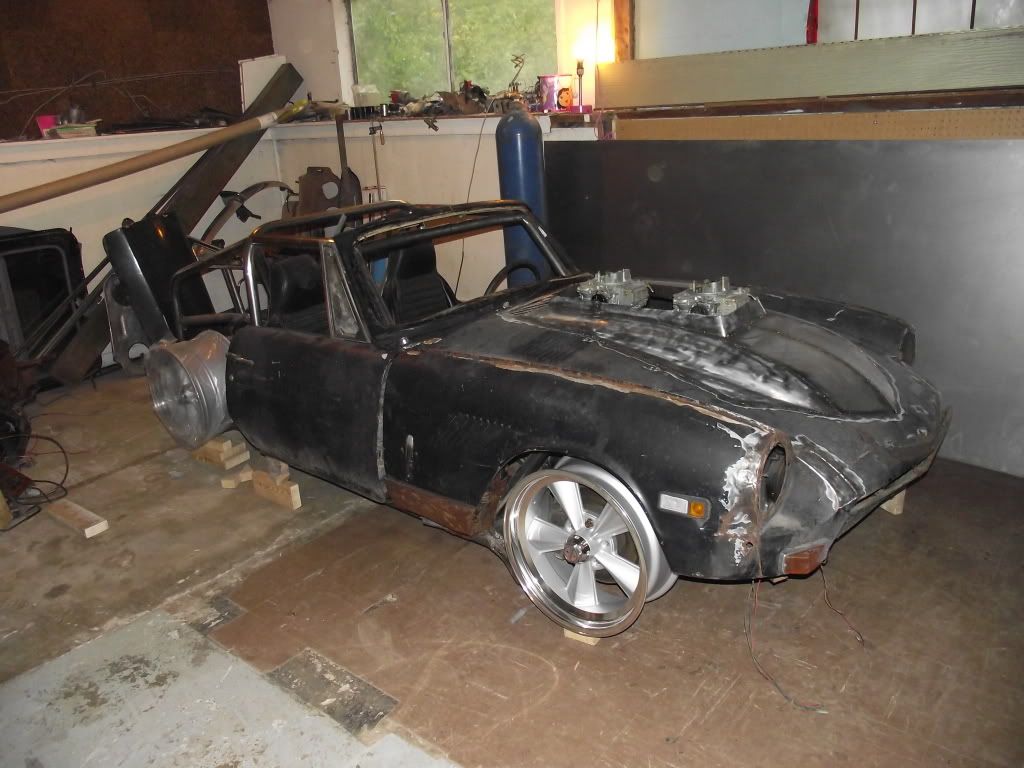
set on the frame,i can see what i'm dealing with,and it's starting to look more like a car. 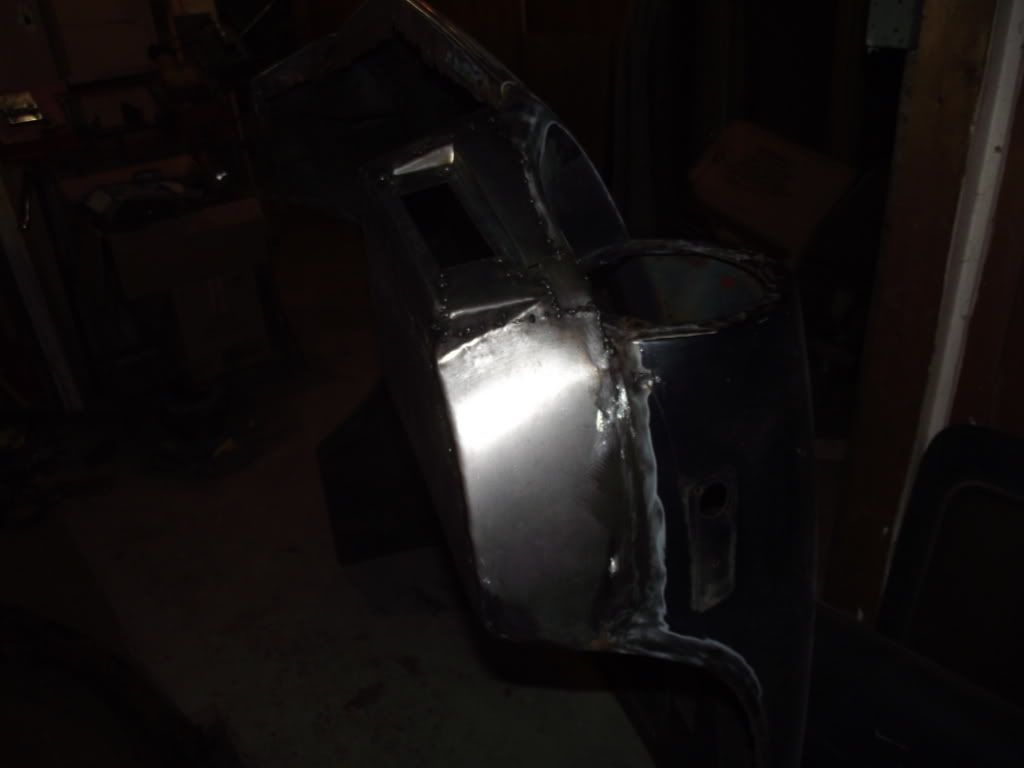
i've been spending some time on rust repair on the hood,too.it needs lots of attention. 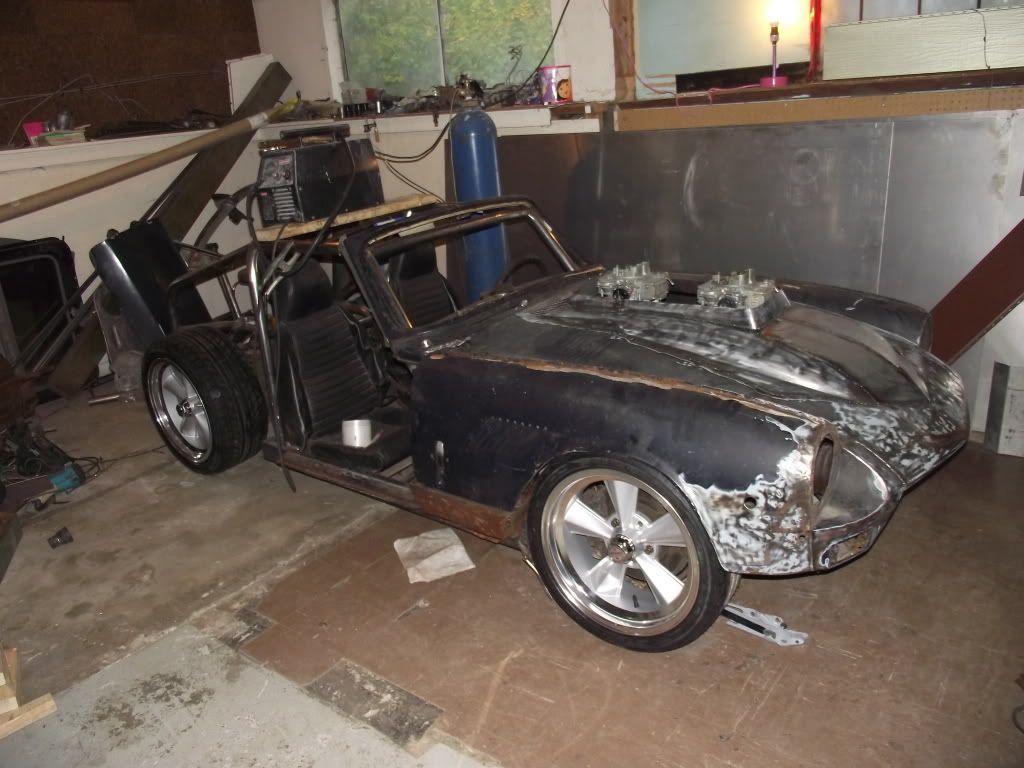
and my tires finally showed up.they are goodrich g-force sport,235/40/17 rear,205/40/17 front. now i can really see how things fit up around them. 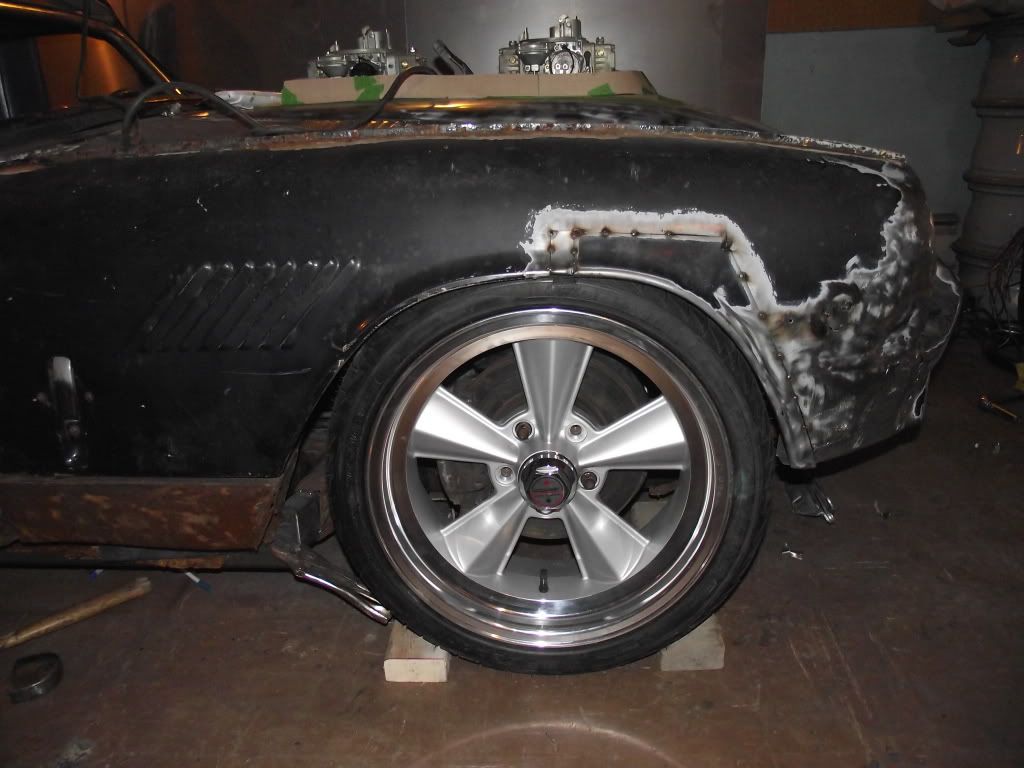
one thing i needed to do was make the wheel openning a little bigger. by cutting the front of the arch out and moving it 1'' forward,the tires fit much better. ok,back to that steering thing. 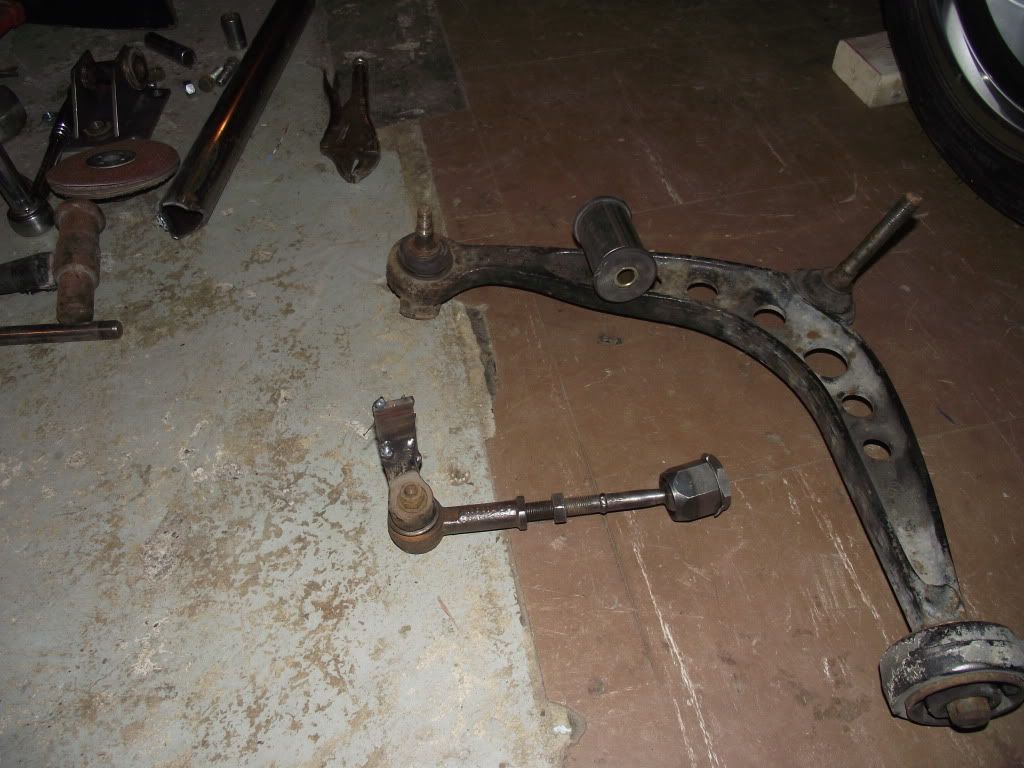
heres the root of the problem-the suspension arm needs to be the same length as the tie rod.i can't make the tie rod longer without openning up a whole other can of worms,so i guess i'll need to make the arm shorter. 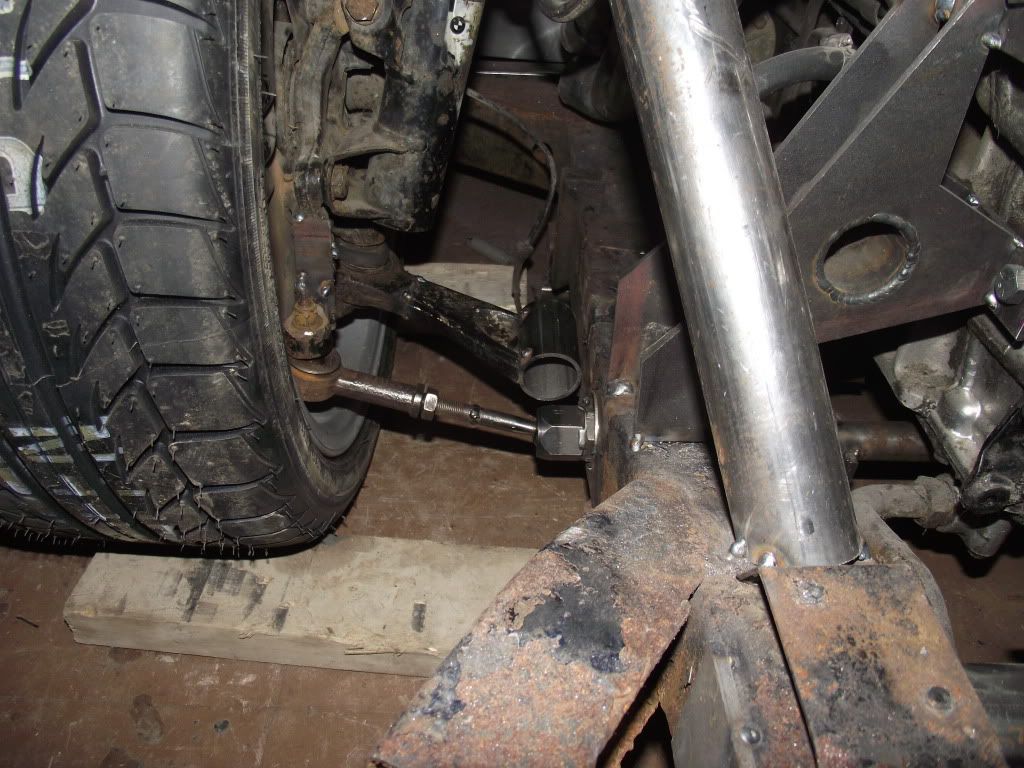
rough tacked,this is more along the lines of what i was looking for. 
after getting the springs in place(i'm using the stock gt6 springs)i can see how it all sits.i was worried about having an arm that short,i shouldnt have been.it cycles well,with zero bump steer through the whole range of travel.for those wondering about the single bushing on the lower arm,a radius rod will be added.right now,everything is just being tacked together to get the fits right.when i'm happy with everything it all gets torn down and finish welding done. 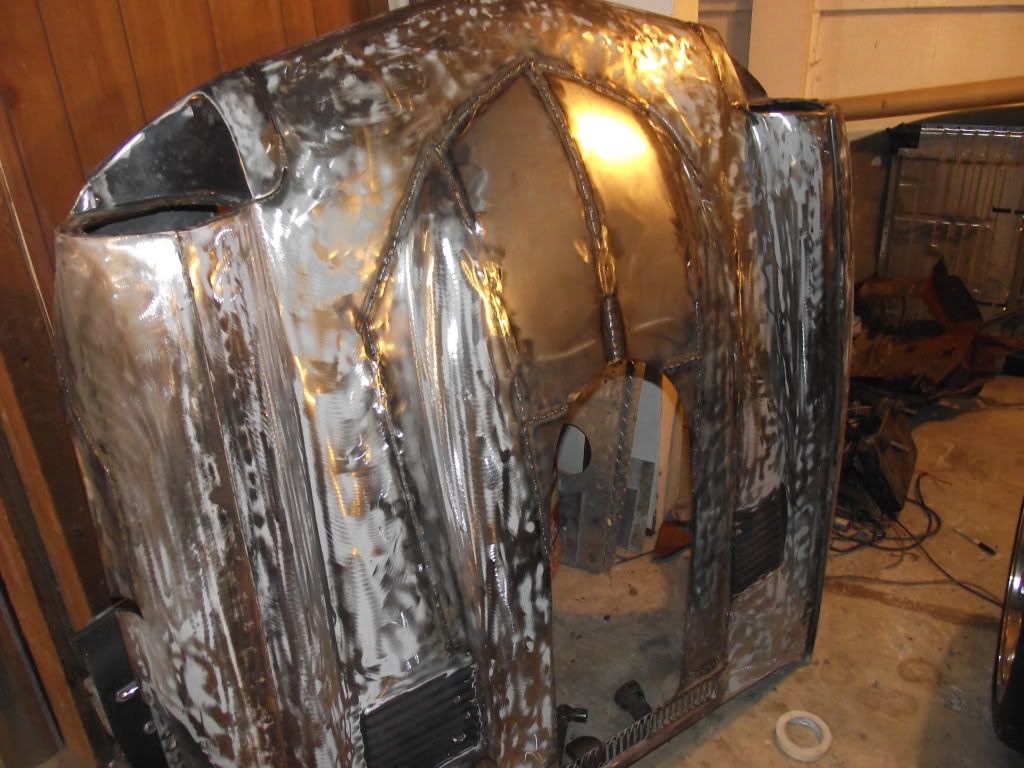
more work on the hood.lots of welds to finish and grind flat.notice that i've removed the upright bit around the carbs,i thought it looked too square,and didn't fit in with the style of the hood.here the hole is recut but the new flare not yet formed. 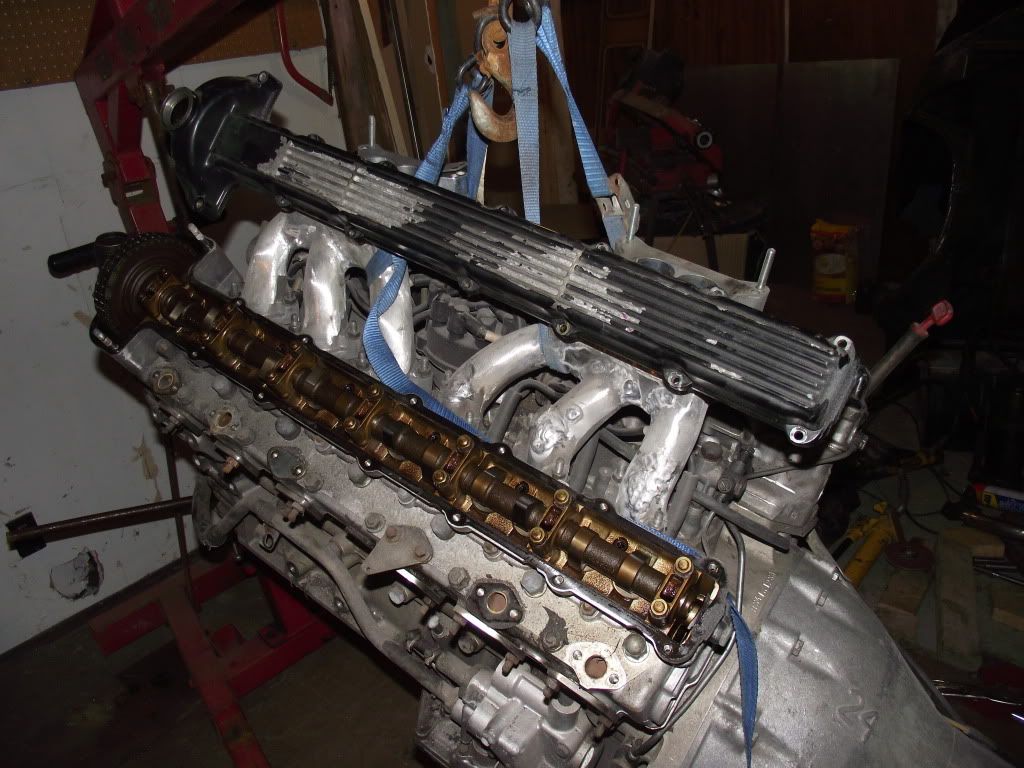
it was time to pull the motor back out to deal with some details i could not get at with it in the frame,like cutting off the stubs of the original crossmembers and such. while it's out,i also want to get rid of the oil cap on the left cam cover. 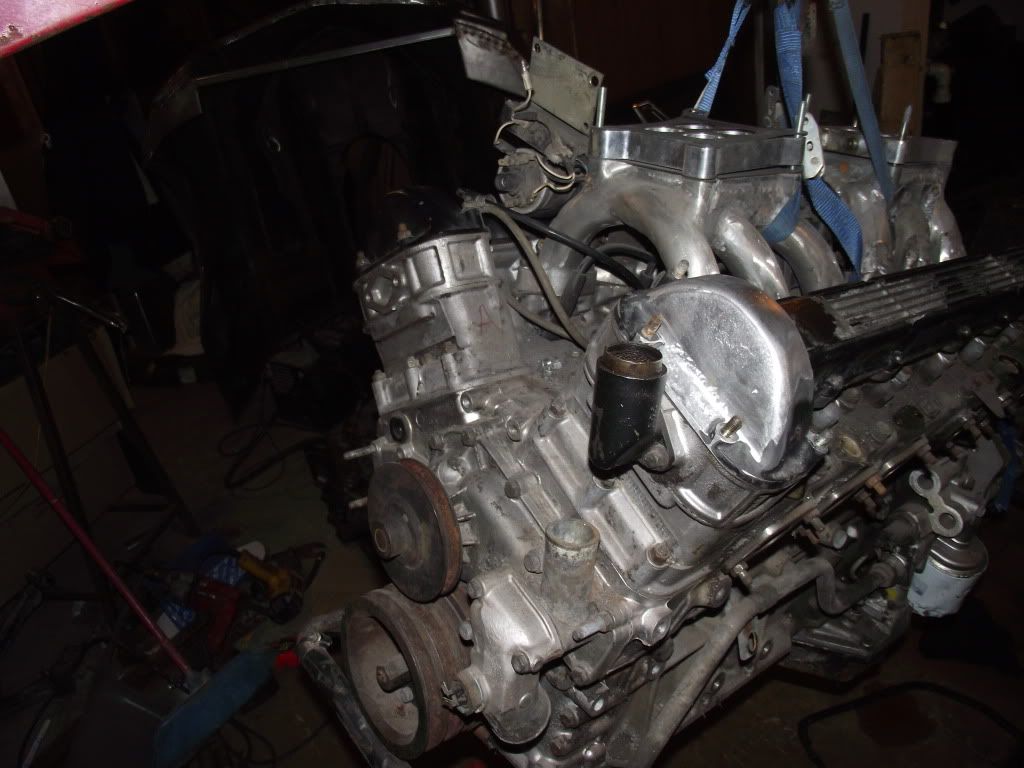
looks better after reworking.i'll fill the oil through the breather from now on. 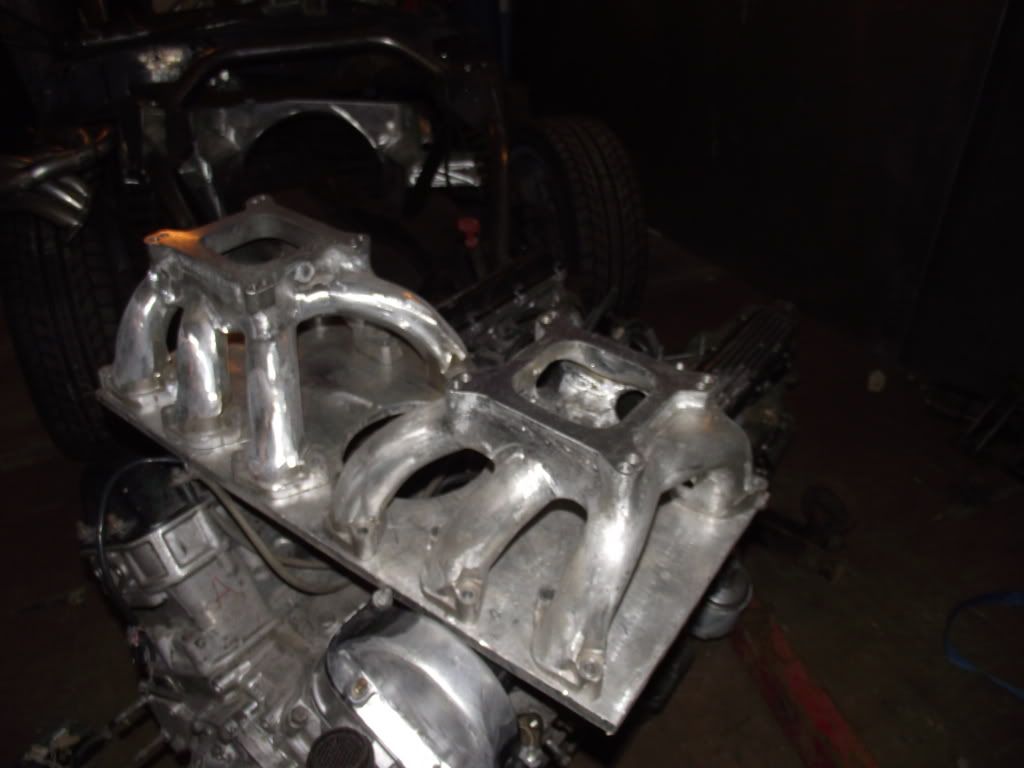
i did some more clean up work on the intakes,too. 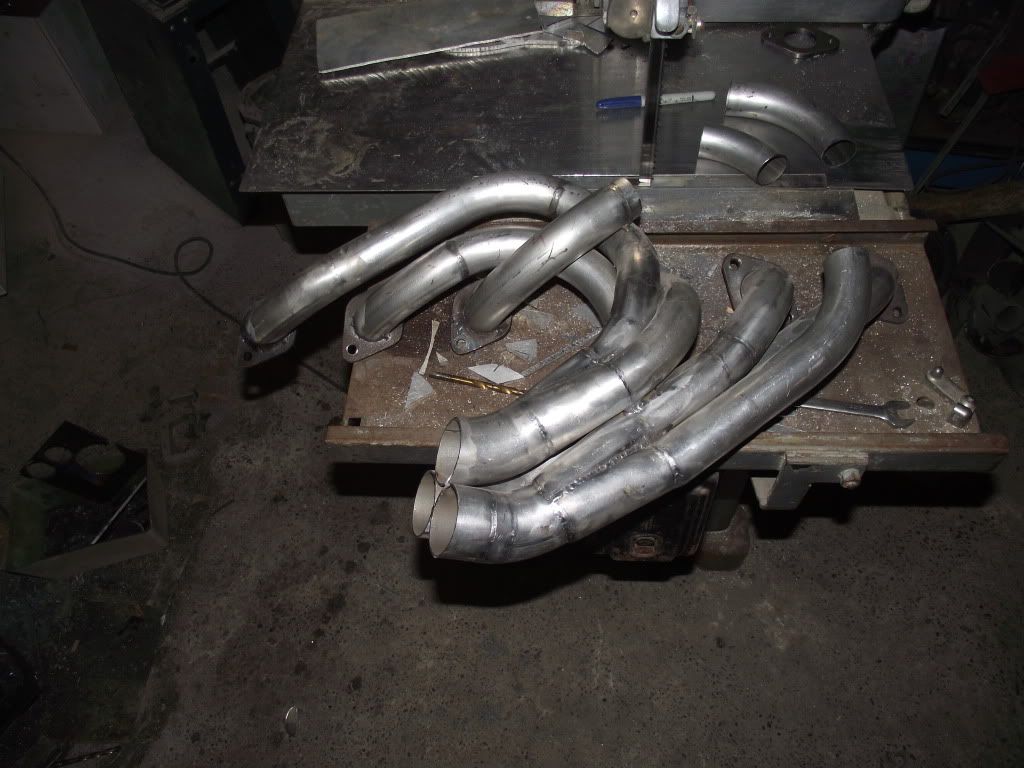
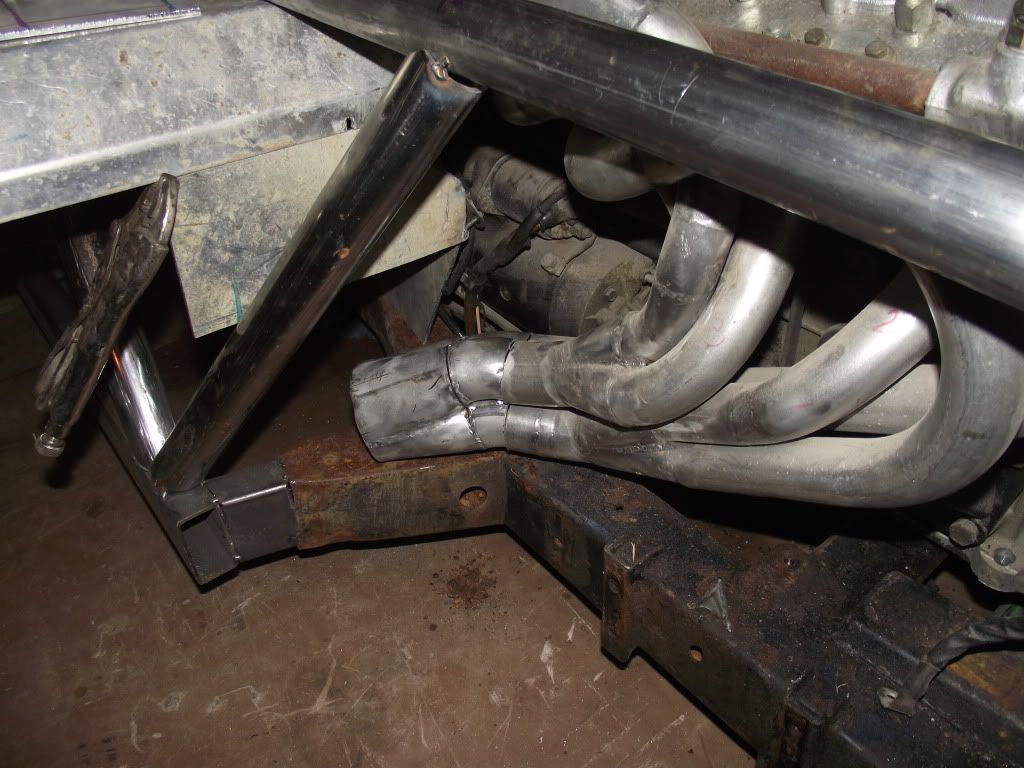
this loop on the header was too close to the spring,so it needed a bit of modifying. 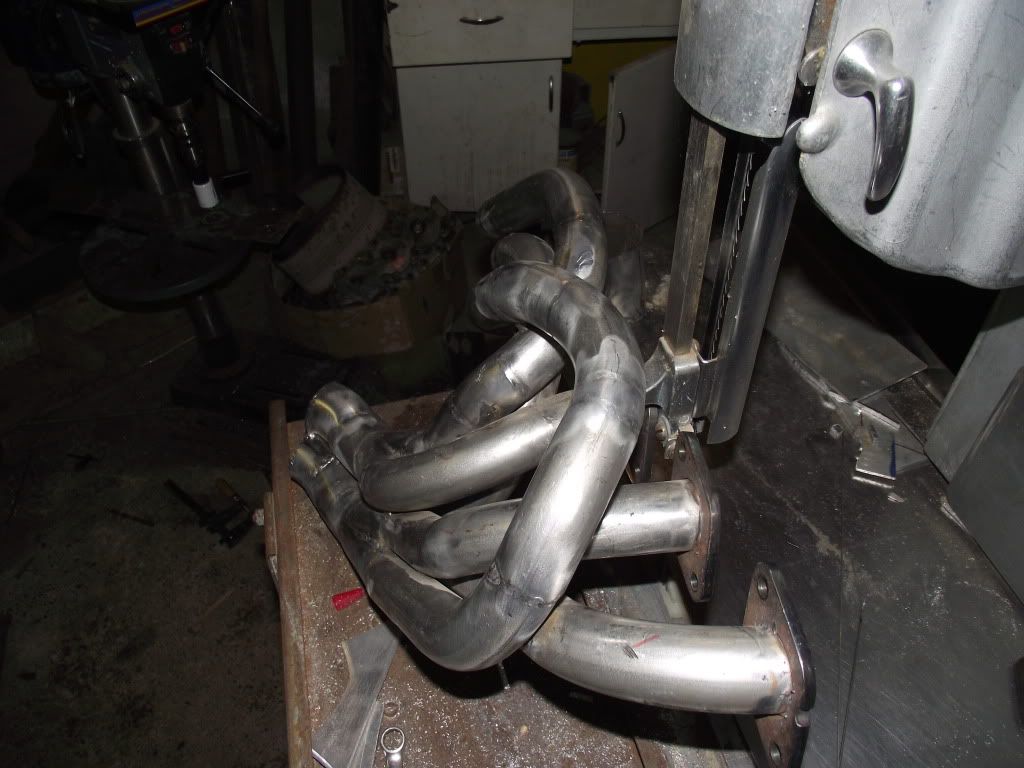
here it is after surgery.it has a curve inward to wrap around the spring now. 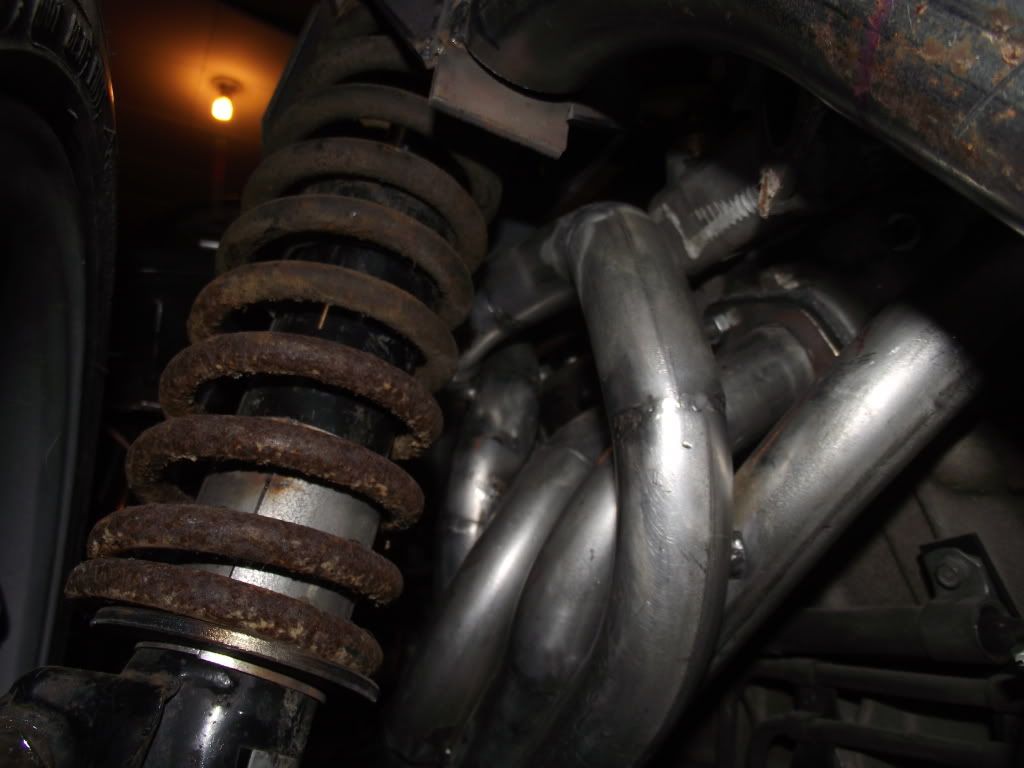
like this. 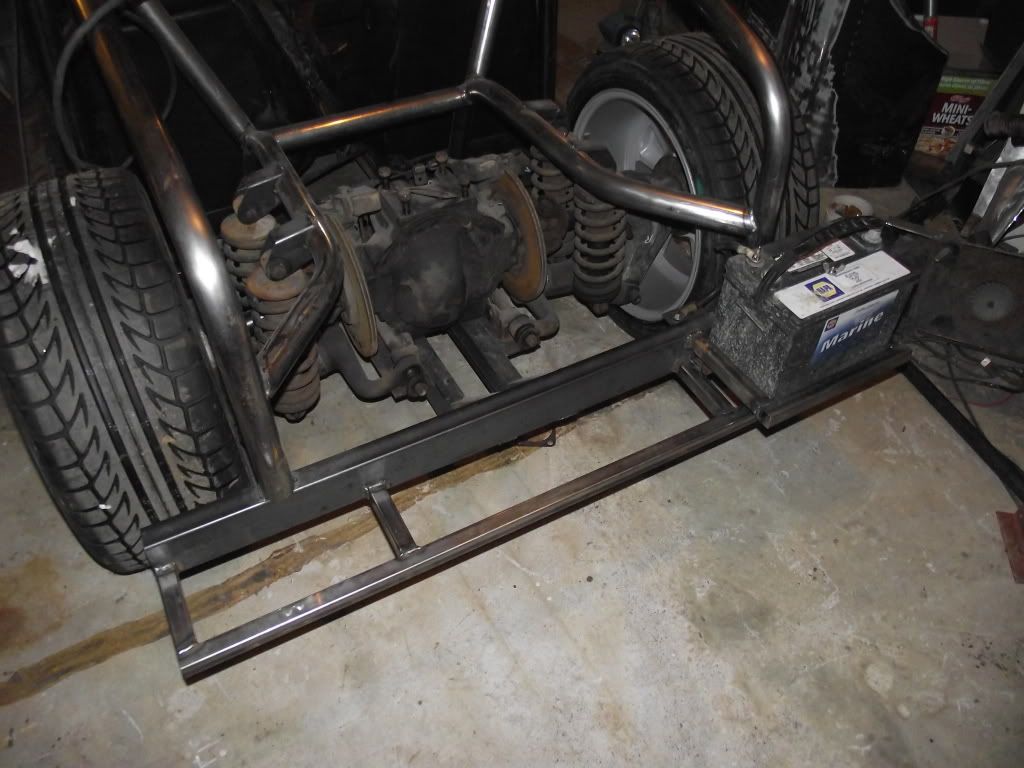
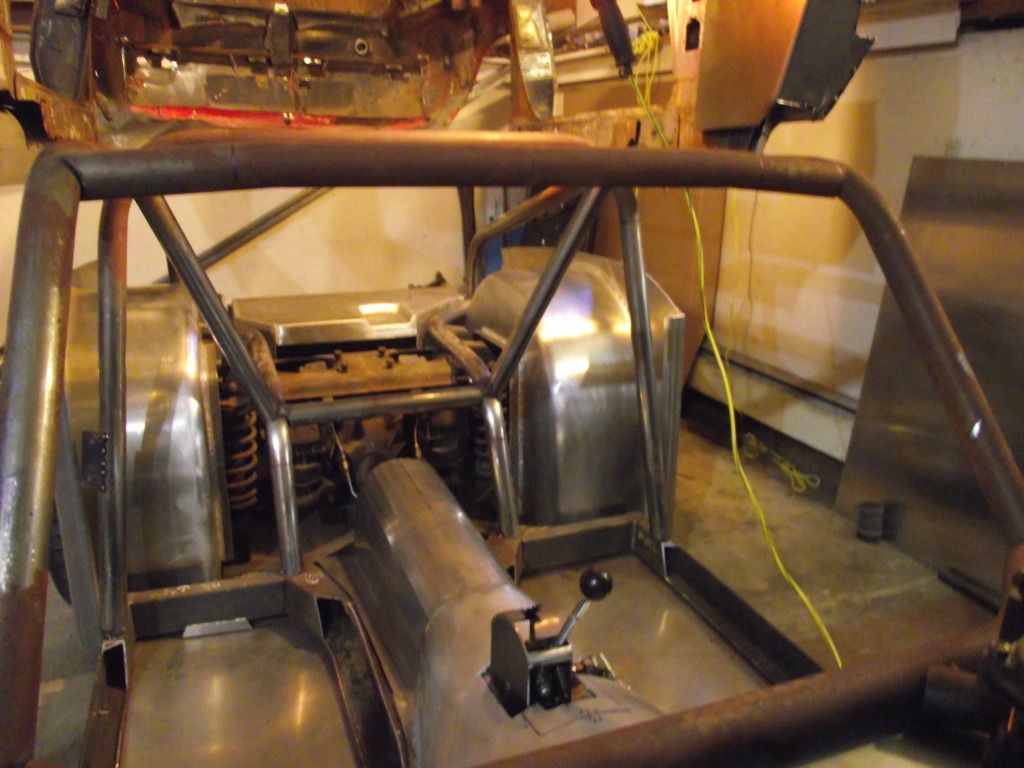
then i got to the back of the frame to build out the subframe the rear of the body will connect to,and build a battery tray. 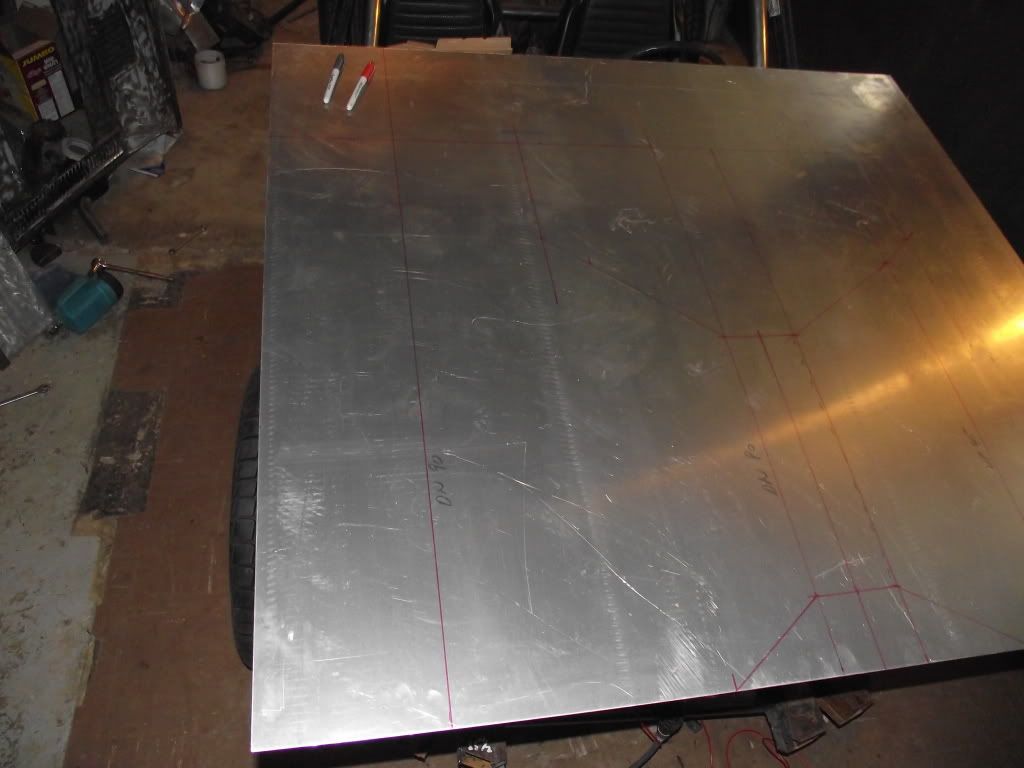
thought while i was in this area it would be a good time to figure out the fuel tank.here is the layout on 12ga aluminum. 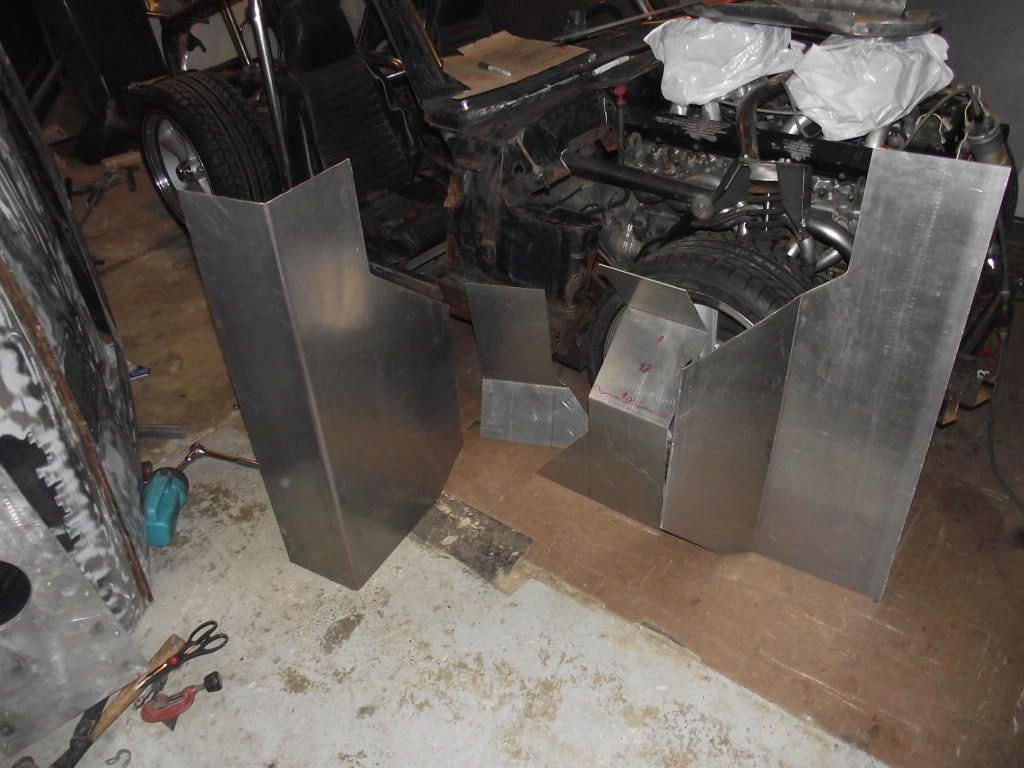
the parts cut out and formed. 
it still needs to be welded,but this is how it'll sit. 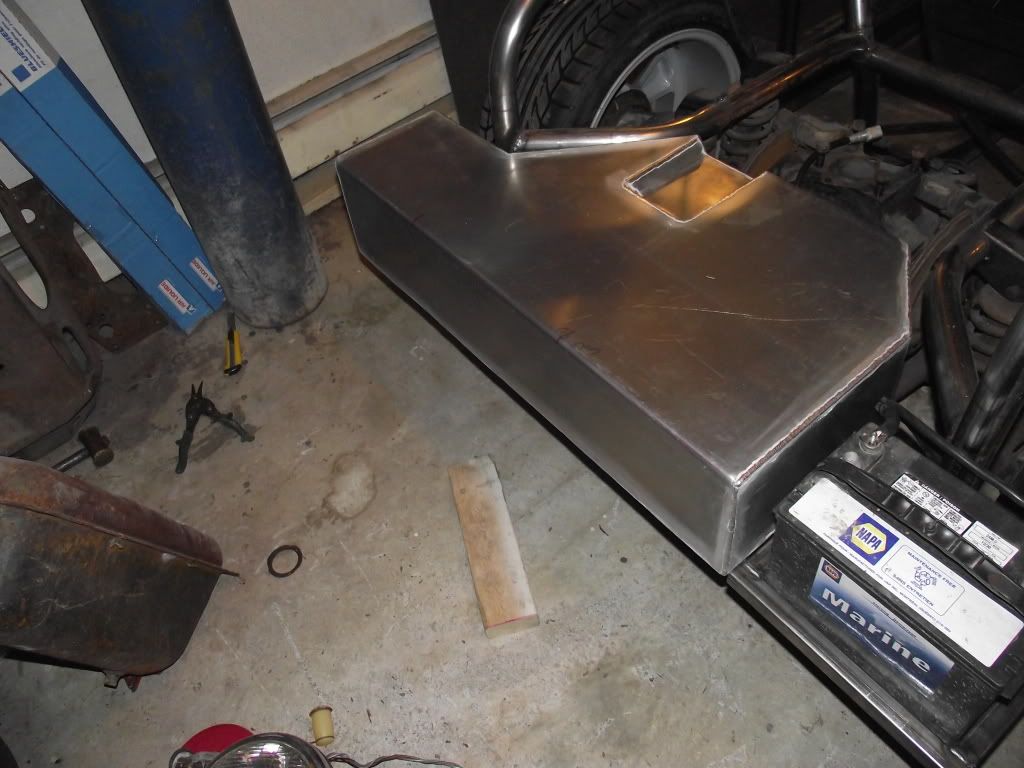
after welding.the recess in the top is for the fuel outlet and guage sender.these need to be set in as the rear floor will sit right on the top of the tank,so nothing can stick up. 
test fired the engine the other day.click on the pic to see vid.sound is pretty bad,i think the sheer loudness overpowered the camera's mic. 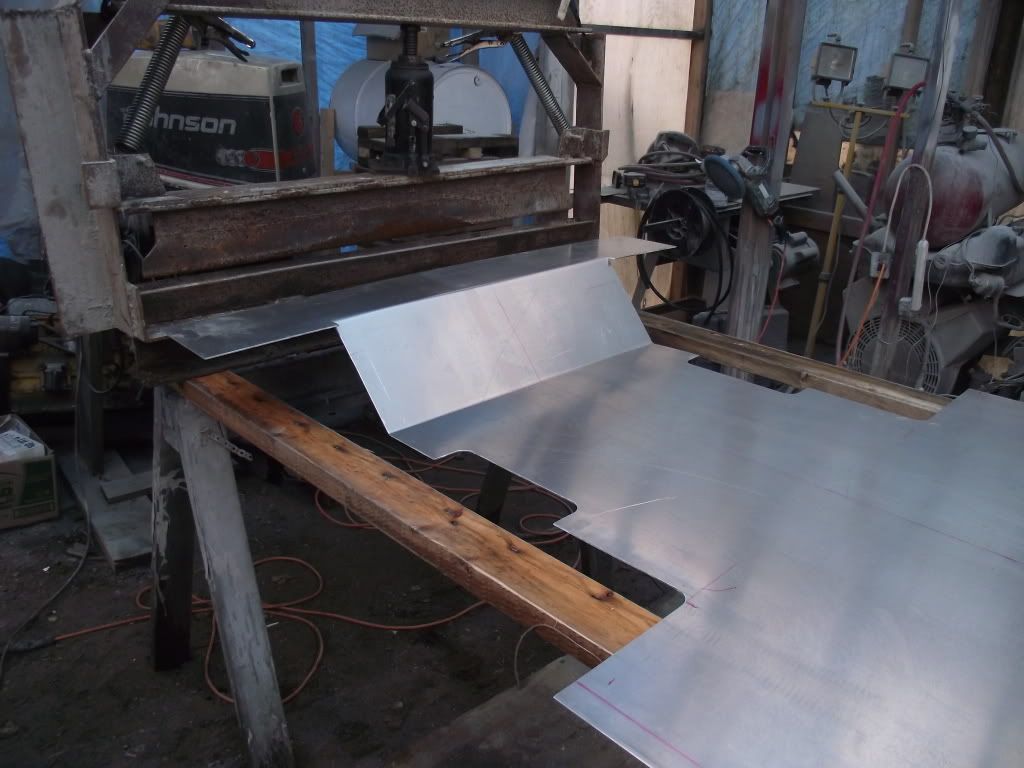
got to making up a floor pan for it,it will be a smooth bottom from front to back.this is the back area around the rear wheels. 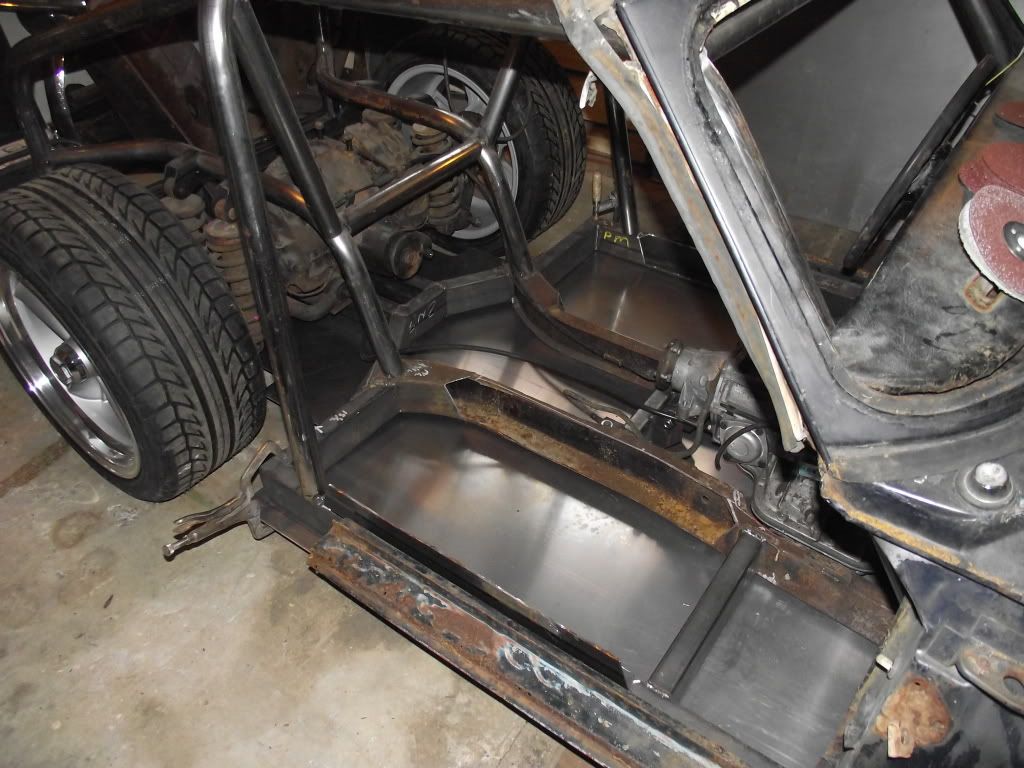
the pan fastens to the underside of the frame rails. 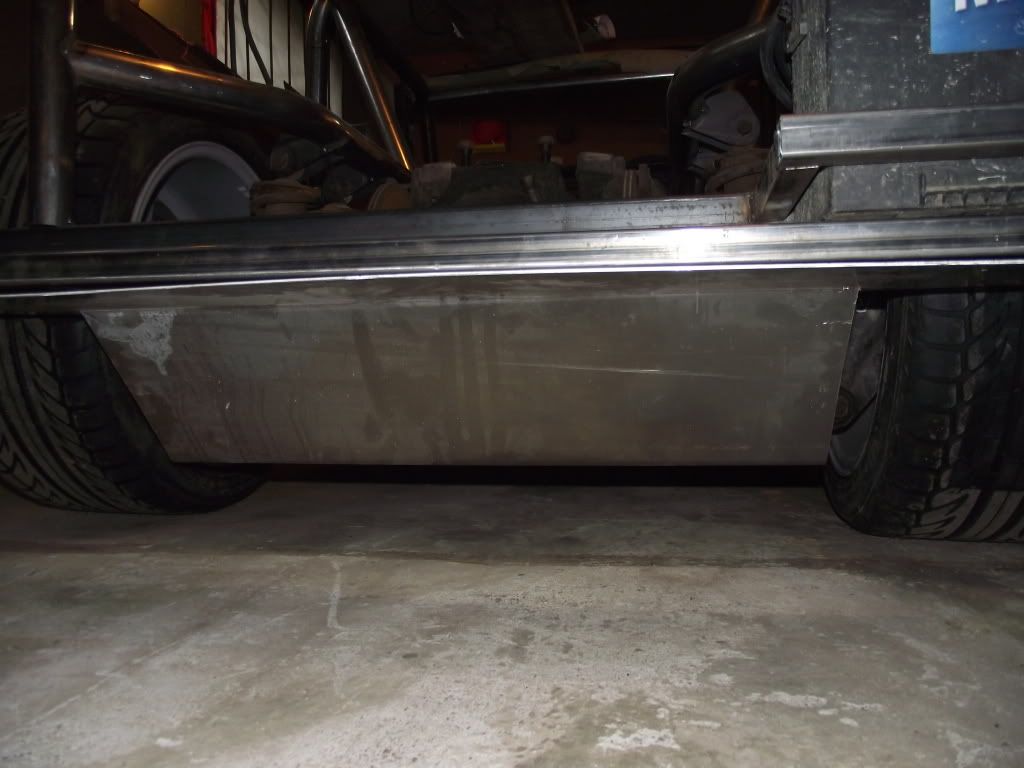
a view from the back. 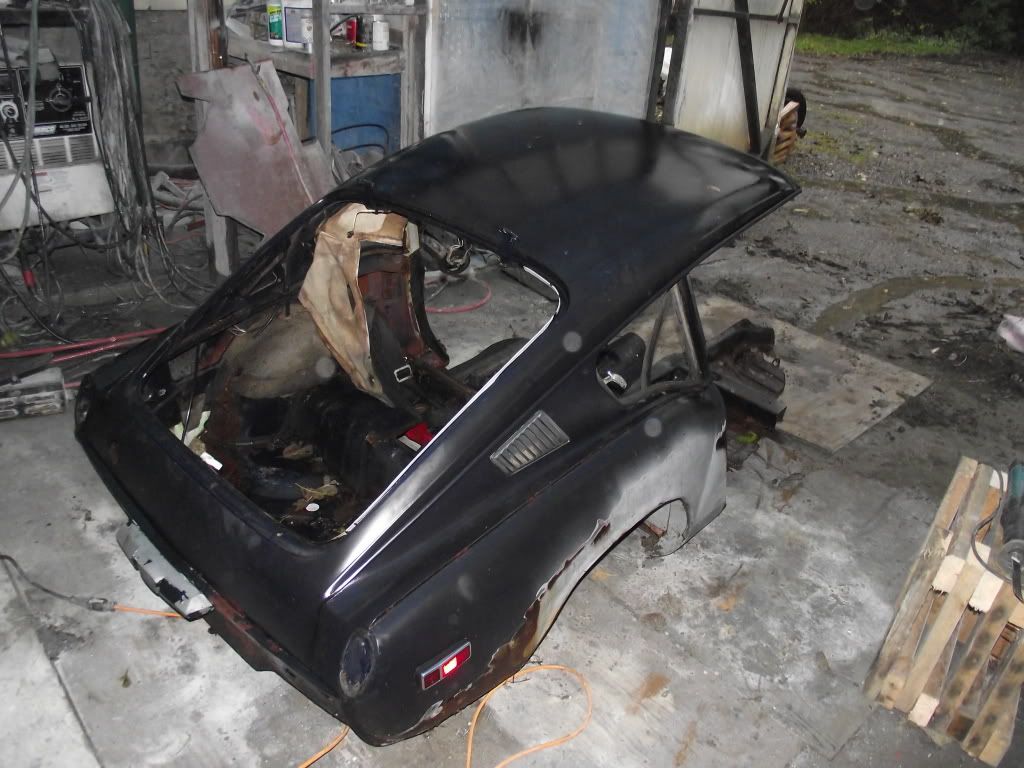
as mentioned earlier,i couldn't fit the rest of the body into the house.this was starting to present some problems at this point,as there was a lot of work to do in fitting the body to the chassis. 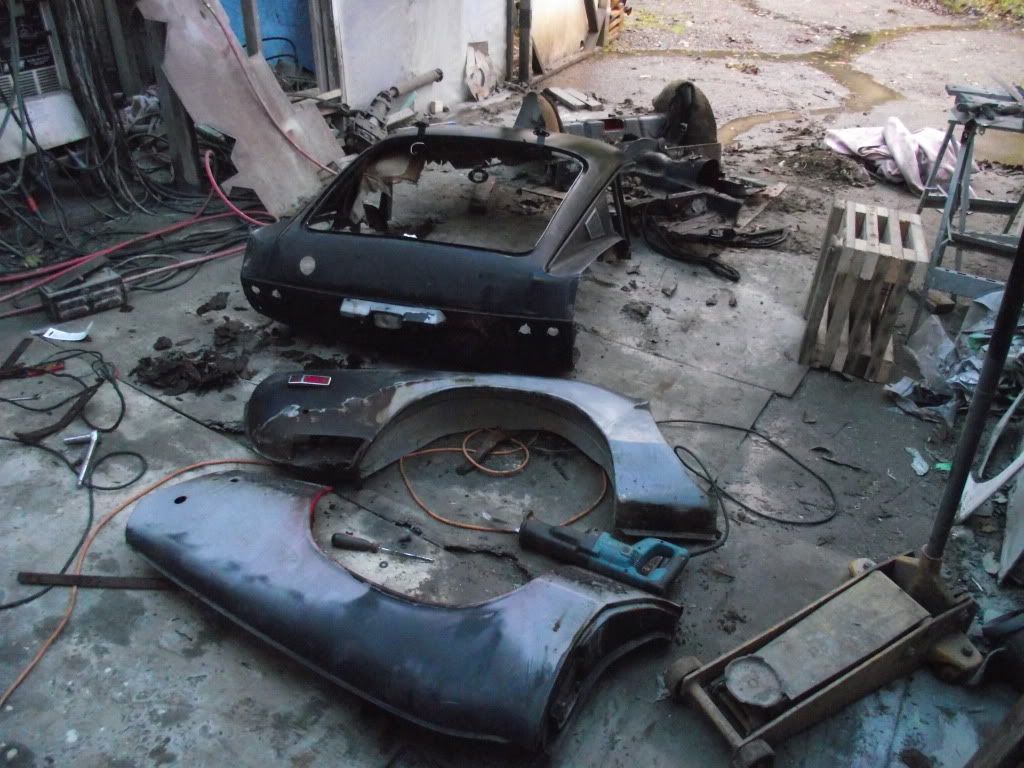
part of the plan was eliminating the pinch welds at the top of the fenders,and i realised this would mean pretty much cutting the rear fenders right off,and if they were off the panels would fit through the door. so out came the sawzall. 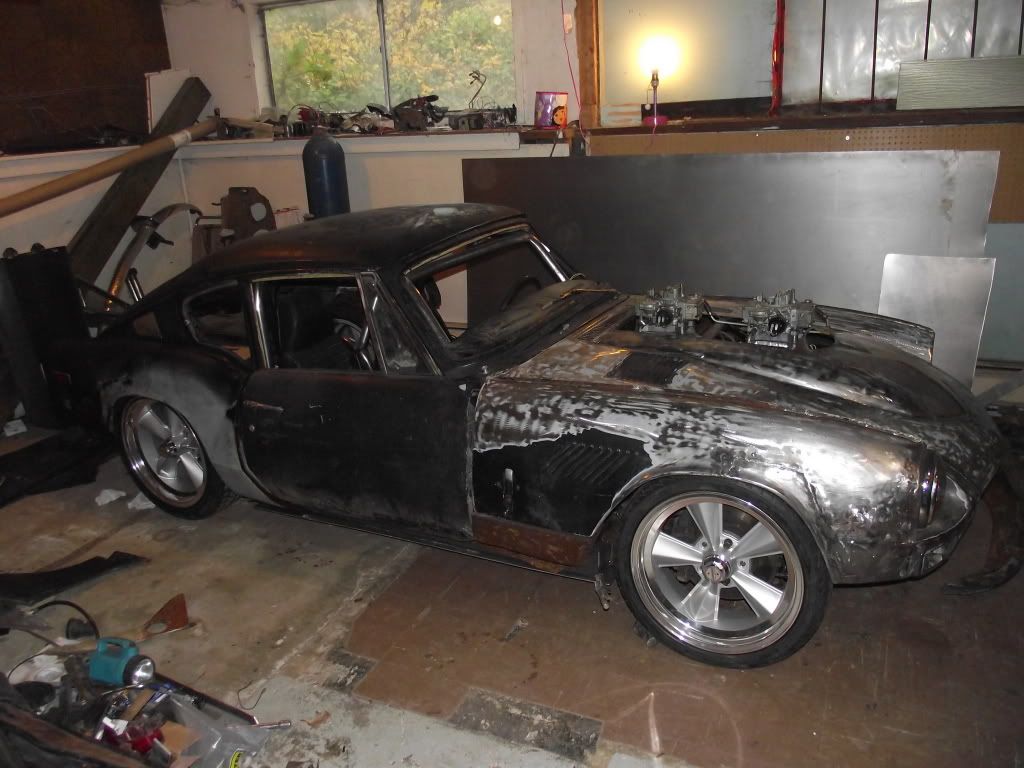
looks even more like a car now.at this point the panels are just rough draped over the frame. 
one area that needed attention right away was the wheel openning.i moved the rear edge back 2 1/4'' to open it up,but there were some old(and ugly)repairs that needed to be fixed. 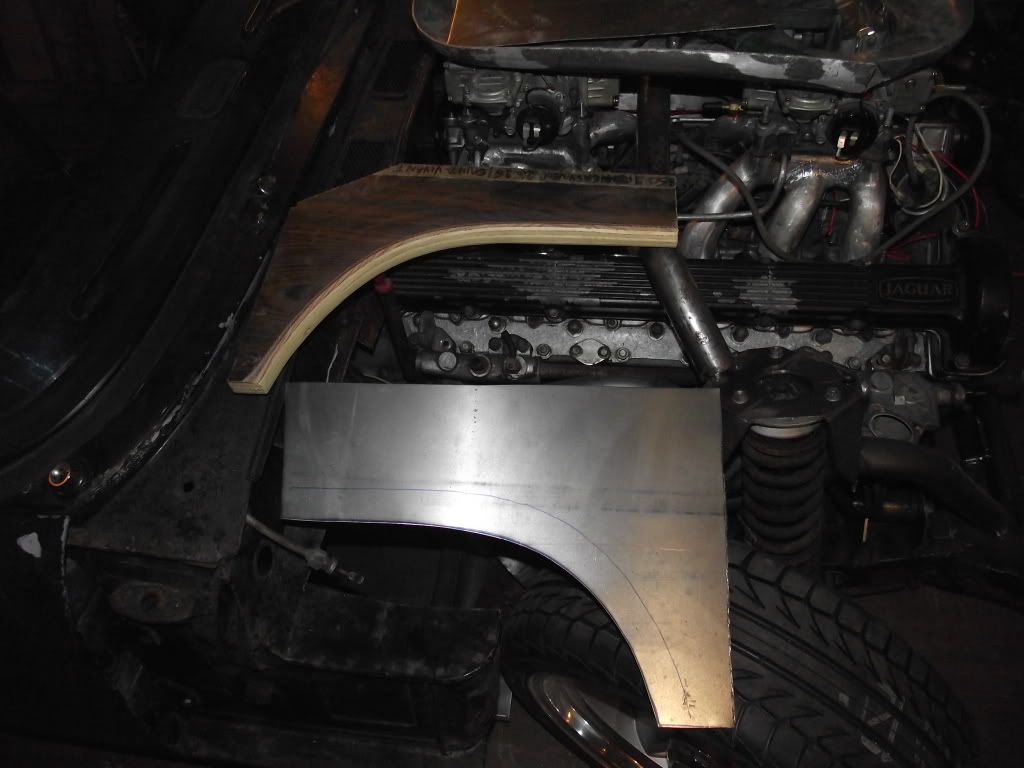
i made up a simple plywood form to make a patch panel. 
after a bit of hammering,i figured it was good enough to trim and tack. 
much better.still need to make up something for the bottom rear corner though. 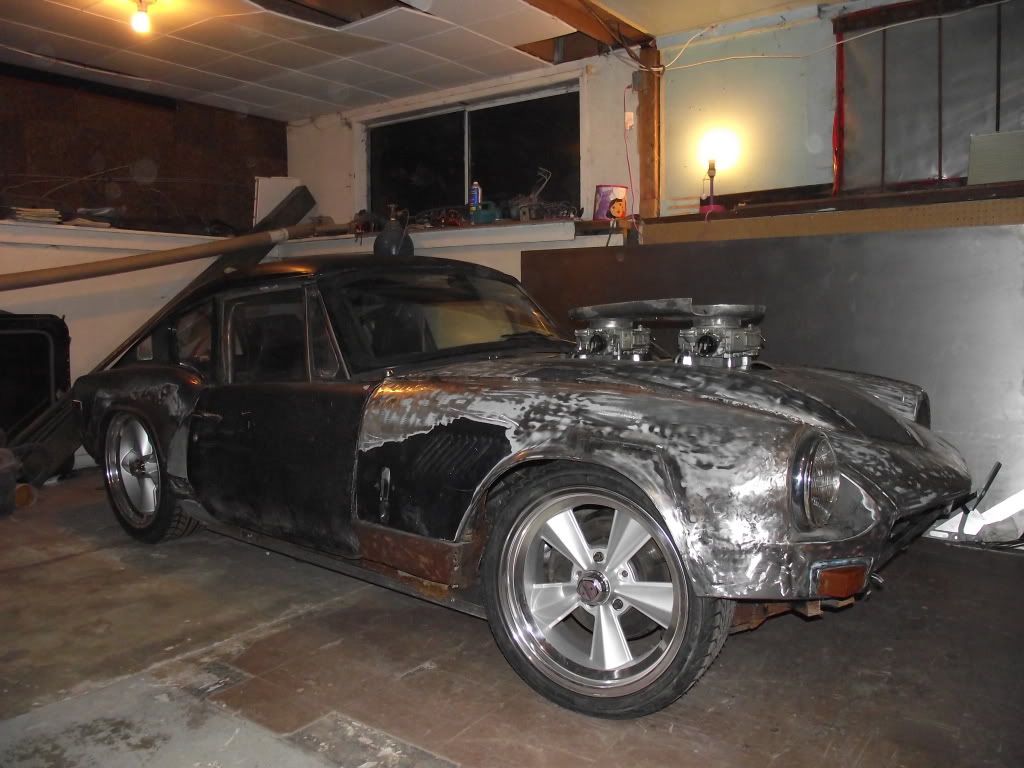
pretty happy with the way it's shaping up. 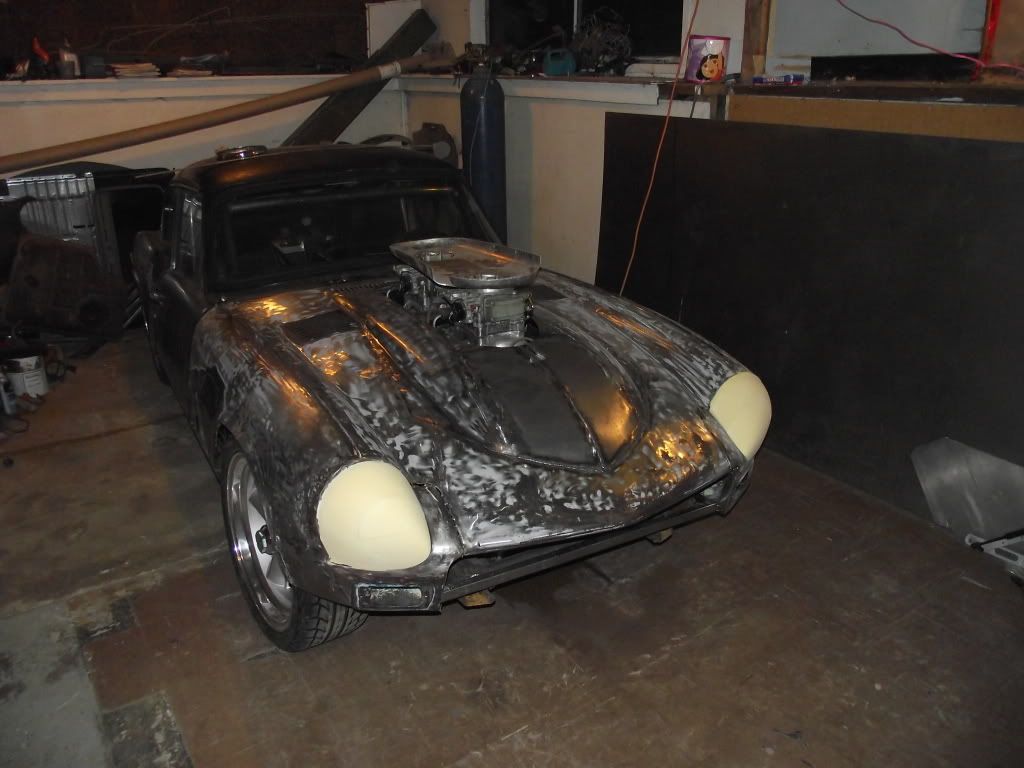
something i decided would be neat was to make some headlight fairings from plexi.i started out by carving the shape from urethane foam.i will fiberglass over this then smooth it out to make a mold. 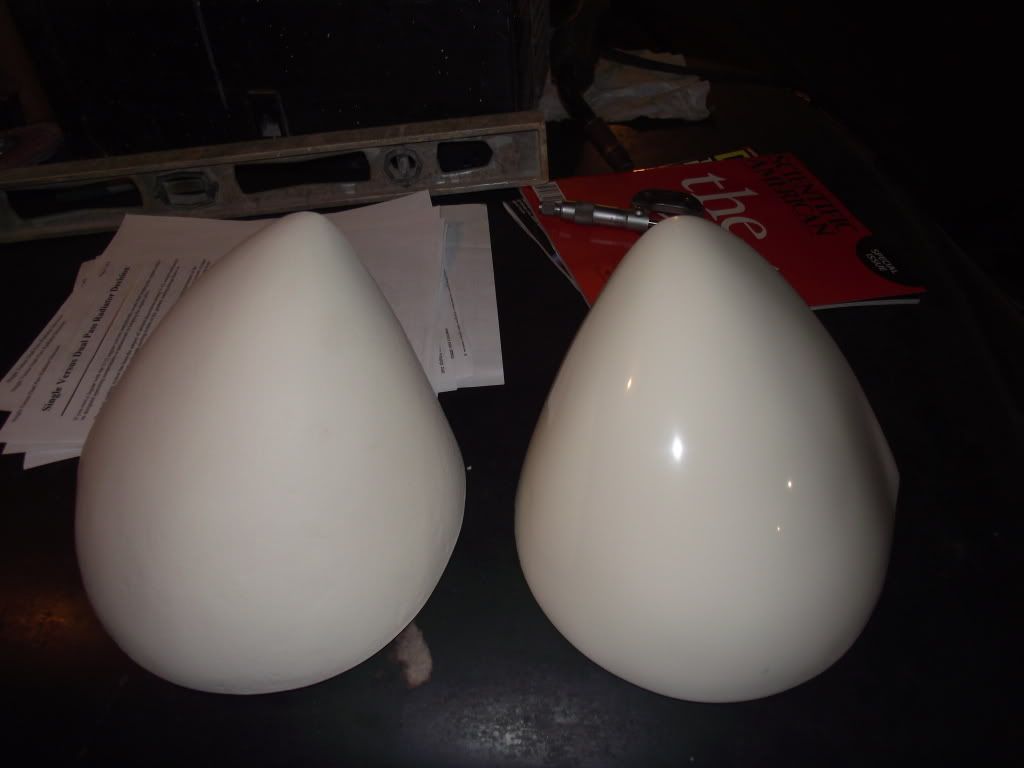
the molds fiberglassed and smoothed.i'll have to make a vacuum mold to form the plexi. 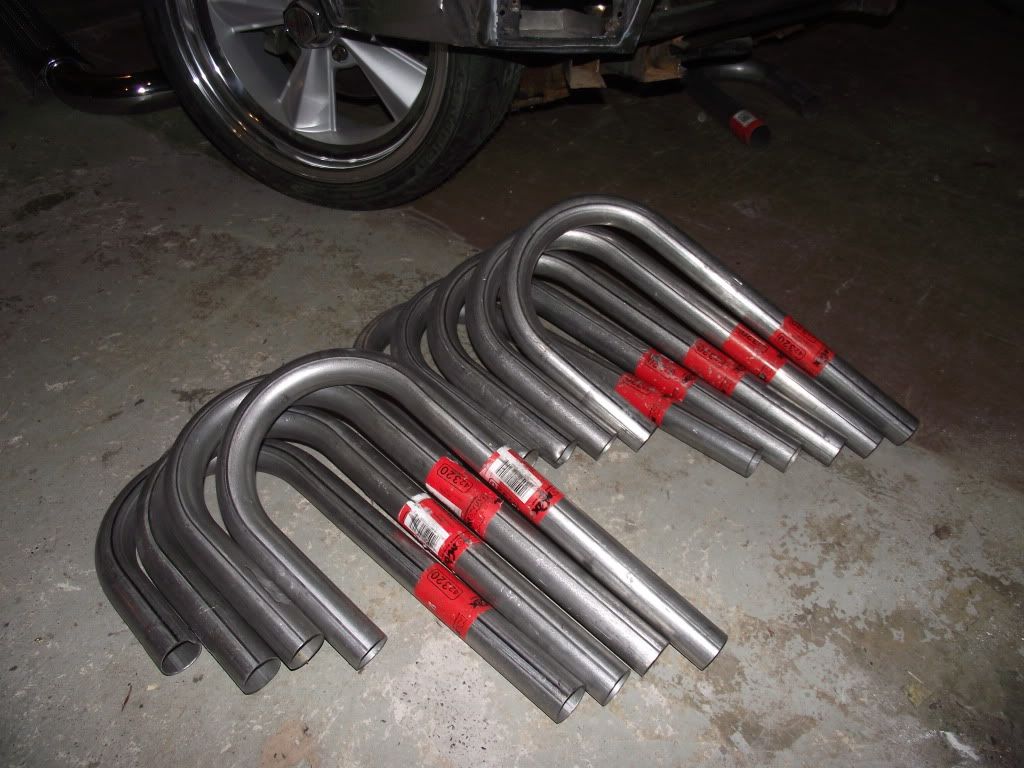
but for now i think i'll get the left side header built.i start with a bunch of u-bends. 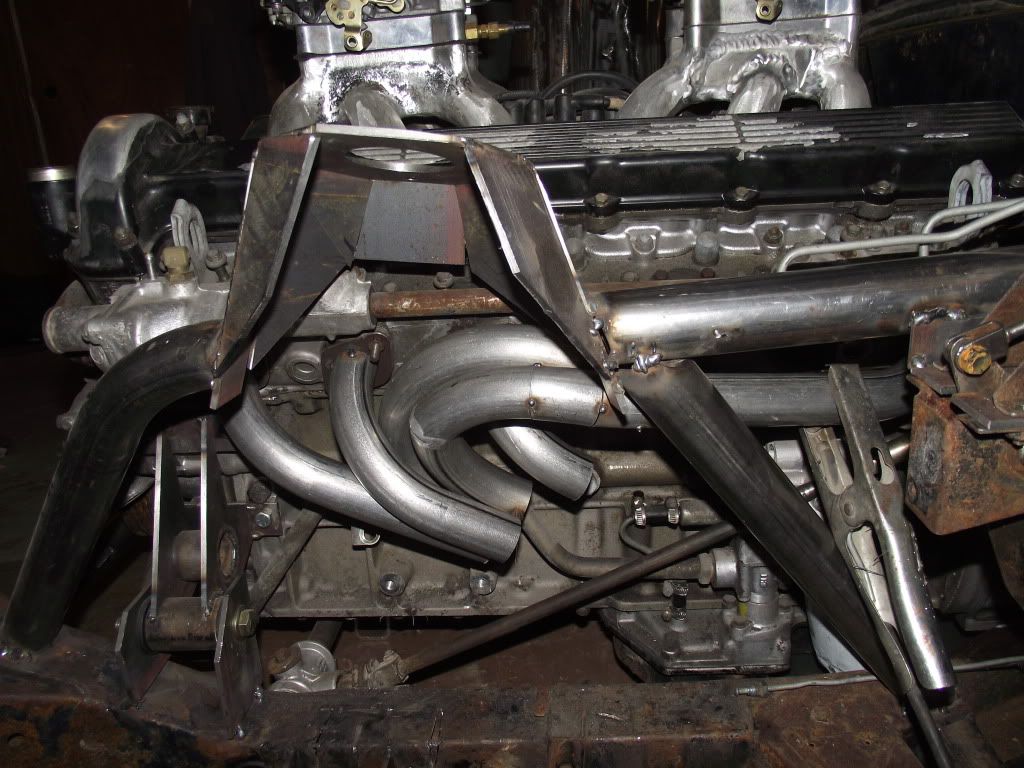
i start cutting and tacking bends to get everything fitted in place. 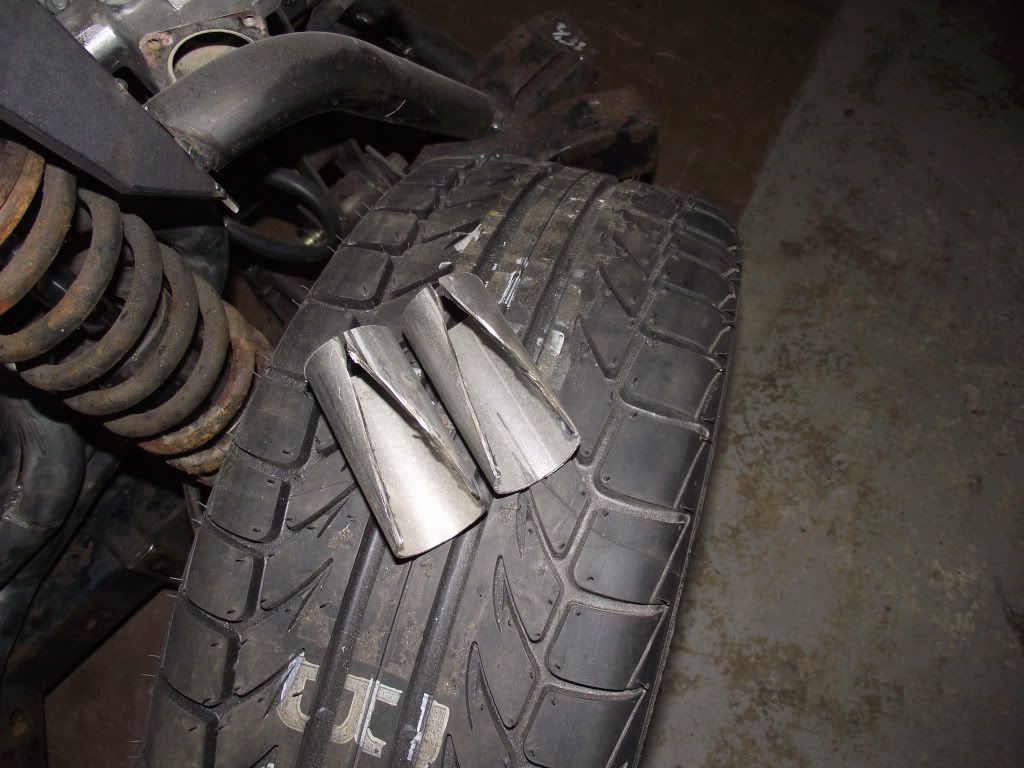
the headers will have three pairs of primarys going into 2'' secondary tubes,so something is needed to join these.i cut some short sections of the primary tube to make a 2-into-1 fitting. 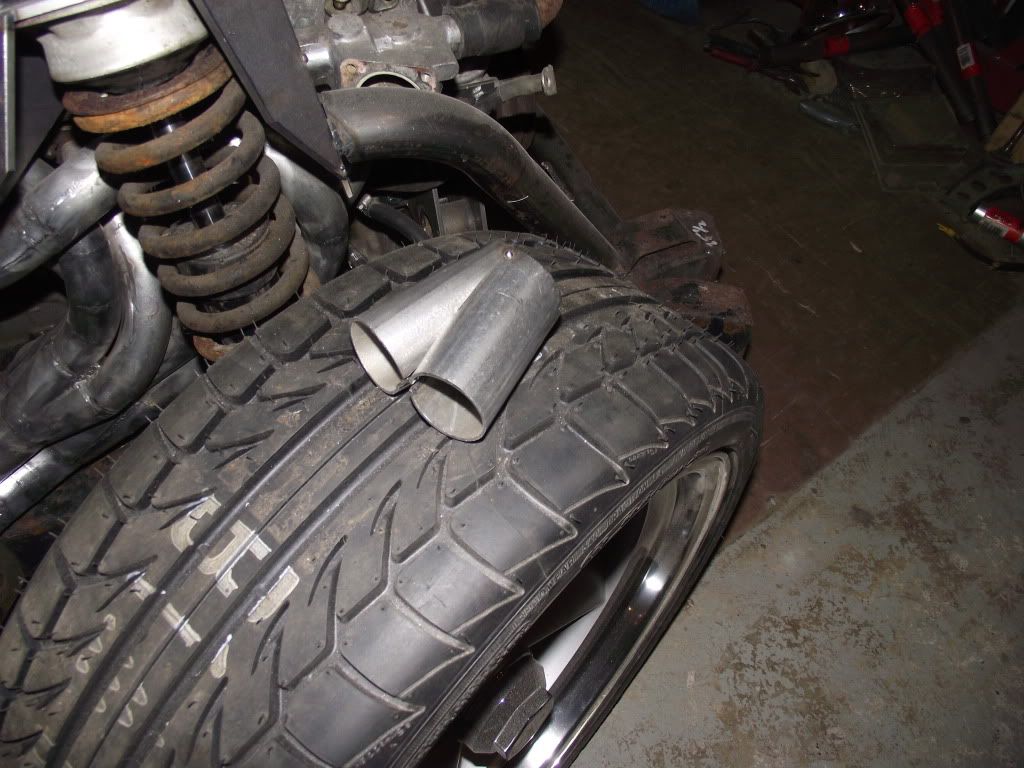
trimmed and fitted,it looks like this.the collector is a 3-into-1,and is made the same way. 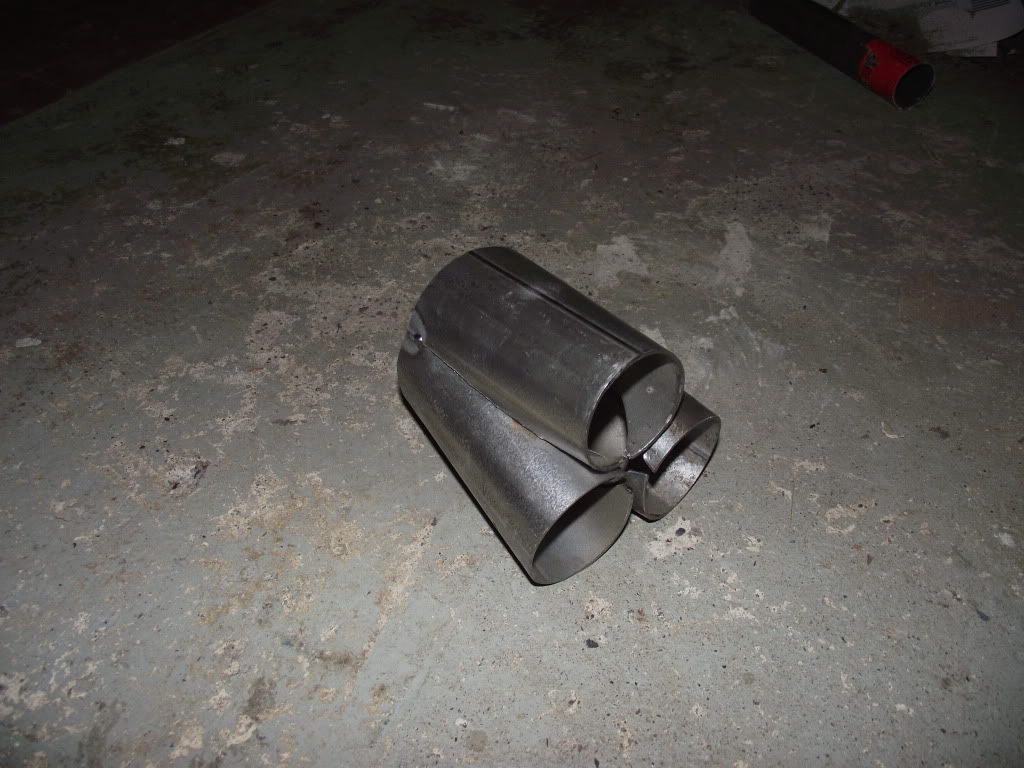
and this is it. 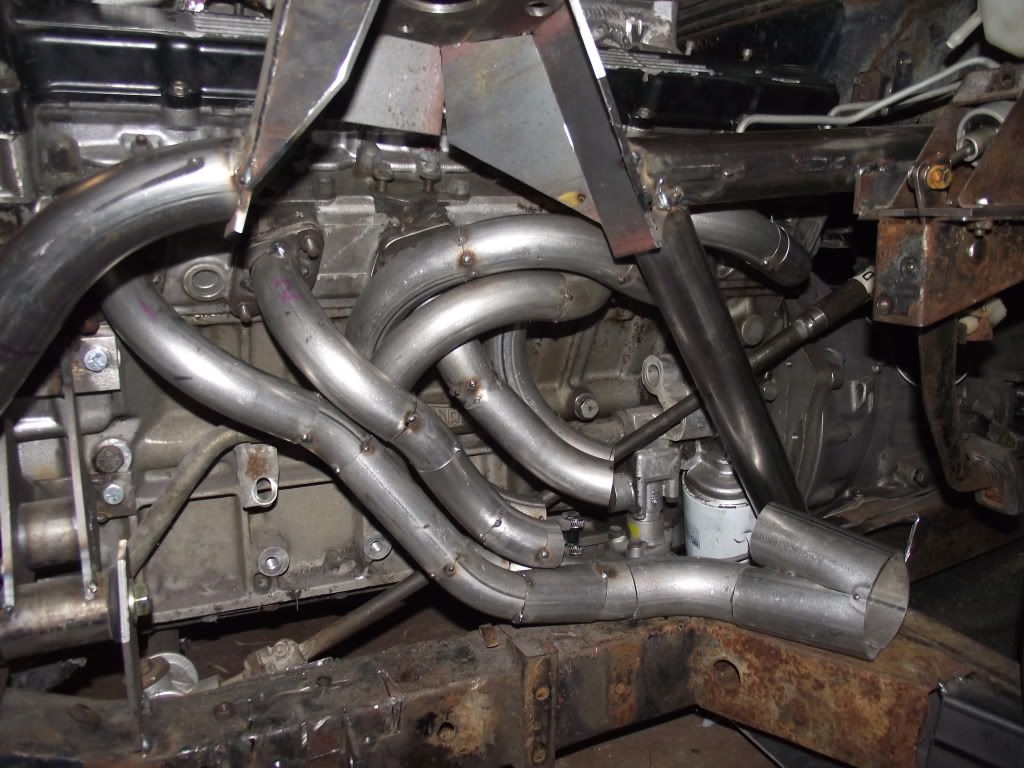
tacked together,it's looking like a header...but there's still some work to do. 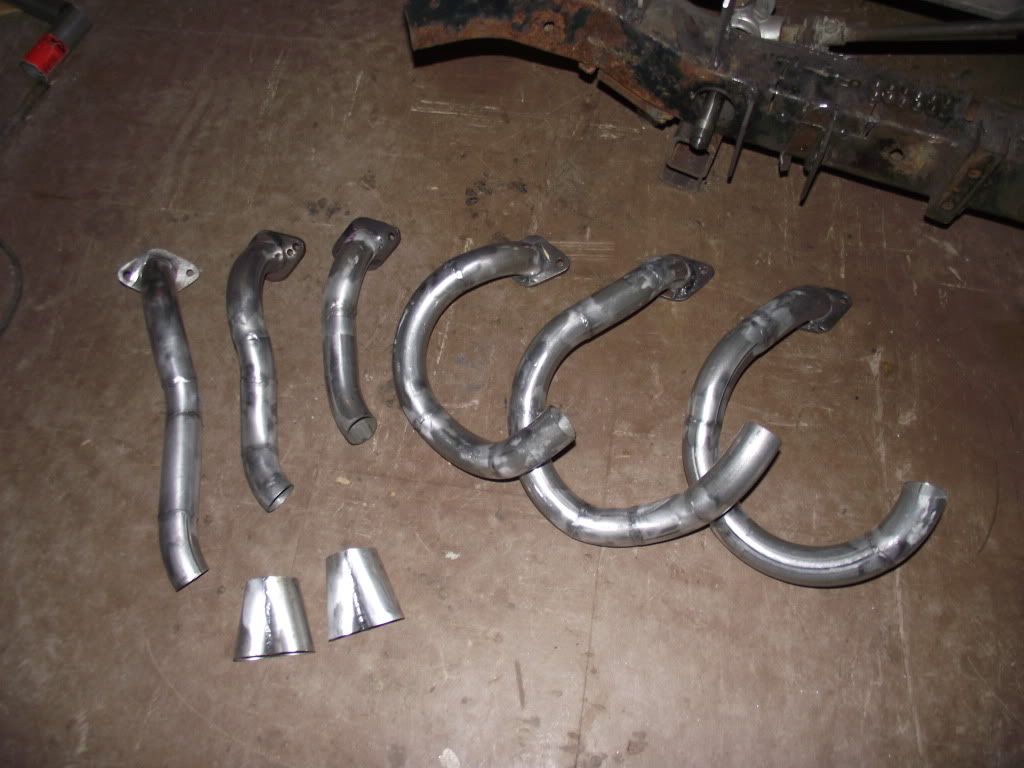
all the tubes have to be pulled and welded seperately. 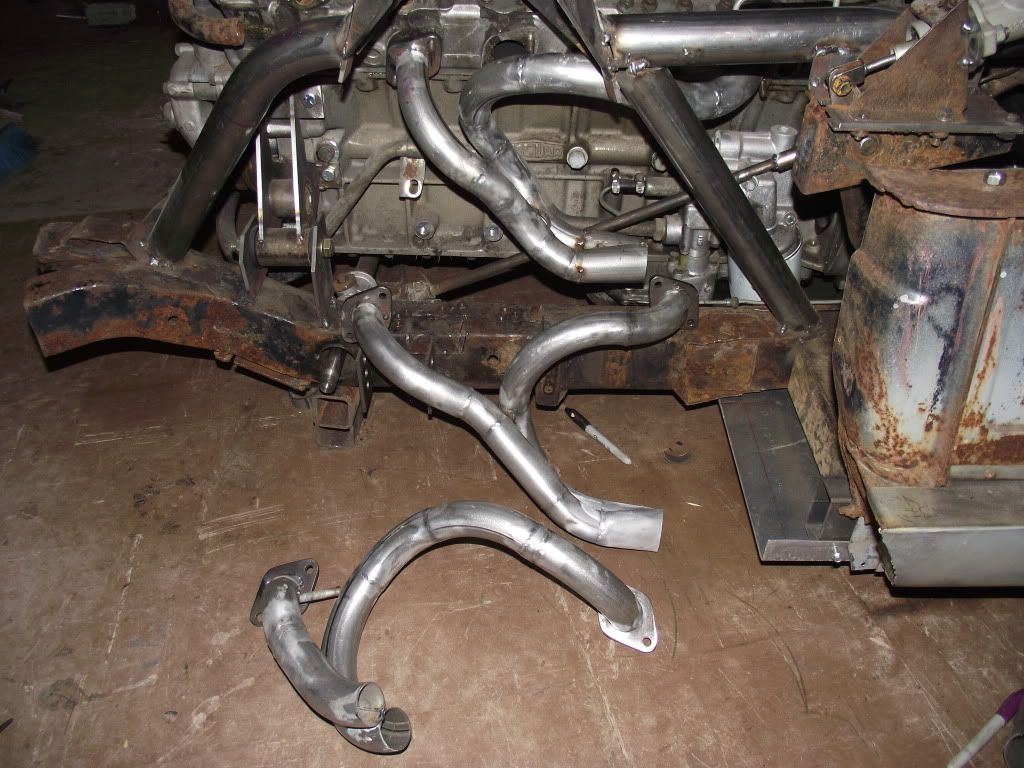
and paired up. 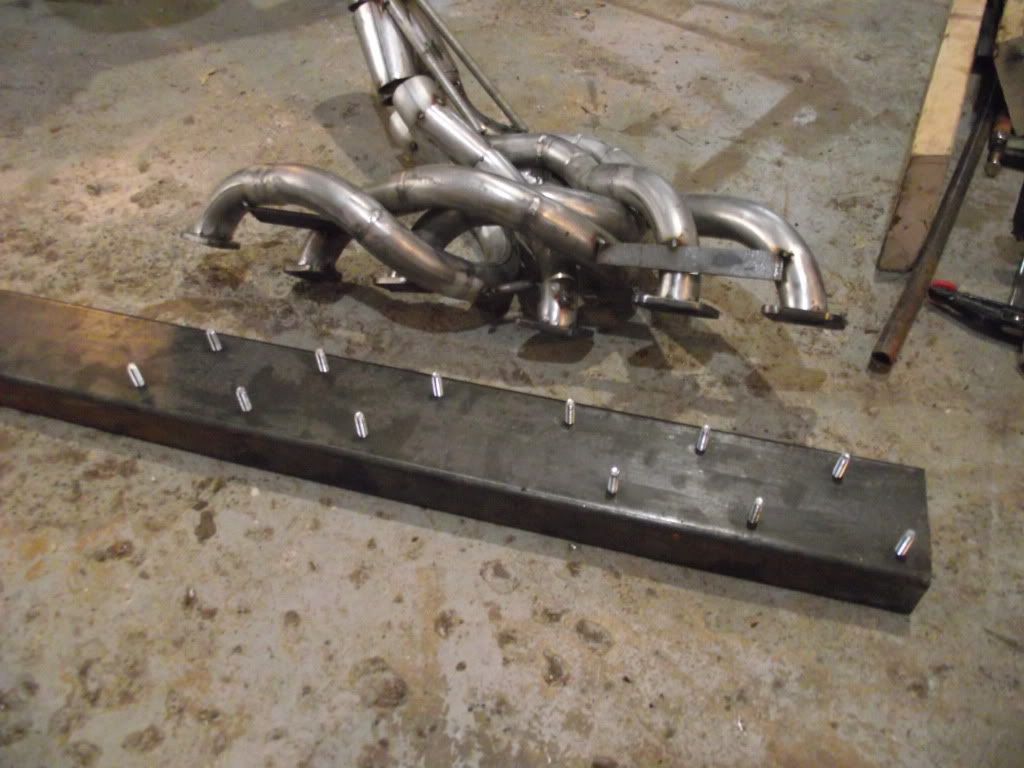
a welding jig was made up to hold everything in place while all the finish welding is done. 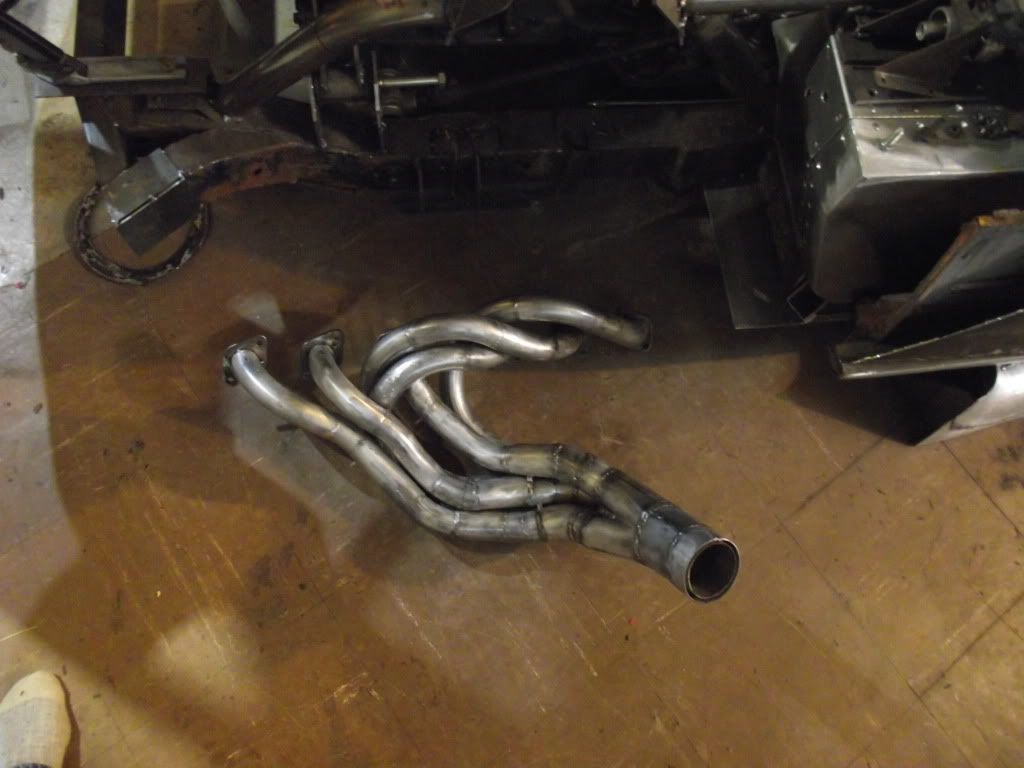
and voila...one header. 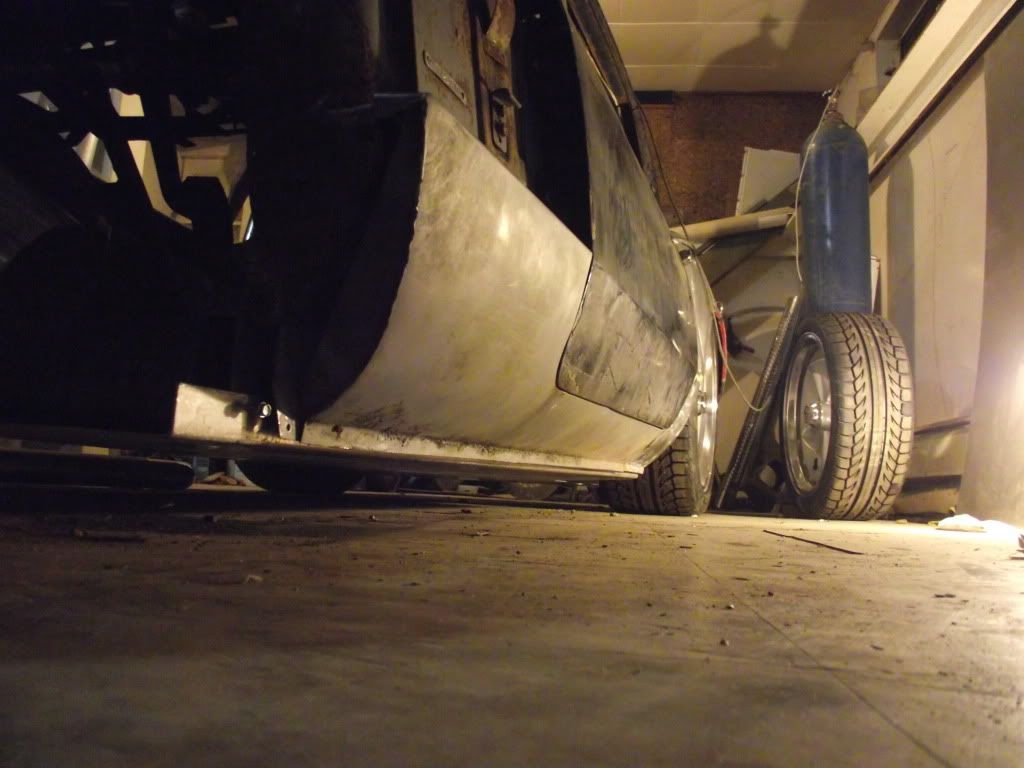
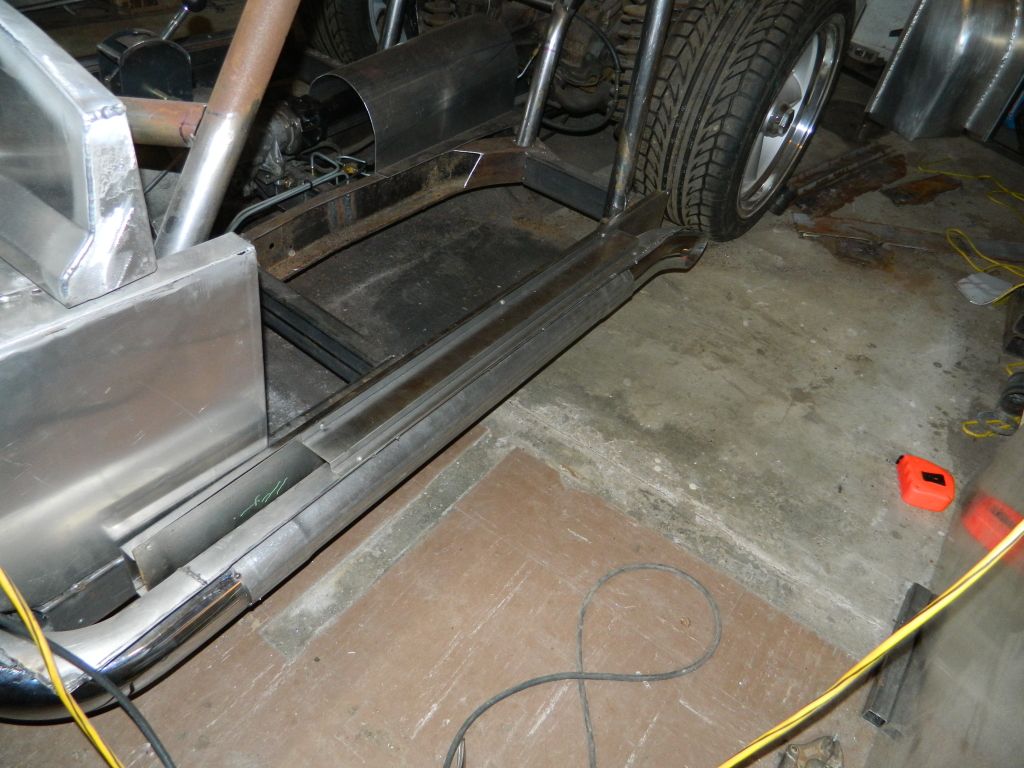
i'm goin to be running sidepipes on this car,but i don't want them hanging out too far.this will require some rocker panel modifications. 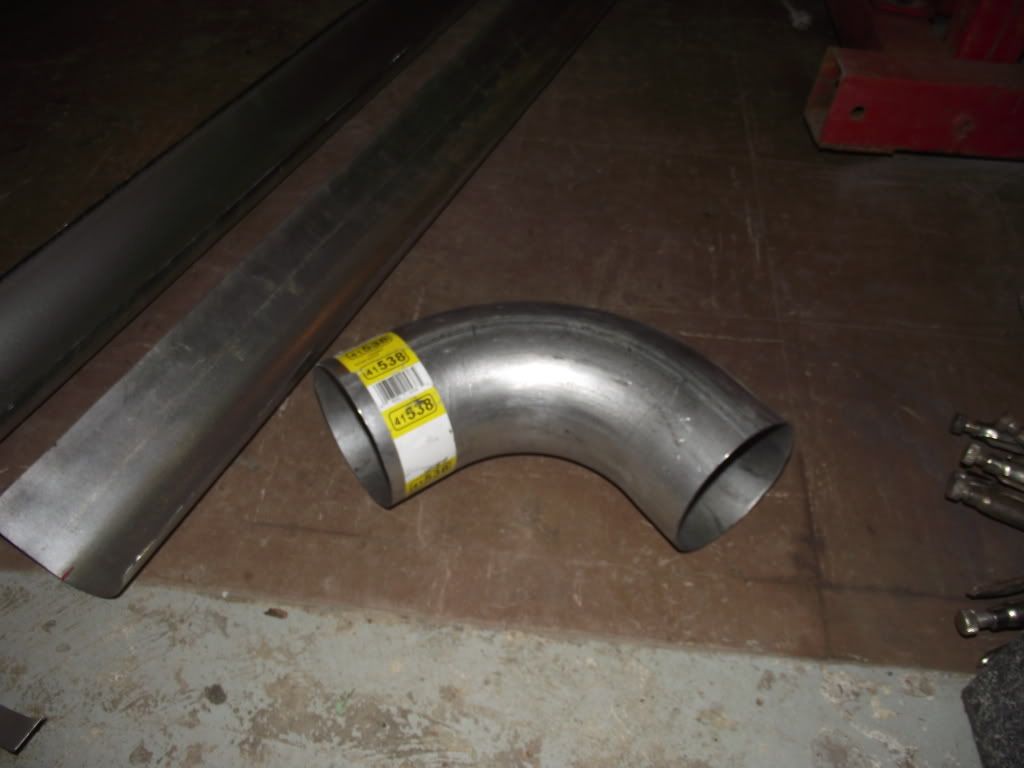
i want the rockers formedso the sidepipes fit nicely into them.for the fancy curves that need to be formed,i decided to cheat,the main part of the rocker will be a chunk of 5'' exhaust pipe,split lengthwise.the elbow will be split into 4 parts for the compound curves at the ends. 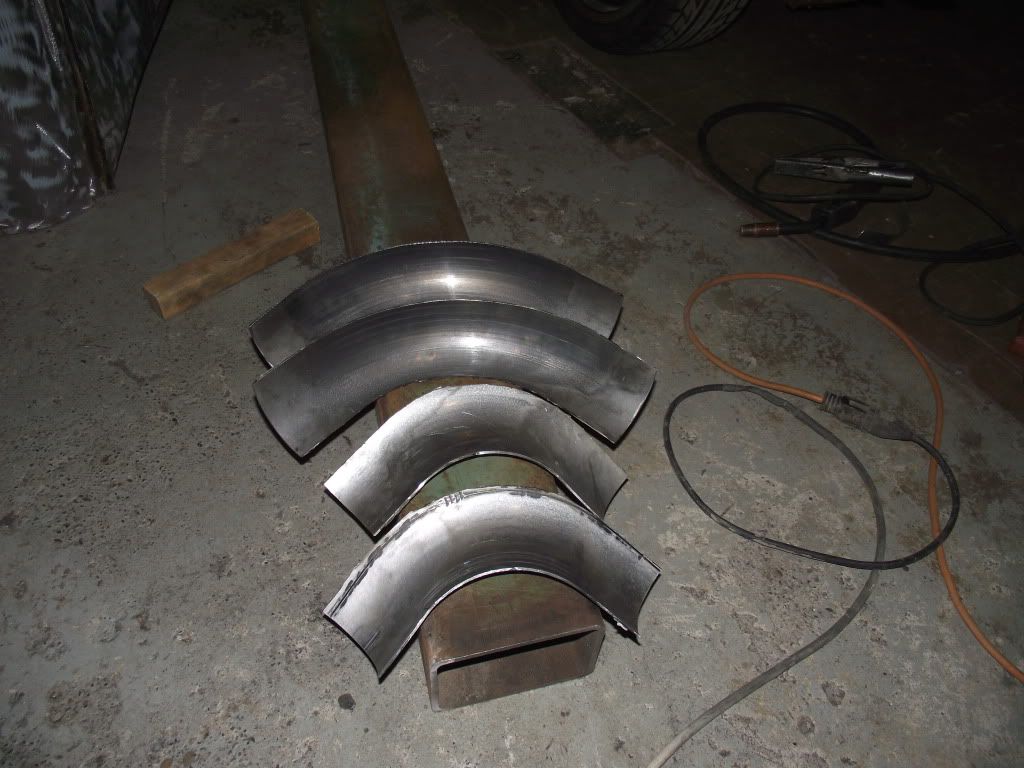
like this. 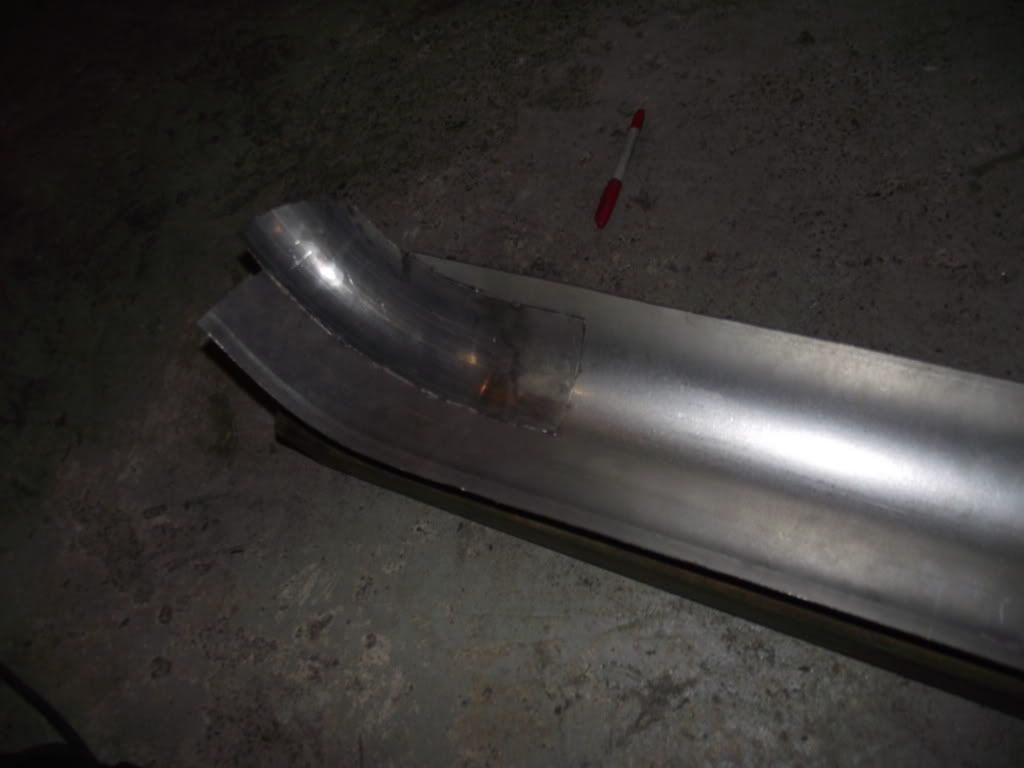
this is the back end. 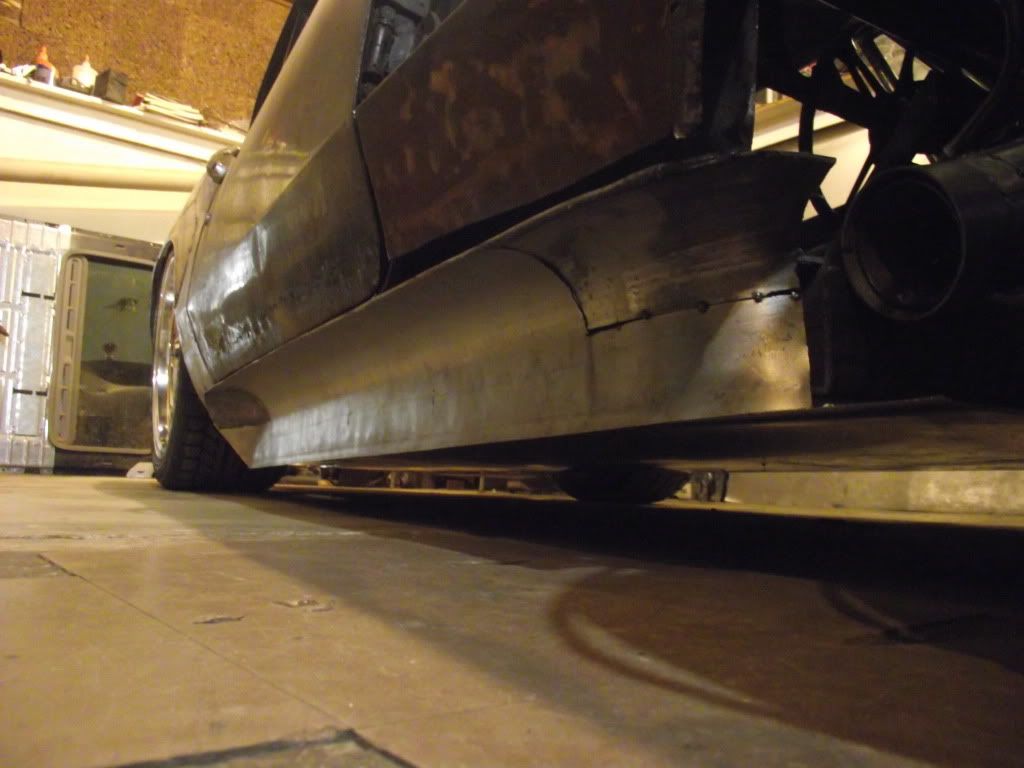
and here's the front,and how the whole thing will be fitted.there's still some trimming and fitting to do. 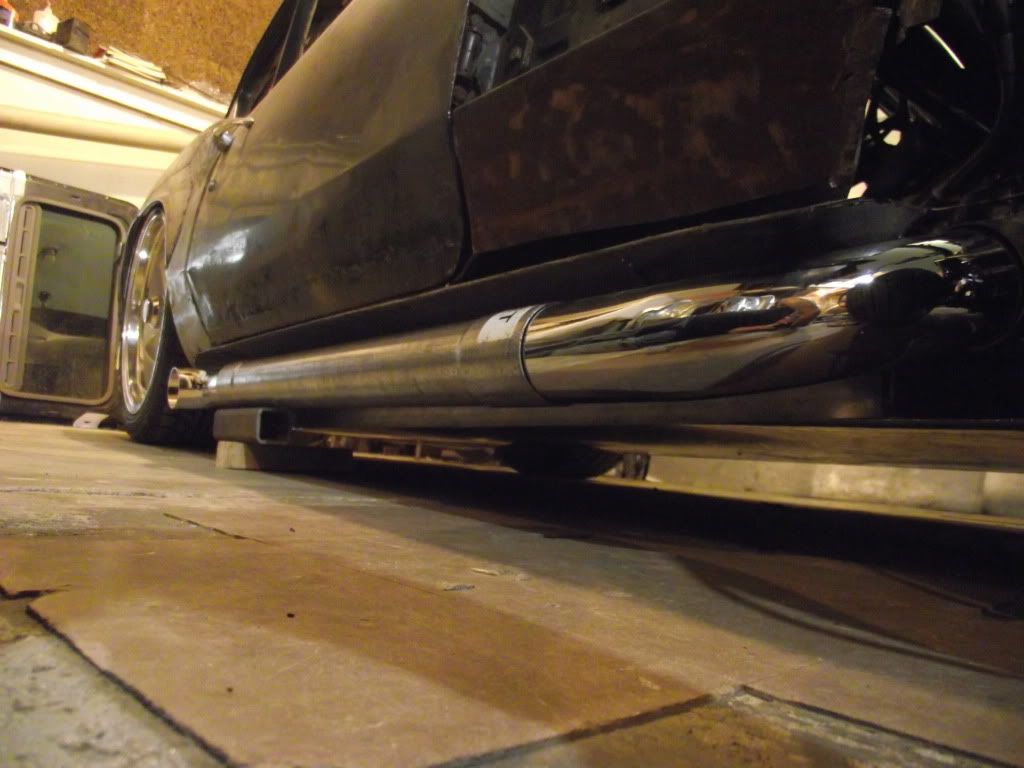
and how the sidepipe fits in. 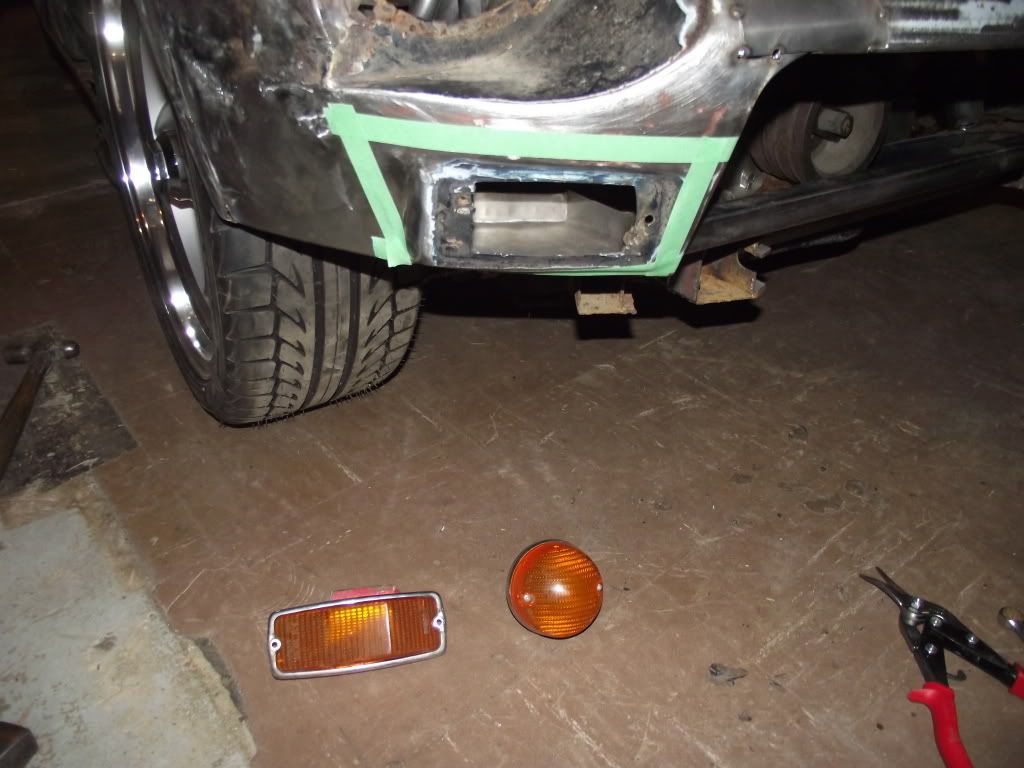
on another note,i've decided i prefer a round signal light to the rectangular one on the car.this is one of the lights that was mounted to the back panel.these are being deleted,and so it can be moved to the front. 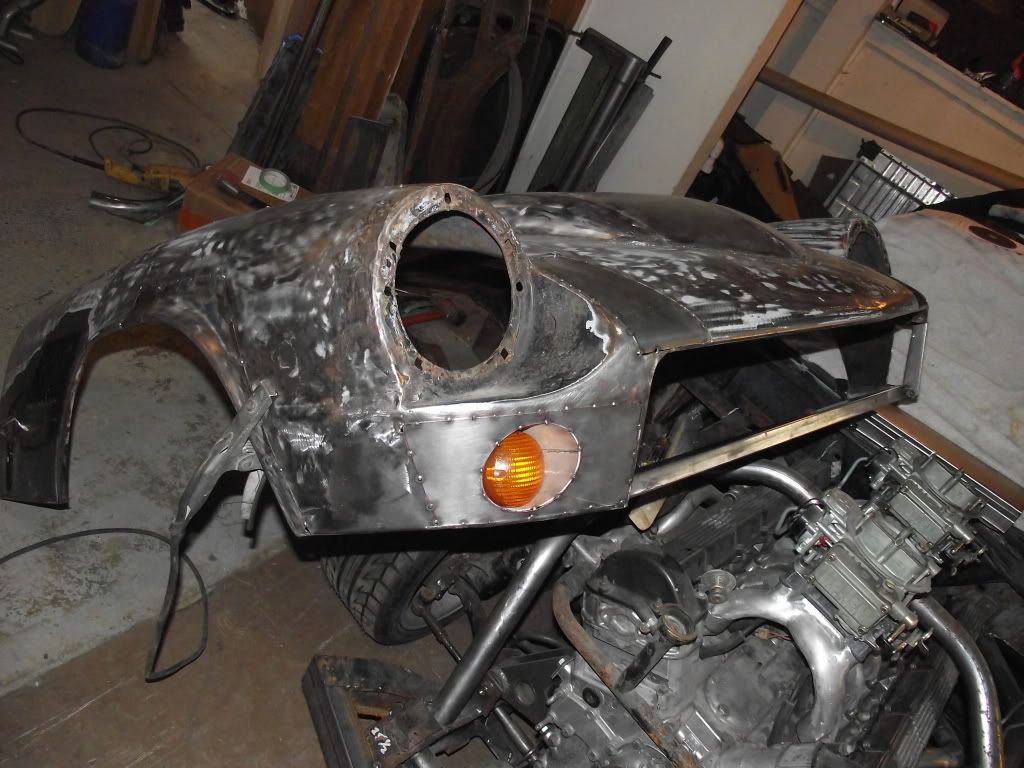
and the new look.i like this much better. 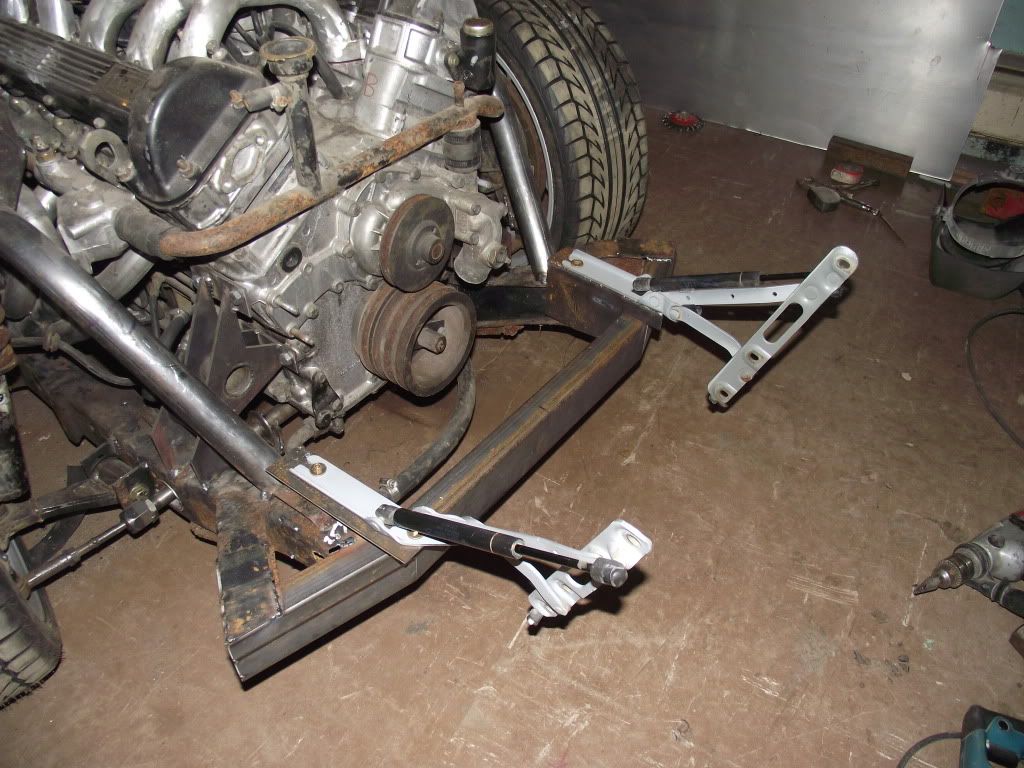
it's also time to get this hood hinged.there will be no bumper on this car,so i don't want to have the hinges sticking out the front like stock. these are some trunk hinges from a bmw,and will work well for this. 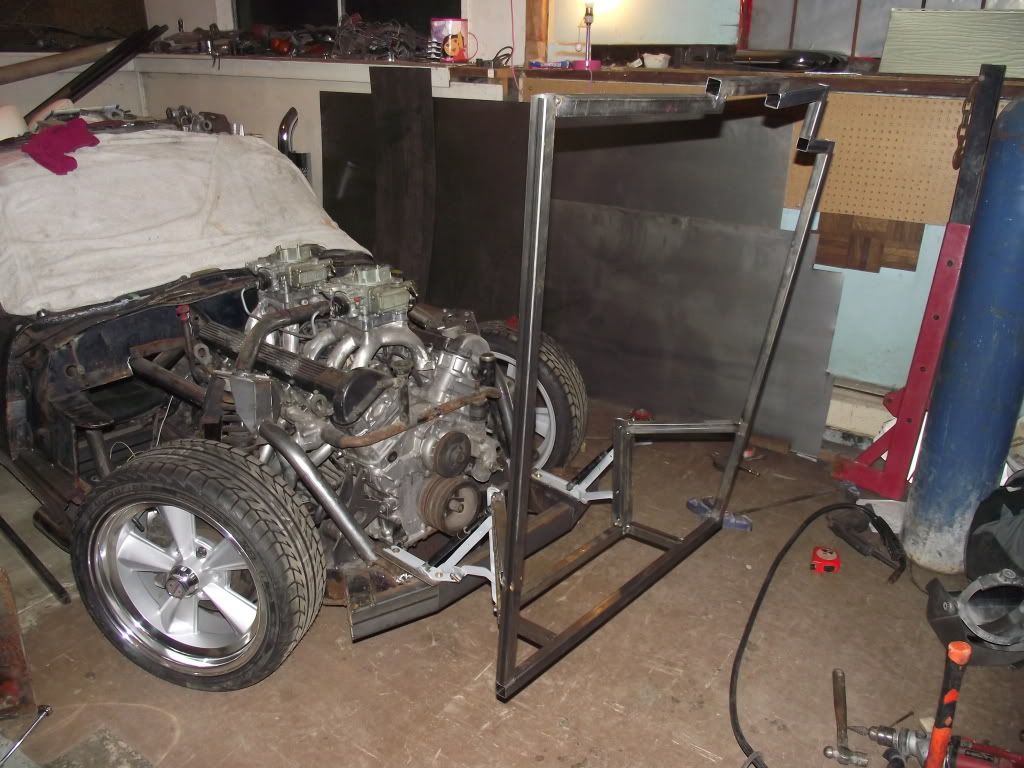
i built a framework from 1x1'' tube to support the hood. 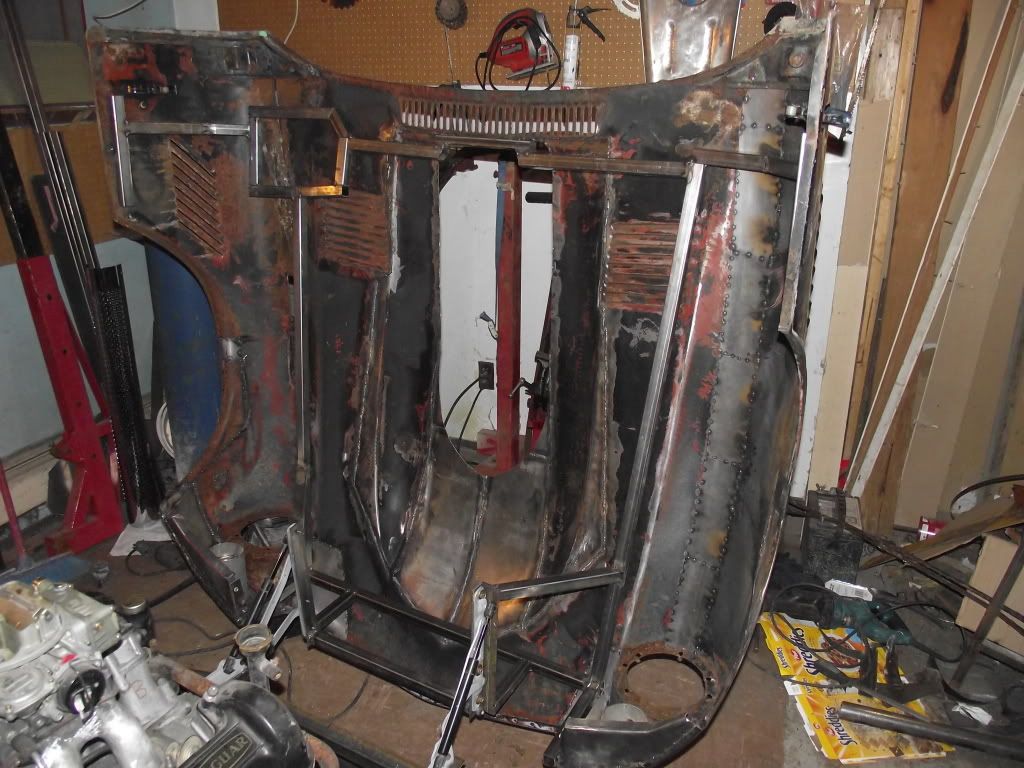
and there she is.much better. 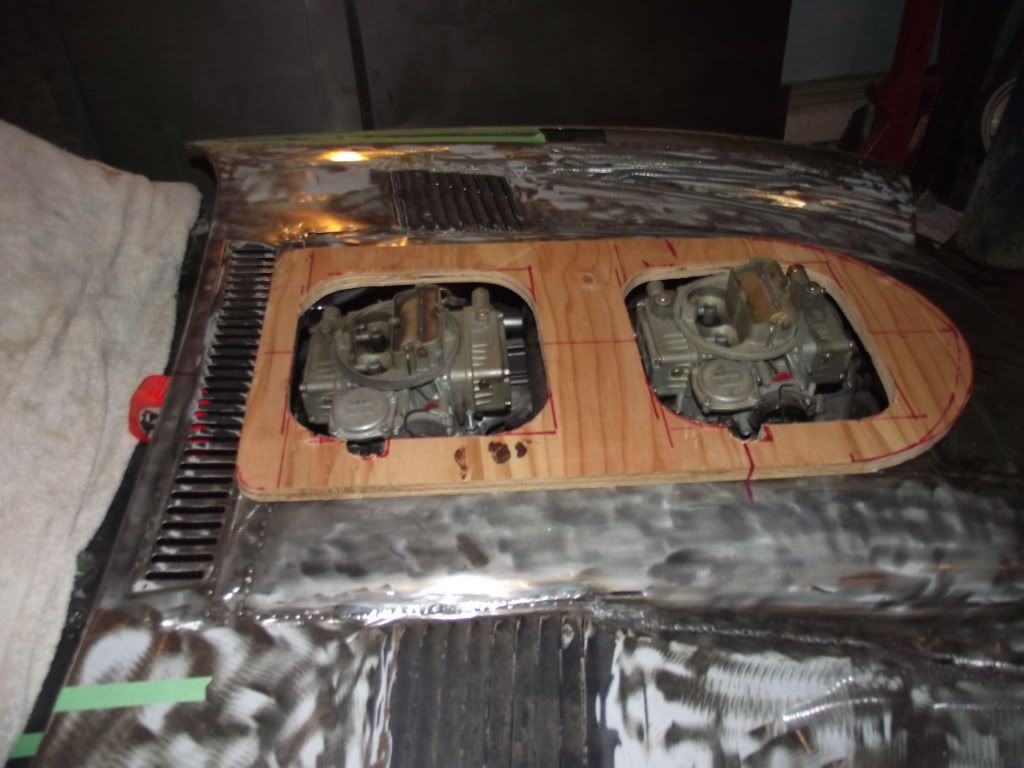
another thing to look at is that big ugly hole around the carbs.a plywood form will help figure out the fit and shape of this part. 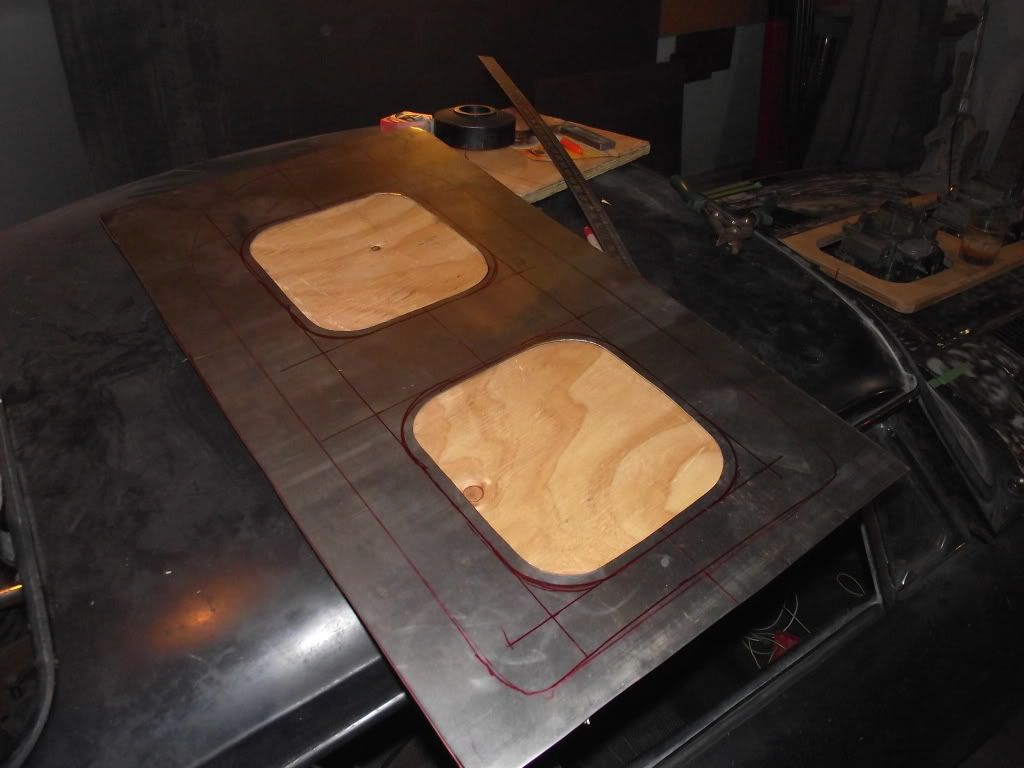
a hunk of sheetmetal is cut out. 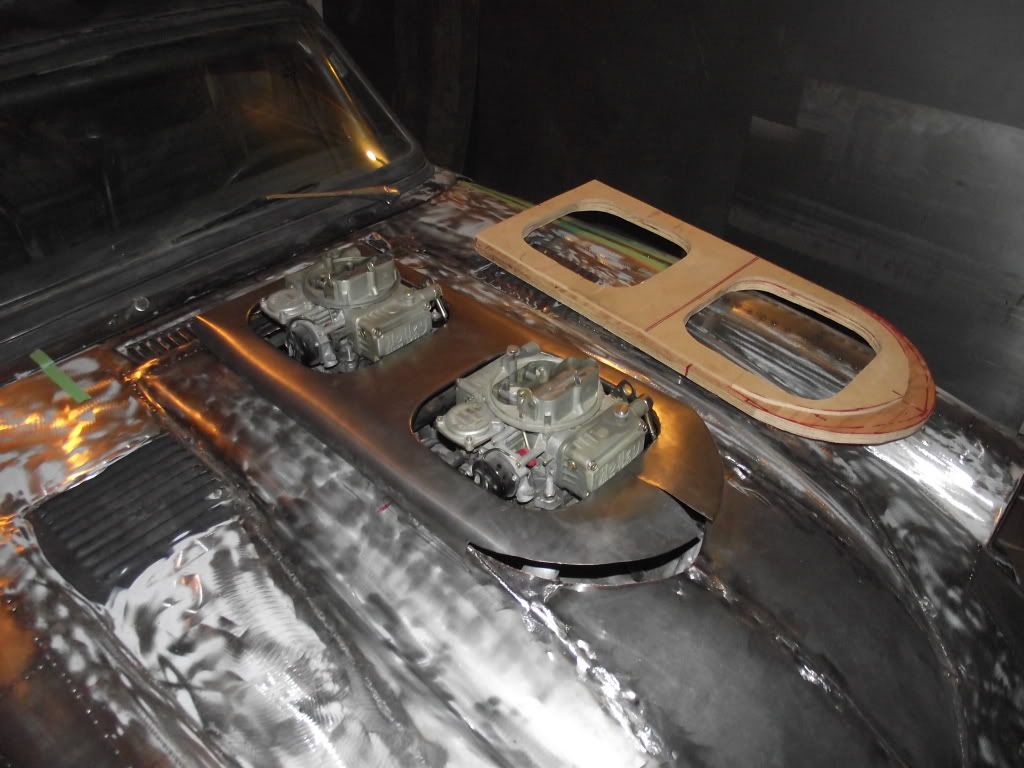
after some rough forming,it's starting to take shape. 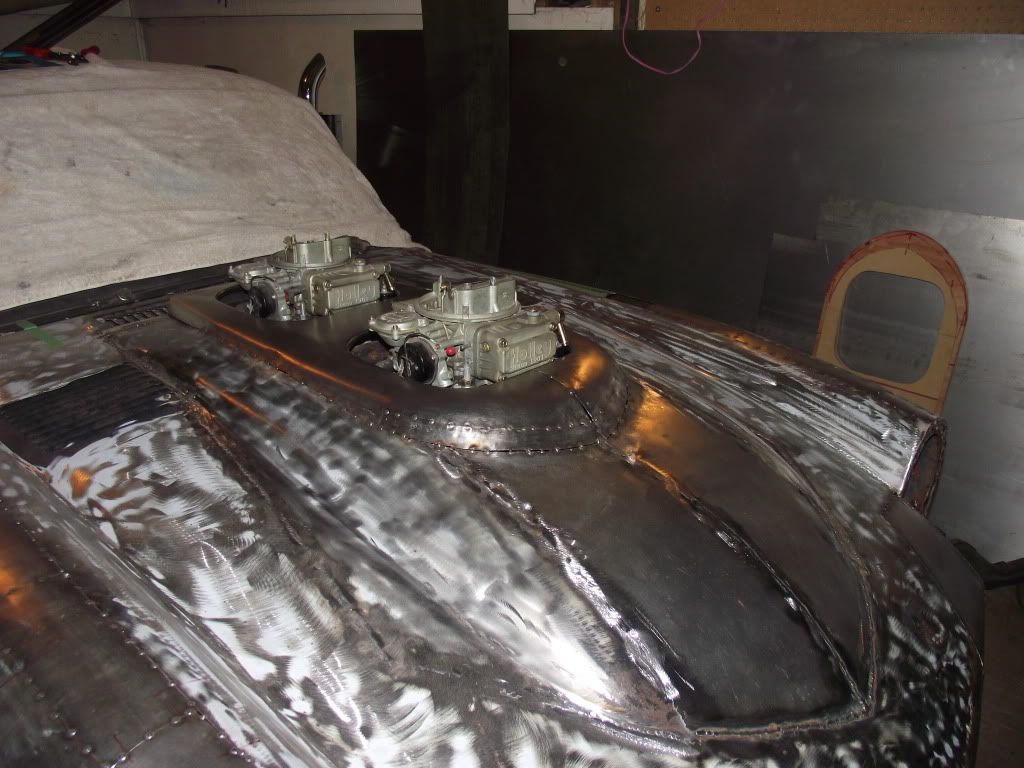
a bit of hammer work and it's acceptable. another seemingly radom bit of fab...the rear wheel tubs. 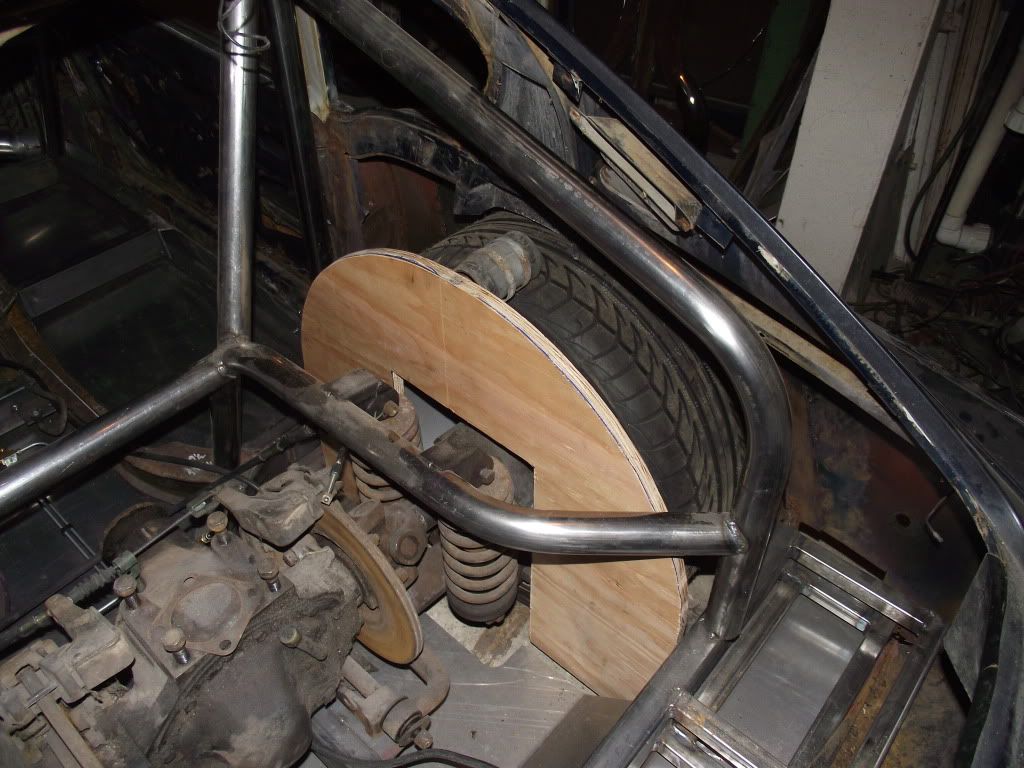
i start out by figureing how things need to fit with a plywood template.it makes measureing easier. 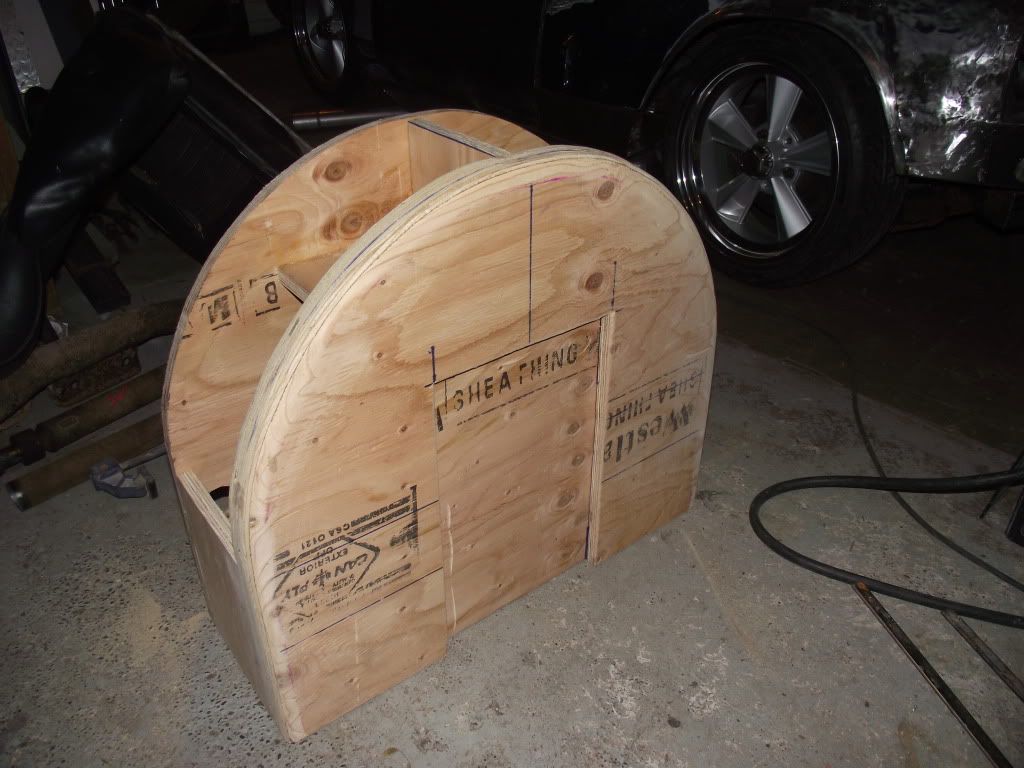
then once i've got my measurements clear,it becomes part of a forming buck. 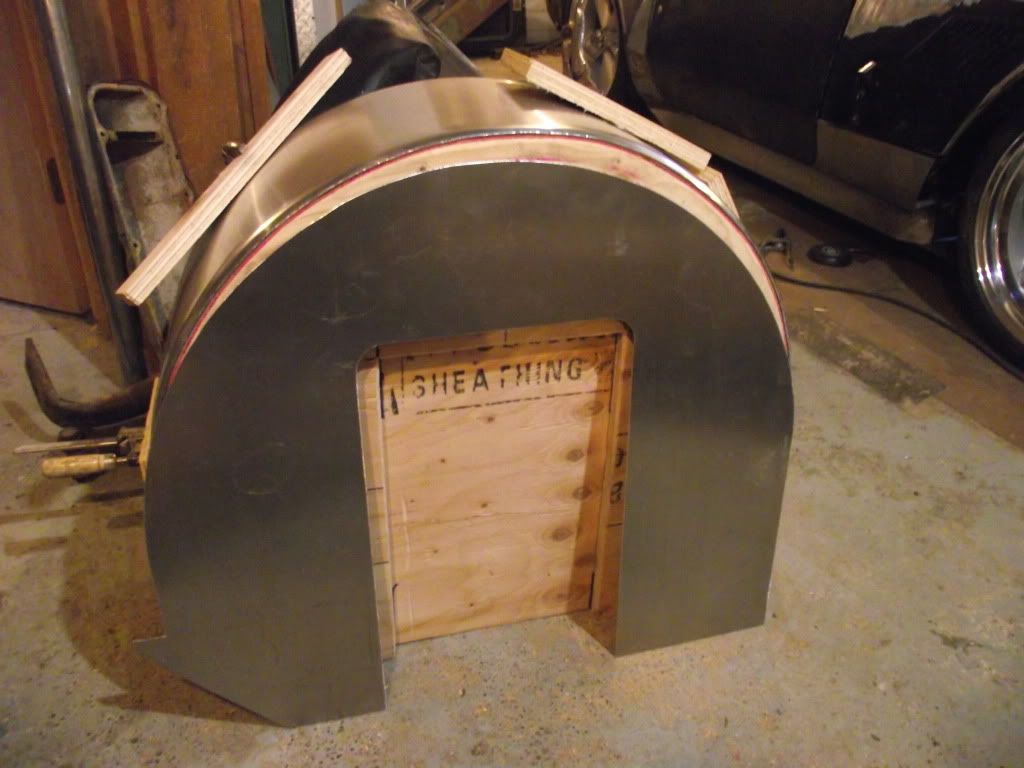
aluminum sheet is cut to fit the form,and the edges rounded in on the mating corner. 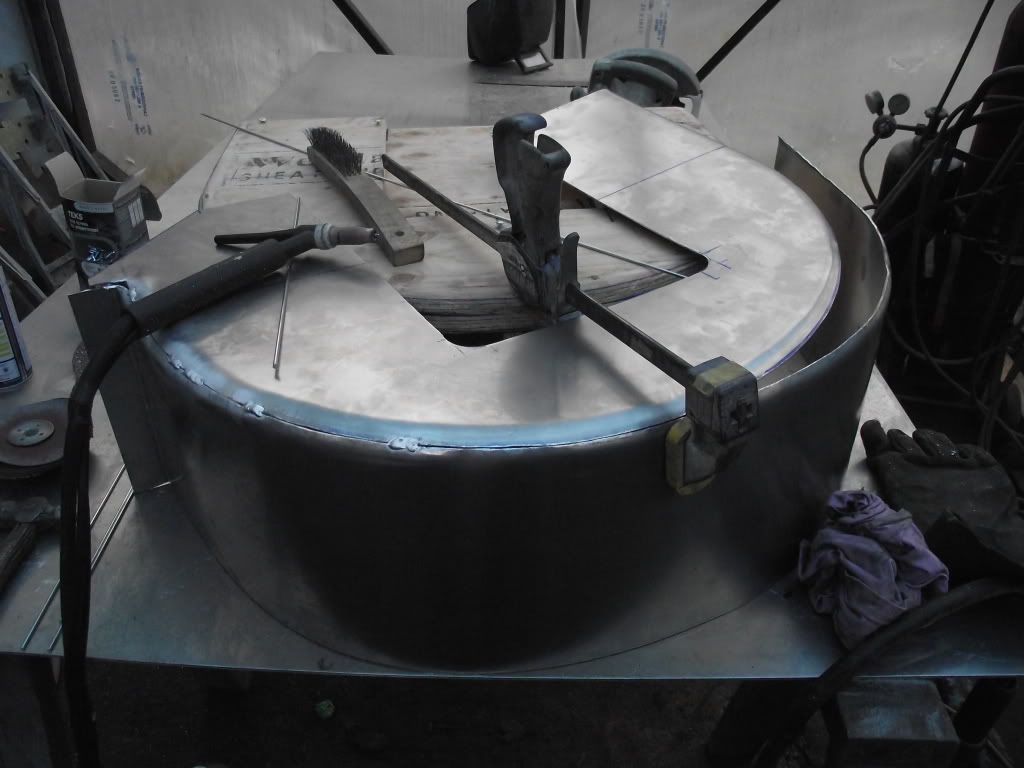
a few minutes are spent welding the two parts together, 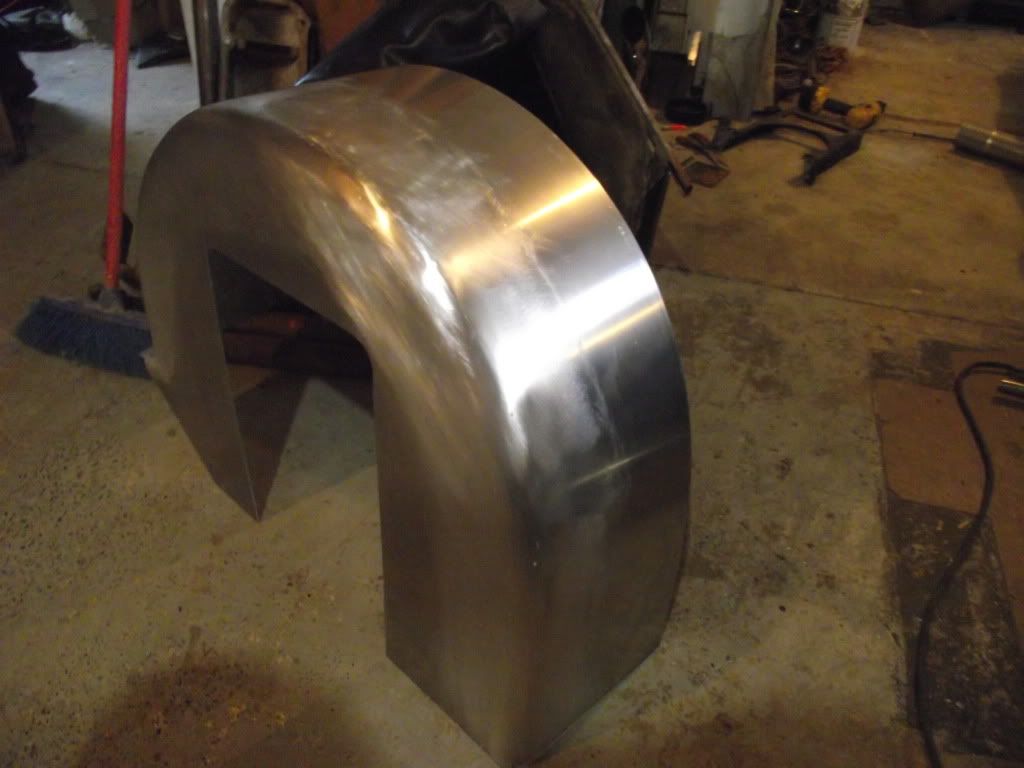
and after a bit of cleanup i have a basic tub. 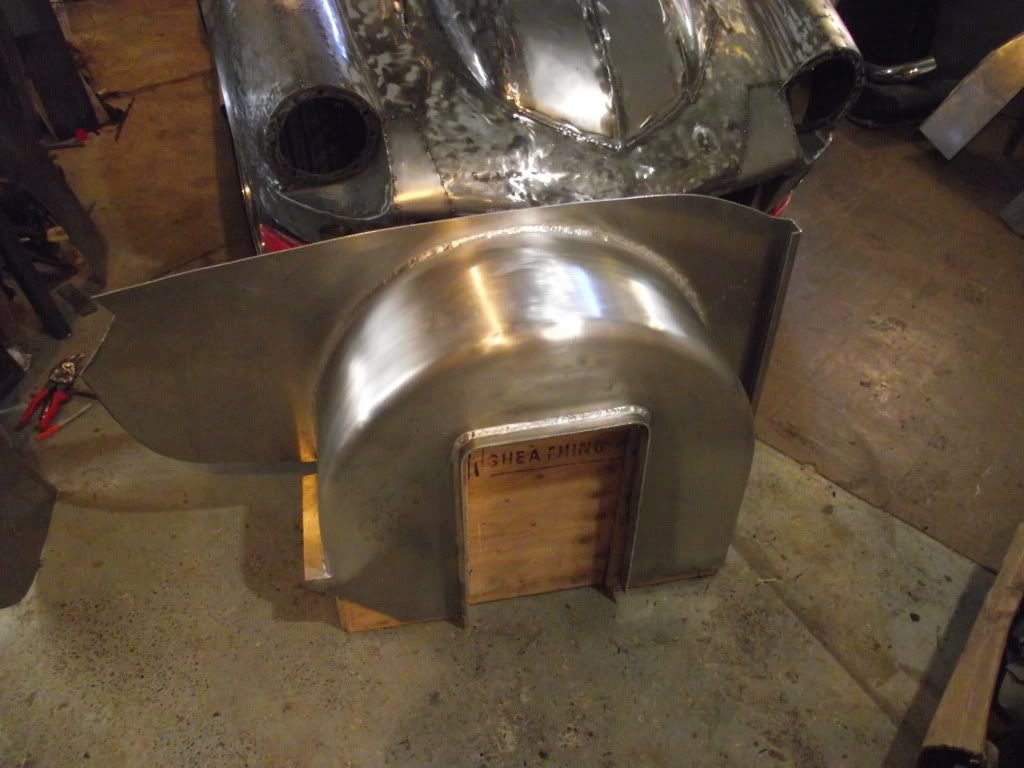
a flange over the axle openning and a backing plate finish it off. 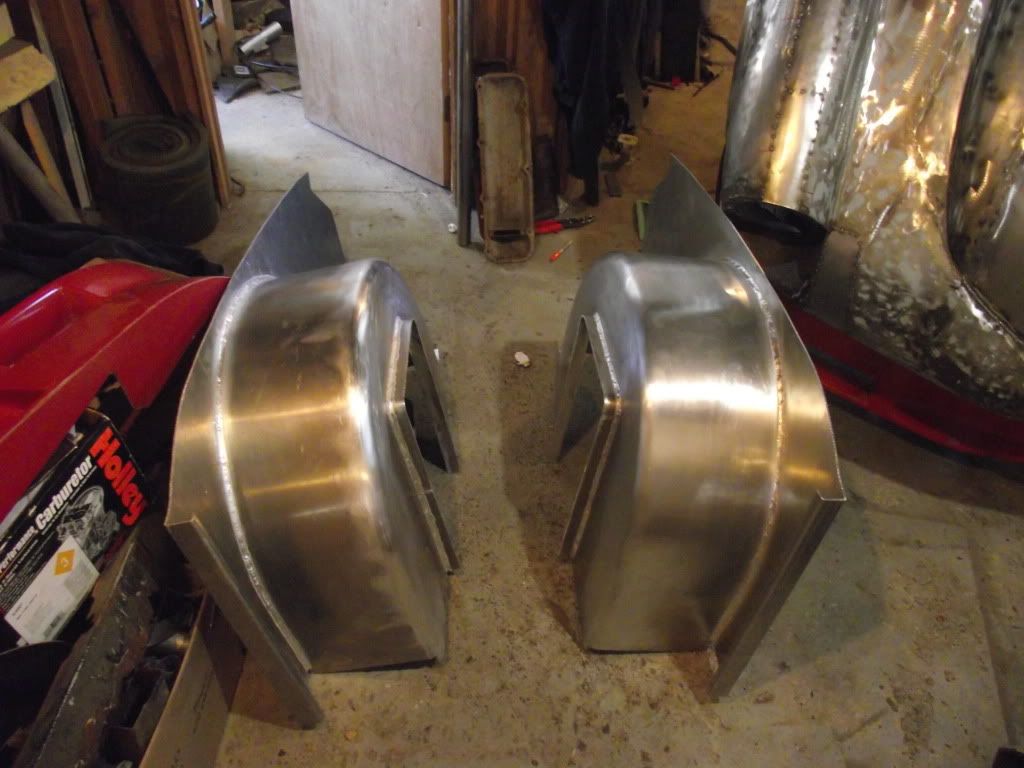
of course,one is never enough! 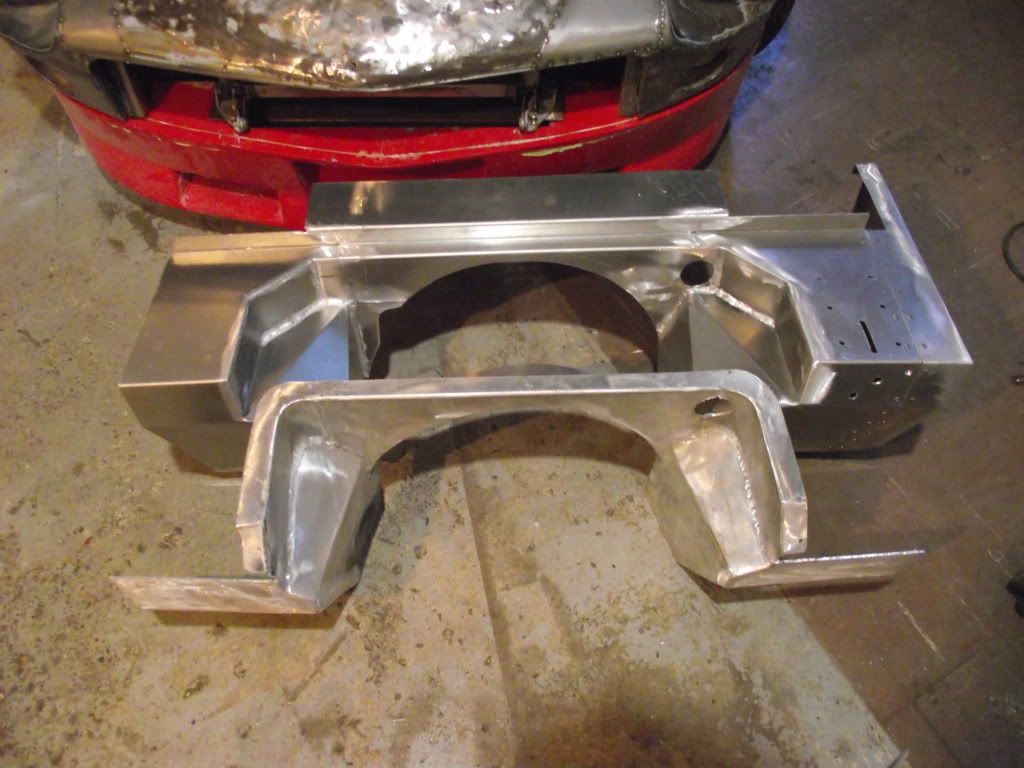
once the headers were in,i saw that the firewall i'd started building wouldn't allow good enough access to the header bolts,so a new one was made.this one looks much better anyway. 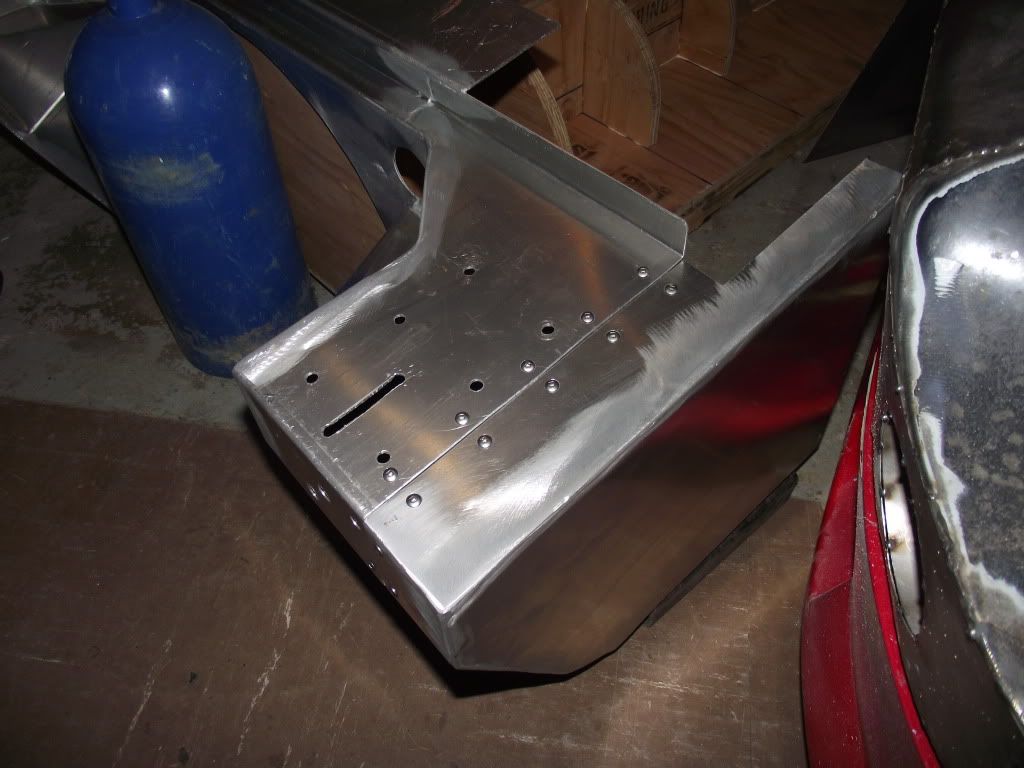
here's where the brake master mounts.the original gt6 brake pedal will be used,but the master is from a 2000 cougar. 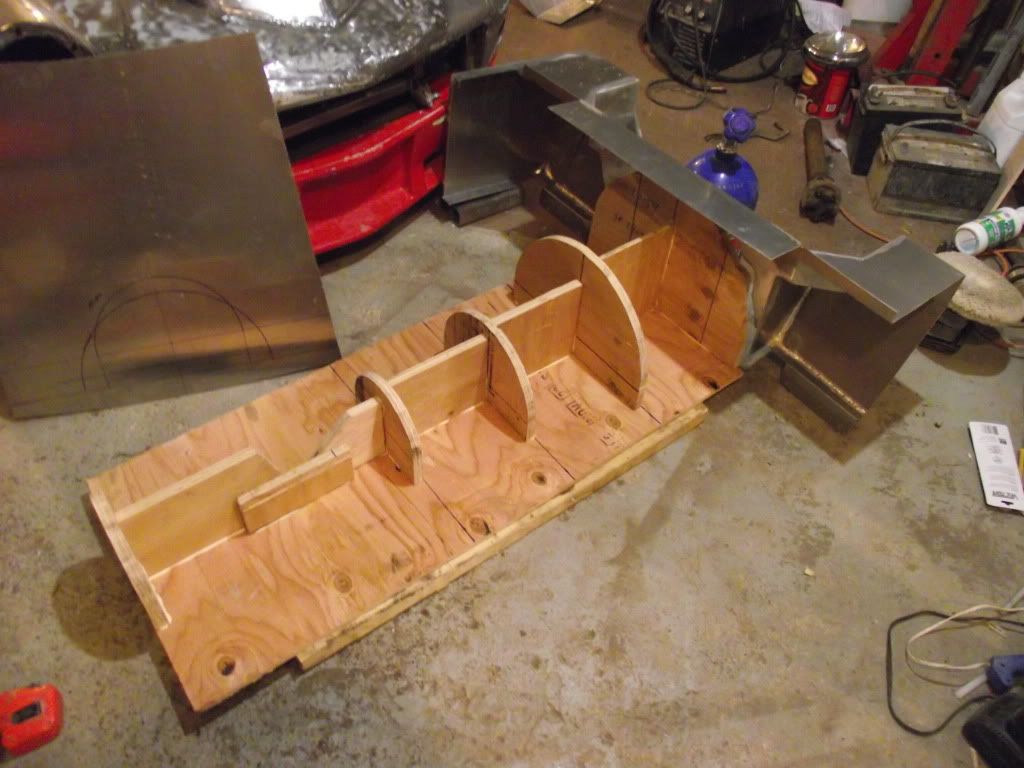
this is a good time to get on with the trans tunnel too.another plywood buck is made up. 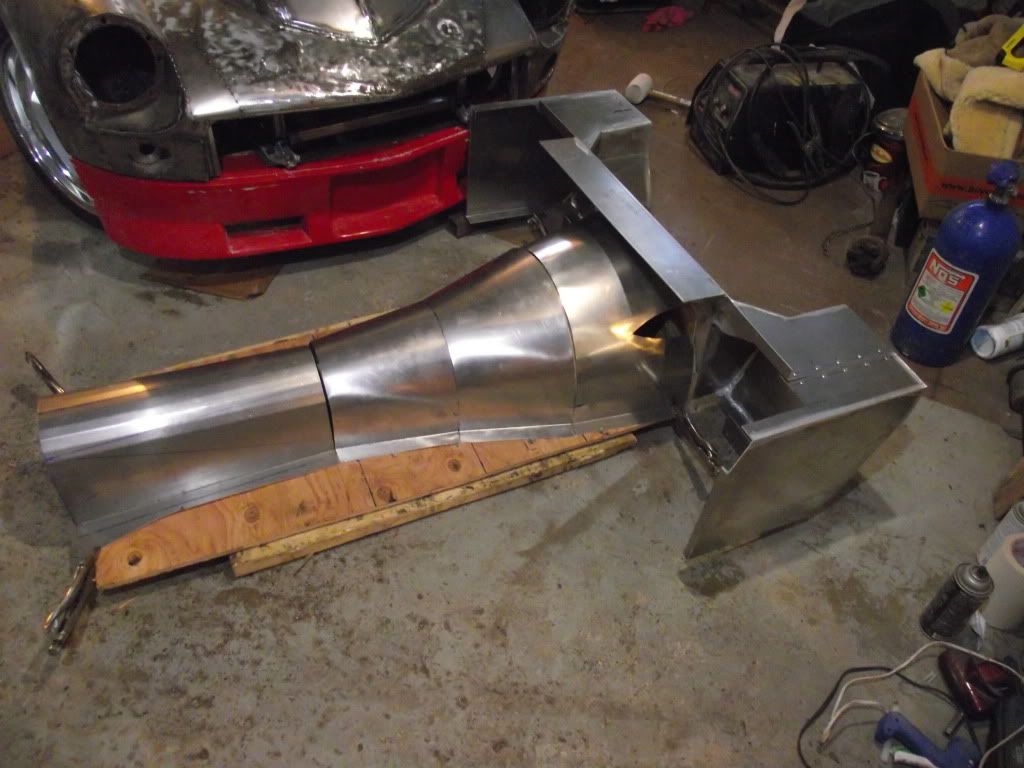
aluminum is cut and formed to fit the buck. 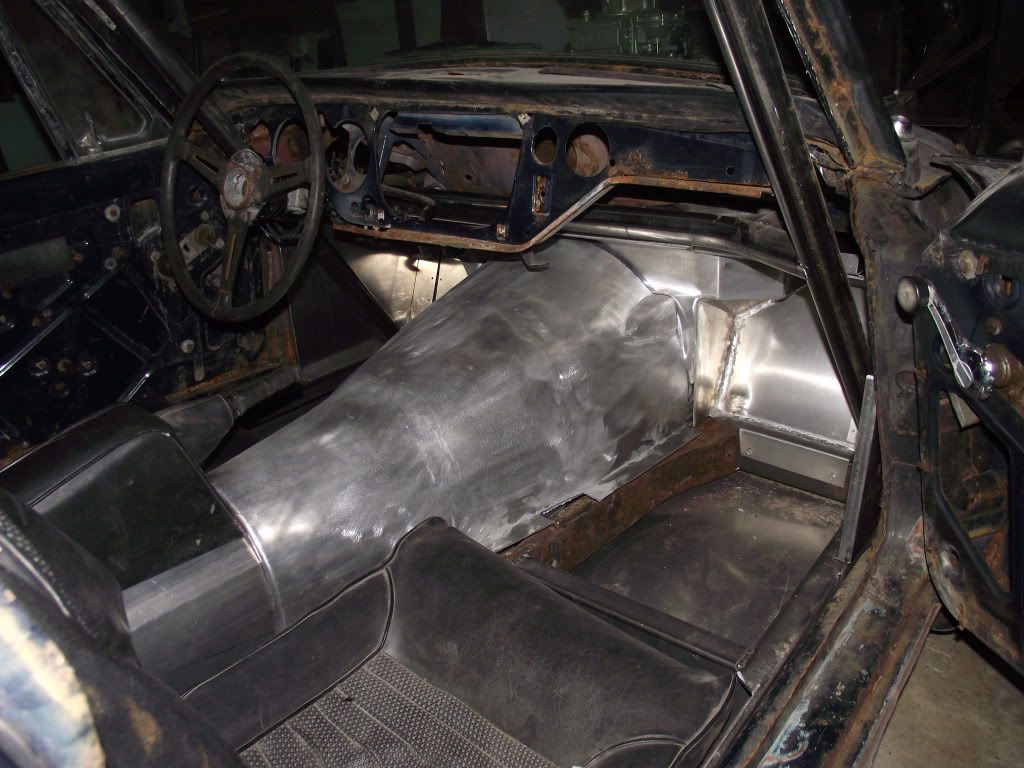
after welding and cleaning,it's a good fit. might as well move on to something else.you may have noticed the air dam in previous photos.i decided to make this from fiberglass,as it will be the first thing to hit and get damaged,so being easy to replace is an important quality. 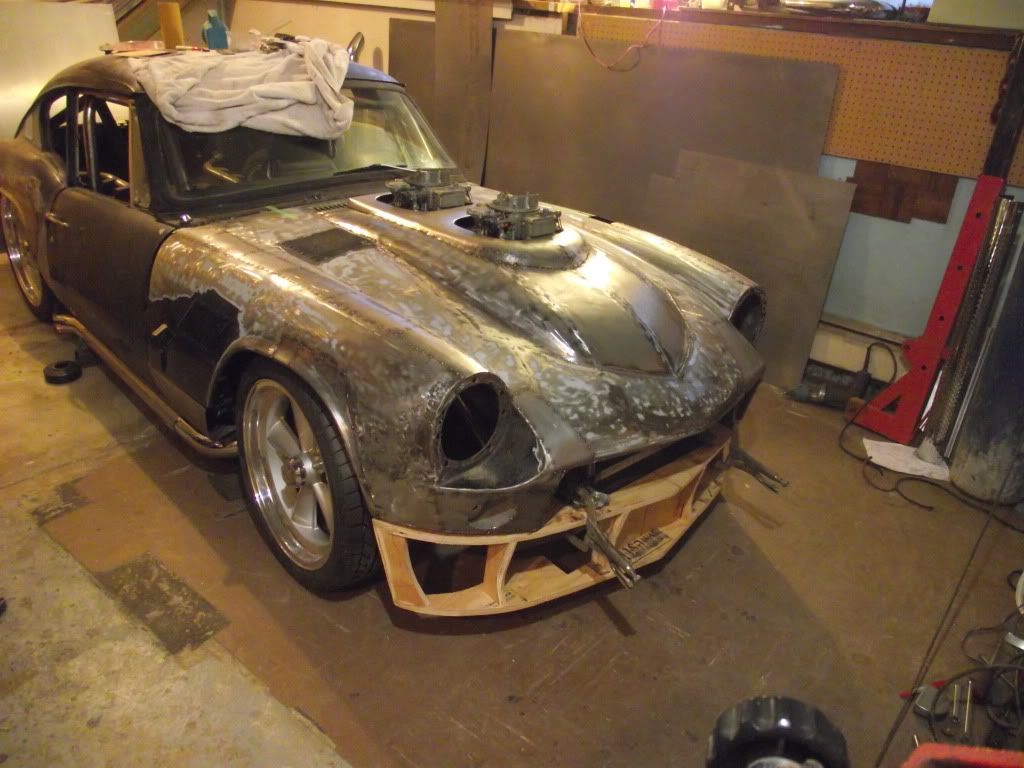
i started by framing out the shape with plywood. 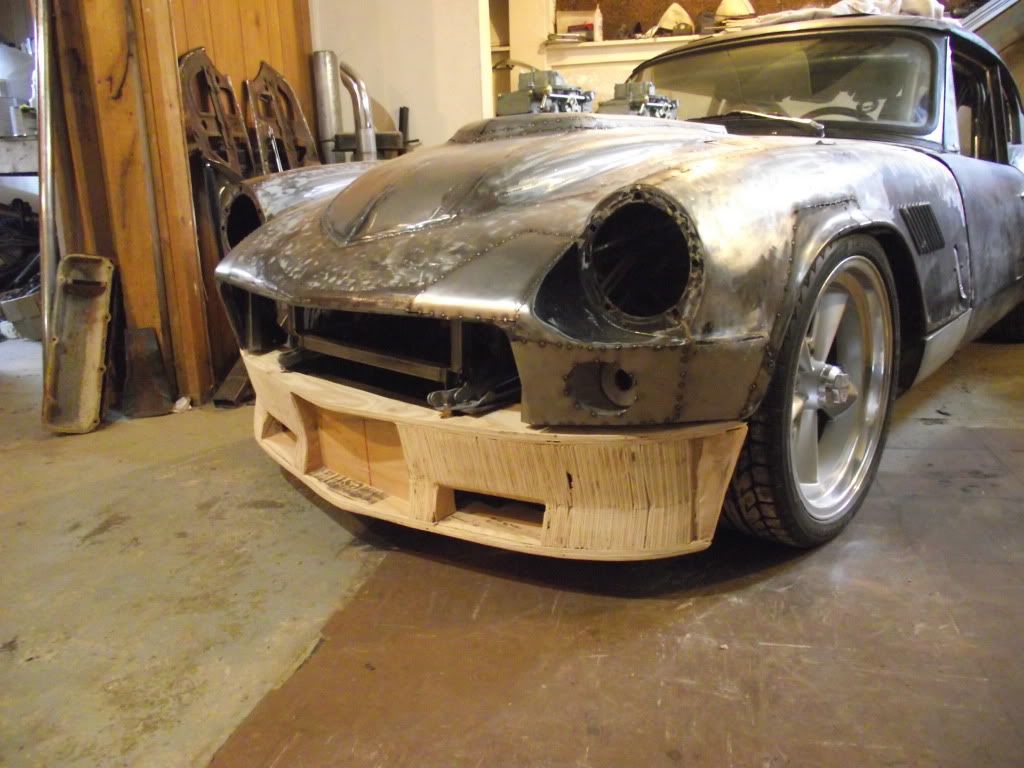
after filling all the spaces with more plywood and grinding to rough shape,i was ready for the next step. 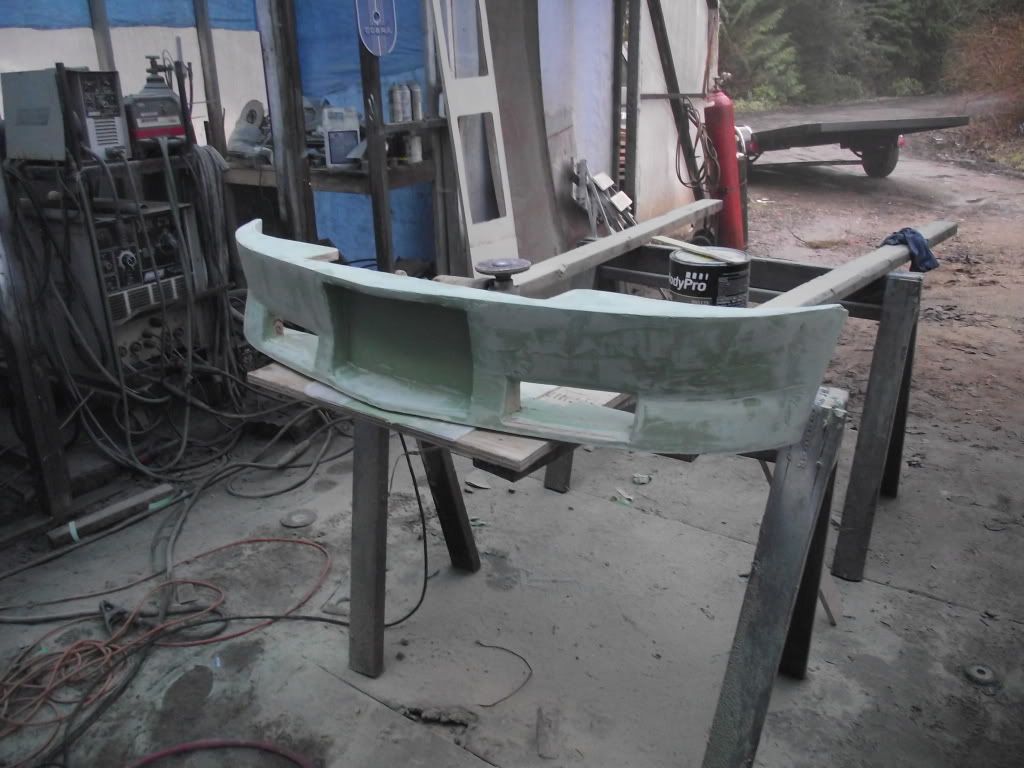
body filler was used to finish out the shape. 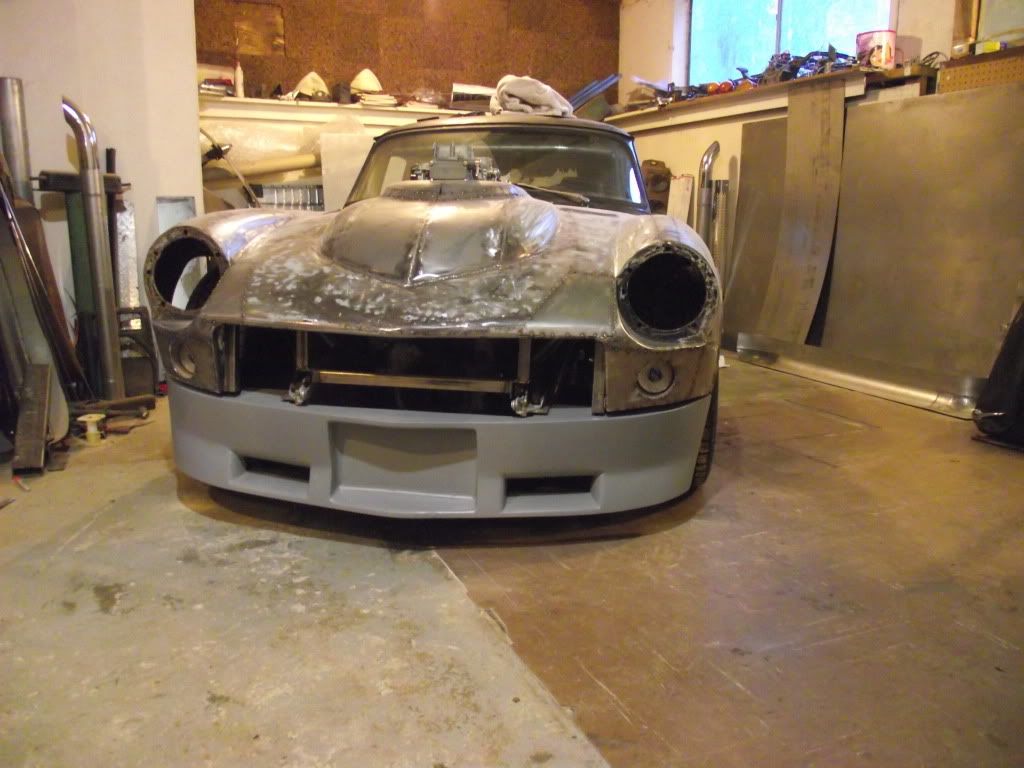
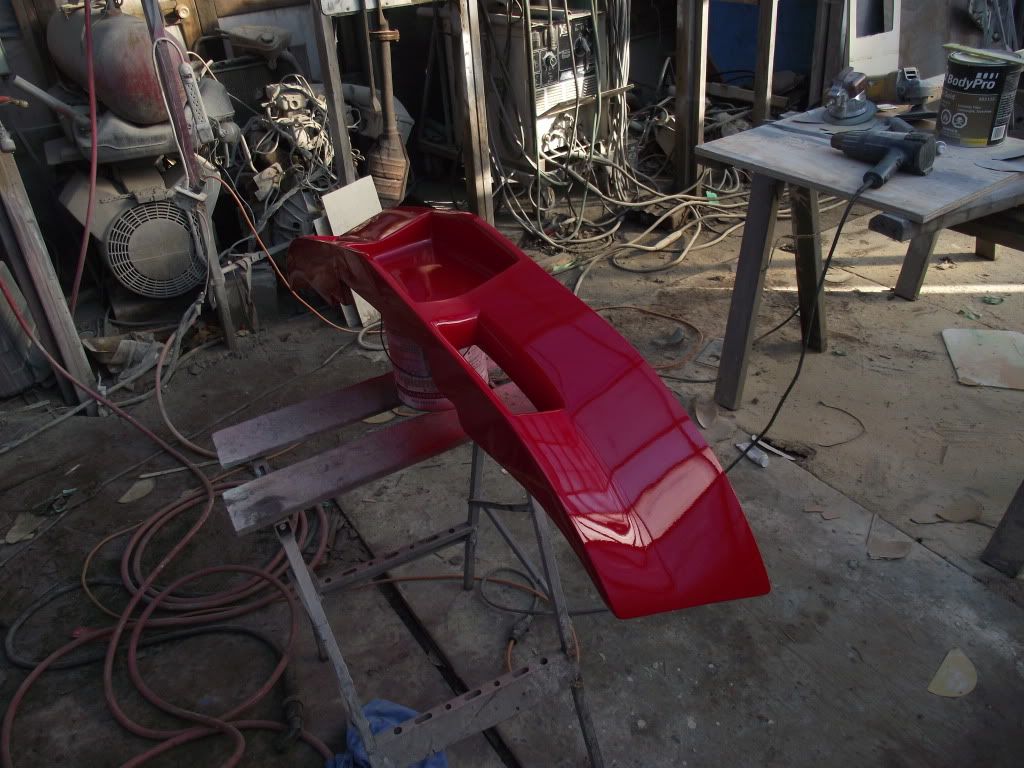
then primer and paint were applied.don't worry,i'm not useing a plywood and bondo air dam on the car. this is just used to make a mold. 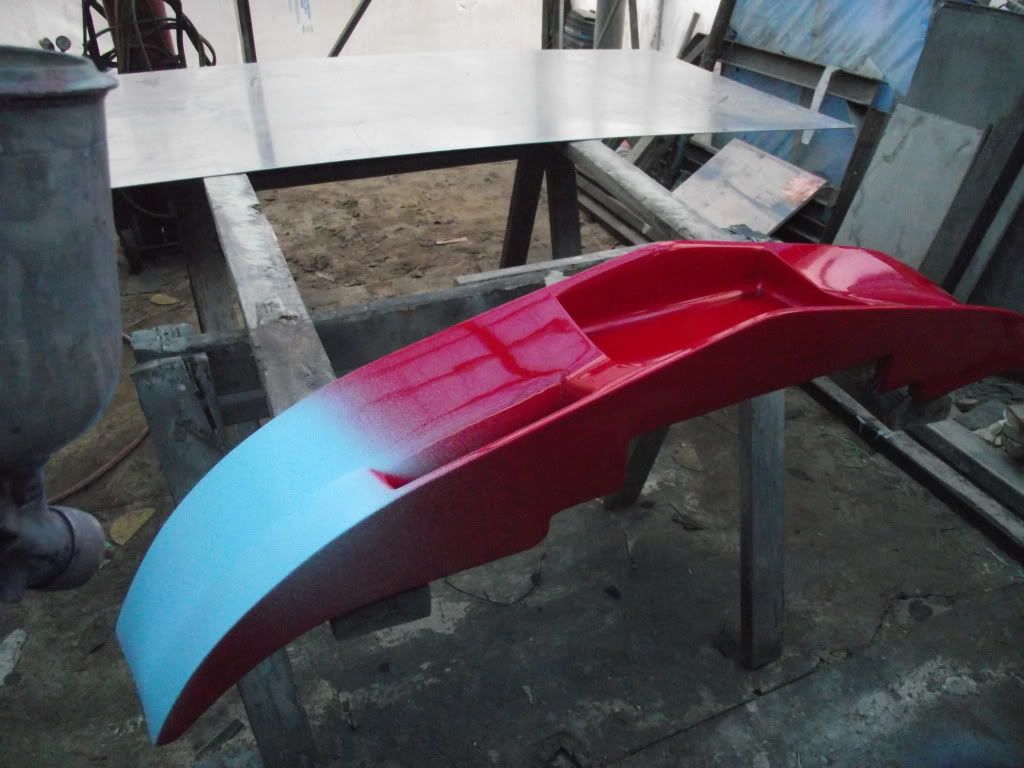
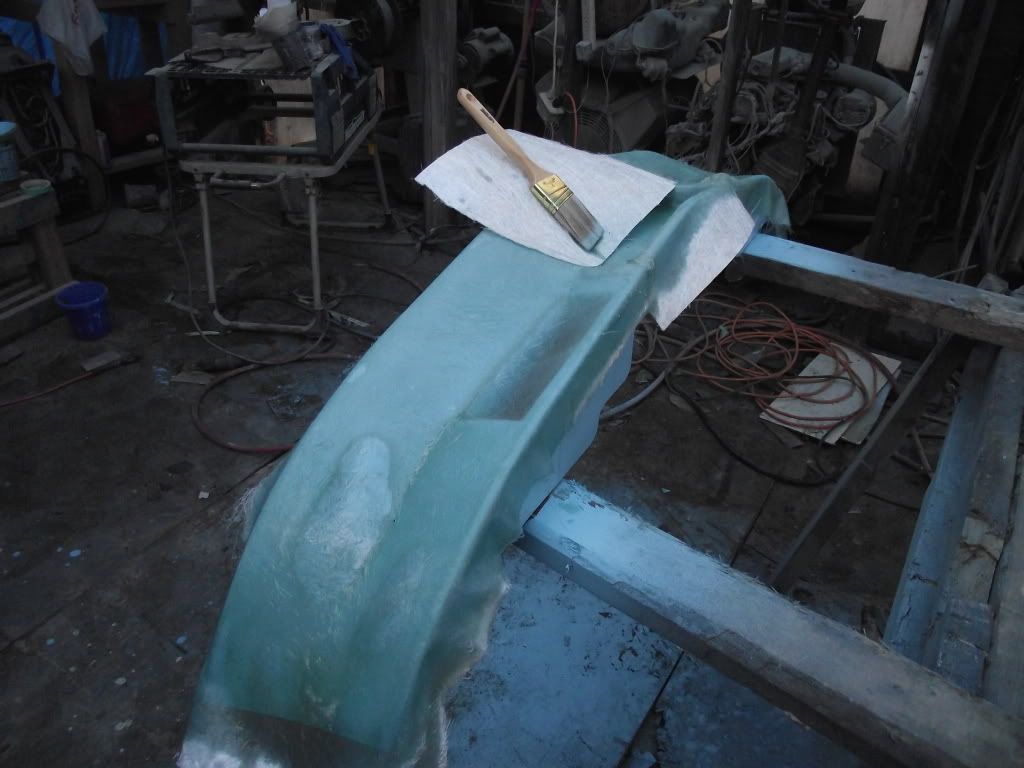
gellcoat and fiberglass are applied..after a release compound,of course. 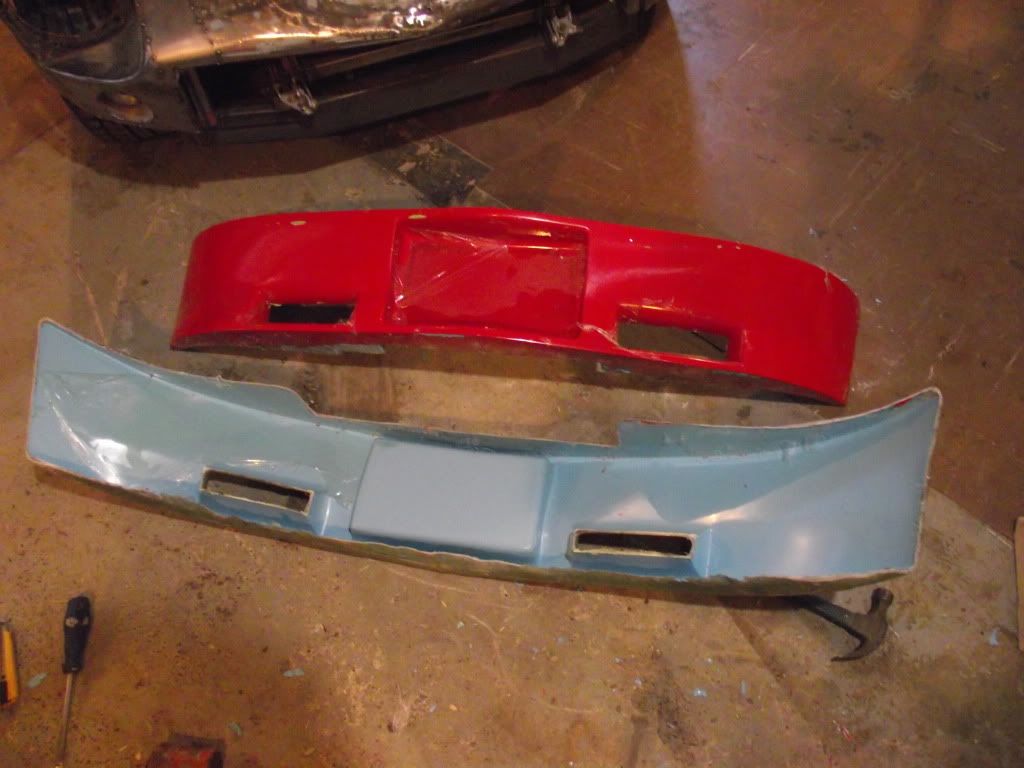
and i have a mold. 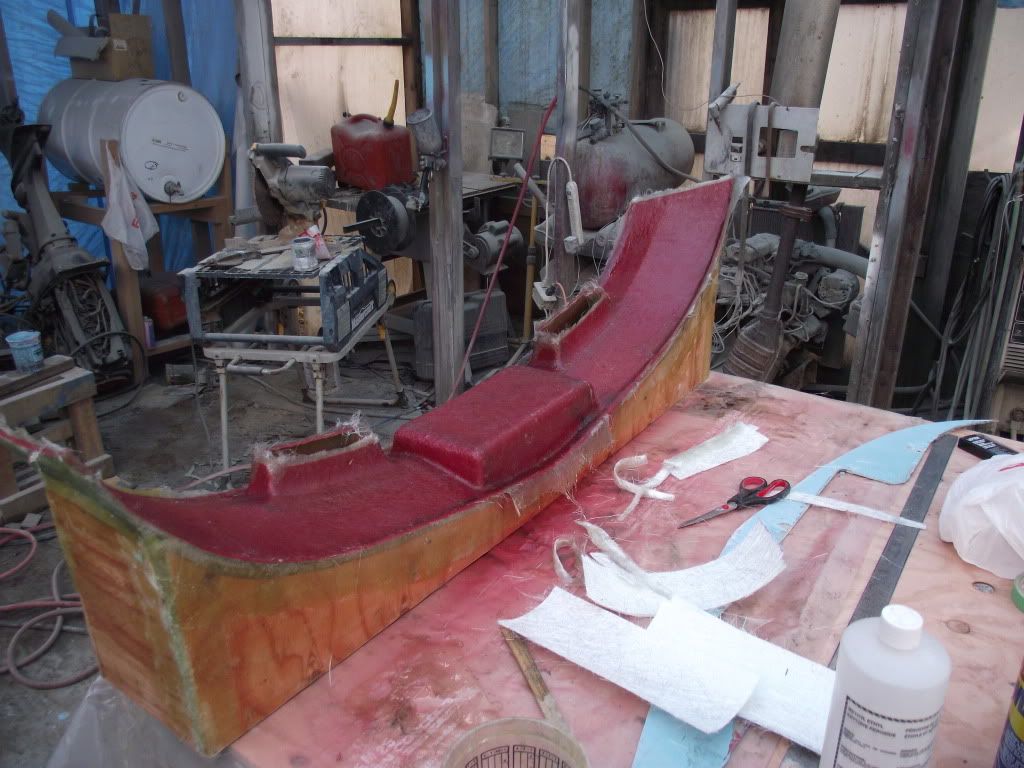
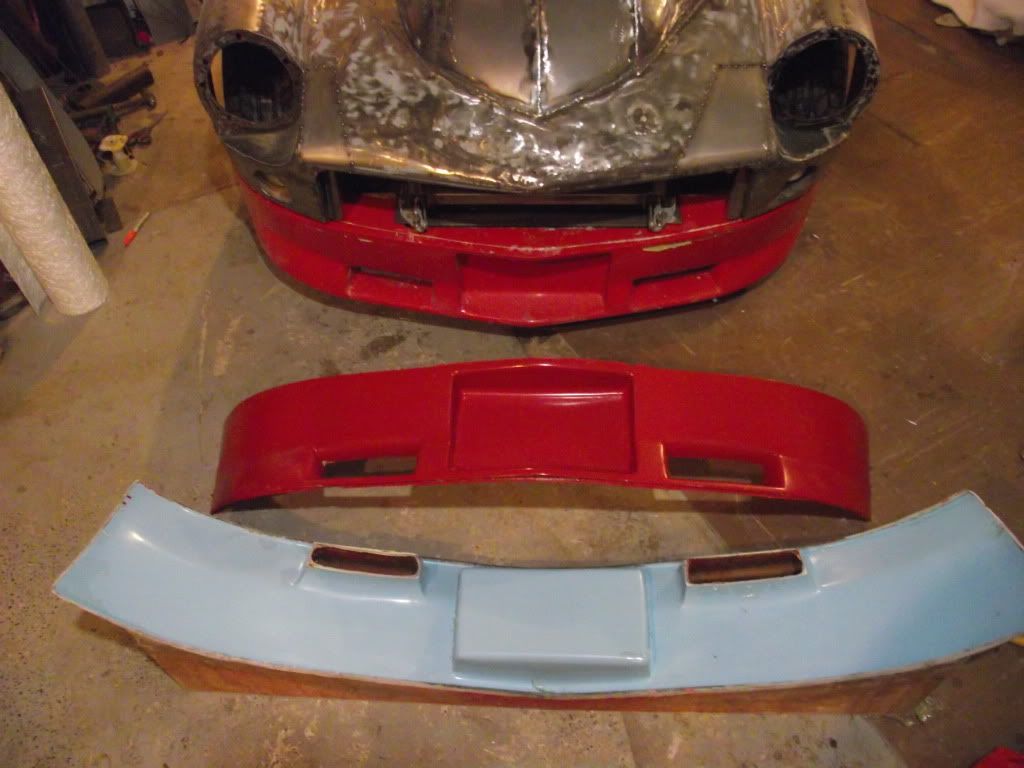
some release compound,gelcoat,and fiberglass in the mold...and i have a finished part. 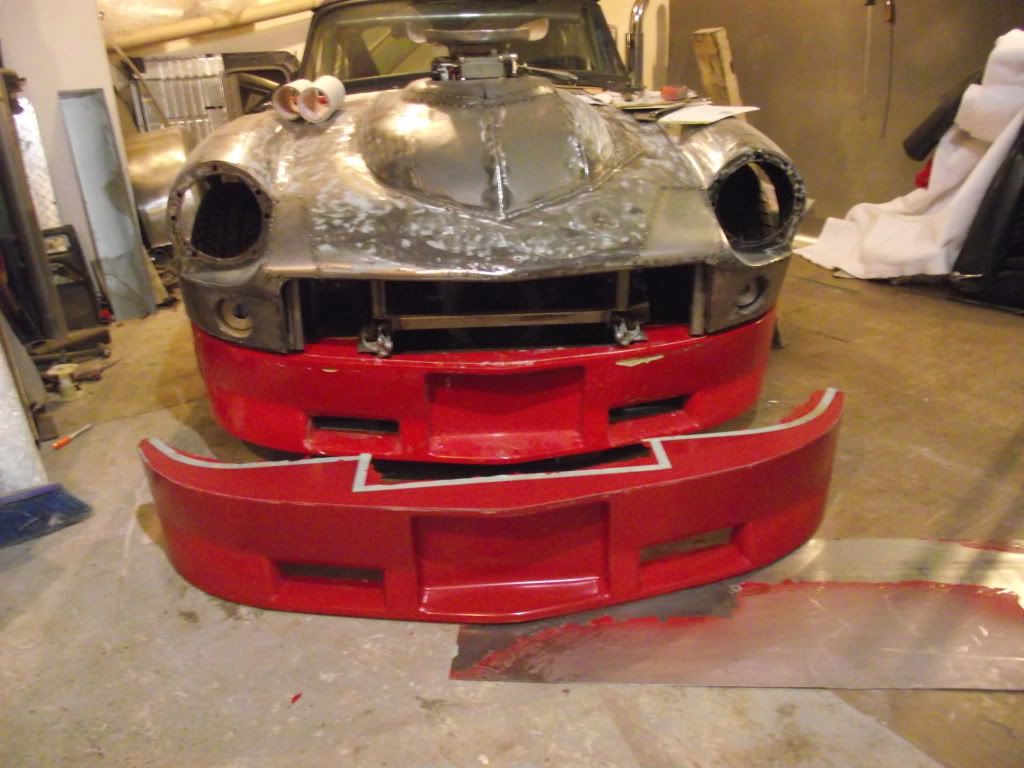
if i bust this one up,i still have the mold to pop out another.gotta love fiberglass. i couldn't find an automatic shifter small enough to work in this car,so i ended up having to make that too. 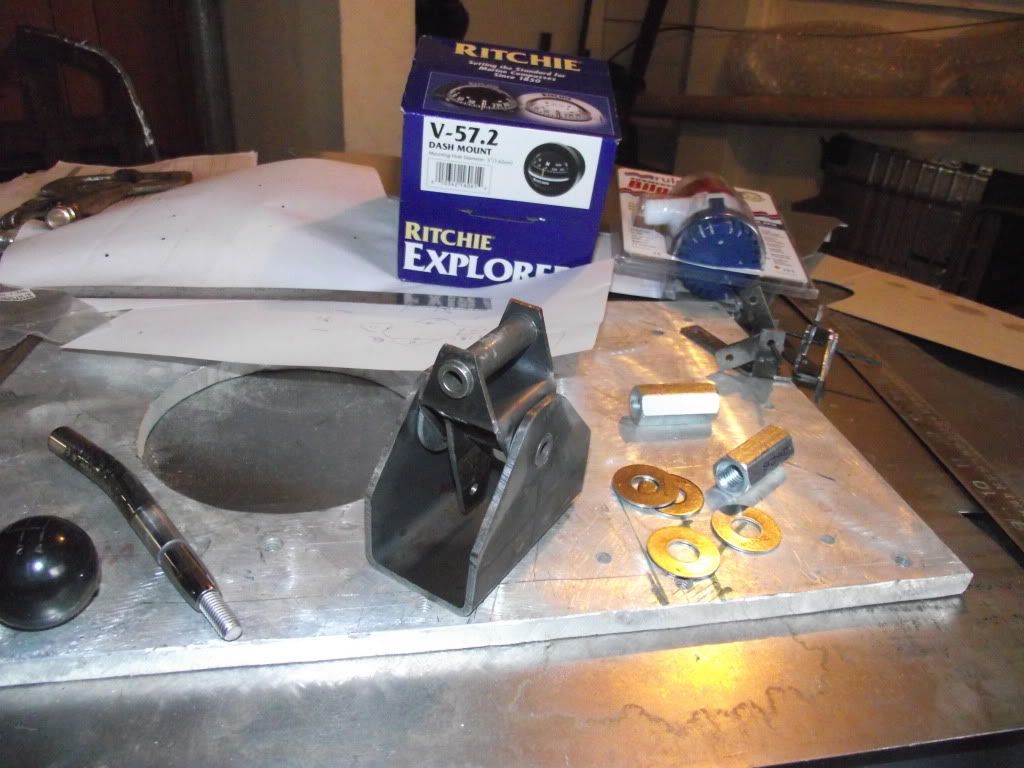
this is the start of the mechanism.to the left is the stainless shift arm,the stock gt6 knob will be used. 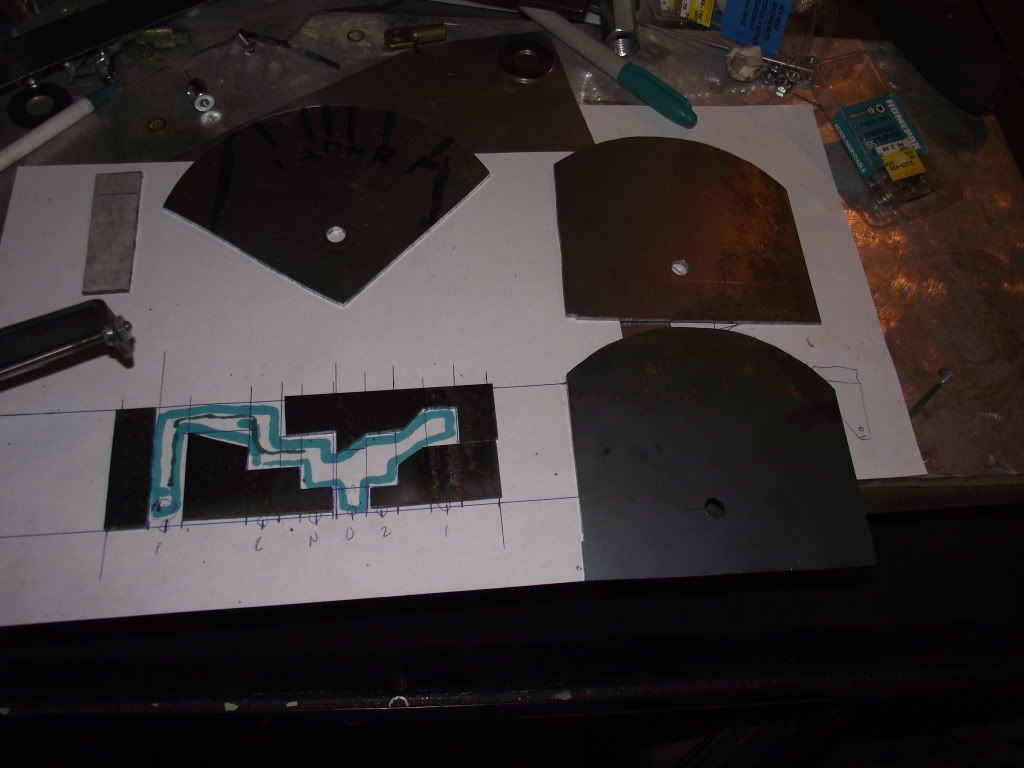
here i'm getting the gates and shell cut and ready. 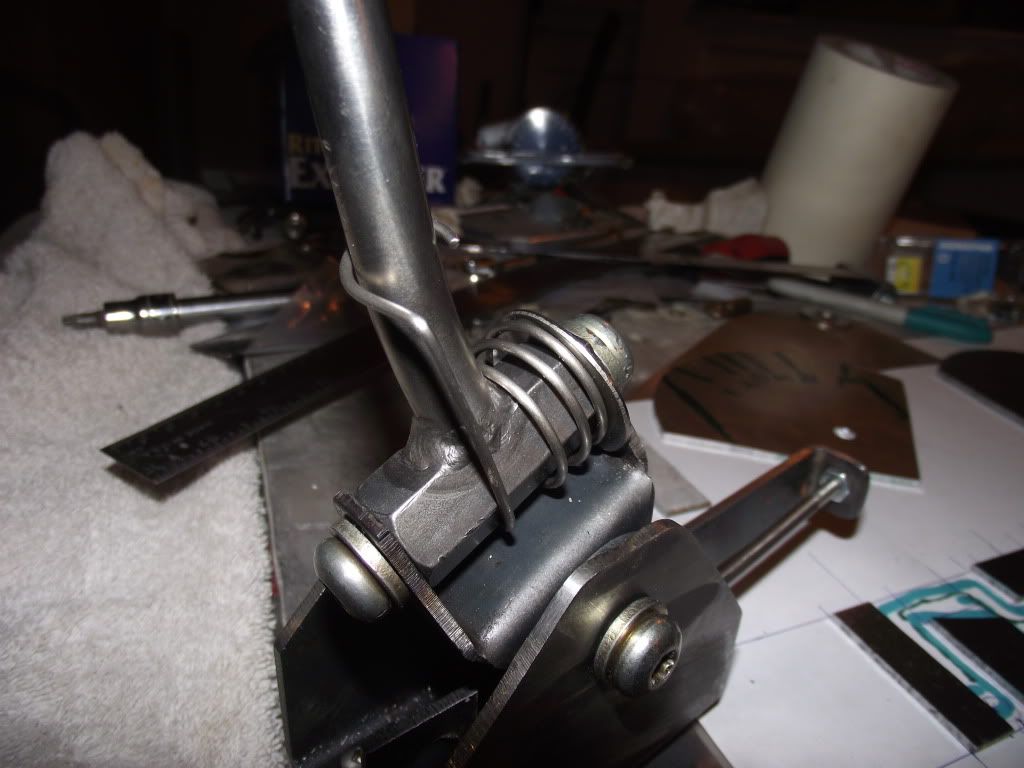
a detail of the mechanism,showing the spring that holds the shifter to the left against the gates.i made the spring fron the center cable from a marine shifter cable.the heavy stainless steel wire was perfect for this. 
the finished shifter looks like a proper piece,and is in scale with the car. 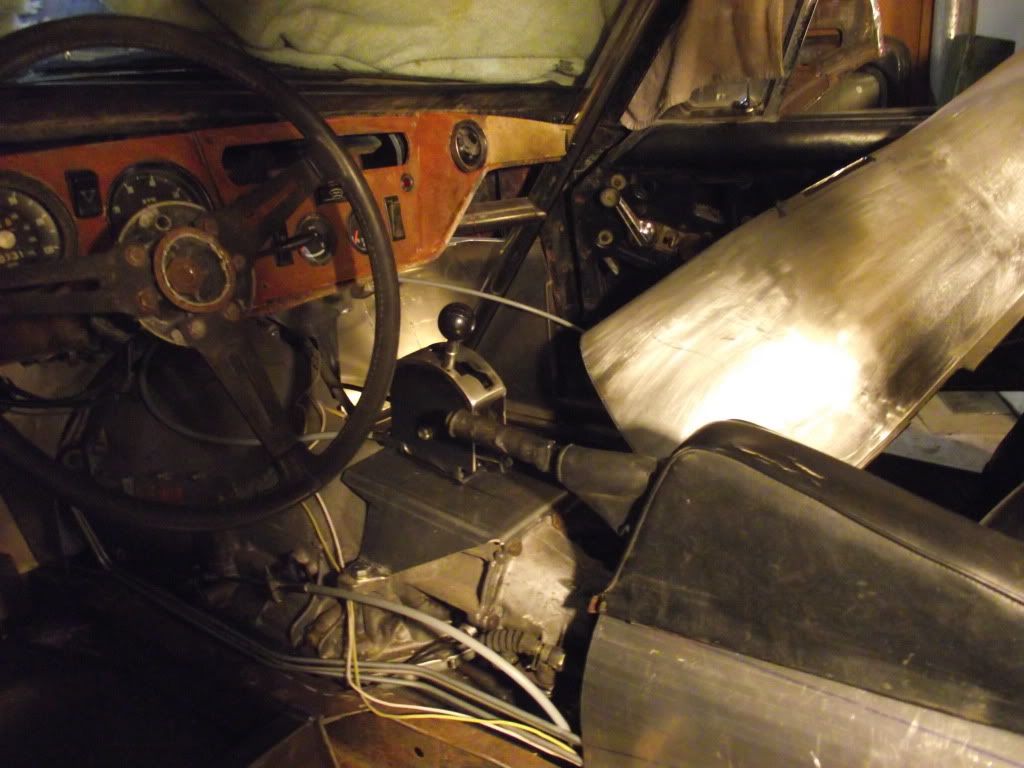
after making a mounting bracket it looks like it belongs,though the cable has too much play for my liking.i may just make a linkage setup for it instead. 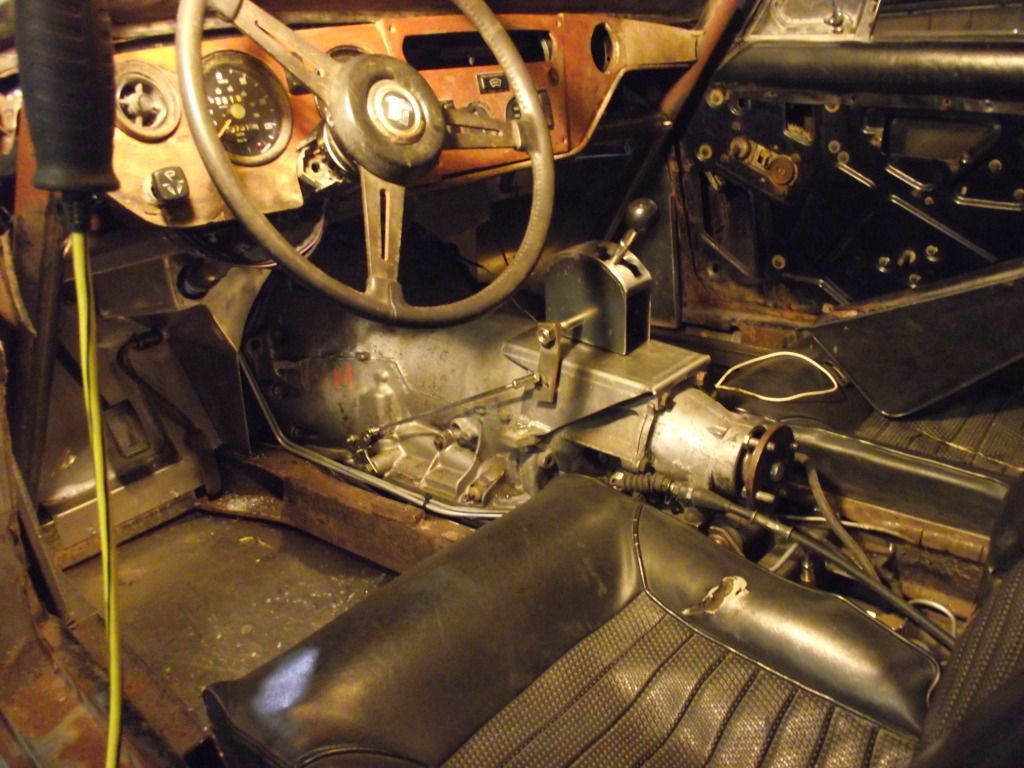
so i changed it over to a link setup.it works perfect,i'm much happier. while there's a lot of detail photos of parts of the car going together,there's not so many of it overall,so i'll post a few complete progress shots. 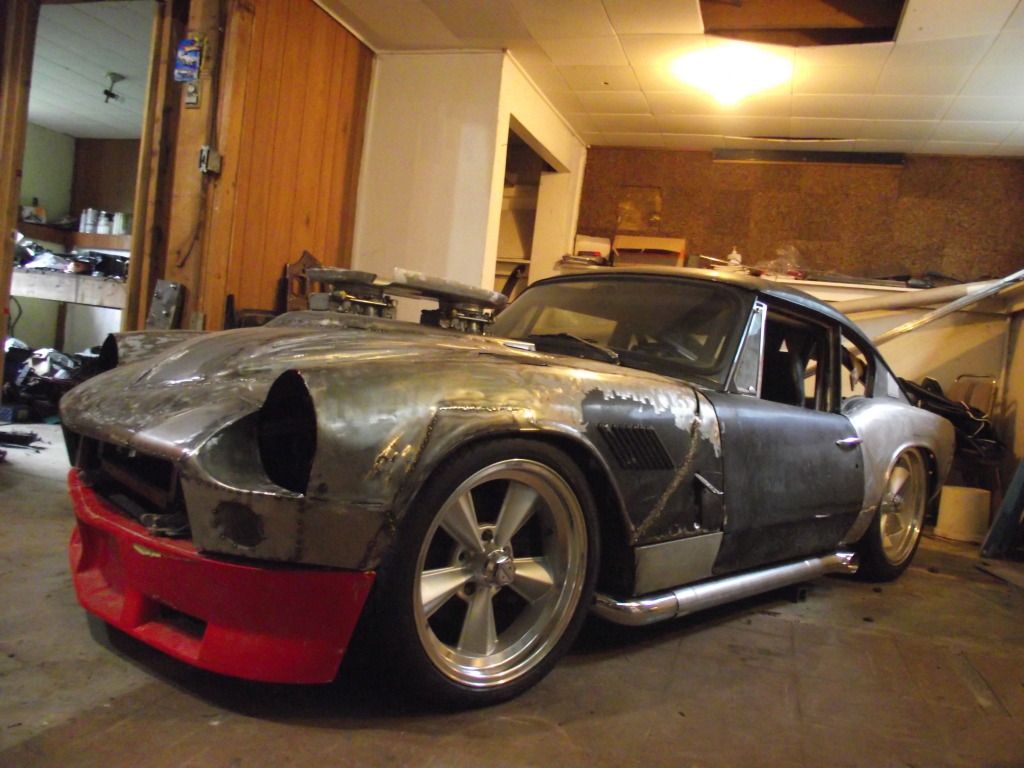
for the charging i've decided to go with the original gt6 alternator.while there are other units that will produce more power,i really don't have much of an electrical load on this car so it should be sufficient. 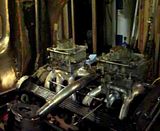
i've finally got the throttle linkage complete,and felt that a simple picture wouldn't do it justice...so i took a quick video of it in action,just click on the pic. i love the look of multiple links working together. 
where the tubes for the heater core exit the firewall,they are just a little too widely spaced to fit between the V 12s heads,but i had a simple solution for this. 
i simply swapped the core tanks left for right,and this brought them in enough to give good access for hooking up the hoses. 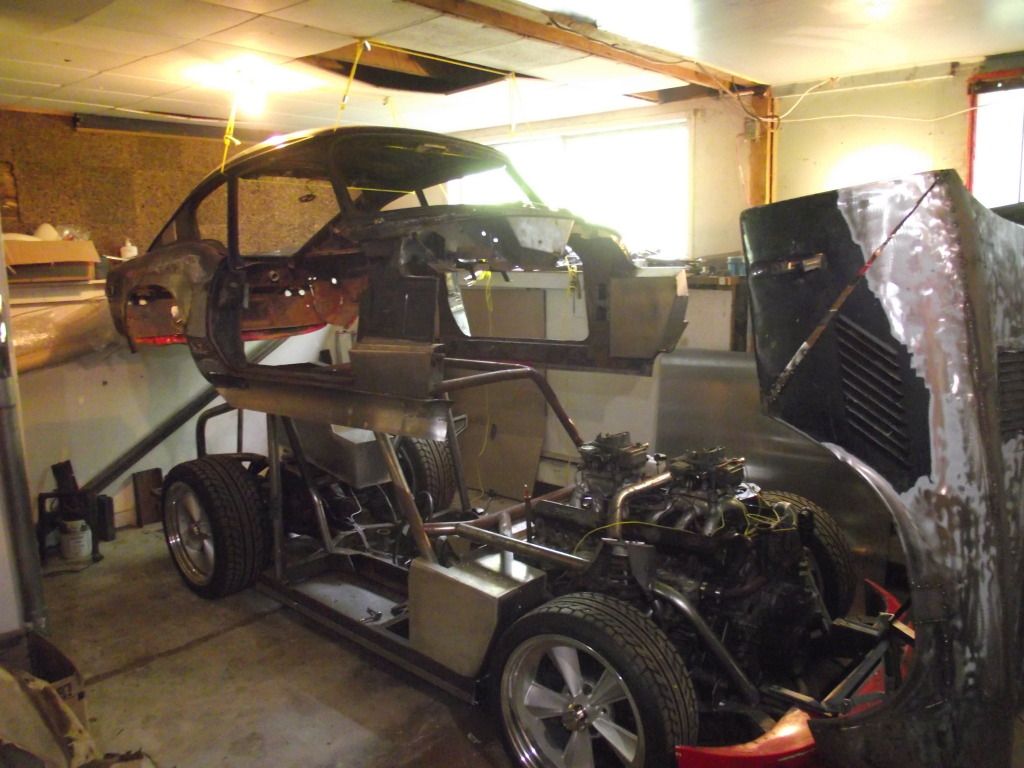
i'm at the point where i need better access to a bunch of stuff under the body,so i hooked some pulleys to the joists and lifted the shell off. 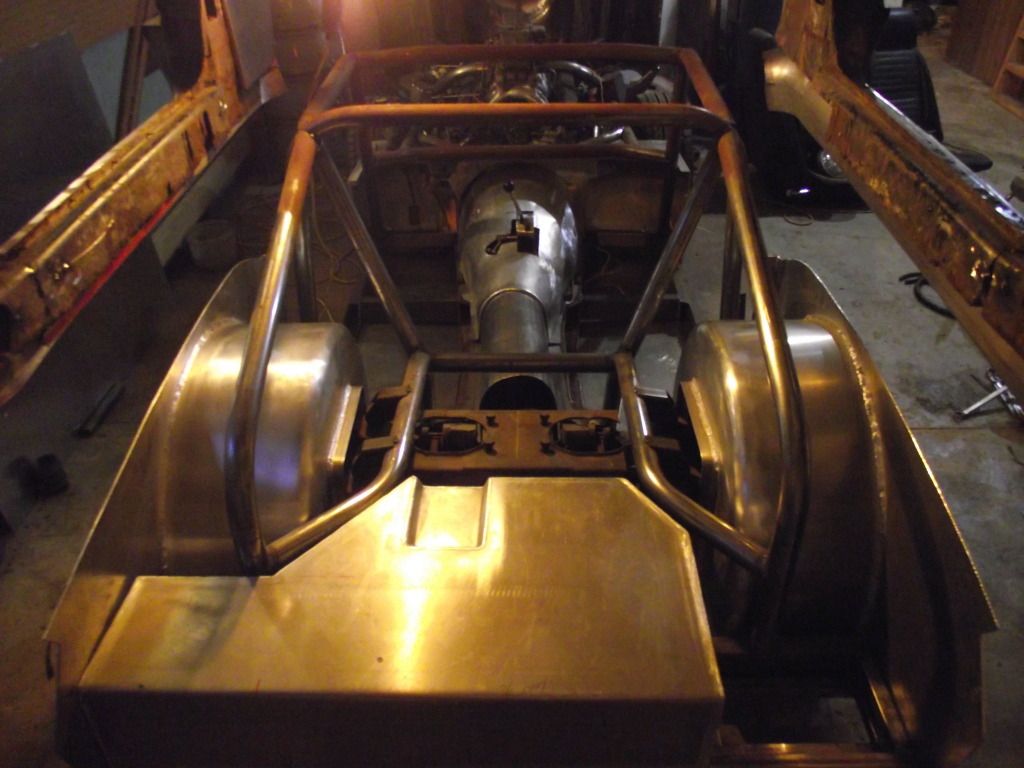
among other things,this allowed me to get the wheel tubs in place. general accessability to the interior and especially firewall area is vastly improved 
i'm at the point where getting the fuel system buttoned up is a priority.i machined up a pair of fittings to weld into the top of the tank for the sender and fuel outlet.the outlet fitting will be drilled and tapped after welding in.the original gt6 sending unit is being used,a marine fuel pickup will be installed. 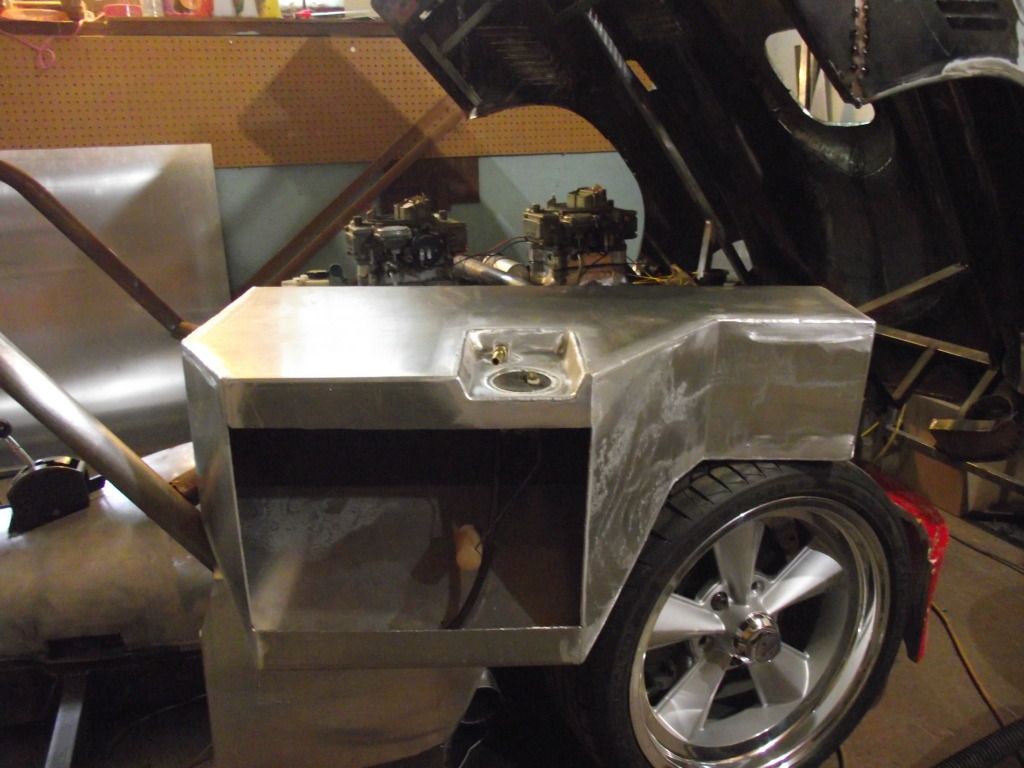
with the fittings in you can see how everything sits.the front panel was left off when the tank was welded up to facillitate the installation of thes fittings,as well as some baffleing.once sealed up,the only thing left to do on the tank will be welding in a filler neck. the tank has a 60 litre capacity.not too bad,but there will be no long highway trips for this car. another area that's been bugging me is the upper firewall. 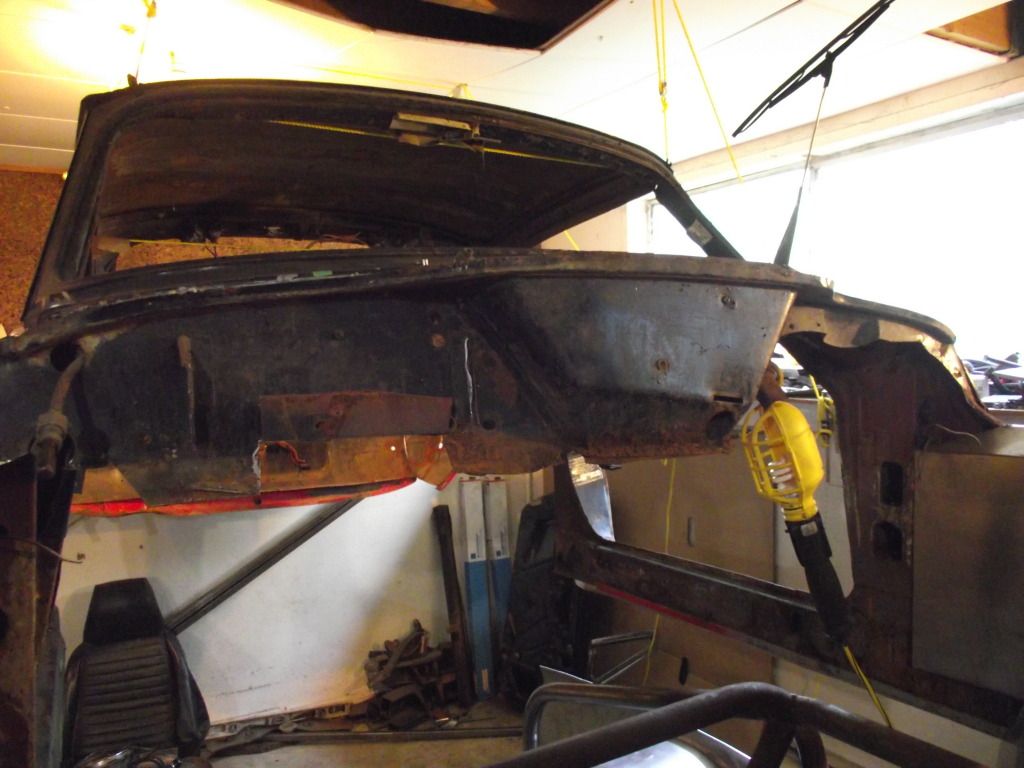
ive considered a few different ways to get around this,but i think i've got a solution.i'm taking all the sheet metal off of the cowl,and i'm building a new upper firewall and heater airbox from aluminum.this will have it's primary attatchment to the lower firewall,with just a few fasteners at the cowl. part of the original design of this car was to have it so the body will be a removeable shell,sort of like with a scale model,so i want as little of the mechanical items on the shell as possible.having the upper firewall stay behind means the heater will stay with the chassis if the body is removed. 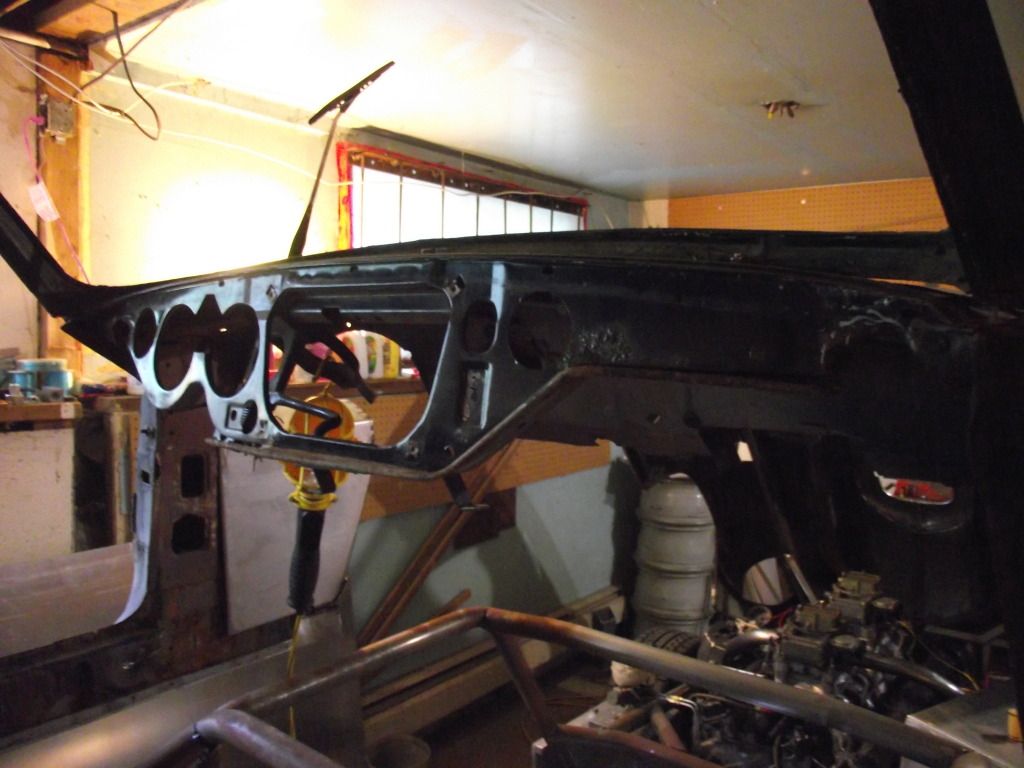
which gets me to the dash.there's a lot of stuff that's held by this which i don't want to unhook in order to pull the body.so i'll cut the dash from the body and have it mounted to the chassis as well. actually,since the dash is a bit rough anyway,i'll just make a new one from aluminum so it matches all the other stuff in this area.this will leave just the wipers and taillights,plus the interior light to worry about.this can be dealt with useing one electrical connector.no problem. 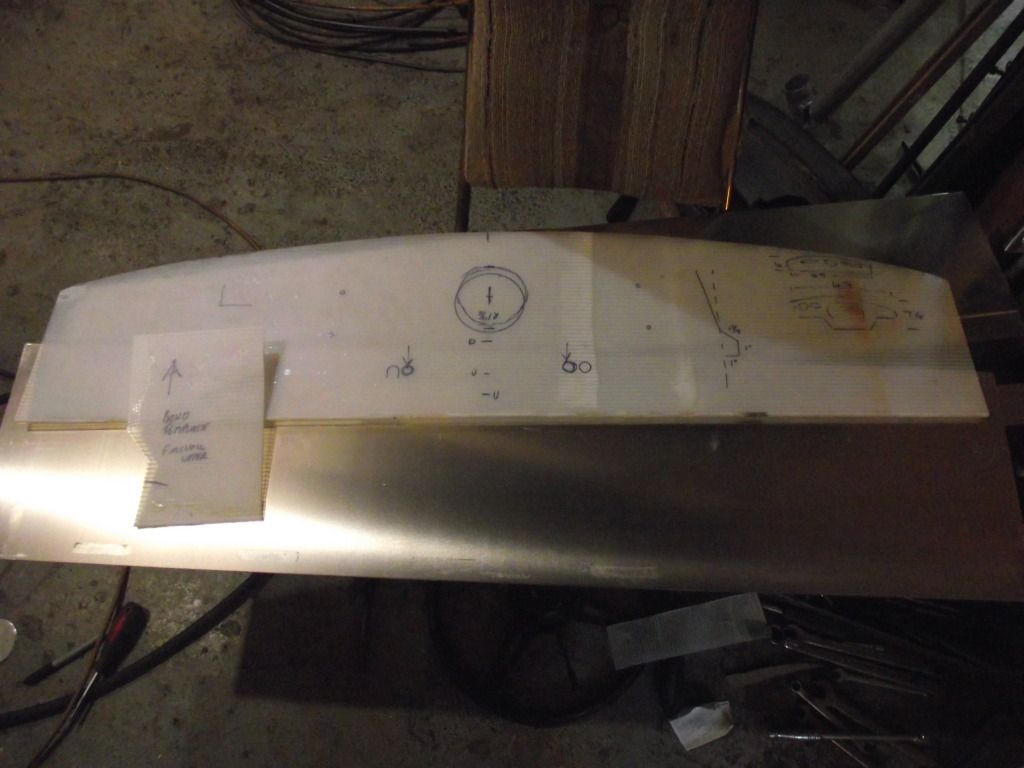
i got started on the firewall by making a template from couroplast.this is mainly for the curve at the top,though the neccesary holes were marked on it too.from my initial measurements the air inlet hole for the heater wasn't lining up with where the heater had to go very well. furthur checking on the original firewall showed that my measurements were correct-like many things on this car fit does not seem to have been a major priority at the factory. a piece of aluminum was also cut fot this part. 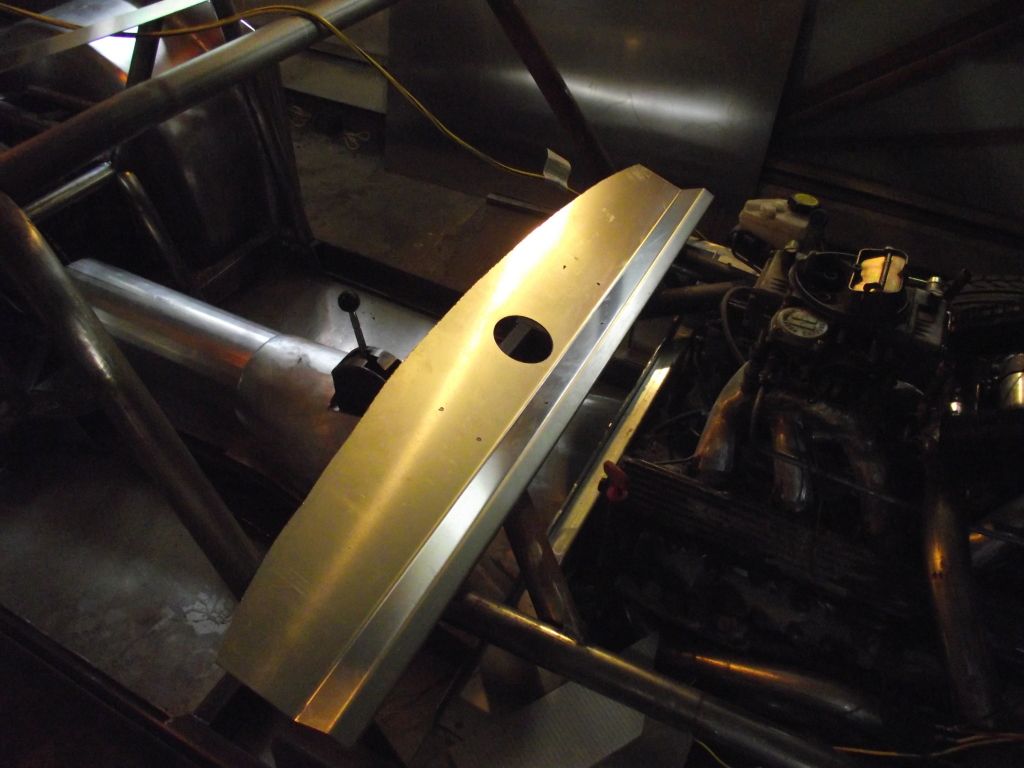
after cutting the curve,some holes,and forming a few bends,i have the basic panel. 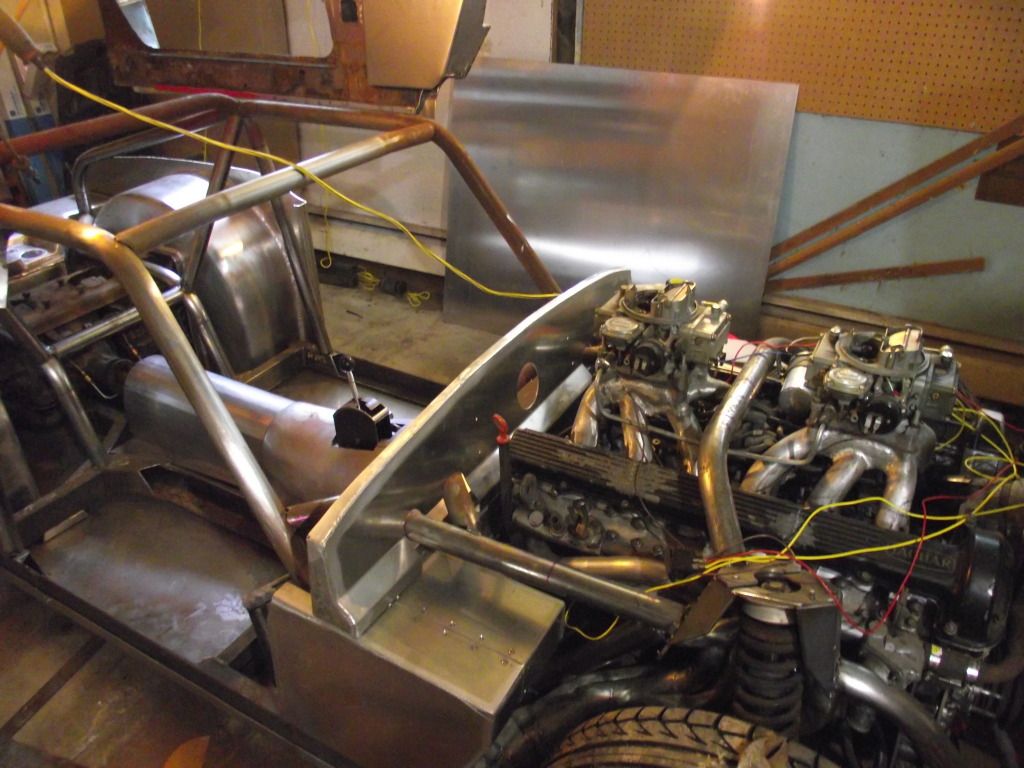
i welded on the ends and a top flange,and trimmed to fit around the frame tubes.i still need to make the air box,but i can see this will look much better than the beat up original firewall. 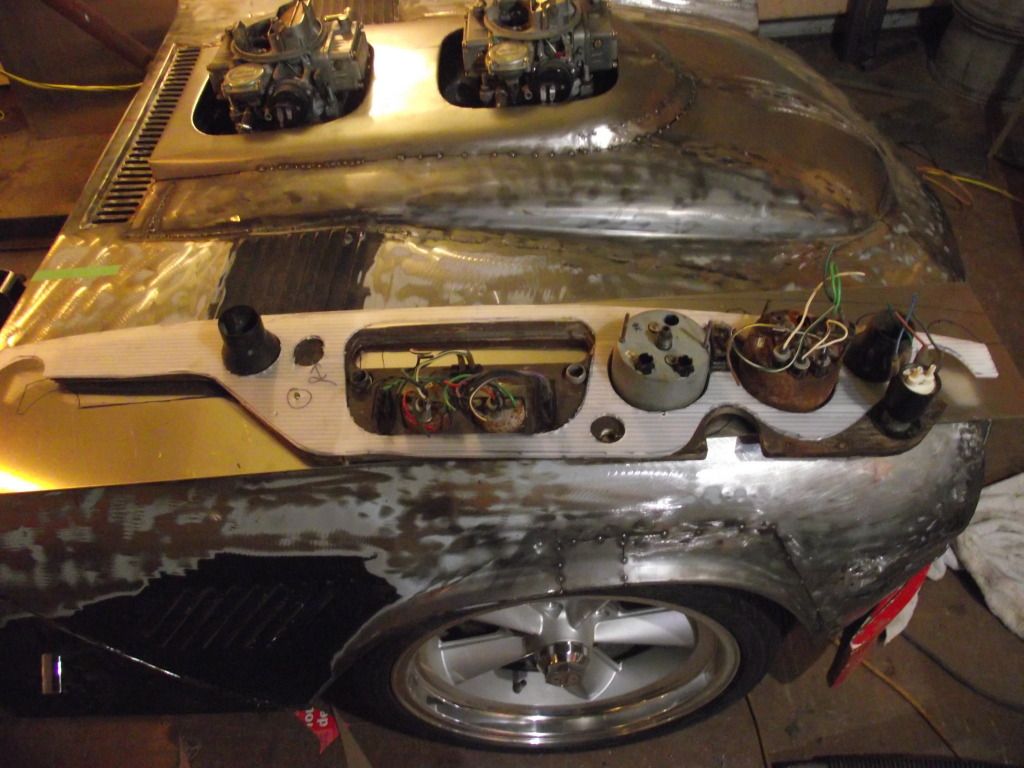
a similar template was made for the dash panel.before cutting the aluminum,i test fitted the dash panels to the template to confirm fit.the aluminum blank is under this assembly,marked out and ready for cutting. 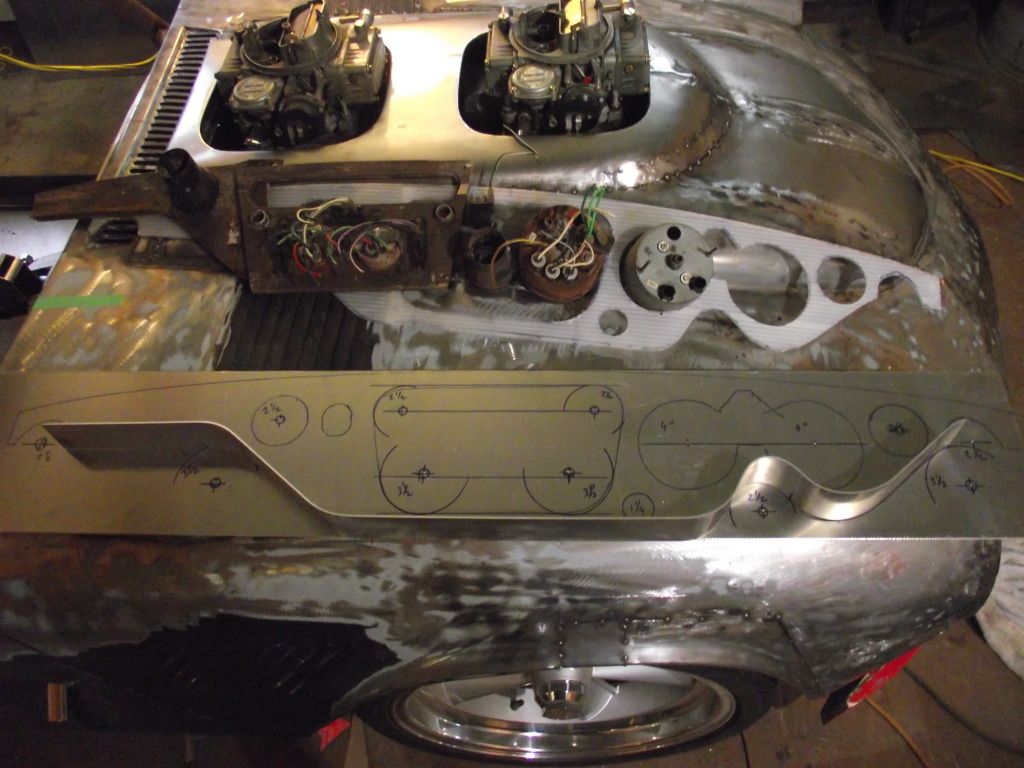
everything marked out,i render all the inside curves to tangents on circles.these are difficult to freehand accurately,outside curves are easier to cut. 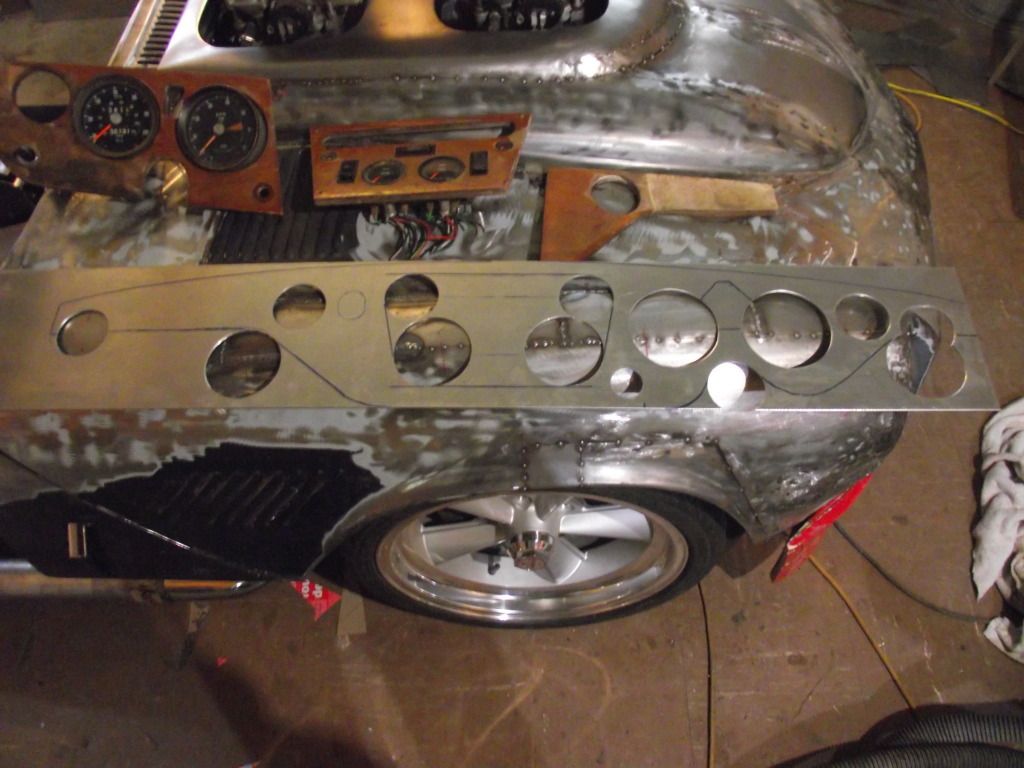
so all these spots are cut with a holesaw first.this leaves only straight lines and outside curves to cut. 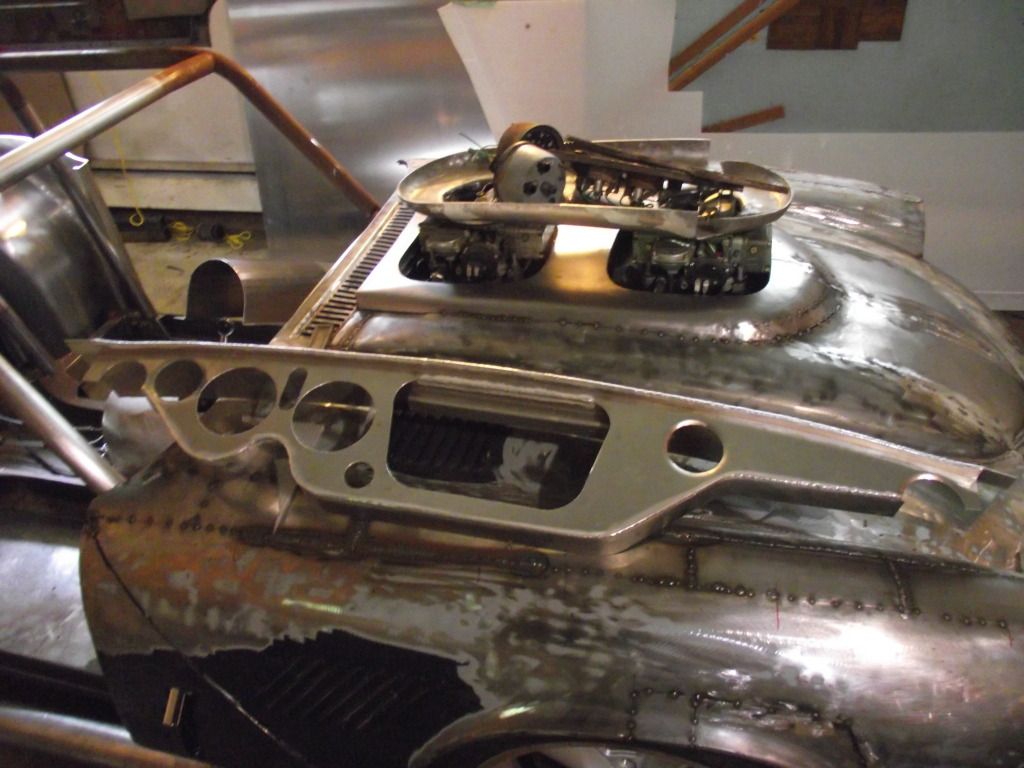
after welding,it still needs a bit of detail work,but i have a basic dash structure. i ordered up a custom rad and driveshaft. 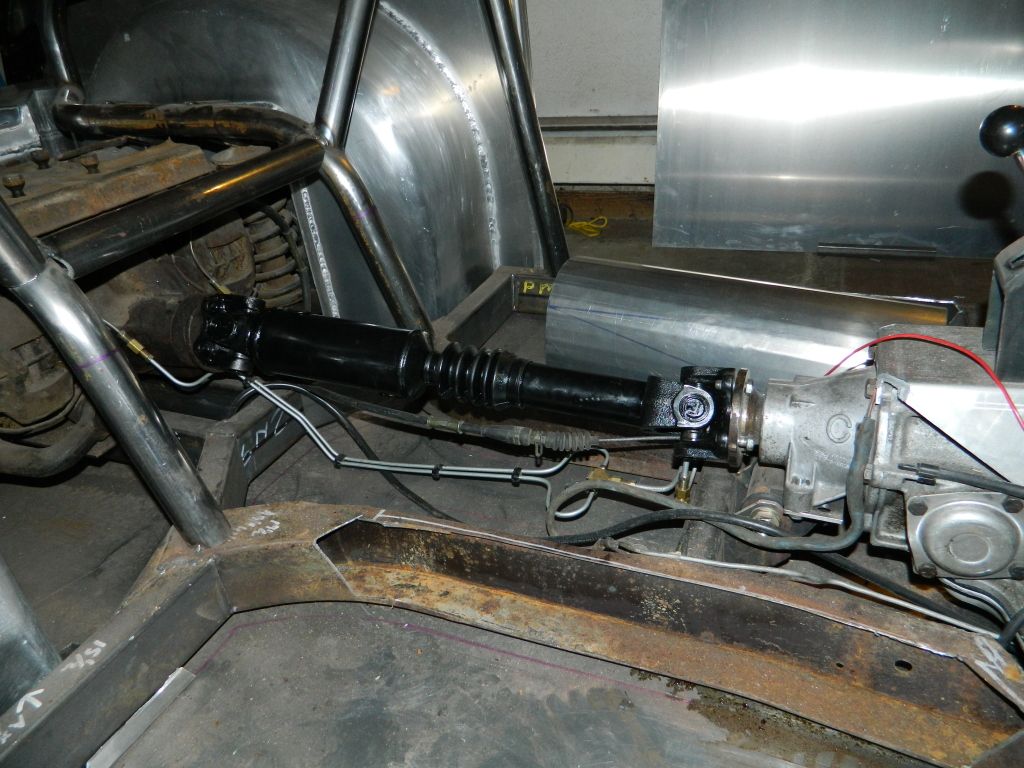
the driveshaft fits perfectly.i can finally have the engine hooked to the wheels. 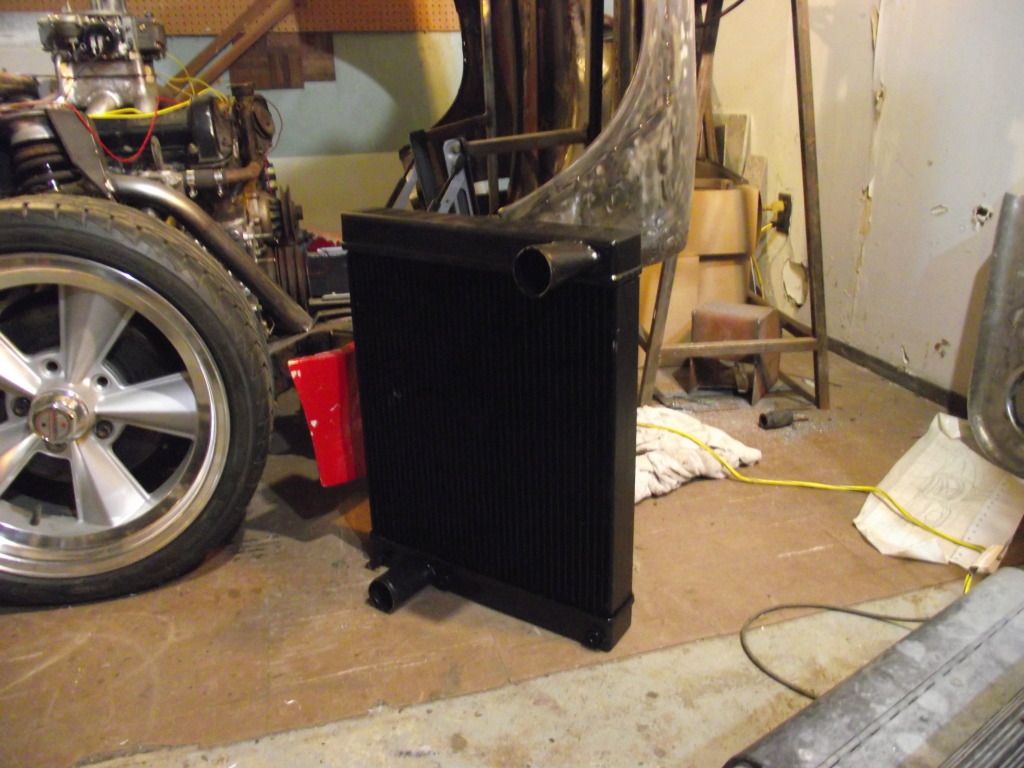
the rad i'll have to do some minor work on.the upper inlet is pretty tight to the engine,so i'll have to replace it with an elbow so it turns across the width.this one is a four core triple pass unit. while the body is lifted i'm working on the body-to-chassis interface.the rockers need to be completely rebuilt,so have been stripped down. 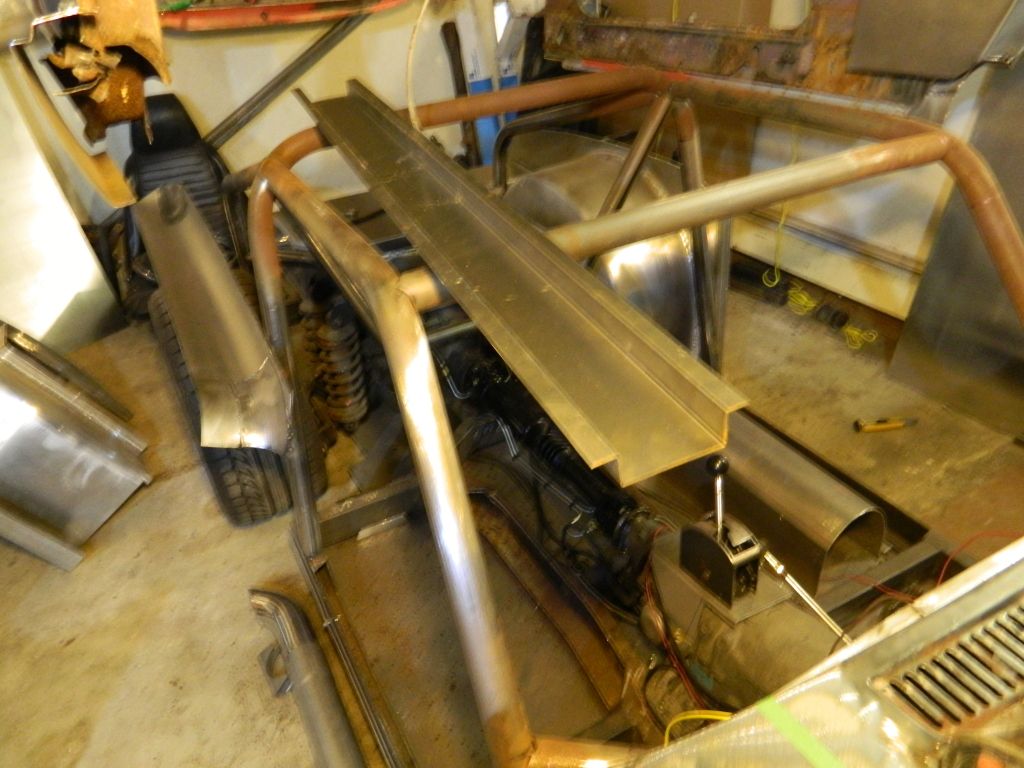
a hat section was formed to replace the inner rocker.behind this will be a vertical plate,and the outers i made earlier to fit the sidepipes.it should make for a solid structure. 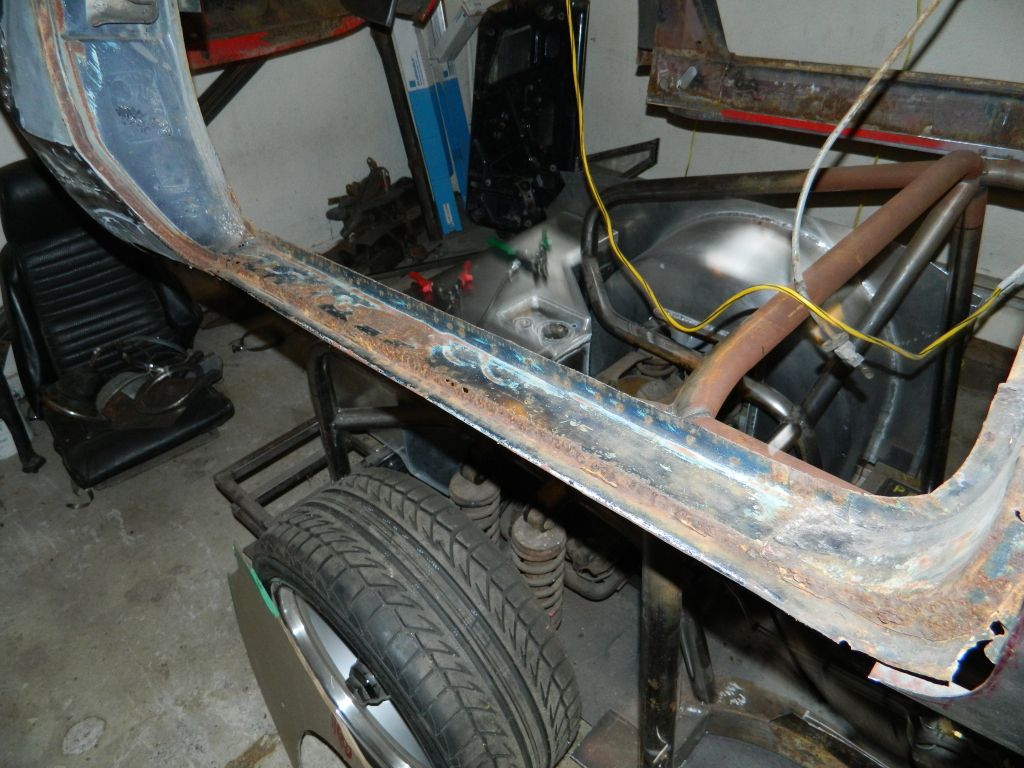
all that's left here is the door sill,but it's toast too.i just left it for now to maintain the door gap. 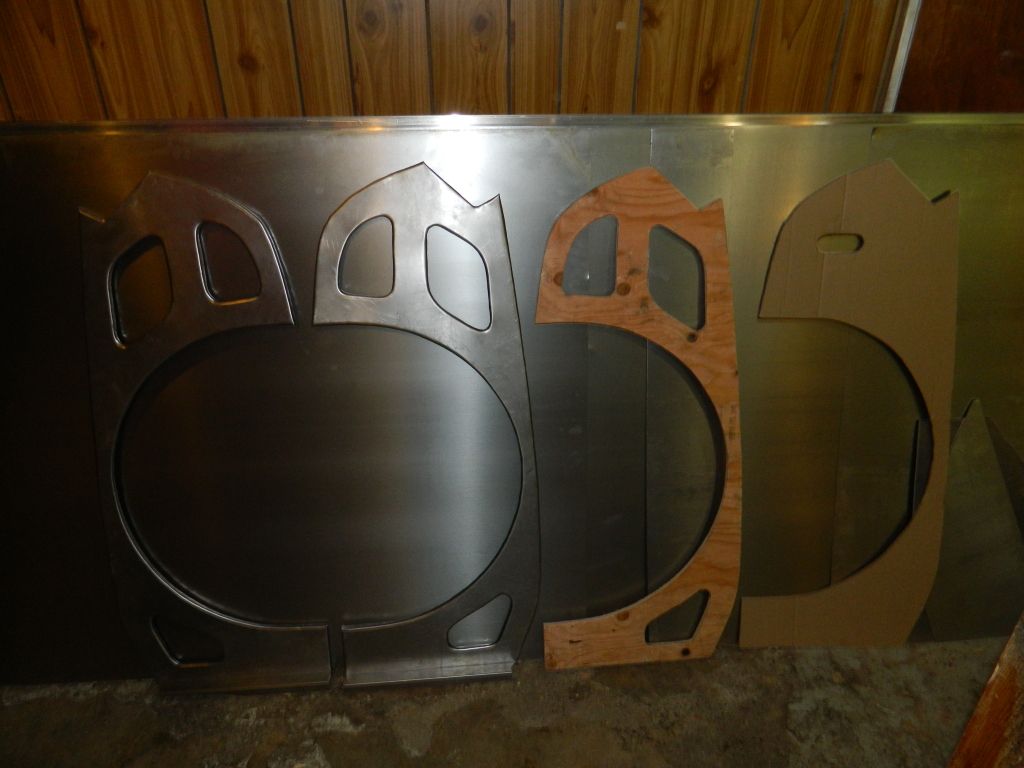
i made new inner fenders to suit the new wheel well shape.these were done with the usual cardboard template,plywood hammerform,and whack on metal with a hammer routine. being that these are part of the body,they've been made from 20ga steel. 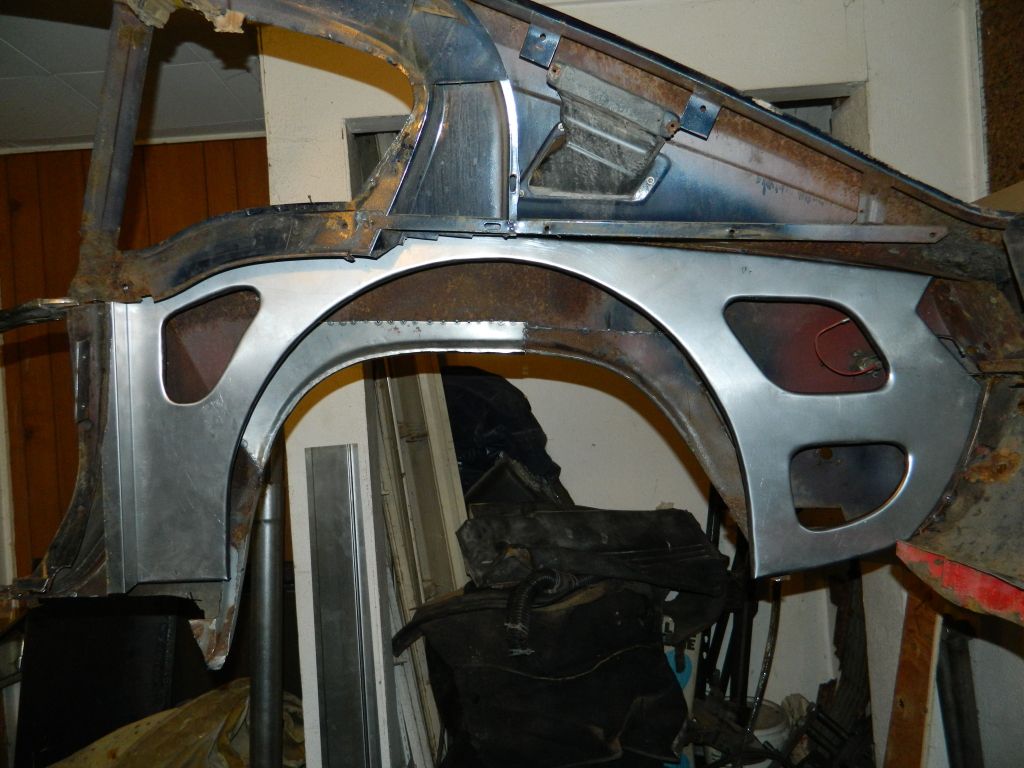
the fit is nice,now i have to make the outer part of the wheel tub to tie it into the arch on the outer fender. 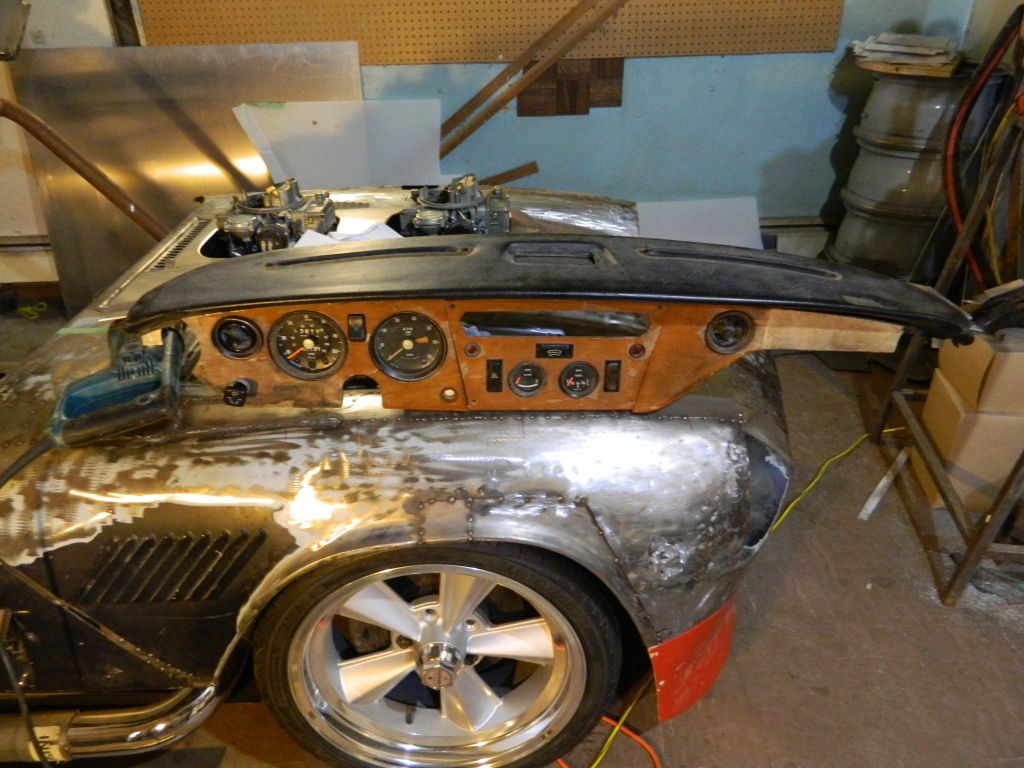
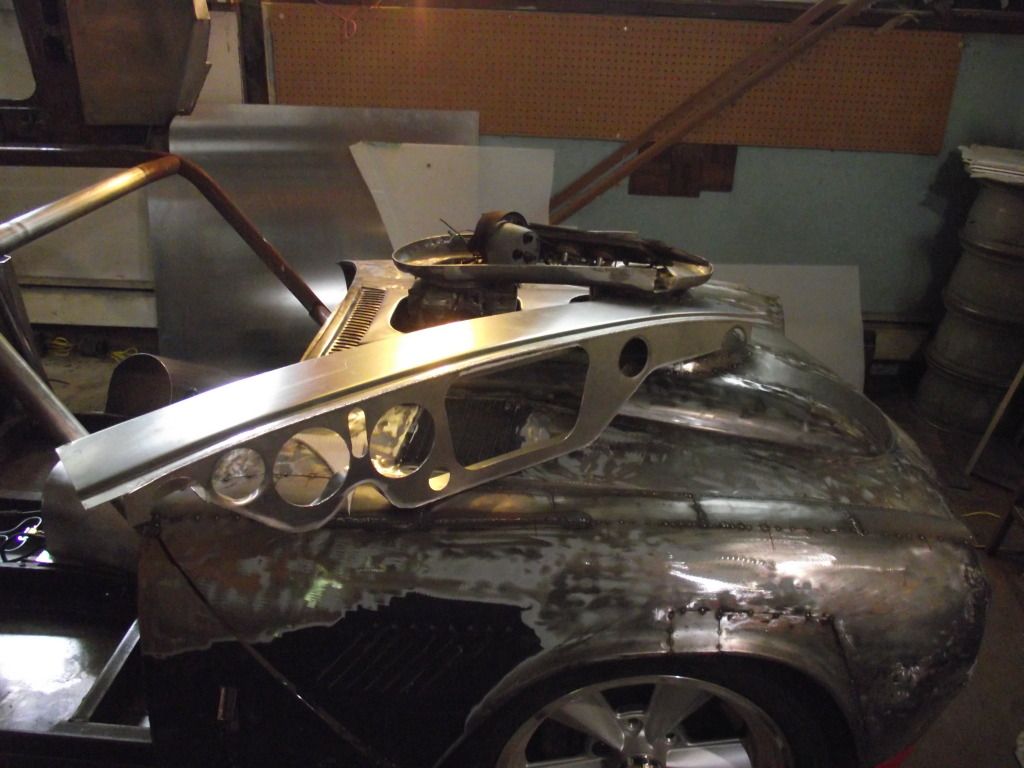
the aluminum dash fitted with all the goodies.all this stuff needs to be renewed,but the fit is good. 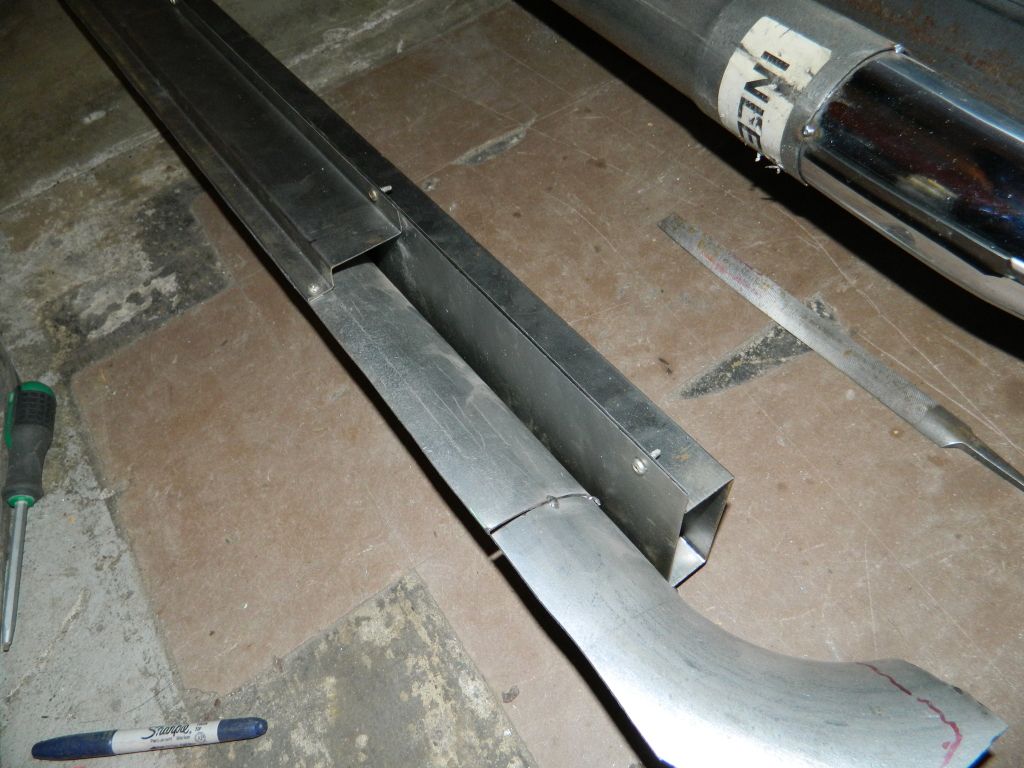
i got to assembling the rocker units.these are what bolts to the perimeter frame and are what the rest of the body will be indexed off. 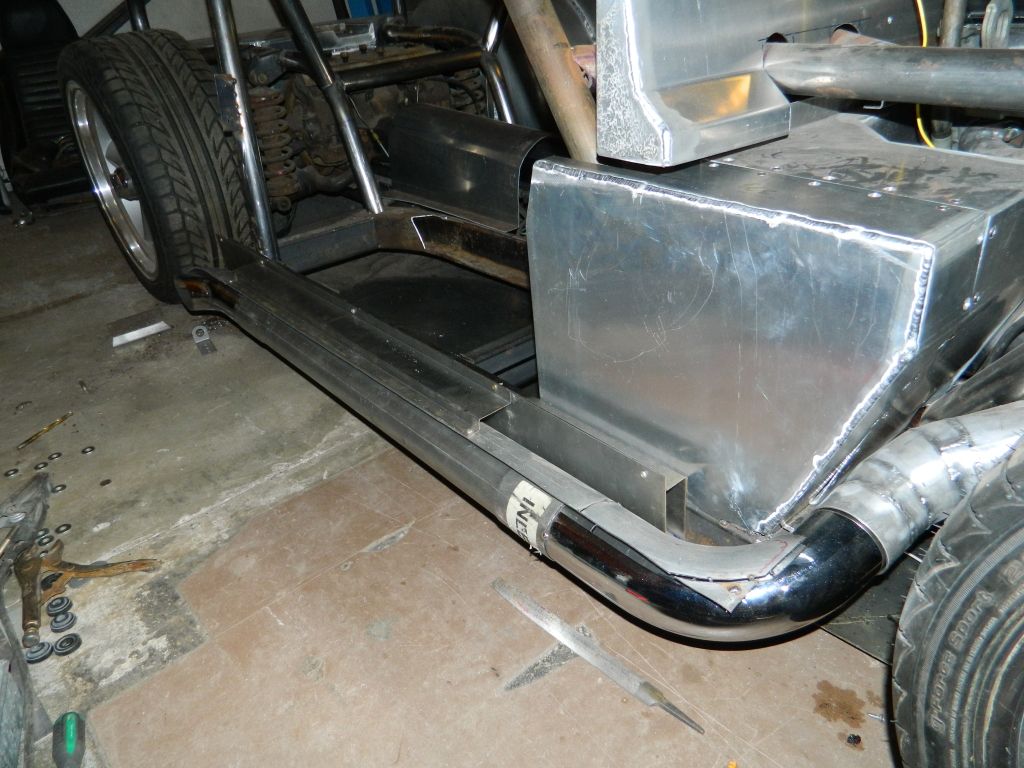
these have been set up so when the body is removed the sidepipe mounting does not have to be disturbed. 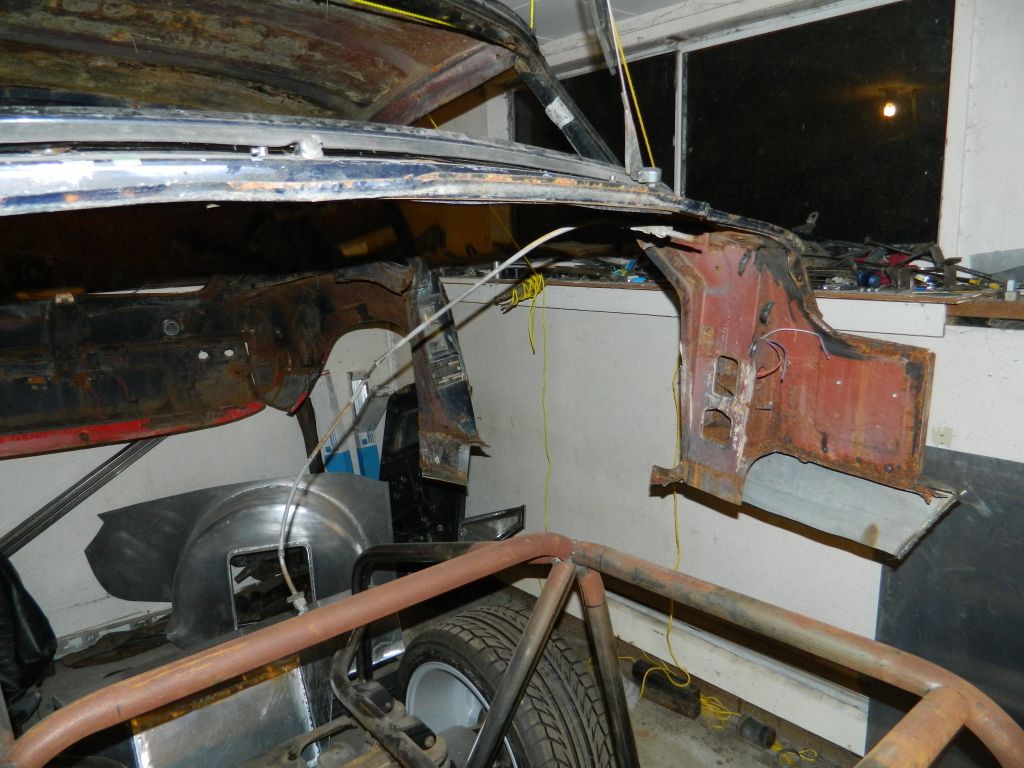
i cut what remained of the old rockers from the cowl. 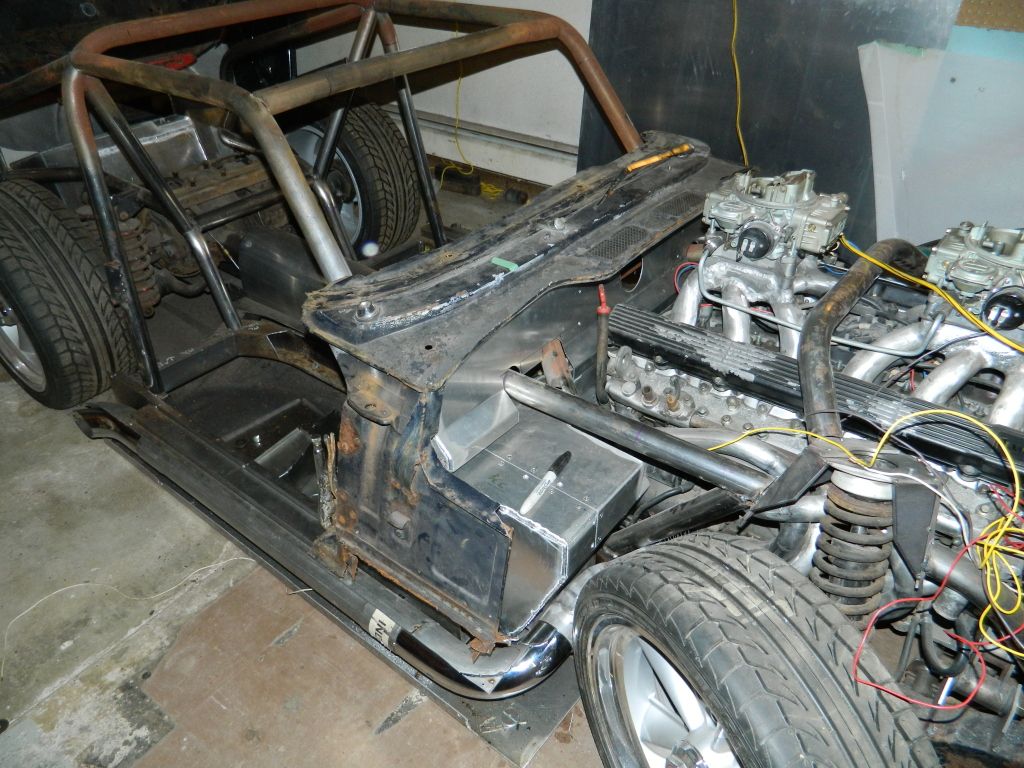
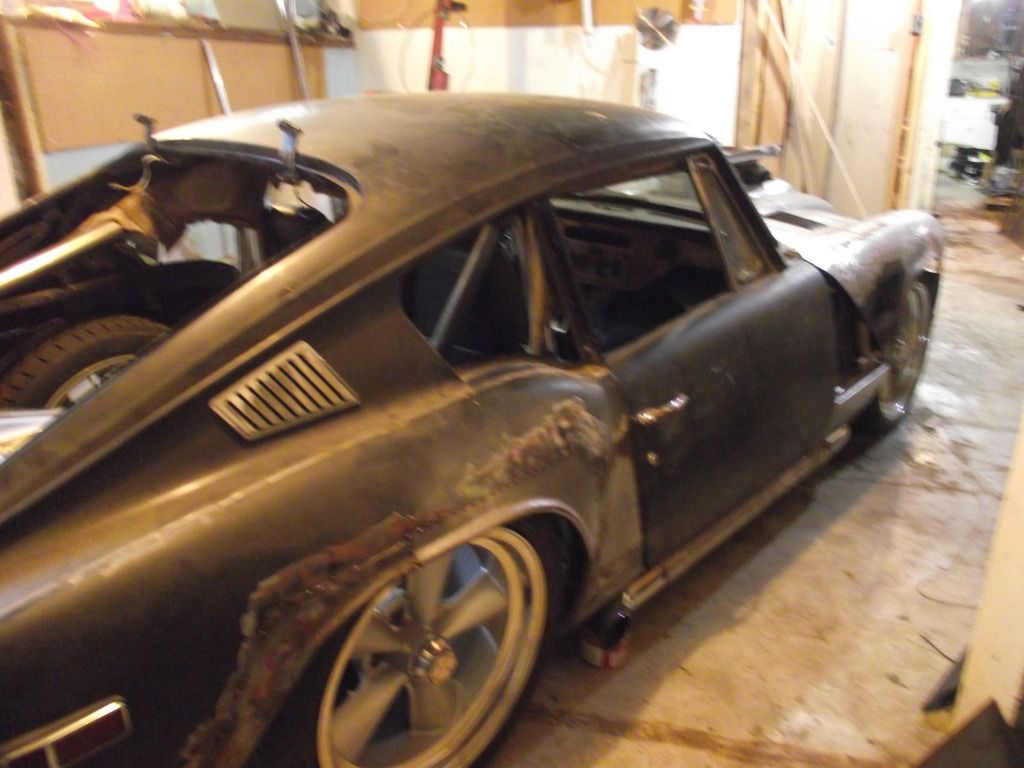
and removed the cowl from the rest of the body so i could build the connections to the rockers.while it looks a bit like it did a long time ago when i first brought in the cowl,i now have a solid foundation to build off of,and a solid plan on how to do it. 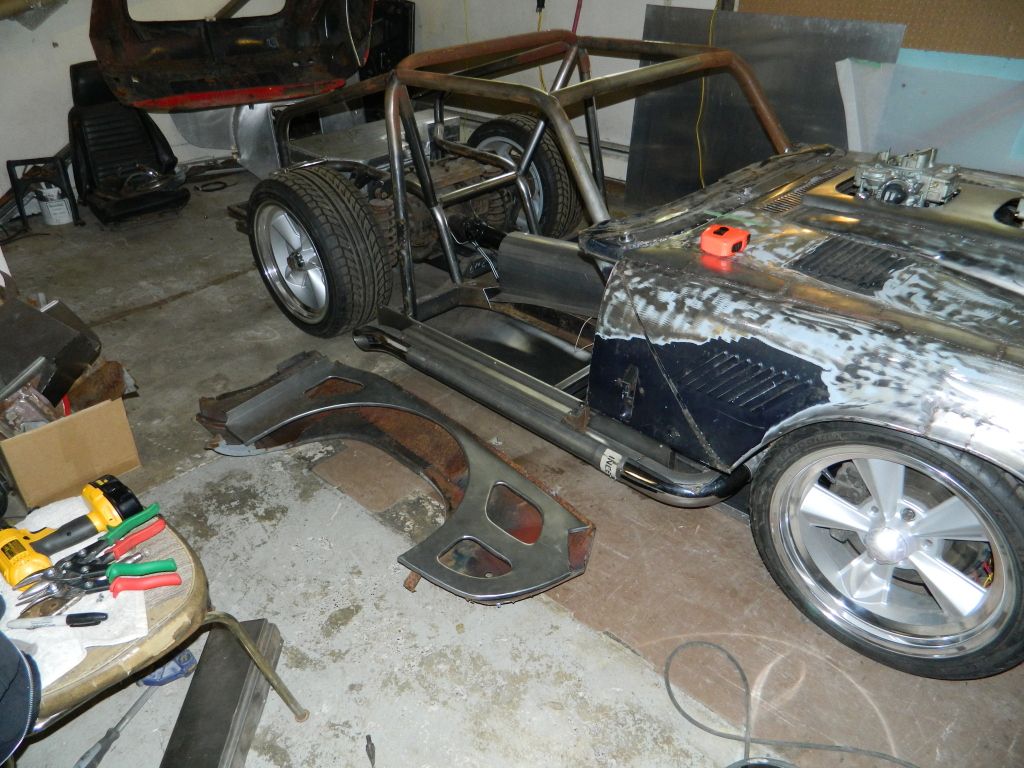
the shell has to be dismantled again to line everything up.here,you can see the right rear fender getting prepped. 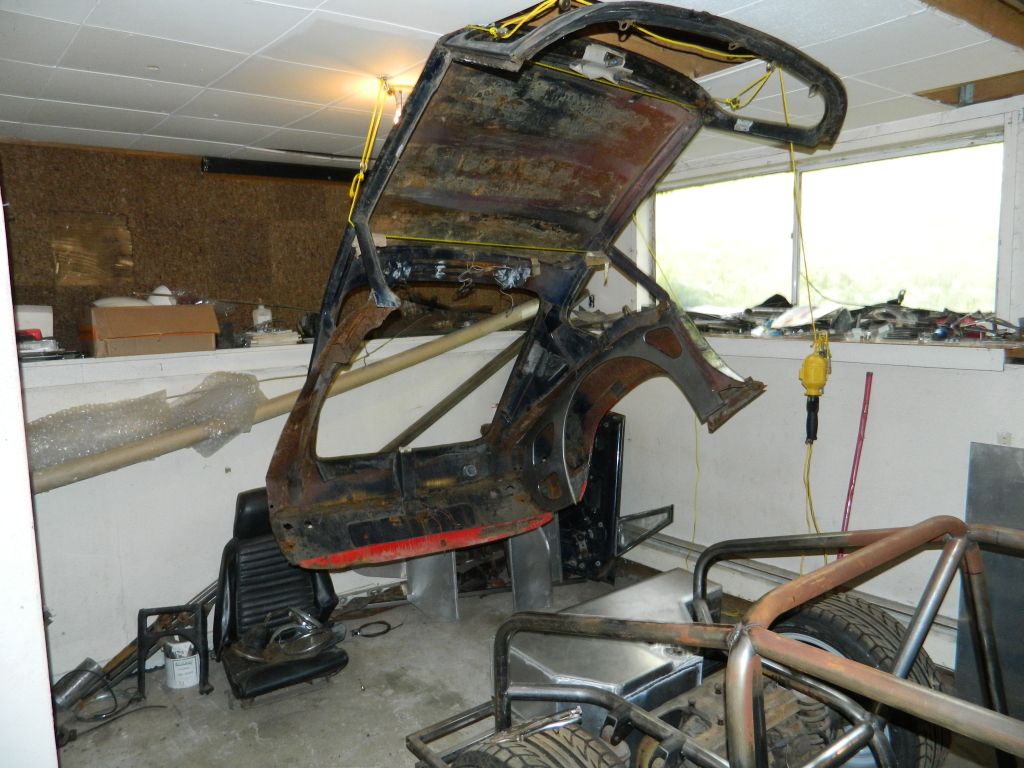
while it's still hanging from the cieling,there's getting to be less and less of the body up there. 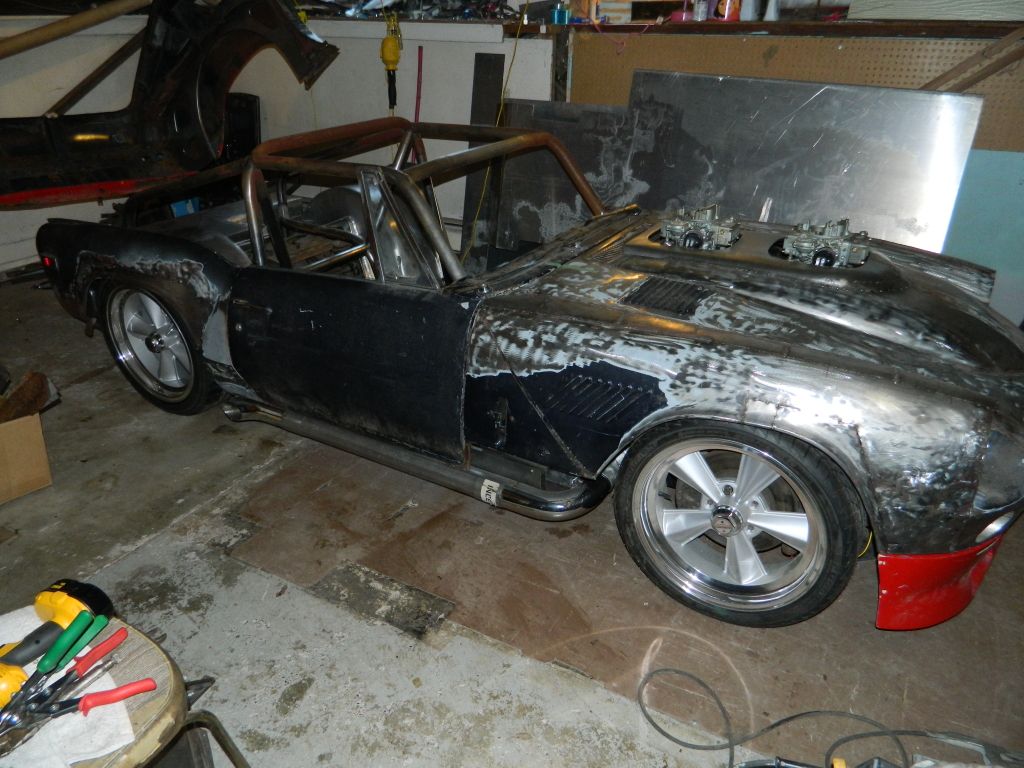
coming together,but this time it's a more solid assembly.there's a lot of measurement checking at this stage. 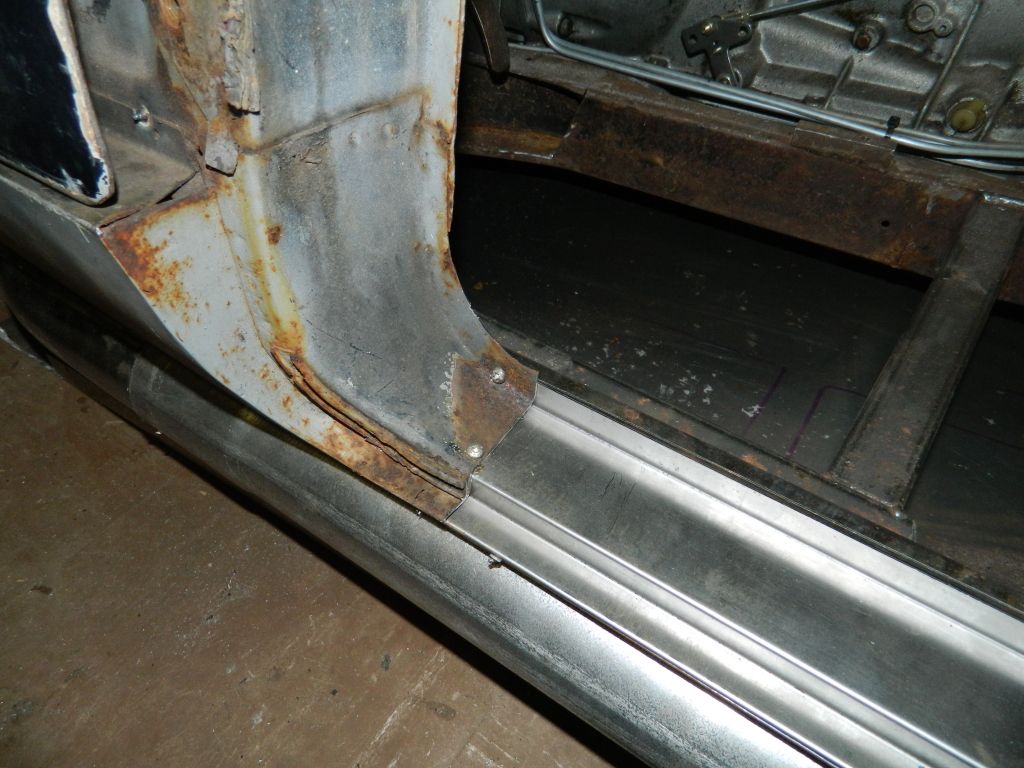
where possible i'm holding it all tgether with sheet metal screws untill it's all adjusted to my liking.then,the screws will come out and everything will be weded into one solid assembly,with all new structural bracing beneath the outer panels. 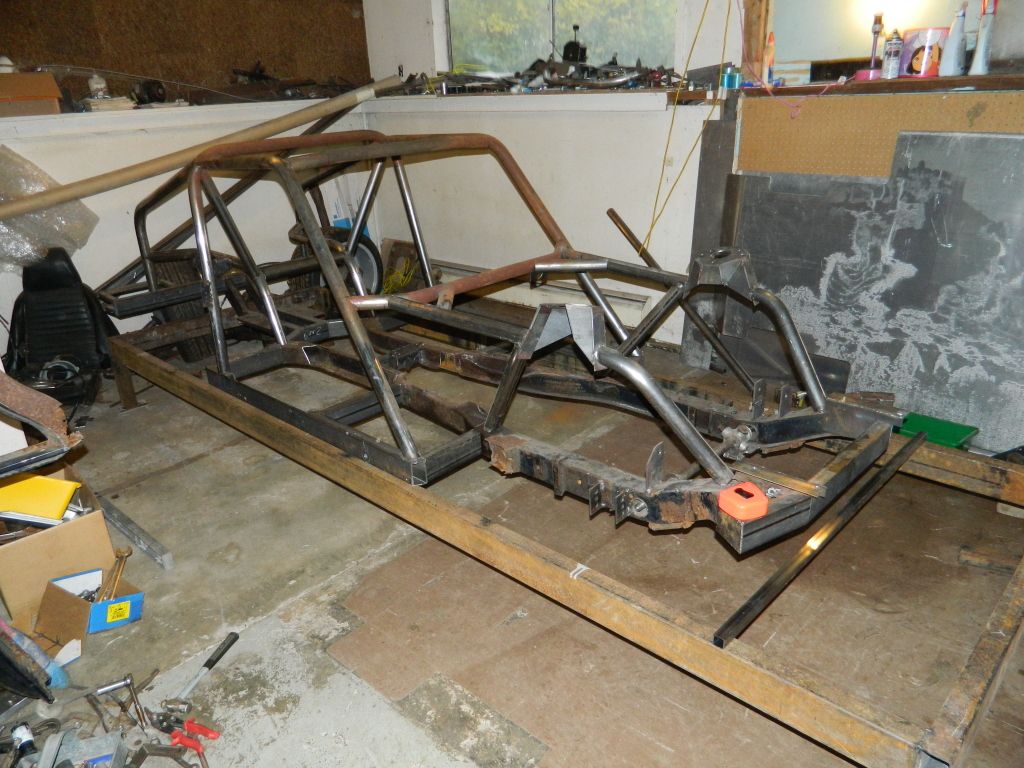
while measureing everything up for the body fitment,i found some minor discrepancies in the frame,so i made a simple measuring rig and stripped the car down so i could get accurate measurements and square everything up.seems this is the time to make sure it's all good-don't want a twist in the thing. Edited 104 time(s). Last edit at 11/23/2011 07:17PM by qwaii. |
Sorry, you do not have permission to post/reply in this forum.
British V8 Home Page
Photo Gallery
Web Forum
Annual Meetings
Contact Info
Site Map
British Race Car

© 2025 British V8™ All rights reserved. Website & graphic design by:
Curtis Jacobson.
BritishV8 Forum is hosted by
SiteWelder LLC,
and is powered by a
Phorum engine.