

Project Journals
create a diary for your project and show us your progress, with up to 100 photos!
|
cgill Chris Gill Salmon Arm, British Columbia (129 posts) Registered: 08/13/2009 12:06AM Main British Car: 1979 MGB roadster Buick 300 stroker with EFI |
Chris Gill's 1979 MGB roadster with Rover 215 and Omni Flares
Well, its official. I am now a member of the dark side!
I purchased a 1979 MGB roadster from a friend of mine in Washington State. It was already converted to chrome bumpers and in nice shape. 
I then picked up a Rover/GM 215 and a T5 tranny in pieces from a nice lady in Vancouver for $400 Canadian. After the machine shop did its magic on the engine it was time to put it back together with ample help from my buddy Ryan. The flywheel was lightened to 23lbs, and the block decked 35,000 to increase compression to 9:1. Some work was done on the Rover 3.9 heads to let it breathe a bit easier but nothing too crazy. The cam was regound for gobs of low end torque and set to 104 degrees. From this... 
To this...(the EFI system is just resting on the manifold for now) 
The T5 tranny was reassembled with bits replaced that were broken and is waiting patiently to be reunited with the engine. I will be using Brian McCulloughs HTOB kit with the tranny. From this... 
To this... 
I rebuilt the front suspension and repacked the wheel bearings. Longer wheel studs were installed along with some spacers purchased from Jeff Schlemmer on the MG Experience website. From this... 
To this... 
I purchased an aluminum radiator for a 65 mustang from a seller on EBay. A local aluminum fabrication guy built the shroud and moved the upper inlet to the drivers side for next to nothing. I ended up cutting about 7/8 off the shelf in front of the rad so I had room between the puller fan and the crank pulley. I probably could have got away with cutting less but this makes for an easy fit. It is still damn tricky to get the fan in with the shroud on. I have to unbolt it from the rad to get it over the lower rad hose outlet. I can't get go in from the top because I can't get the fan motor past the water pump pulley. 

Here is the rad in place during a test fit. 
The stock hood will close with the Rover EFI system in place (upper and lower plenums were shaved) which is great (my son Coen showing off his MG). 
I also test fitted Rick Ingrams front and rear strut kit. What a great design! Body & Suspension: The tub was stripped to prep it for Dodge Omni fender installation. 

It's funny, there was a fair amount of bondo on the car but when I removed it there wasnt anything underneath and no major dents. Weird. The only rust I have found is a few pockmarks in the dog legs which I will take care of. It then headed off to the sand blaster to clean up the undercarriage, engine bay, trunk floor and cockpit. I have concluded that sandblasting is great but also very messy! I spent a few hours vacuuming all the sand out of the various crevices of the car, along with help from my son Coen. 


I got the sandblasted bits expoxy primered today with assistance from my new buddy Paul. The underside was pretty challenging since we couldn't get the car that high off the ground but with a little patience and yoga poses we managed to get it well covered. 

Buzzzzzz, Buzzzzzzz, buzzzzzzzz..... That is what my hands feel like they are doing after 2 hours of grinding today. I am going to try and tidy up the welds a bit more tonight with my disc grinder. Then I will fill the few remaining holes, finish welding in the inner fender patch and then move on to the next one. Here are some photos of the event. Trusty limey helper....aka Paul "TR4" Barnes 

A little touch up with the hammer to get the fit just right.. 
TADA! 
Look what the postal person dropped off today. A custom aluminum fuel tank with an in-tank fuel pump. OOOOhhh, it is a work of art. Todd at custom aluminum works made it. 
We got all four flares on today. I still need to grind one of the front fenders but then they are done! Next on the list is the front signal markers, fill in speaker holes, fix minor rust in the dog legs, fill in any remaining holes, grind, sand, epoxy primer, sand, sand, sand!!! It is nice to see some progress finally.... 

Almost all the welding is done now. I have one small area on one dog leg to cut out and then I need to weld in the chrome bumper turn signal mounts below the headlights. We started skimming the car last night. Lots of sanding, lots of dust!!! But the fender flares are starting to blend nicely. It still needs one or two more coats before we move onto 'finer' finishing. And yes, I know my wheels are on backwards... 
Well after about a month of sanding, my buddy Paul and I finally got the tub in epoxy primer tonight. There are a few areas that still need attention but we were astonished to see how well the flares turned out, especially the back ones. I will be cleaning up over the next few days and then get back to filling holes, blending the flares a bit more (probably another week of sanding/filling) and then we're on to the high build stage!!! The spray booth... 
My buddy Paul and I finished the rear of the car a few nights ago and started on the front flares. They are tricky to say the least due to all the compound curves. Here is what we have come up with so far. The lights make the flares look a bit bumpy but they aren't actually. After much deliberation we deleted the trim line in front of the flare. And now back to sanding! 

I am trying to figure if the height is right in terms of where the flare meets the wing. Here is a little photoshop experiment I did with ellipses. Most of the ellipse edge follows the lower curve of the flare in the front and back. From this it looks like my curve is pretty close. 

Sanding, sanding and yet more sanding.... But we finally have the tub in high build primer!!!!! The front flares took a bit of work but I am very pleased with how they turned out. The photos below make it look like there are sharp 'joins' to the flares but it is just the shop lighting. I have a few very small things to putty up and then it's time to start wet sanding. Once the tub is ready for paint I will start working on the doors, hood and trunk - they shouldn't take very long to complete. I'm still aiming to paint it by early December. Then again, my wife is due in 7 days with our second child...maybe she will be okay having the baby in the shop so I can work on the car in between contractions! 


I managed to strip all the paint off the boot lid tonight. What a mess! The good news is that the lid in almost perfect 

Last night my buddies Paul and Michael came over for some Scotch and body work. Thanks for the help guys!!!! We got the ST spoiler fitted and I got the doors and boot in high build. We also managed to get the car up on the rotisserie finally, which will make it much easier to paint the underside. 


Next is undercoating and wet sanding the top side Update time! November 26, 2010 After a slight mishap with the rotisserie (the car fell partly off it and dented the rear quarter panel) and follow up repairs we (my buddy Paul and I) got part of the car in paint. It is only a first coat and no clearcoat has been applied. I am getting used to the colour and expect I will really like it after a while but it is a bit shocking! 

November 30, 2010 It is painted!!!! We got one layer of clearcoat on but will be correcting a few minor imperfections in it, plus a couple of sags before adding additional layers. The colour is growing on me even though it is different from what I thought it was going to look like. I am very happy to see it in a colour instead of gray!!! 


January 4, 2011 No posts in a while because I've been busy either looking after our new baby boy or wet sanding the paint! So far I have the front and rear suspension completed (not torqued down), hydraulics are almost all in, and the rear lights mounted. I only have one crappy iPhone photo of the progress so far but that will have to do until I have a spare moment to take some decent pictures. Tonight I am wet sanding the high build on my bonnet and will hopefully have it painted on Thursday. Then its on to wet sanding the clear on the bonnet, one door and one wing. Then I'm all done with the body work. YAHOOOOOO! 
January 30, 2011 I have been picking away at the roadster as much as I can while juggling a four year old and a 2.5 month old (read very understanding and patient wife!). I finally got everything in paint after a bit of a fiasco with the paint supply place so I started assembling. It is really hard to get the colour of the car accurately produced in digital photos. All I can say is that it looks REALLY good with the charcoal wheels and chrome! 

I installed the suspension and finished the hydraulics today, except for one last line clamp. I also finished putting B-Quiet Ultimate sound deadener in the interior. I went a bit overboard with the stuff because I had it on hand. 

The dash is finally finished after almost a month of picking away at it. Installing a new dash pad is a pain in the butt!!!! At least it turned out really nice so I guess it was worth all the hassle. 
I decided to hide the bonnet release cable under the drivers wing because I am trying to keep the engine compartment as tidy as possible. On that note, I managed to figure out how I am going to run my wiring. As you can see I got some ½ flexible conduit and installed it on the inside of the passengers wing. It pops out under the slam panel or whatever you call it just behind the grille. I still have to figure out how I am going to run the wiring to the passenger headlight and signal with this setup but it shouldnt be too hard. 

I also installed Todd Buddes aluminum fuel tank. It is a piece of art! I still have to run all the fuel lines but at least its in the car. 
And now on to installing the Advance Autowire harness! YIKES! Here are a few photos showing how I ran the conduit to the firewall, wiring routes to the back of the car, shots of the wiring harness (Advance Autowire - make sure you know electrics or have a good friend who has an electrical degree before tackling - I have the latter in my arsenal!). 


March 6, 2011 Well it's been a while since I had a chance to post an update. I can't quite remember what I did last so here are a few photos. The wiring is almost completed with the exception of a couple of grounds, wiring in the hazard switch and finishing wiring the driver's side headlight/signal. The wings are now mounted as is the ST spoiler. Next on the list is to install the engine and wire in the EFI harness. Somewhere in between there I need to install new seals on my windscreen and get it polished. Now if I could only win the lottery I could afford to buy the last few bits I need! 
The Advance Autowire harness mostly installed. This was a miserable experience and if it weren't for my buddy Paul helping me, I would never have tackled this. I hope it will be worth the pain in the end.... 
The engine bay. Wiring is all installed except for the coil and fan (seen hanging out on the right front of the engine bay). The two wires hanging down are for the starter. 
March 20, 2011 The engine is finally in. It was a struggle to get the mounts seated properly but it finally gave up. The second major issue was my transmission crossbar. It seems that the mount I got is off centre so my carefully prepared cross member was unceremoniously 'modified'. Oh well. Tonight I will install the upper EFI plenum and radiator. Next on the list is finishing all the wiring except for the EFI system so I can do some testing. Then it's on to wiring in the EFI system... 

Whoops! Time for an update I guess. I got the windscreen installed after cracking the first one. I think that seems to be a rite of passage albeit a painful and expensive one! I also finished all the wiring and everything works! Well, except for the electric fan. After bringing in my buddy Paul to help troubleshoot we concluded that it was a faulty fan. That meant I had to tear out the old fan which meant removing the front sway bar, water pump pulley, unbolting the rad, etc., etc. A pain in the ass! I am now waiting for the new fan to arrive so I can button everything back up. I still haven't run the various hoses for the engine or the fuel lines because my budget is on a diet. I did order a carpet set and spent tonight getting ready to install it. I shortened the valve cover breather vent on the passenger side so the hose would not rub against the underside of the bonnet. Today I managed to find a 90 degree plastic fitting that, after modifying it slightly, fit perfectly into my modified breather vent. Wohoo! The remote oil filter was a massive pain in the ass. I ended up combining two remote oil filter kits from two different vendors because 1) I'm using a GM block and the oil filter base is slightly larger than a Rovers (which I didn't know) and 2) I was having issues getting the inlets/outlets pointing in the right direction and not interfering with the steering rack. Oh well, it's done now. As you can see from the following photos, most of the wiring is either hidden under the passenger fender or neatly tucked away. I have yet to purchase spark plug wires so that will mess things up a bit! 


July 1, 2010...Happy Canada Day! I still have to plumb in the fuel lines, the rad hoses, the accelerator cable, install the driver's seat, figure out my clutch issues, etc. but I'm getting closer. Here are a couple of shots showing how the car sits right now. If the front end doesn't settle at all I might look into dropped spindles but it is already damn hard to get my floor jack under the front end! 

Whoops! I guess it's time for an update. I got the engine running back in September and one week later I took it on a 400 mile road trip with the Okanagan British Car Club. The car ran quite well although I have a clutch issue, a minor engine miss when it isn't under load (running lean, no vacuum leaks found), steering which is a bit twitchy, and a dire need for taller gears in the rear end. Aside from that the car is great. Lots of power (I could always use more!) and lots of positive feedback by anyone who sees it. On the way to the exhaust shop.... 
Engine bay... 
On our first road trip with my son Coen riding shotgun! 
My other son Parker posing with the car 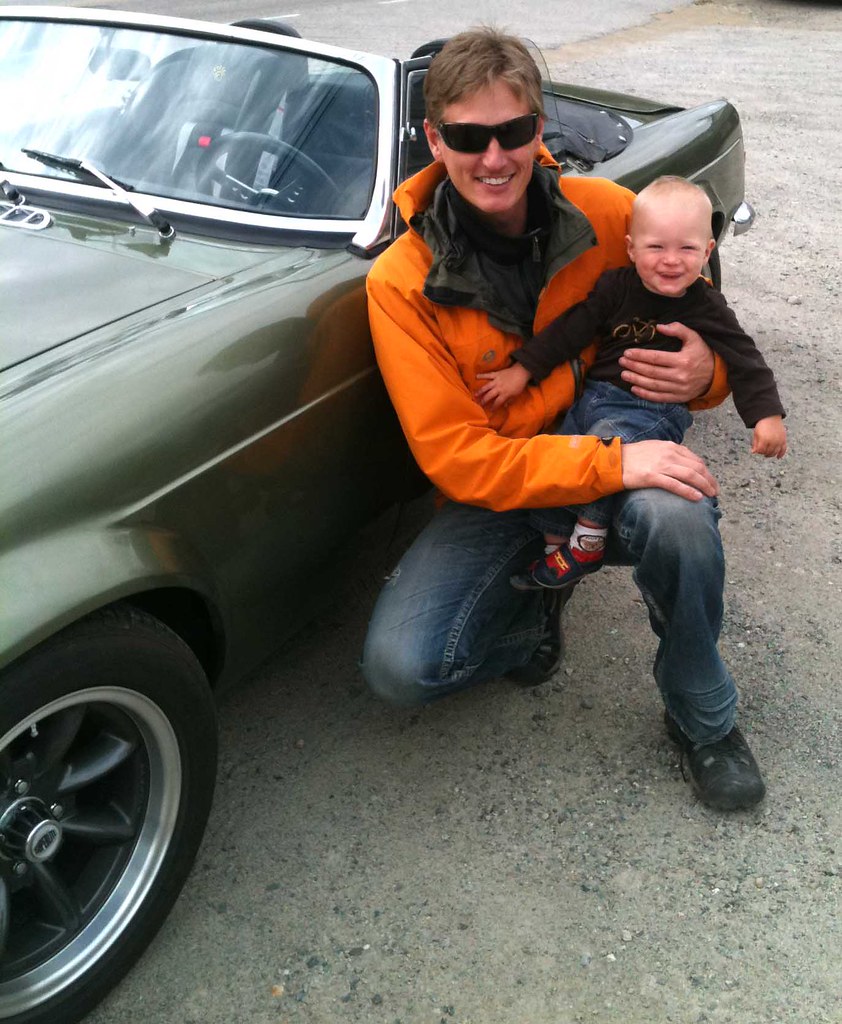
The roadster at the top of Anarchist Mountain near Osoyoos, British Columbia 
My two sons hanging out with our MGs at the Festival of the Grape (wine fest) in Oliver, British Columbia. The roadster attracted a huge amount of attention and I had trouble getting away from the car to do some wine tasting because of all the questions! 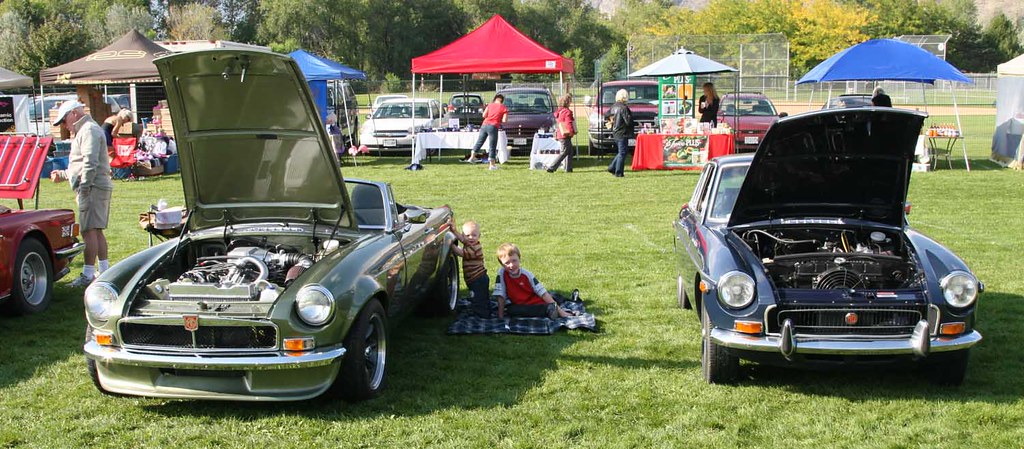 Edited 18 time(s). Last edit at 11/14/2011 12:25AM by cgill. |
Sorry, you do not have permission to post/reply in this forum.
British V8 Home Page
Photo Gallery
Web Forum
Annual Meetings
Contact Info
Site Map
British Race Car

© 2025 British V8™ All rights reserved. Website & graphic design by:
Curtis Jacobson.
BritishV8 Forum is hosted by
SiteWelder LLC,
and is powered by a
Phorum engine.