

Project Journals
create a diary for your project and show us your progress, with up to 100 photos!
|
loosecannon mark sawatsky (10 posts) Registered: 08/16/2010 02:10PM Main British Car: 1969 MGB Buick 2.0 |
Mark Sawatsky's V12 MGB-GT-Part 2
Link to part 1: [forum.britishv8.org]
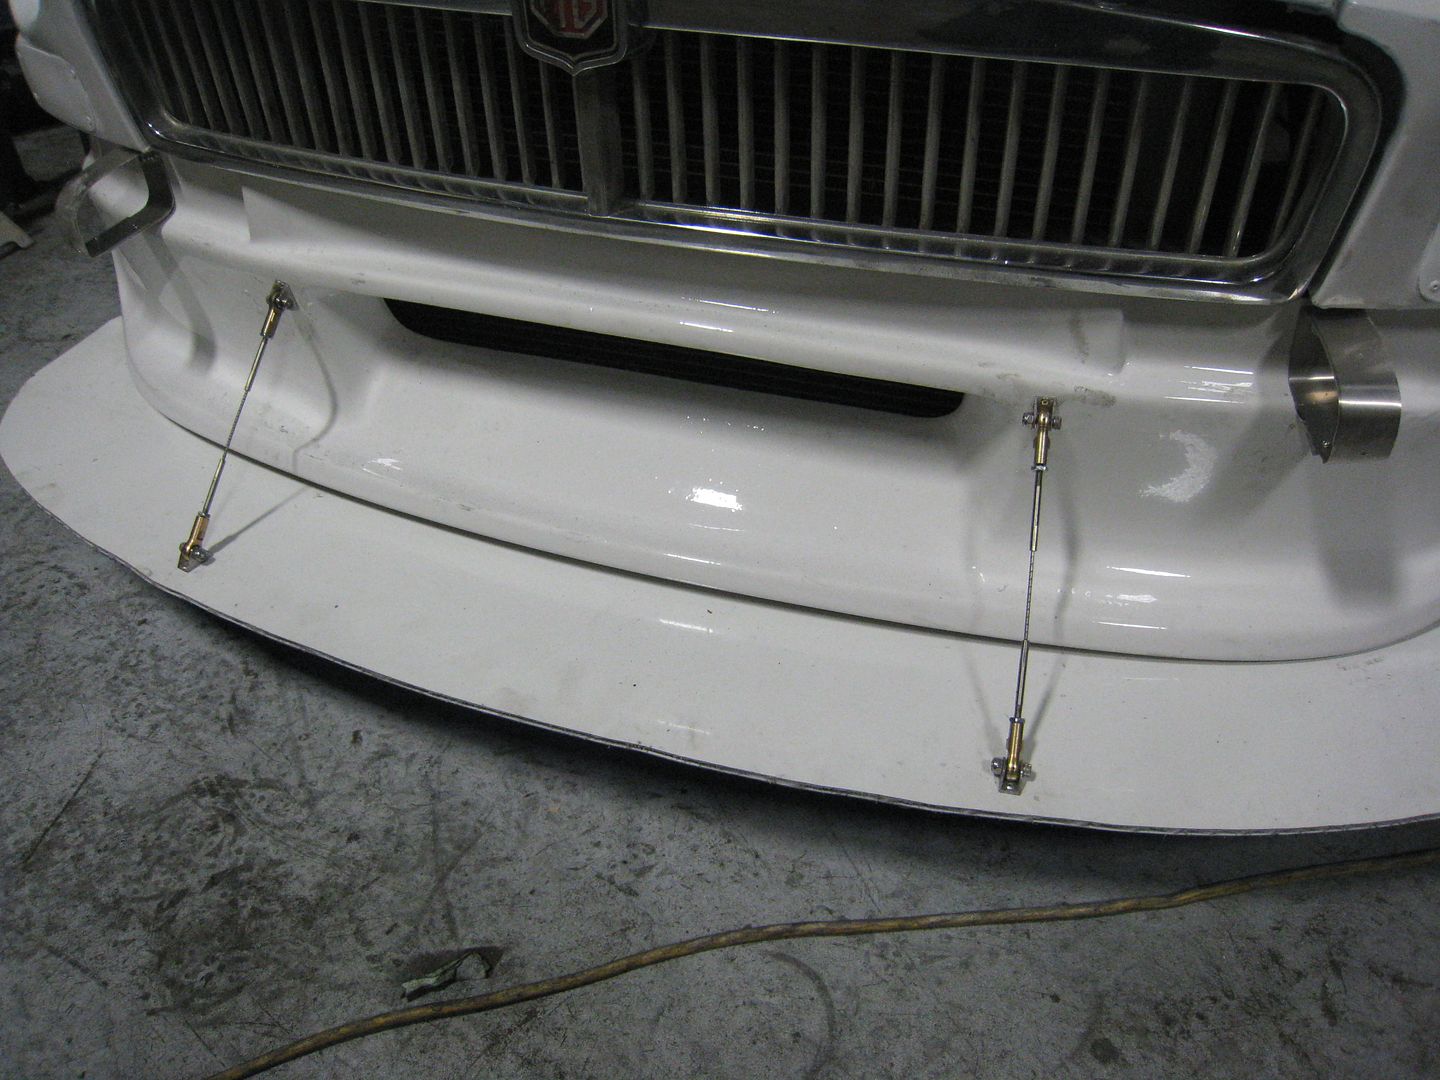
I changed the vertical bars of the grille to the same aluminum mesh of the taillights. Here is the grille in stock form, also notice the new splitter struts: 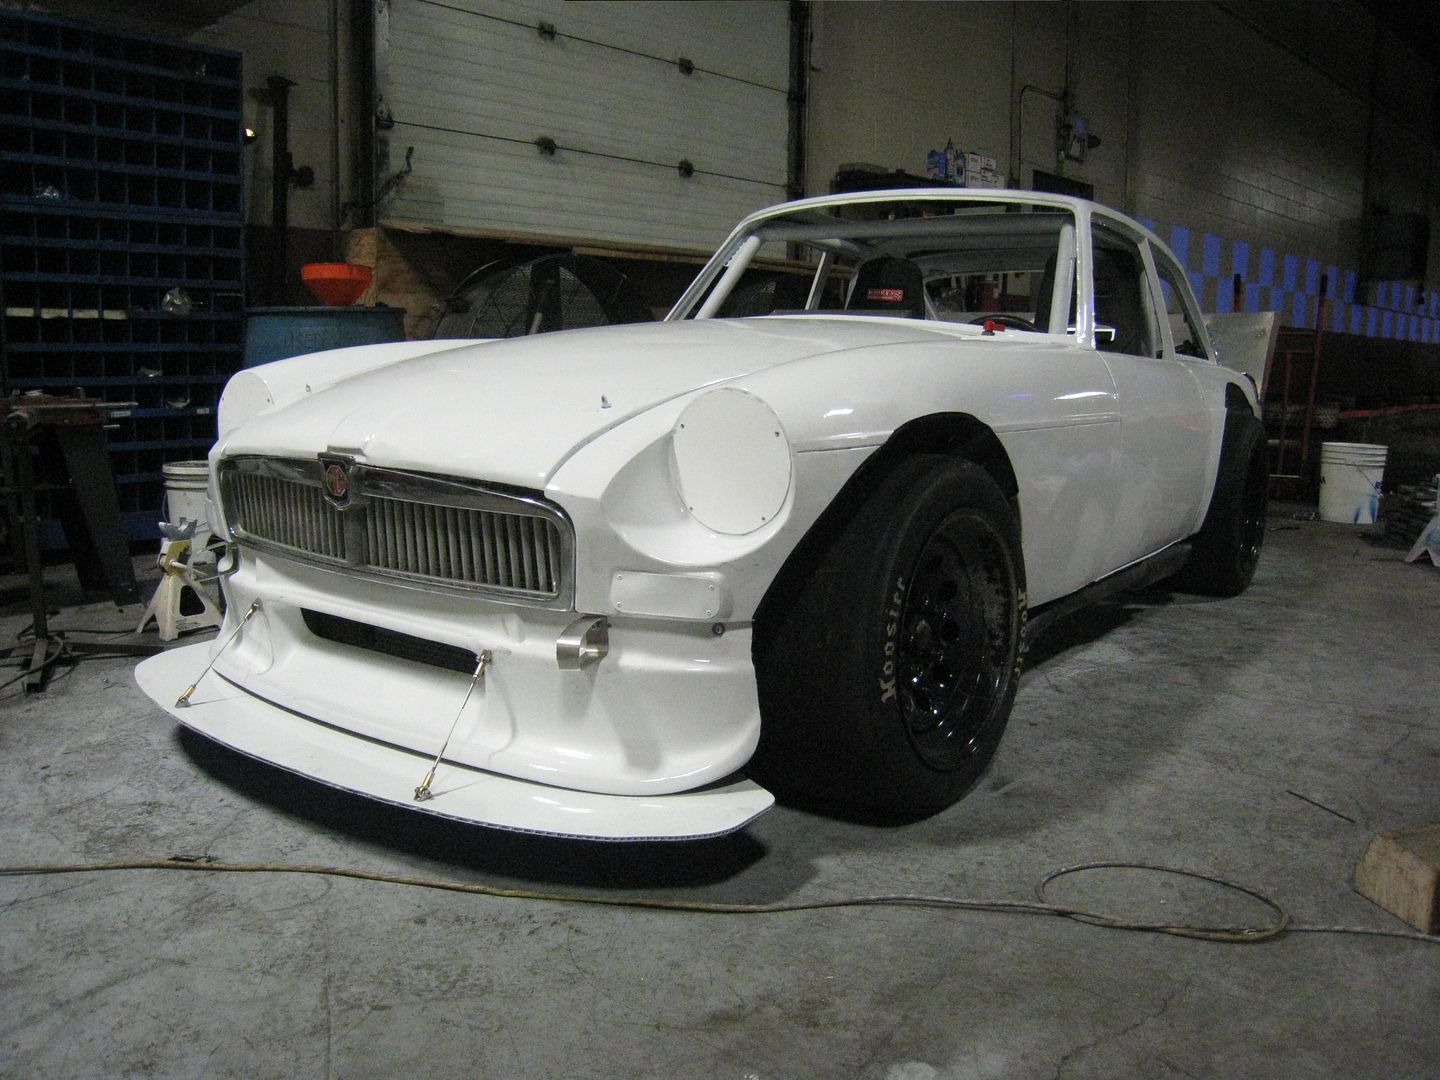
The mesh grille: 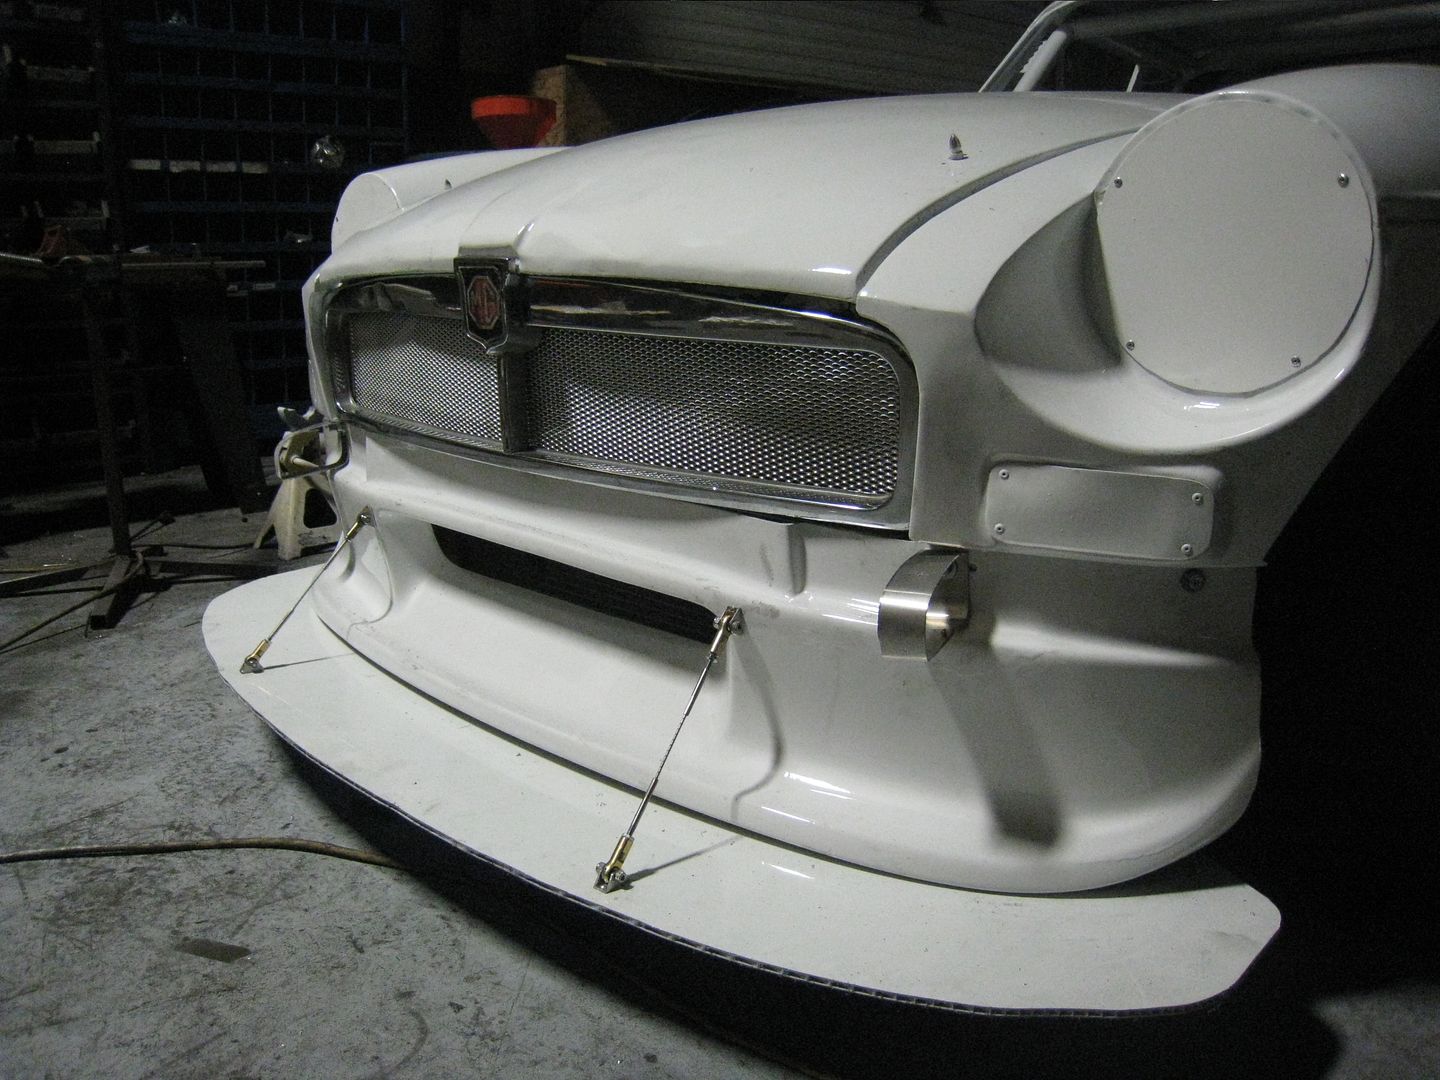
Also put mesh in the cowl vent: 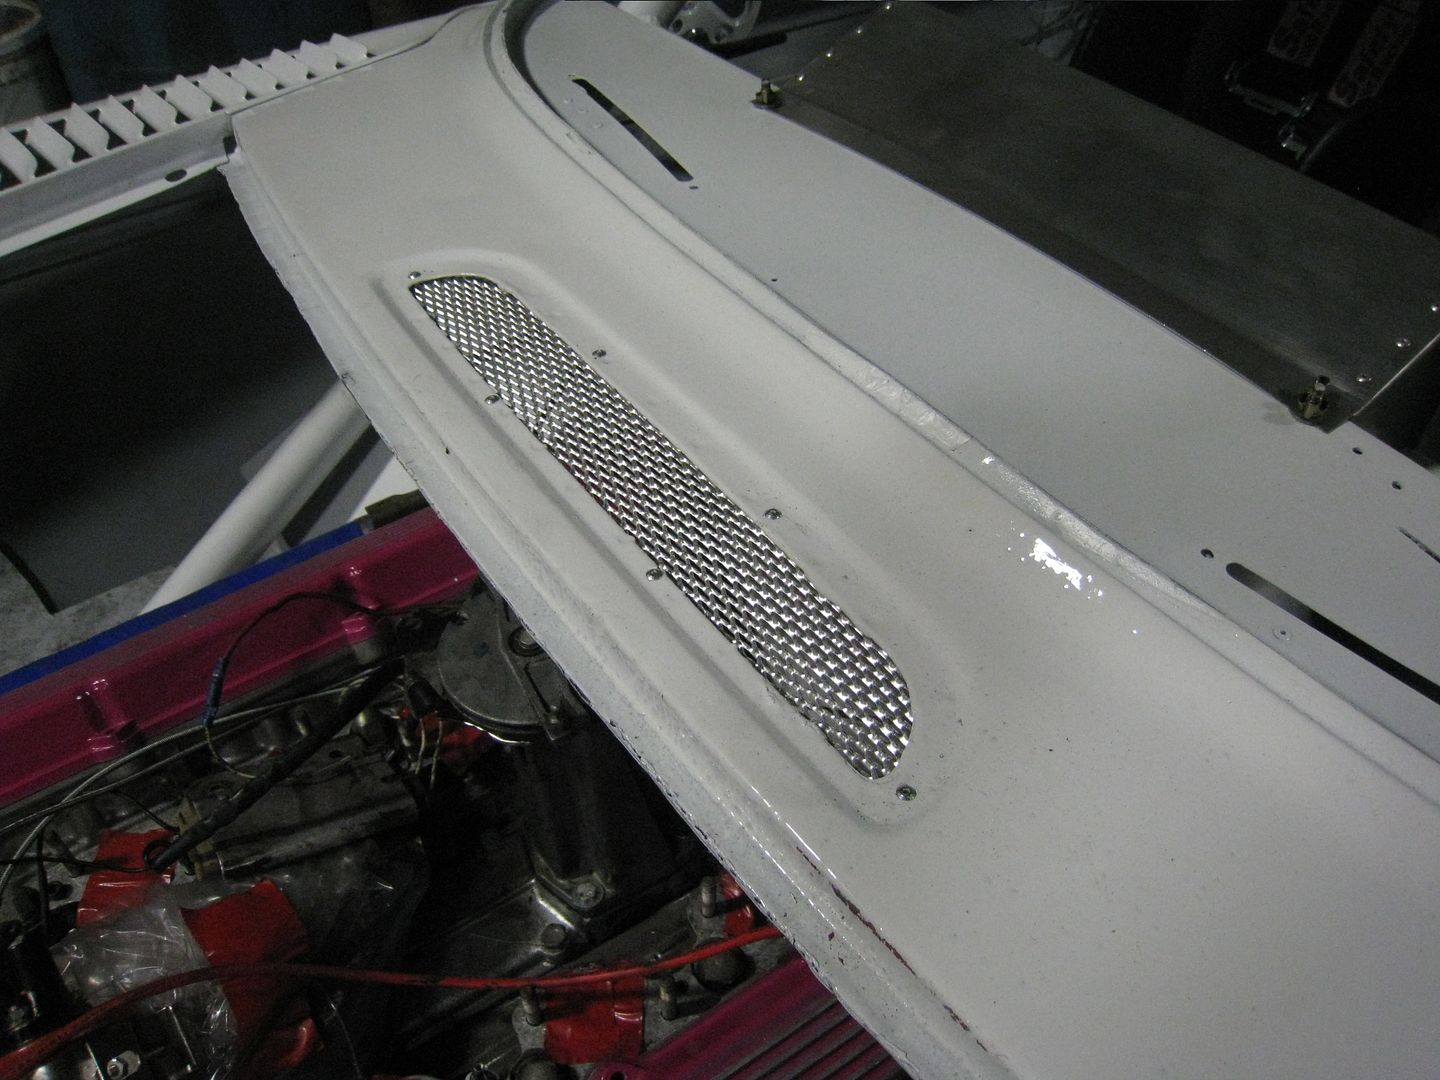
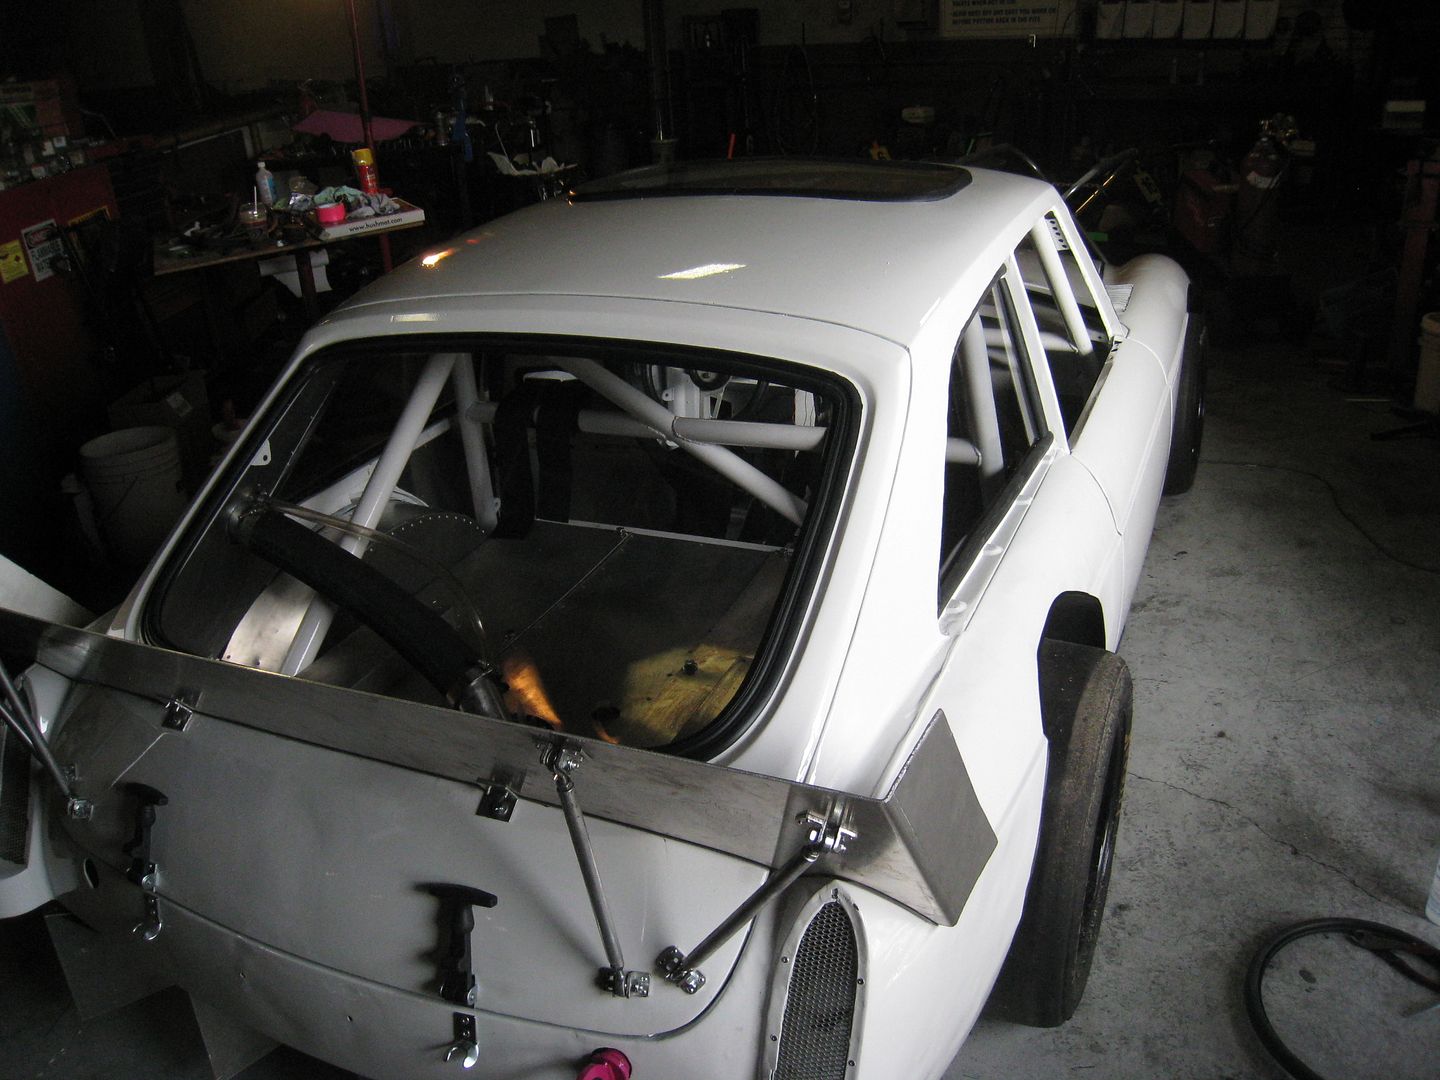
I remade the straps going to the grille and bead rolled them so they look nice: 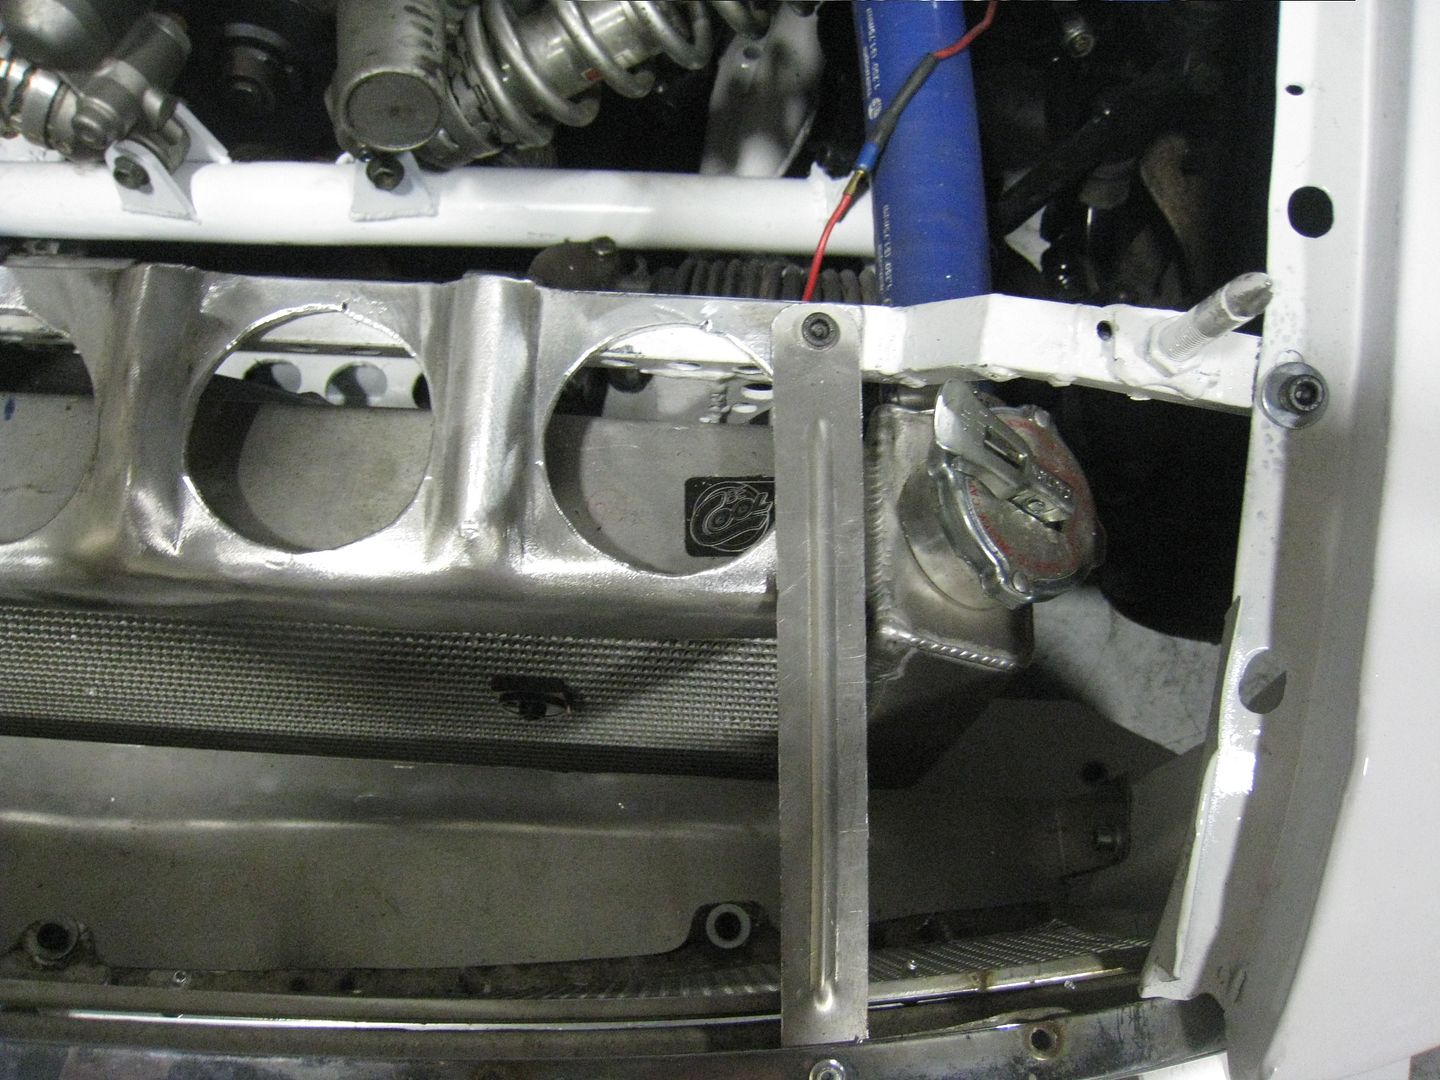
And installed straps to hold the rear hatch down: 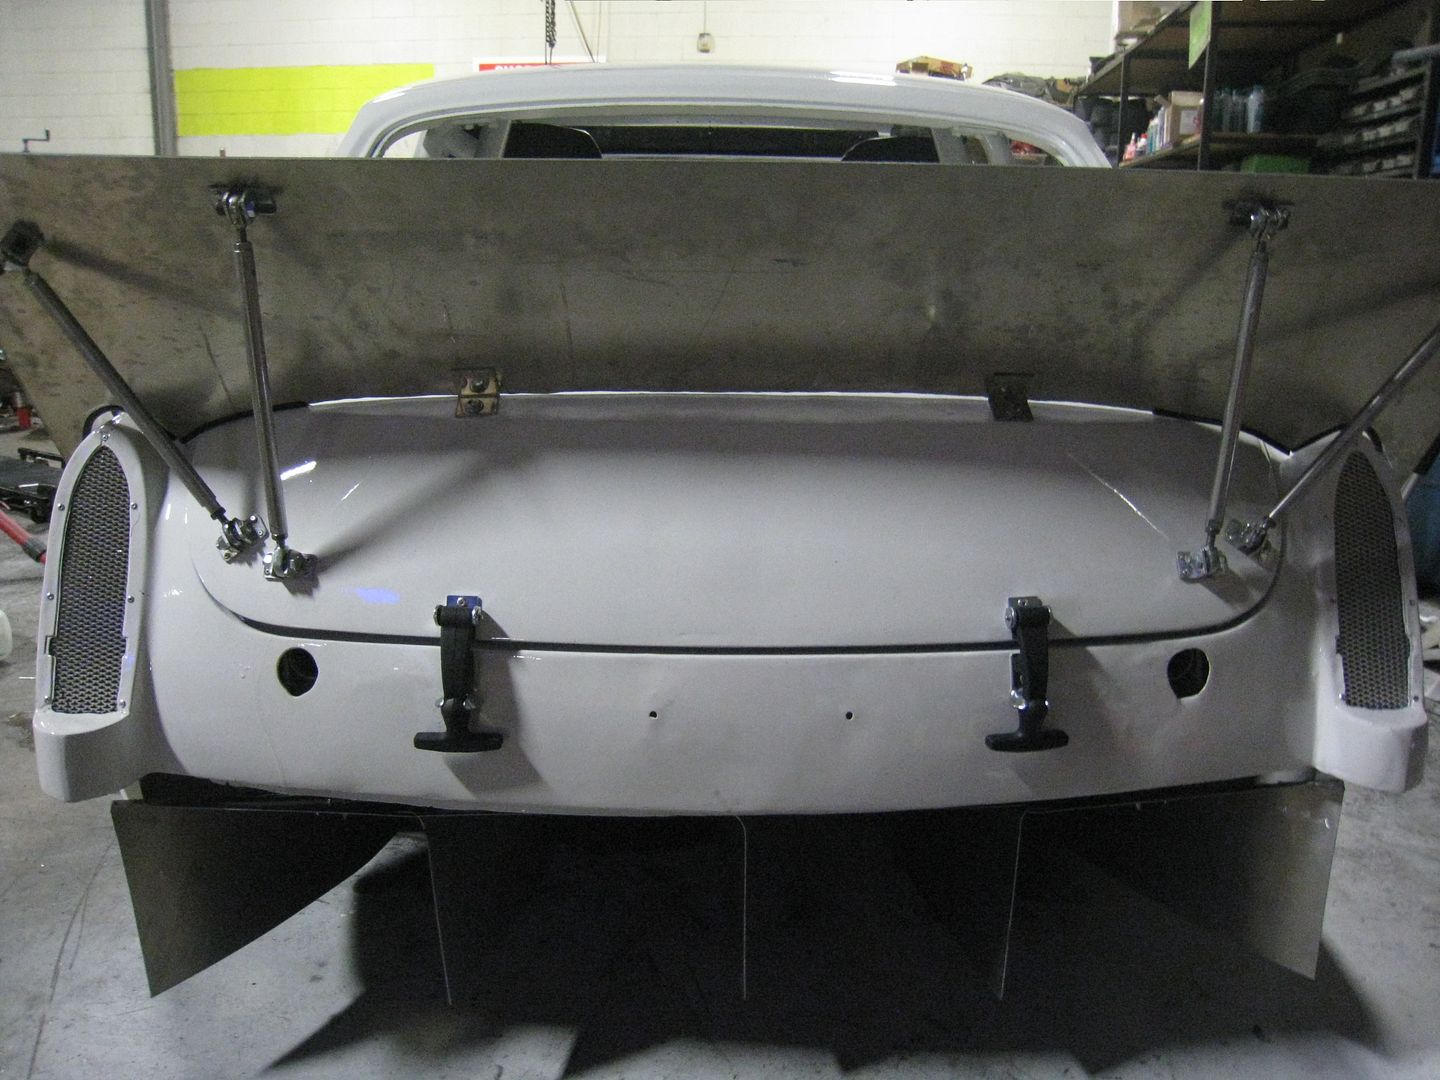
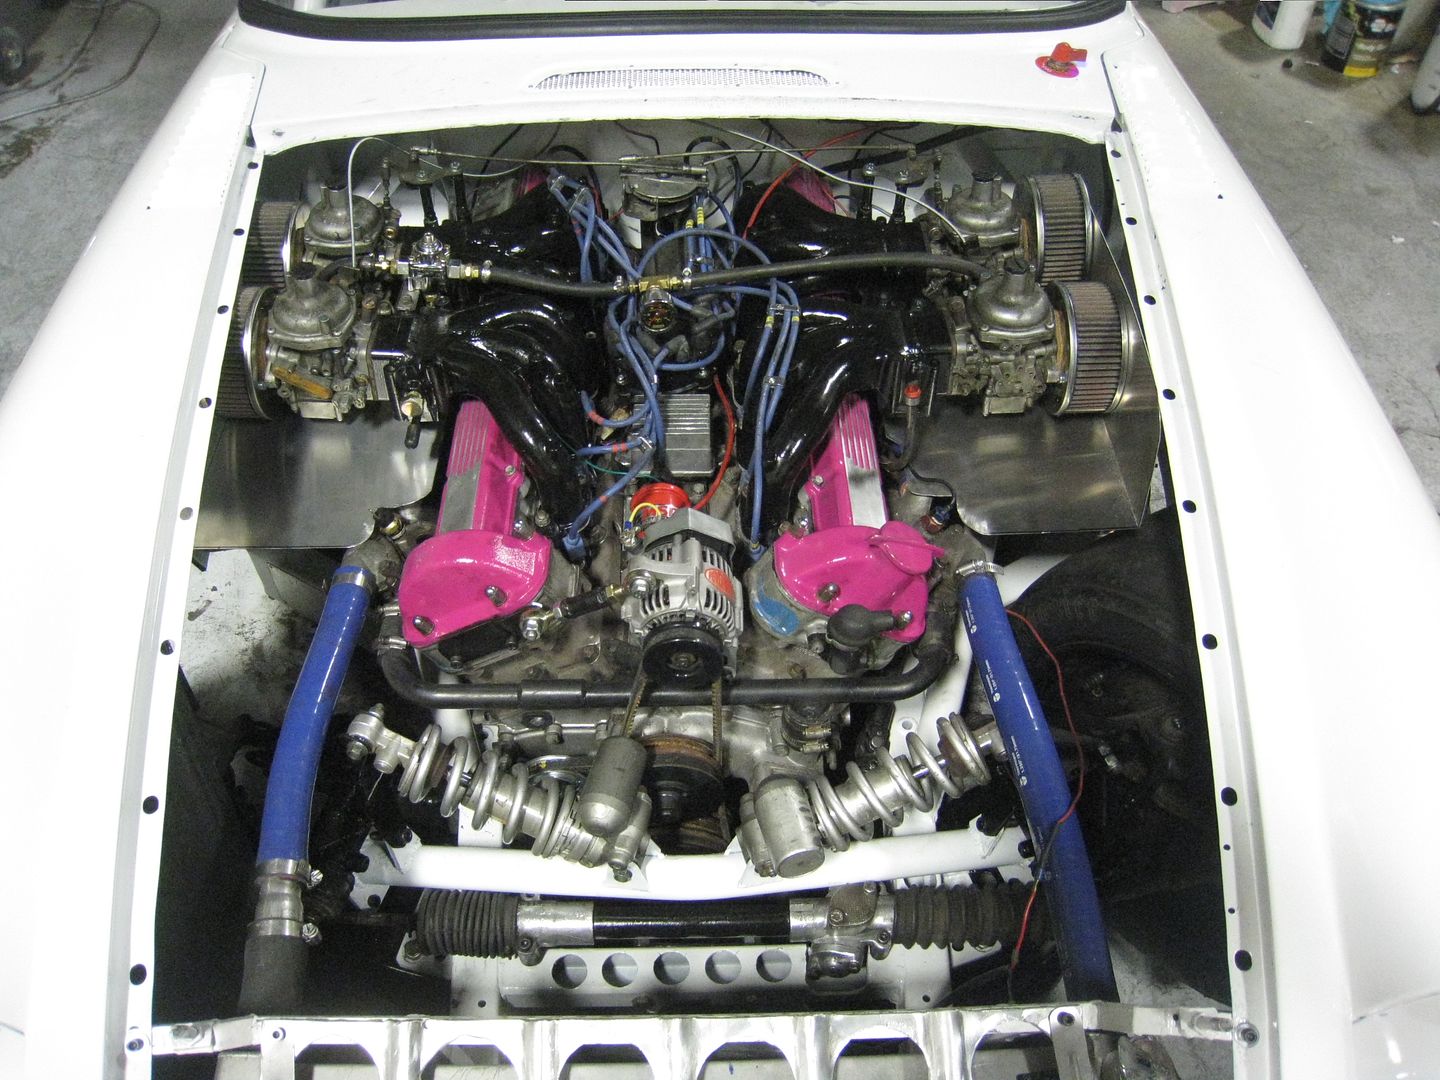
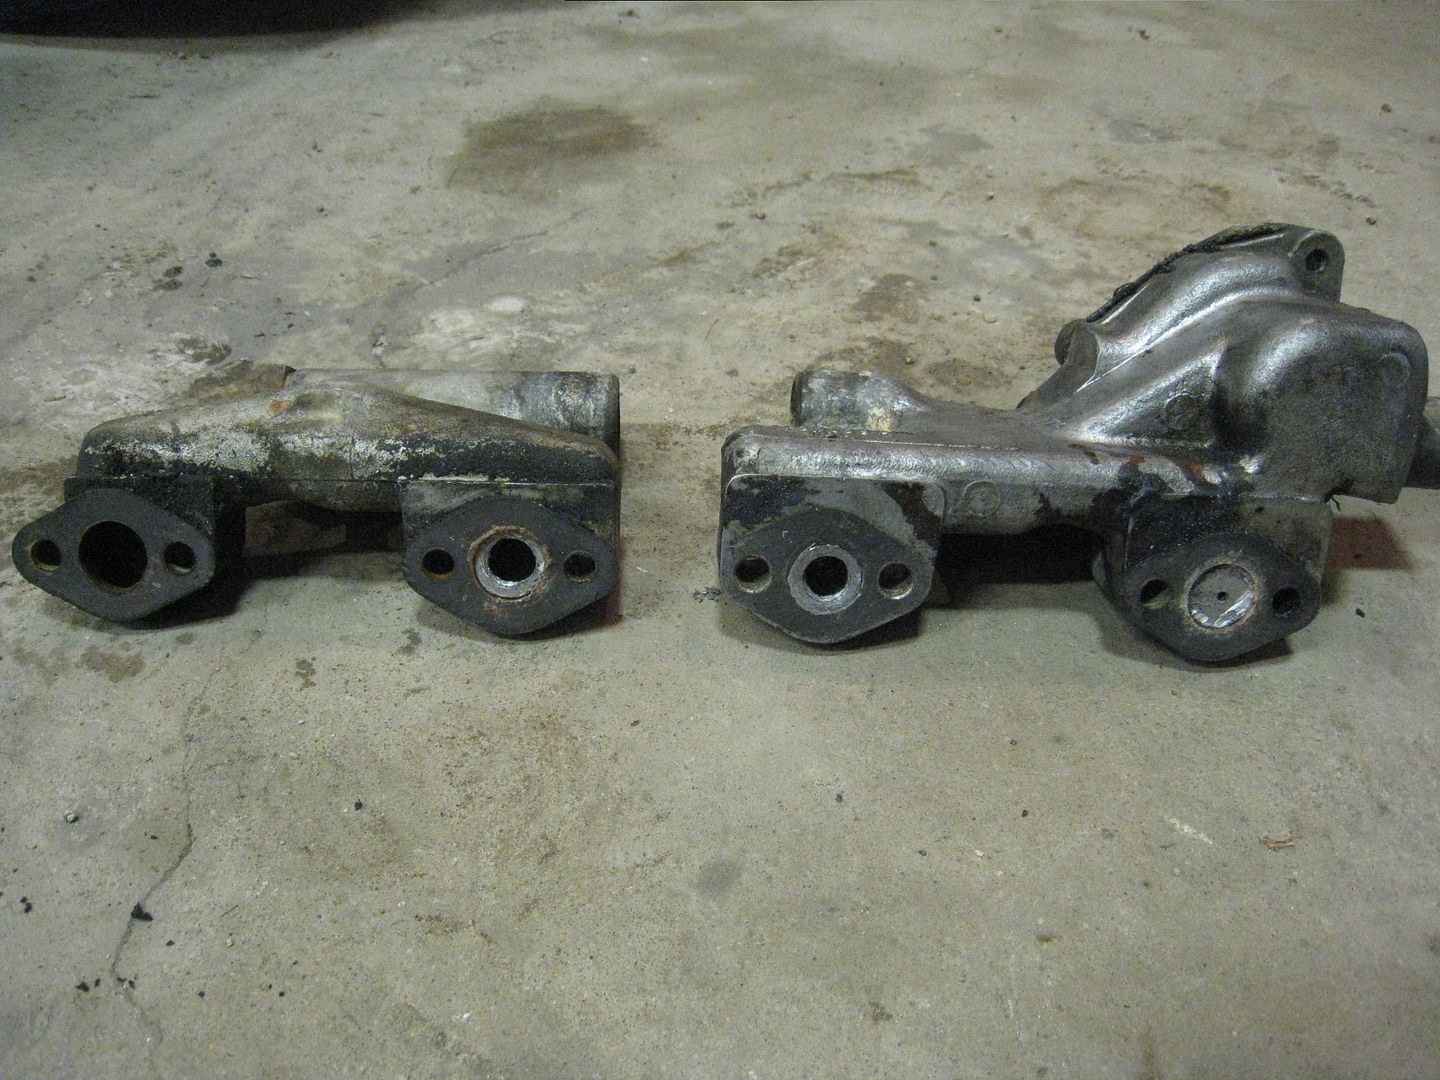
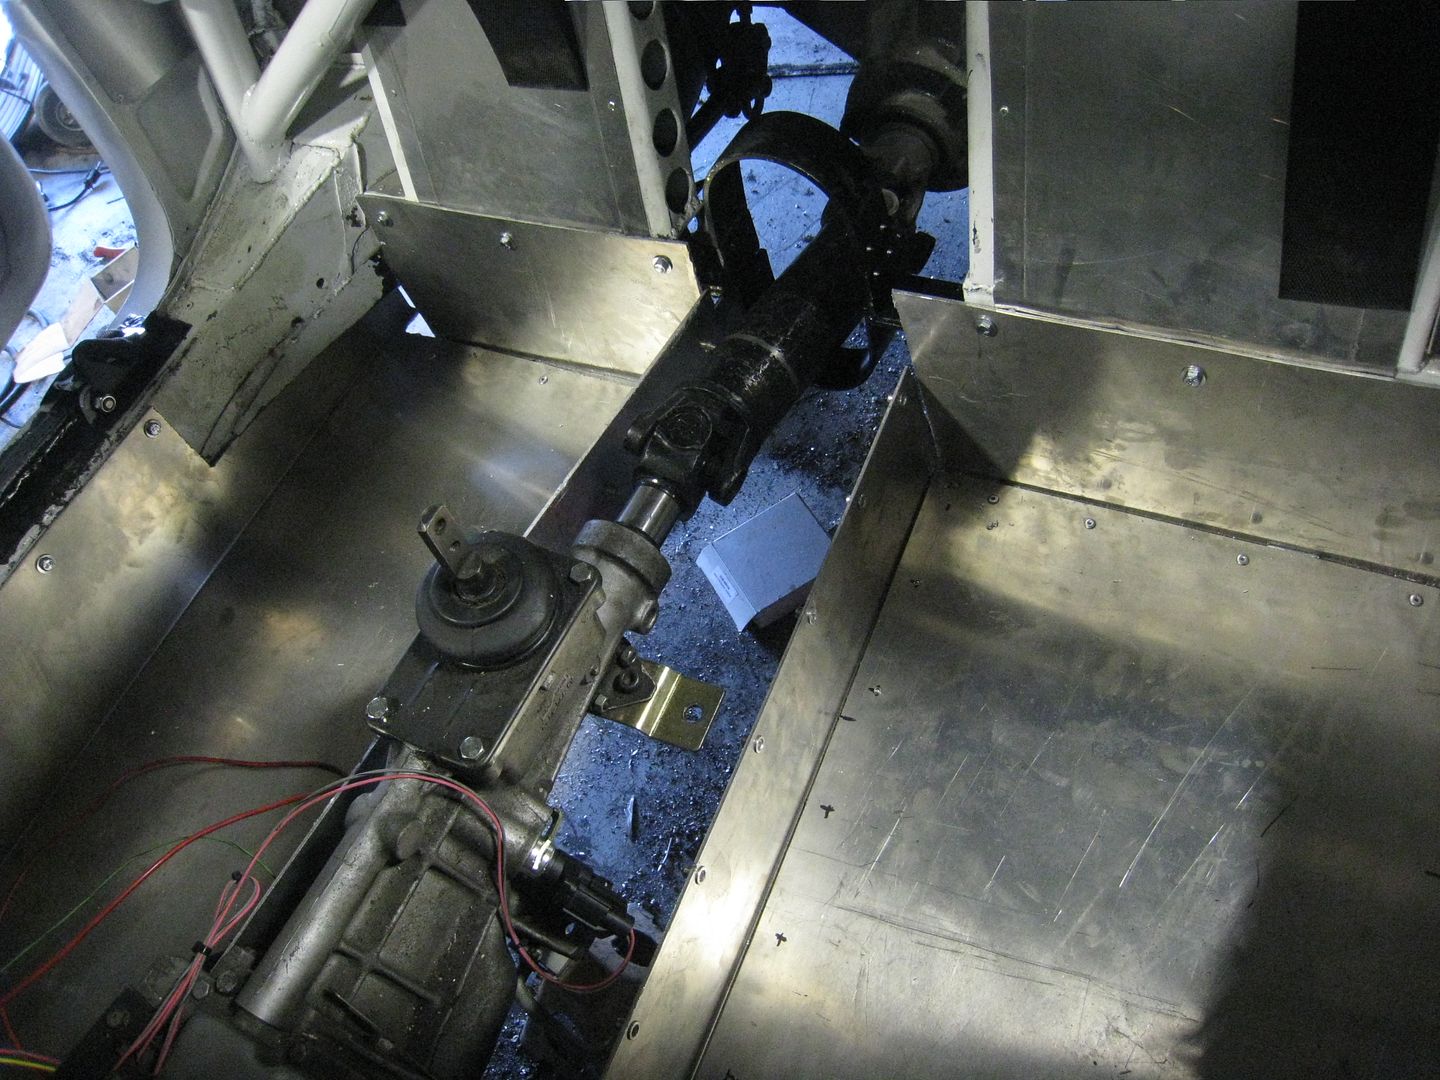
The intakes came back from JRS manufacturing [url]www.jrstephenson.com[/url] today and after some cleaning up with a die grinder, I shot a coat of paint on them and did a trial fitting on the car. The good news is that the linkage will not have to be modified much to fit and the great news is that the hood doesn't have to be modified at all to fit. 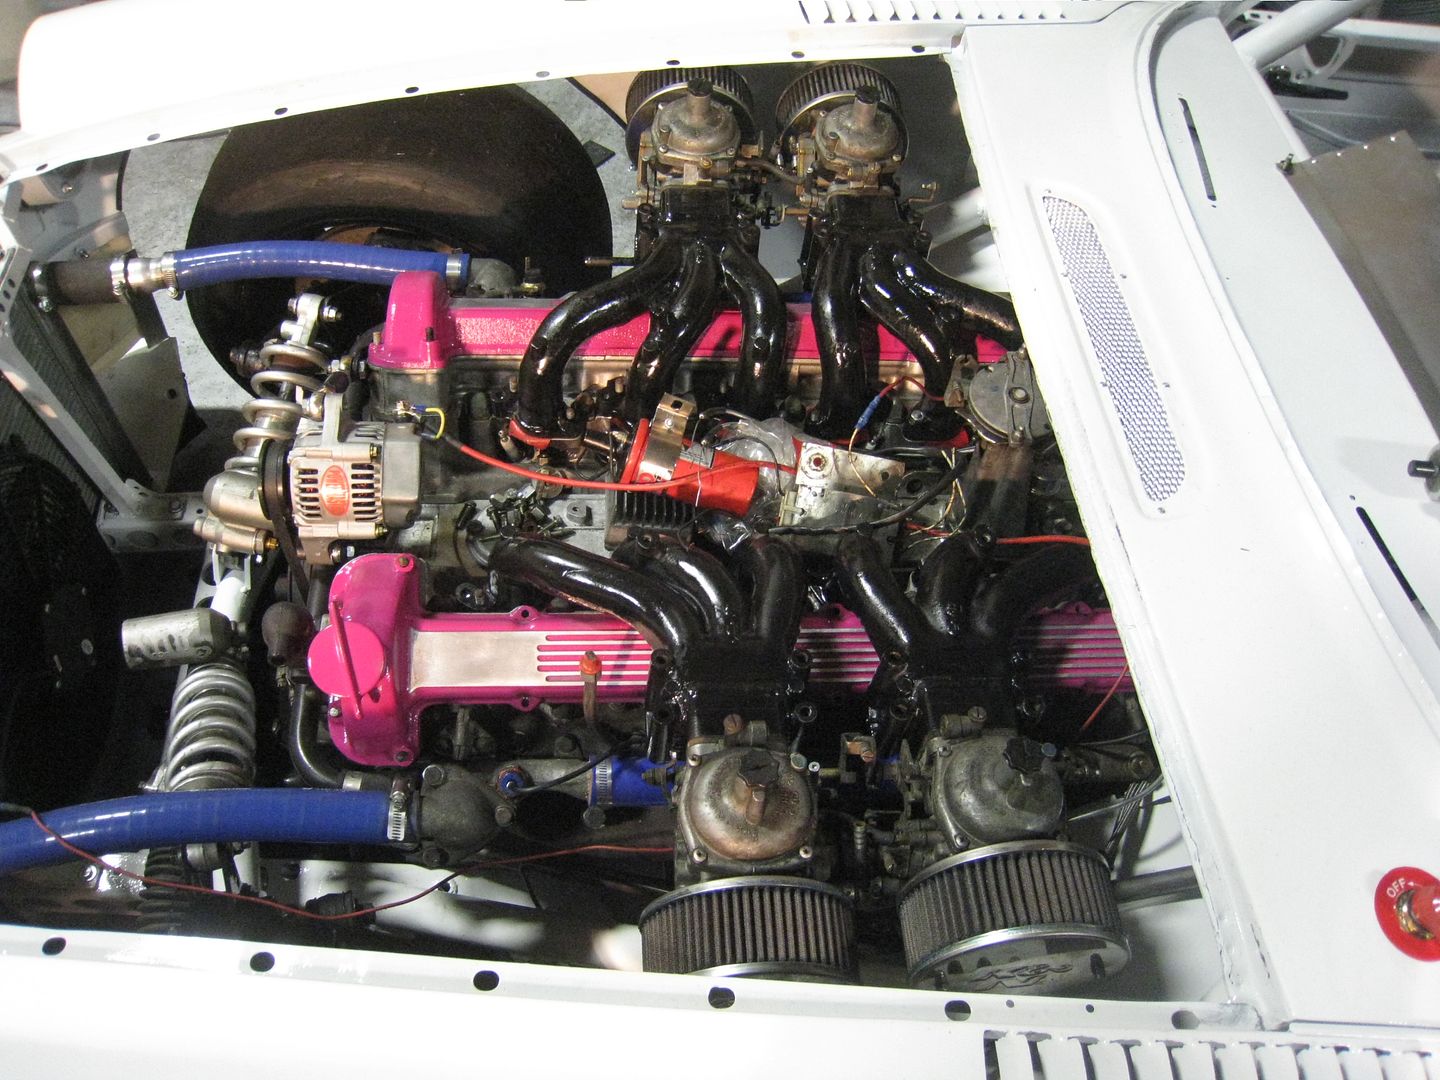
The splitter is not allowed to extend beyond the bodywork so to make it more effective, I added endplates. 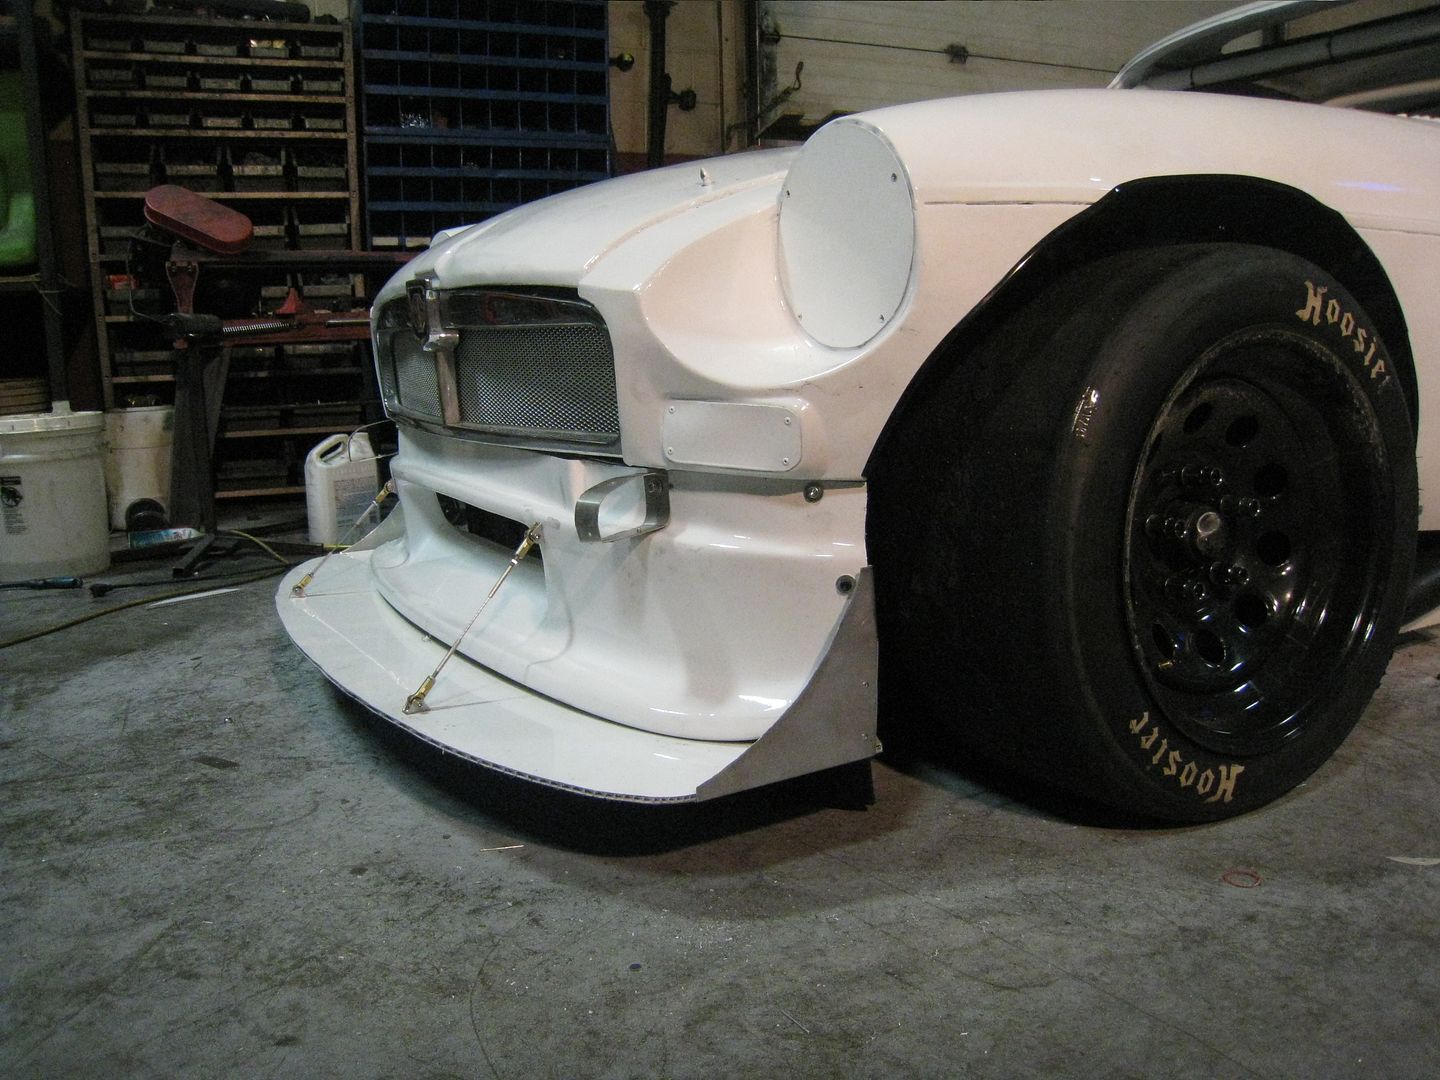
And to keep the exhaust from discoloring the paint, I added stainless steel heat shields above each outlet: 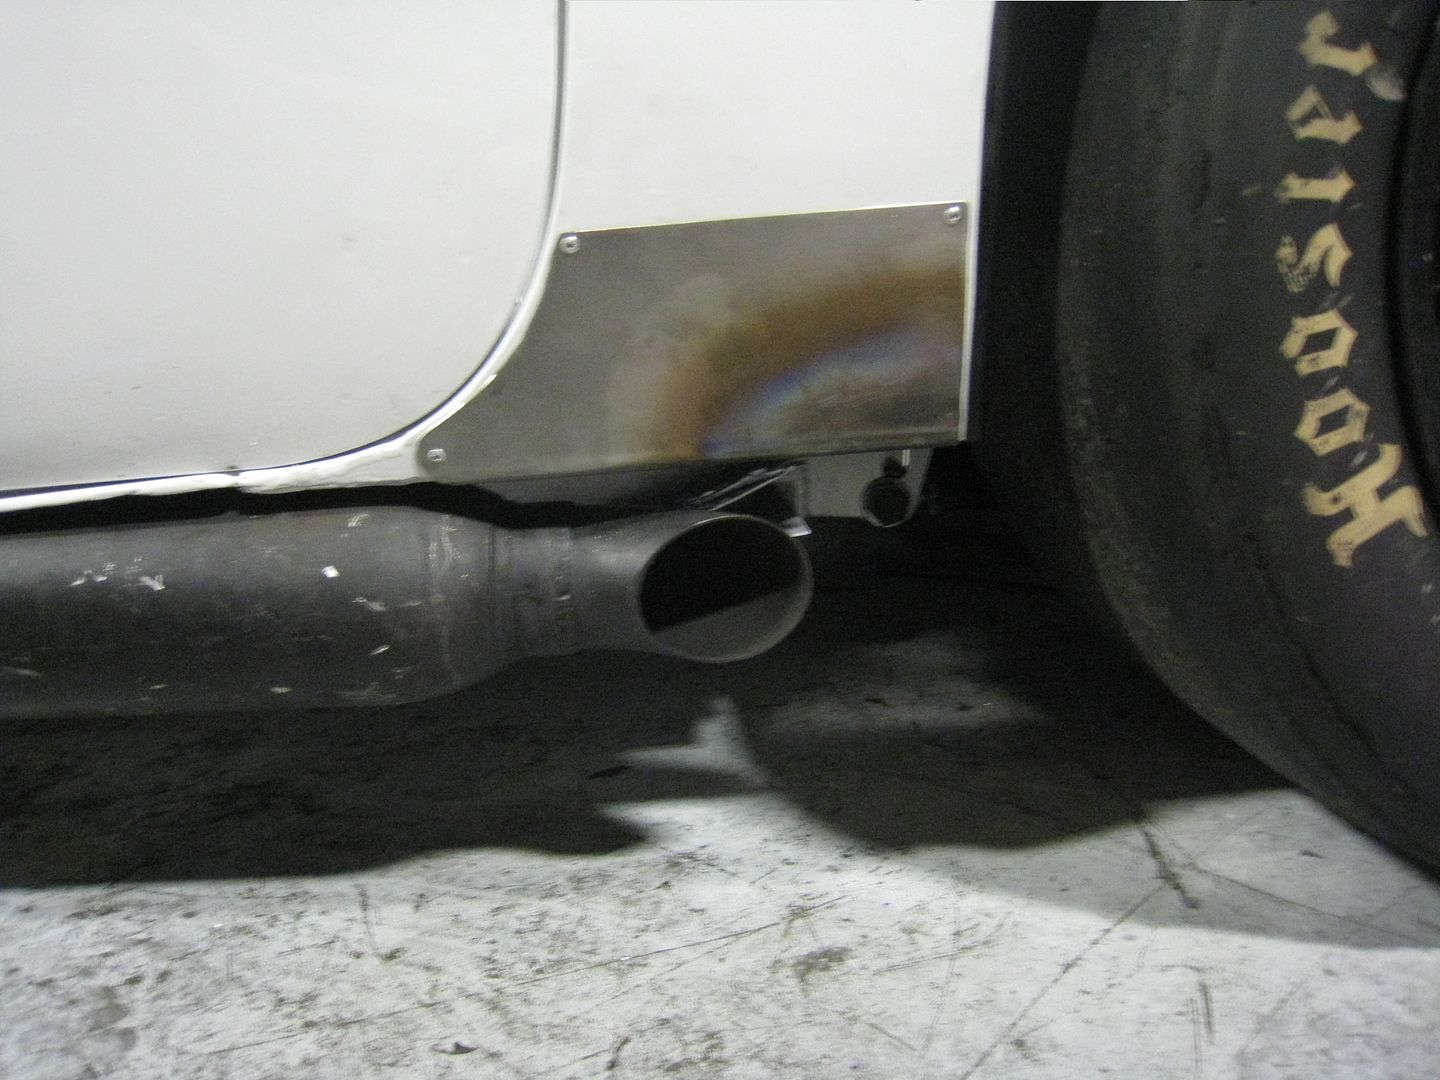
I figured out a way to have a front tow hook. If I need it, I just have to slide it under the splitter, through a slot in the air dam mount and to a bracket bolted to the crossmember where it is held in with a sheer pin. It is not attached until needed. 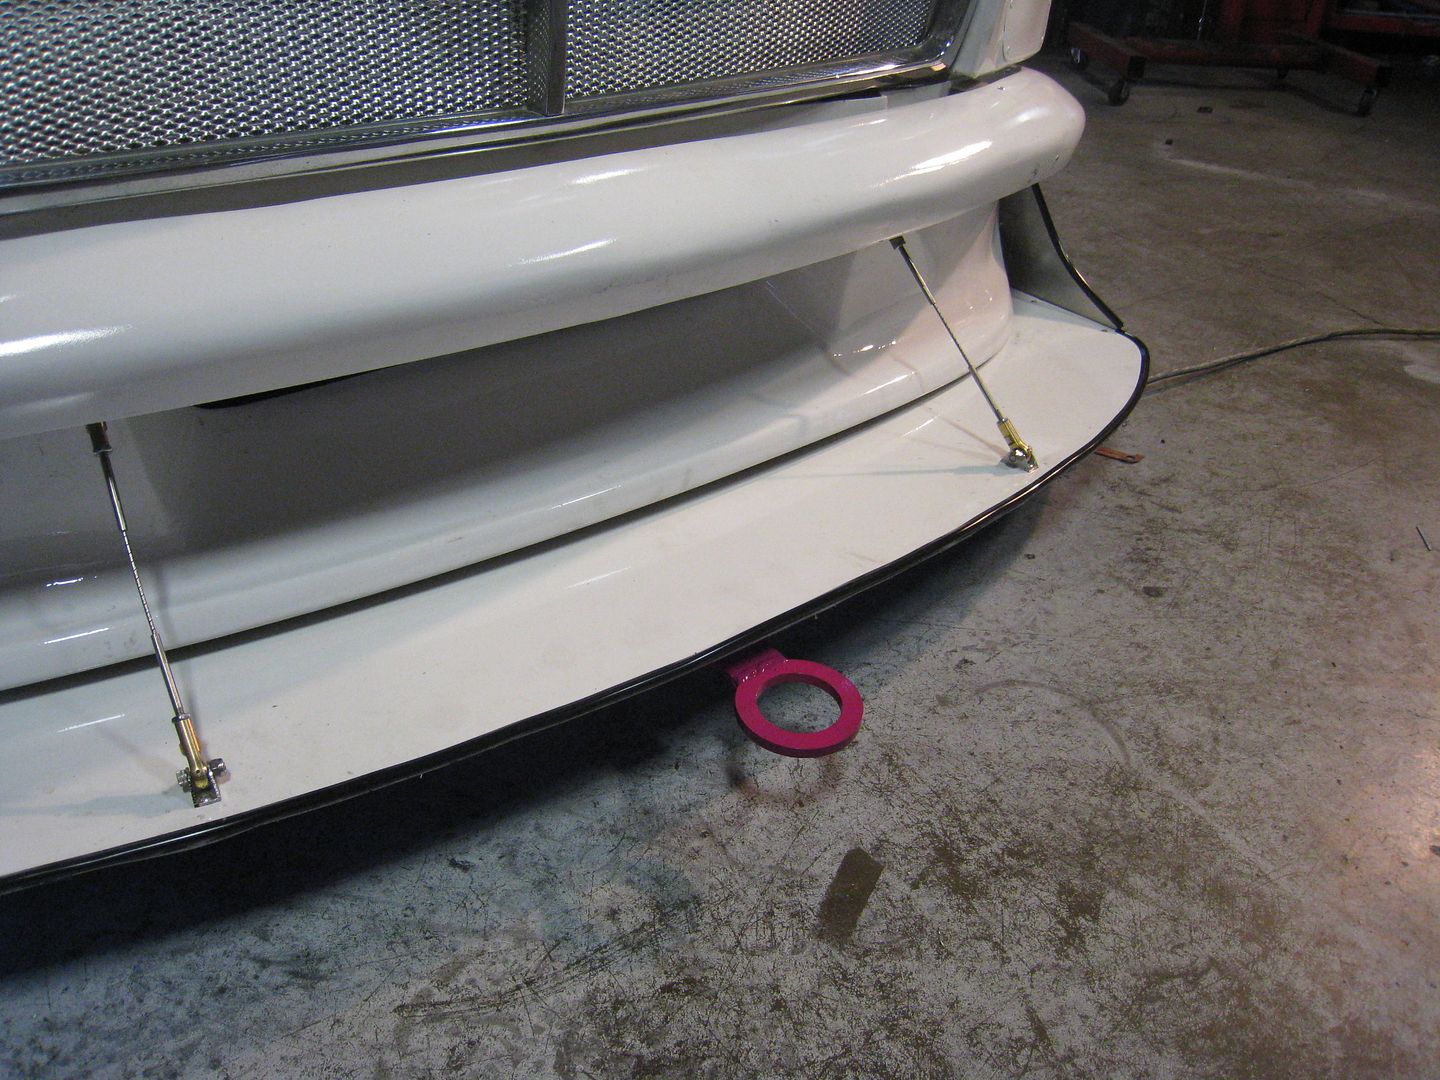
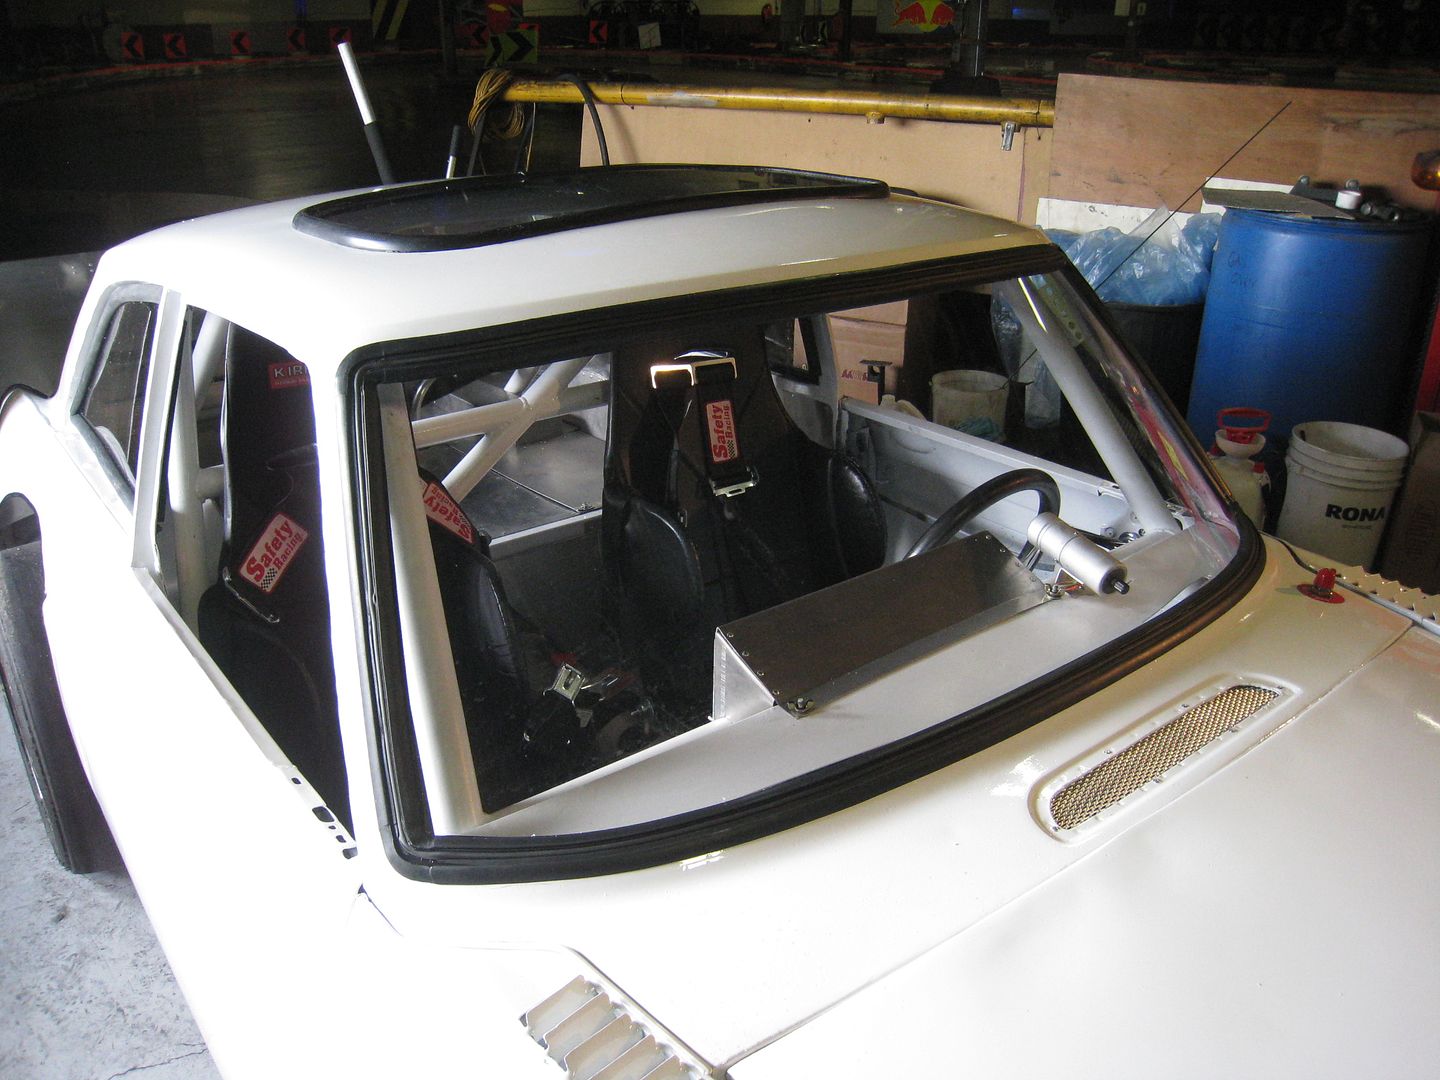
I also put all the Lexan windows in, using MGB seals on the front and back windows and sunroof seals on the side windows and the sunroof. 
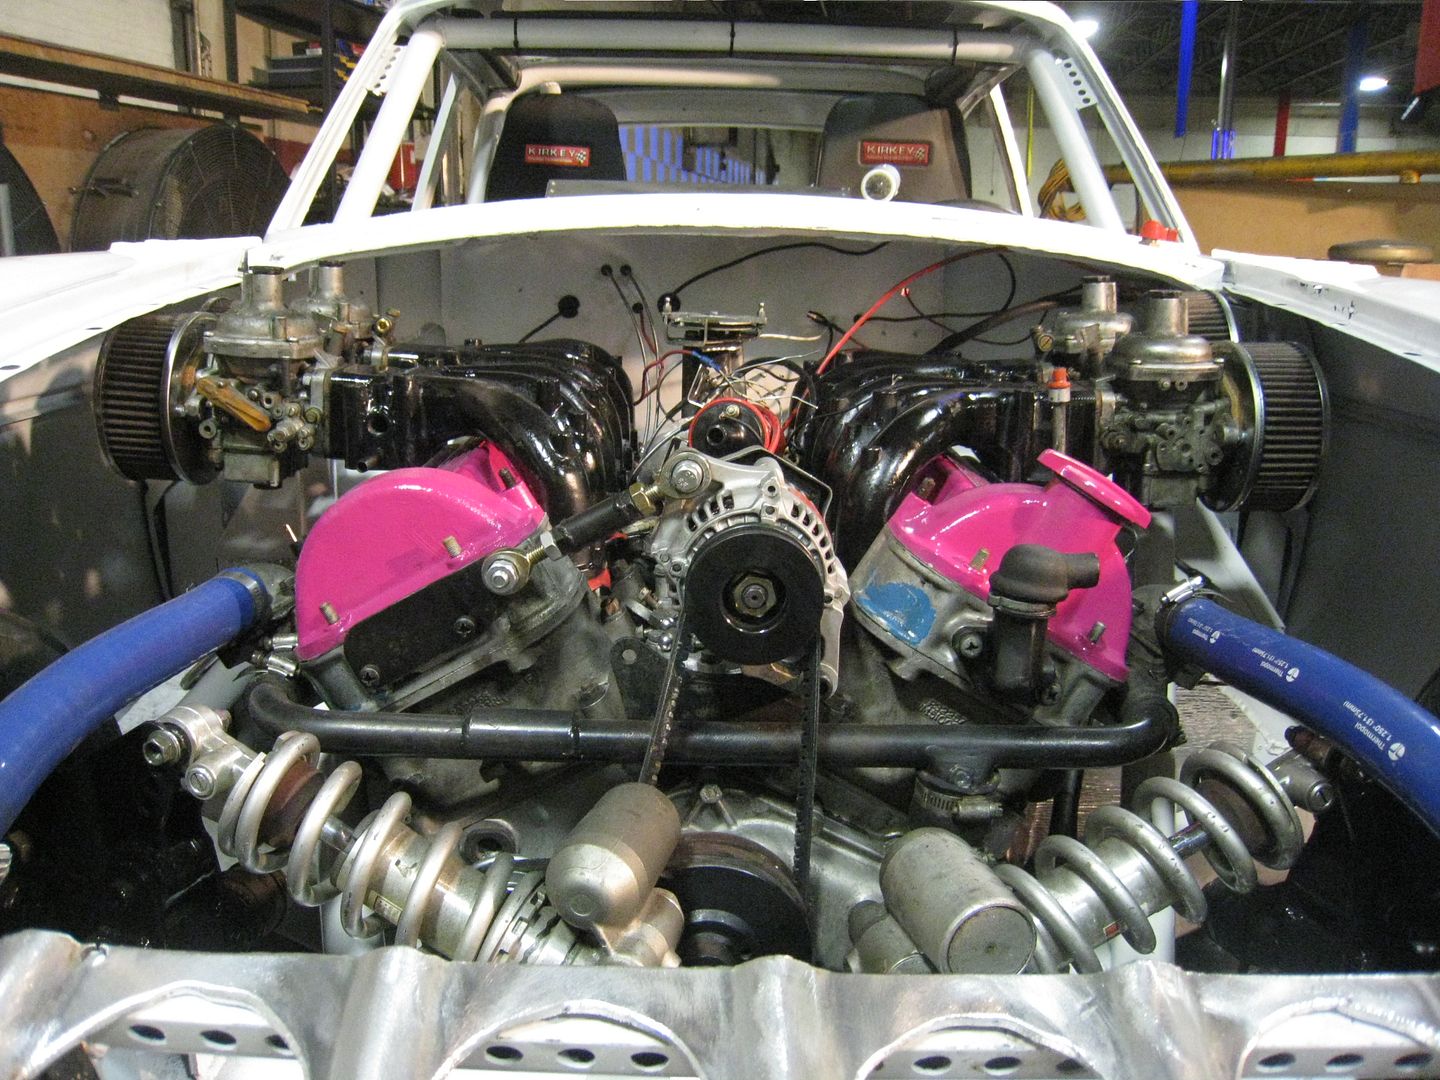
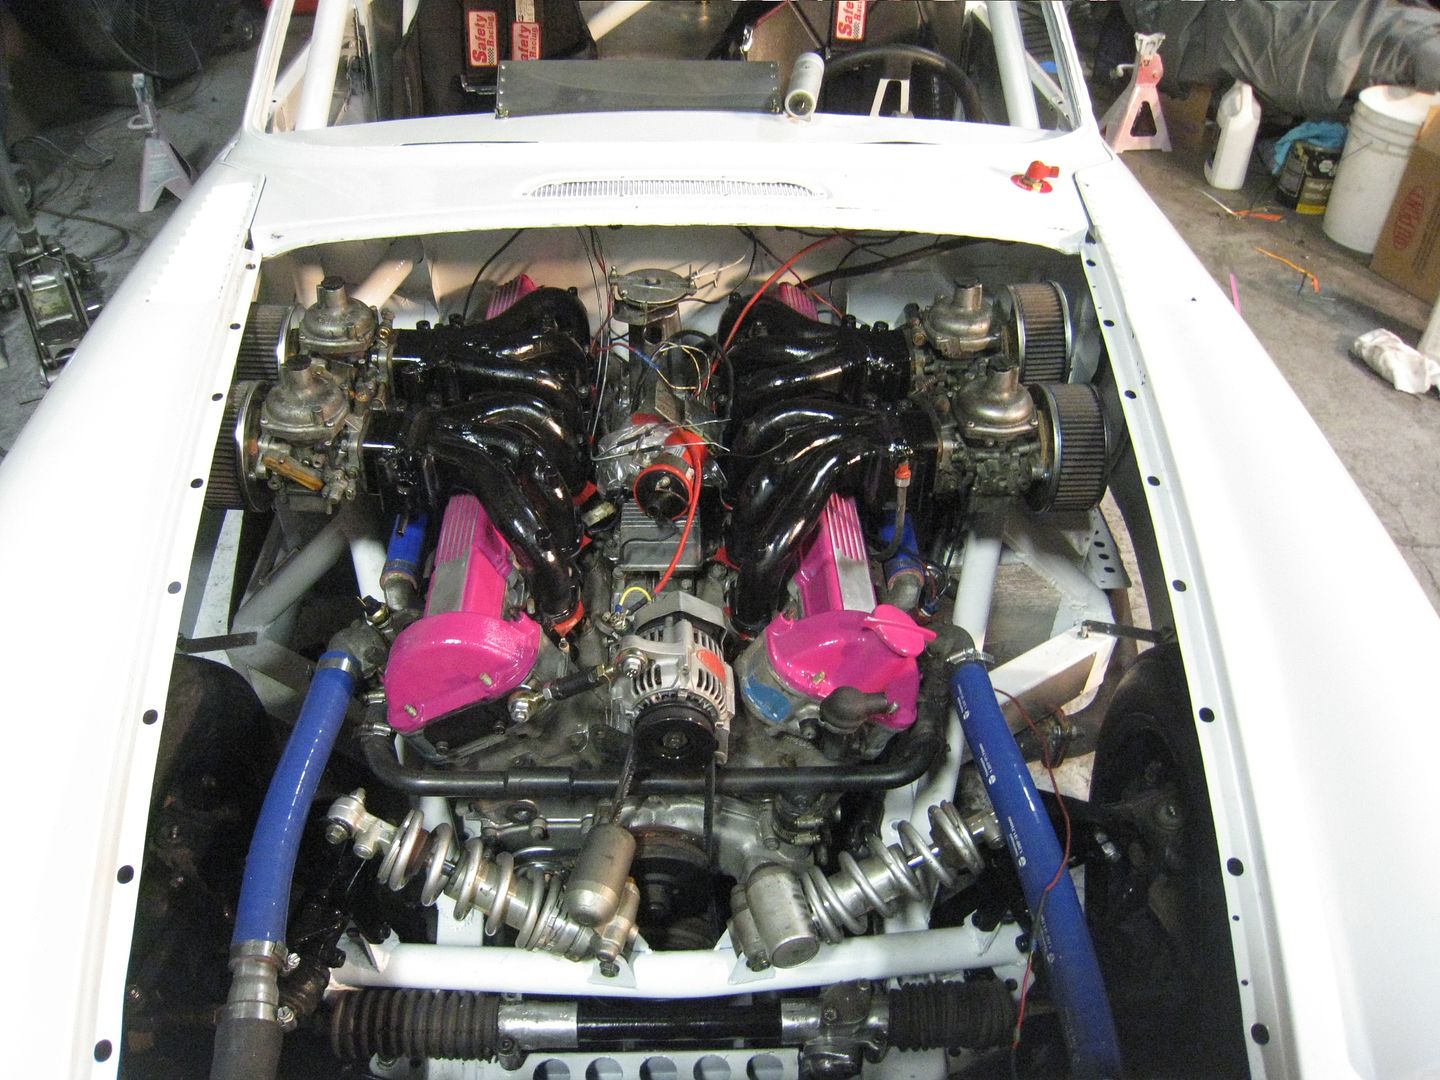
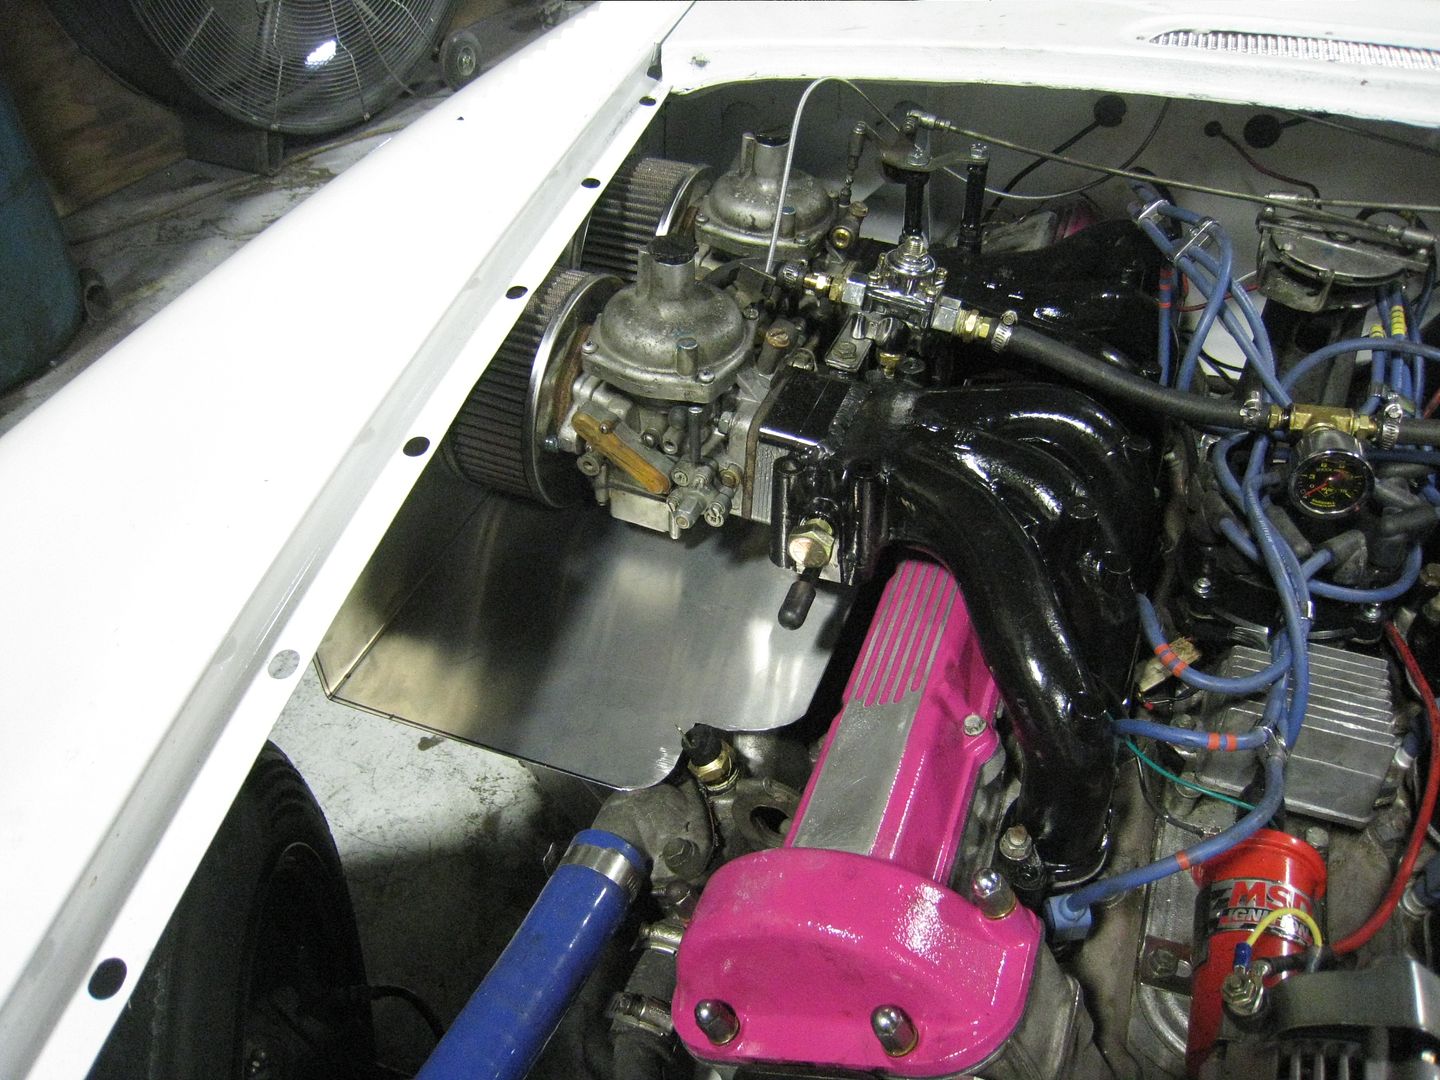
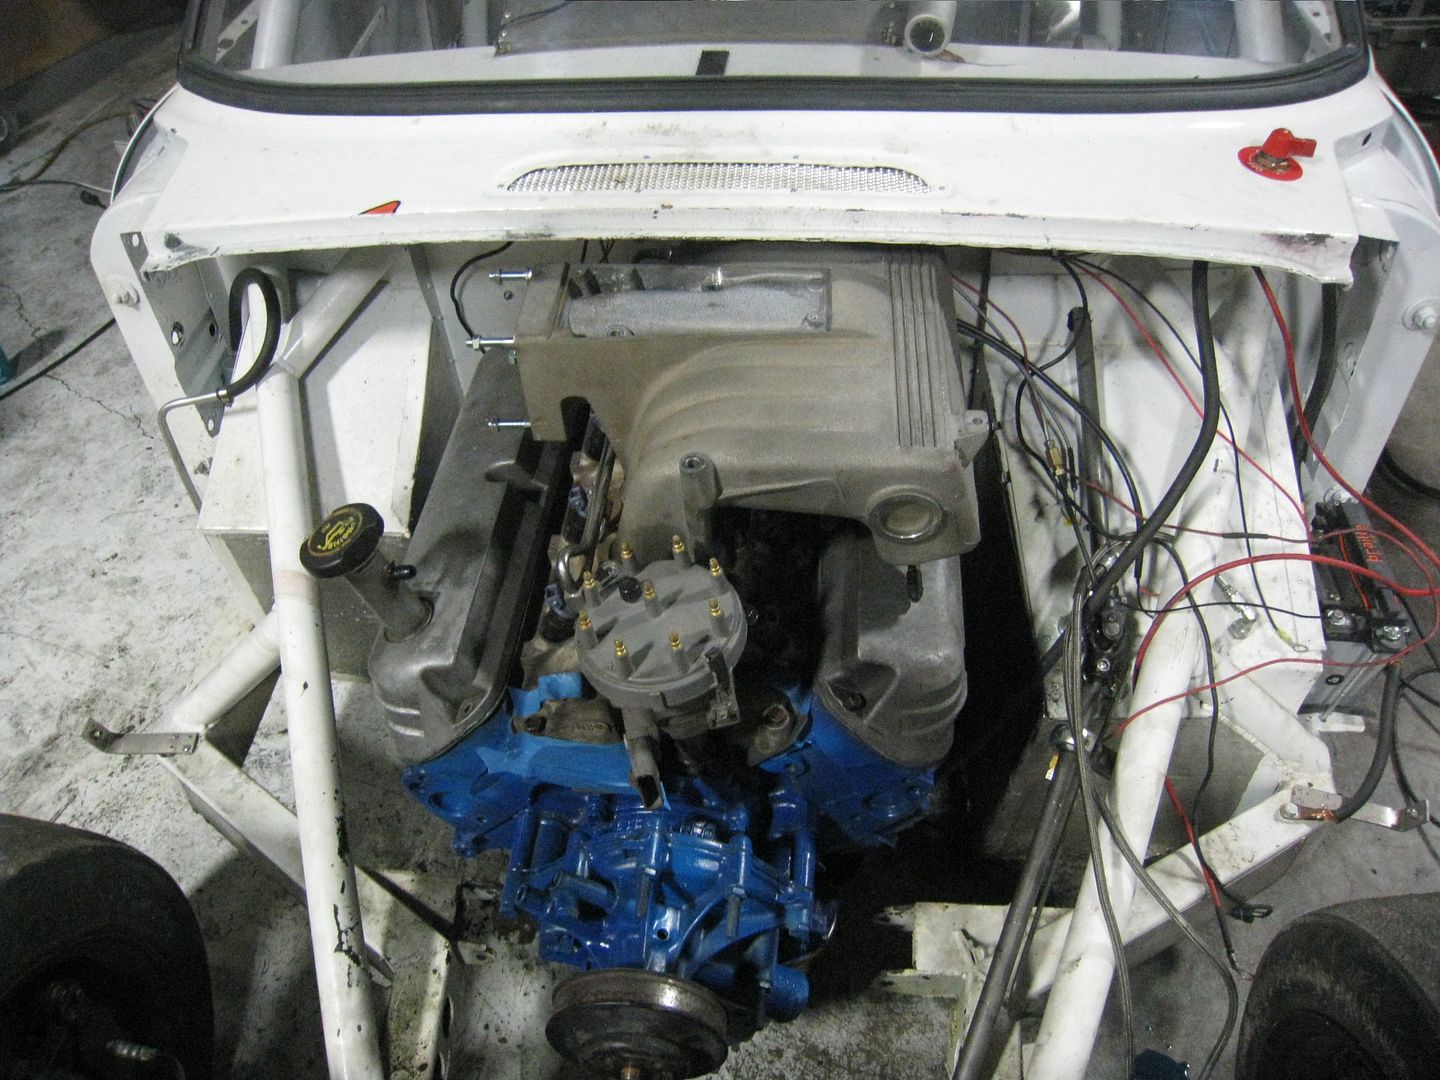
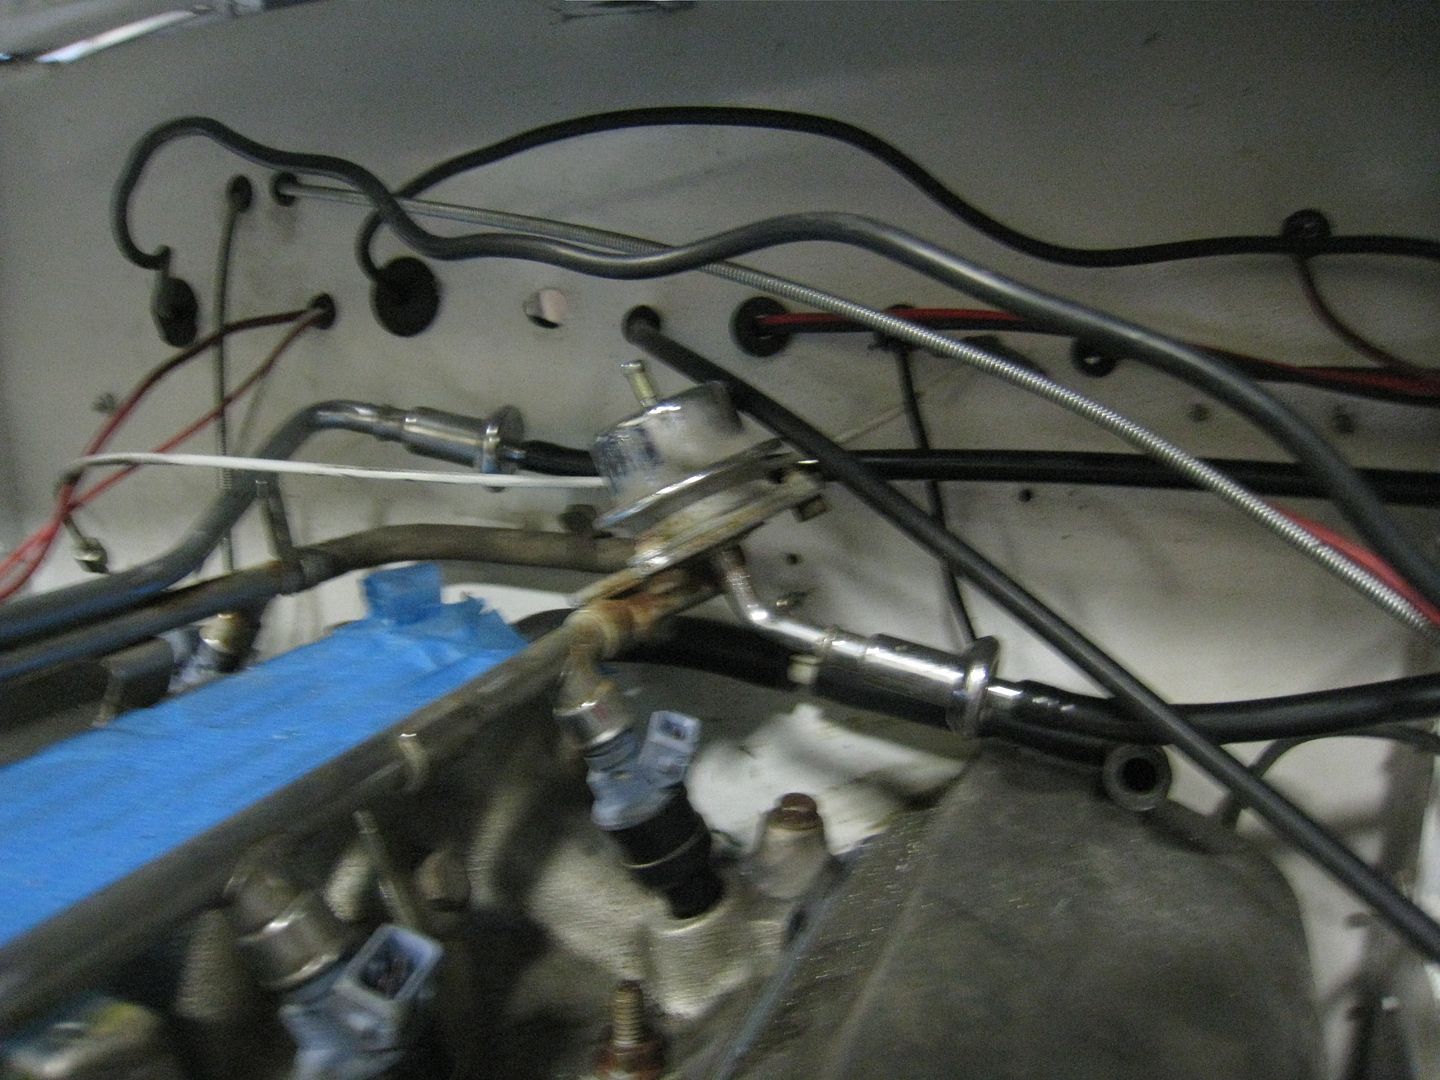
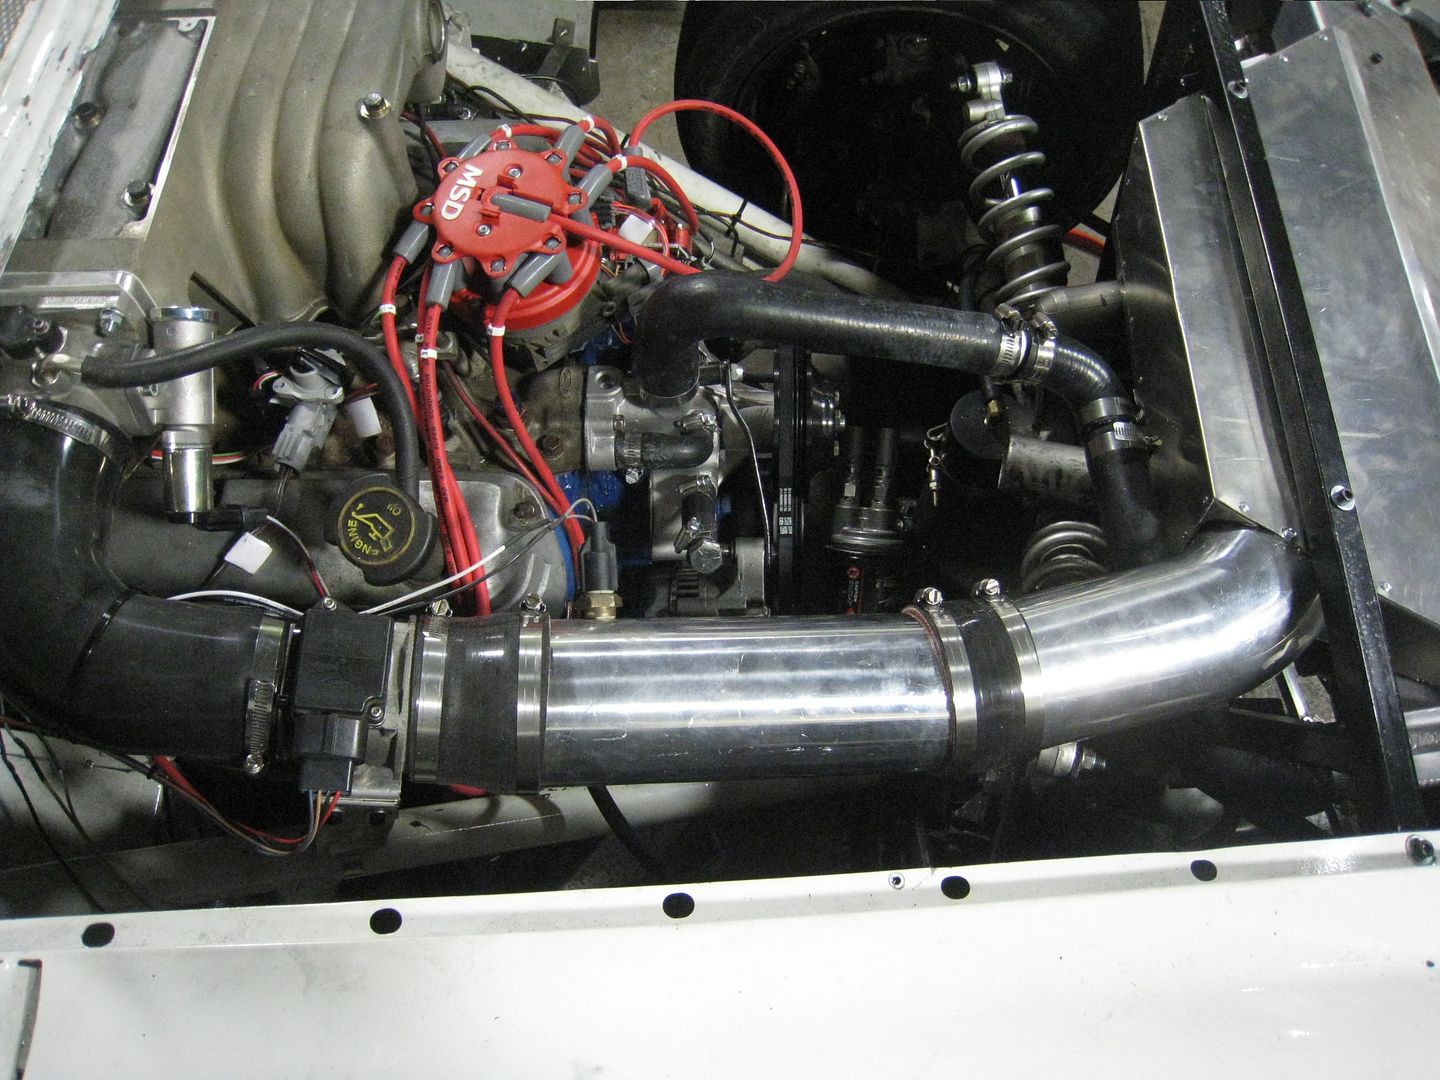
I had concerns about water flooding the air cleaners and heat from the exhaust manifolds being sucked into the engine so today I made heat/water shields. Of course, when I get my dream ram air system made, these will get yanked out. Notice also that the throttle linkage has been modified and re-installed and the coil and fuel pressure regulator have been moved to better locations. 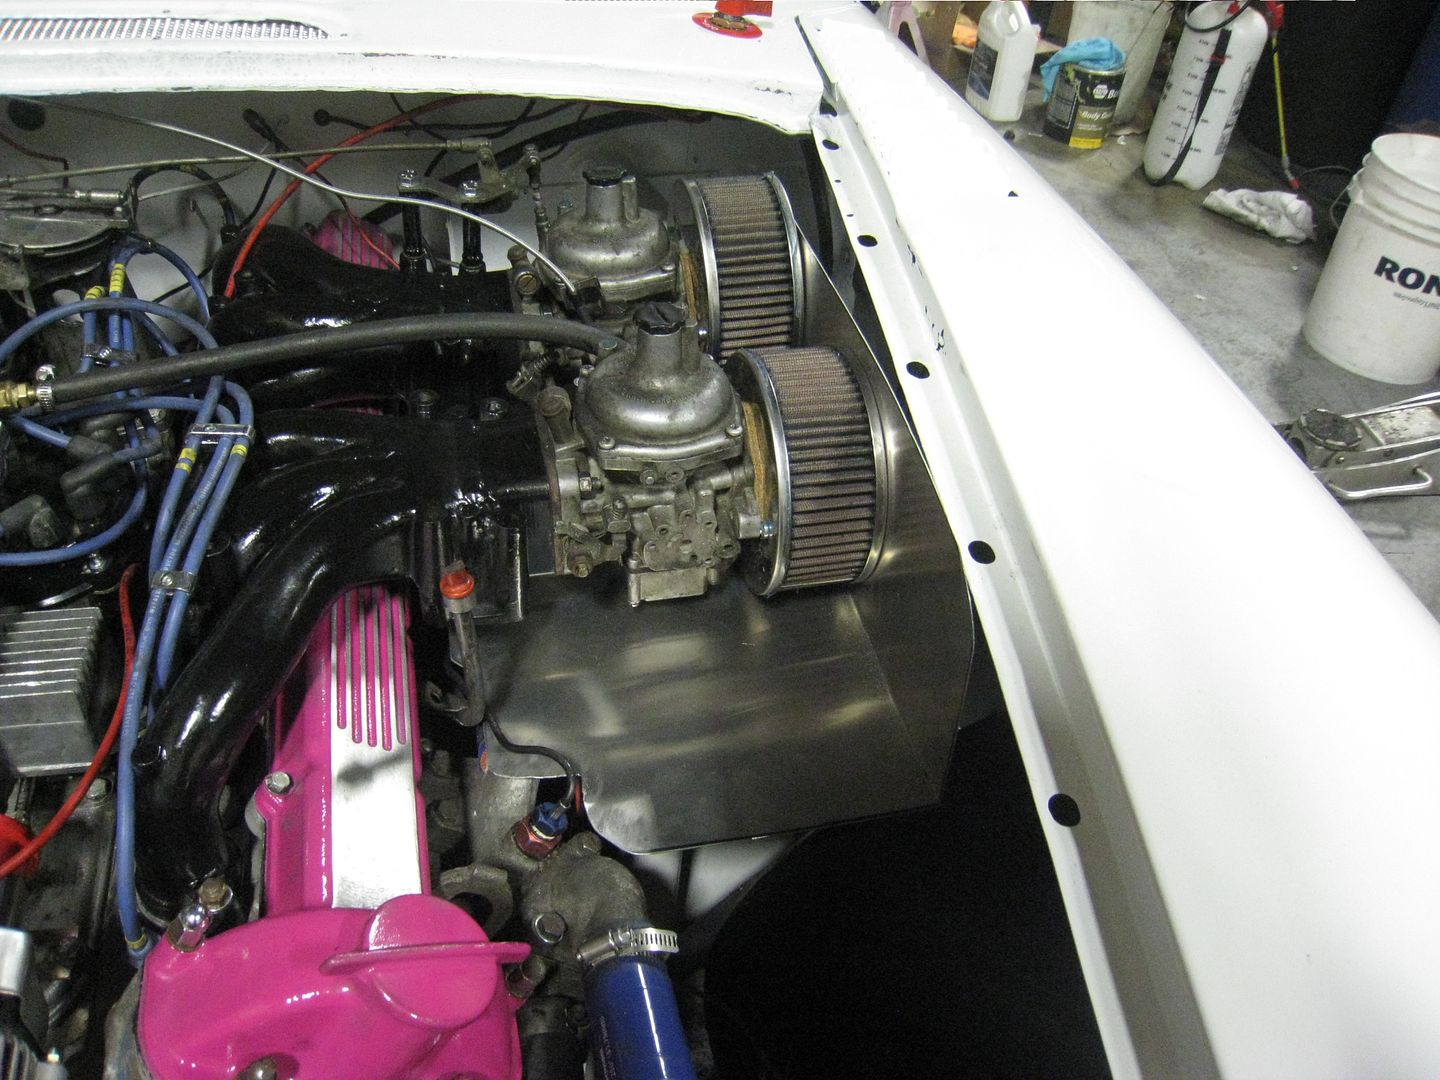
All I could do today was get the shifter boots installed: 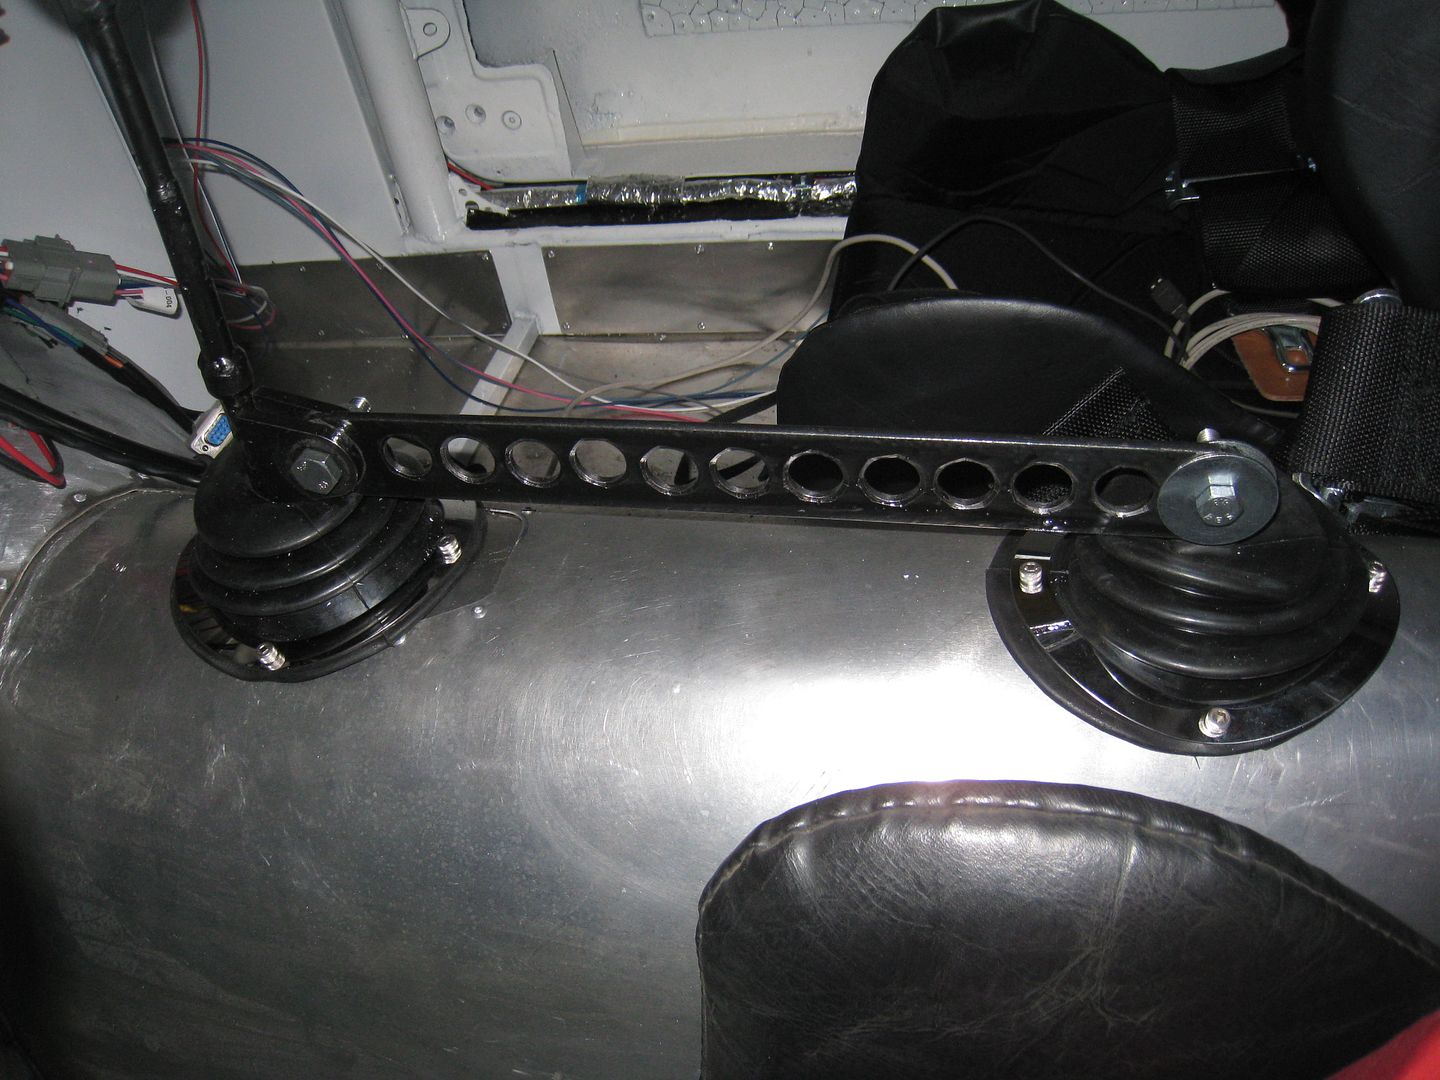
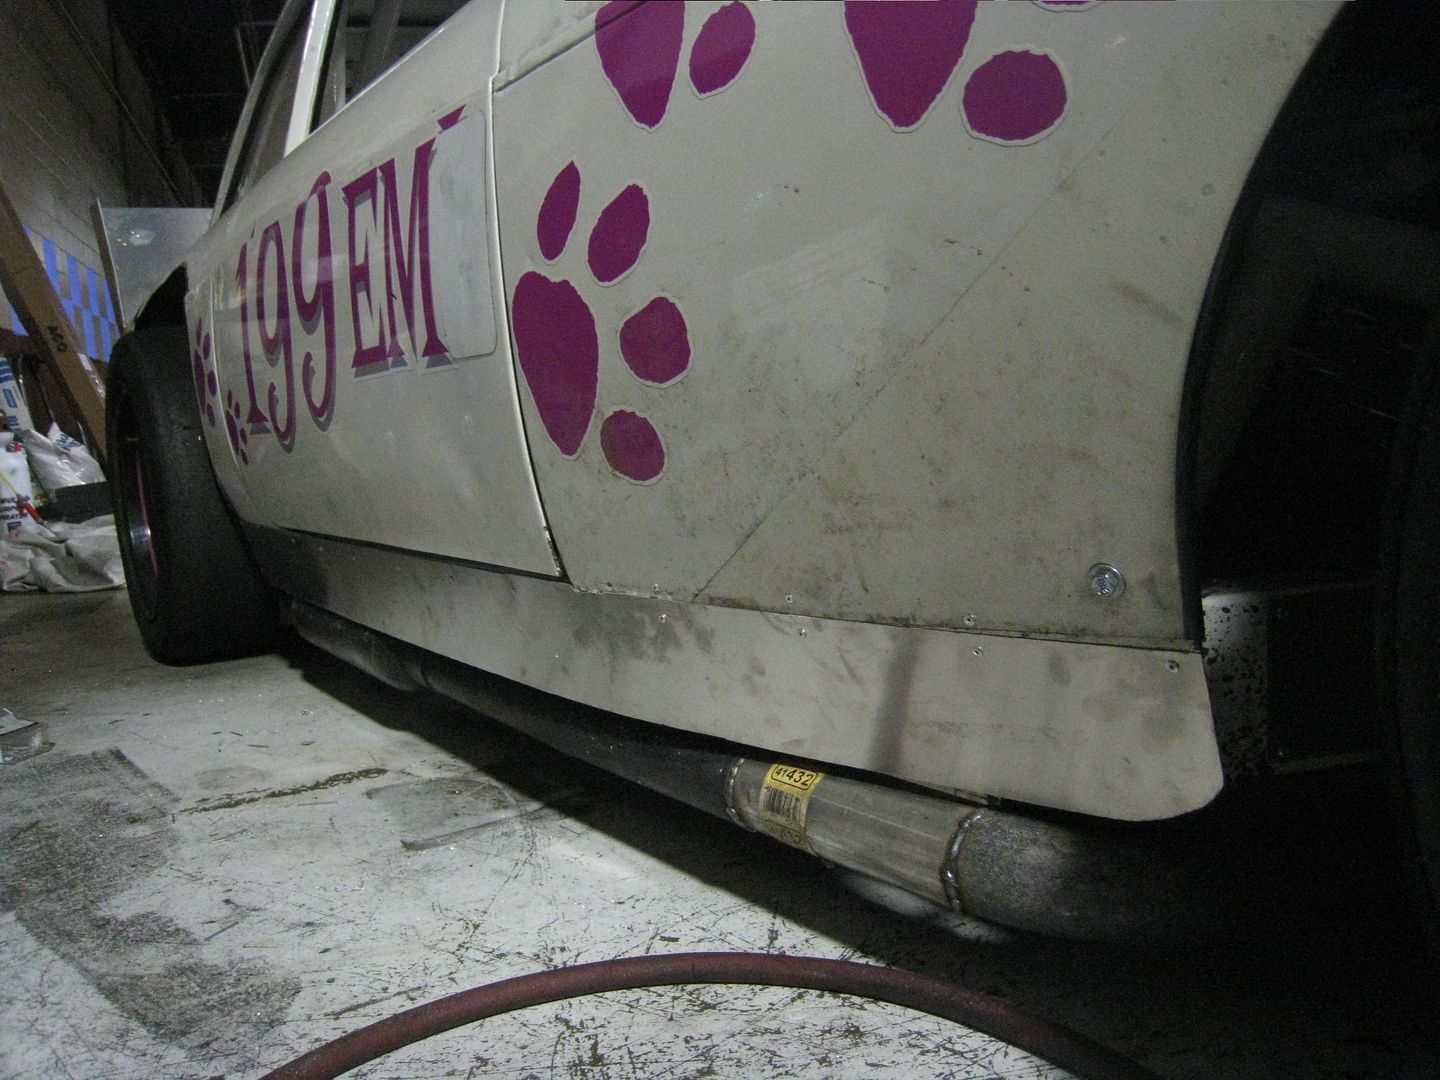
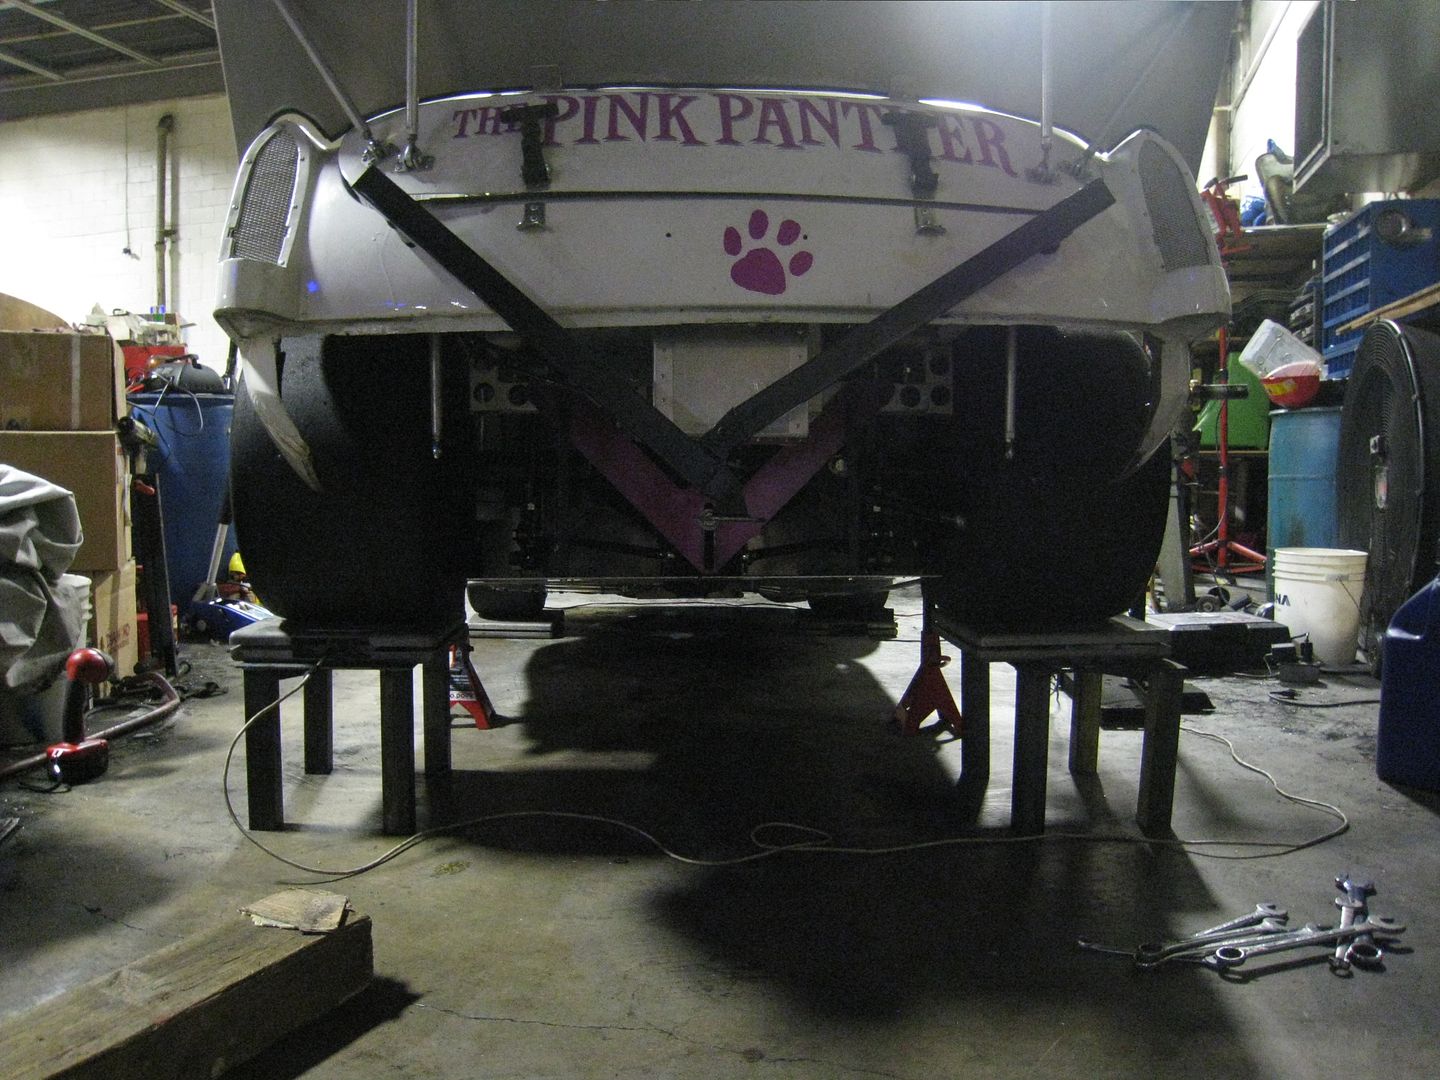
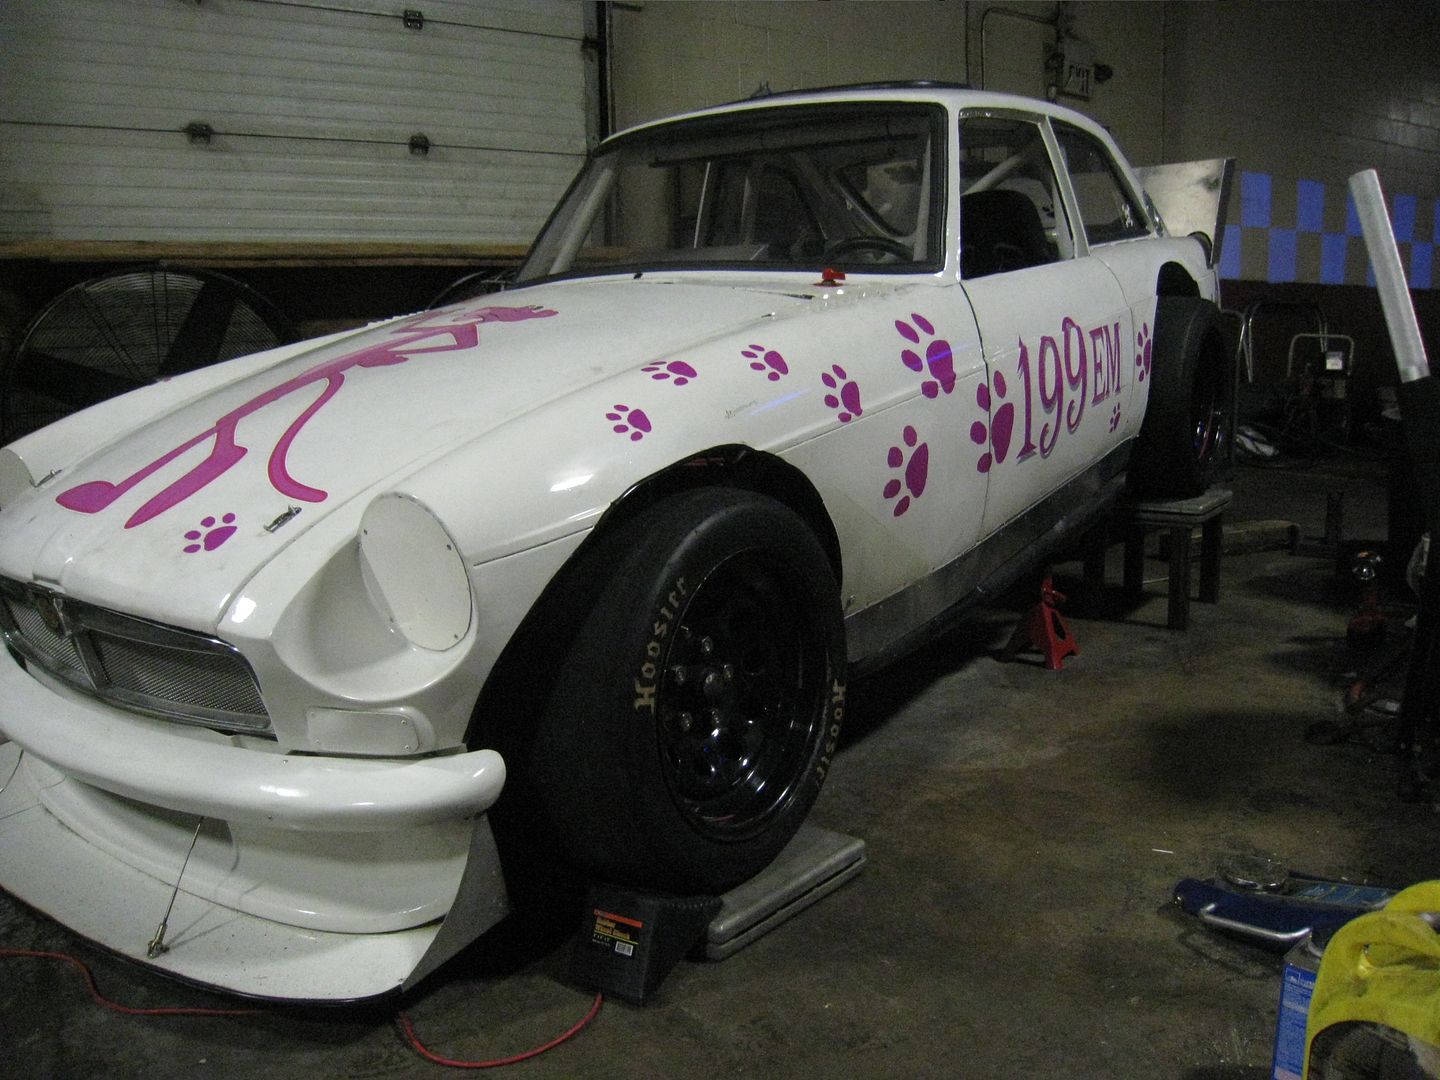
We tossed around many ideas for graphics and wanted something unique and tied into the Britishness of the car or the Jaguar V12. Briget sketched out the leaping Jaguar on the side of the car and it occured to her that the Jaguar is also called a Panther, and it wasn't a big leap to "Pink Panther" so here is the graphics of the car. There are a few details missing but you get the idea. 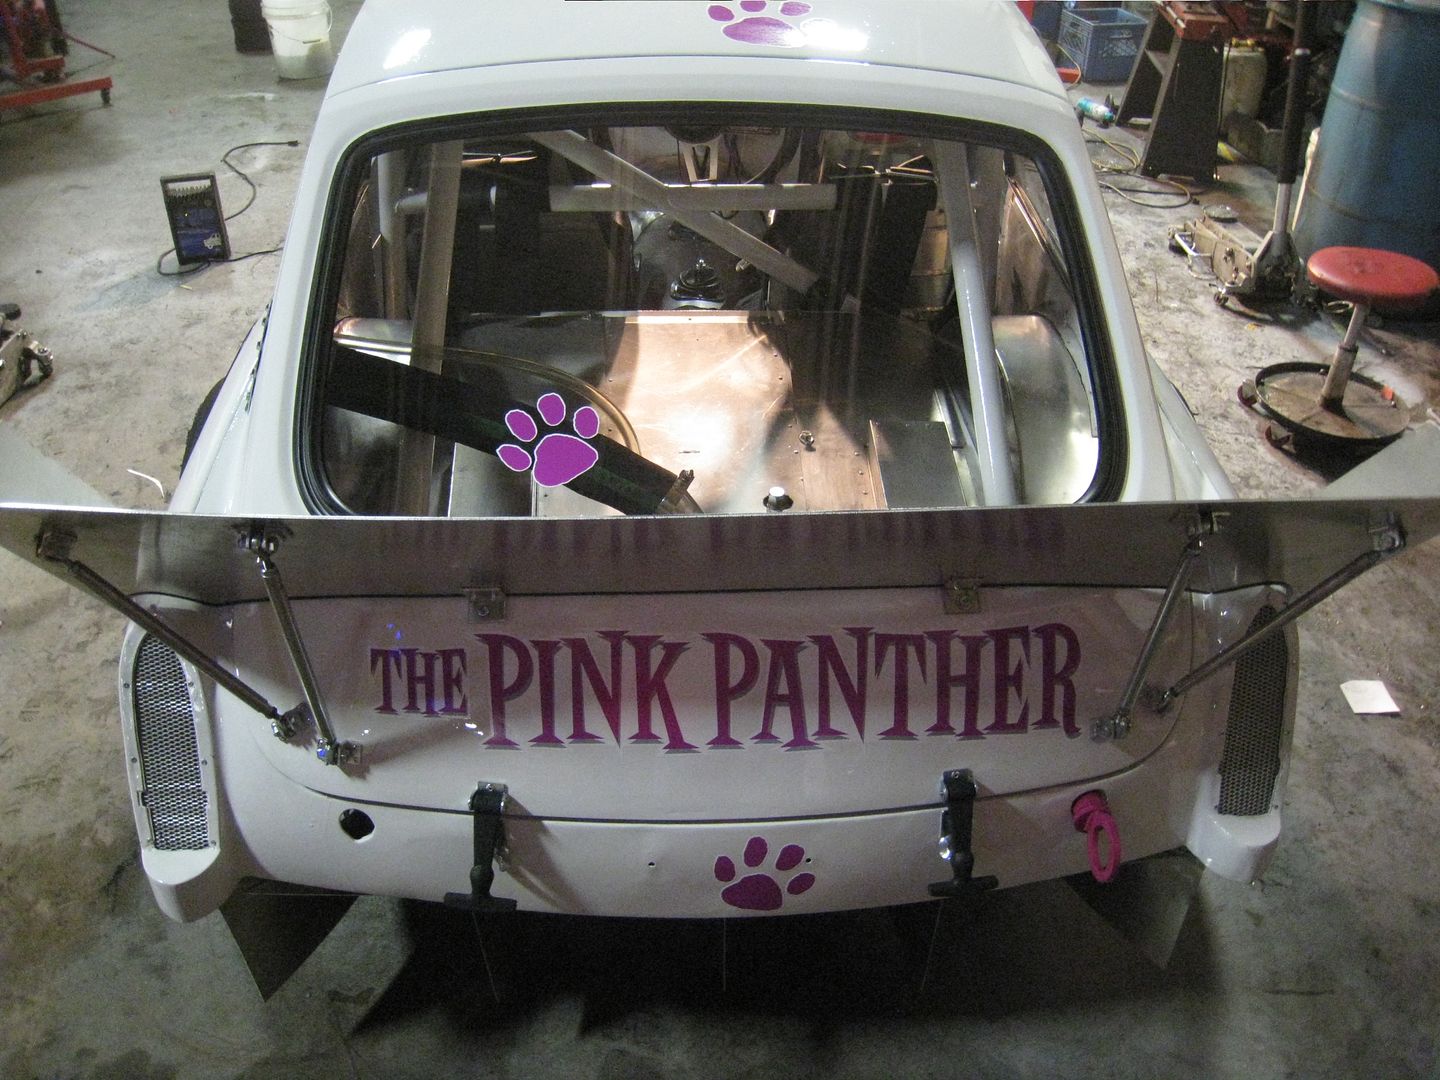
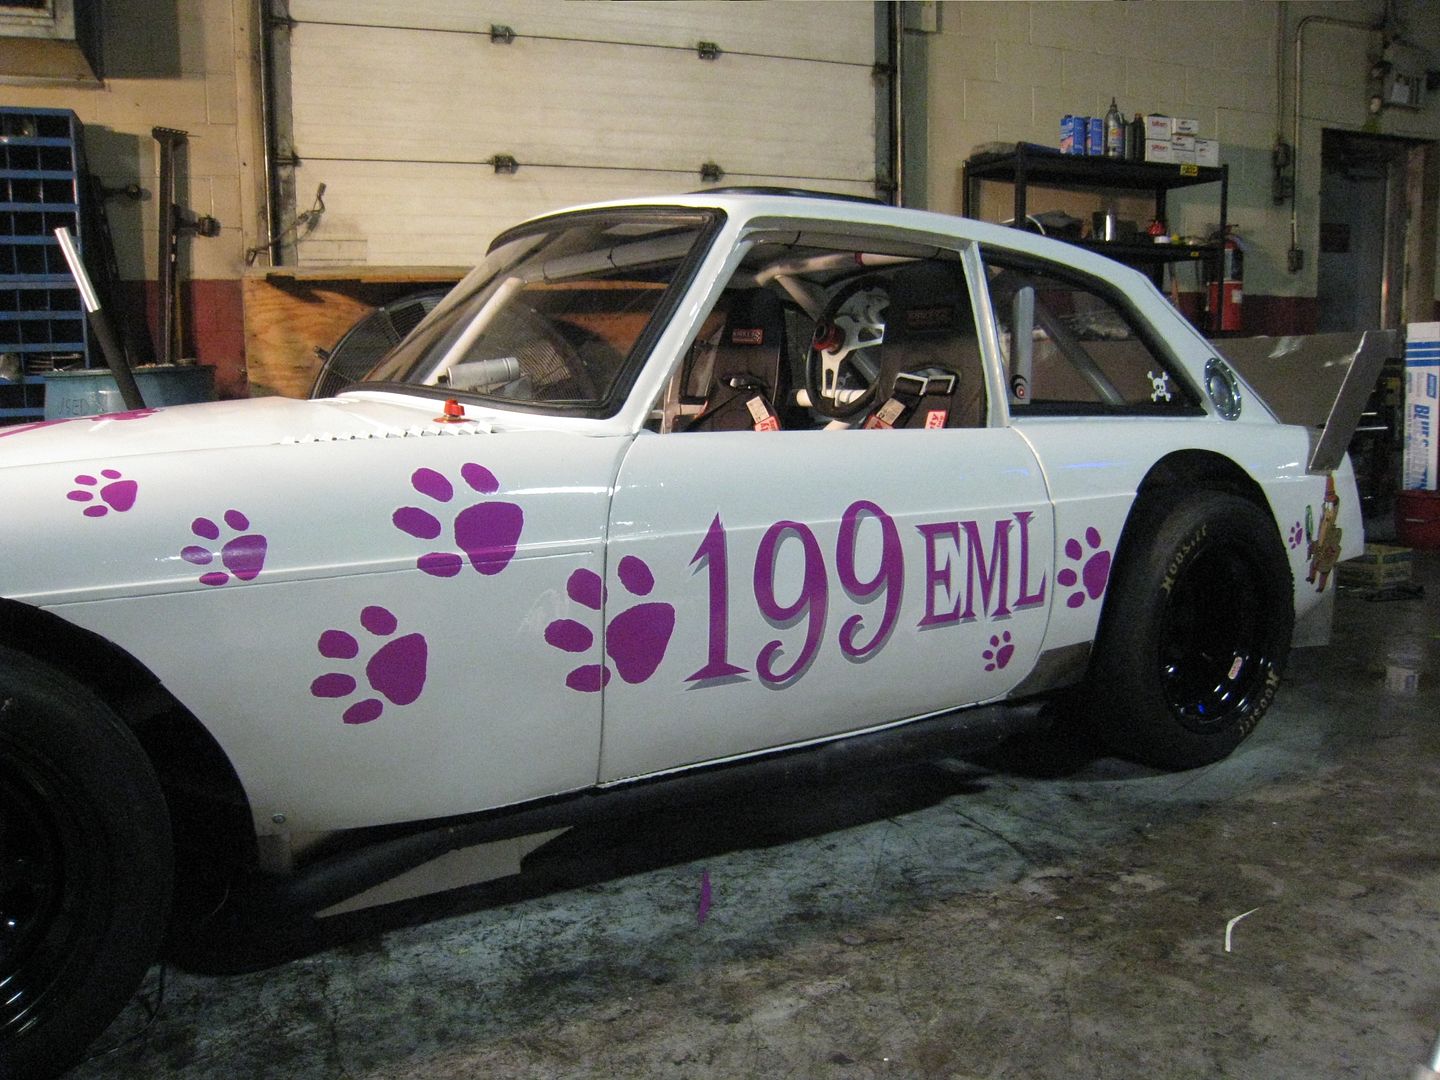
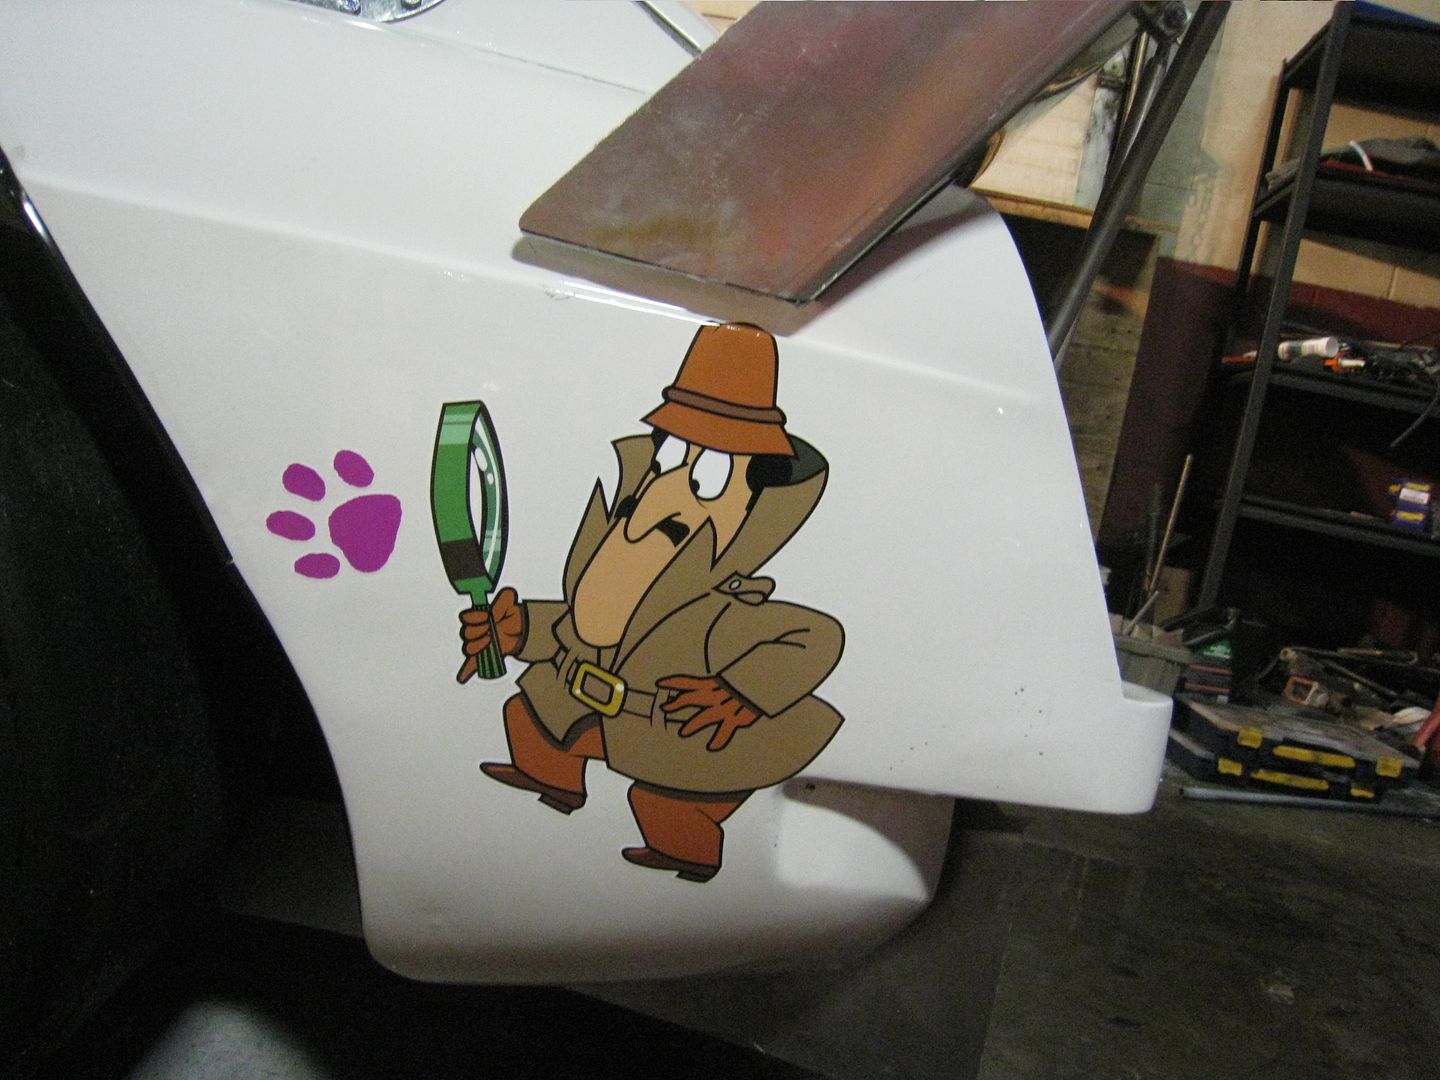
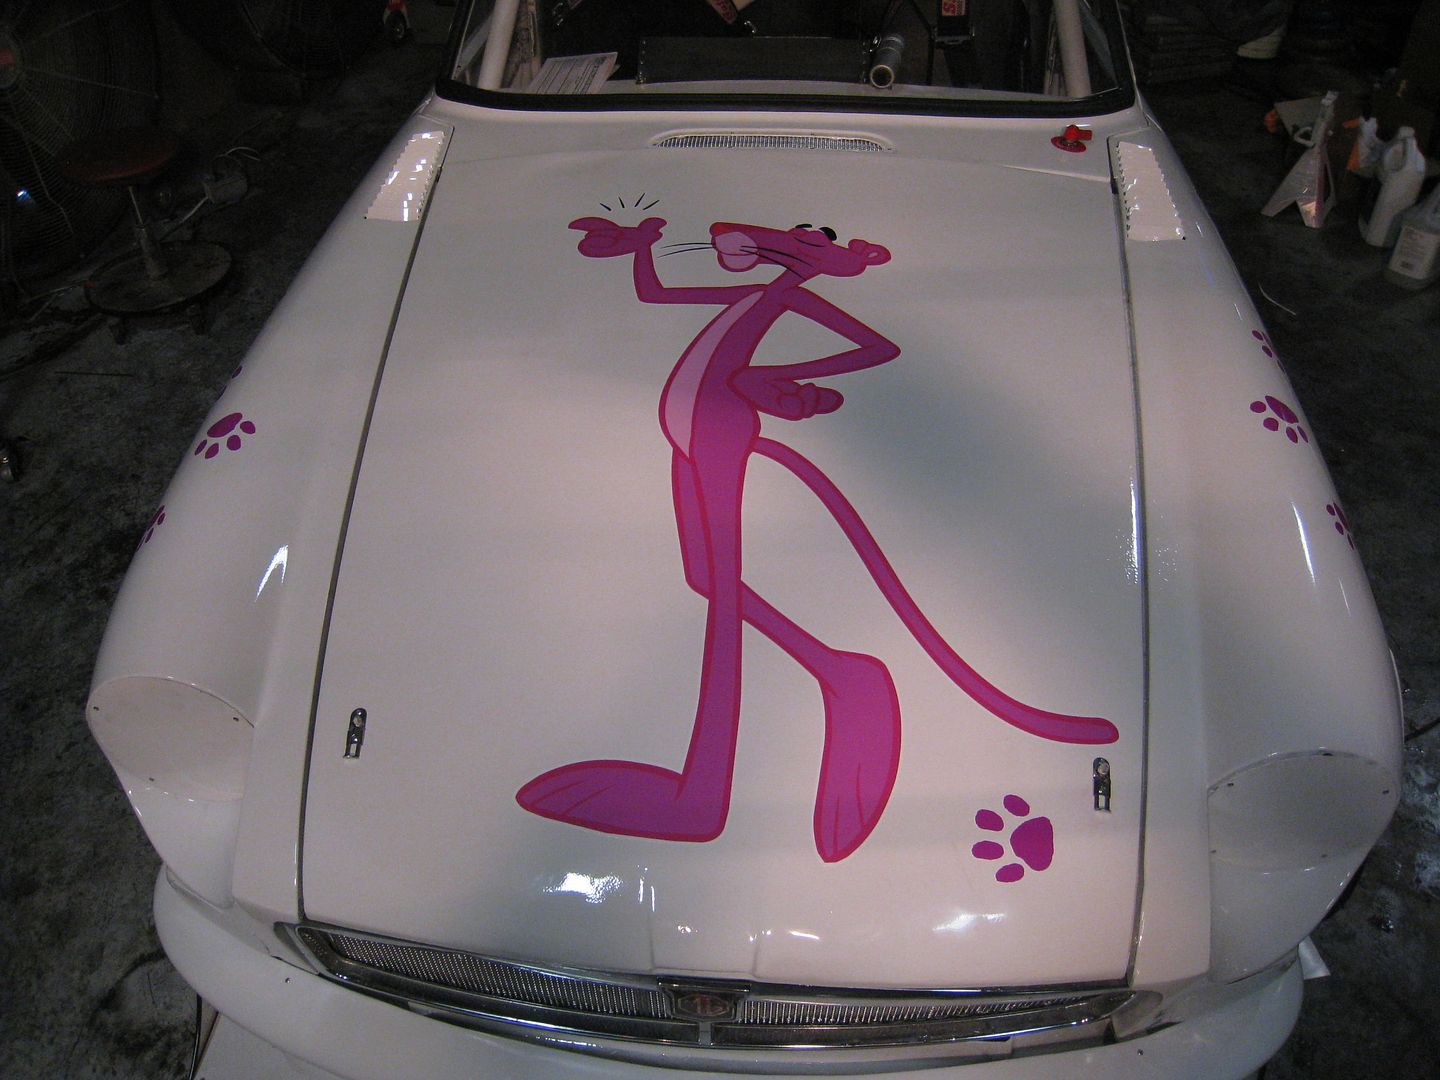
Some more graphics on: 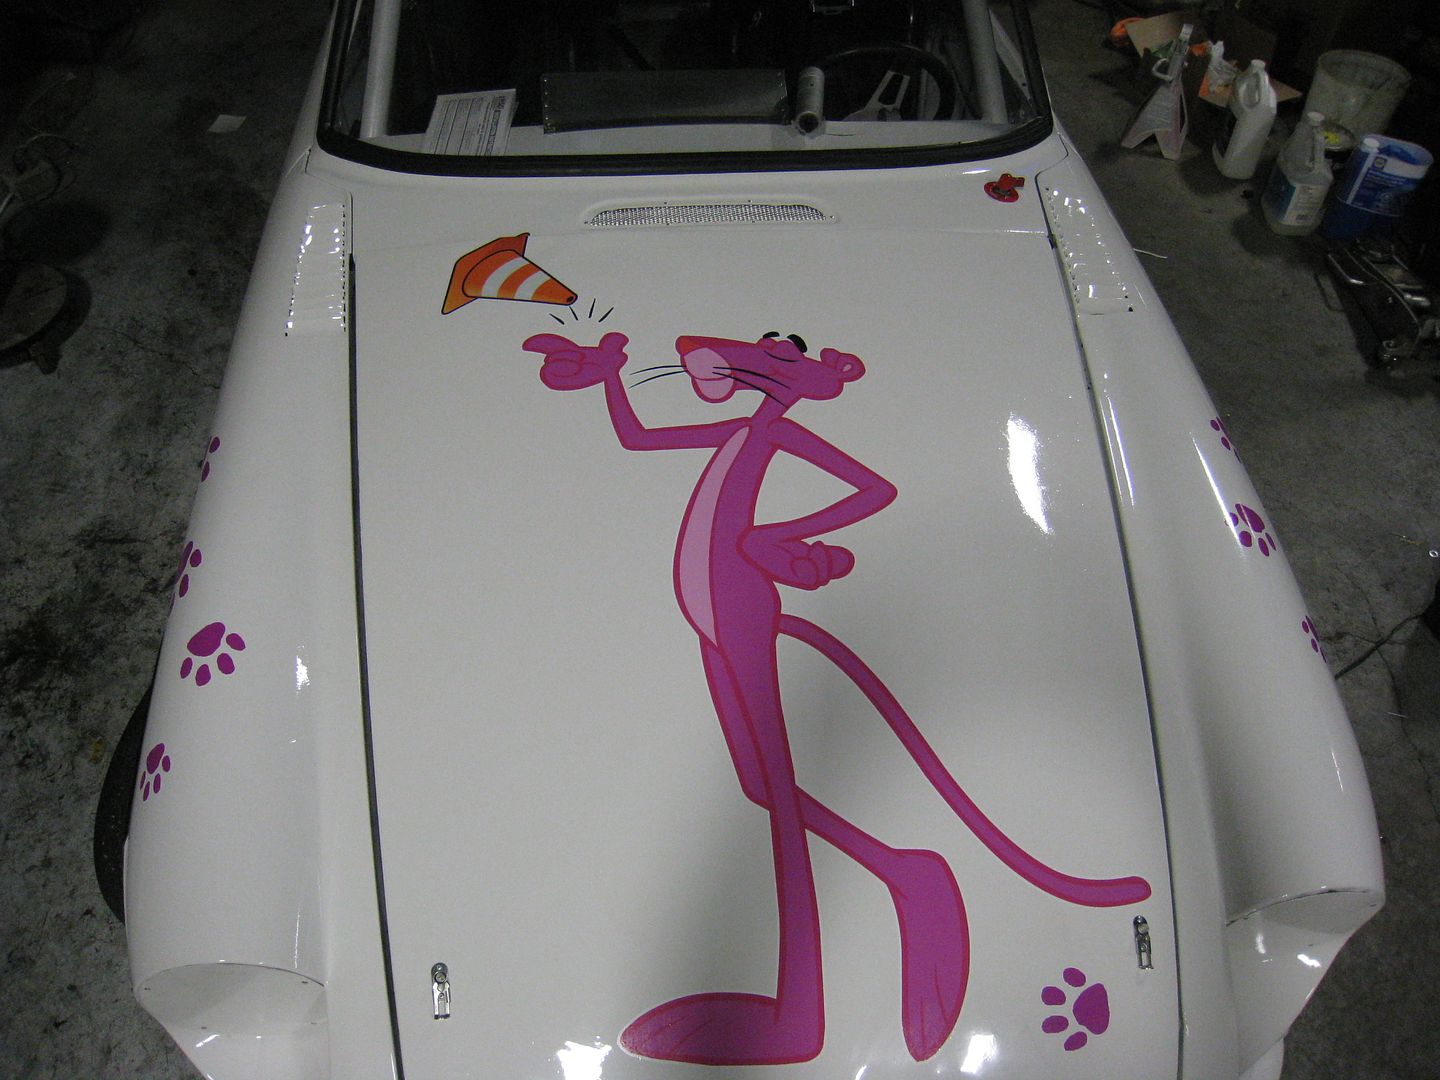
Had my second dyno session today. With no other changes, the new intakes made about 30 more hp and with some timing advance the car made 290 hp at 6023 rpm and 288.5 ft/lbs at 3765 rpm. The hp peak is 600 rpm higher and the torque peak is 400 rpm lower than before. Here is the video: [www.youtube.com] Today was corner balance and alignment day. I put the car on the scales with 170 lbs in the drivers seat to simulate my race weight and pressed the cross weight button on the scales. I had a bit of wedge with 49% of the weight on the left front and right rear tires, and 51% on the right front and left rear tires. This was easily corrected by shortening the pushrods on the right front and left rear tires, which reduced the amount of weight they were pushing down. Here's a picture of the results: 
Save the calculations, my total weight is 2353 including driver and the balance is 53% front, 47% rear. Once that was done, it was on to the alignment. The Jaguar front suspension resembles a typical 70's GM front suspension in that you just have to add shims to the top A-arm to get the desired camber and caster. I added shims to each side to get -2.17 degrees camber on both sides. Then I turned the tie rods to get a total toe of .14". The rear suspension needed just half a turn on the passenger side bars to get it squared up with the front. I'm ready for some autocrossing. 
I had a chance to drive the car on the old airport runway we use for our events, the problem was it was raining and there was standing water everywhere. I decided that any test is better than no test and went for it. Even running old slicks in the rain and near freezing temps (it was actually snowing only 15 minutes drive away) the car felt fantastic. It had no weird handling characteristics, was completely neutral and didn't squirm when going over some rather large bumps or through deep puddles. I know that the conditions will not reveal a lot of things but at least I know what rain set-up to use ;) It did reveal that the lsd needs to be tightened up a bit because it spun the inside tire too easily, and that there is a lot of engine braking-when I lift off the gas, the tires went into a skid, but the car didn't want to come around on me. I thought the acceleration was a little soft for 290 hp and 2300 lbs but in retrospect, maybe the tires were just spinning? Here is the video [www.youtube.com] Well, I think the Pink Panther performed better than expected. The handling is awesome although the amount of engine braking when you chop the throttle is startling, the rear tires just stop moving as quick as the car. I didnt find the unassisted steering difficult but Briget did. The power was way down and we think it is fuel pressure related. The regulator would not hold a steady 3 psi, it would fluctuate between 0 and 7 psi. Then it developed a previously unknown coolant and oil leak and that's why we only did two runs each. Another weird thing was after a couple of runs, the engine would stall when we hit the brakes, even with the clutch pushed in. Perhaps related to the fuel pressure problem. But , as I said, it handles far, far better than expected so it's going to be awesome when I sort the engine out. Here is the video: [www.youtube.com] We sprung a coolant leak and it was the Jaguar sensor in the middle of this water pump housing. Somebody along the way tried silicone and safety wire to fix it but I found a better way: 
I took the sensor out and was left with a nice flat area, perfect for drilling some holes and bolting on a plate: 
I drilled and tapped some holes: 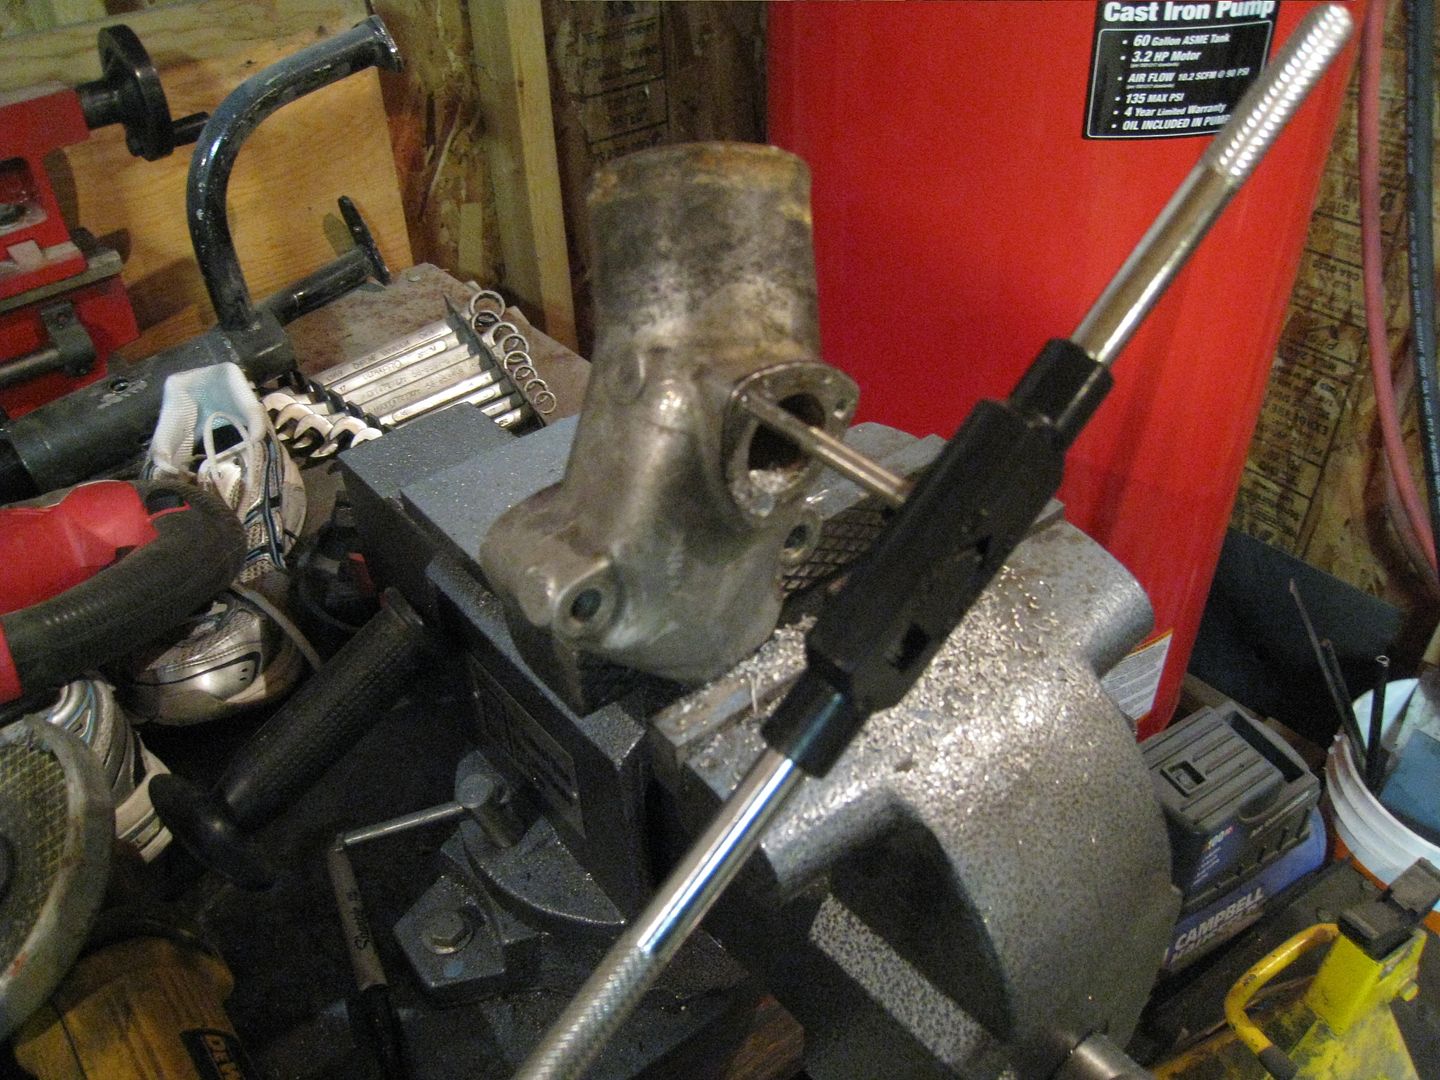
And bolted on an aluminum plate to keep the coolant in 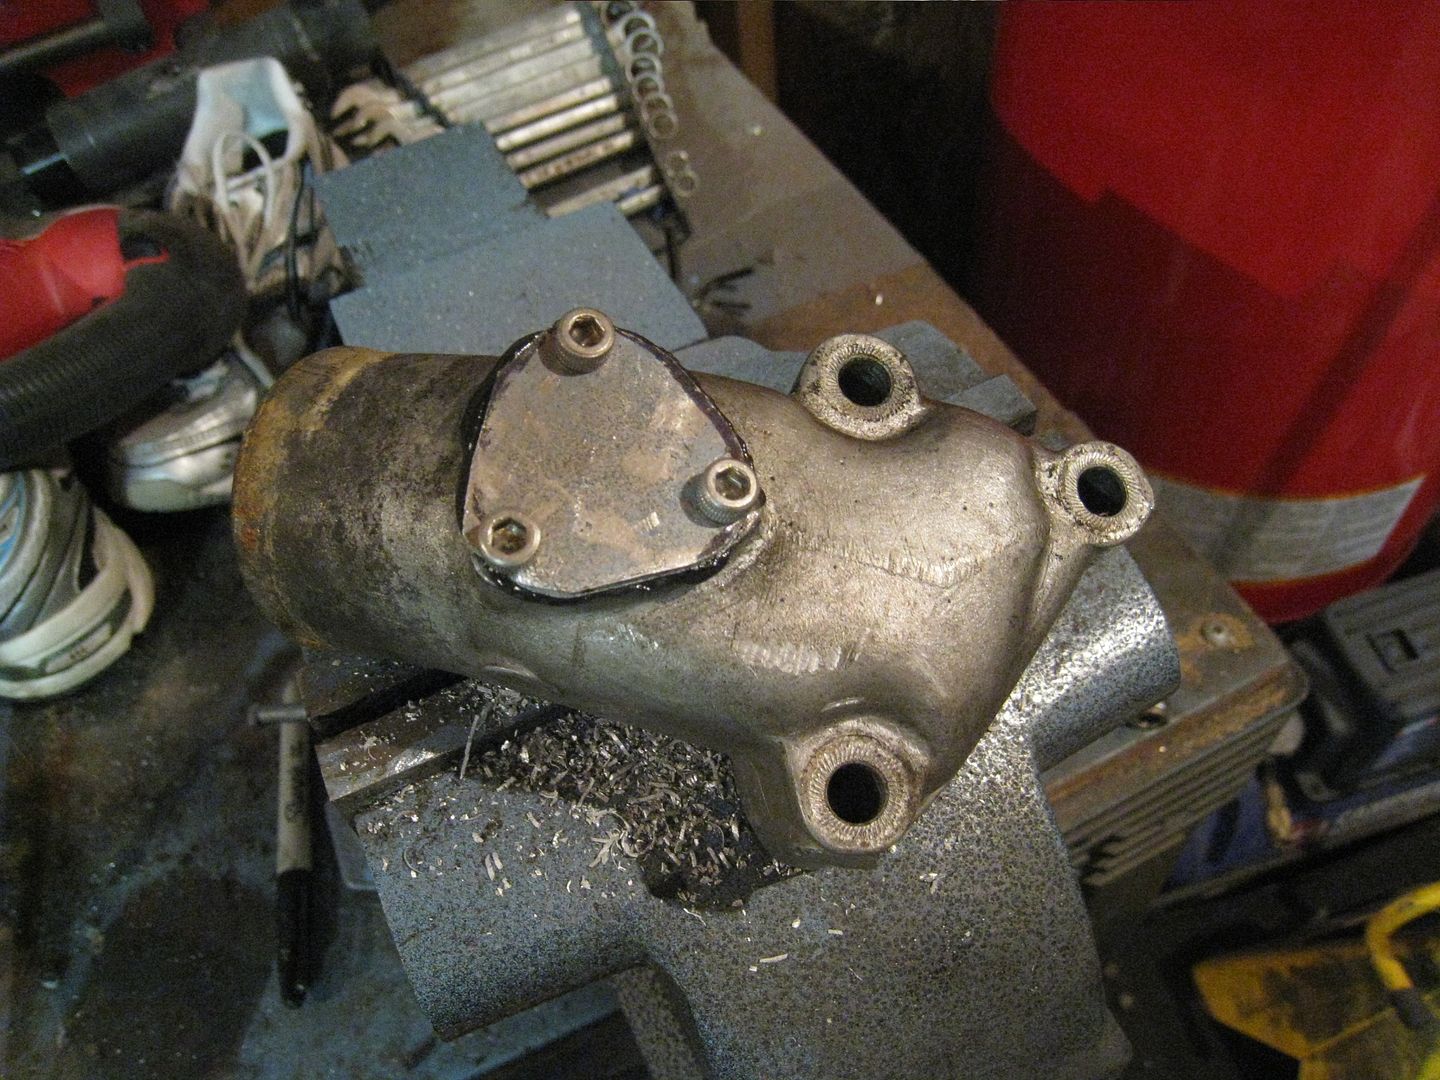
I have never been able to use a timing light on the engine because I didn't see any timing marks on anything. But while I was replacing the oil pan gasket, I spotted this plate with timing marks on it right at the bottom of the engine. I guess Jaguar technicians have to put the car on a hoist to time the engine? 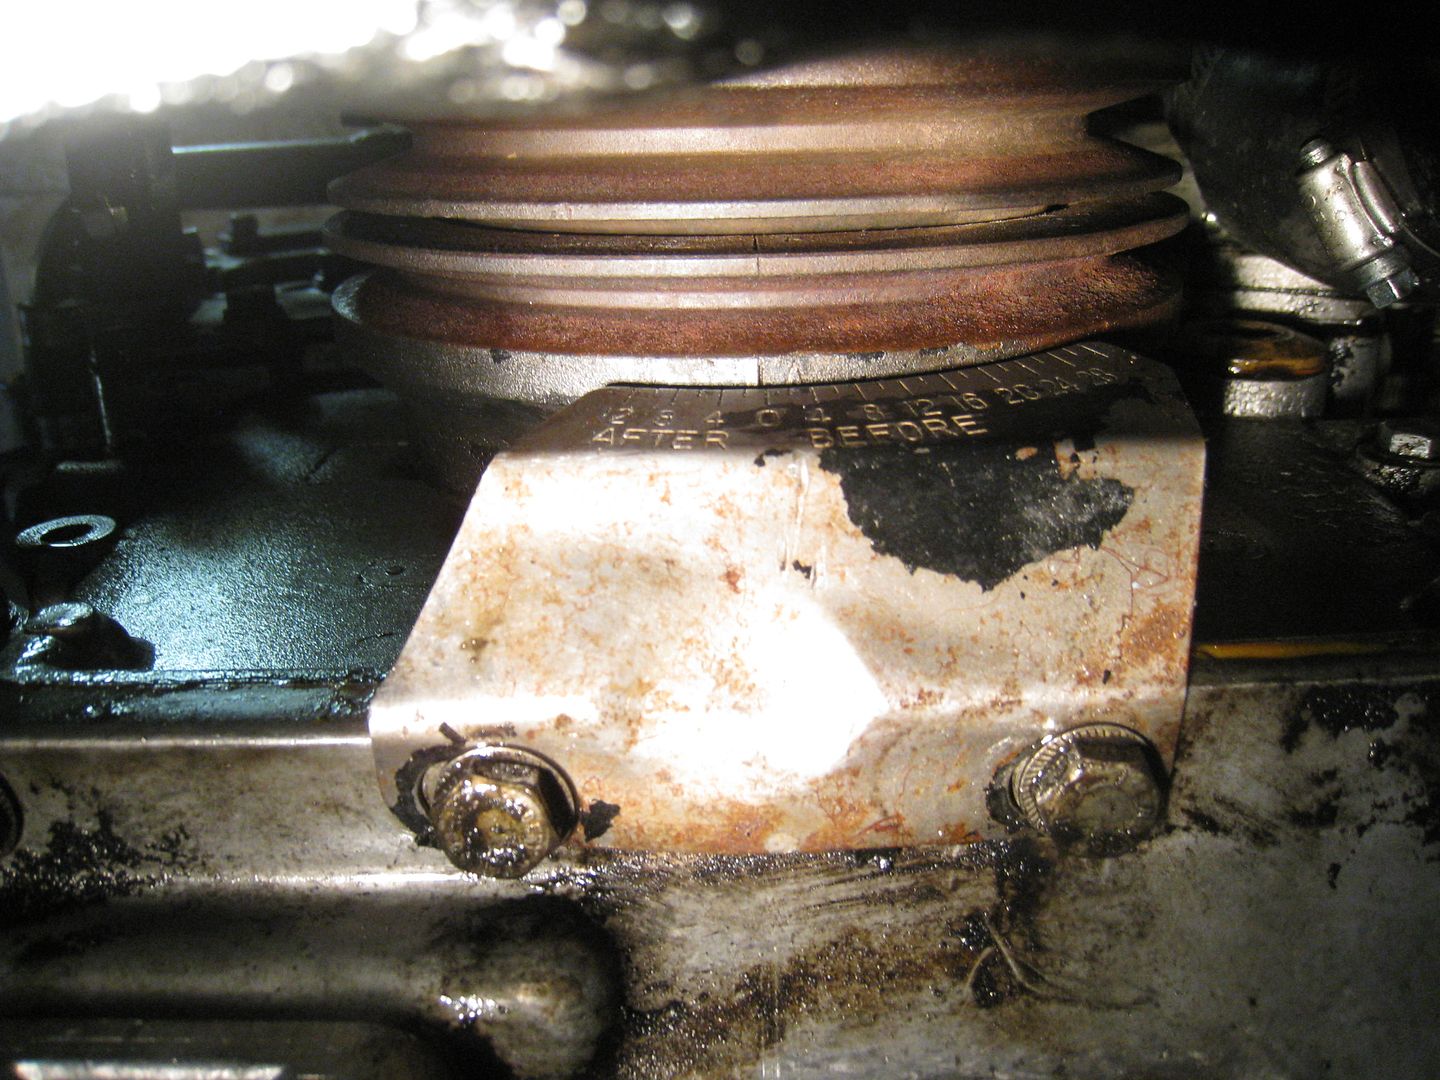
I used a dial indicator on cylinder #1 to get the engine at exactly top dead centre: 
Then I used a piece of hanger wire to make a new timing indicator and cut a notch in the pulley. Now I can use the advance/retard display on the timing light to find out what the timing is. 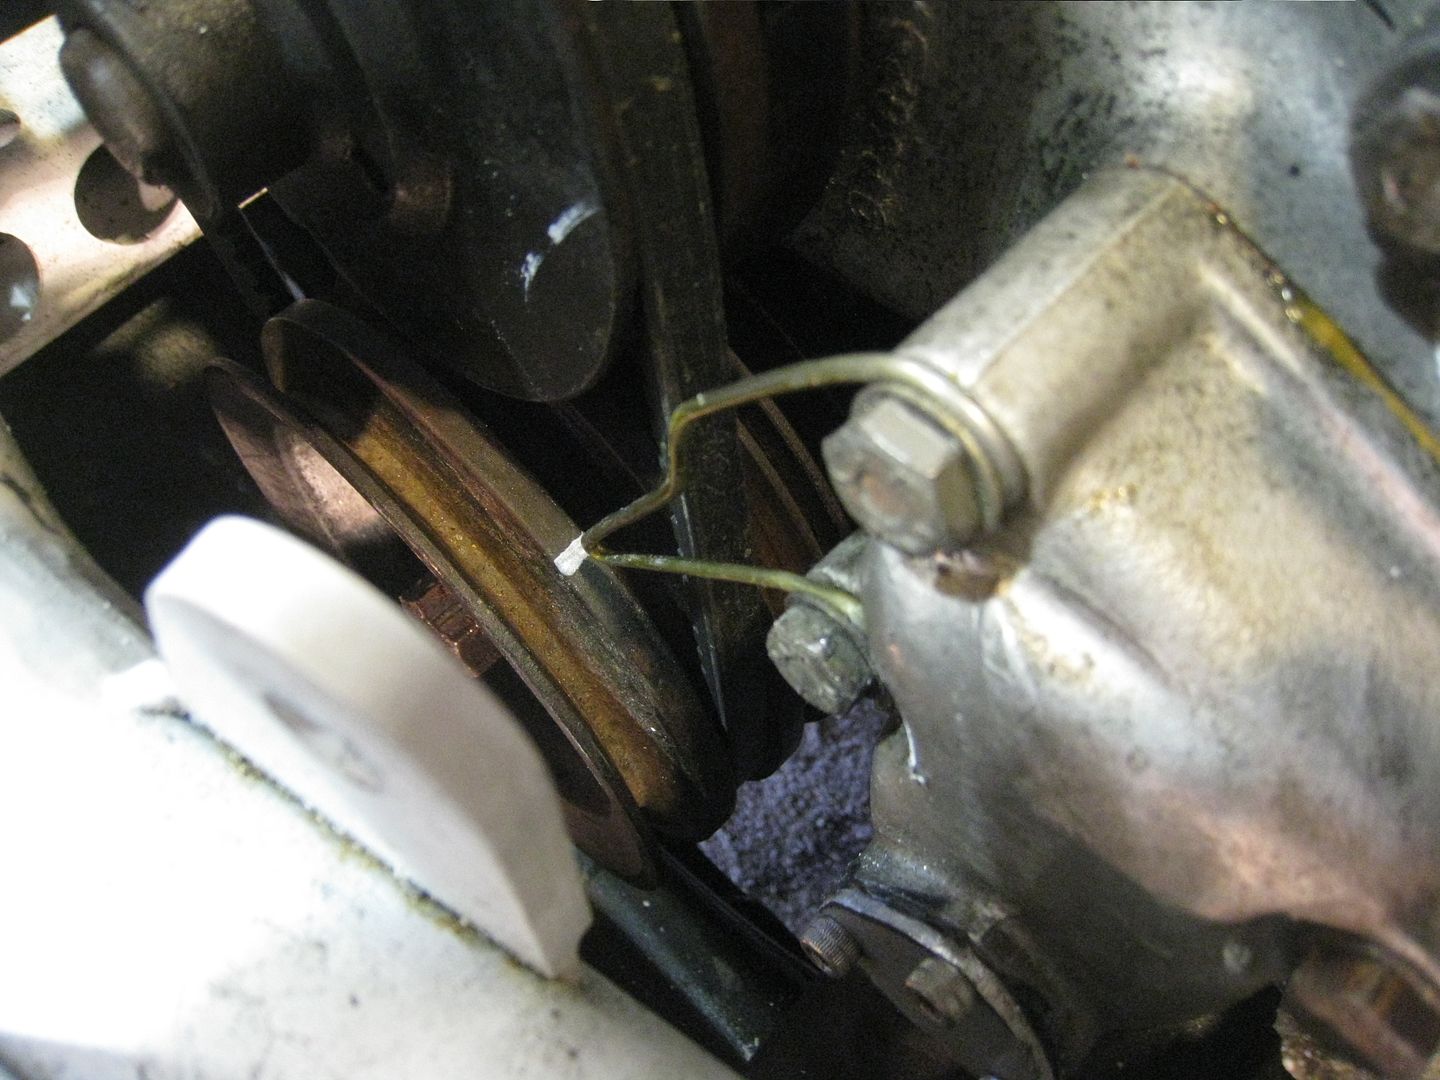
Looking at the pictures from the first autocross, the Pink Panther has a little too much body roll so I am installing a front sway bar. And before anybody suggests that it will just understeer, remember that I have an adjustable rear sway bar and can change the motion ratio of the rocker suspension and stiffen it up considerably. I used some aluminum stock and angle pieces to make mounts and brackets to hold a stock MGB-GT front sway bar to the new frame and suspension. 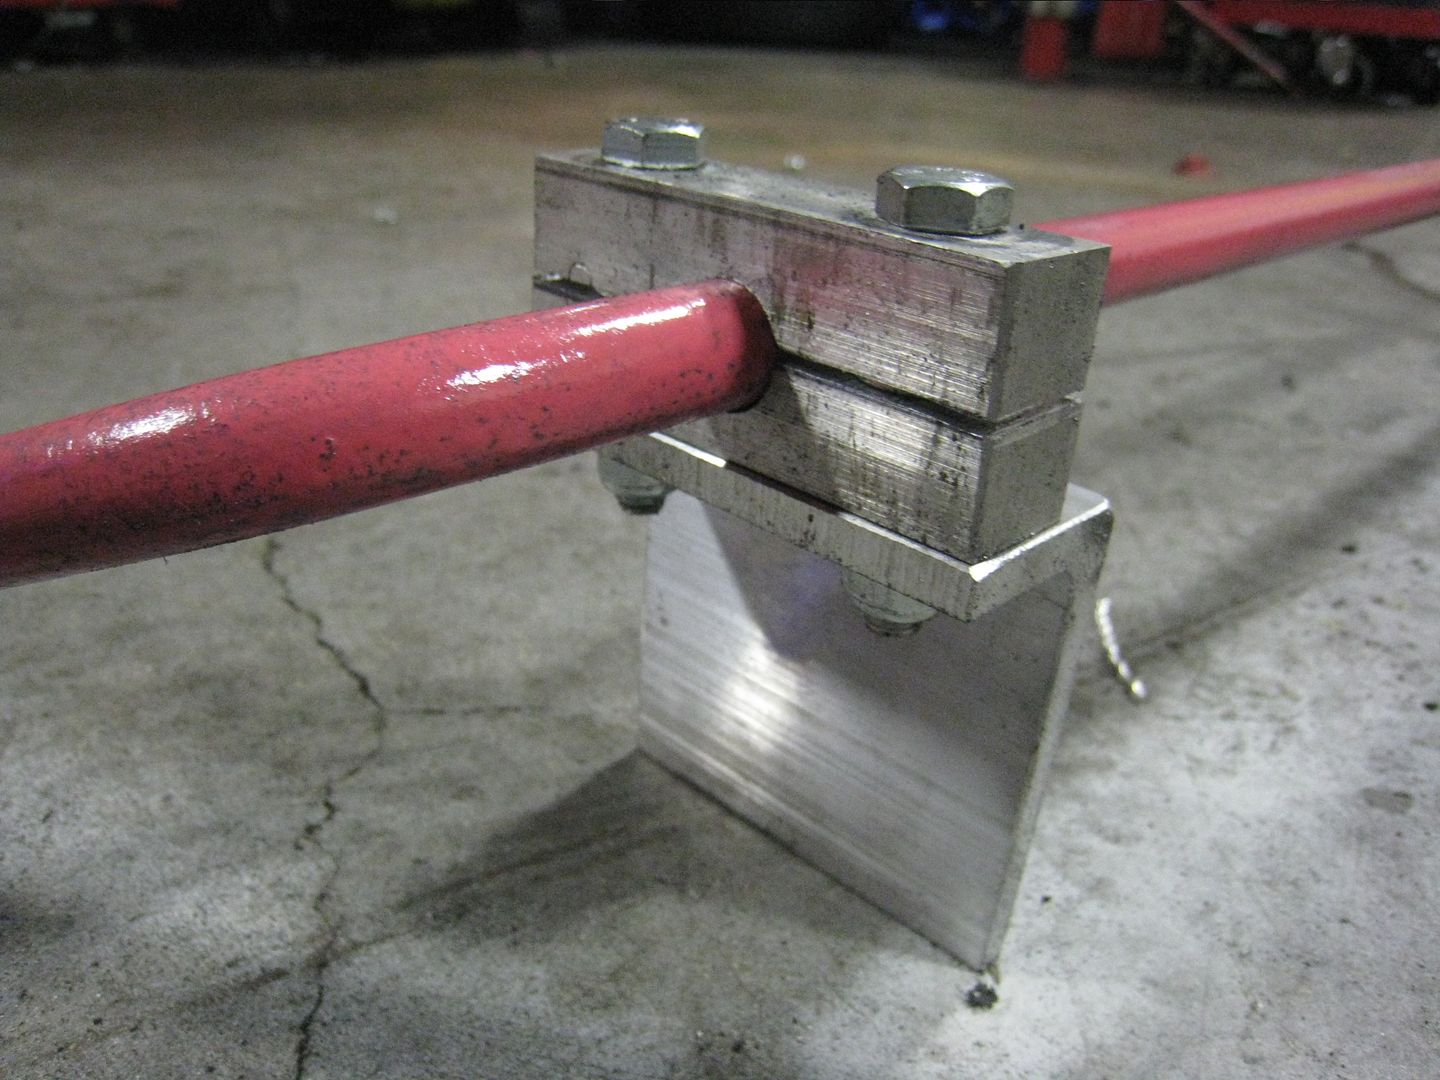
And I replaced the soft rubber bushings with aluminum ones: 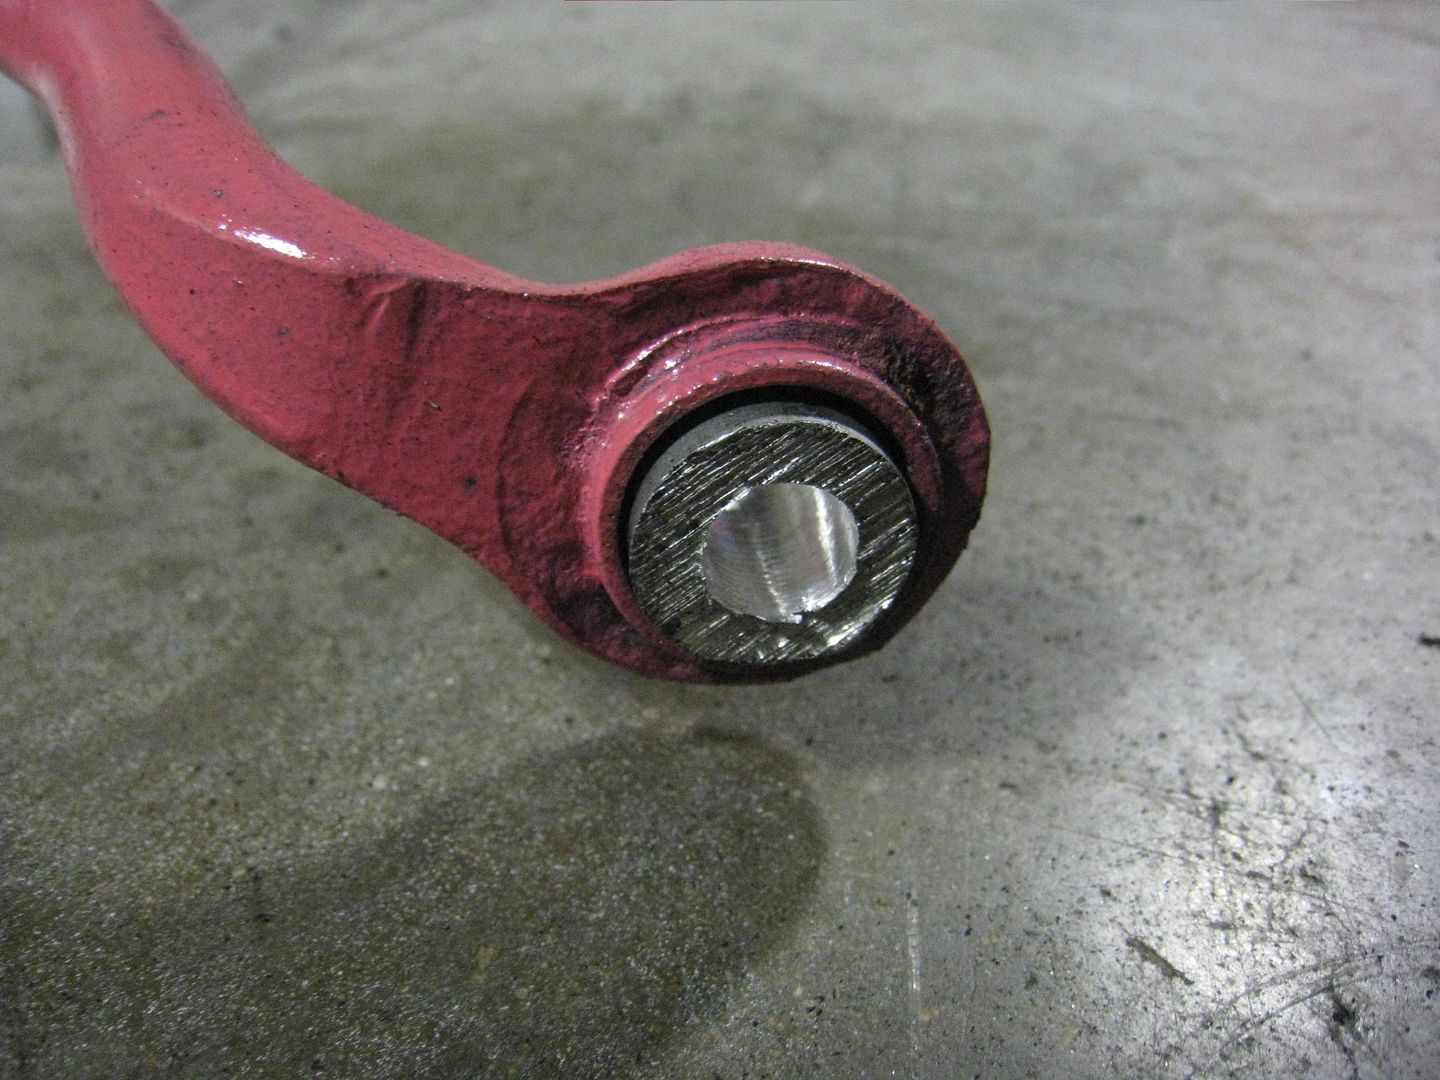
Here it is installed on the car: 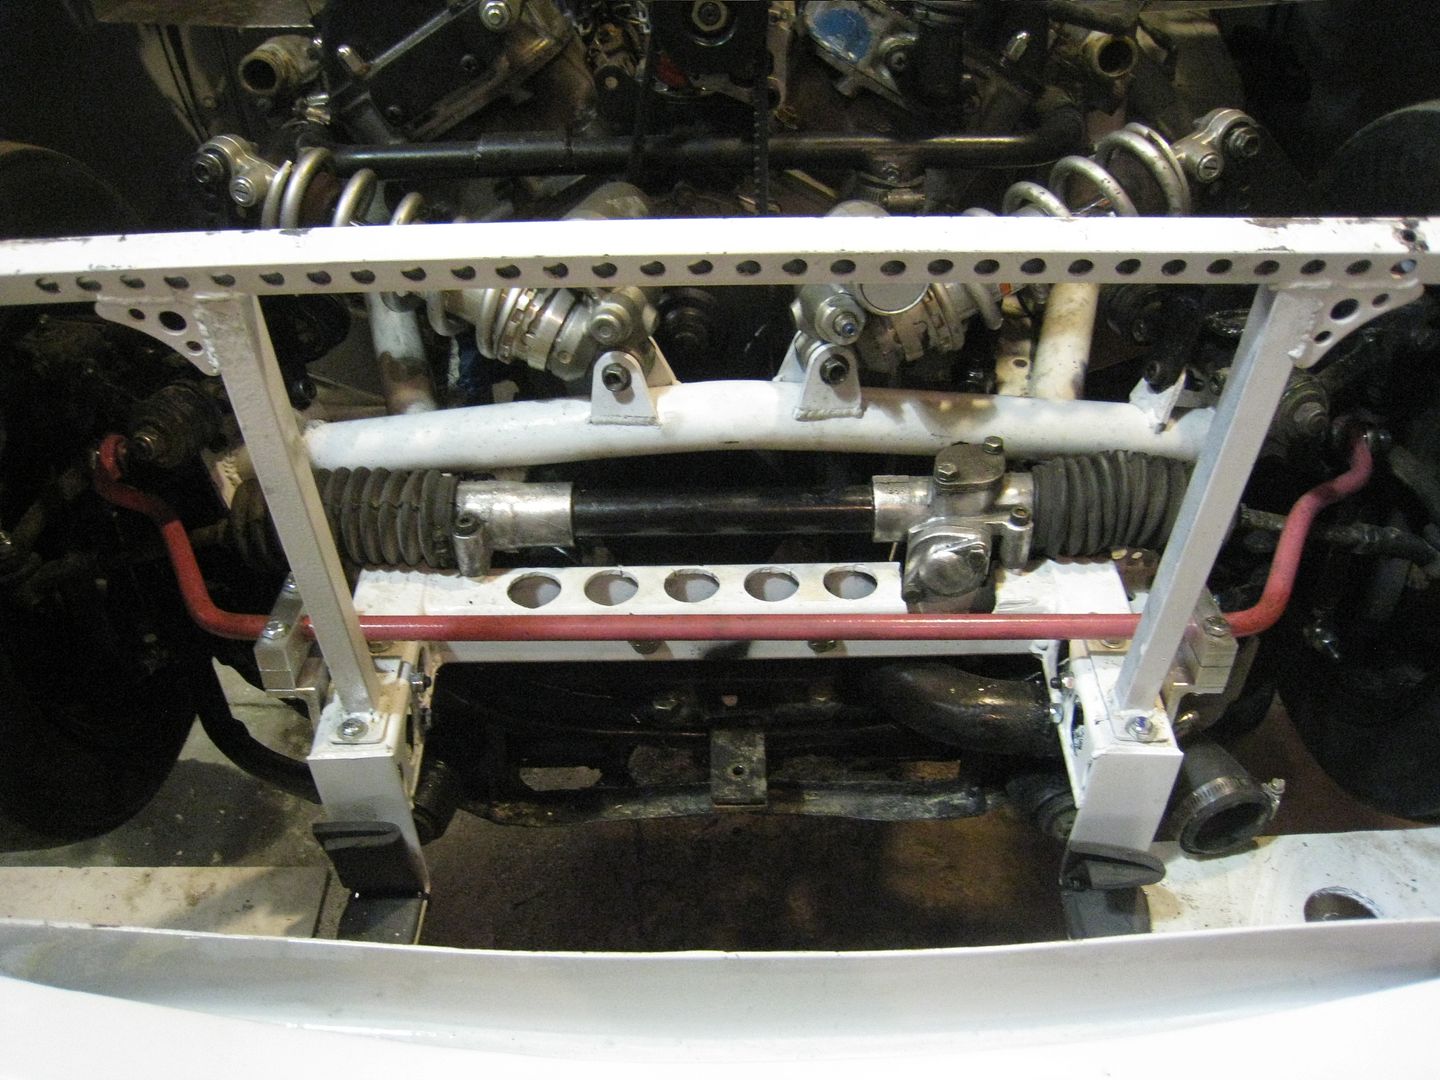
And I made the drop links out of .75" square tube with nuts welded on to hold the heim joints: 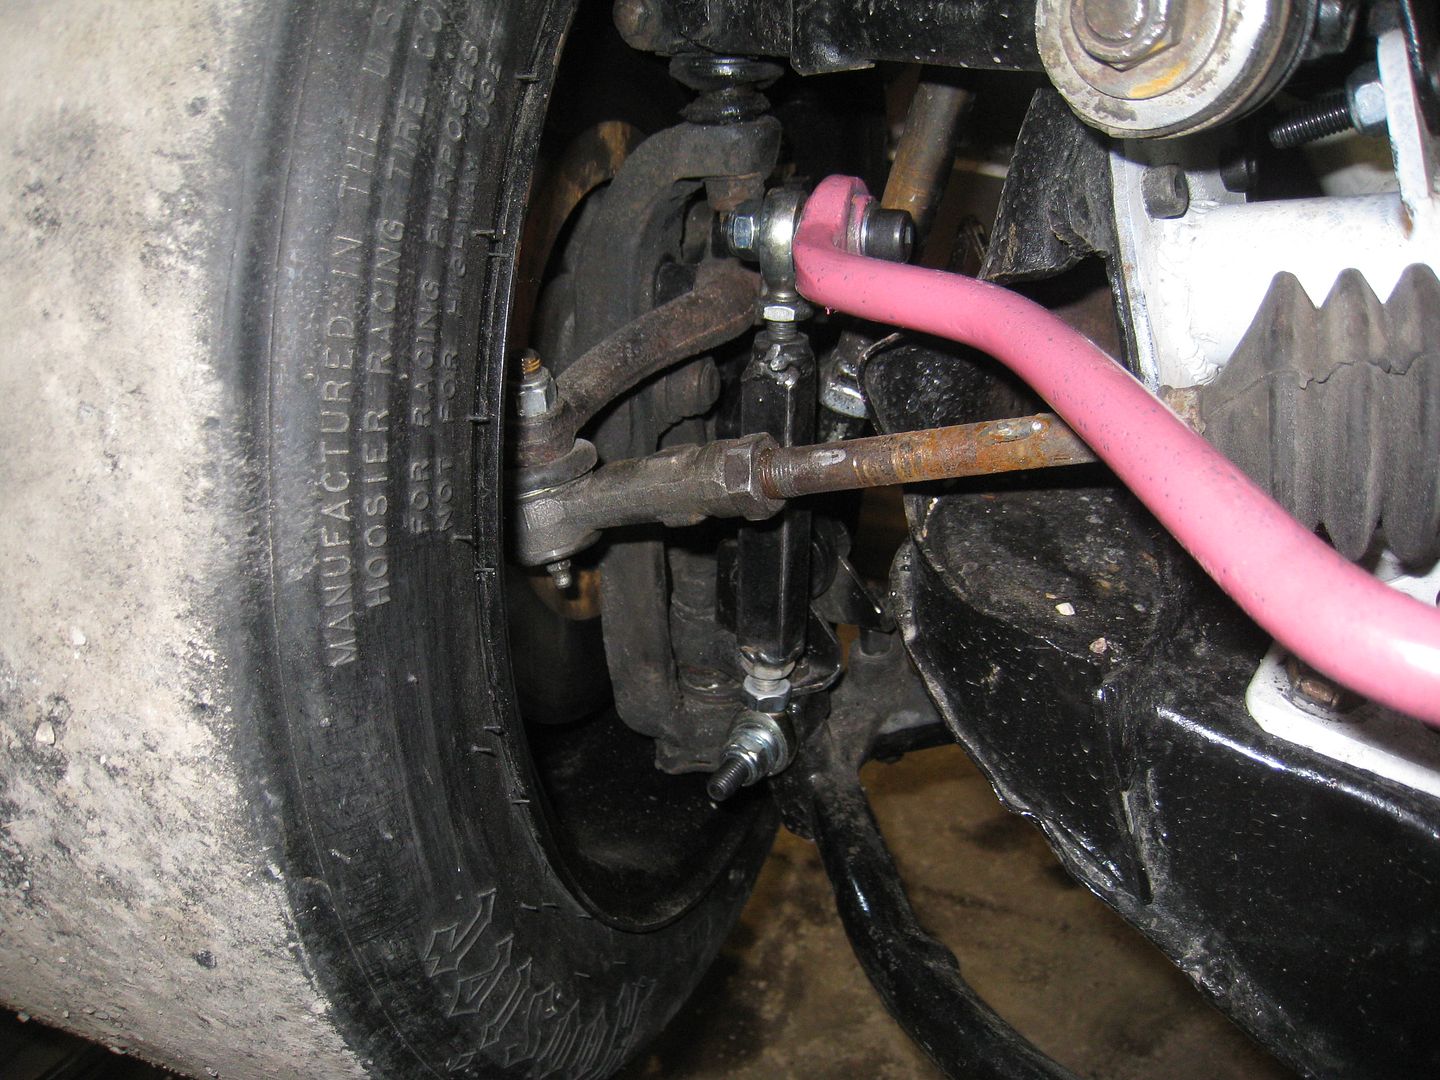
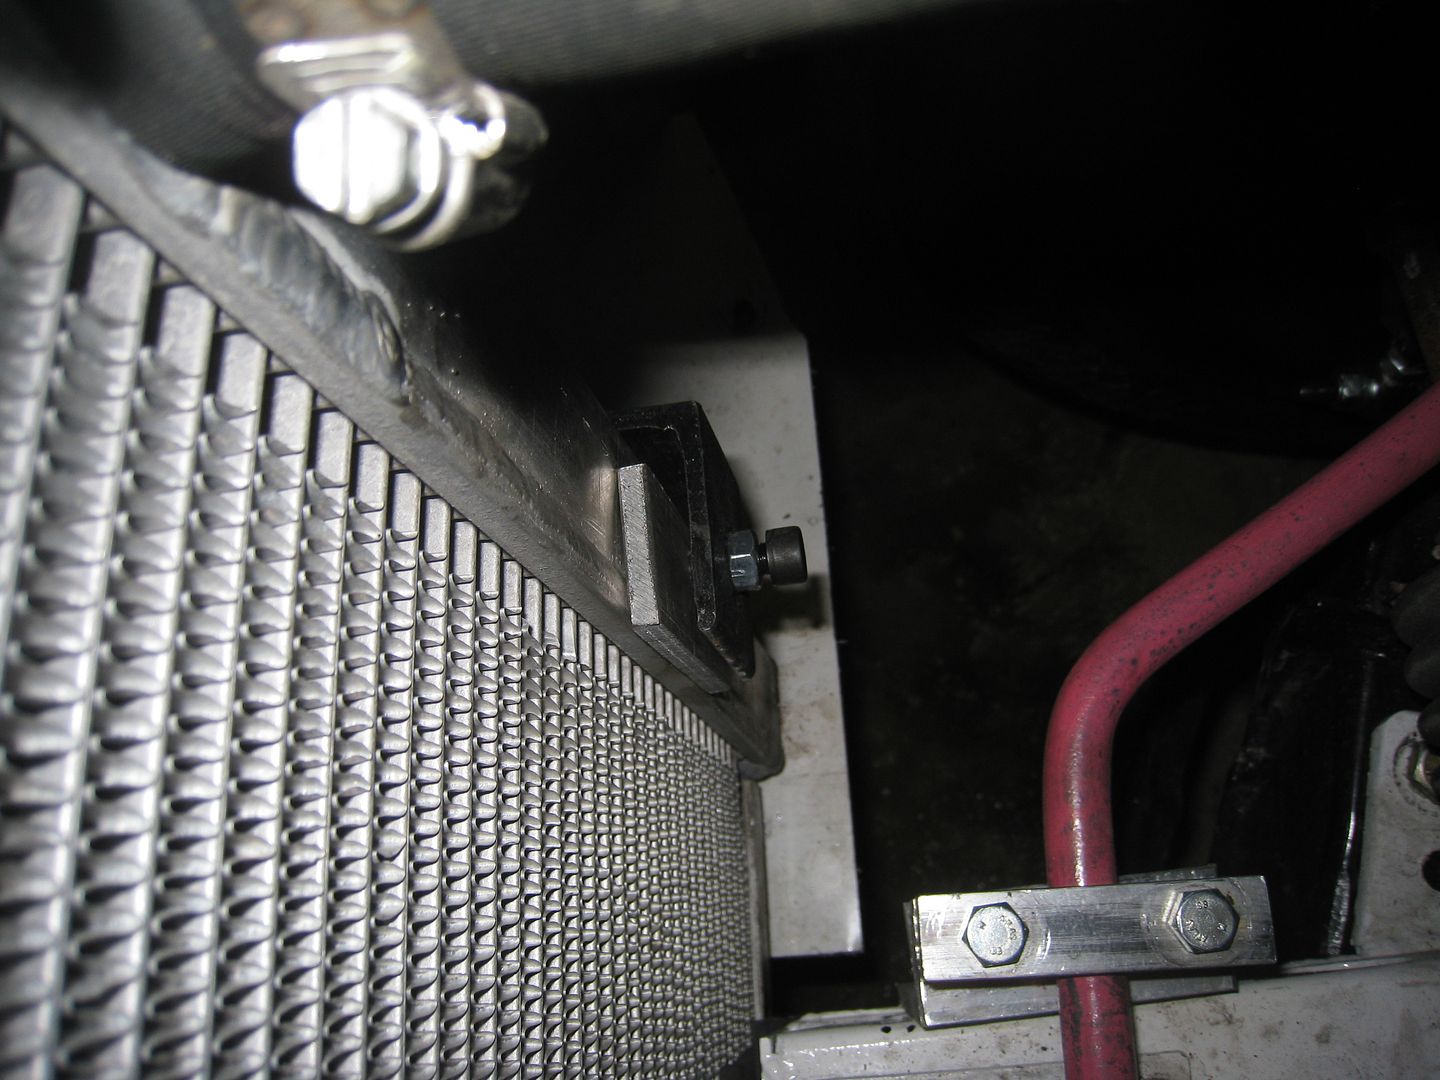
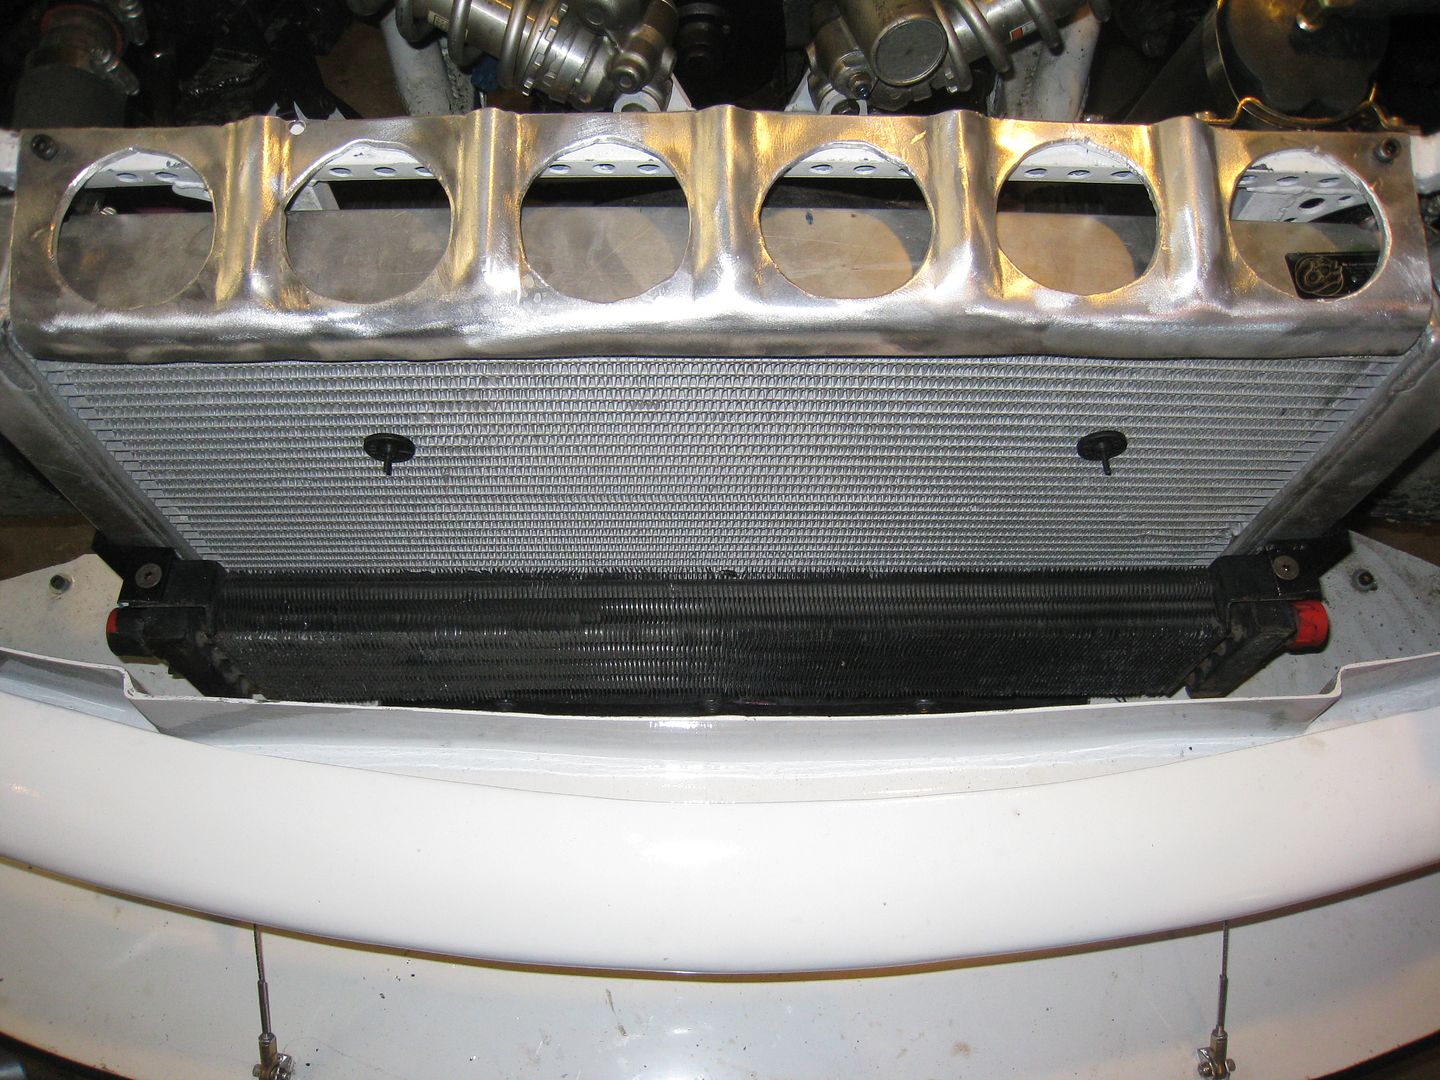
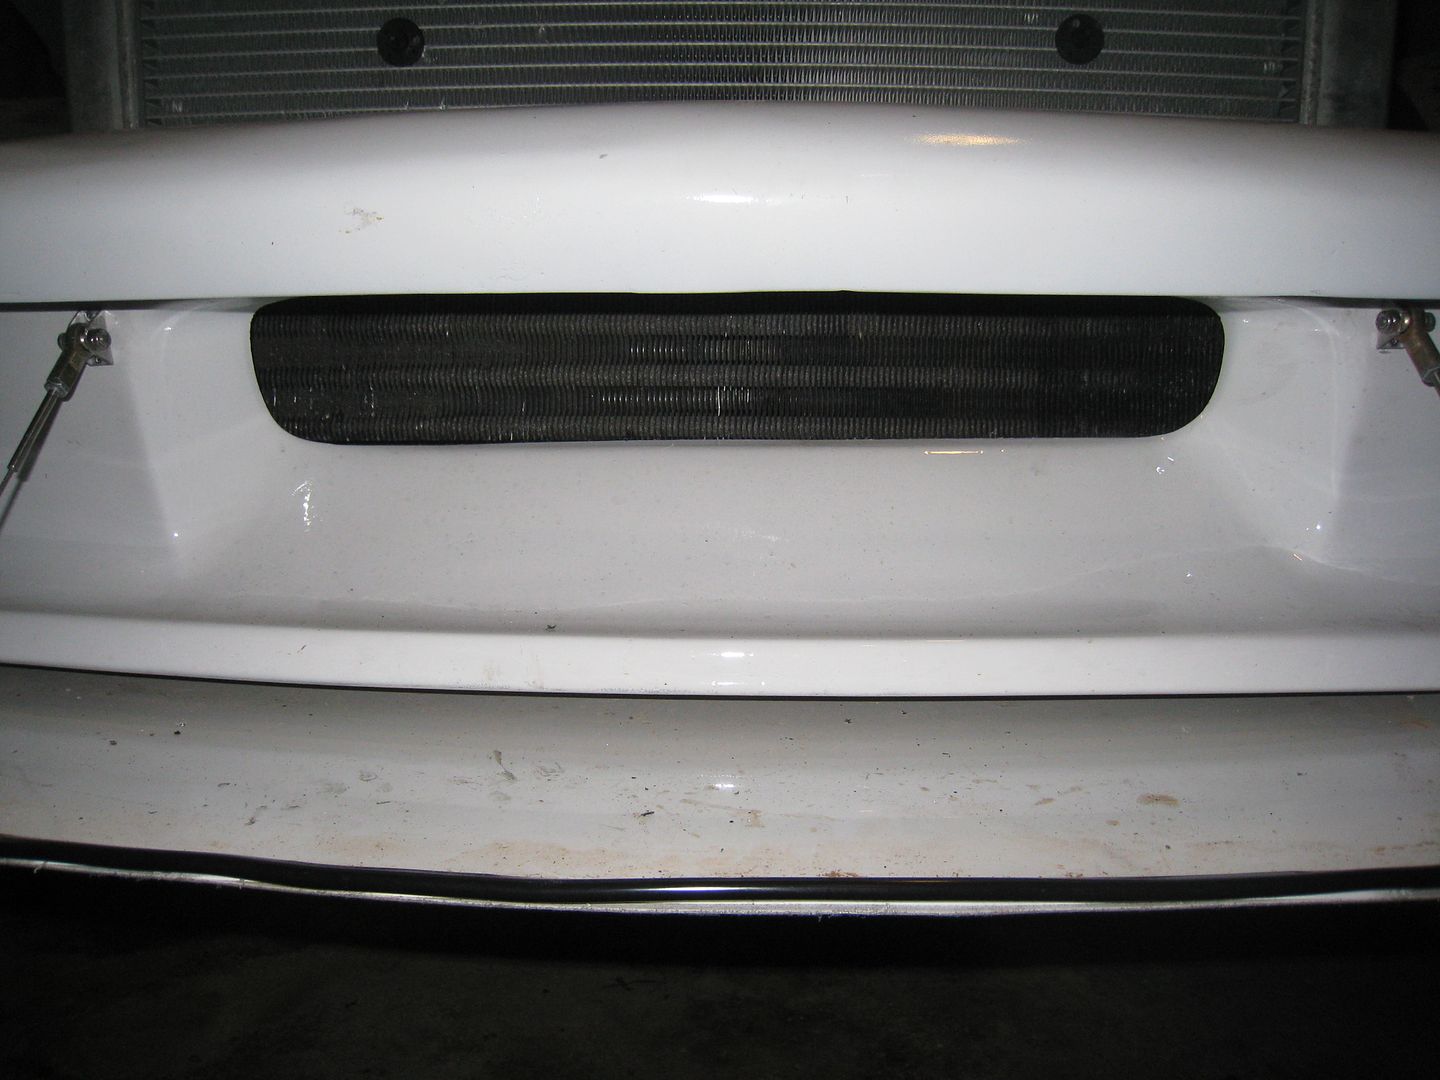
There is a lot more detail on my blog I think I solved a laundry list of problems today: 1.Spinning inside tire-Took the diff to Asperline on Monday and they found the LSD clutch discs to be worn out. Discs were replaced and shimmed for minimum slippage. 2.Engine running a little too warm-Took rad to shop to get converted to dual pass style rad. Now coolant is forced to go across the cooling surface instead of taking a shortcut down side tank. 3.Power loss-Installed Aeromotive fuel pressure regulator and changed oil in carb from straight 30 to synthetic ATF so the dampers can open more quickly-seems to have worked, throttle response is improved. 4.Coolant overflow-Purchased Moroso Coolant overflow resevoir from www.fasttoys.net (also got pressure regulator from them). 5.Potential understeer from front sway bar installation-adding front sway bar stiffened front suspension frequency from 2.19 Hz to 2.44 Hz. I changed the rear motion ratio from 1.42:1 to 1.37:1, and this changed the rear suspension frequency from 2.53 Hz to 2.65 Hz. I still have the rear sway bar to adjust balance. 6.Unknown timing-My previous mod to the timing marks was tested today. Using a timing light, I was able to determine that the car has 10 degrees initial advance and it's maxed out to 40 degrees by 3000 rpm-coincidently, this is exactly what the guys on the Jag forum say that my engine should have for performance. I may need an oil cooler but have no good place to mount one, so I built these radiator clamps out of steel and will use them as templates to get some aluminum ones built. They clamp onto the rad and hold the cooler behind the lower spoiler opening. 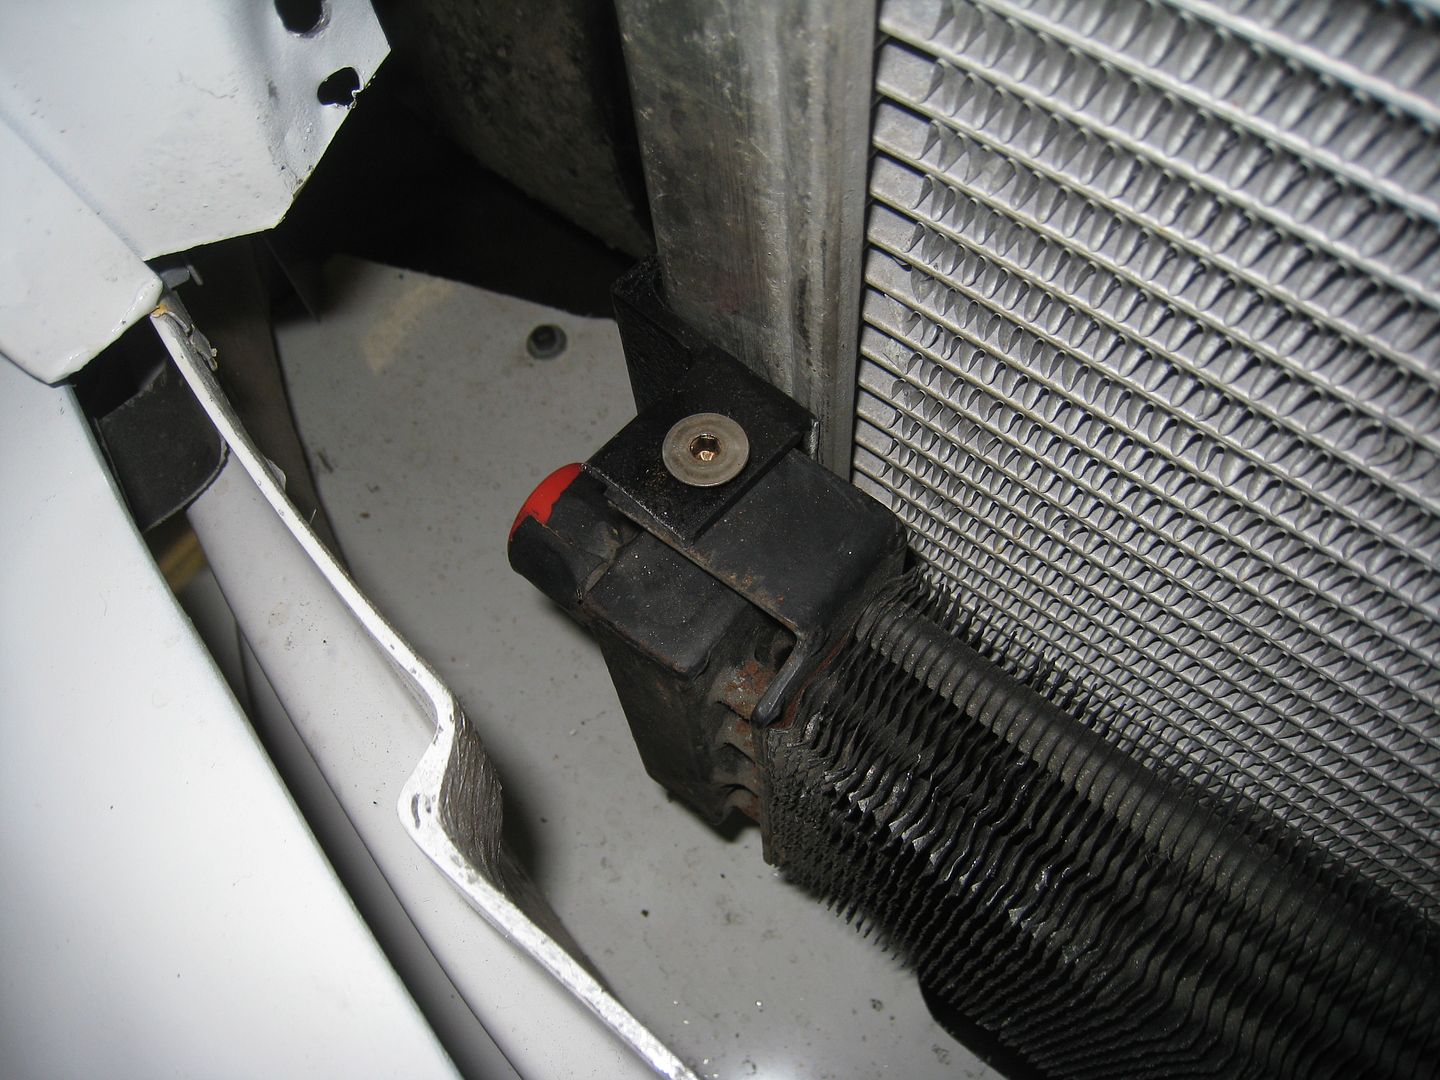
I had a very bumpy abandoned runway to test out my changes the other day. The new front sway bar and changes to the rear motion ratio seem to have done exactly what was expected-there is much less body roll and quicker reacting handling but it's also less forgiving. I went from full soft to full hard on high speed compression and the car felt most controlled somewhere in the middle. I tried stiffening low speed compression on the back only and the car went from planted to tail happy pretty quickly. Full stiff on the rebound seemed to reduce traction but adjusting to the middle felt right. I suspect the whole set-up is just a little too stiff for the very bumpy surface but I'm pretty optimistic for Nationals. I am concerned about the lack of traction off the line and under hard braking. The car has 93% anti-squat and I can raise or lower that with an adjustment of the top bars on the 4 link, I think I want to try lowering the AS number to improve braking performance. I also have an oil leak and the back of the rear spoiler and expansion chamber of the diffuser seem to have sucked up every drop of it-a good sign that the aero is working, I think. And it looks like I will have to vacuum out the interior of the car after every event because it fills up with small rocks kicked up by the slicks. I'll post video of some of it later. Here are a couple of short videos, pardon the audio, I forgot to plug in a mic: acceleration test [www.youtube.com] slalom test [www.youtube.com] I needed to fill the gap between the floor and the diffuser so I took a sheet of aluminum and made room for the lower bars and diff to poke through and put it on. Here is the before: 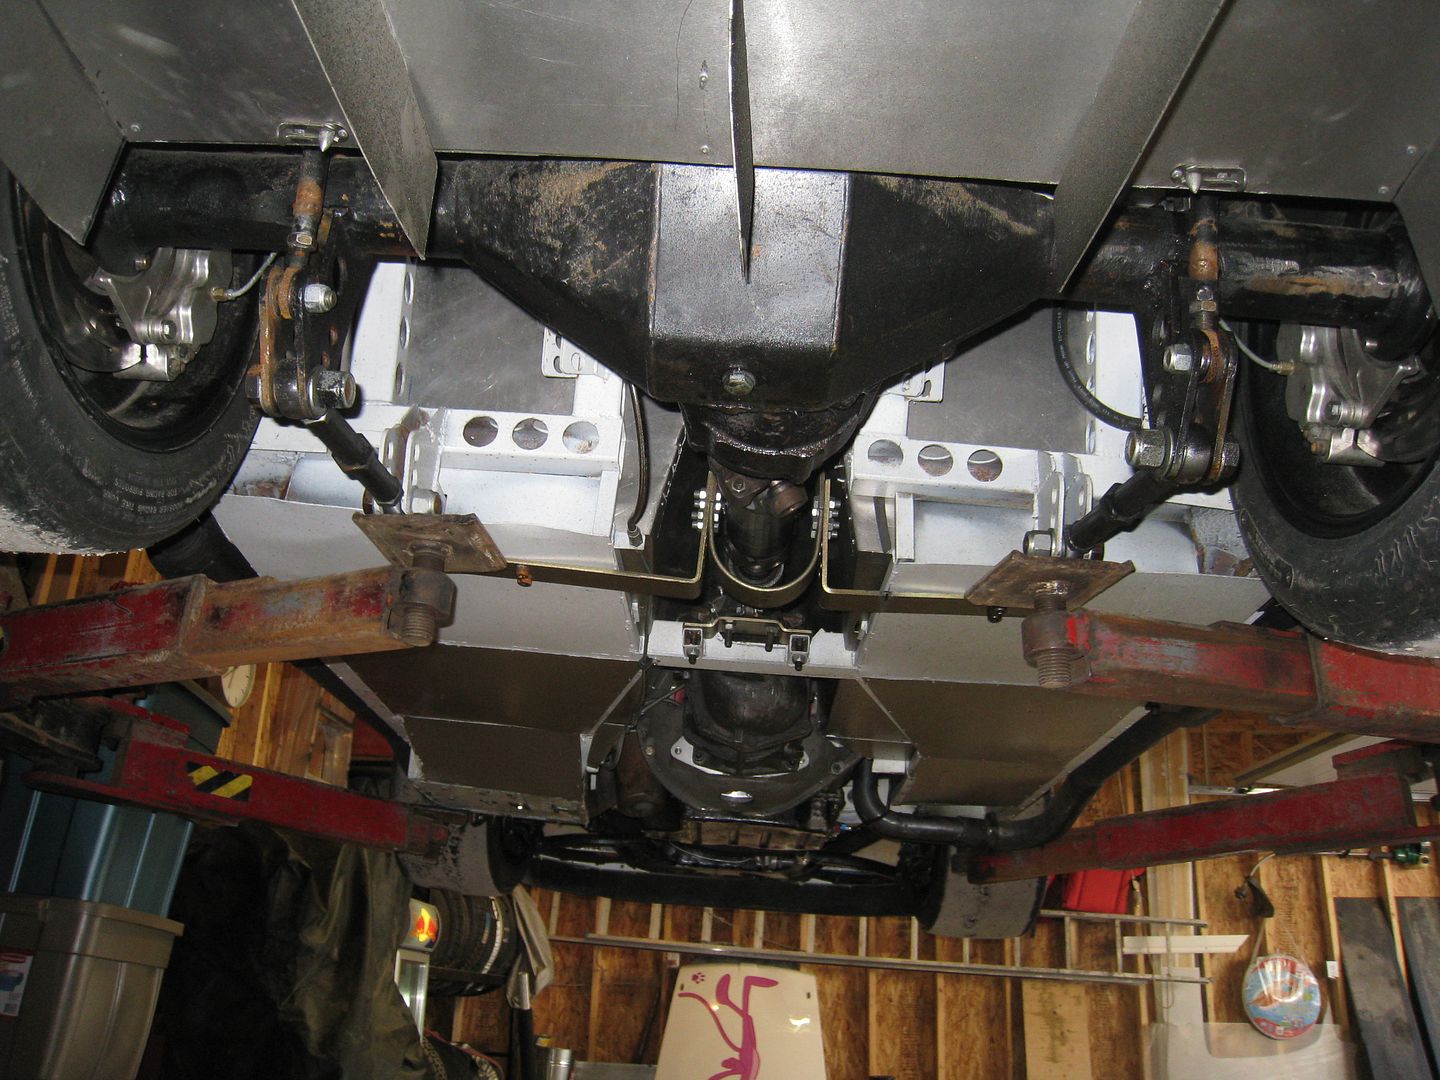
And after: 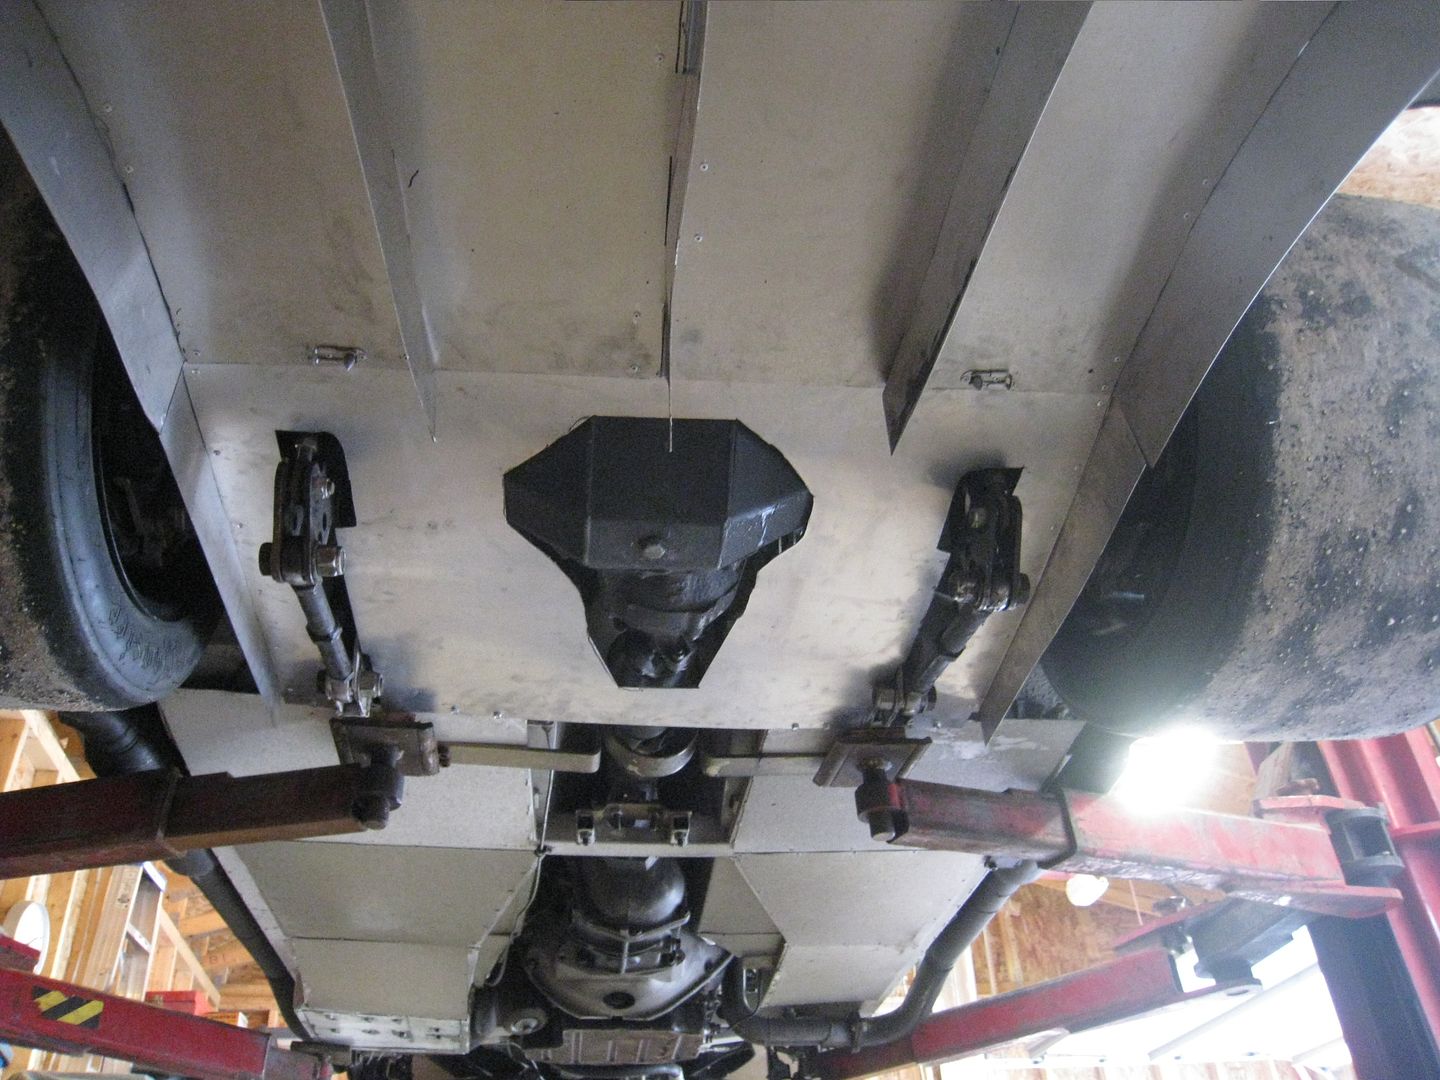
The Pink Panther's second event went much better than the first. The new front sway bar, rear suspension adjustment and undertray all worked very well plus the car didn't leak any oil or coolant this time. Perhaps I let the car idle for too long because it ran a little warm on my last run and it tends to stall under braking when the coolant gets above 200 degrees. I actually had time to fiddle with shock settings and landed up being full soft on high speed compression, a few clicks harder on low speed compression and around the middle of rebound damping. I think I can improve turn-in with giving the car a little more toe-out and I am going to adjust the rear 4-link for better braking but otherwise I am thrilled with the handling, which I found to be very much like an S2000. The engine still isn't making the power it made on the dyno so I must find those lost ponies somewhere. Here is 4 really shaky videos of my runs and one really good one, all with data included: run 1 hit cones [www.youtube.com] run 2 hit cones [www.youtube.com] run 3 clean [www.youtube.com] run 4 stalled on course [www.youtube.com] best run with different camera [www.youtube.com] At the last autocross, I was very disappointed with the power of the car. The dyno said 290 hp and 288 ft/lbs but my butt dyno said it was a lot less than that. I even called the dyno guy and questioned the accuracy of the equipment. Well, anybody familiar with Stromberg or SU carbs will look at the pictures below and know immediately what the problem was-a torn diaphram. The diaphram raises and lowers a sleeve inside the carb, allowing more or less air in. This diaphram was ripped and so the sleeve wouldn't allow any more than a trickle of air into the 3 cylinders fed by this carb. 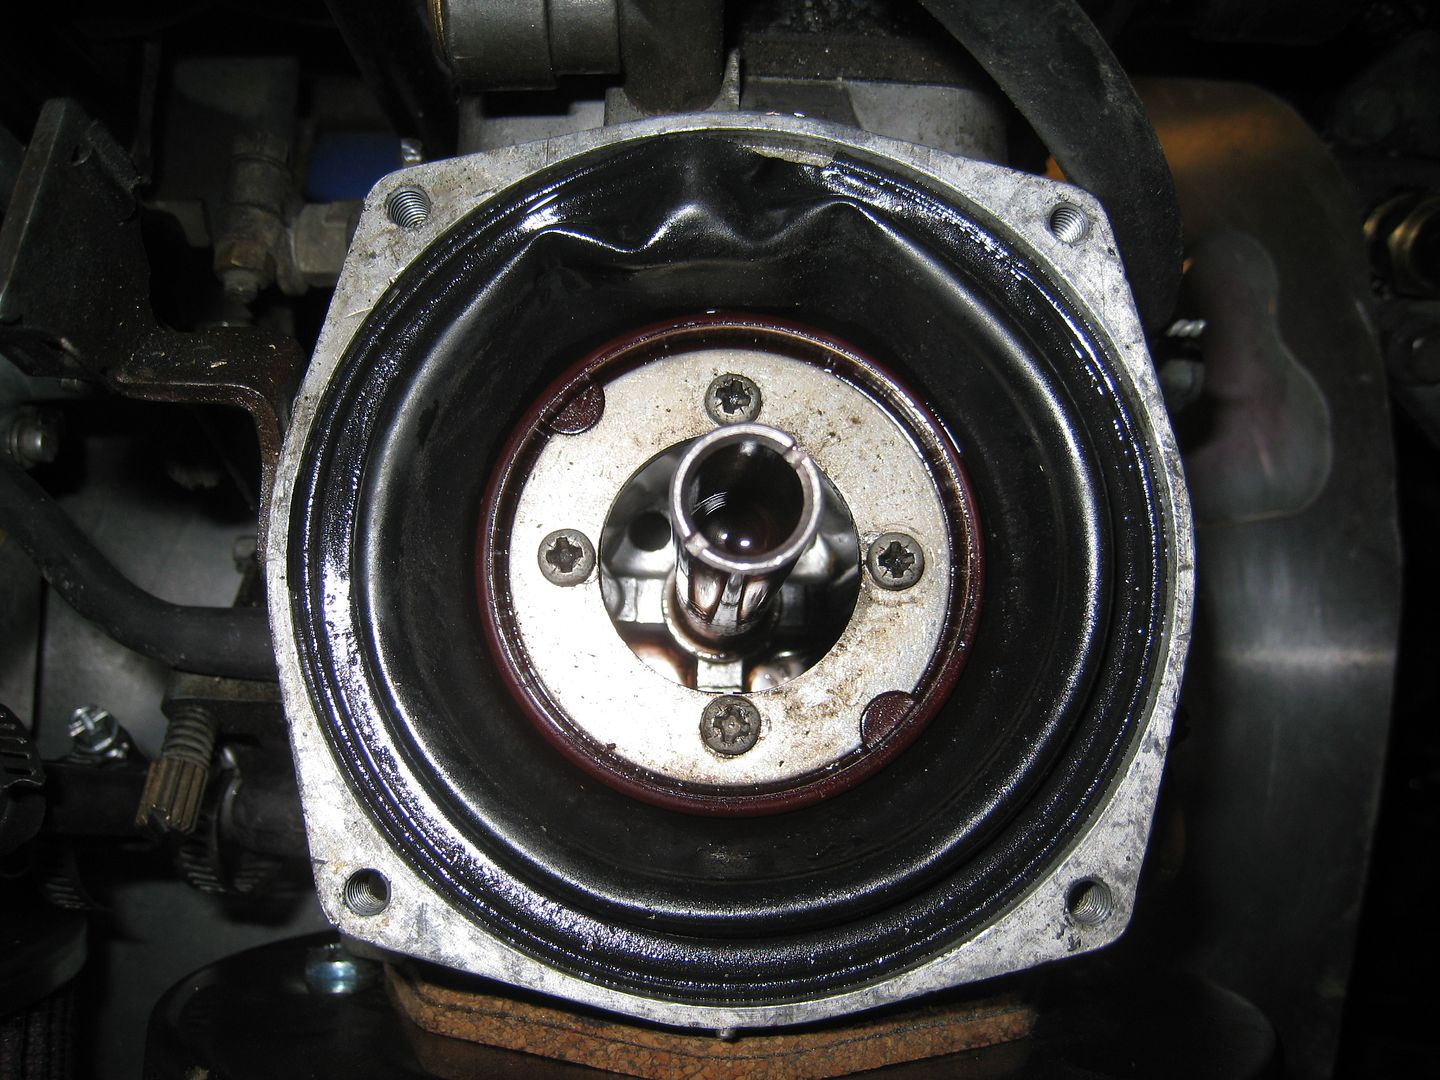 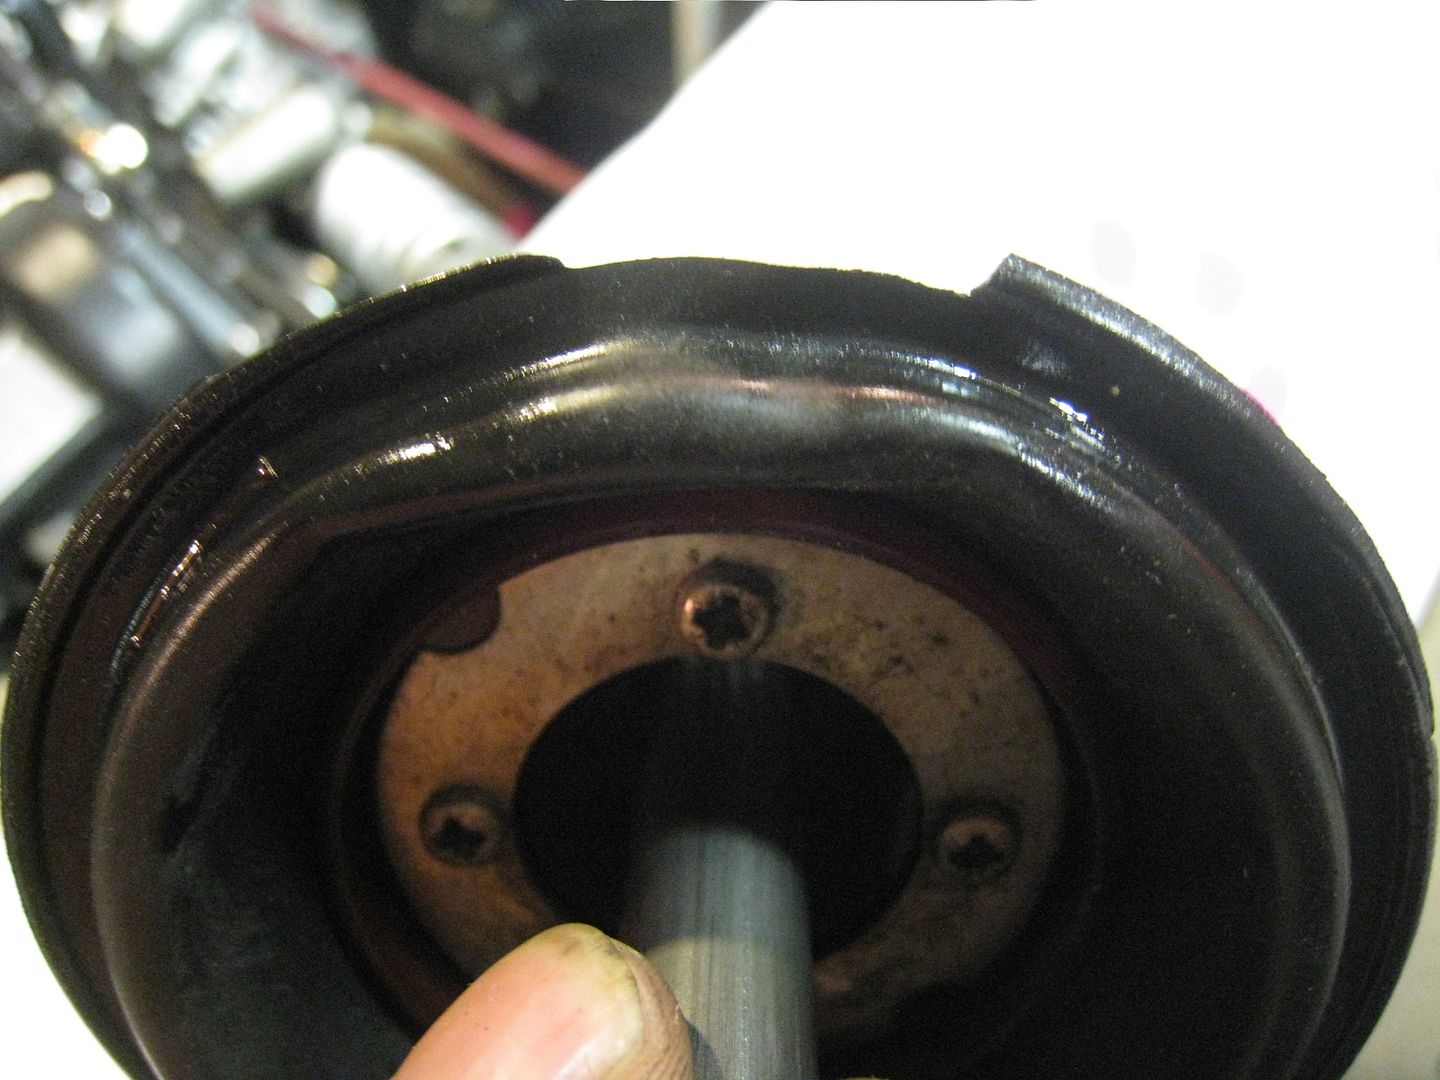
I also discovered a big ignition timing problem. I had purchased a new cap and rotor from a "Top Seller" on E-Bay and I should have known the quality of the parts was poor when the rotor just snapped in half when I tried to install it. Well, the cap recently failed as well so I went back to the original Lucas distributor cap. I'm guessing that the knock-off cap and factory cap didn't share the exact orientation on the distributor because the timing was suddenly 20 degrees too advanced. This now makes me question the quality of the thermostats I purchased from the same seller because even with the oil cooler hooked up, the coolant temperature is too high. The engine has been running a little warmer than I would like, even with the addition of an oil cooler and dual pass radiator. A Jaguar technician named Norman Lutz figured out that that coolant inside the V12's was not evenly distributed. He found a way of altering the flow using restrictors in the external coolant manifolds. I made made the mods last night and now the temperature, at least when the car is idling, seems to stay under control. I can't say for sure if the mods are what did it because I also found an airlock in the cooling system and was able to add more coolant. Here are the manifolds without and with the restrictors: 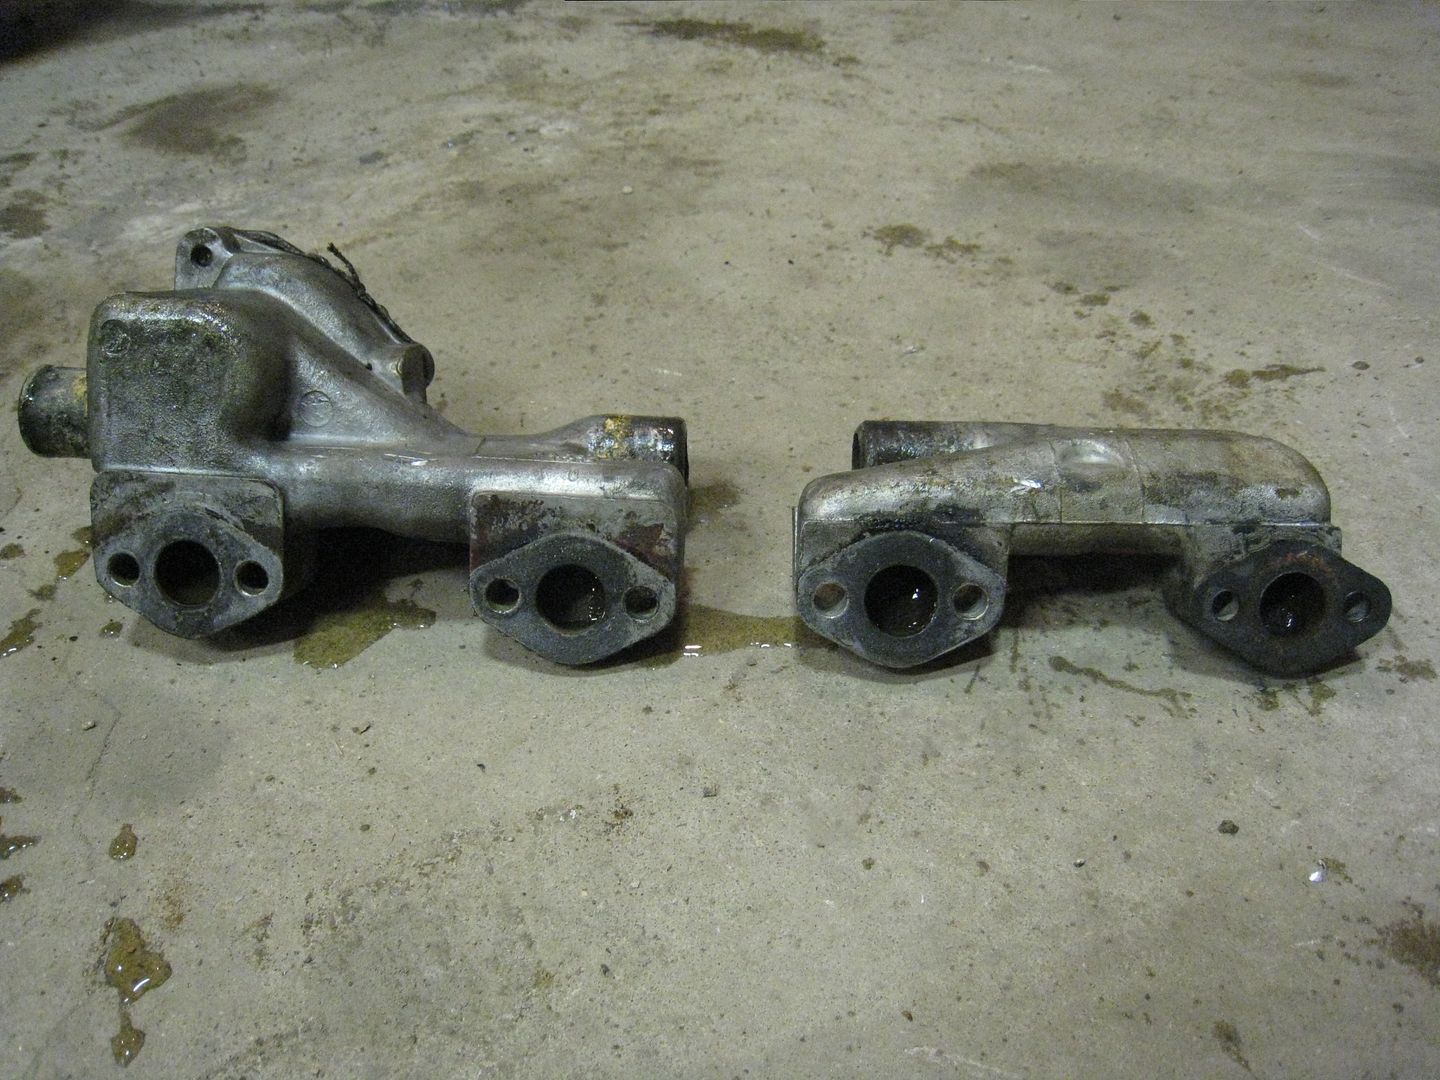
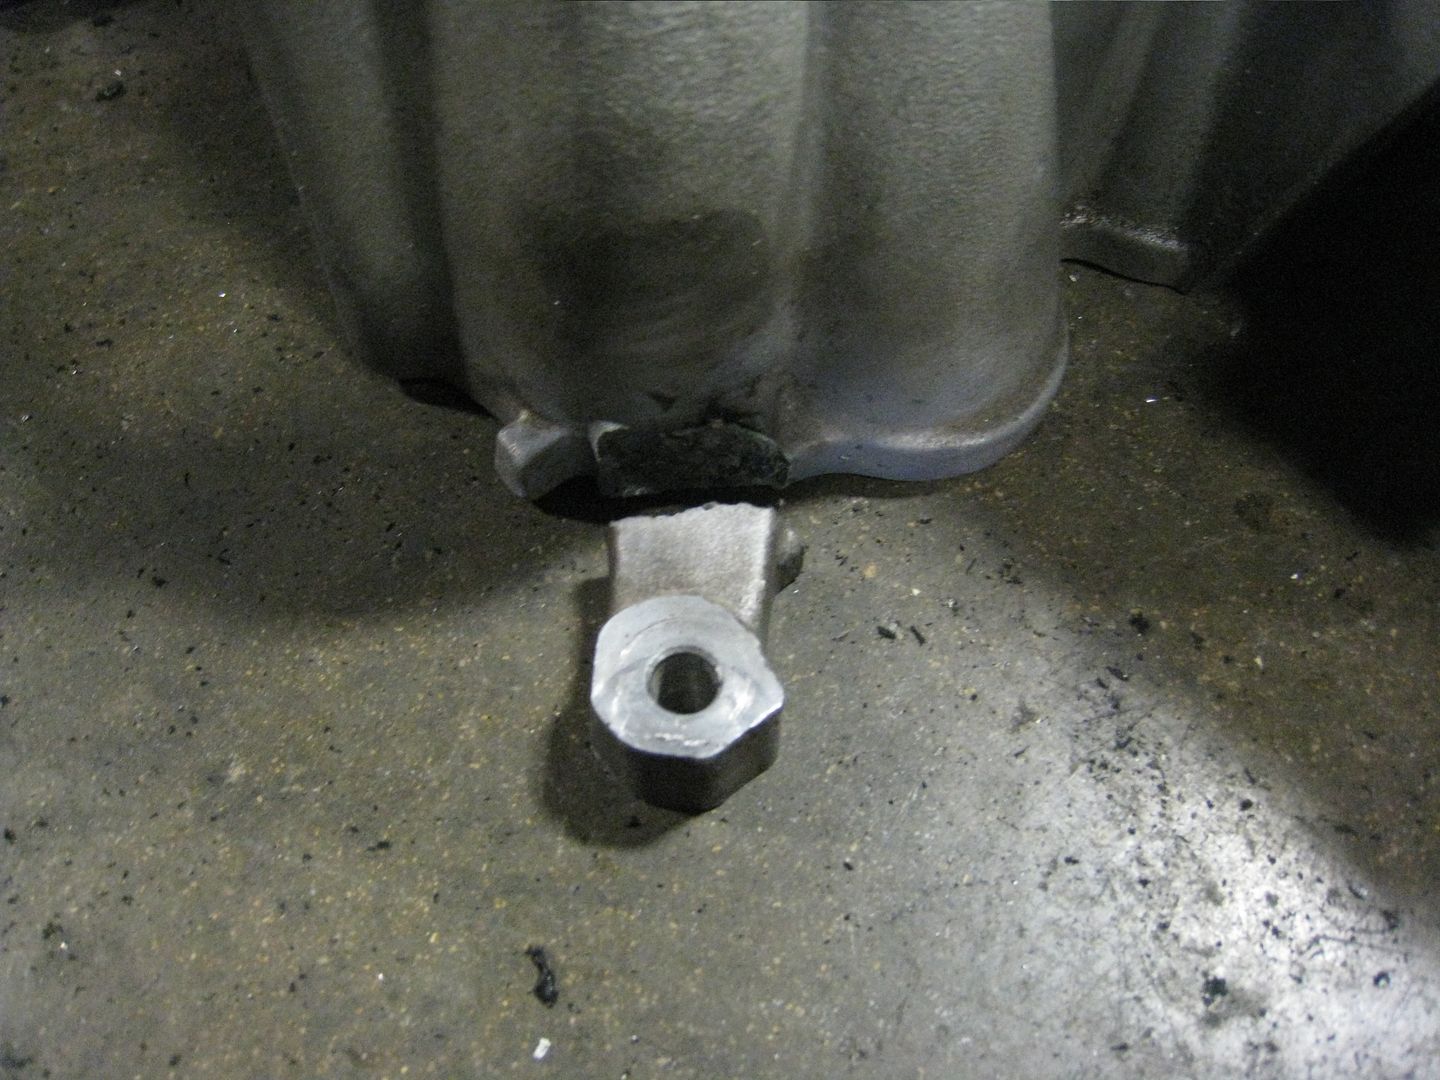
I have bad news: I have done everything I can to cure the power and overheating problem with this V12. I have done all the recommended things to keep it cool and have tested or replaced all the things I can afford to do to make the power I need it to make. But after testing today, I realized that I have failed at both things. It still does not have the acceleration that 290 hp in a 2300 lb car should have and it reached 220 degrees on a cold morning and wouldn't cool off even with water sprayed on the rad. If it was powerful, I would invest in an oversized custom radiator and hopefully cure the problem. If it ran cool, I might invest in new cams/valve springs to get more power out of it. But as it is, throwing money at one problem to still have the other is more than I am willing do right now. So, I know there are thousands of people that follow the progress of this car, and many of you really want to see the Pink Panther at Nationals. To do this, I am going to need help. If anybody has a suitable replacement engine that they are willing to donate, lend or sell at a rock bottom price, I am willing to save a co-drive at the 2011 Solo Nationals in exchange. A suitable engine would be another V12 (carbs or EFI), GM or Ford V8 that is known to be healthy and strong. I don't want to fabricate new mounts and exhaust, purchase a bellhousing, clutch and pressure plate just to find that an engine can barely wheeze out 200 hp at the wheels. A generous fan of the car has already offered a mildly modified Ford 5.0 for no cost, but I have my doubts that it will make the power I need. Nobody is more disappointed than I am that I can't run this engine in the car. I have been wanting to do something great with it for the last 26 years but that is just not going to happen. If you are willing to help me get to Nationals, e-mail me marksawatsky at gmail dot com I pulled the oil pan off and found a thrust washer staring up at me from the bottom of the pan. 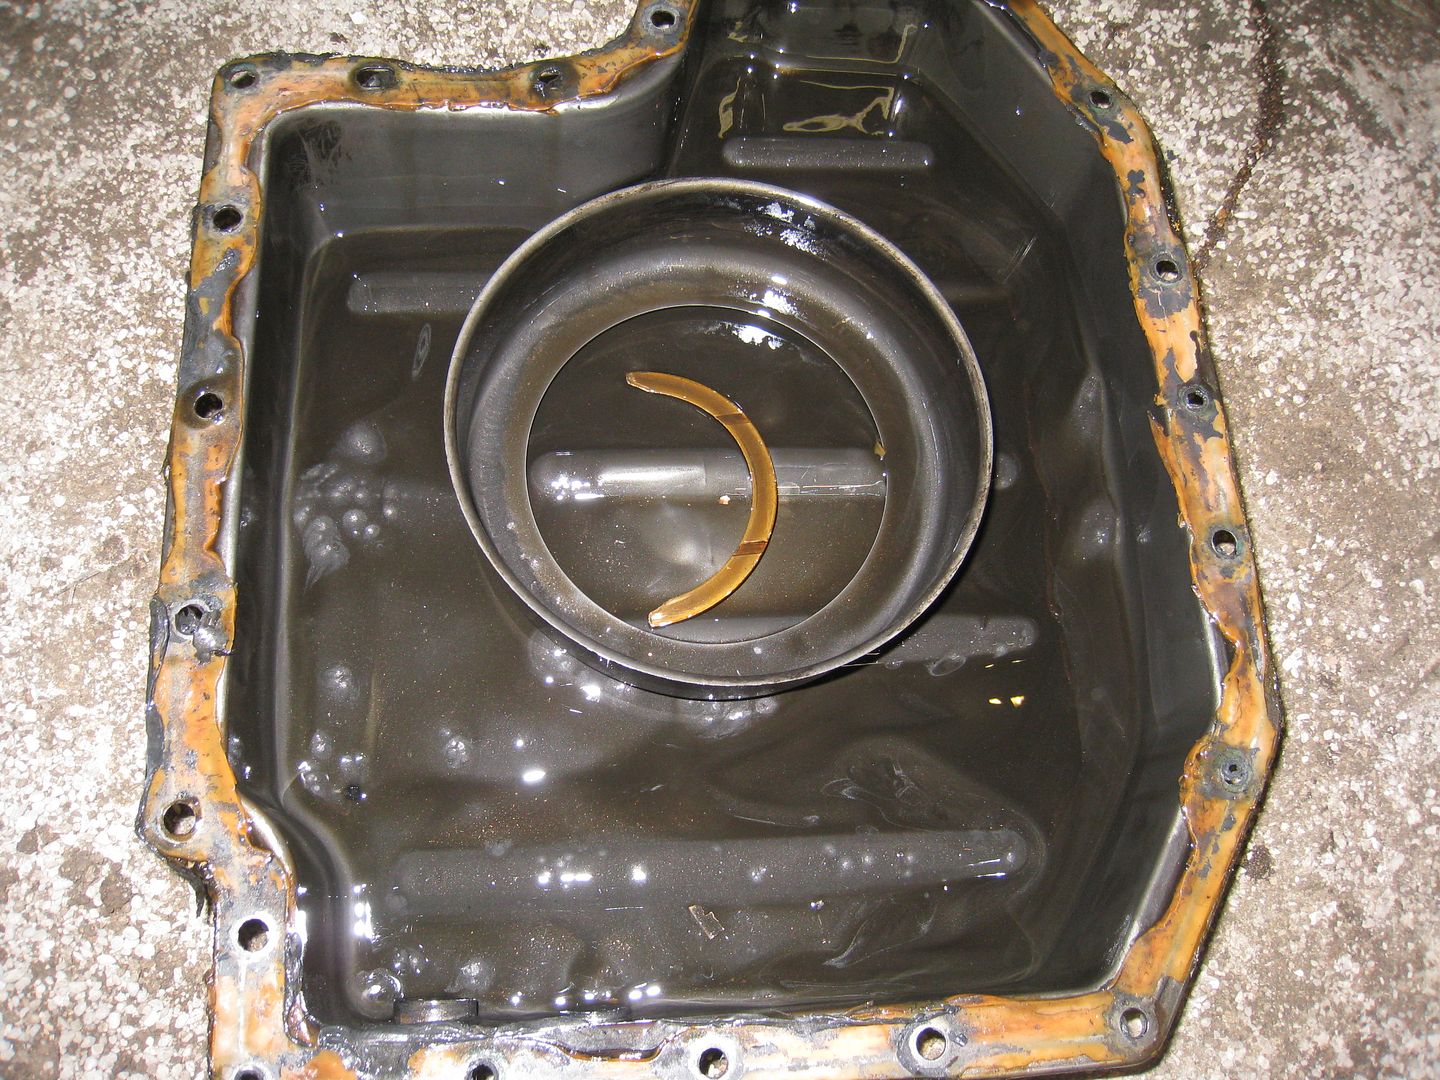
Further investigation revealed the cause. The input shaft on the transmission was pushing the crank forward with enough force that the crankshaft ground itself through one of the thrust washers, allowing the one on the opposite side to fall out. Look carefully at this picture and you can see the groove worn in the crank (left arrow) where a thrust washer used to be, and can just make out what is left of the thrust washer poking out (right arrow). 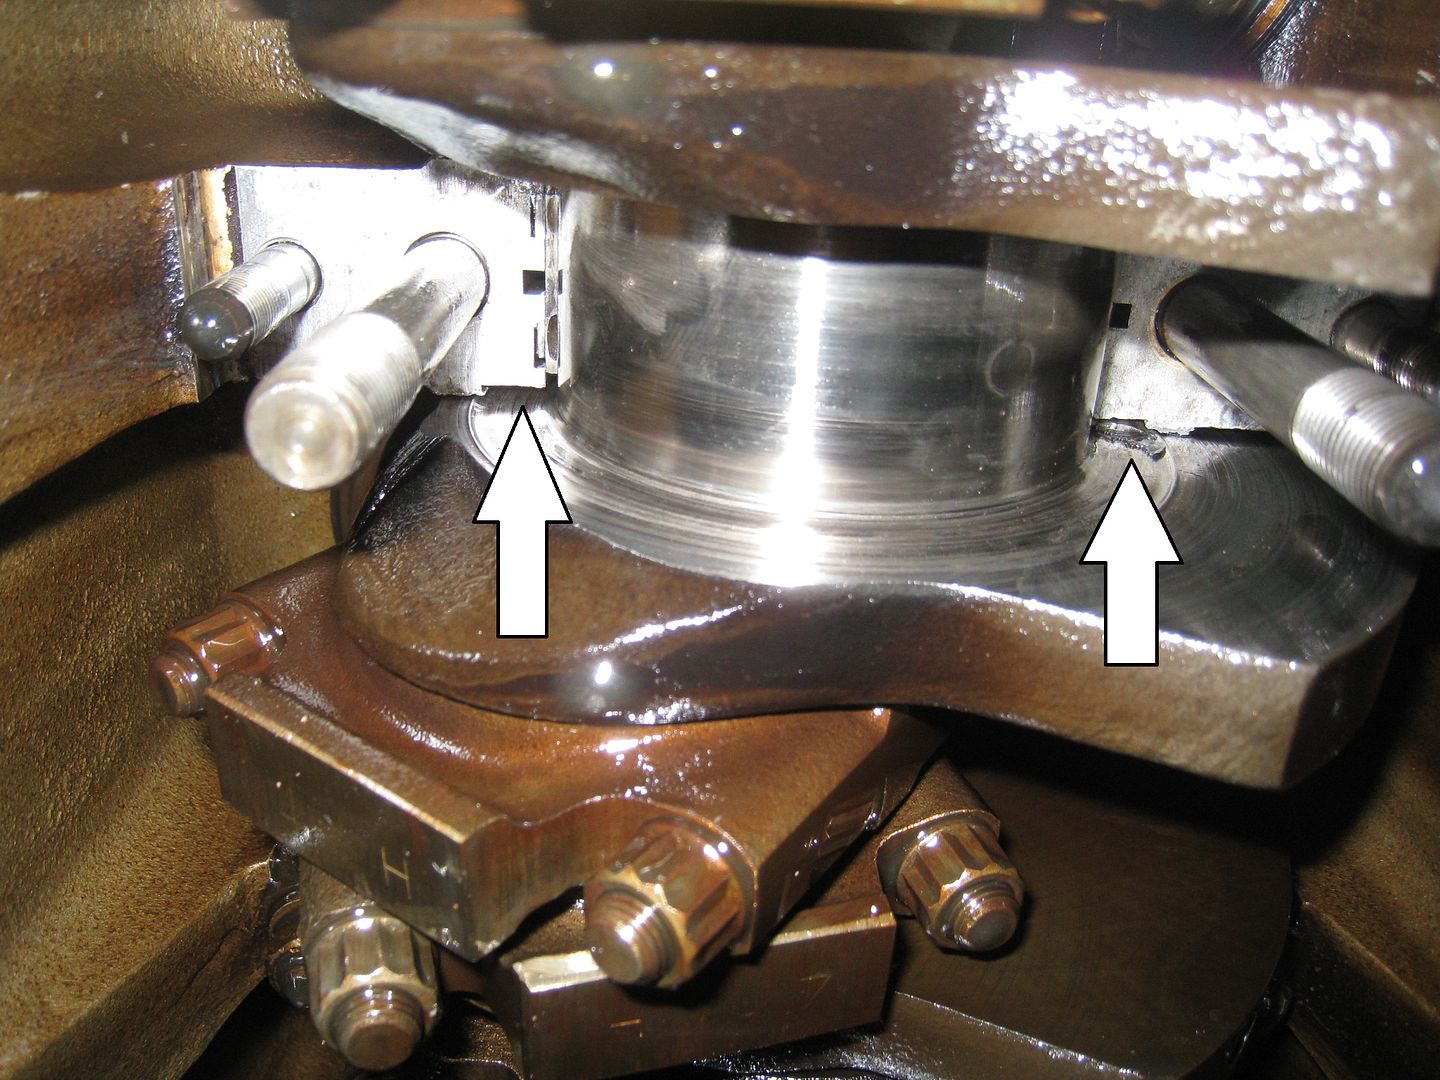
The crank now has a deep groove where it's not supposed to and all the crank and rod bearings are shot. 
The question is: do I buy another engine or replace the crank and bearings on this one? This may or may not have been the cause for overheating and low power but I won't know until it's fixed and there could still be other issues like head gaskets, timing chain, etc. Any other engine I buy may have it's own problems. The cost is about the same for fixing the crank/bearings or buying another engine. I have decided to go with the Ford 5.0 that has been donated to the project. It's hard to argue against a free, powerful motor that also bolts up to my transmission. This morning I pulled the exhaust, spoiler, splitter, bumper and fenders off so pulling the engine will be easier. I also bolted the bearing caps and oil pan back on the engine so I don't lose anything. I may rebuild this engine some day and make it into a real screamer with high compression pistons and good cams. 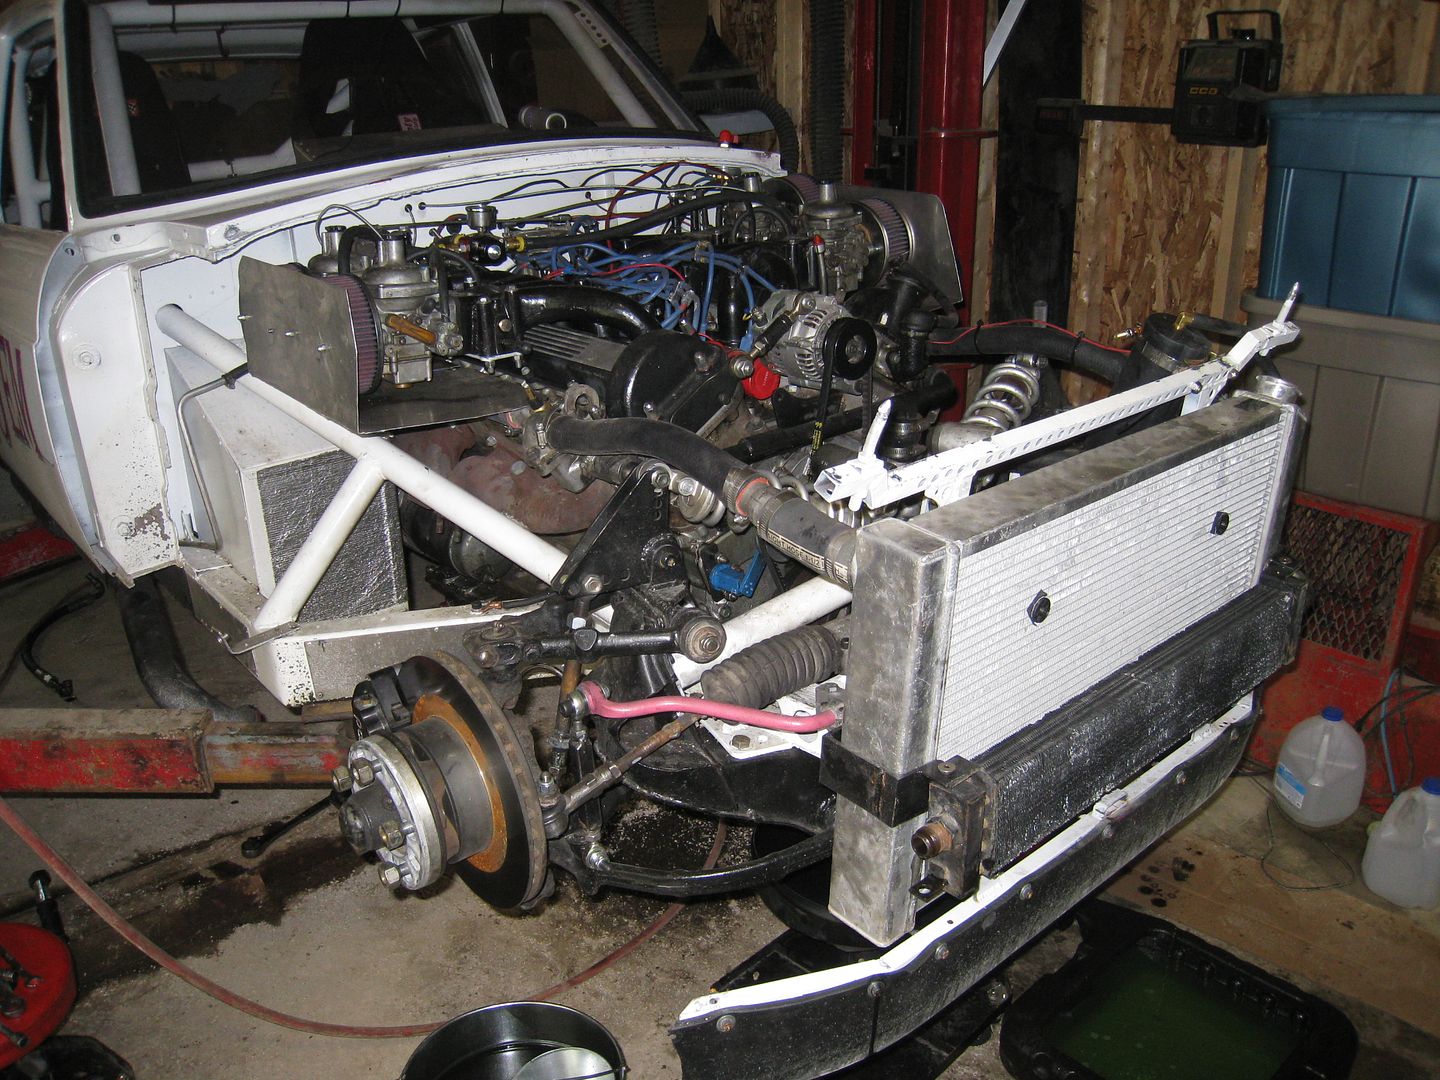
I removed the final bits and pieces getting in the way of pulling the engine today so now all I have to do is get my engine hoist and pull out the V12. There should be lots of room in there for the V8, maybe I can add a trunk for holding our helmets? ;) 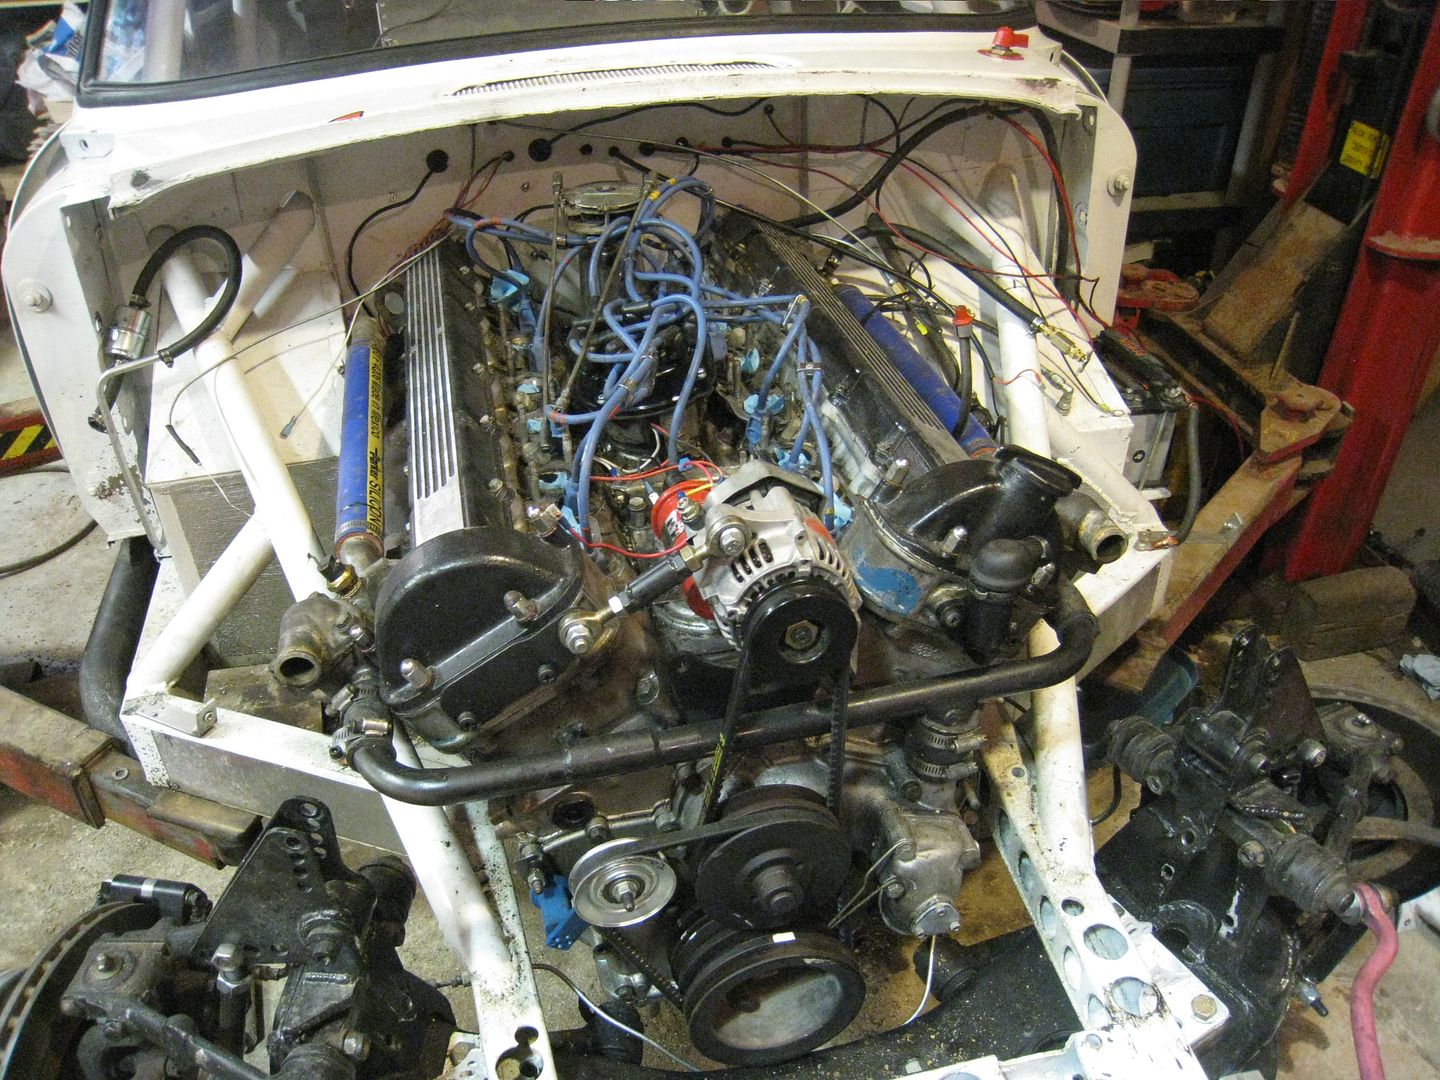
It took quite a while but I finally got the Ford 5.0 I'm using out of the vehicle it's been sitting in. The engine is a mess with all it's emissions garbage still attached and a layer of rust on every surface but it was free and does run really well so I can't complain too much. Just to get an idea of how it will fit, I hoisted the V8 into the space freshly vacated by the V12 and it looks like everything will fit ok. There will be a bunch of fab work required but I think I can handle it. 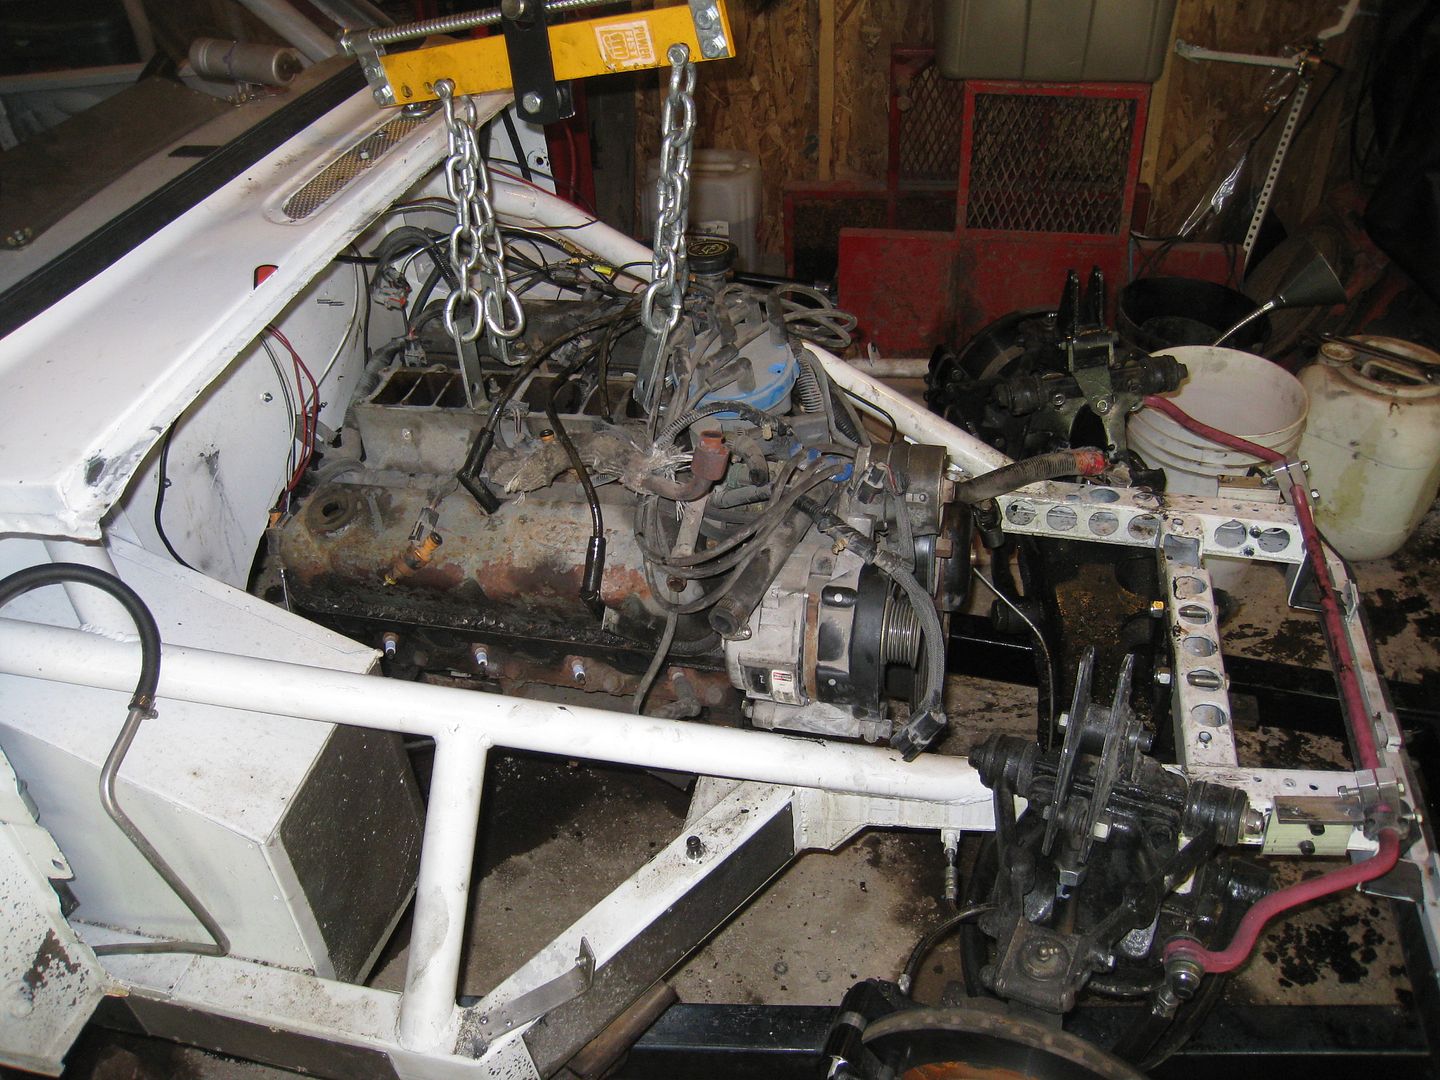
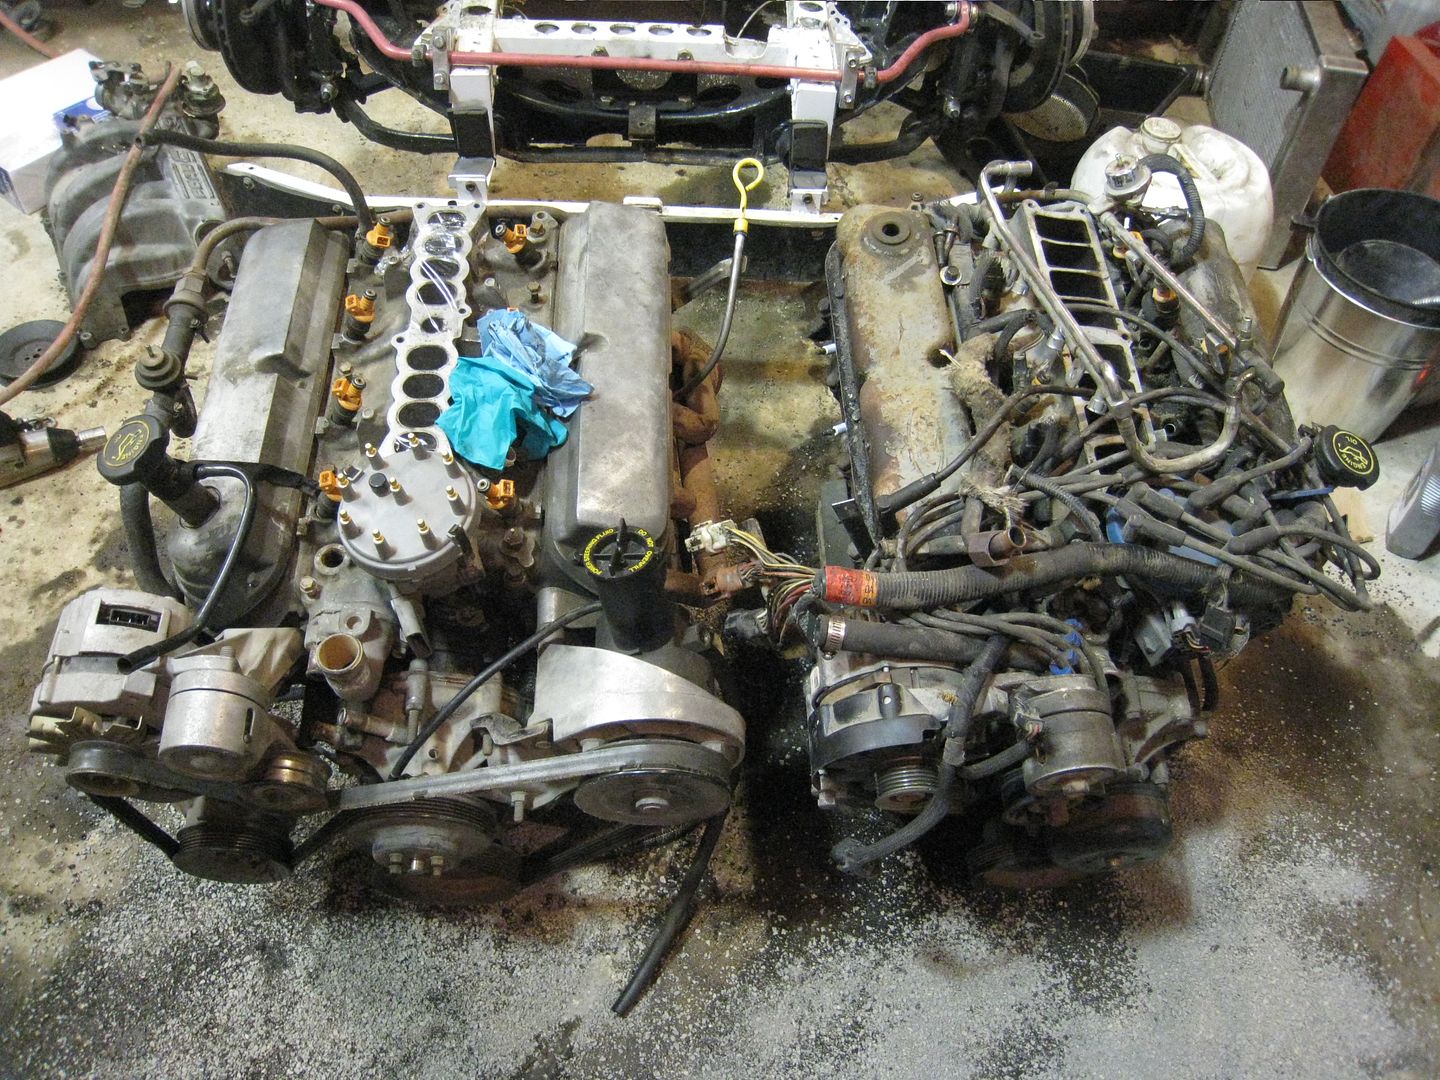
As is typical for these kind of projects, the "free" engine I was given was actually going to be quite costly to put in the car. It came out of a truck and even though the Mustang and F150 5.0 were similar, they are not the same. The location of accessories, intake, compression ratio, camshaft, pistons, water pump and other tidbits are different so getting the same performance out of a truck engine is more costly and difficult. Fortunately, I found a complete and running Mustang 5.0 HO engine locally for $200.00 and it even includes headers. On the left is the High Output 5.0 and on the right is the F150 engine, notice that the water pumps spin in opposite directions: 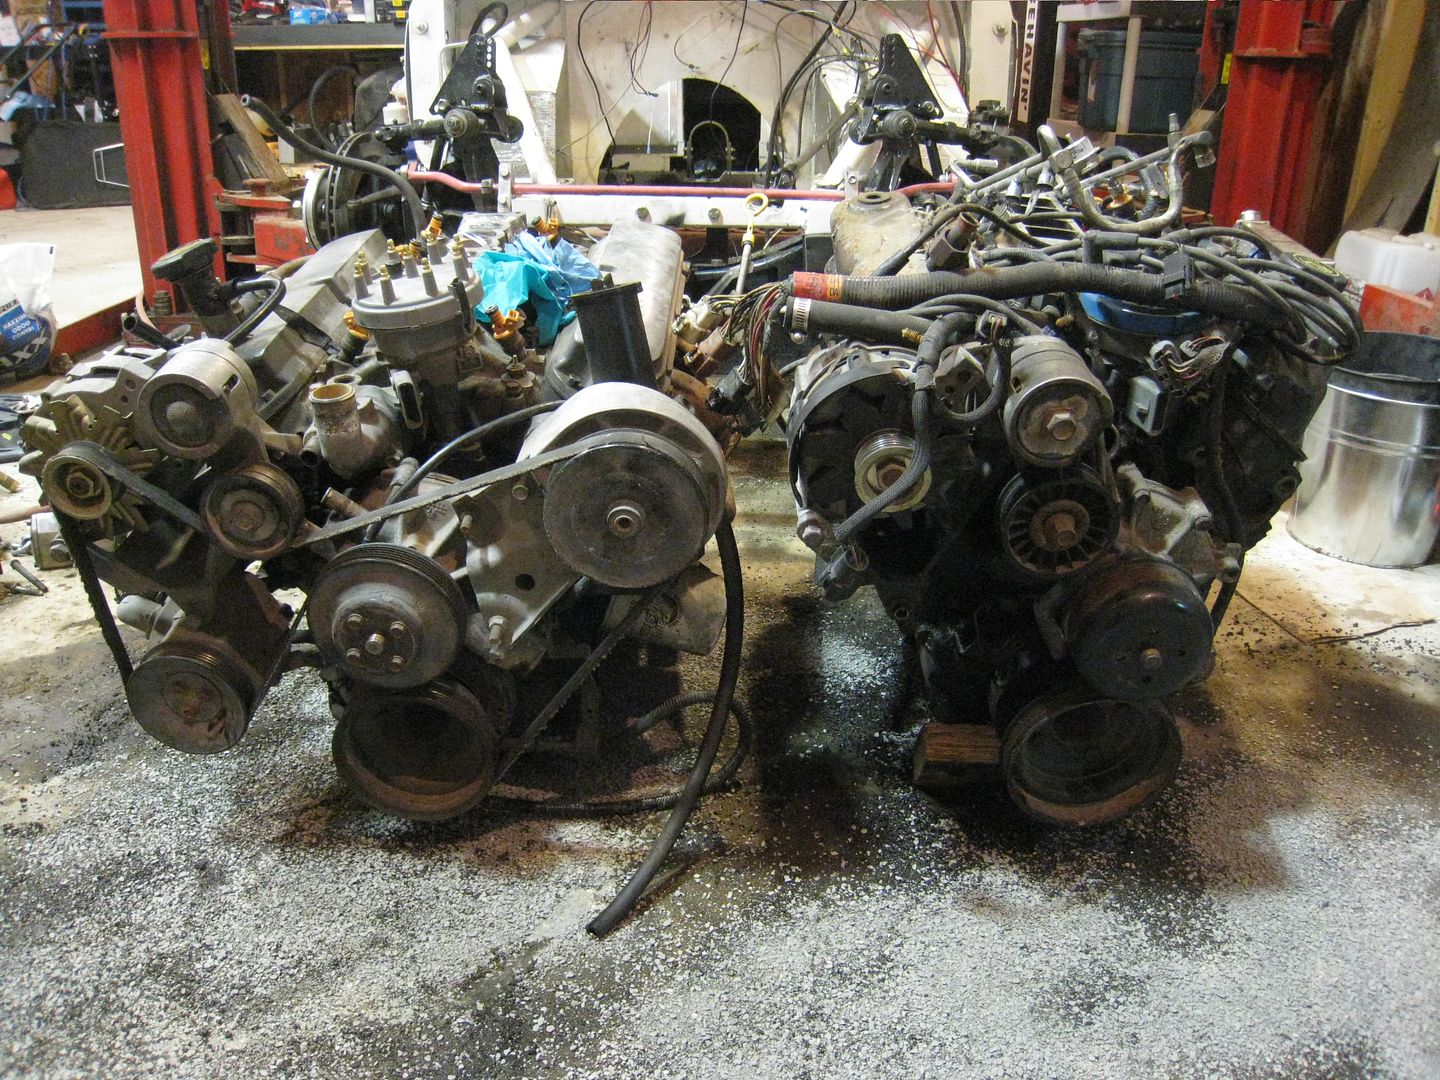
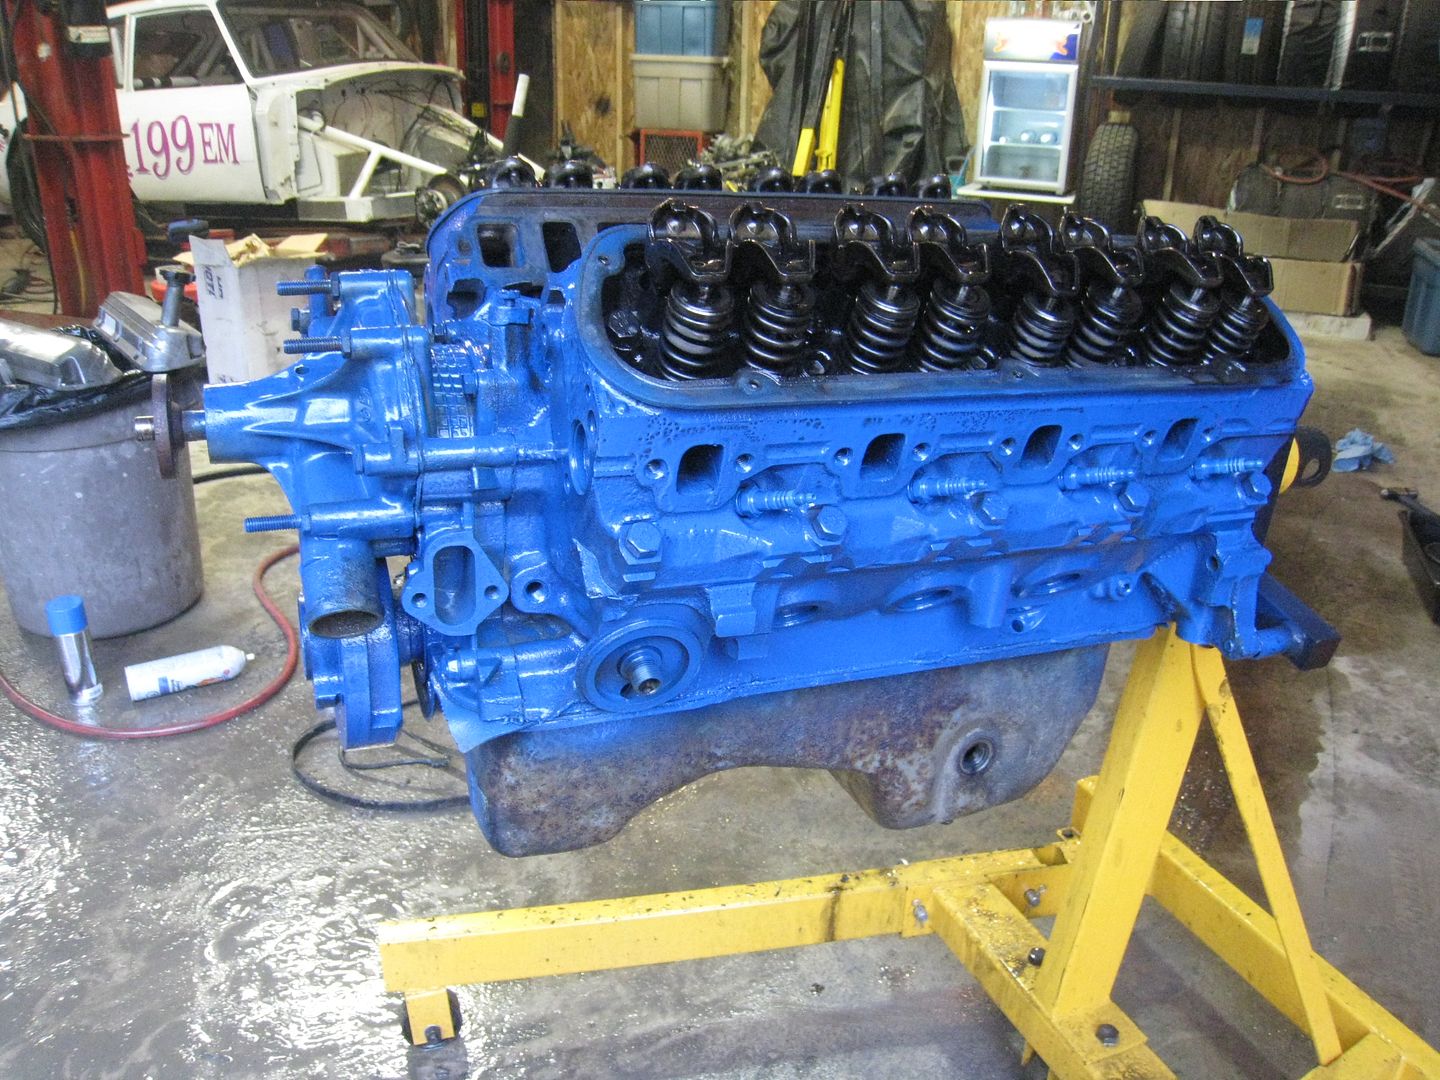
The 5.0 was pretty dirty so I removed all the brackets and started cleaning. I soaked it in engine degreaser then used a wire brush on the end of a drill to get the thick stuff. Then I used a garden hose to rinse the engine off so I could take a closer look. If I found any more grime, I soaked that area with degreaser and scrubbed some more. After several cycles of degreaser-rinse-inspect I was able to go over the whole engine with brake cleaner to remove the film left by the degreaser. Then I sprayed it with Ford Racing Blue engine paint. Before and after: 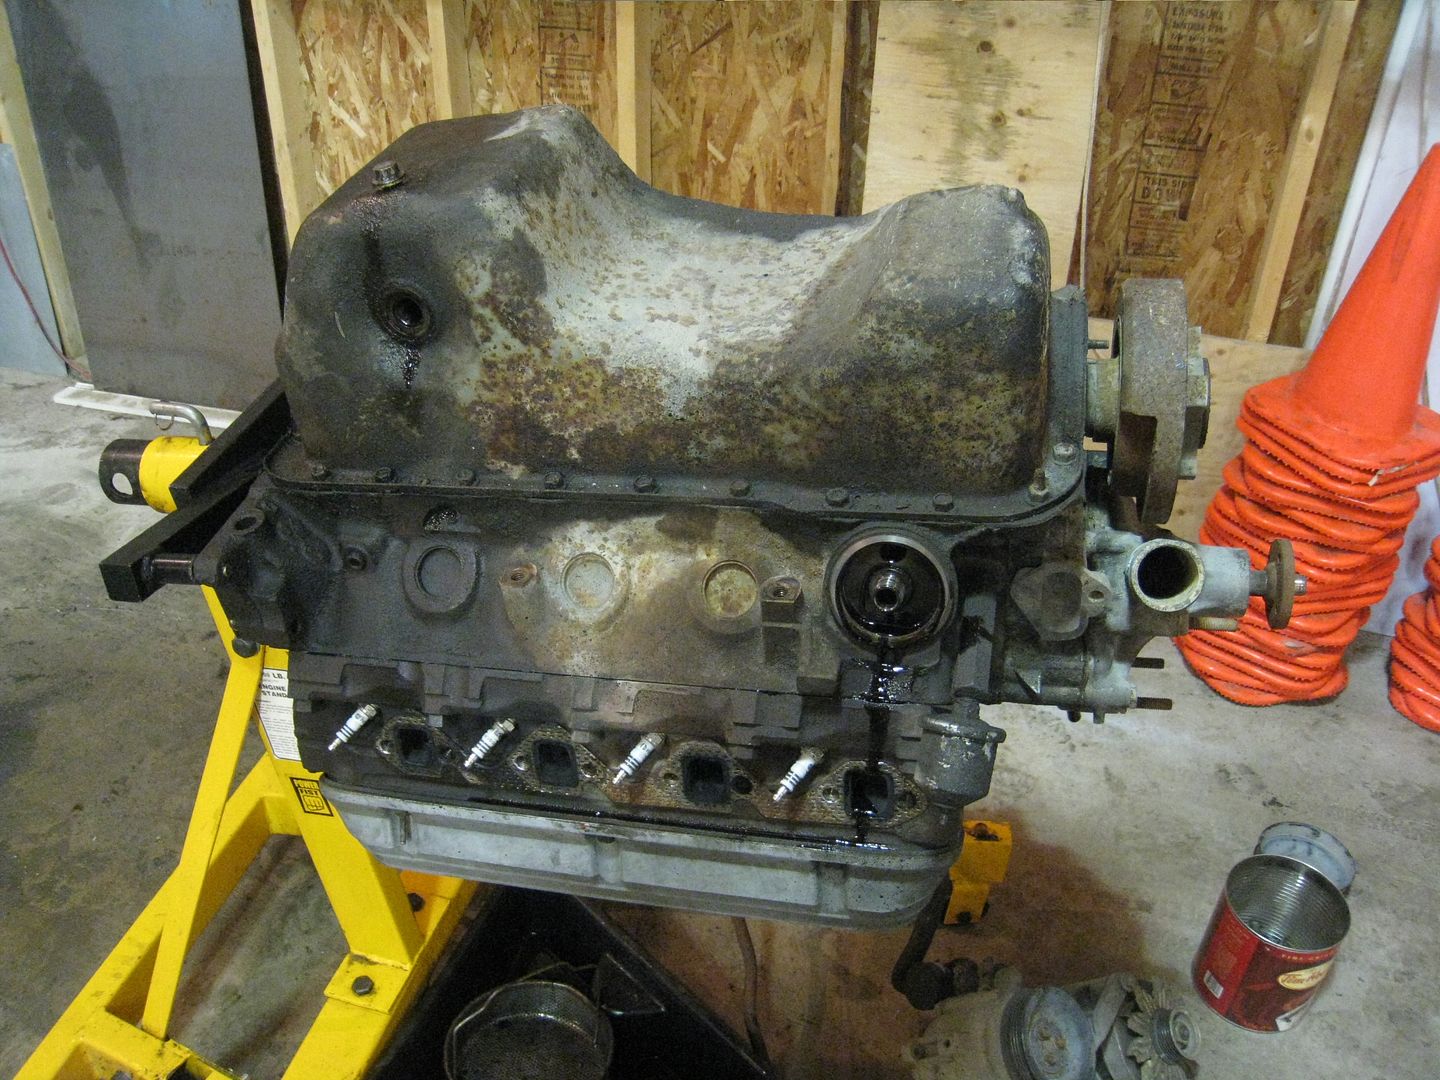
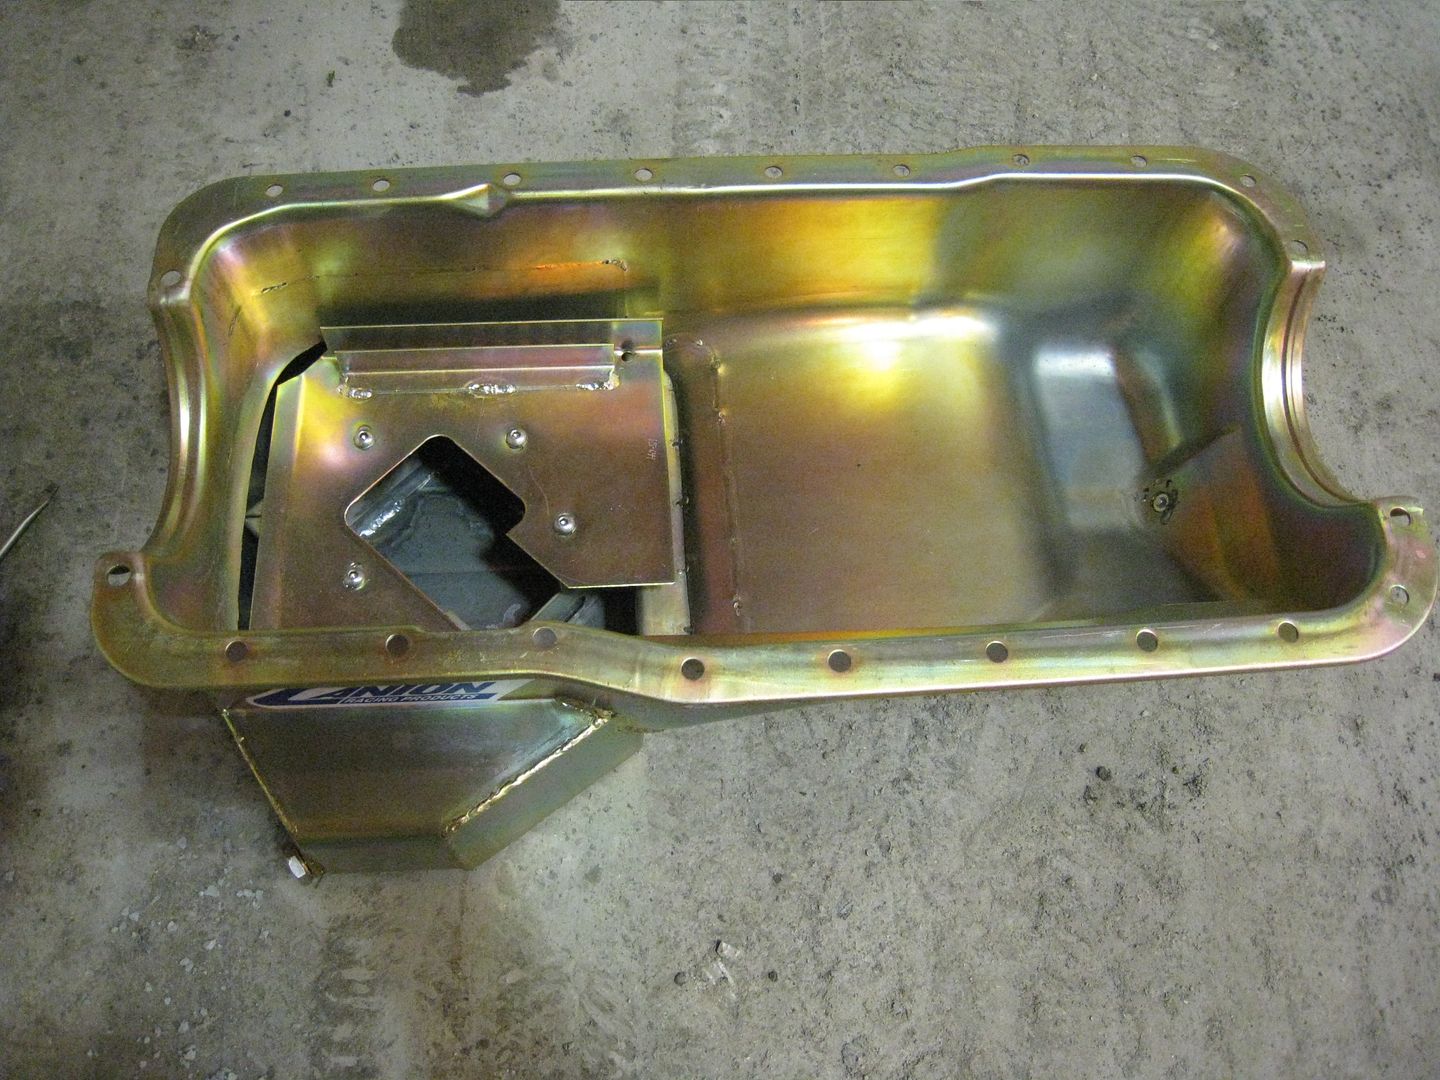
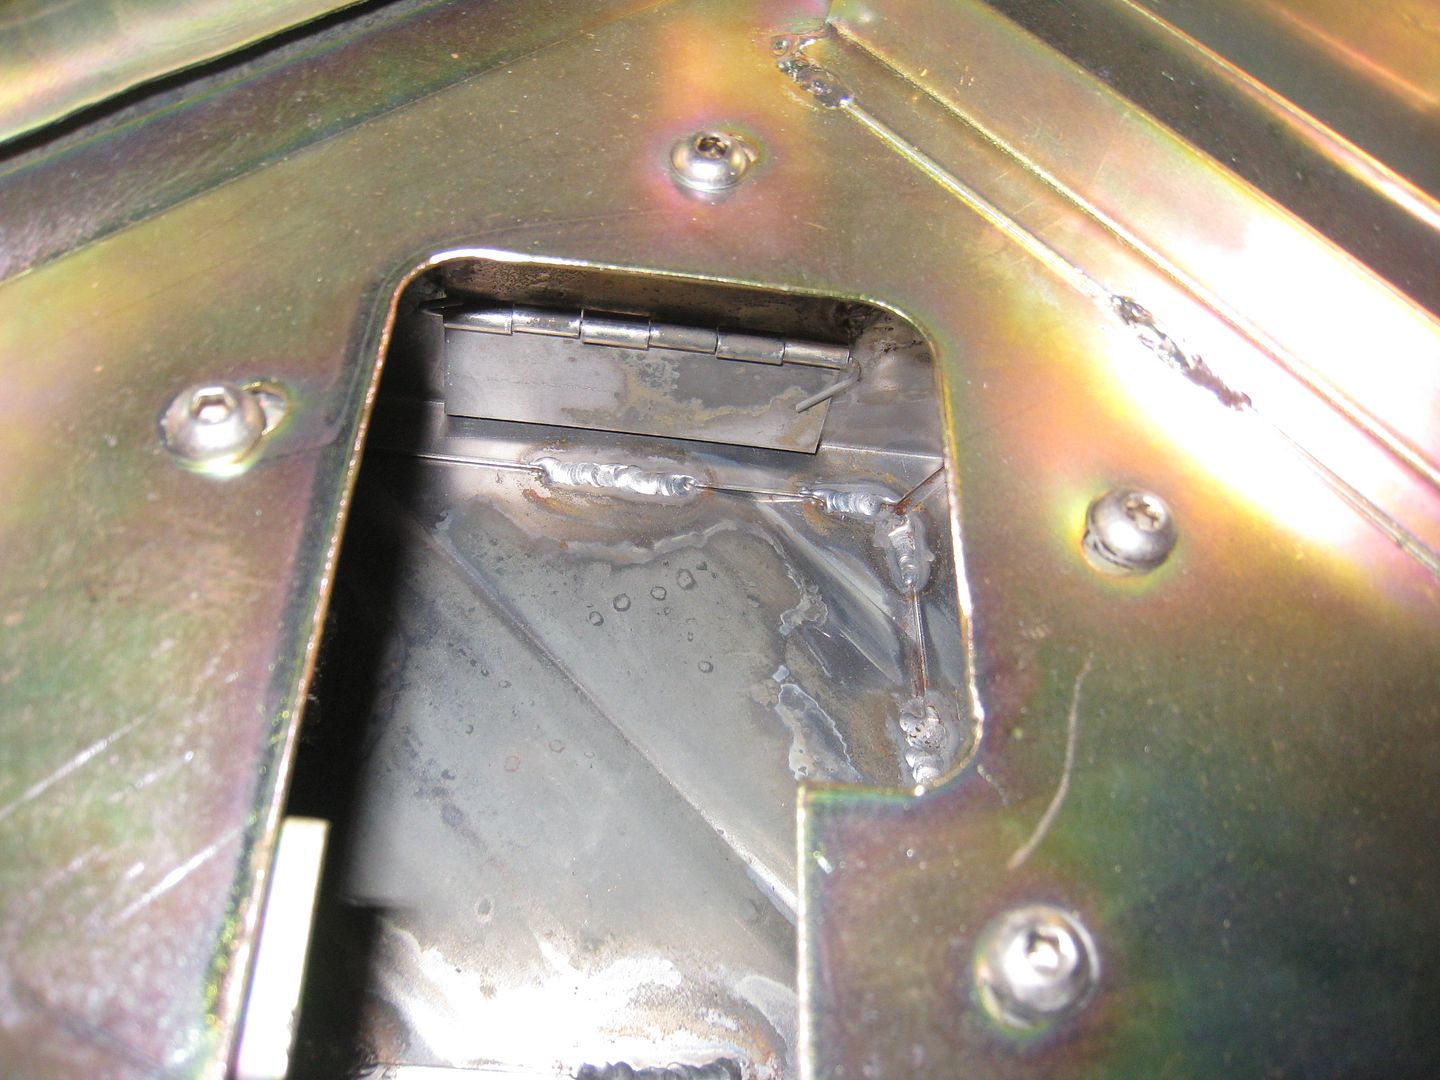
I installed a windage tray and road race oil pan today. A windage tray is designed to keep oil from splashing back up on the crank during racing while still allowing oil to drip into the pan. The oil pan is made by Canton and has several one way doors that keep oil flowing towards the pickup but prevent oil from flowing away. The one pic shows one of the hinged doors. 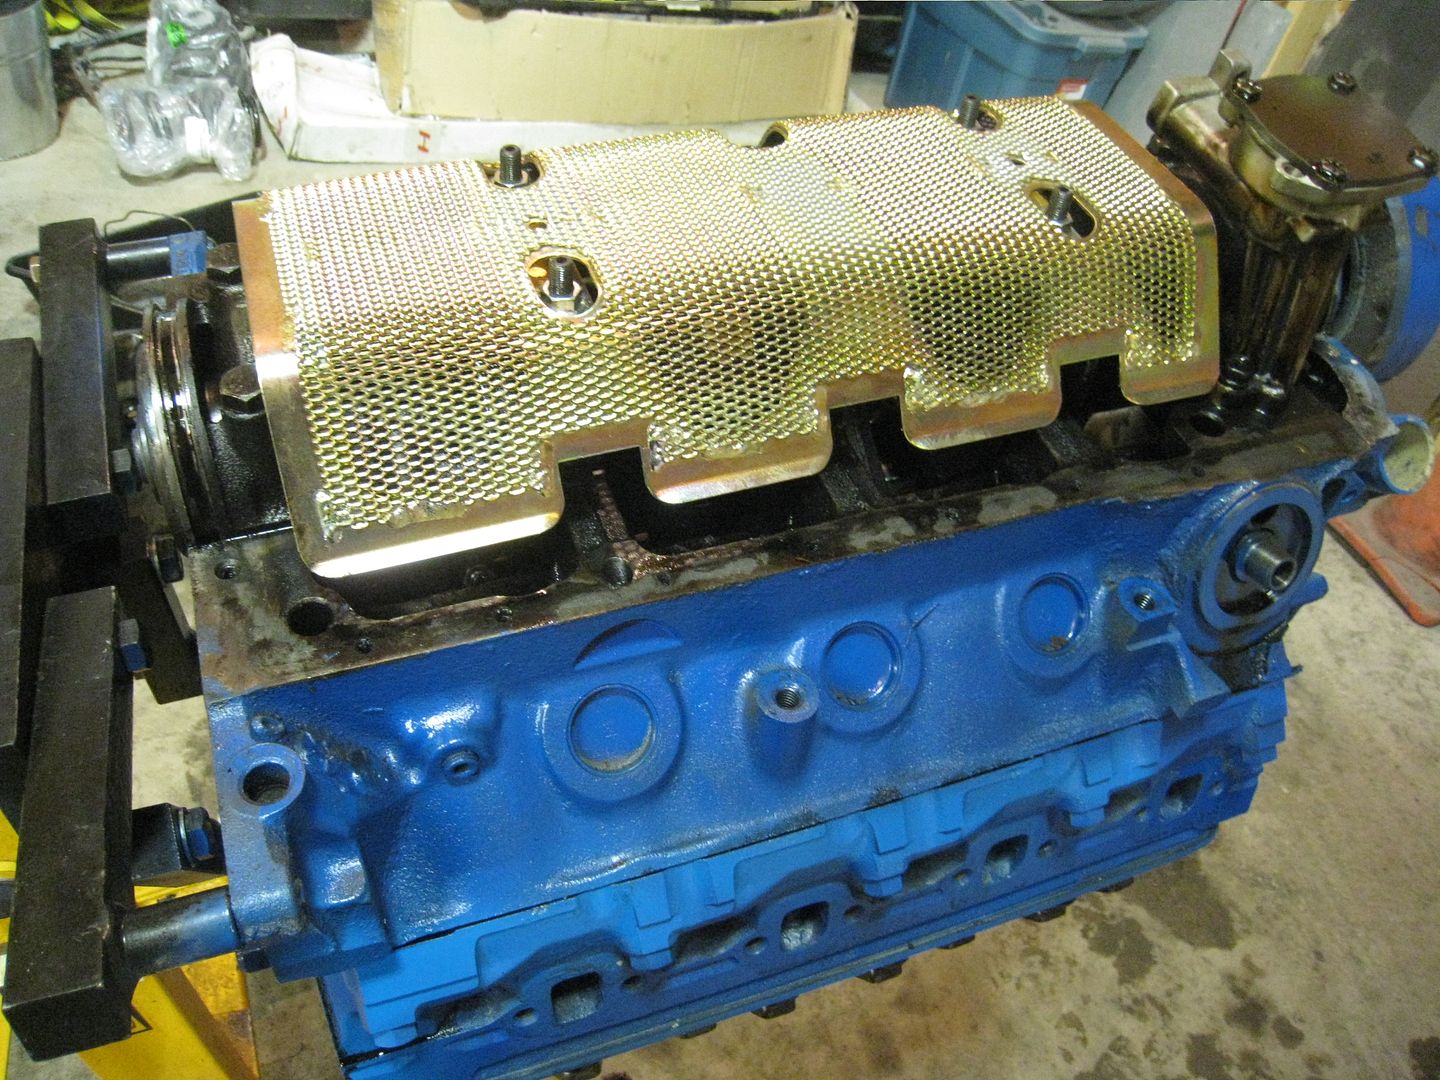
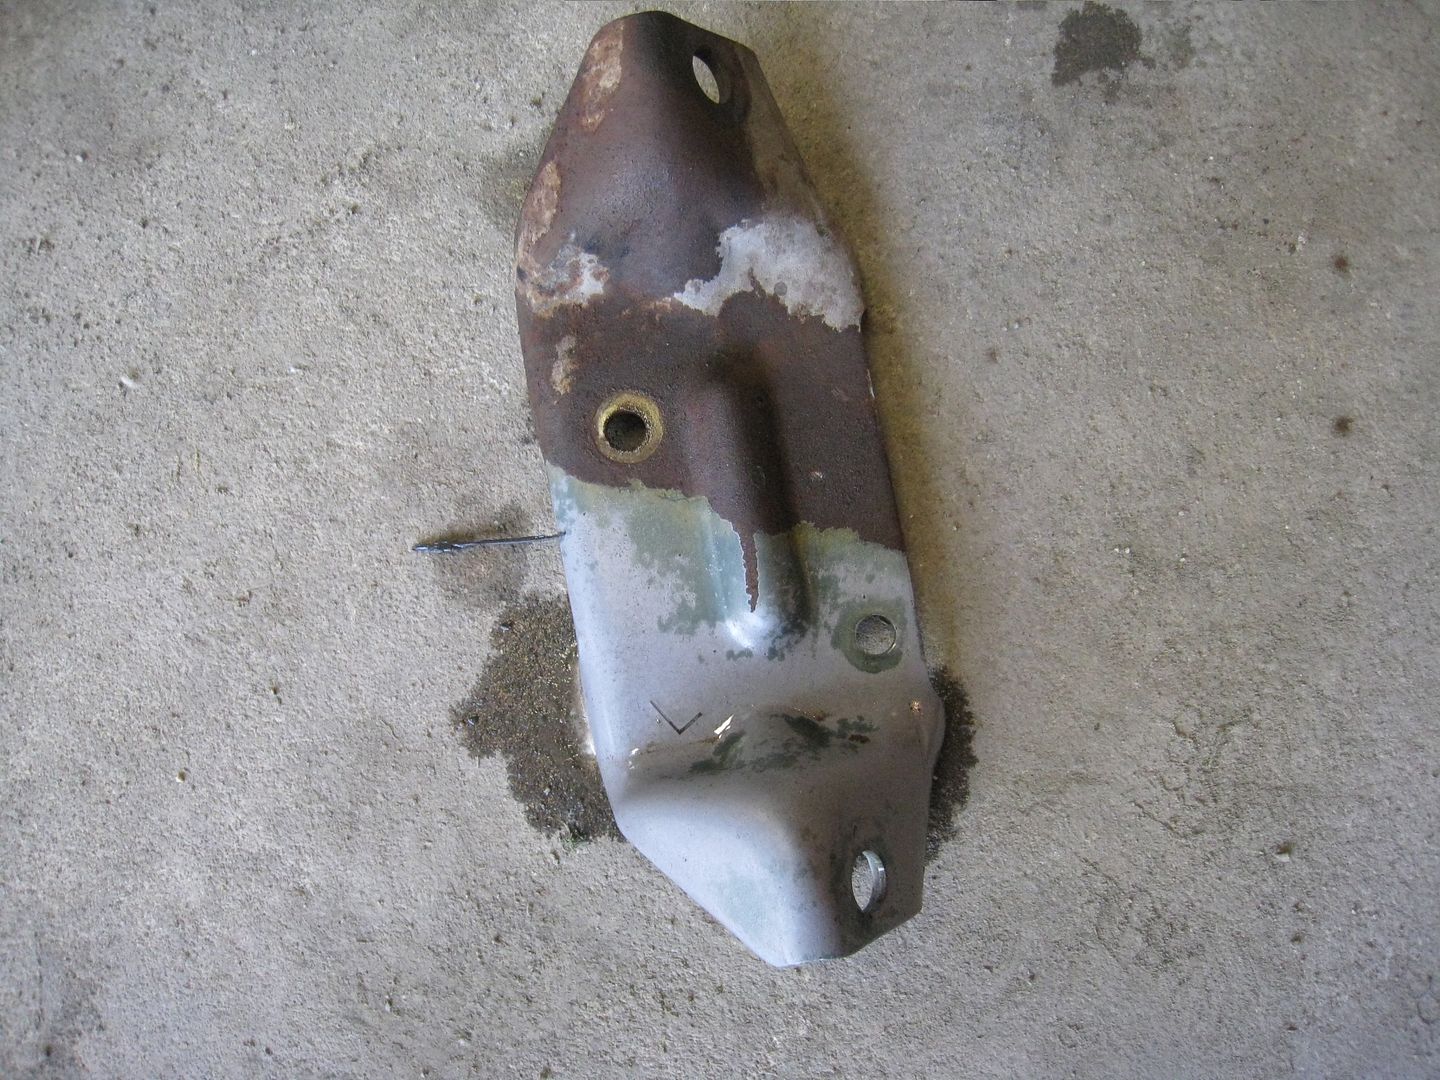
The whole project has ground to a halt because I am waiting for the flywheel bolts to arrive (there seems to be a worldwide shortage) but I am desperate to do something so I started taking the rust off the nuts/bolts and certain parts. I purchased some Zep Lime and Rust remover and soaked the parts in it for a day. Here is a motor mount before and after. I put only half the mount in the solution so you can see the difference. After eating off the rust, I rinse the part with water then either paint it or spray with WD40 to prevent further corrosion. 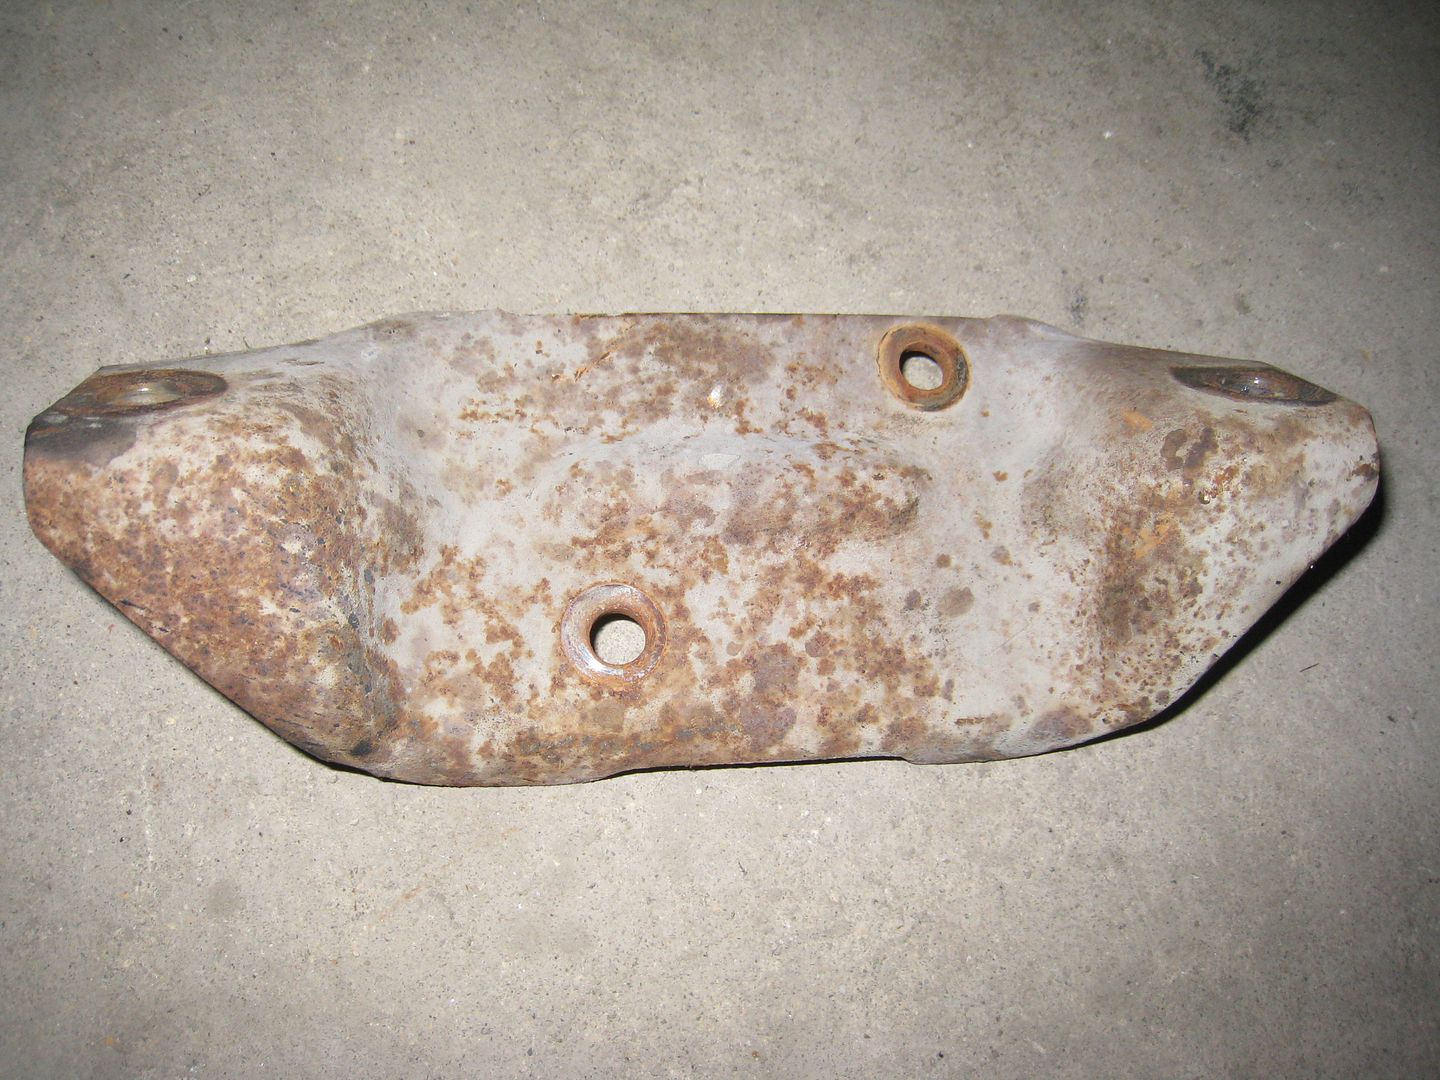
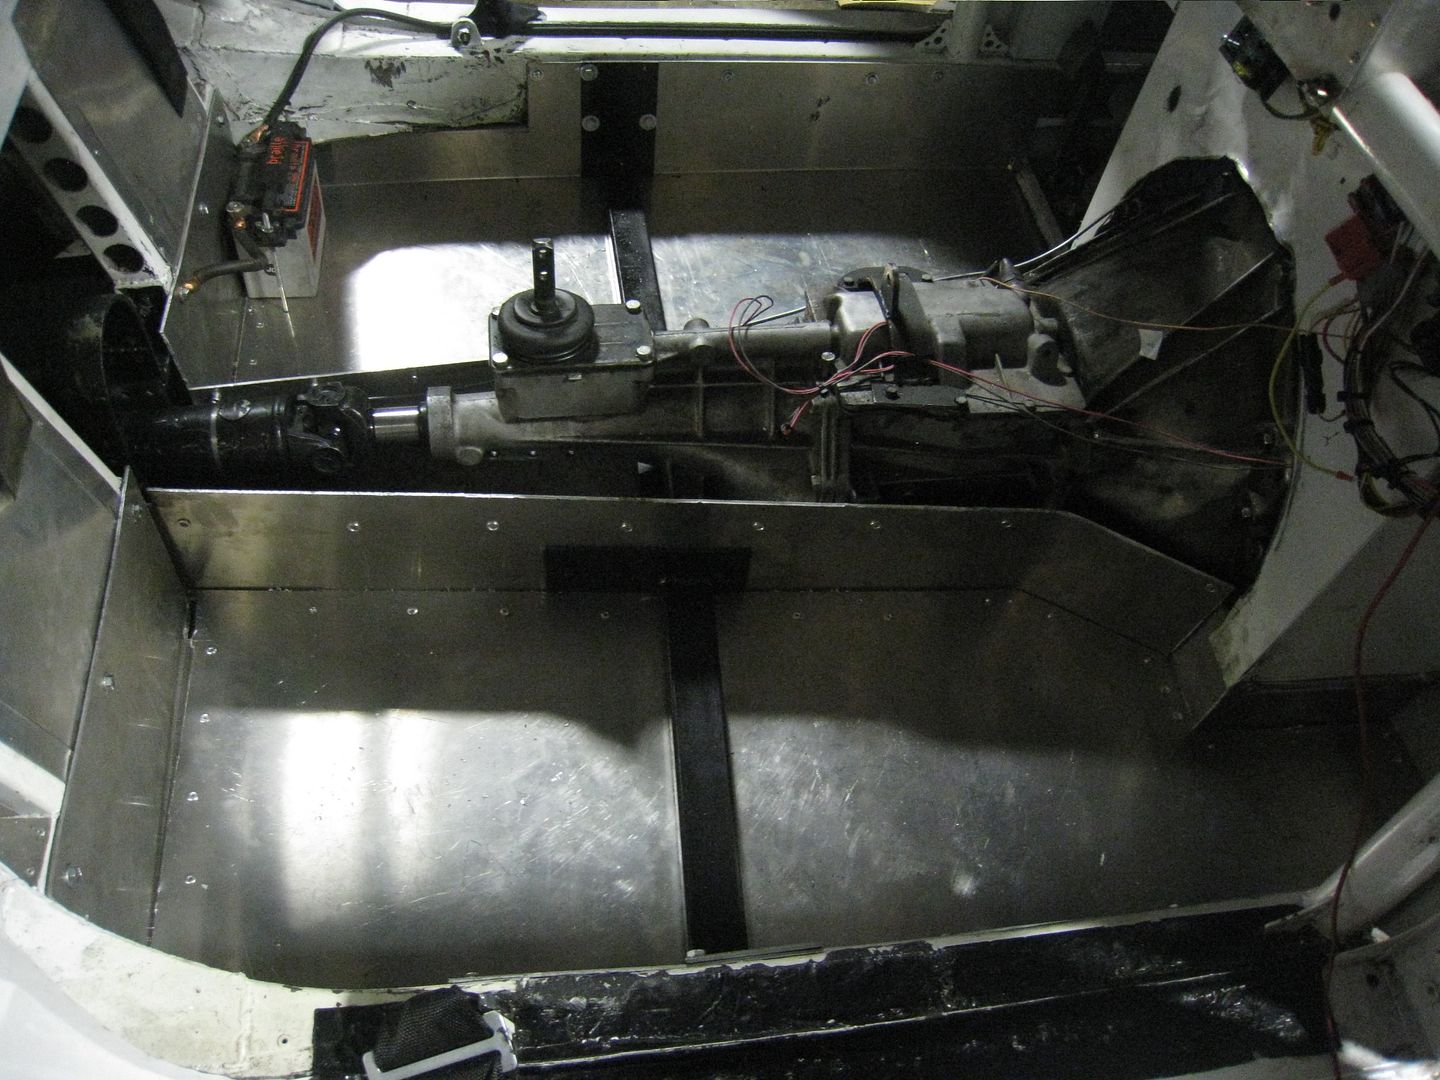
Finally got the bolts I needed so I bolted the flywheel, clutch, pressure plate, bellhousing, transmission and intake manifold on and slid the whole unit into the car. The good news is that there is a ton of extra room in the engine compartment, the bad news is that the Tilton hydraulic release bearing I have will not work, the V12 mounts interfere with the 5.0 oil filter, the headers will have to be modified and the oil pan is a little too close to the ground. I can't do the fabrication work at home so I will have to move the car to the kart track to move this project along. 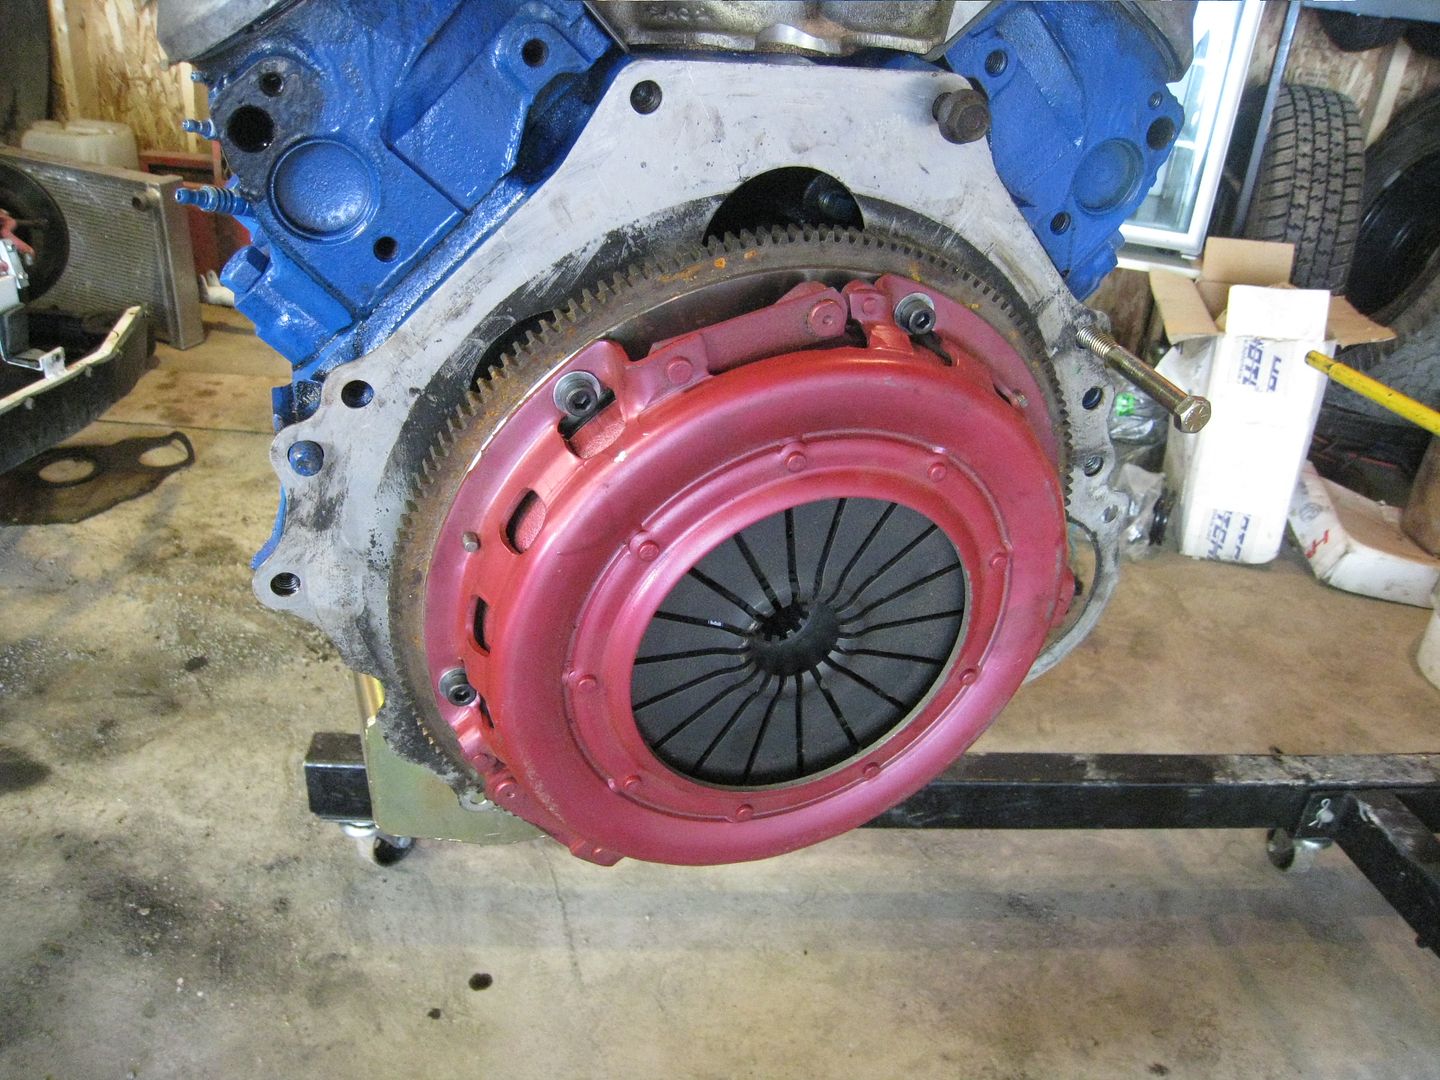
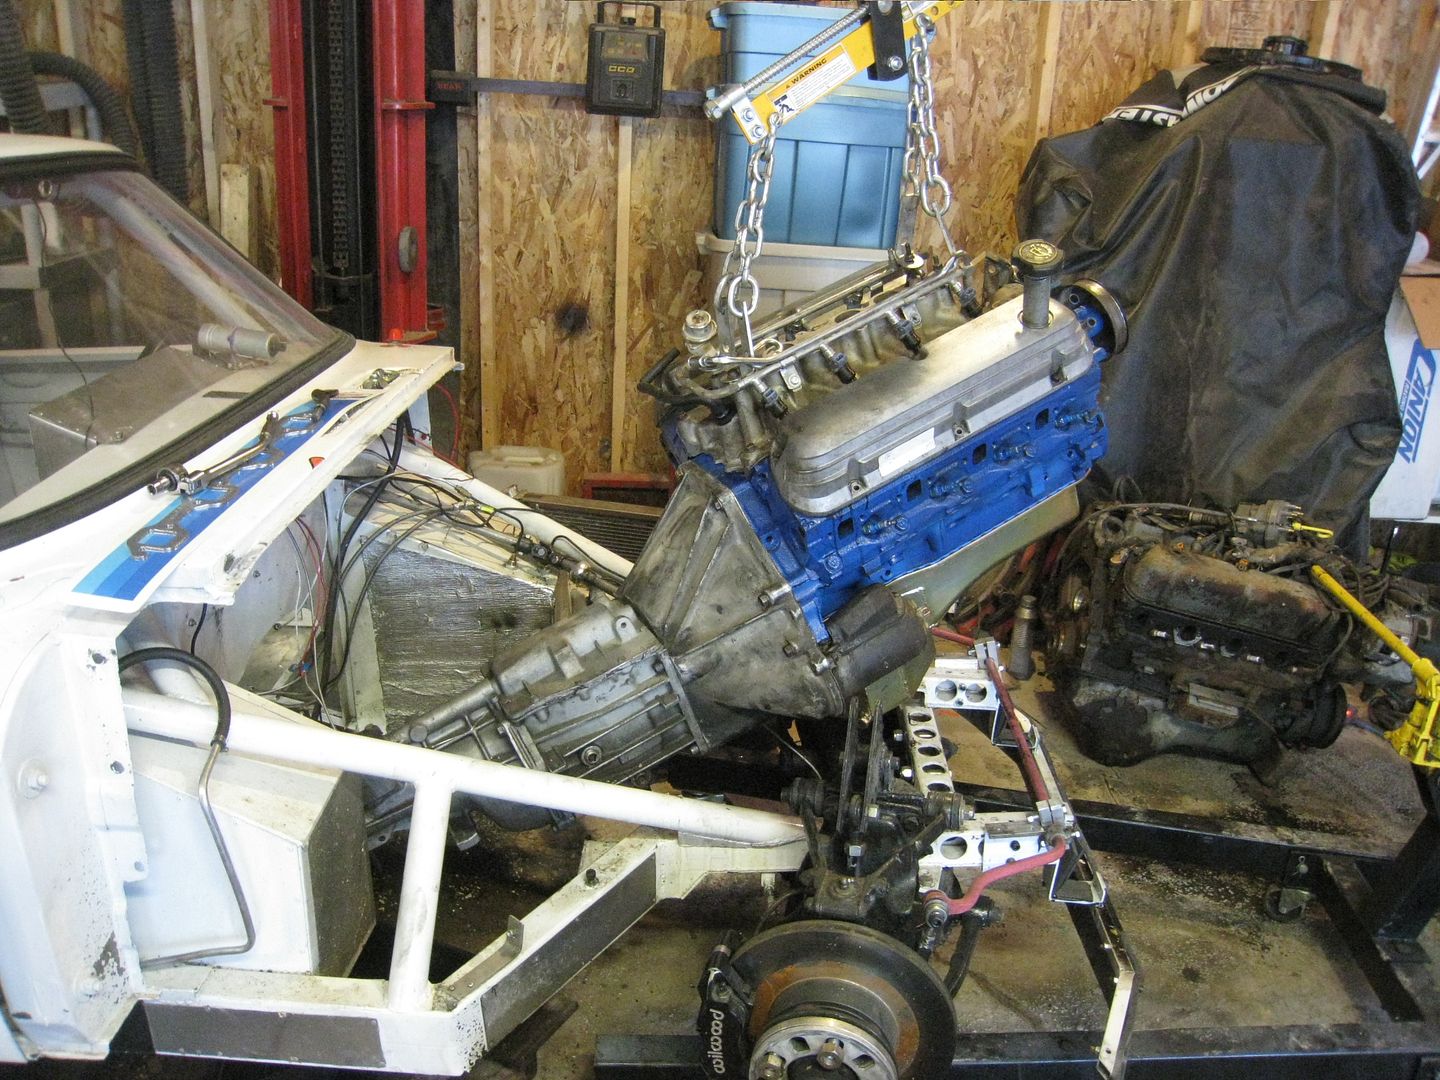
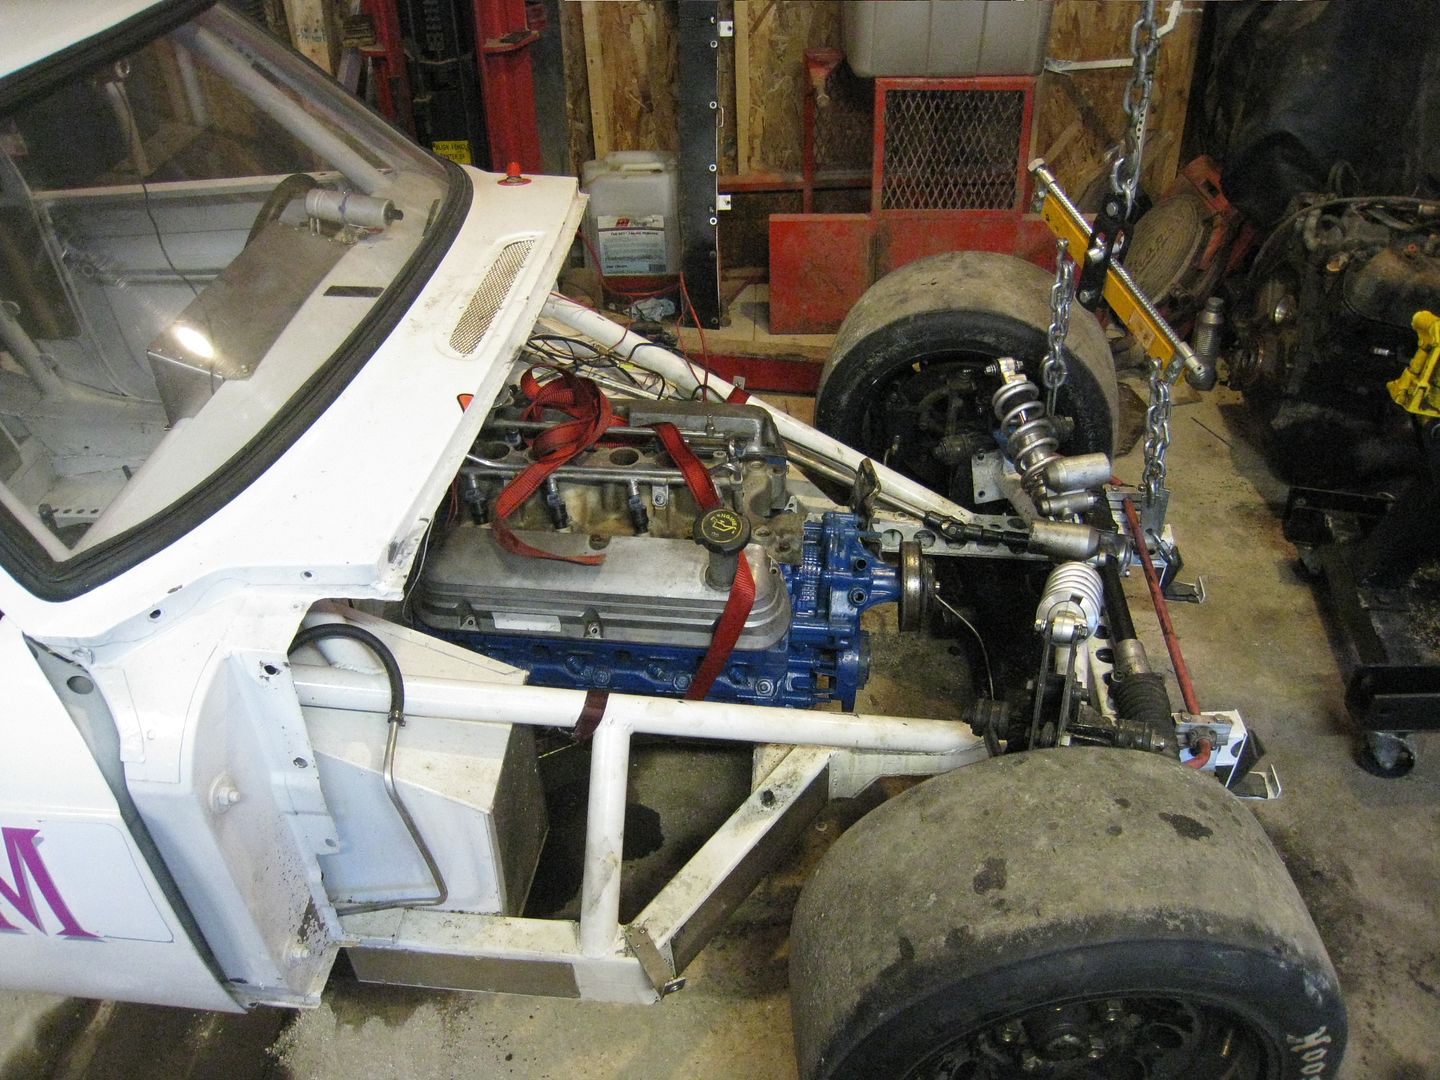
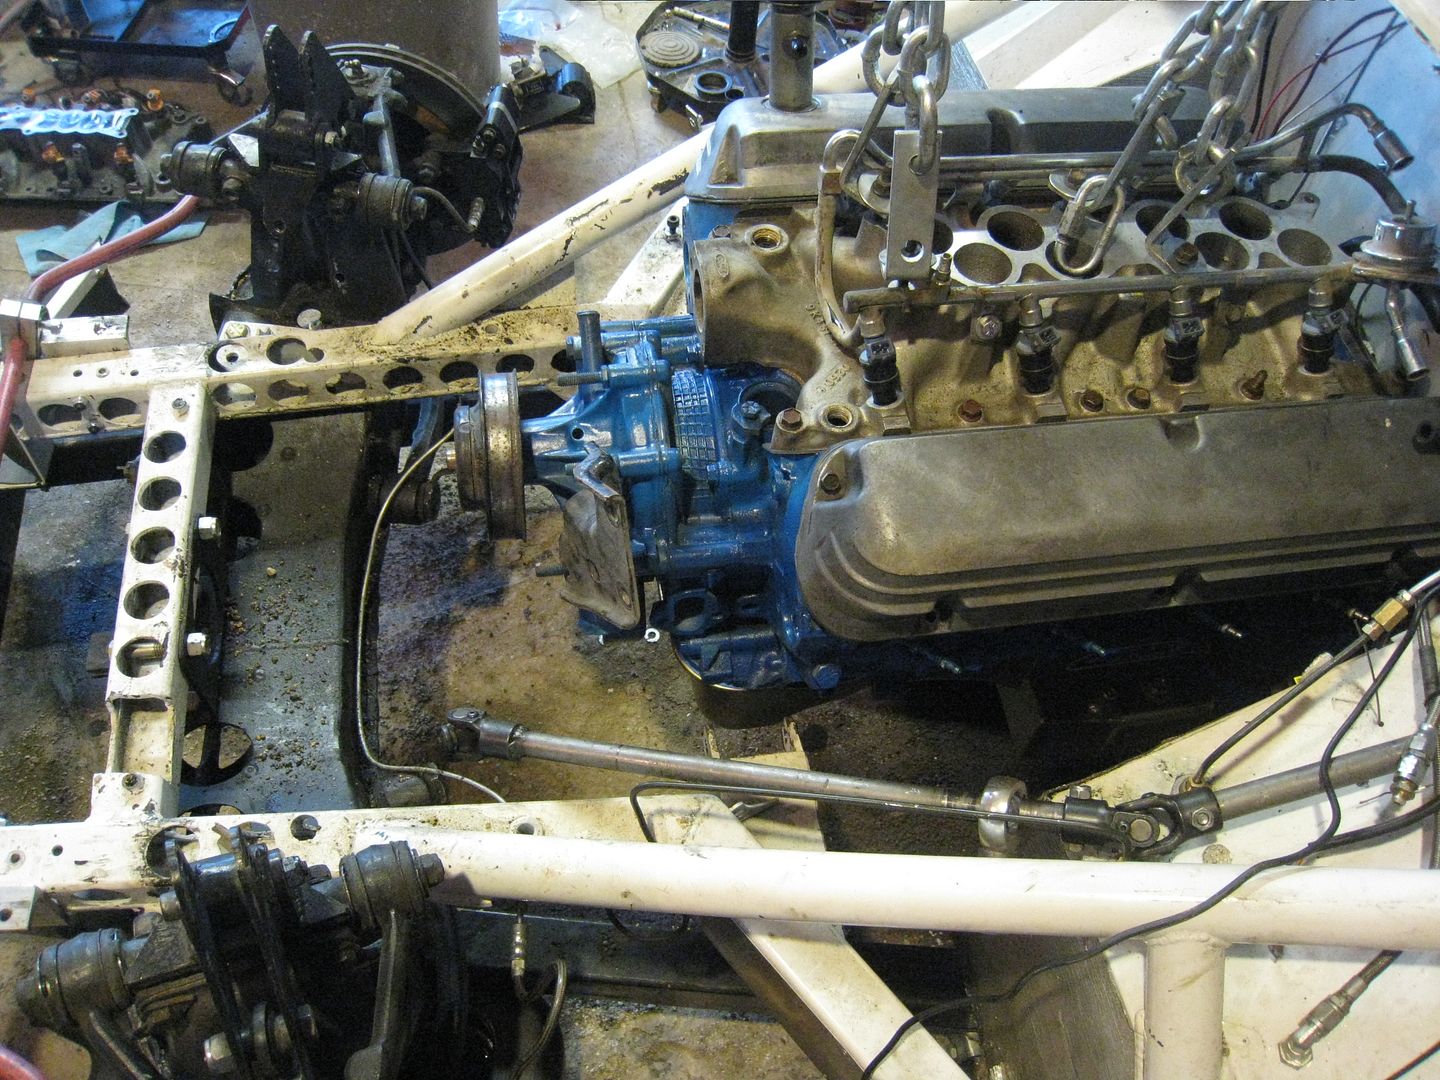
The car is back at the track, where the adventure began. The first thing I did was put a 2" block under the oil pan and crossmember to simulate the clearance I need at normal ride height. The 5.0 bellhousing is taller and the oil pan is deeper than what was on the V12 so there is some clearance issues with the firewall. I trimmed the firewall and fitted the EFI upper intake manifold, it barely fits. It looks like I will have to mod the frame for the exhaust to fit. 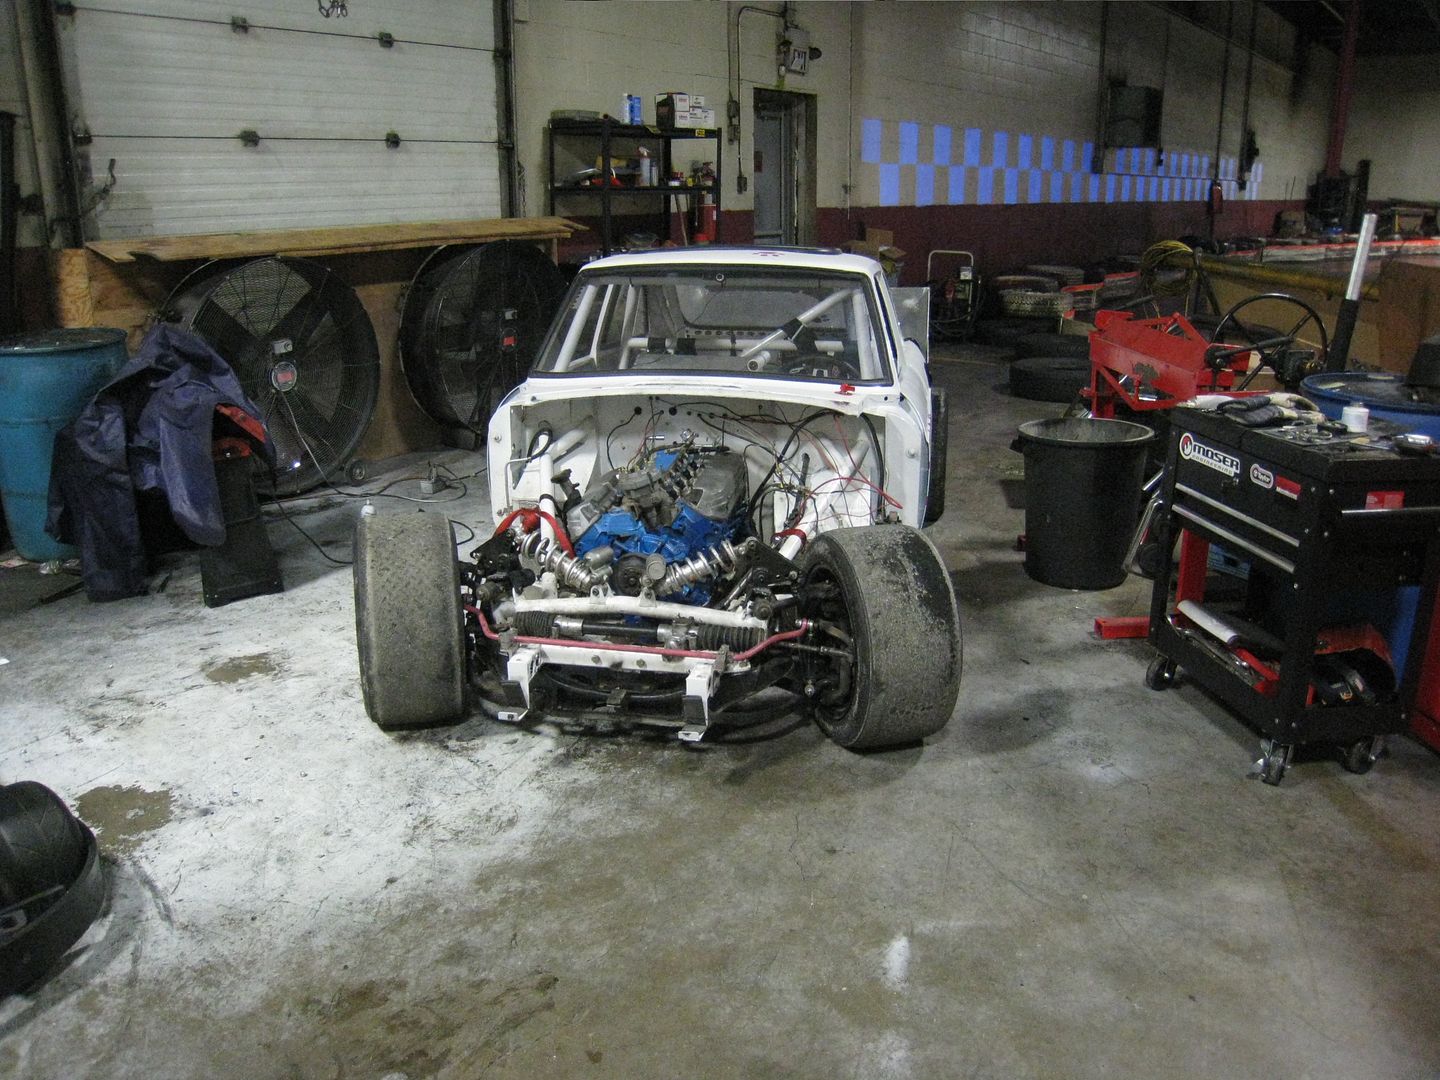
Now that the headers are flipped around, they dump out right where the frame was. I cut the section out on each side and welded in a new piece at a new angle so the exhaust will clear. Here is the section I had to cut out of the drivers side: 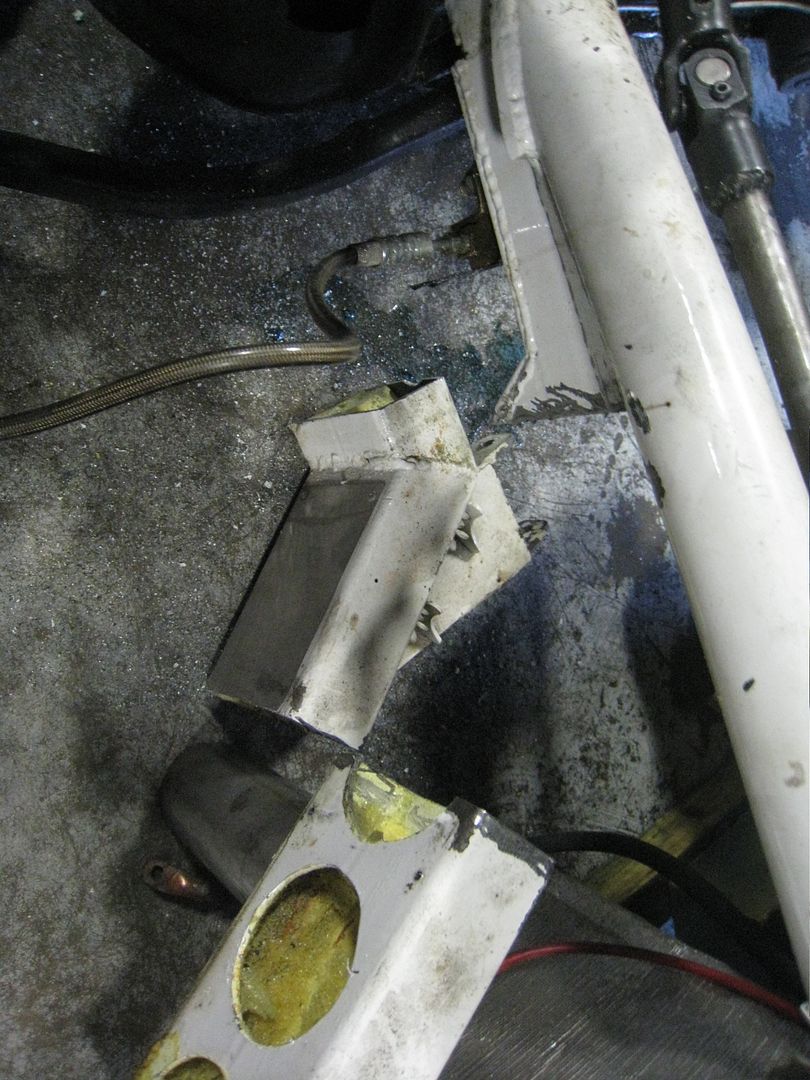
And after the new piece is welded in. I have to do some final welding up on it. 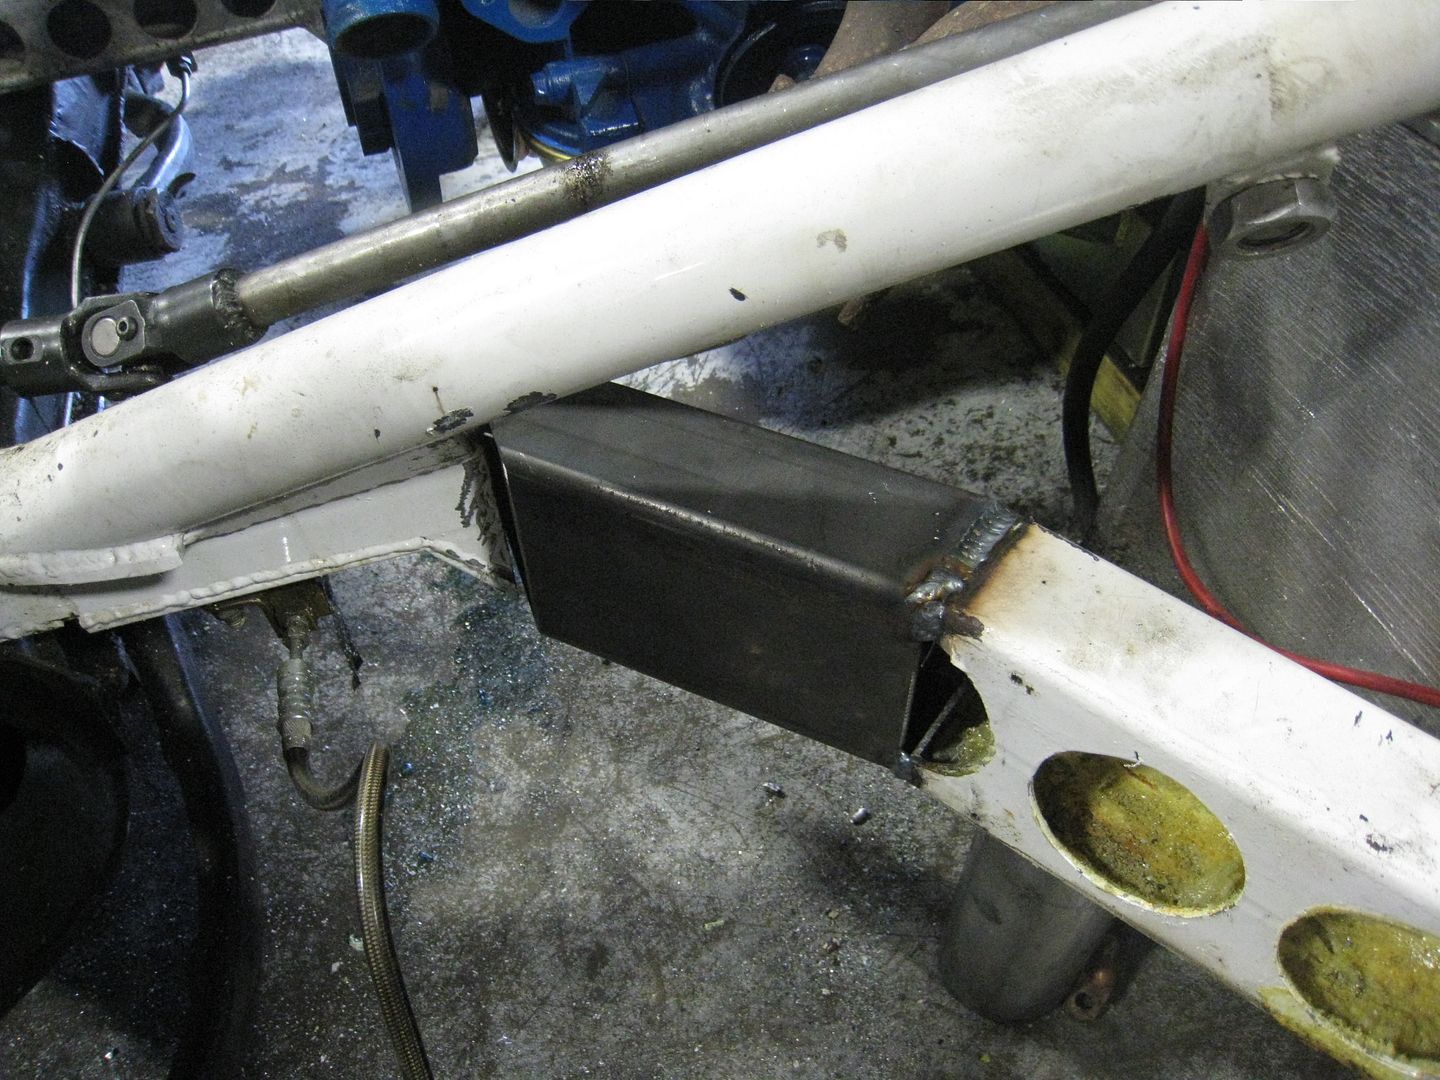
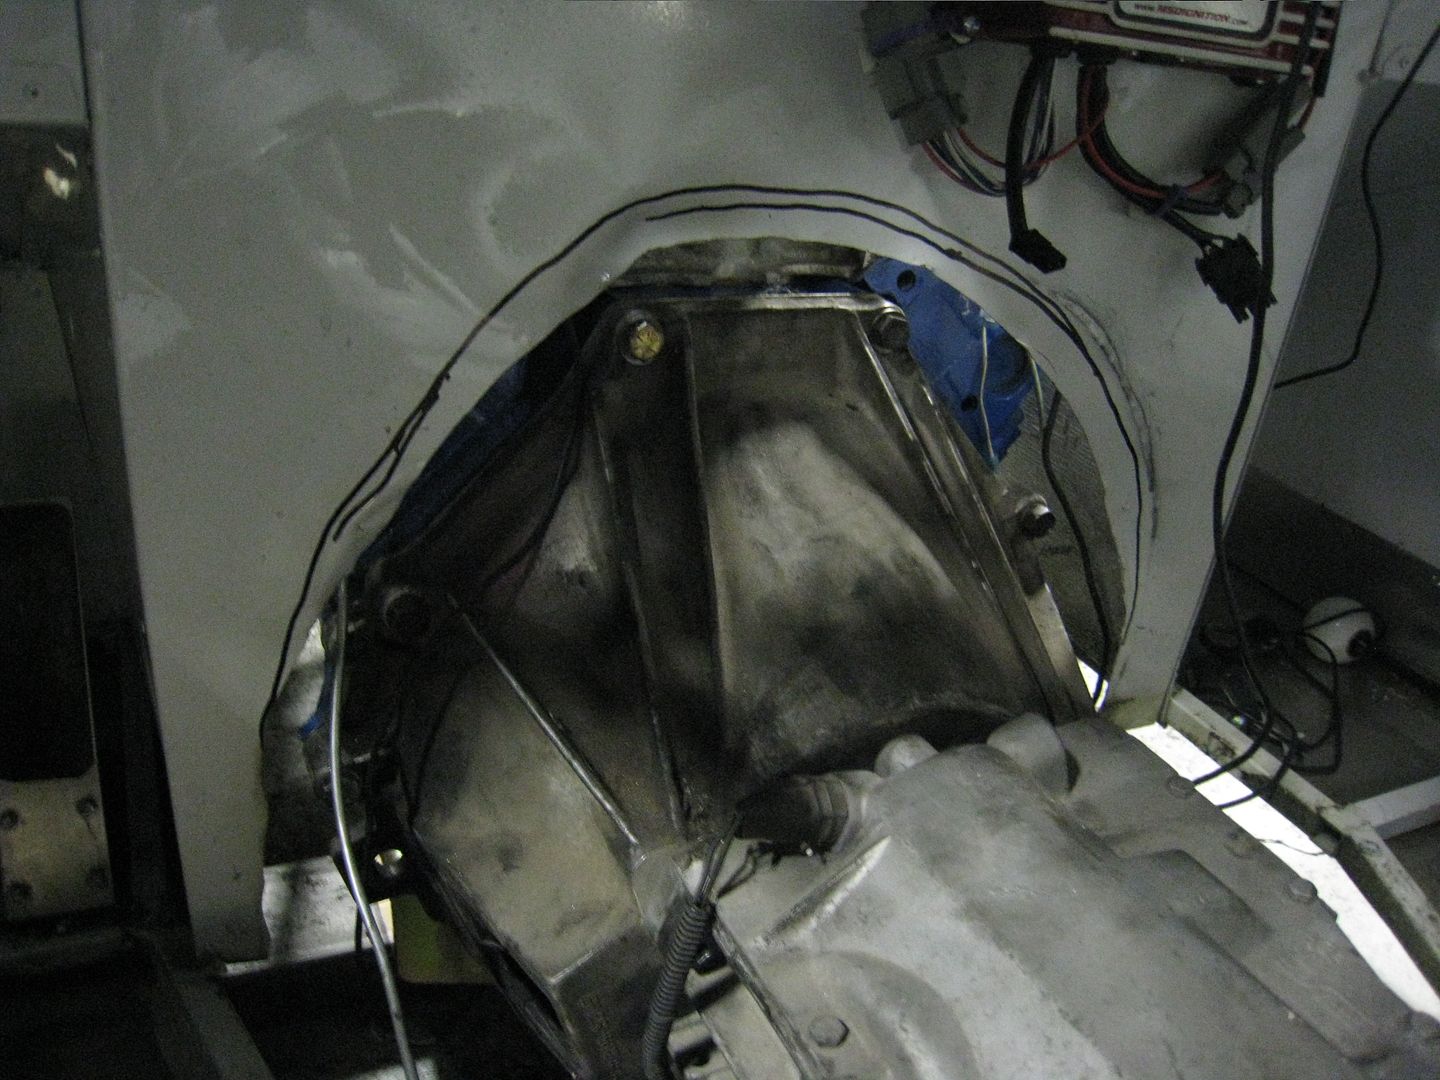
I learned from the V12 that motor mounts sticking into the engine bay make it difficult to remove the engine, so for these ones I ran 2" tubing from the stock mounting holes on the block out to the frame and made them bolt-on. 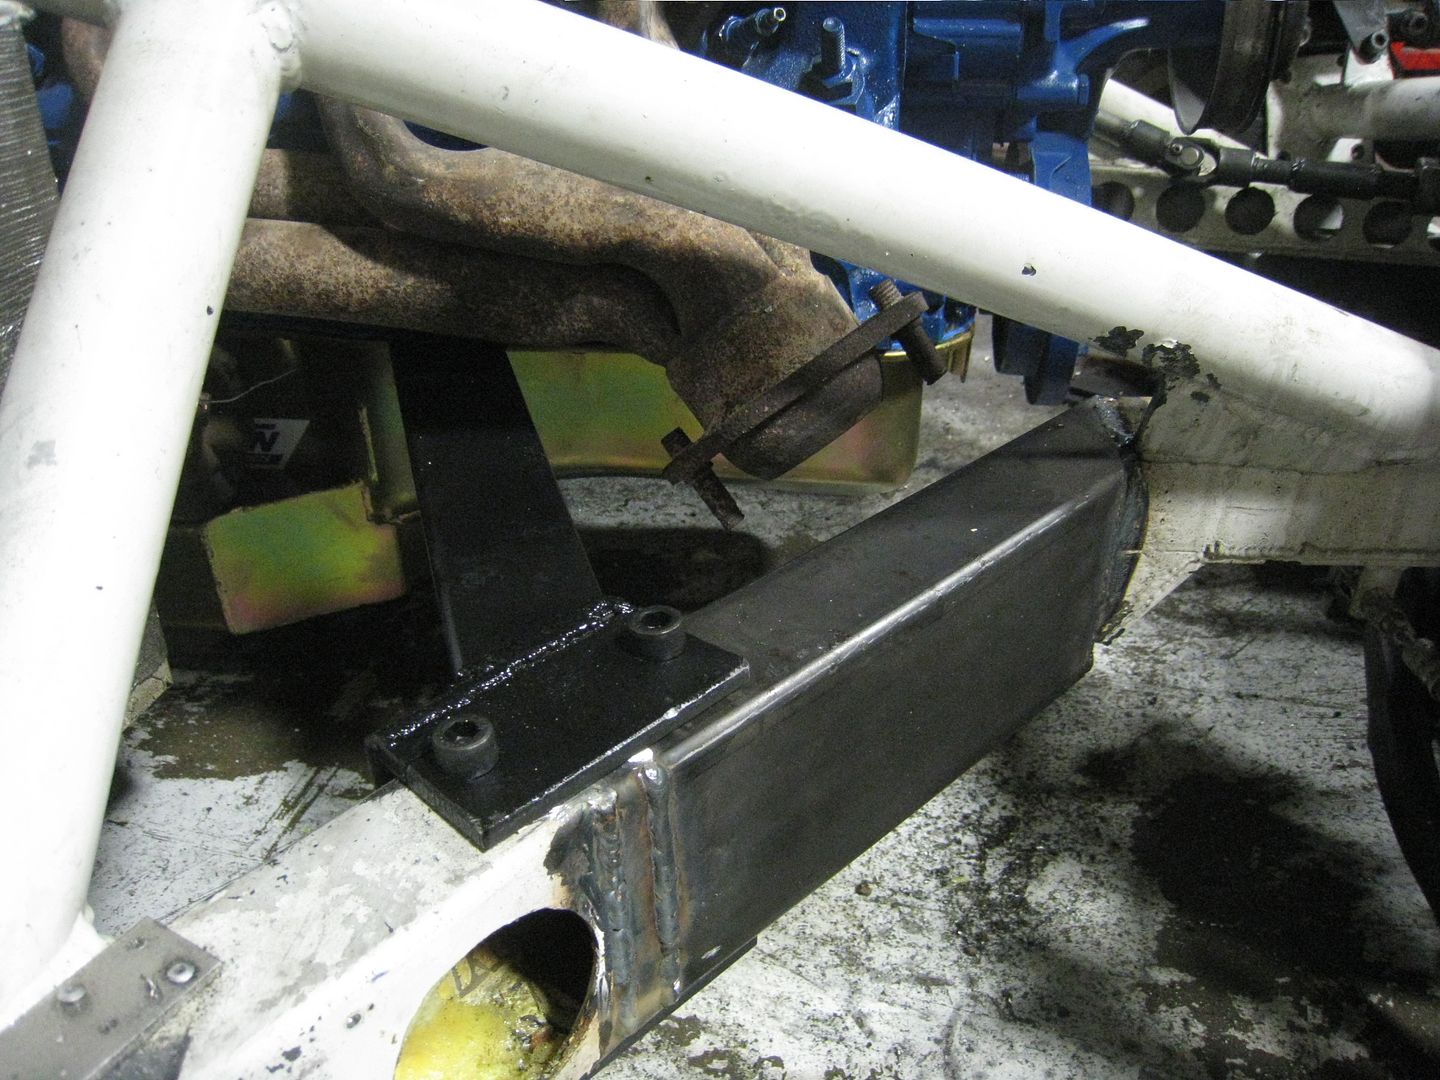
There is no cushion between the engine and frame, it's essentially solid mounts. 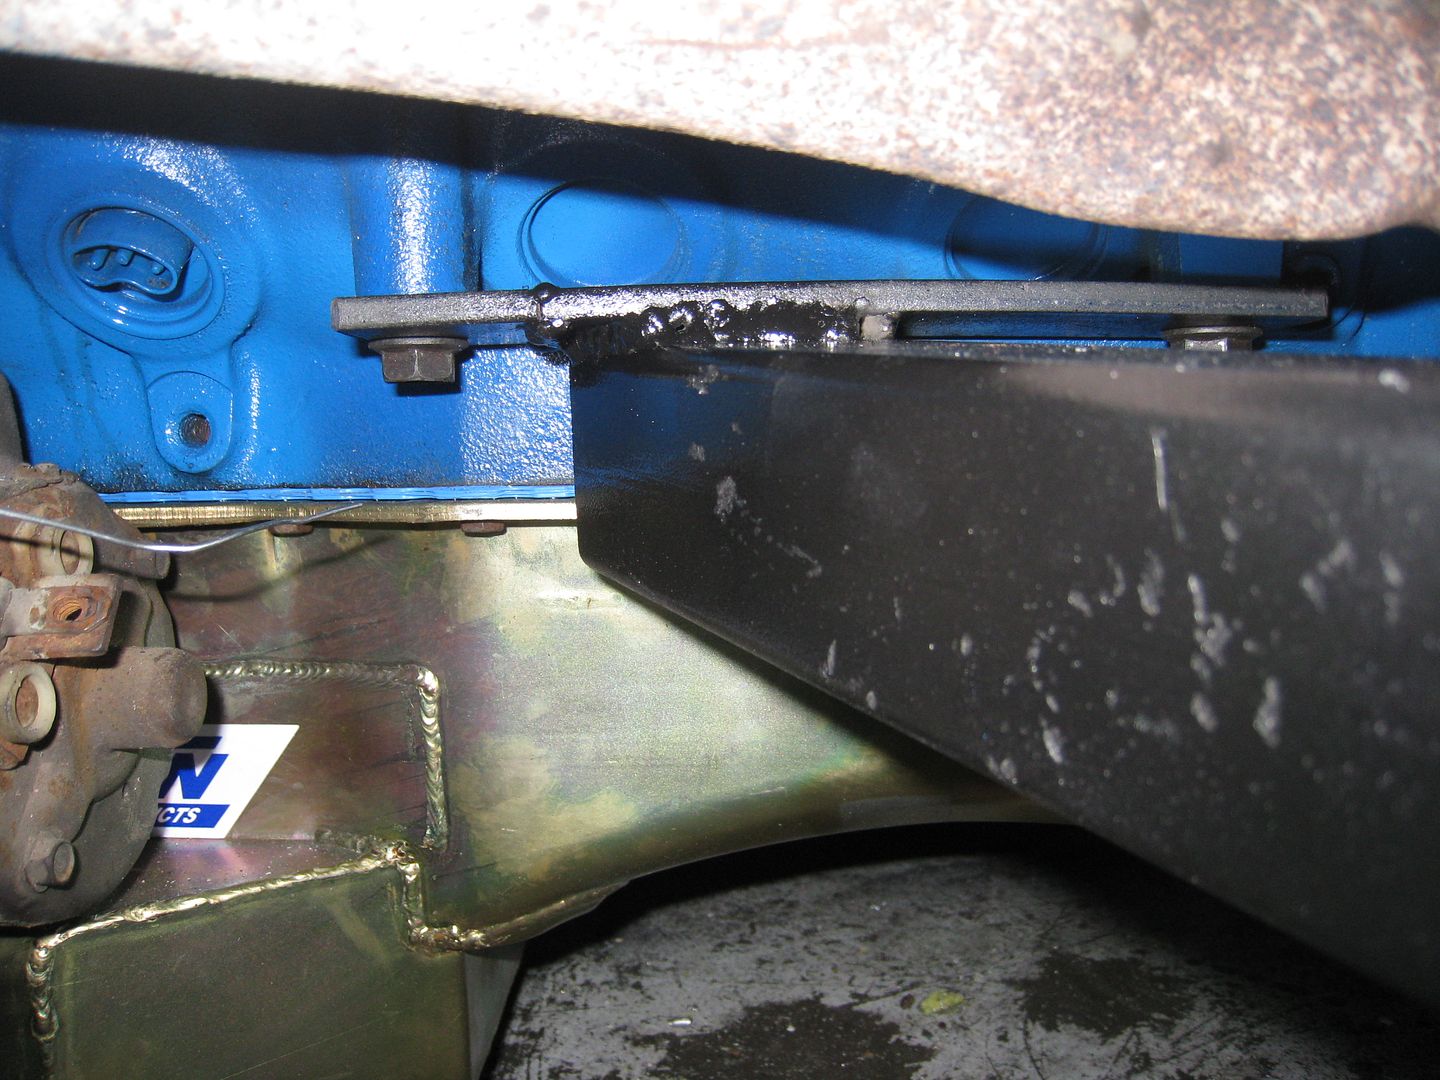
The switch from carbs to EFI required a complete change of the fuel system. I needed to remove the old fuel line, pump and filter and add a new fuel pump, feed line, filter and return line. The new fuel pump: 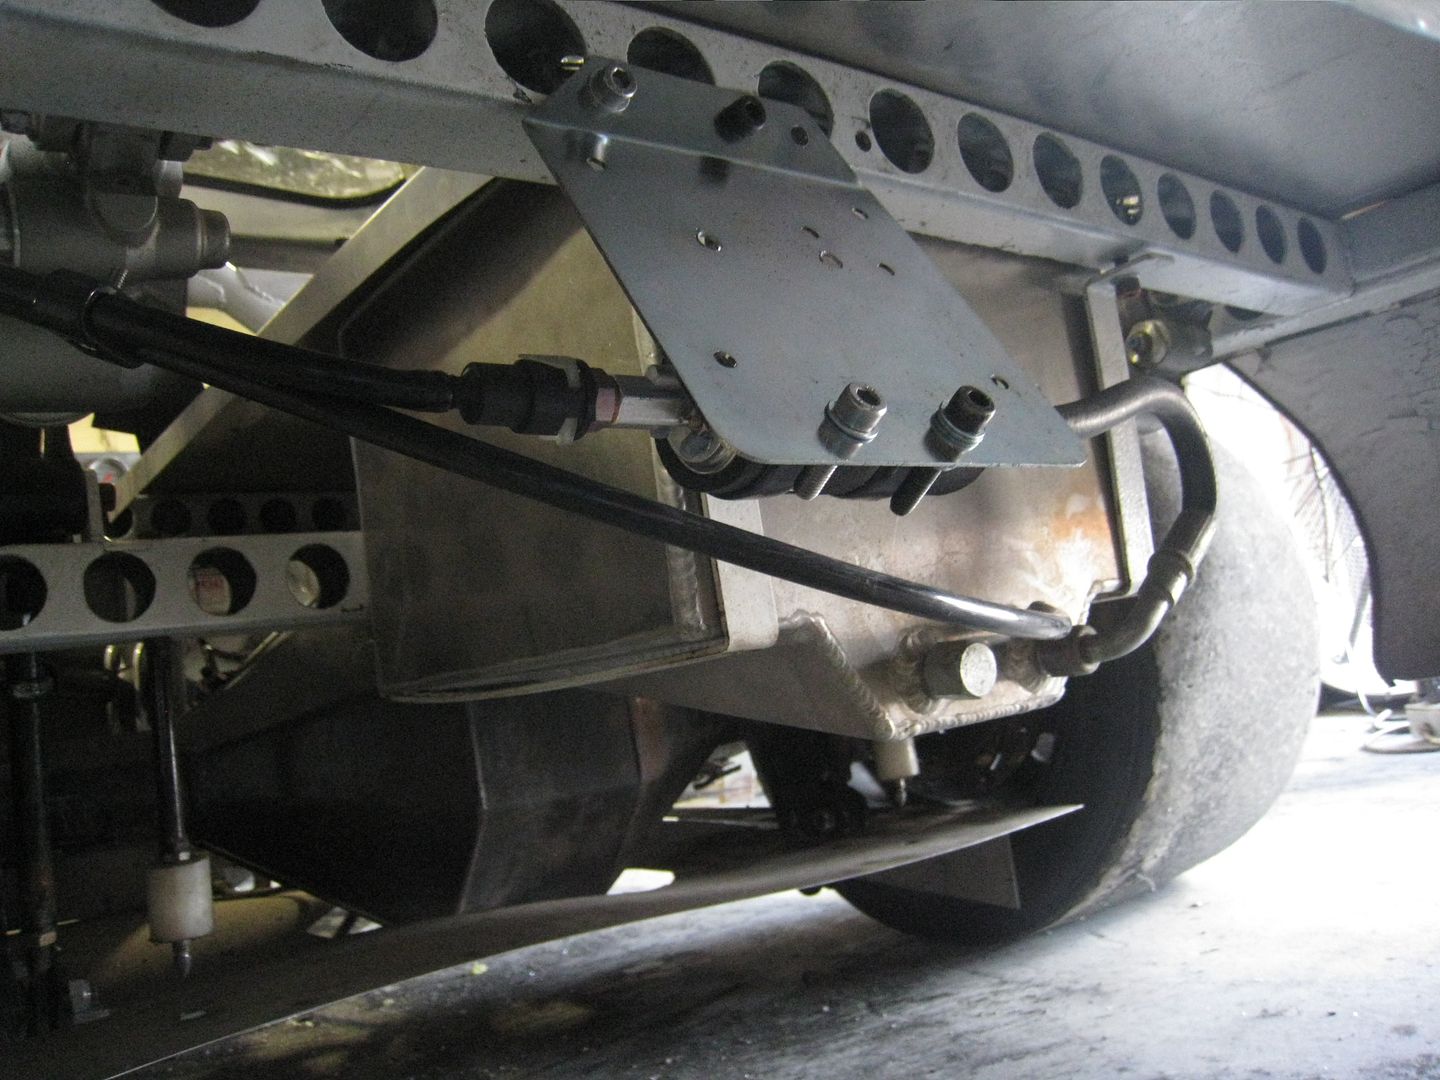
Fuel filter bolted to the frame rail. I hope it's not going to get too warm from the side pipes. 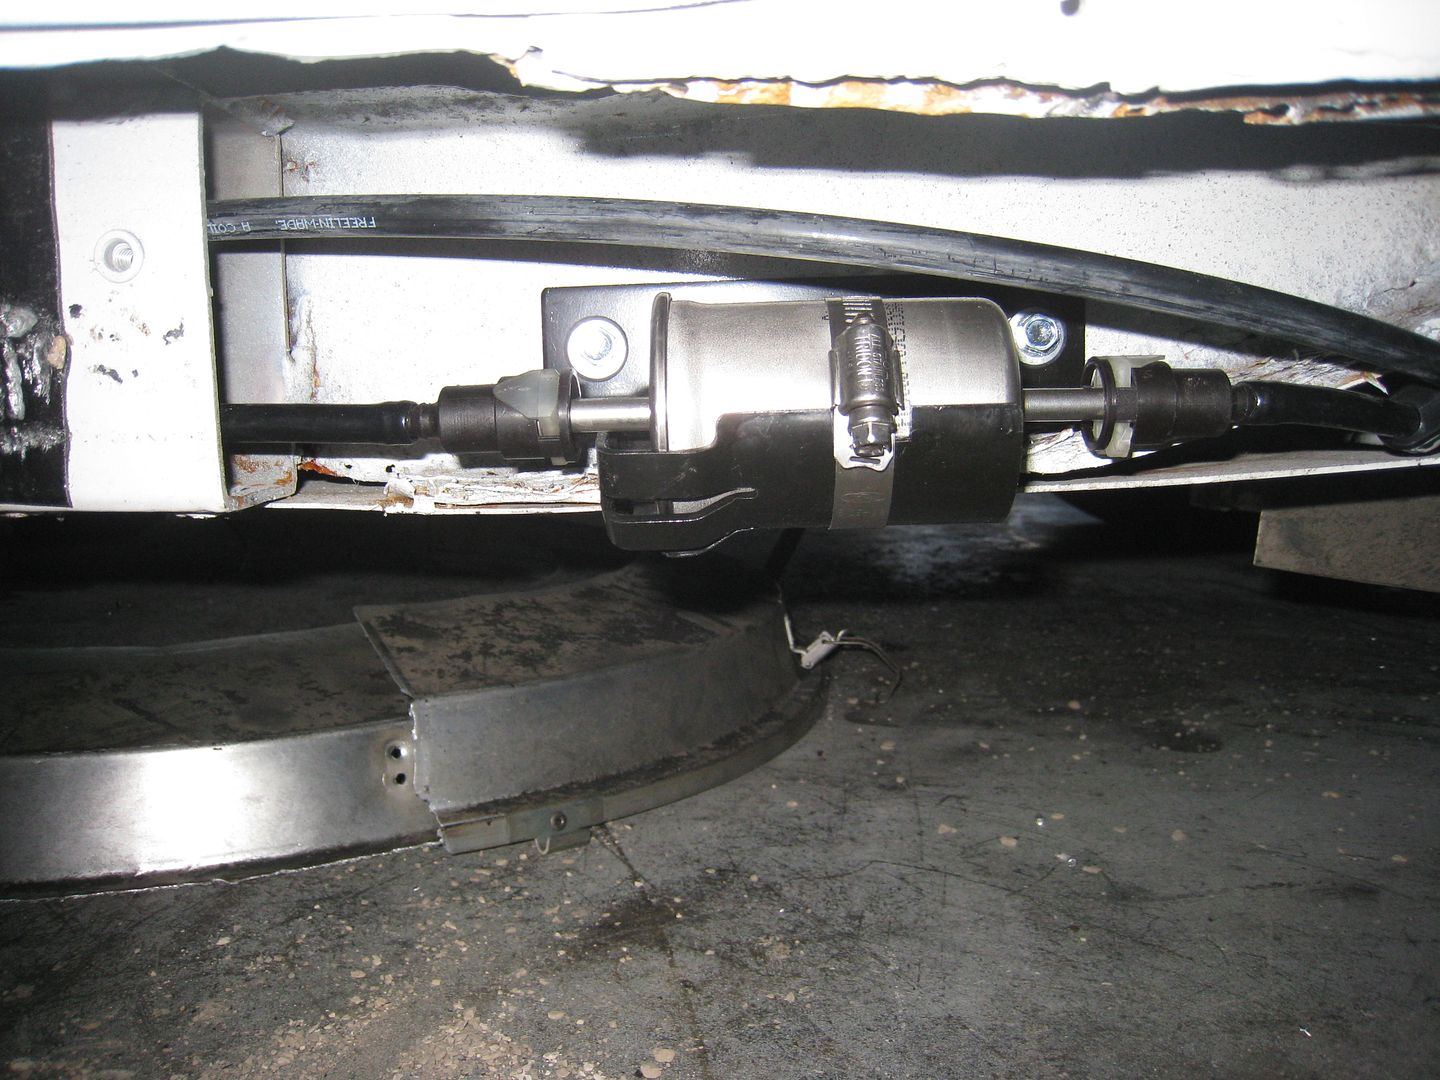
The fuel lines run inside the frame rail until just behind the battery where they pop out and go to the fuel rail on the engine: 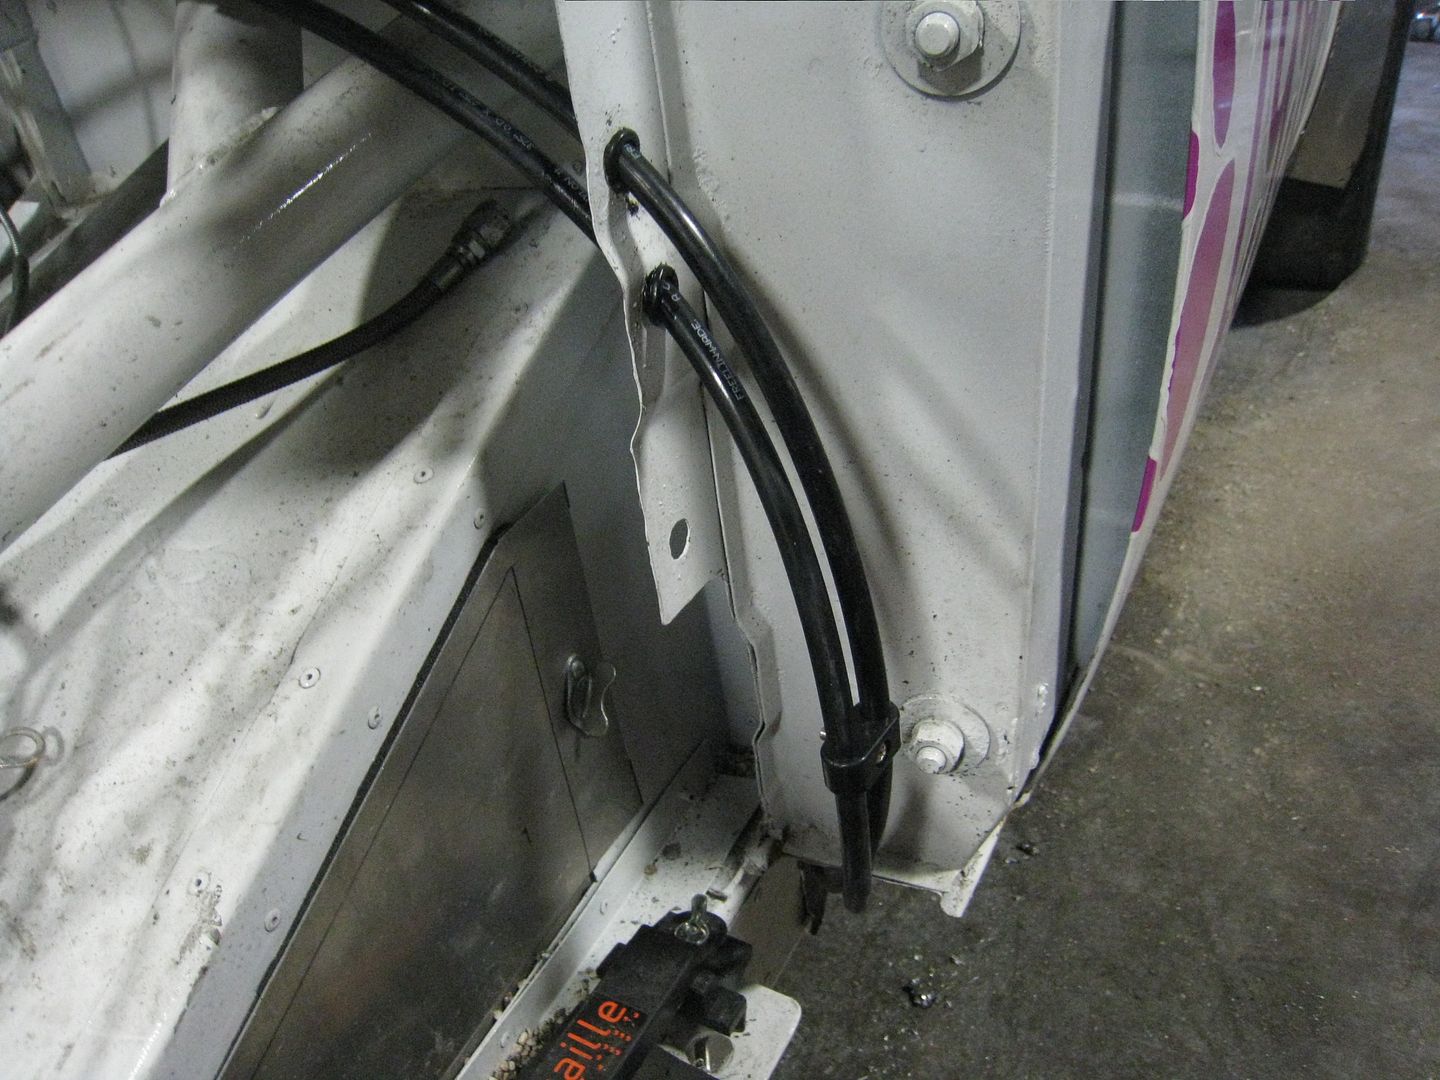
I haven't stopped work on the car, I just haven't completed any tasks. I have been working on a few things, here's some pics: 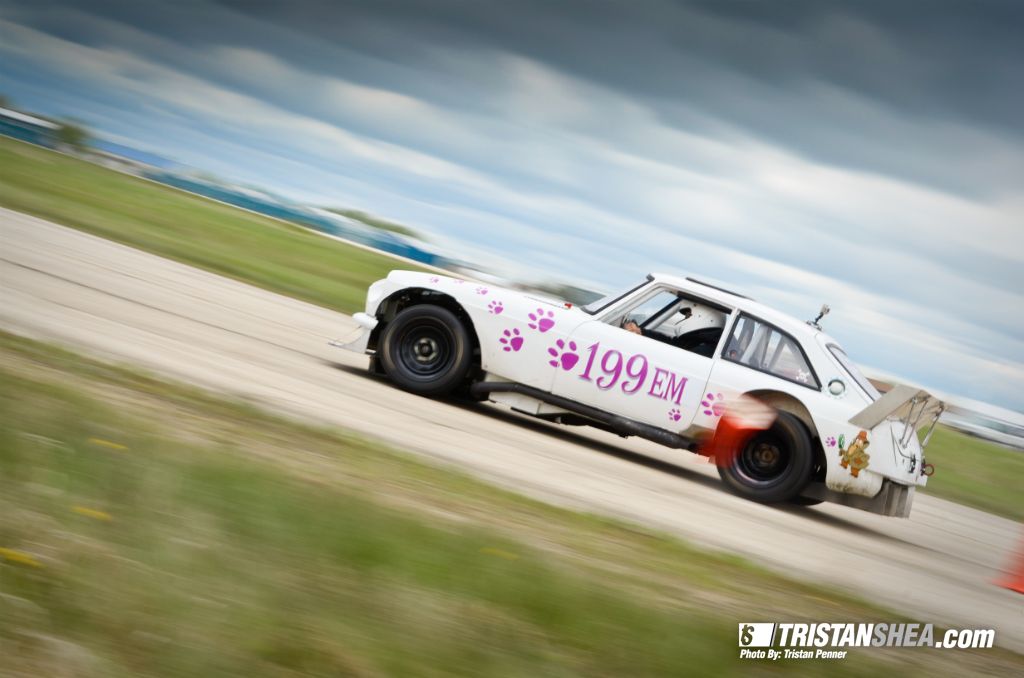
In this picture of the car in action at an autocross, you can see a lot of daylight between the floor and ground. This was a mistake, I built the floor higher than the MGB floor when I didn't need to. So the next picture shows the whole floor cut out, to be remade entirely out of aluminum and a few inches lower. 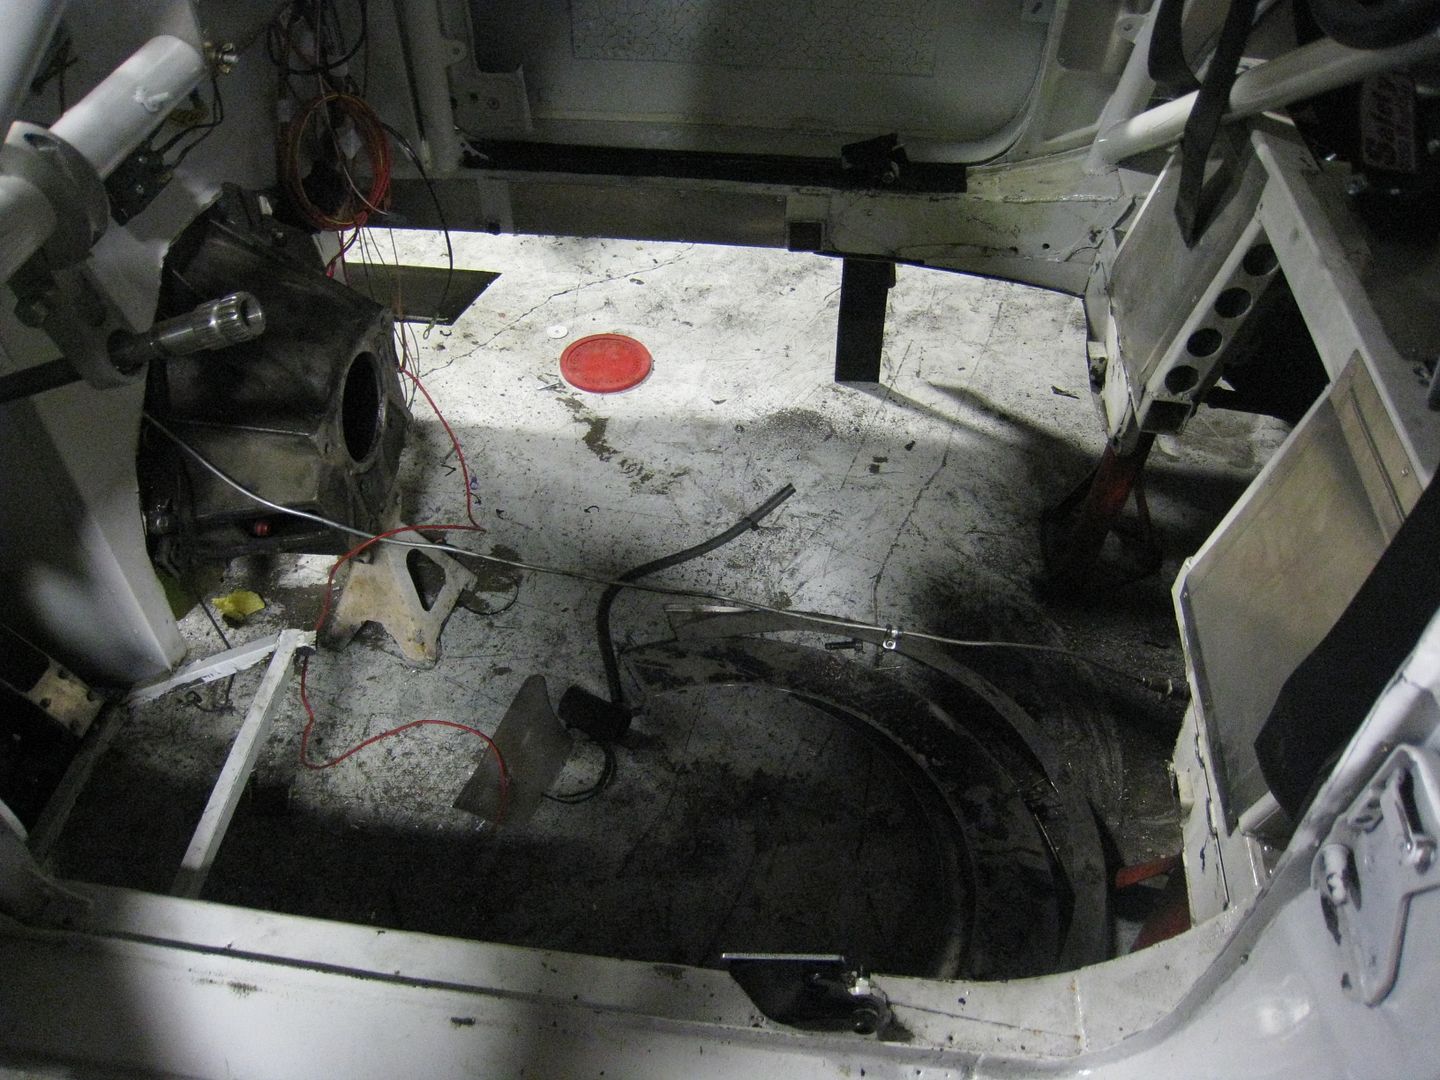

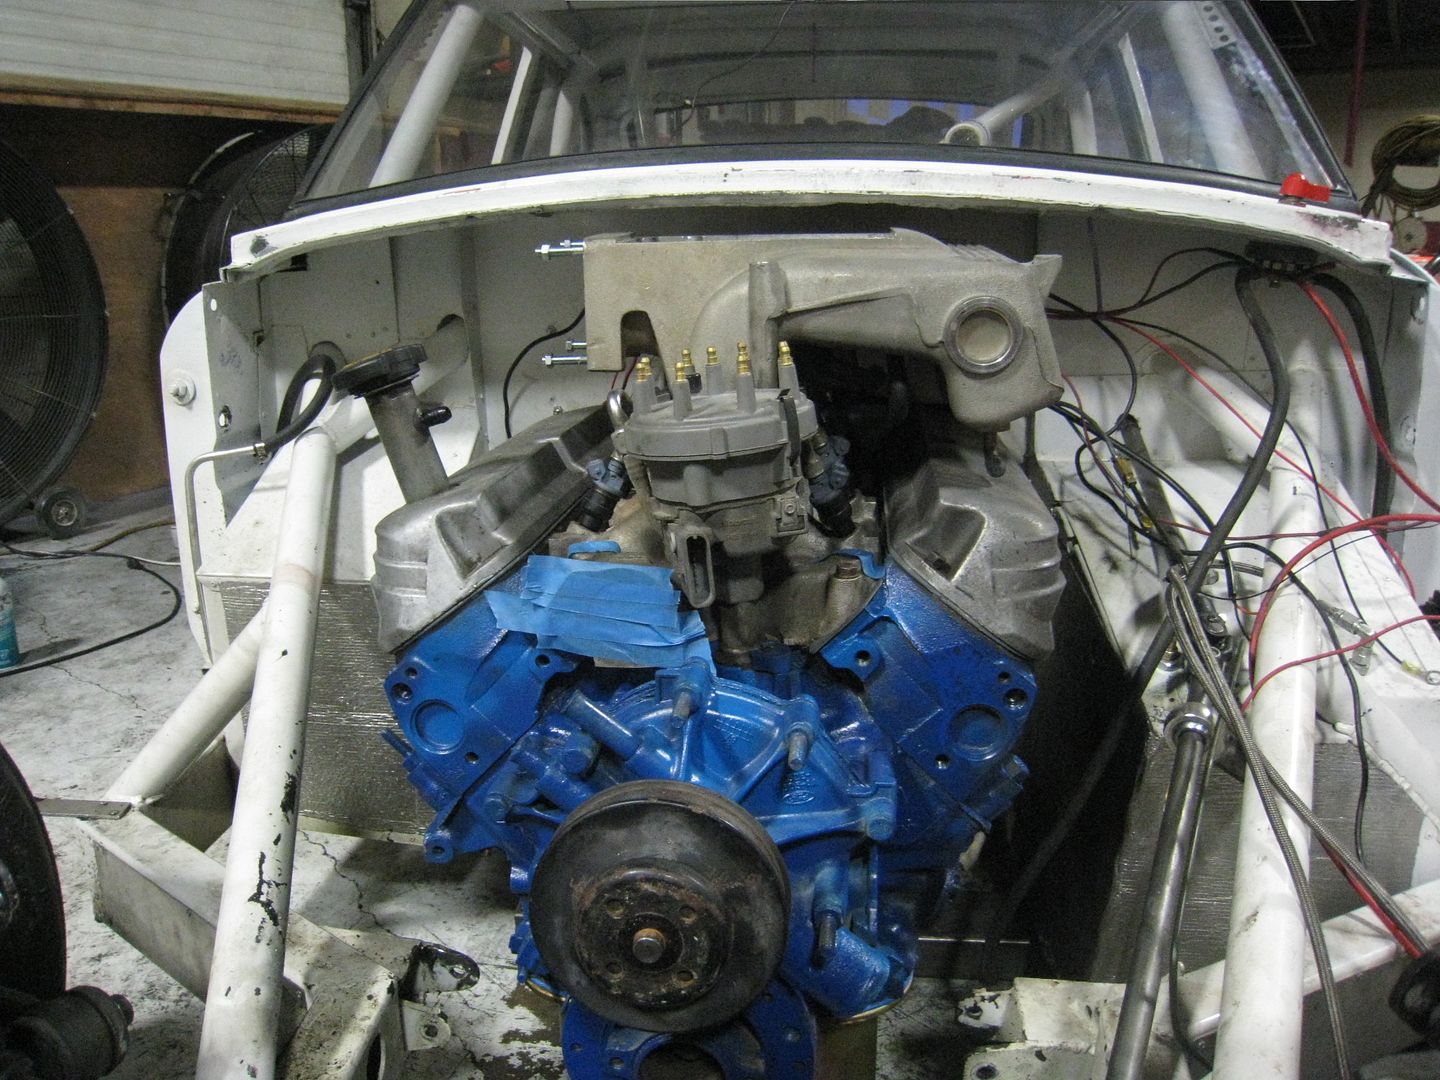
And the upper intake is bolted on. I also began installation of the Painless wiring harness. 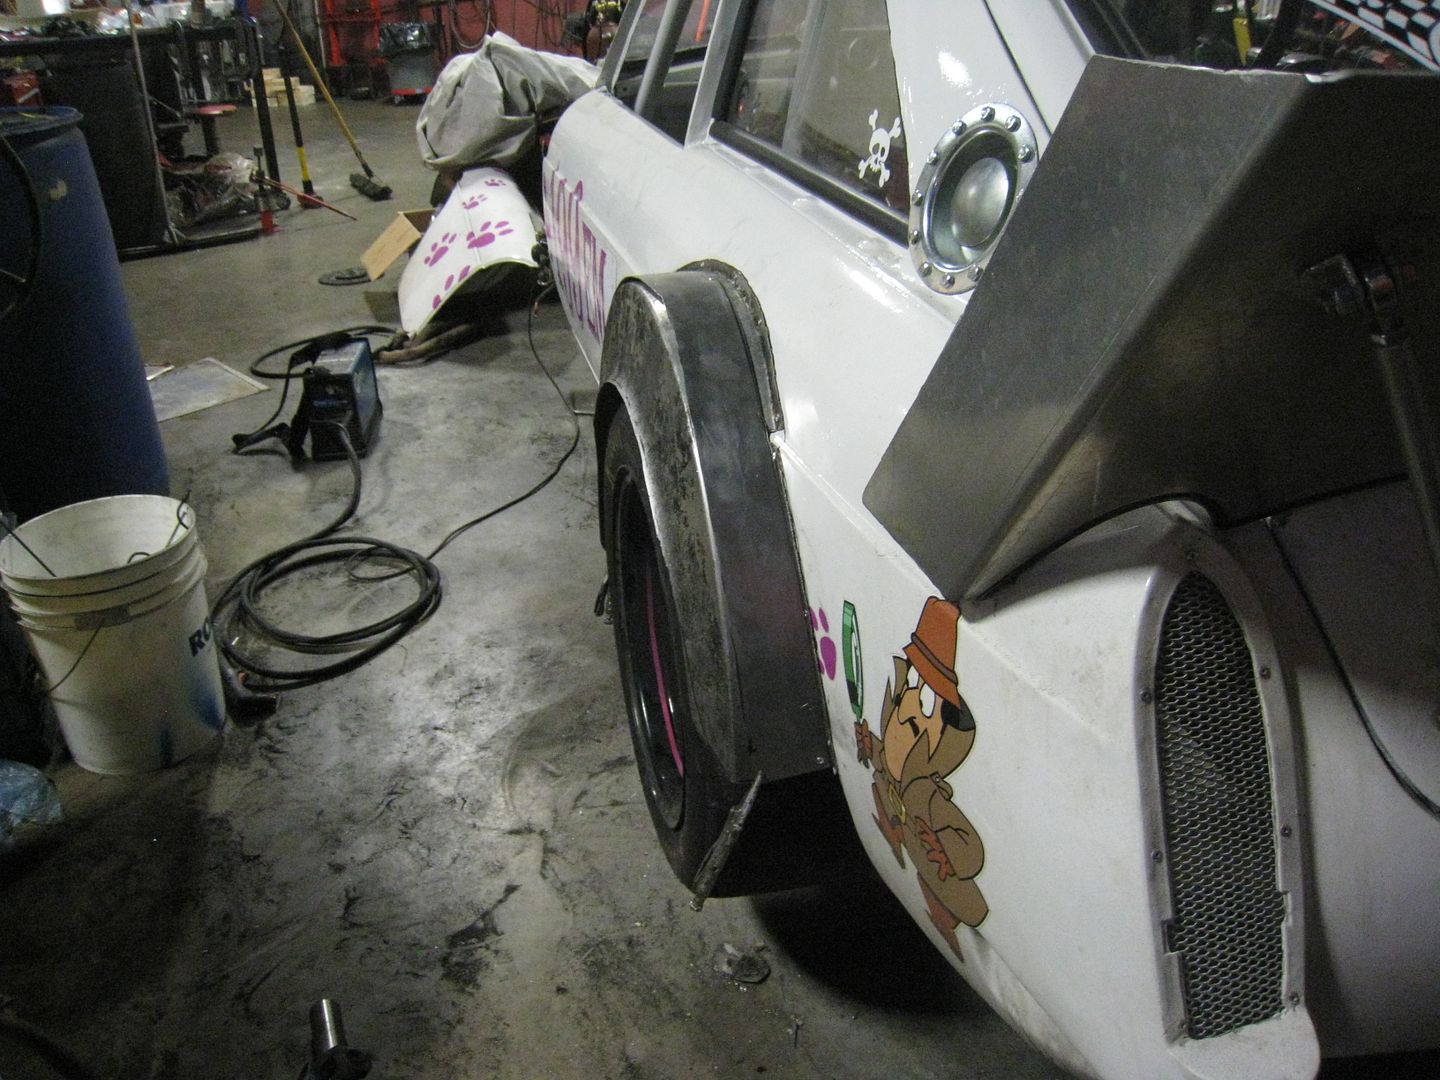
I am also attempting to build fender flares out of aluminum. I think they will look pretty good when all done. The construction of the new lowered floor began with the drivers side. I ordered some 1/8" aluminum sheet from Tailor Made and had them bend it for me. 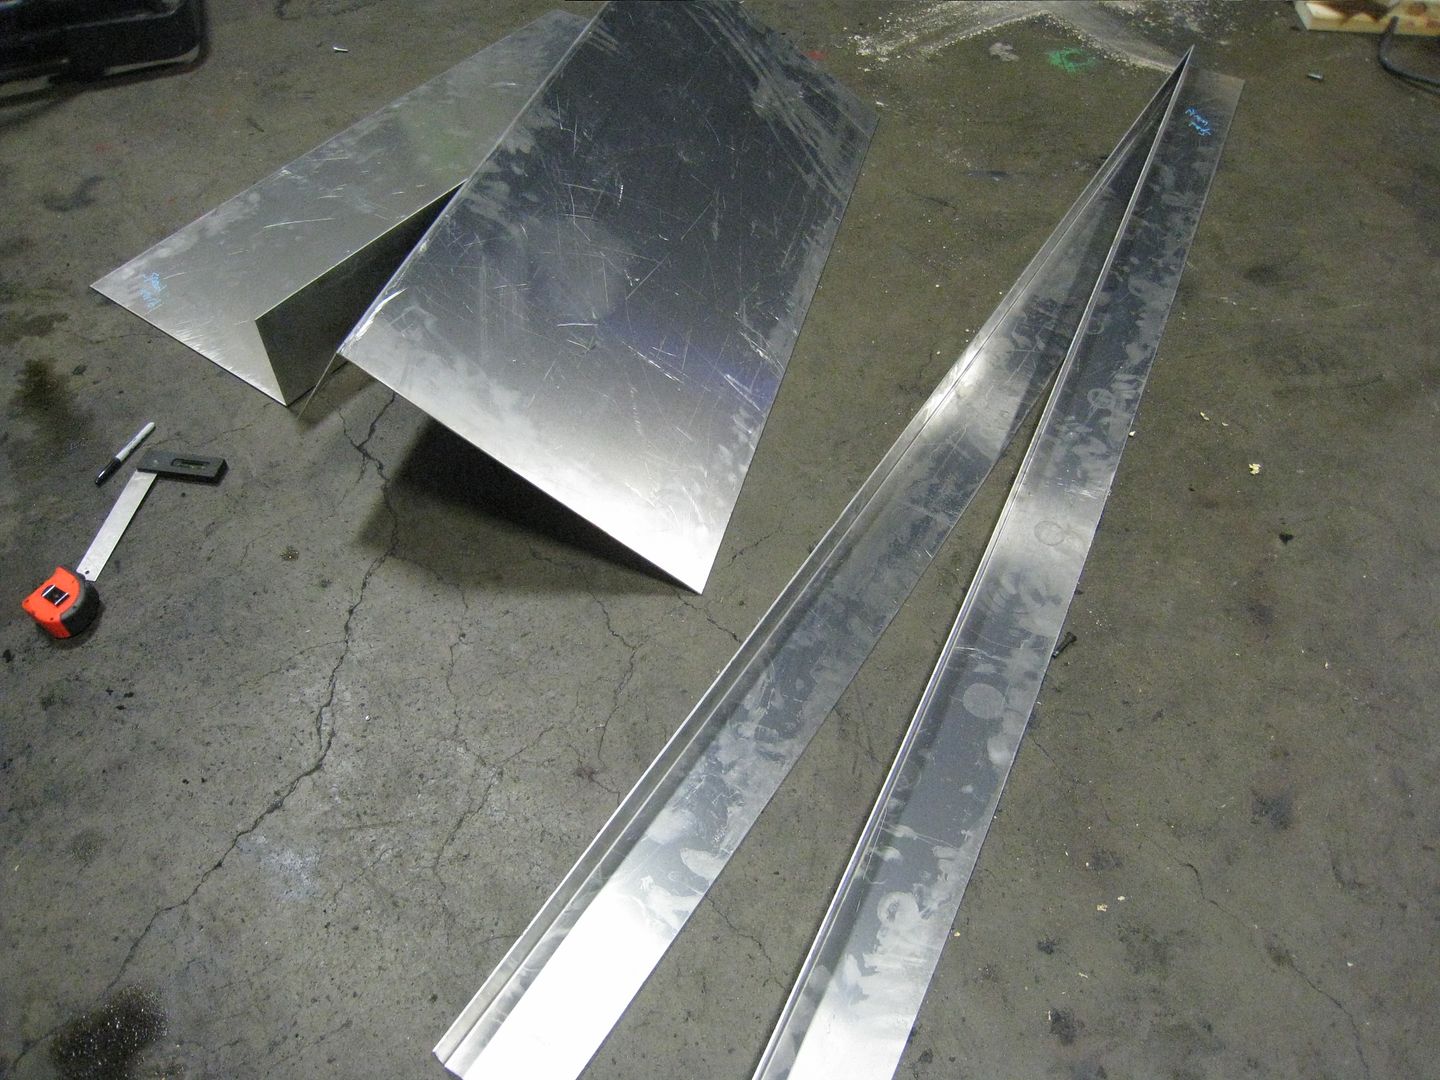
The raw materials. 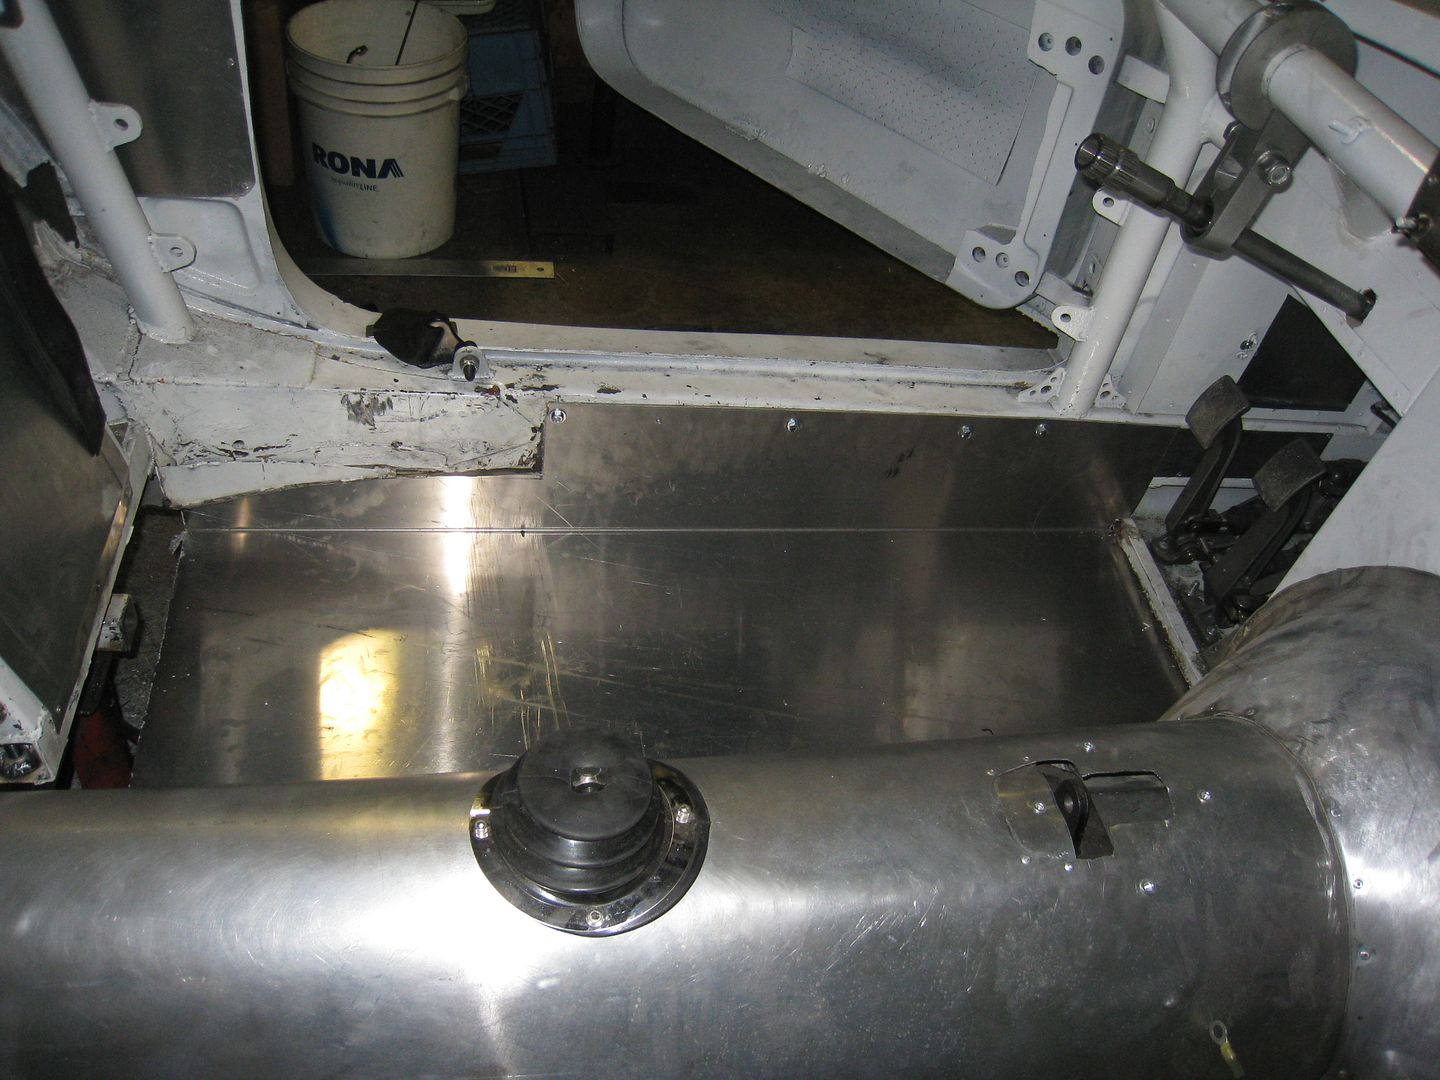
After a lot of fitting, trimming, cutting and re-fitting I was able to use threaded rivets to hold the floor to the frame rails. 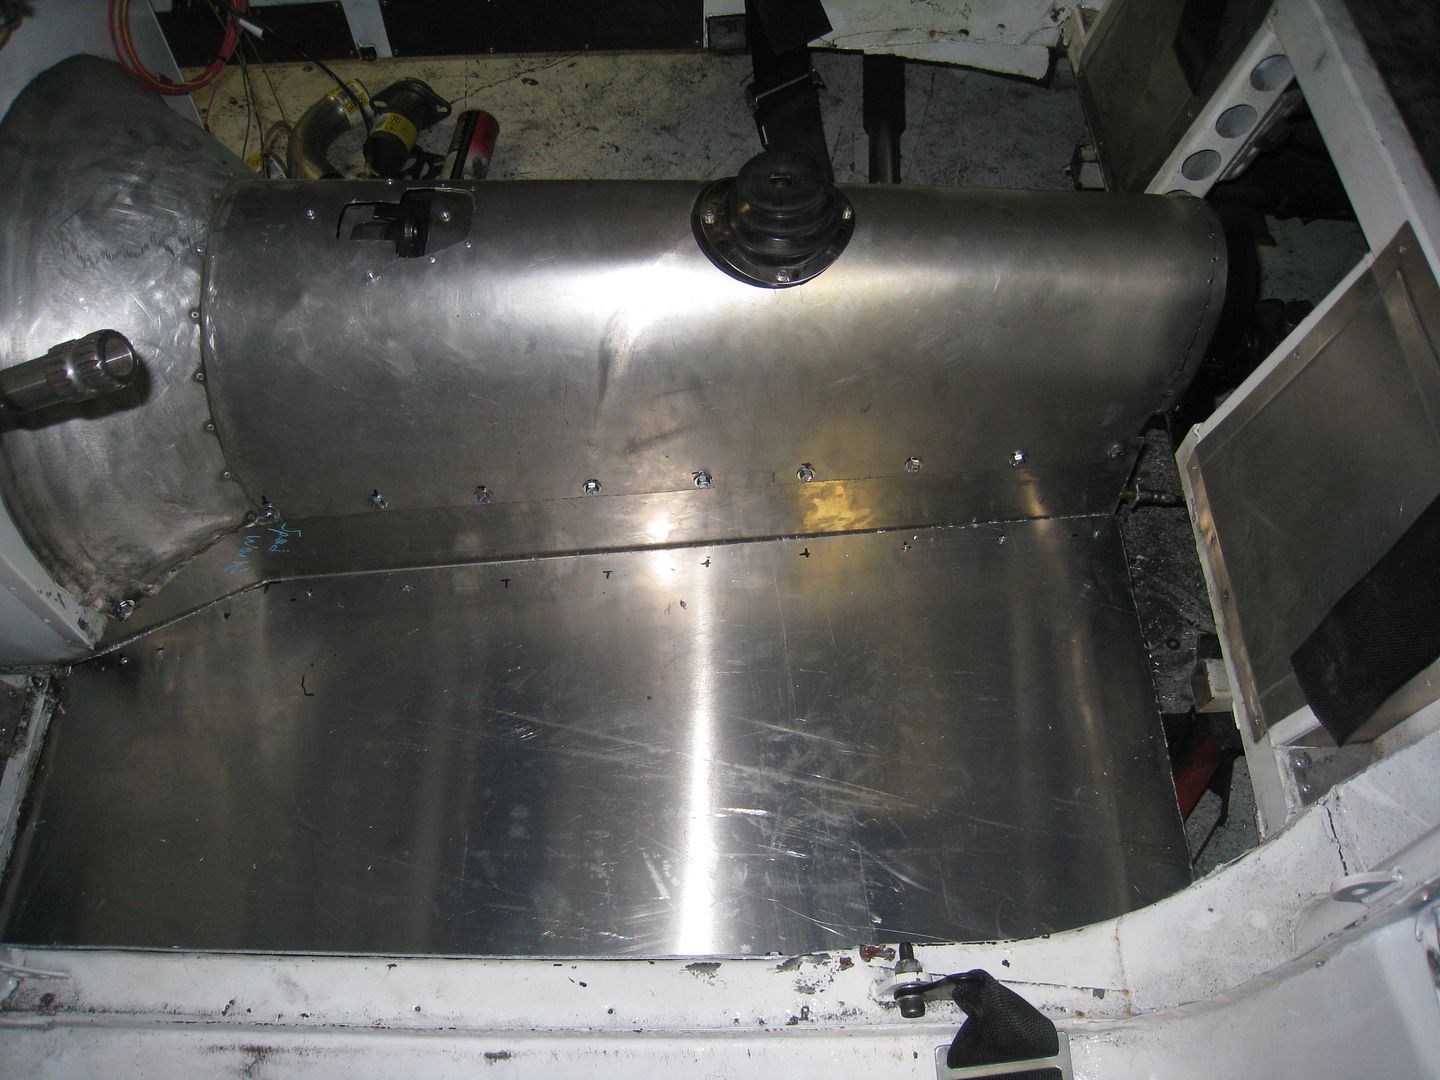
And bolt the tunnel to the floor. I still have to fill in the gap at the back of the floor then onto the passenger side. I got everything hooked up on the 5.0 V8 and here is the video of the very first time I pushed the start button: [www.youtube.com] I worked on the passenger side floor and finished up the drivers side floor this week. For now everything is just riveted together but I will be seem welding the whole thing soon. Here it is without the tunnel bolted on. 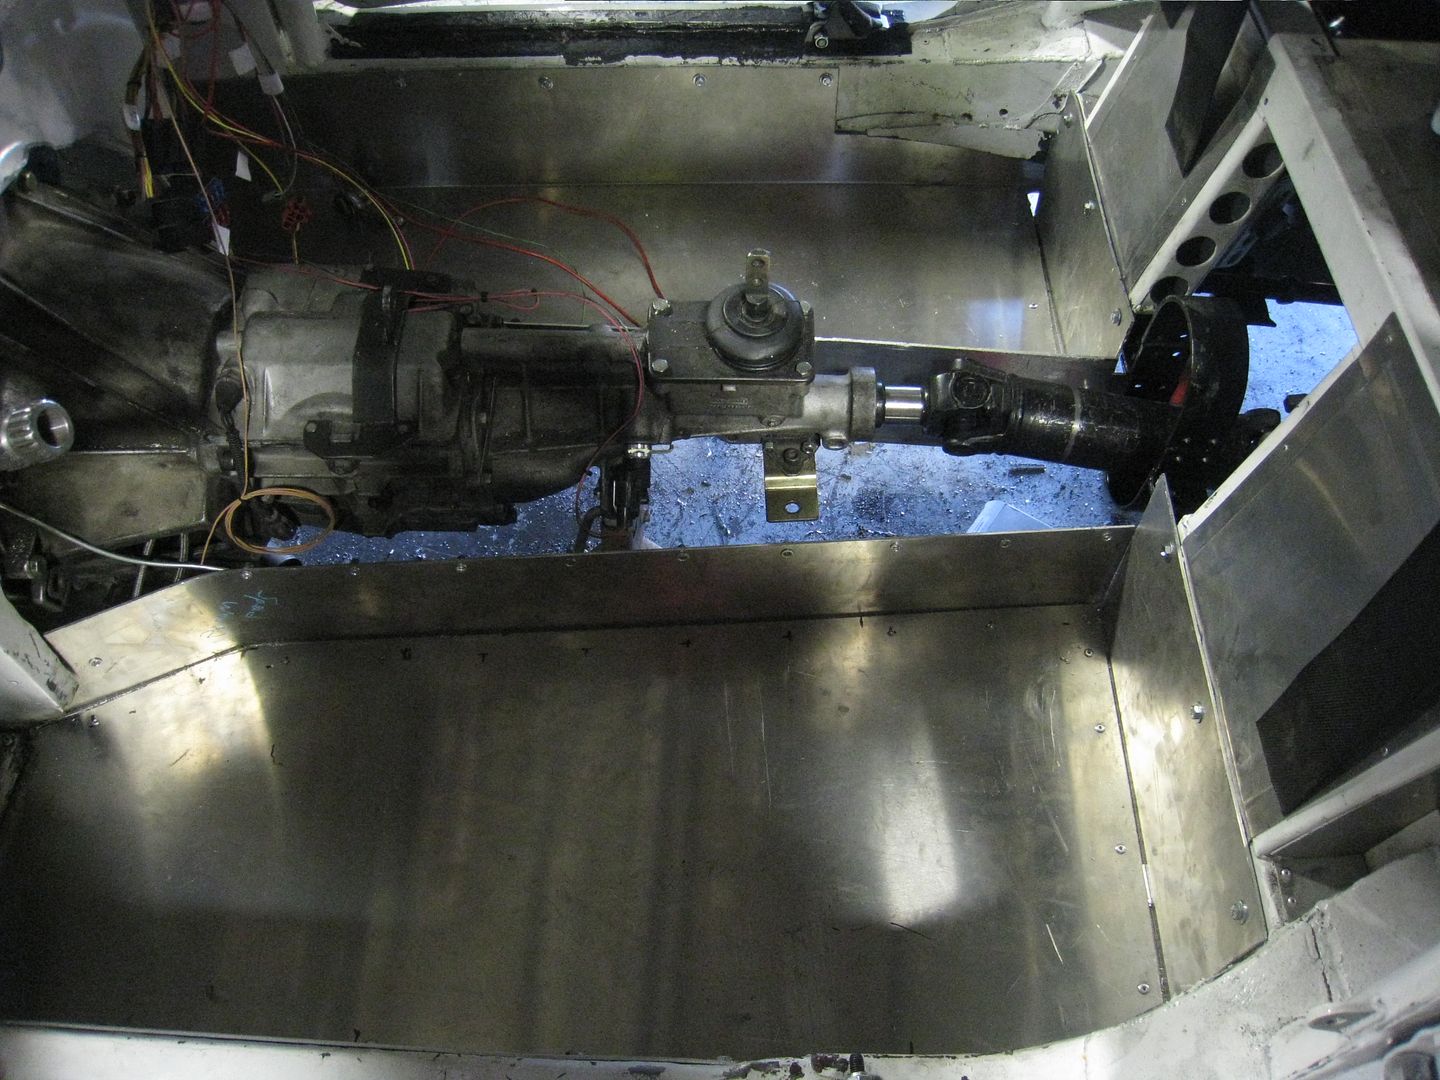
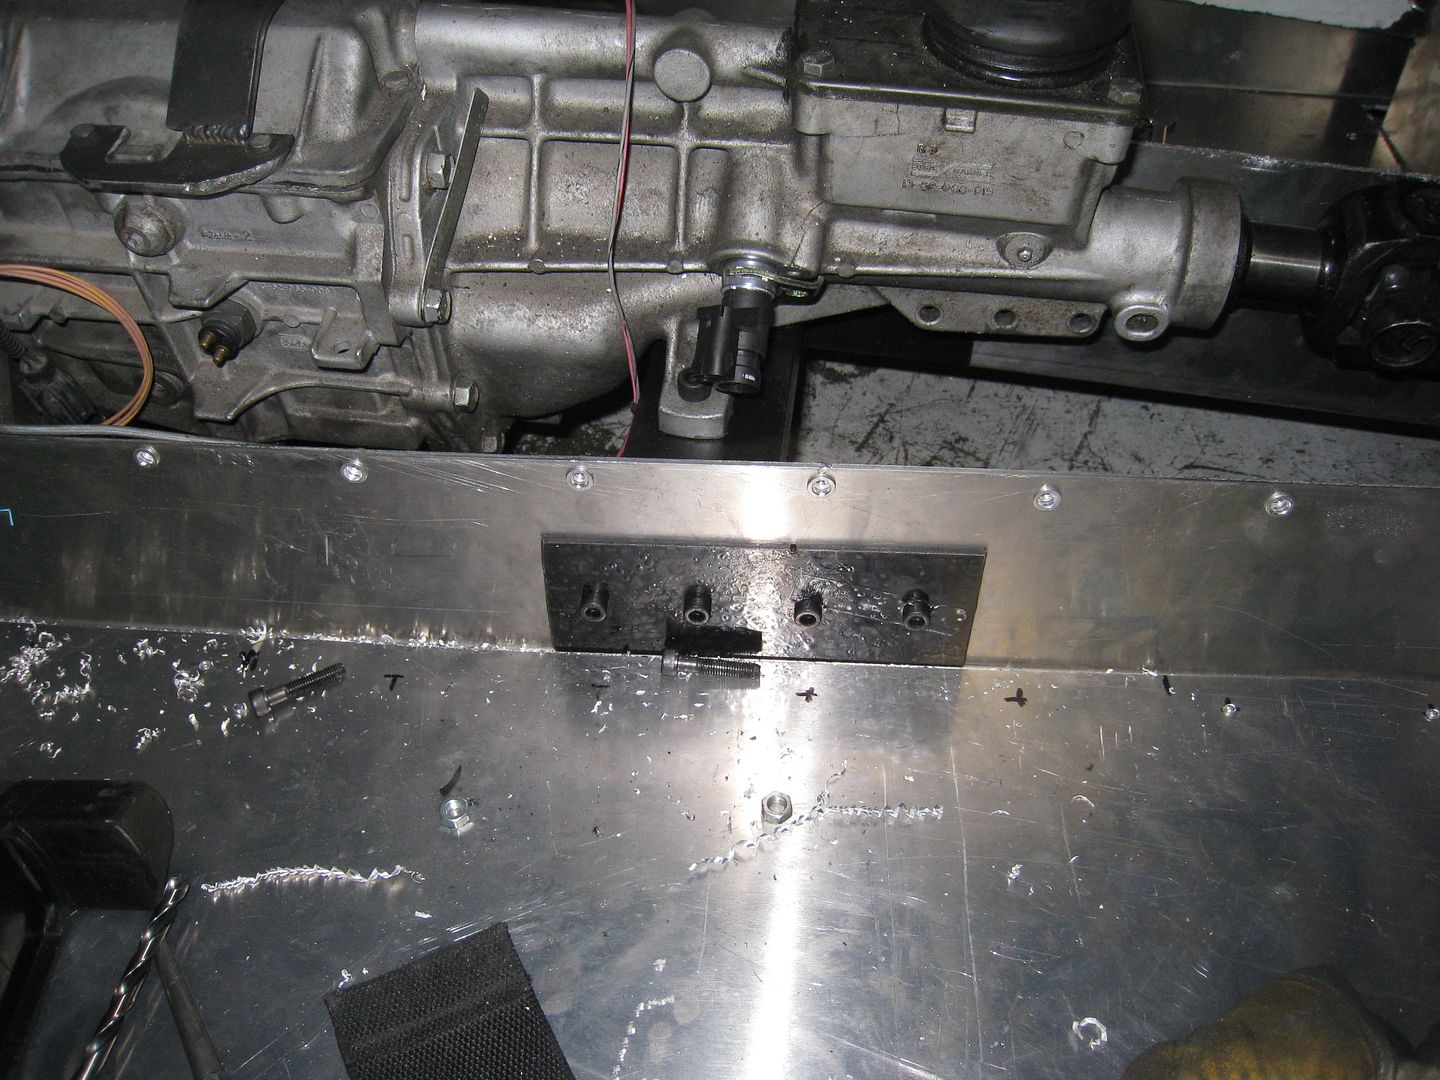
I needed a new rear transmission mount and the floor feels so strong that I decided to build a steel mount that bolts between the driver and passenger side floors. This is the reason I have decided to weld the floors and add some gussets. When I first bolted the bracket in and let down the bottle jack holding up the tranny, it didn't budge, so I take that as a good sign that the floor can handle the weight. I will still be keeping a close eye on it. 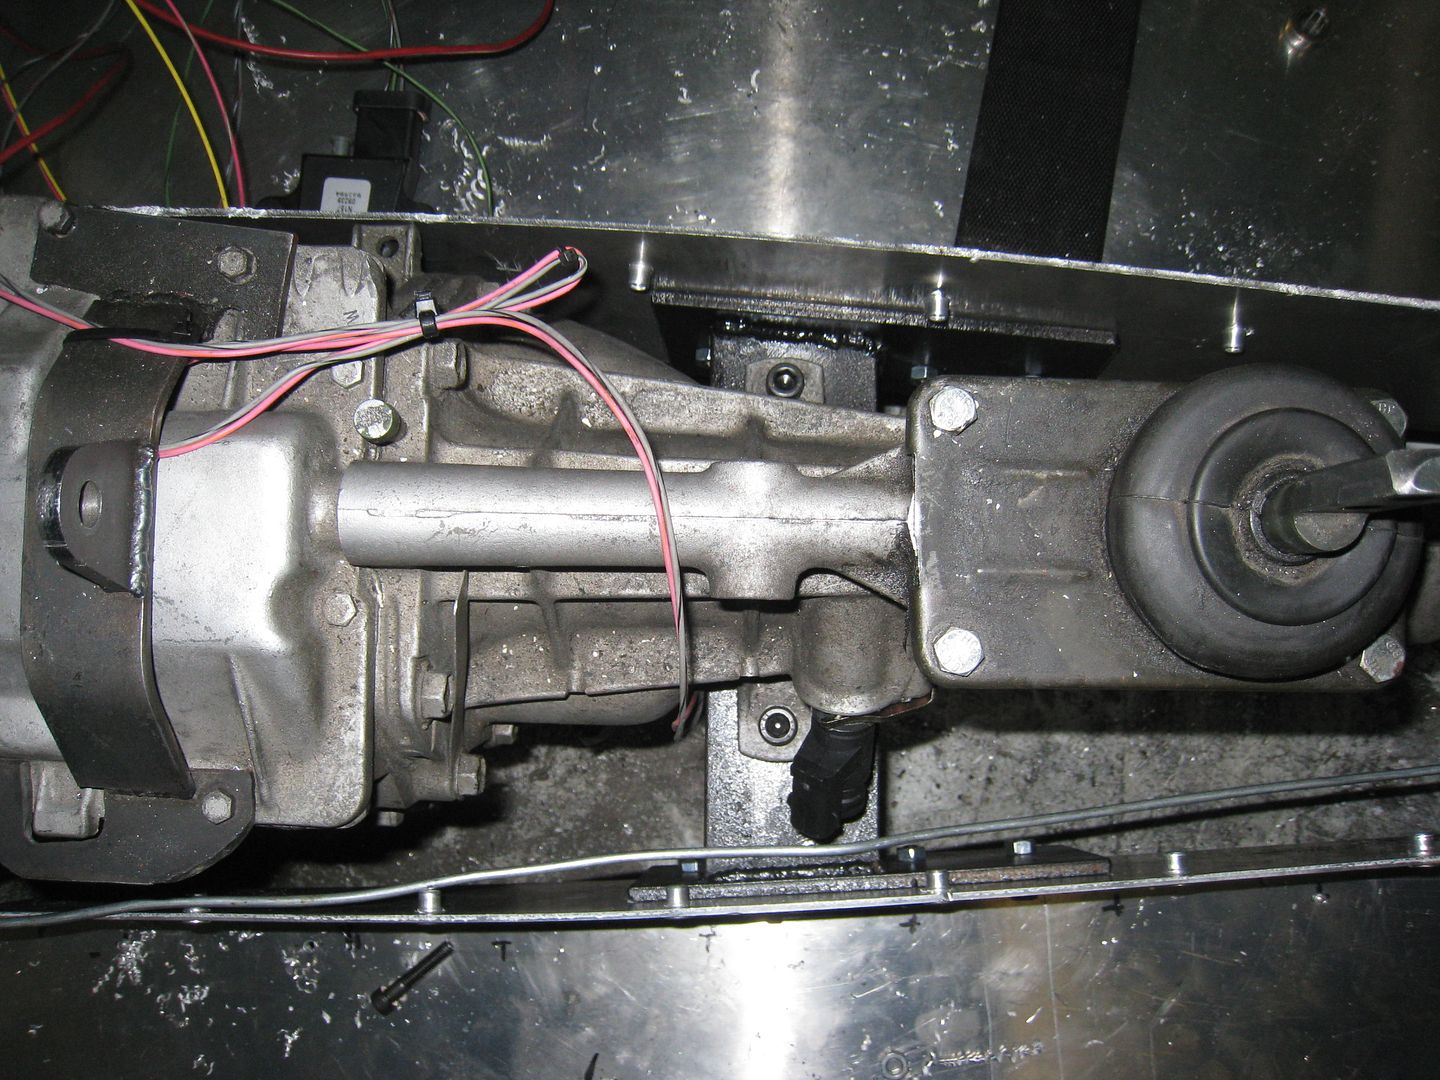
The giant radiator I had for the V12 was so heavily modified that I decided to start fresh with a new, built for a 5.0, aluminum racing radiator. A mistake I made with the other one was that the uprights holding the rad also got in the way of shrouding the radiator. For this one I mounted it lower and farther back for improved weight distribution and I allowed lots of room for shrouding. Here is the passenger side lower mount bolted to the frame: 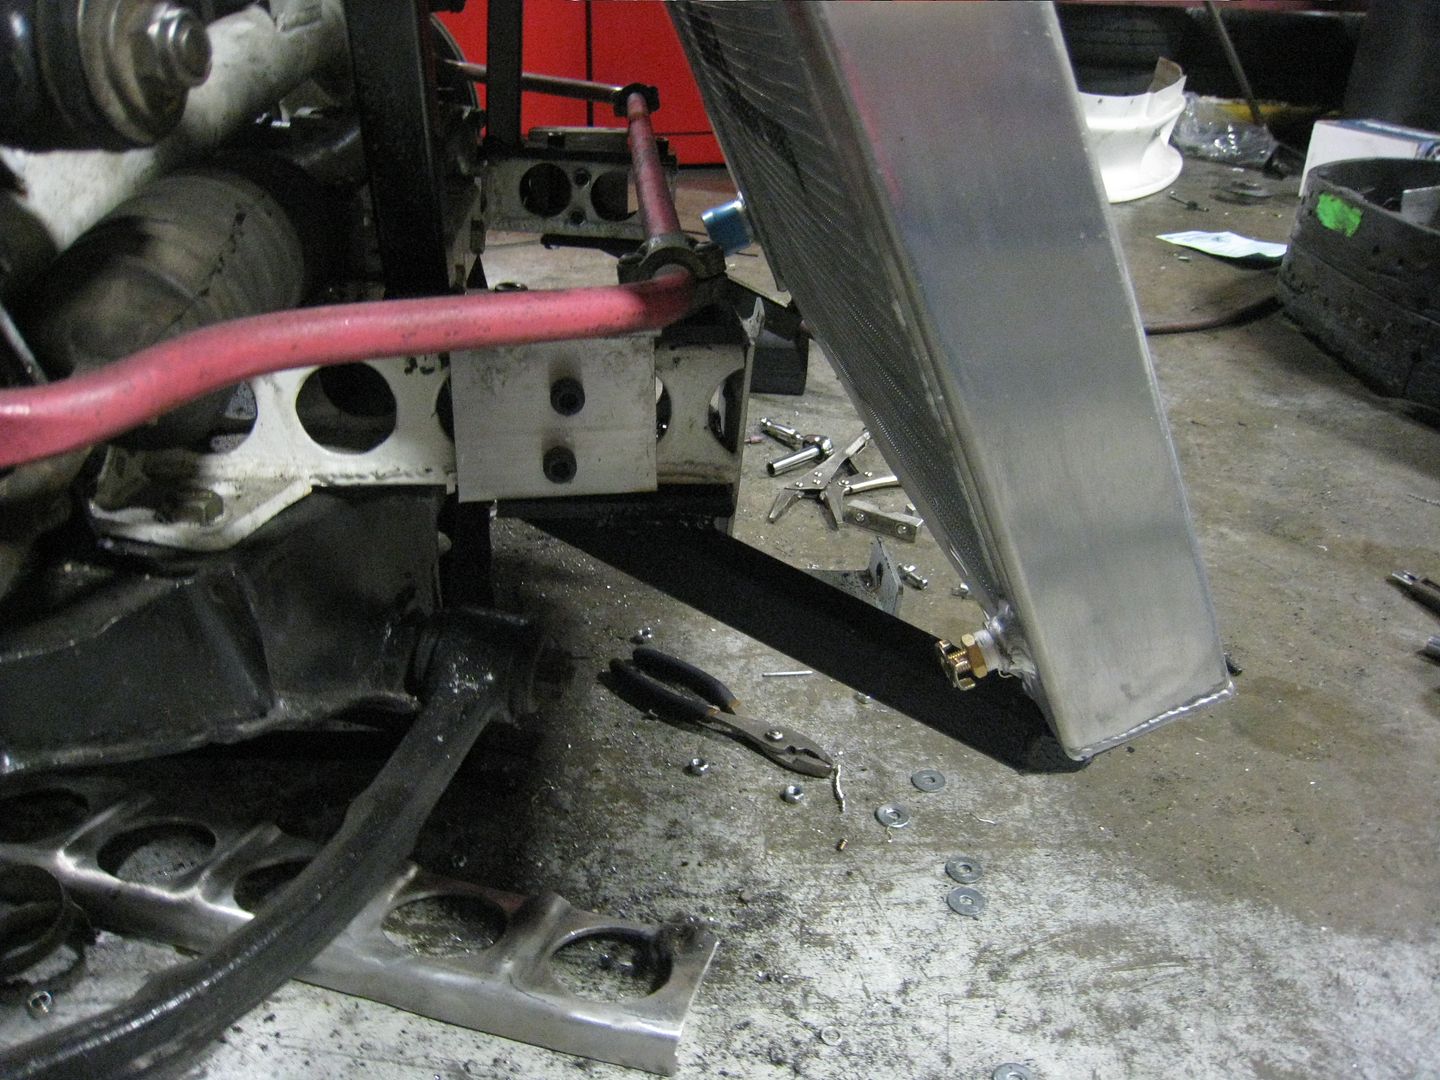
And upper passenger side: 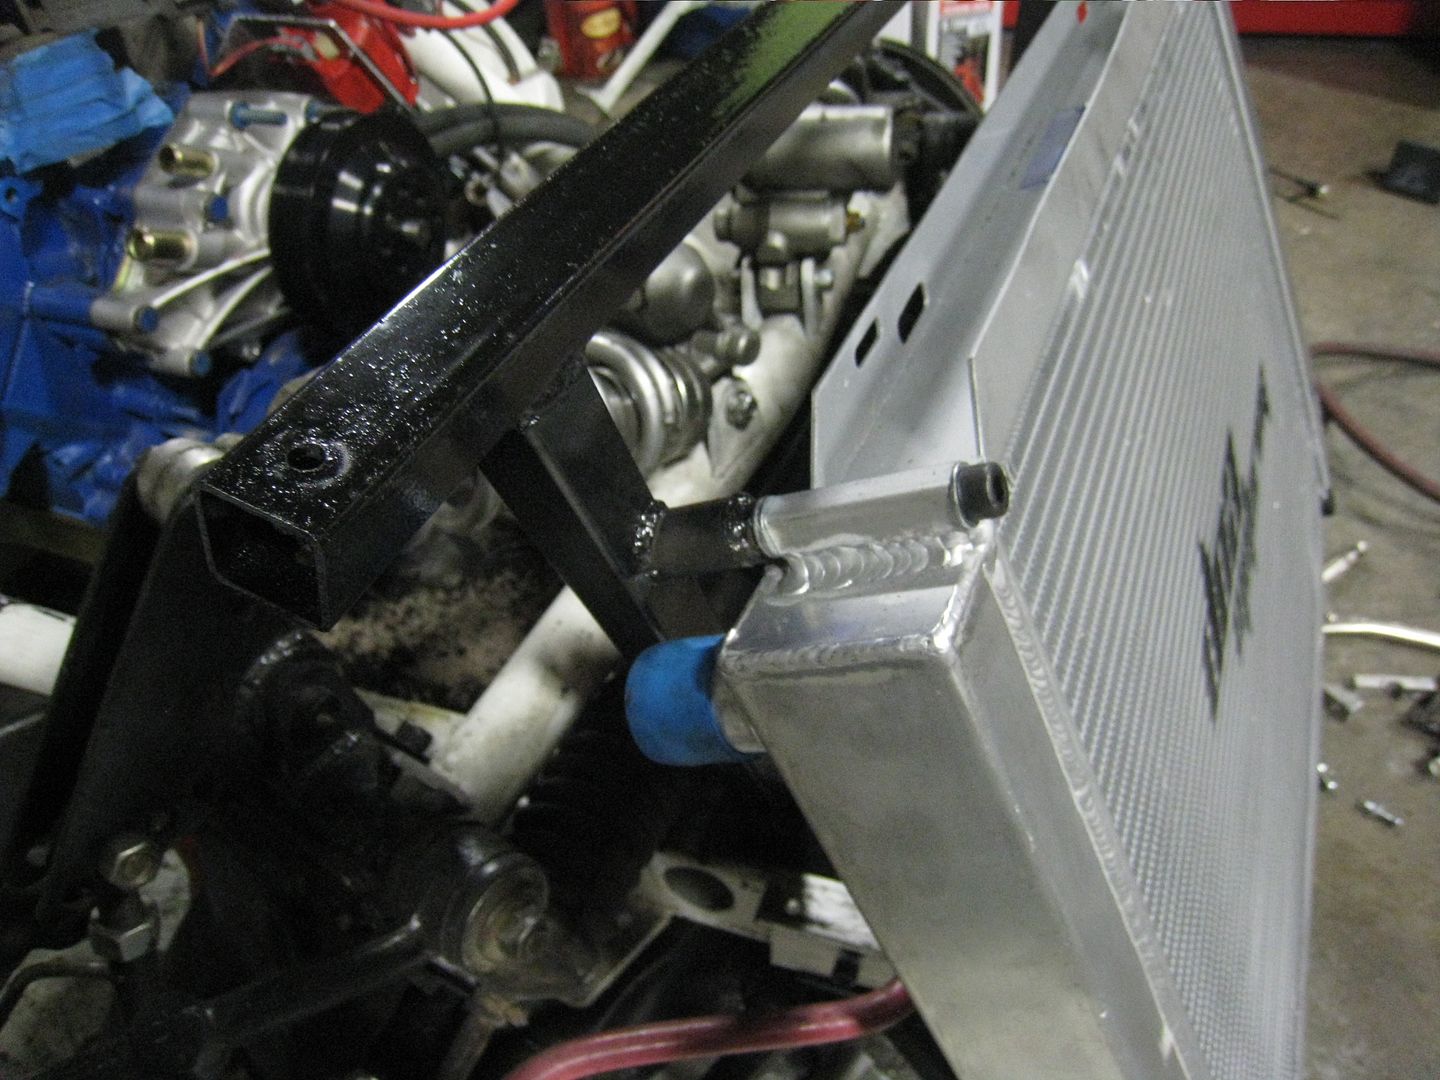
And here you can see there is plenty of room behind the rad for shrouding some fans in: 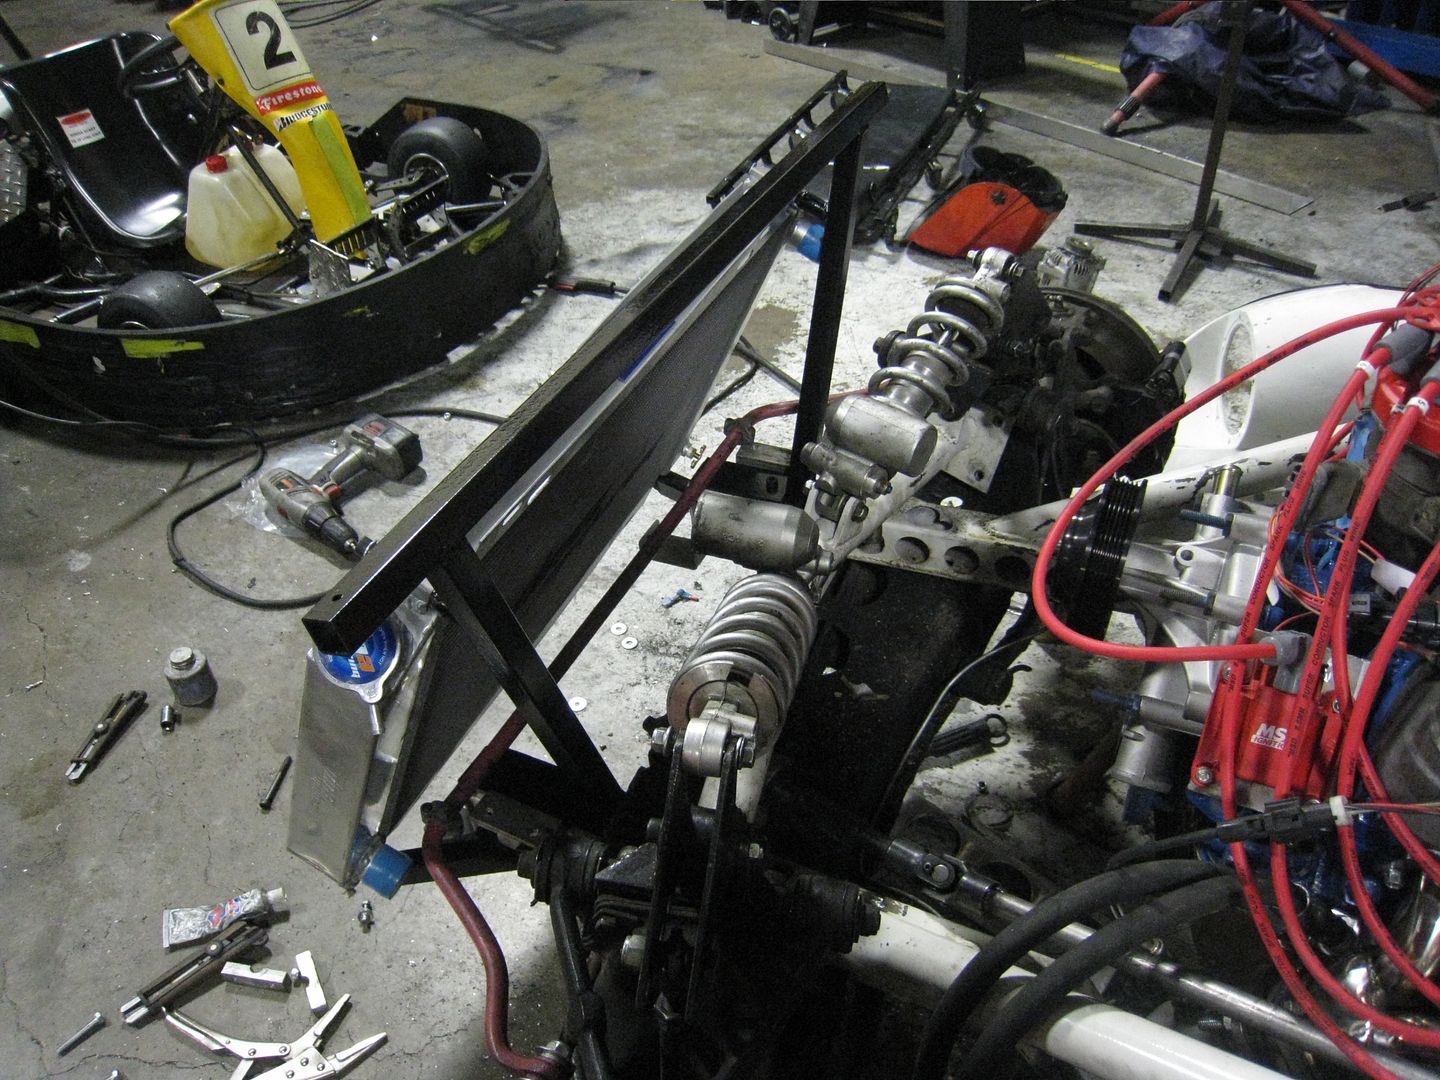
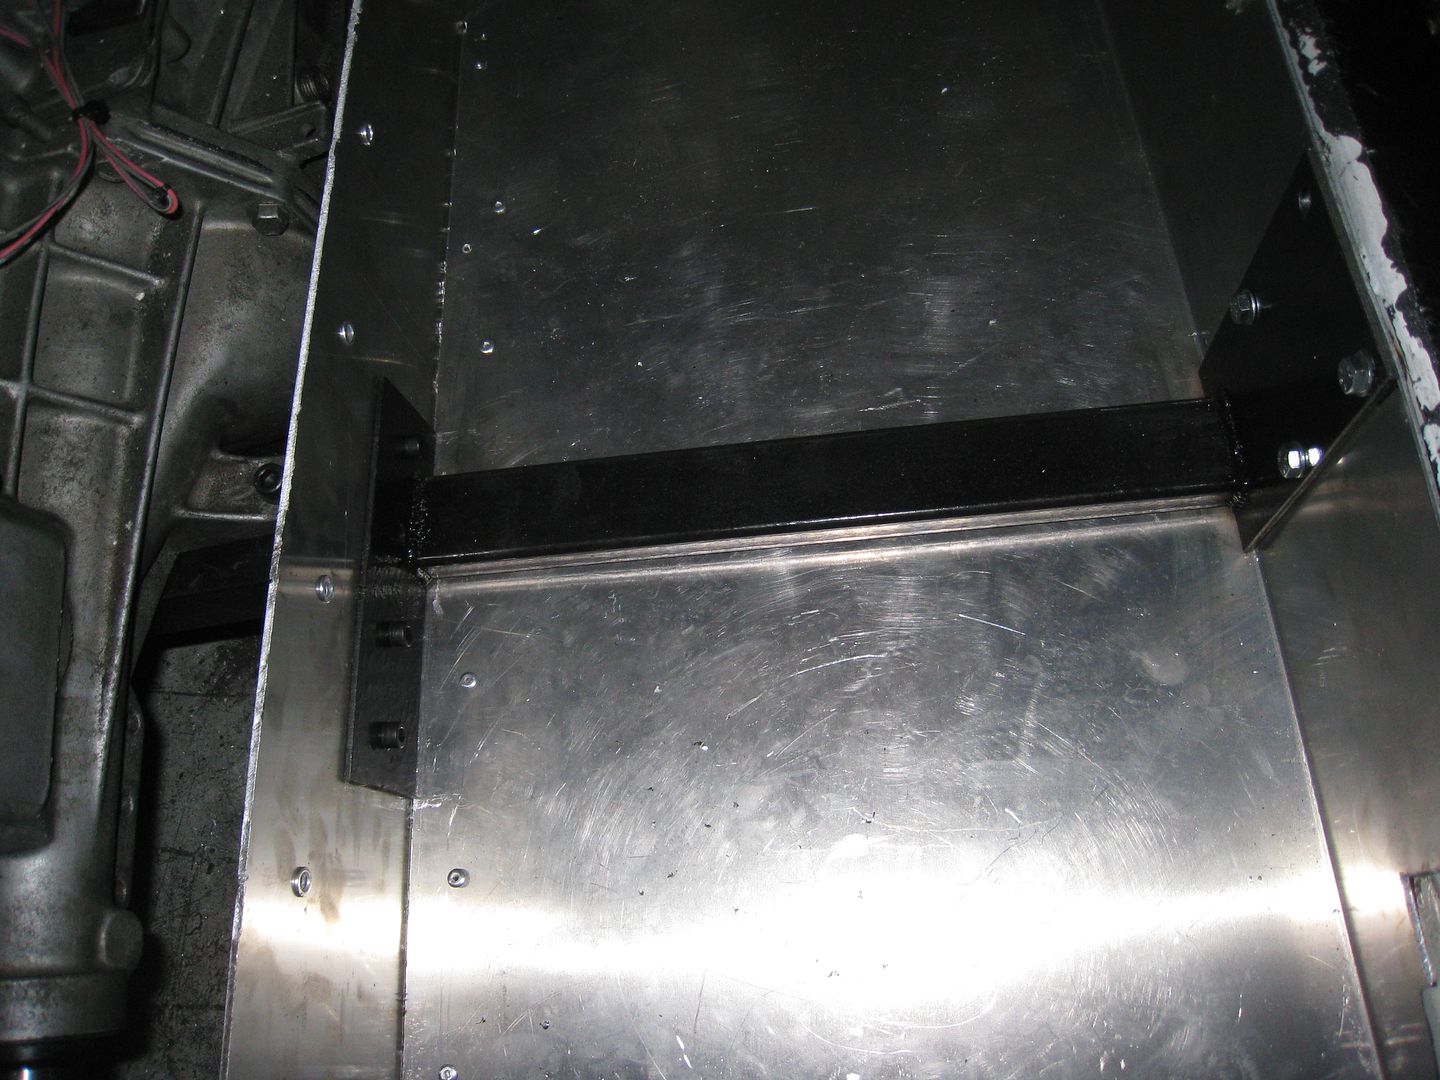
It turns out that my aluminum floor is not legal for the class because the rear tranny crossmember bolts to it and becomes load bearing, and aluminum is not allowed for load bearing structure. I simply added 1"x2" steel tube between the transmission crossmember and the frame rails and the problem is solved. 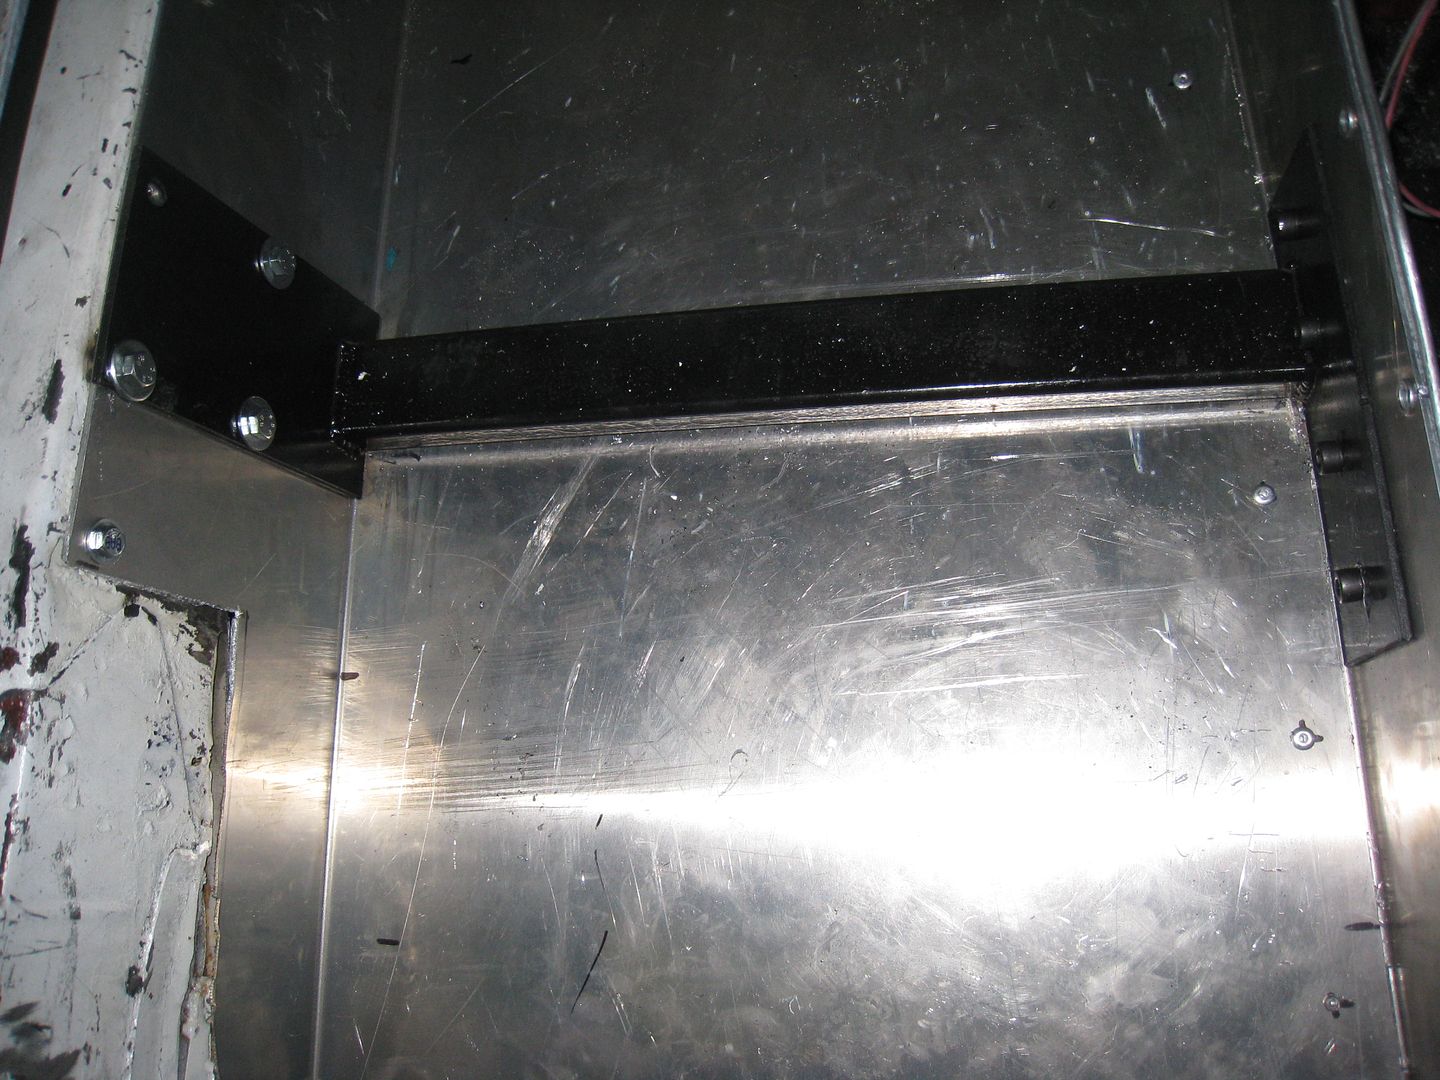
I drove the car around the kart track for a few laps, it was too much fun! It feels understeery so I have to give it some welli to get it to rotate but otherwise the handling feels good. It does smoke a lot but I hope to have that problem solved soon. Here is video from 3 different angles: [www.youtube.com] [www.youtube.com] [www.youtube.com] Because the floor and side pipes dropped 3 inches, there was an ugly gap between the body and the pipes so today I took some 18 gauge aluminum and filled the gap. I was going to paint it but some have the opinion that it looks good in natural aluminum. It could also be a good place for sponsor stickers. 
If you go back to the post where I weighed the car with the V12, you will see that the total weight (with me in it) was 2353 lbs and 46.8% of that was on the back tires. Now, with the V8, the total weight is 2136 and 51.1% of that is on the back tires-this is all good news. All I need is to switch to aluminum heads and rear diff and some glass fenders and I'm down to the class minimum weight. :) 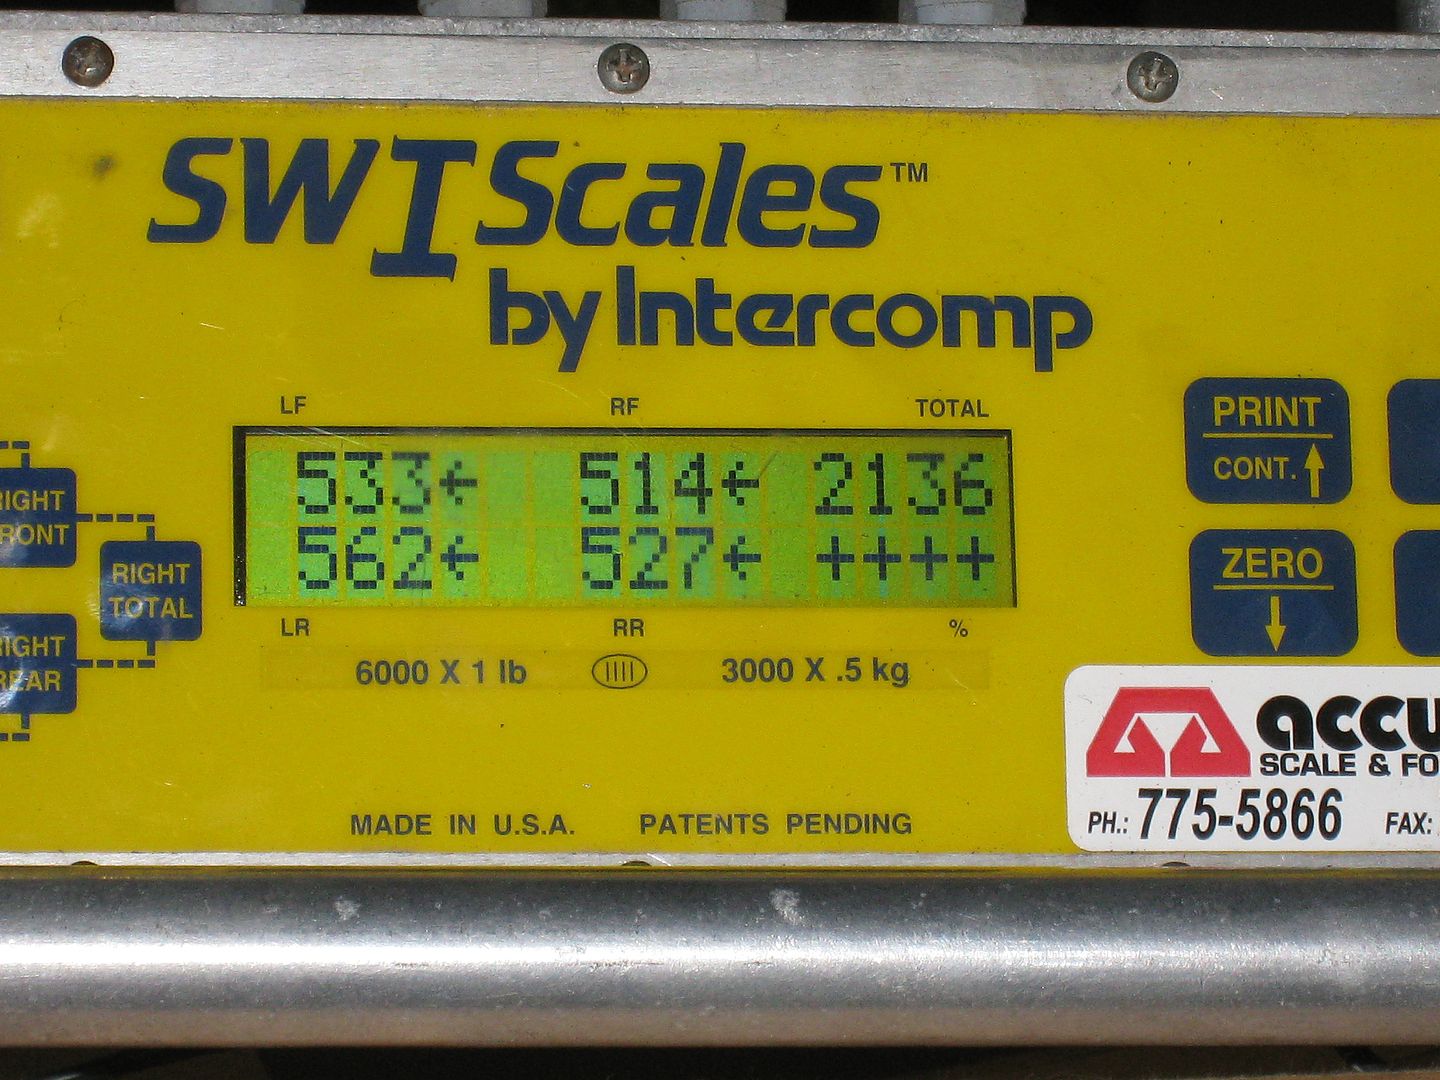
With the new lowered floor, the belly pan under the rear suspension and the diffuser had to be lowered as well. Here is the belly pan, notice it is now low enough to go completely under the diff where before I had to cut a hole for the center section to poke through: 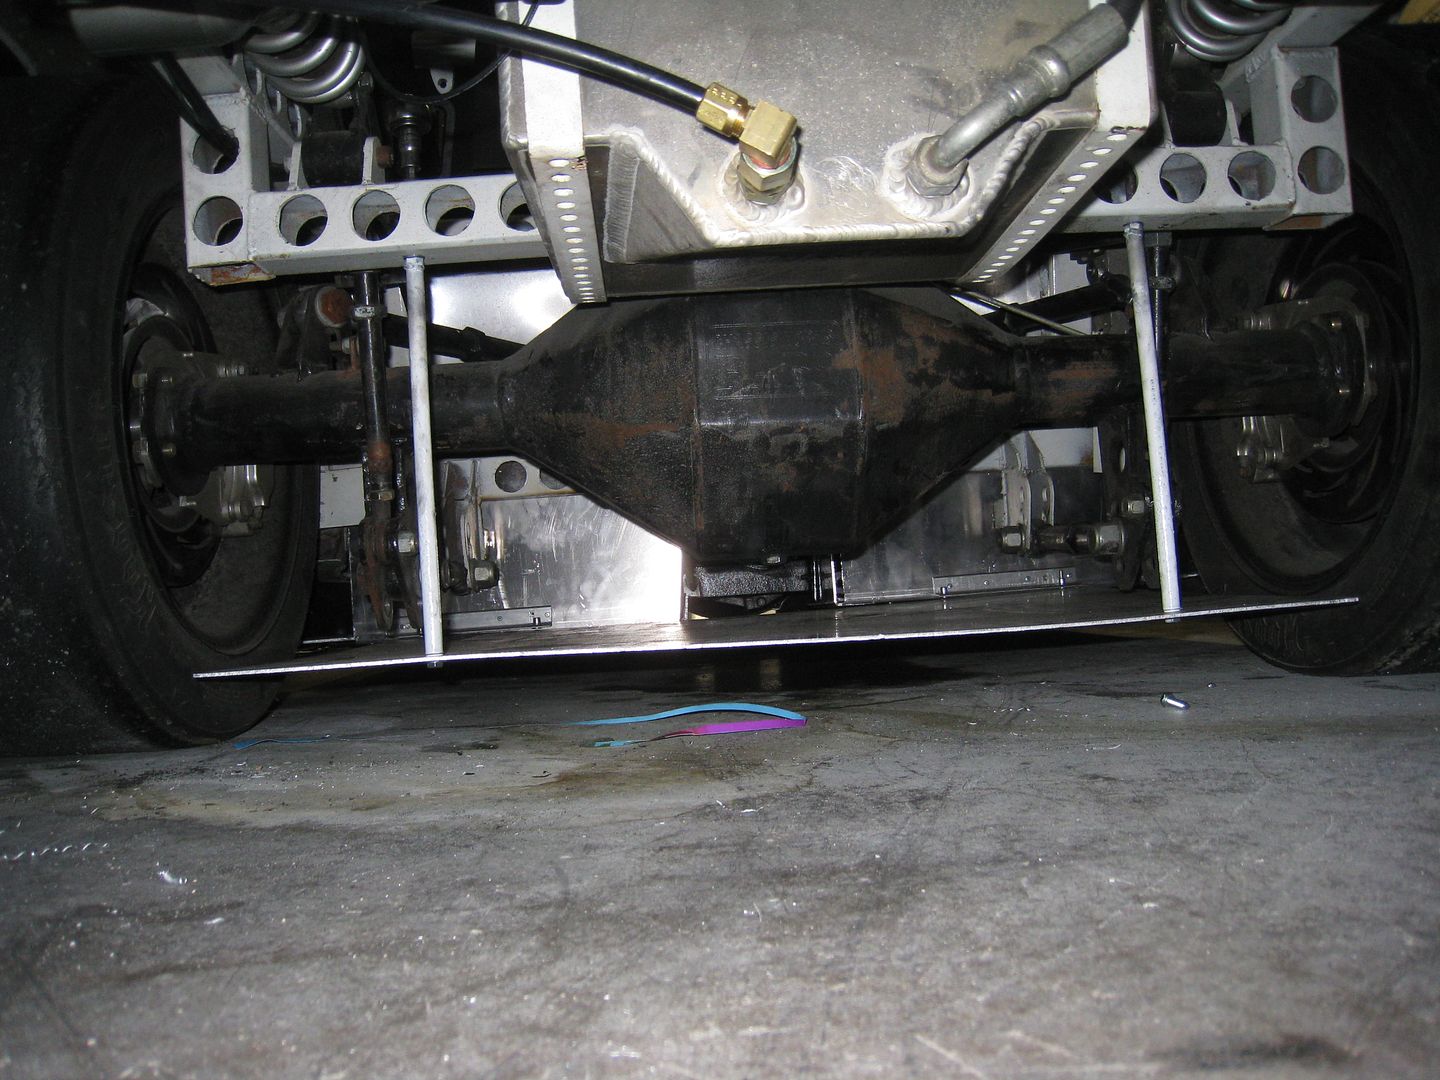
And the diffuser bolts onto the belly pan. A lot of material was cut off the vertical pieces in order to make it fit. 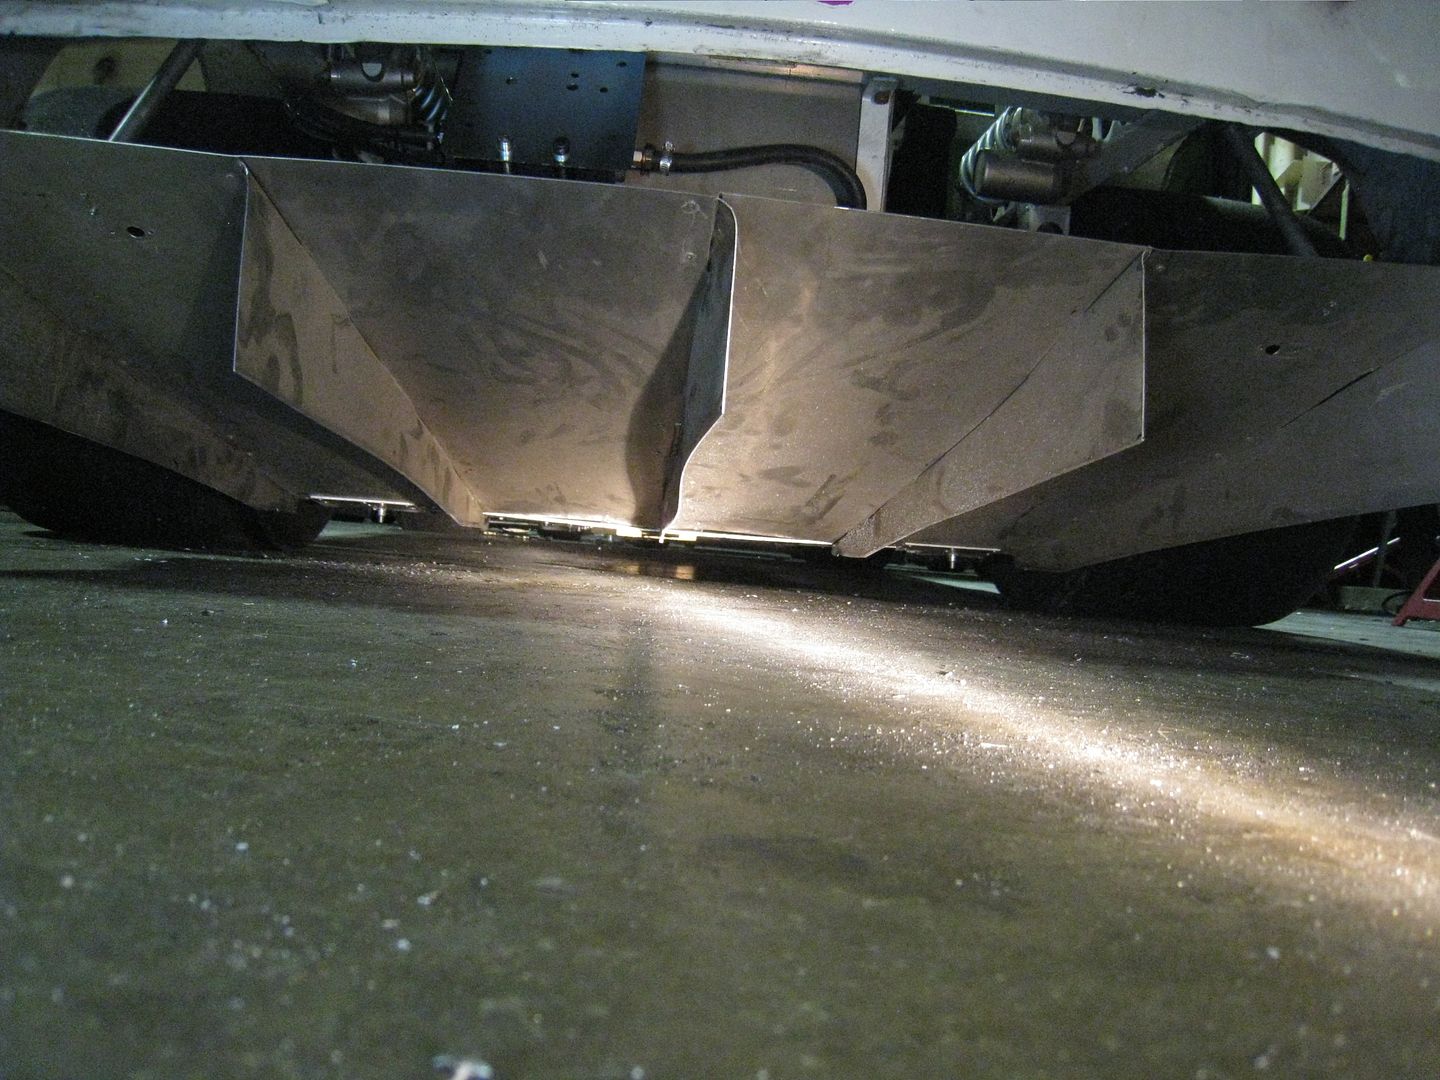
And from the side. The rear diffuser supports are adjustable and right now are in their highest position. 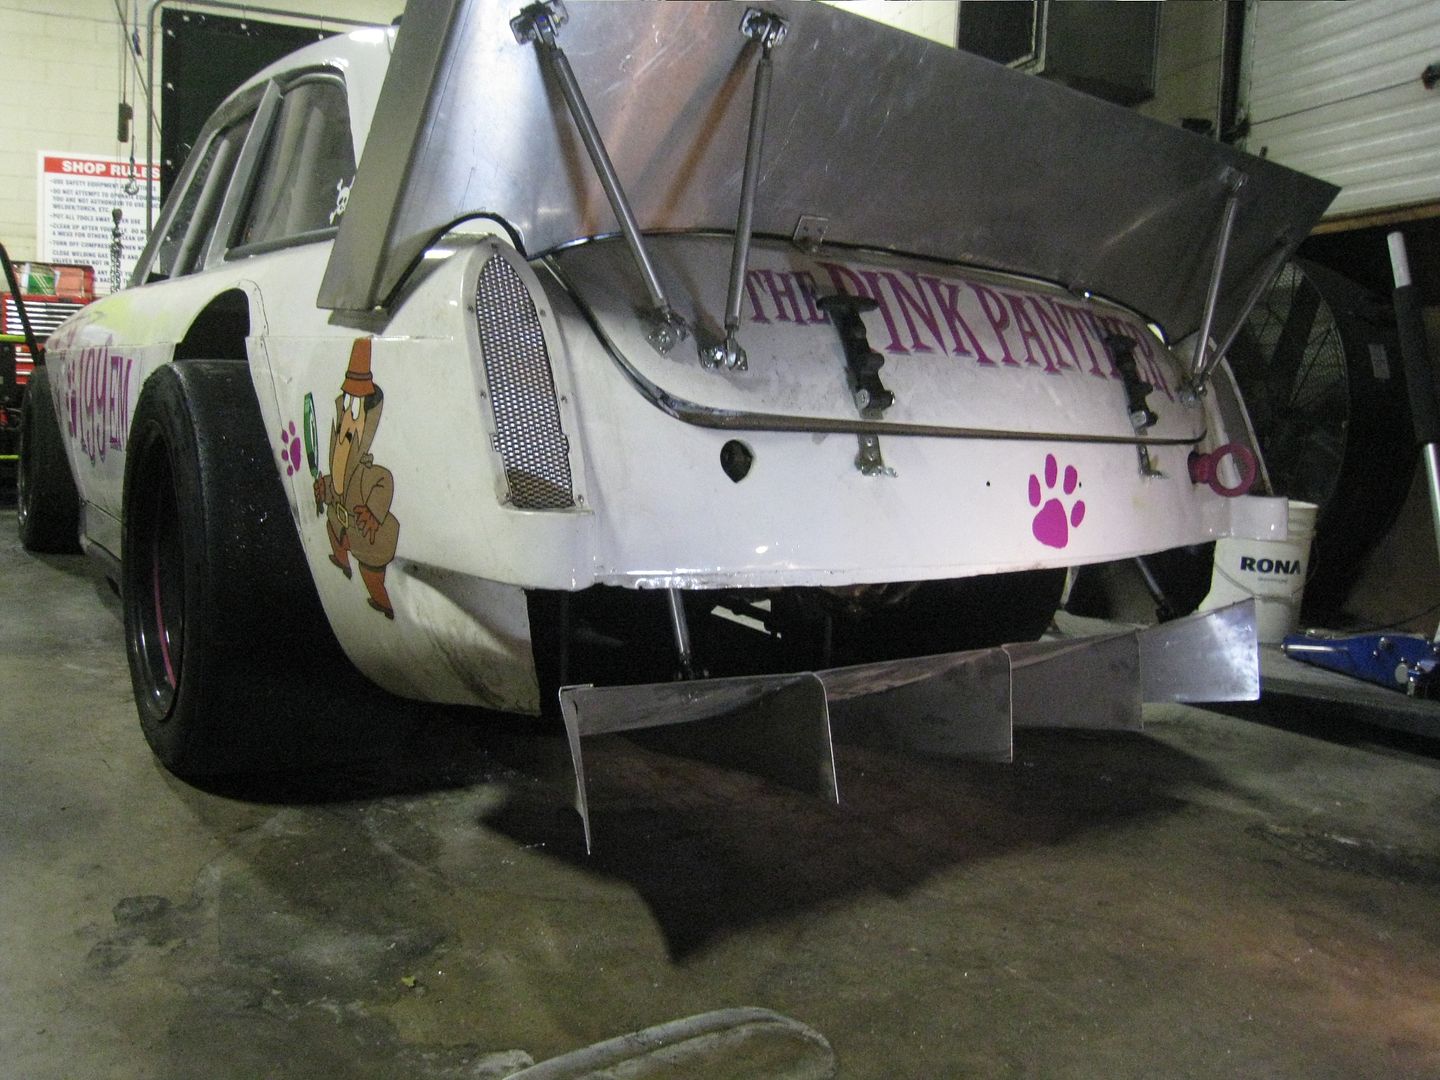
My idea to put a bellmouth in one headlight opening and use it for a ram air system was a fail, so I built something else using the opening above the radiator. Here is a pic of the aluminum piece I use to keep air from going over the top of the radiator: 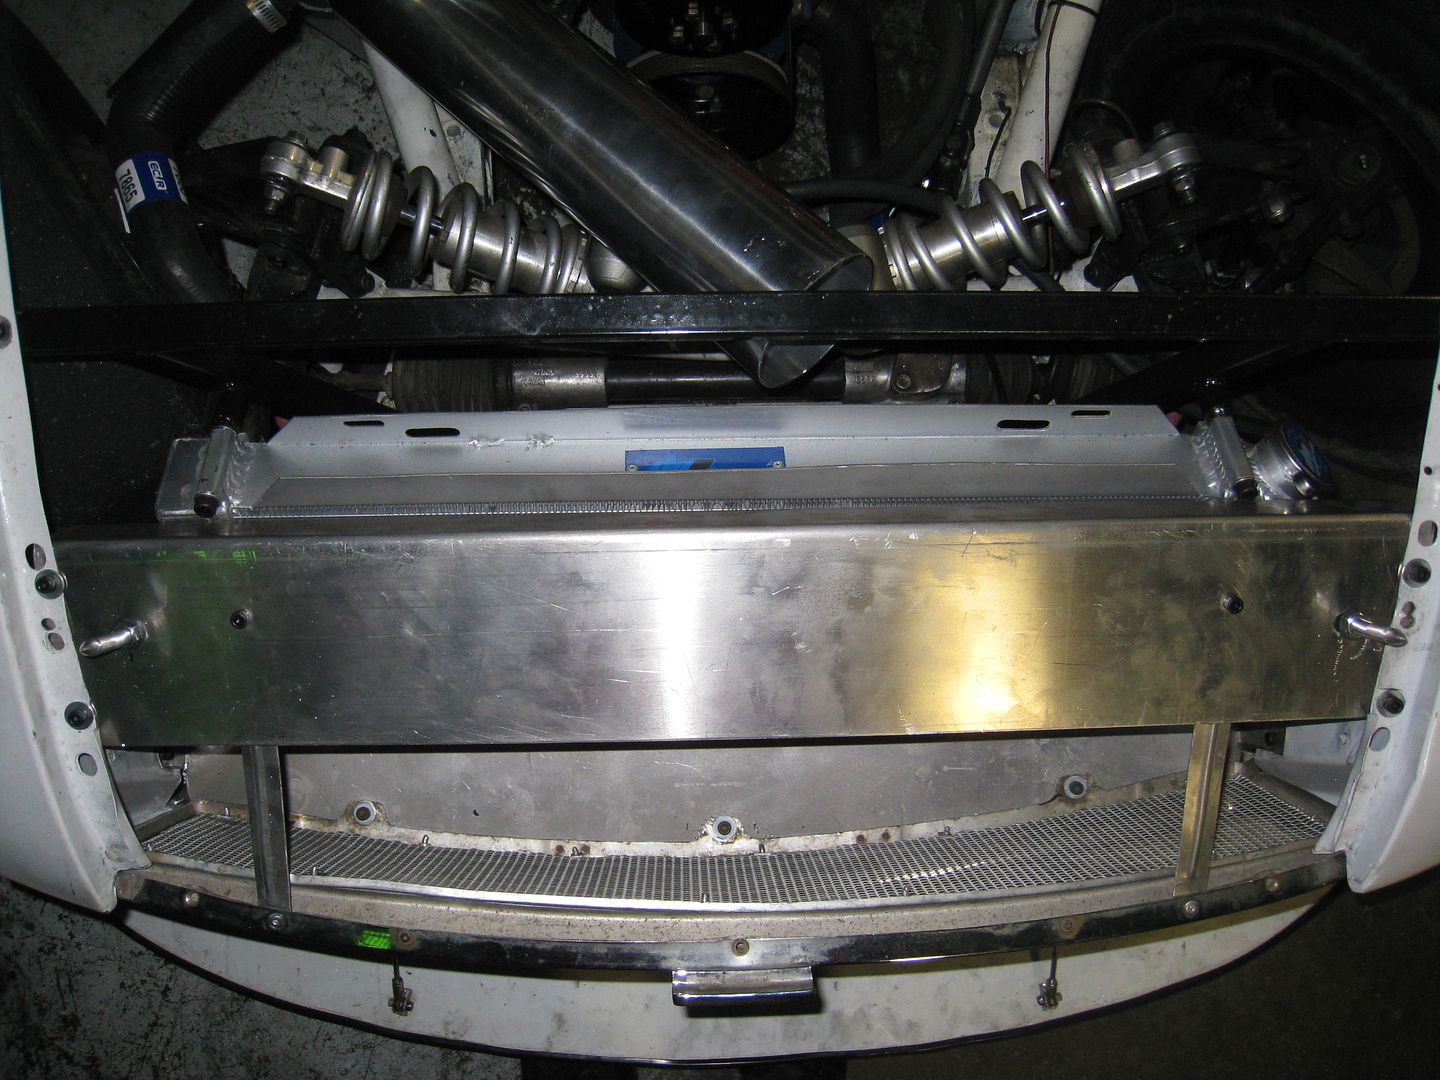
Underneath it is a large gap between the rad and the fender/rad support structure: 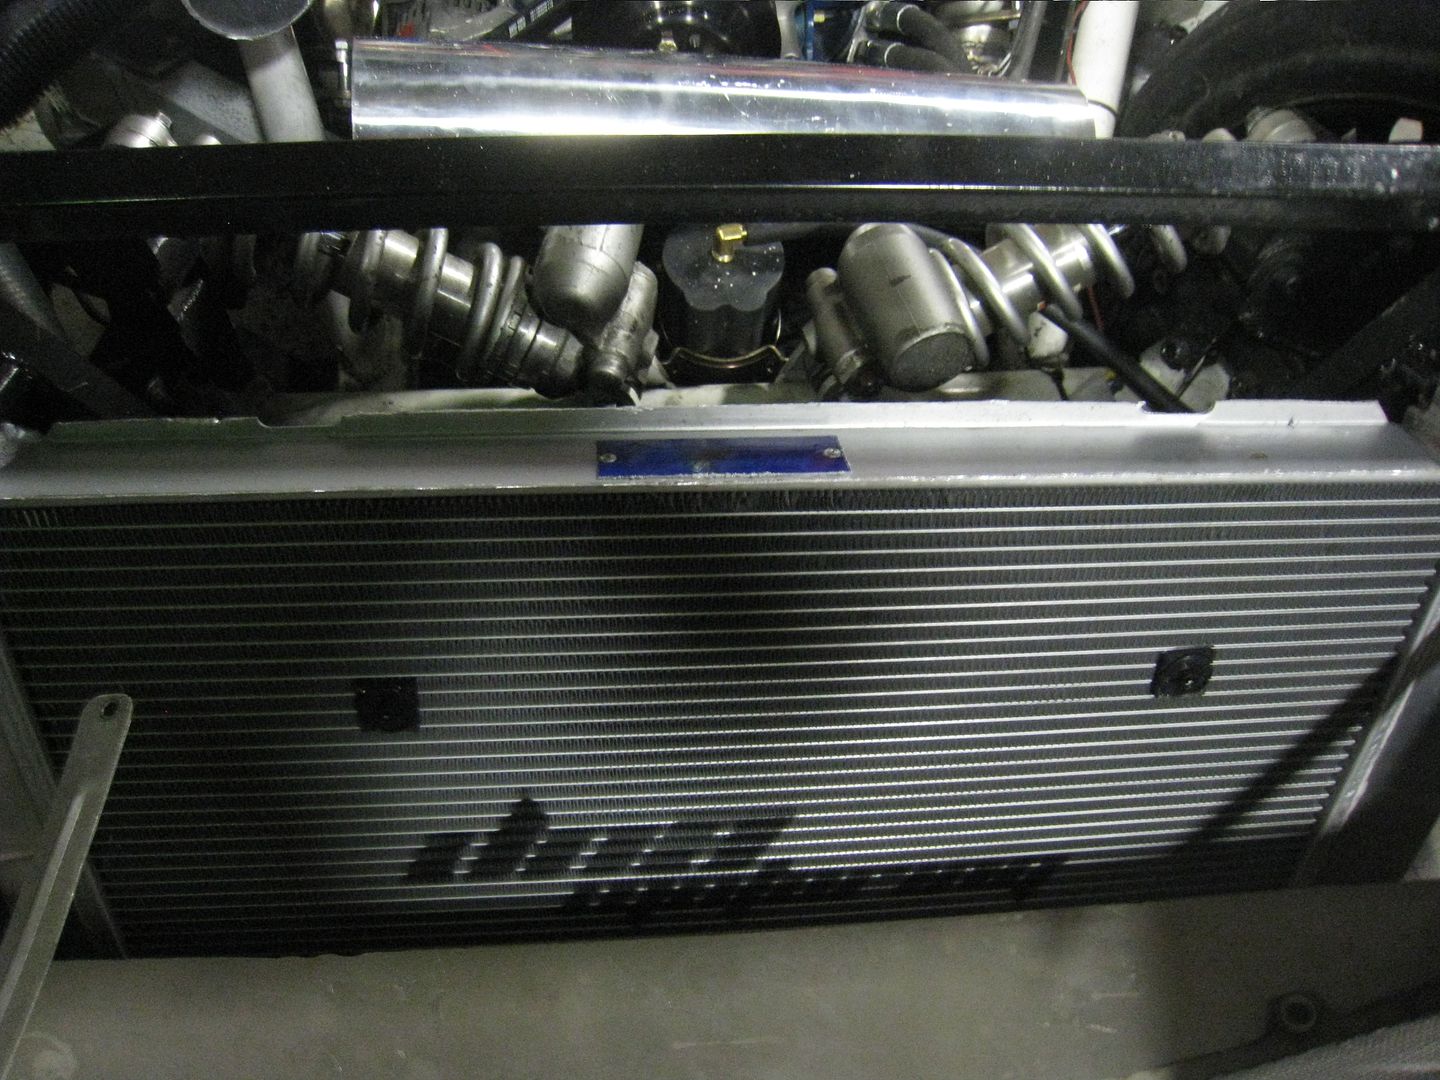
I built a box which takes air from that gap and directs it towards a 4" pipe which then shoves the air through the MAP and into the engine: 
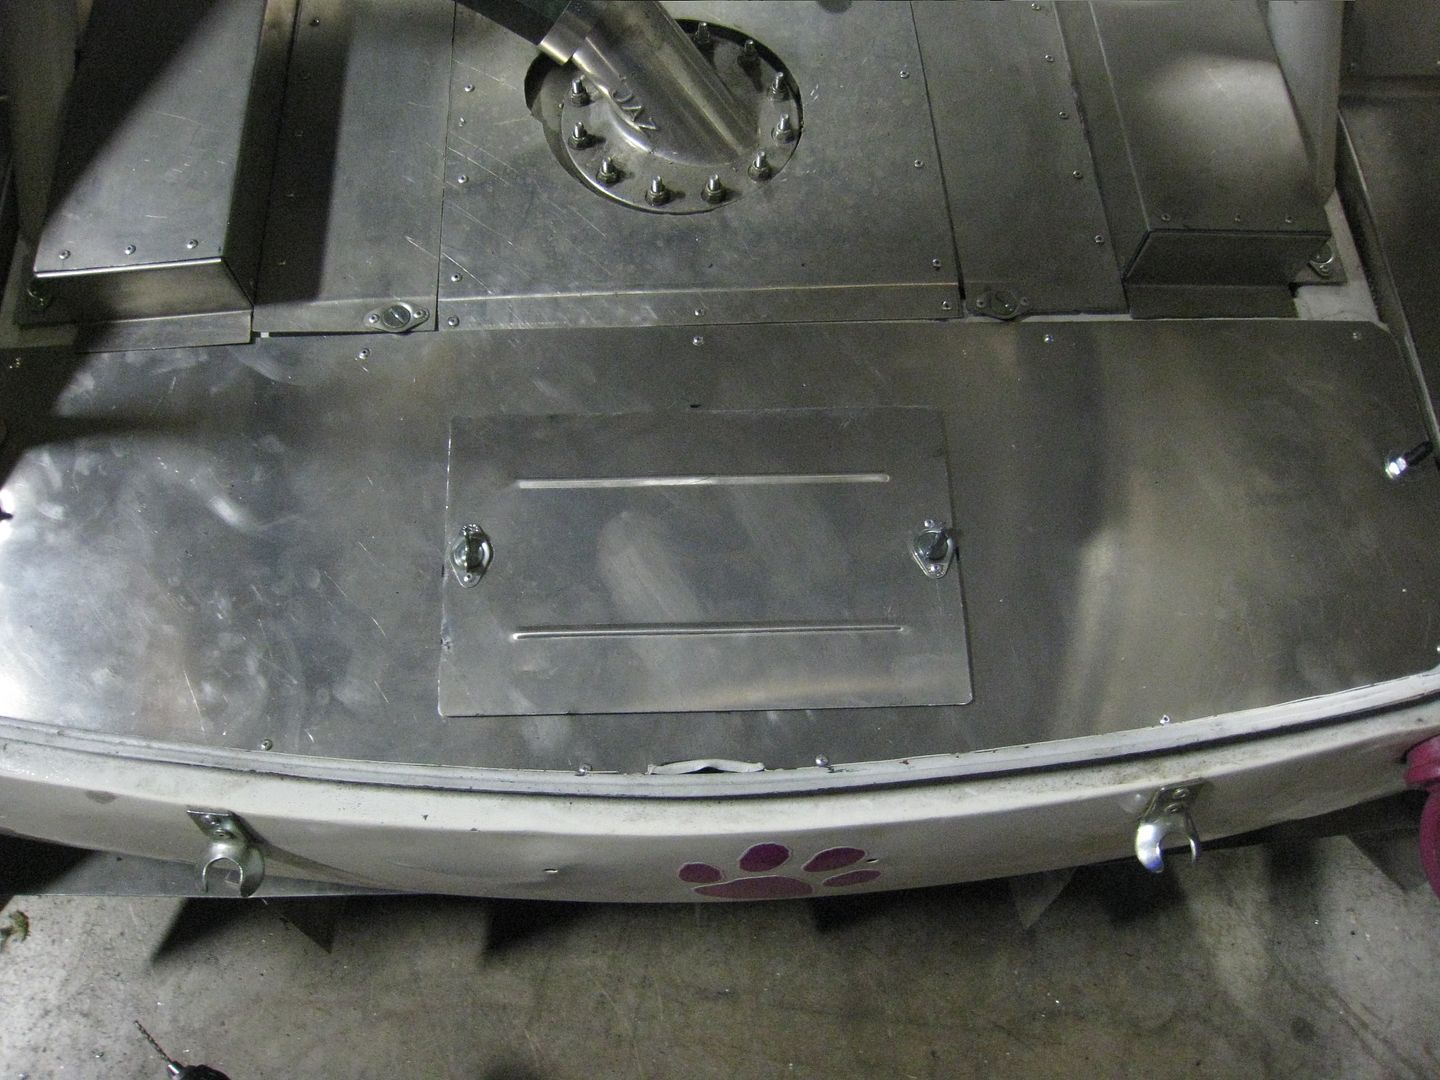
I wanted to improve the weight balance even more so I moved the battery to the very back of the car. I built a battery box out of aluminum and incorporated it into a cover panel under the rear hatch: 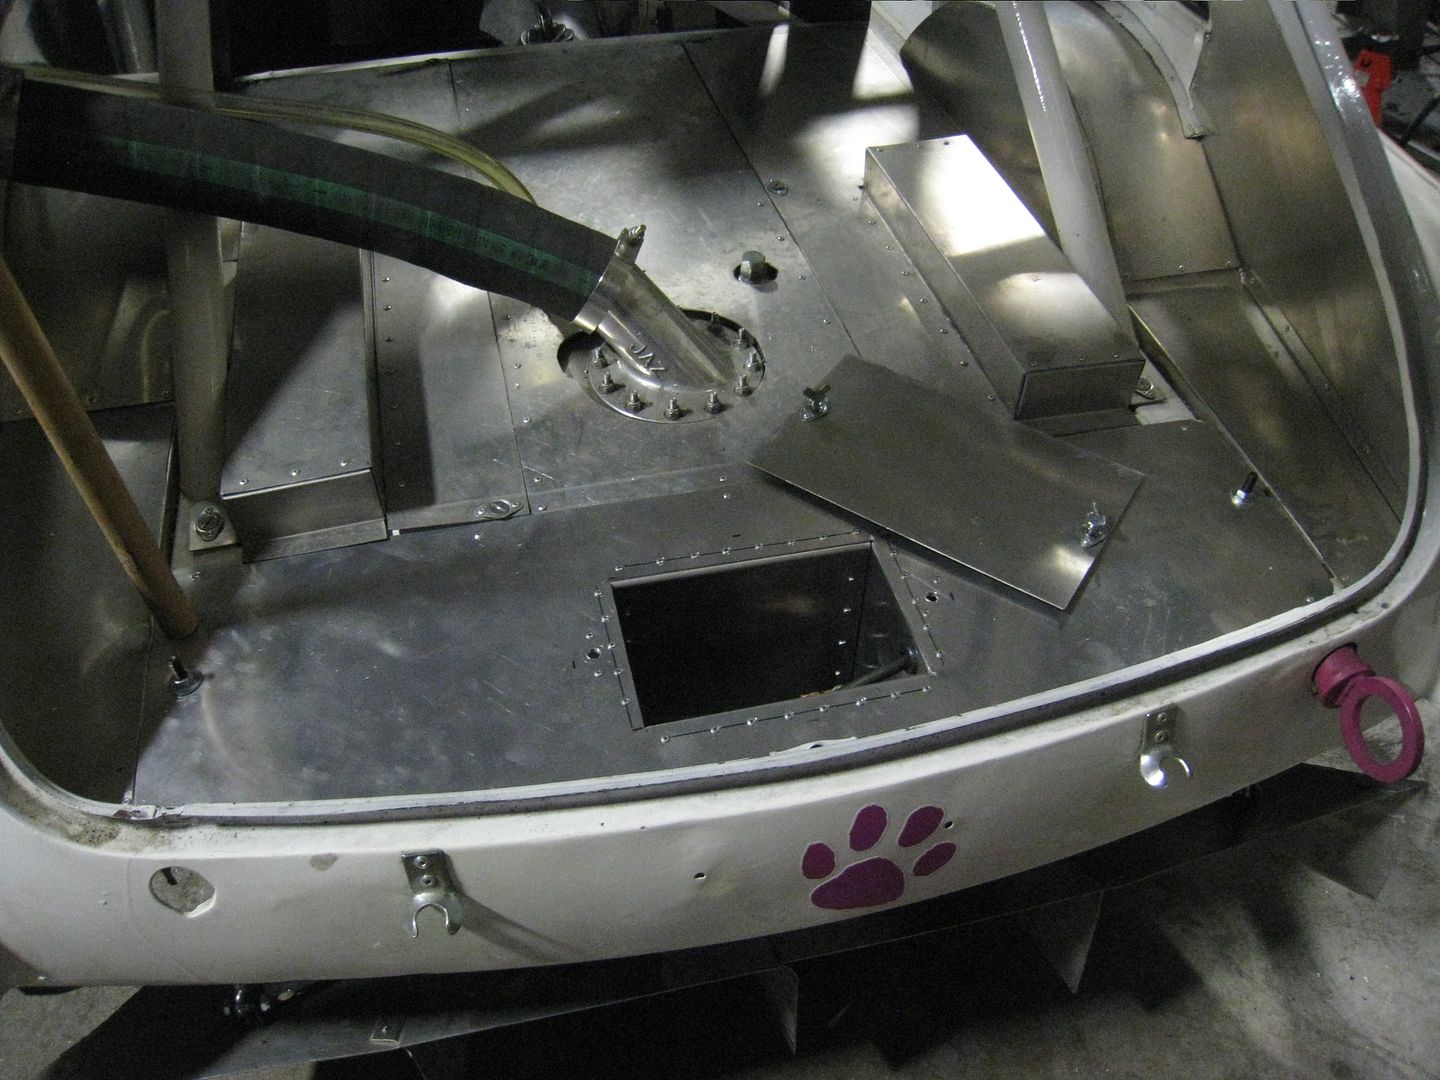
With the car all together, running and driving with the whole winter ahead of me, I have time to stare at it and wonder how I can make it better. This led me to purchase some software ($29.99!) which allows me to punch in all my data and it spits out results about roll center, anti-squat, roll stiffness, etc and I found some interesting things. The biggest thing is that my front roll center is 3" (good) but my rear roll center is "14 (bad). No amount of adjusting of my tri-four link suspension was going to correct this so I have decided to just chuck the whole thing and start fresh with a new, and better design. I chose a 3 link suspension with a Watts linkage because it's light, fully adjustable for roll center, squat etc and I can use all my old rod ends and bars. The 3 links will be two lower links in the same location as the current lower bars and one top link from the middle of the diff to a crossmember. Since I am making my own mounts, I am moving the lower front mounts so I can make the lower bars 2" longer, which reduces the arc that the rear end moves in and should make the handling more predictable. I included a picture of a Watts linkage. The red part is the crossmember that holds the pivot and the the black rods attach to each side of the diff. The center of the pivot becomes the roll center and if it's adjustable up and down, the roll center is adjustable up and down. 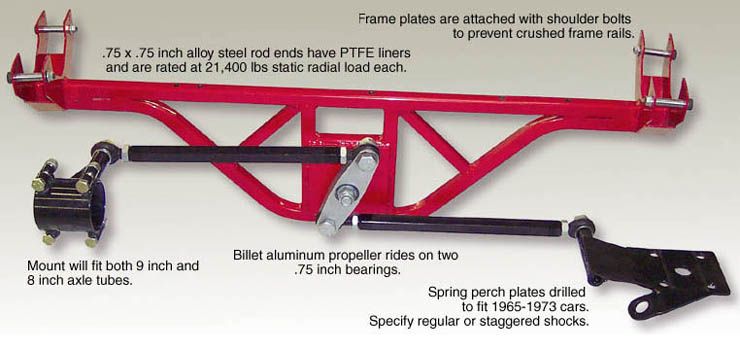
Here is the new top link and the right side will be welded to the crossmember and the left side will be welded to the diff. 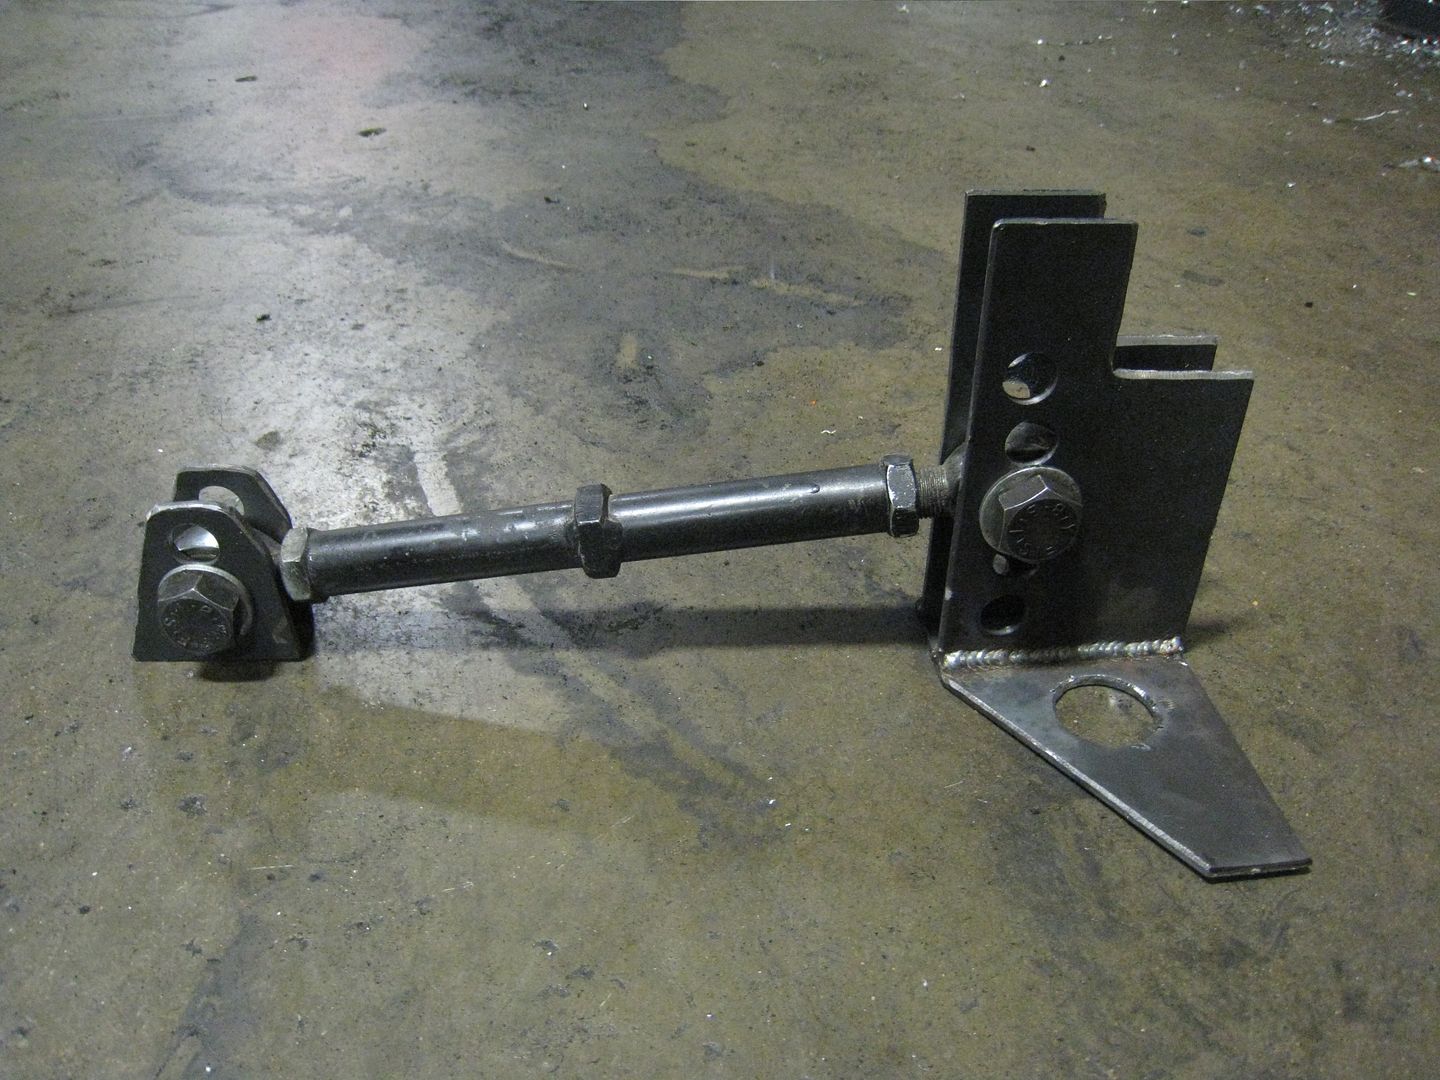
And the new front brackets for the lower links, with holes cut in an arc to match the lower bars so I don't need to adjust bar length when changing mounting holes: 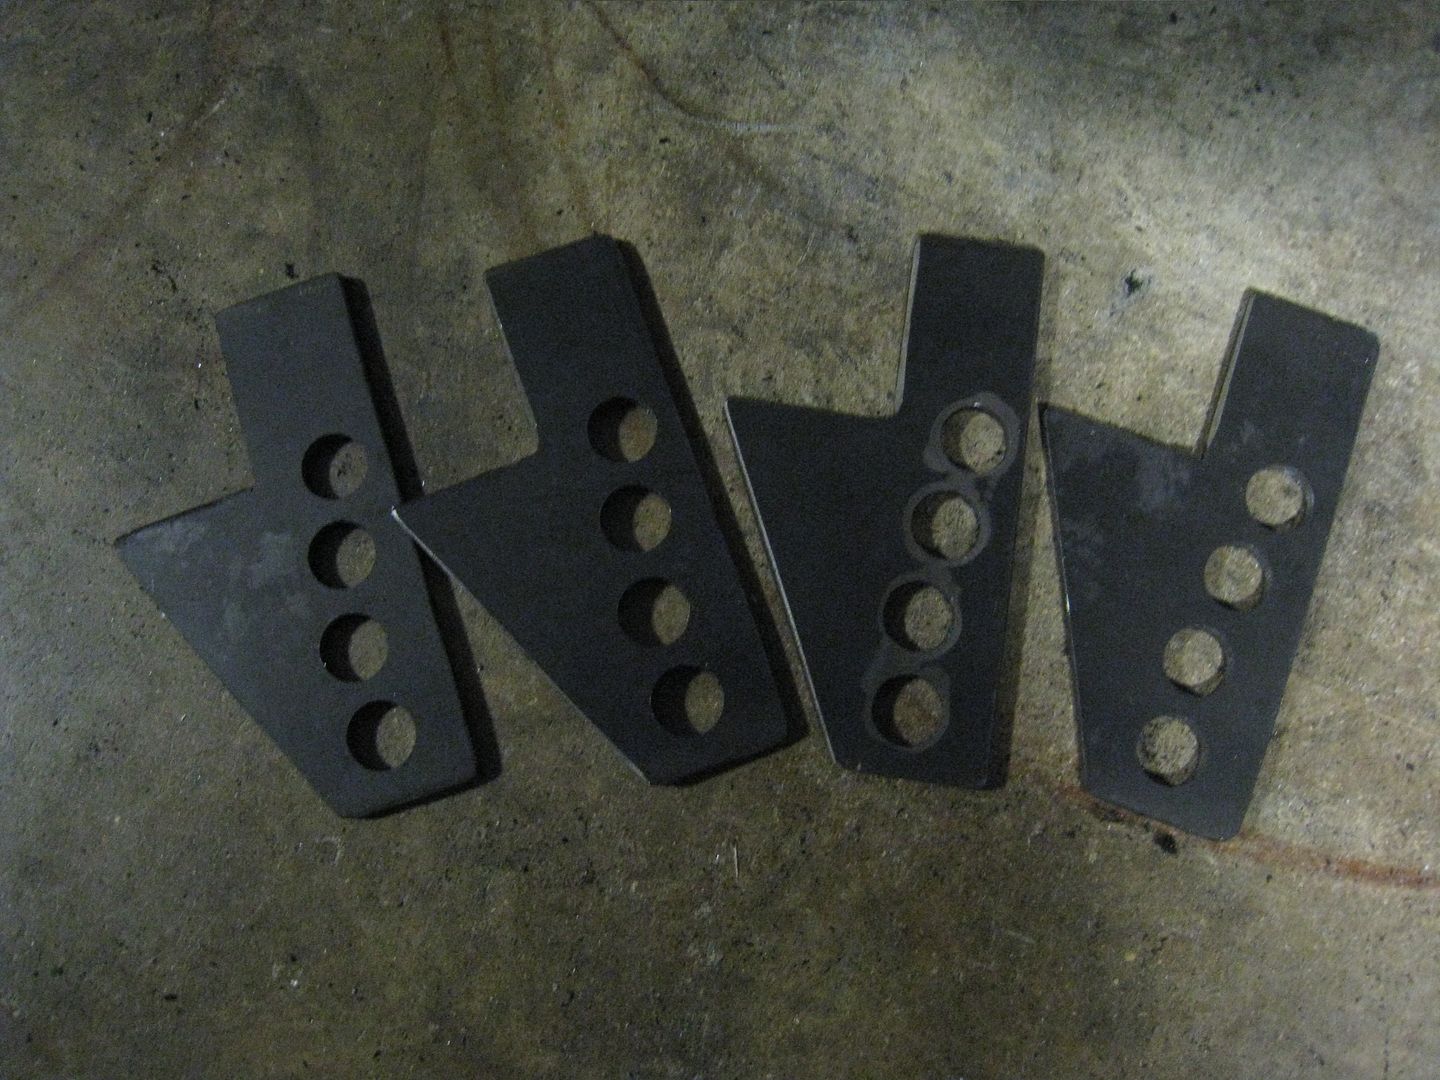
And I had a chance to weld all the mounts into the car: 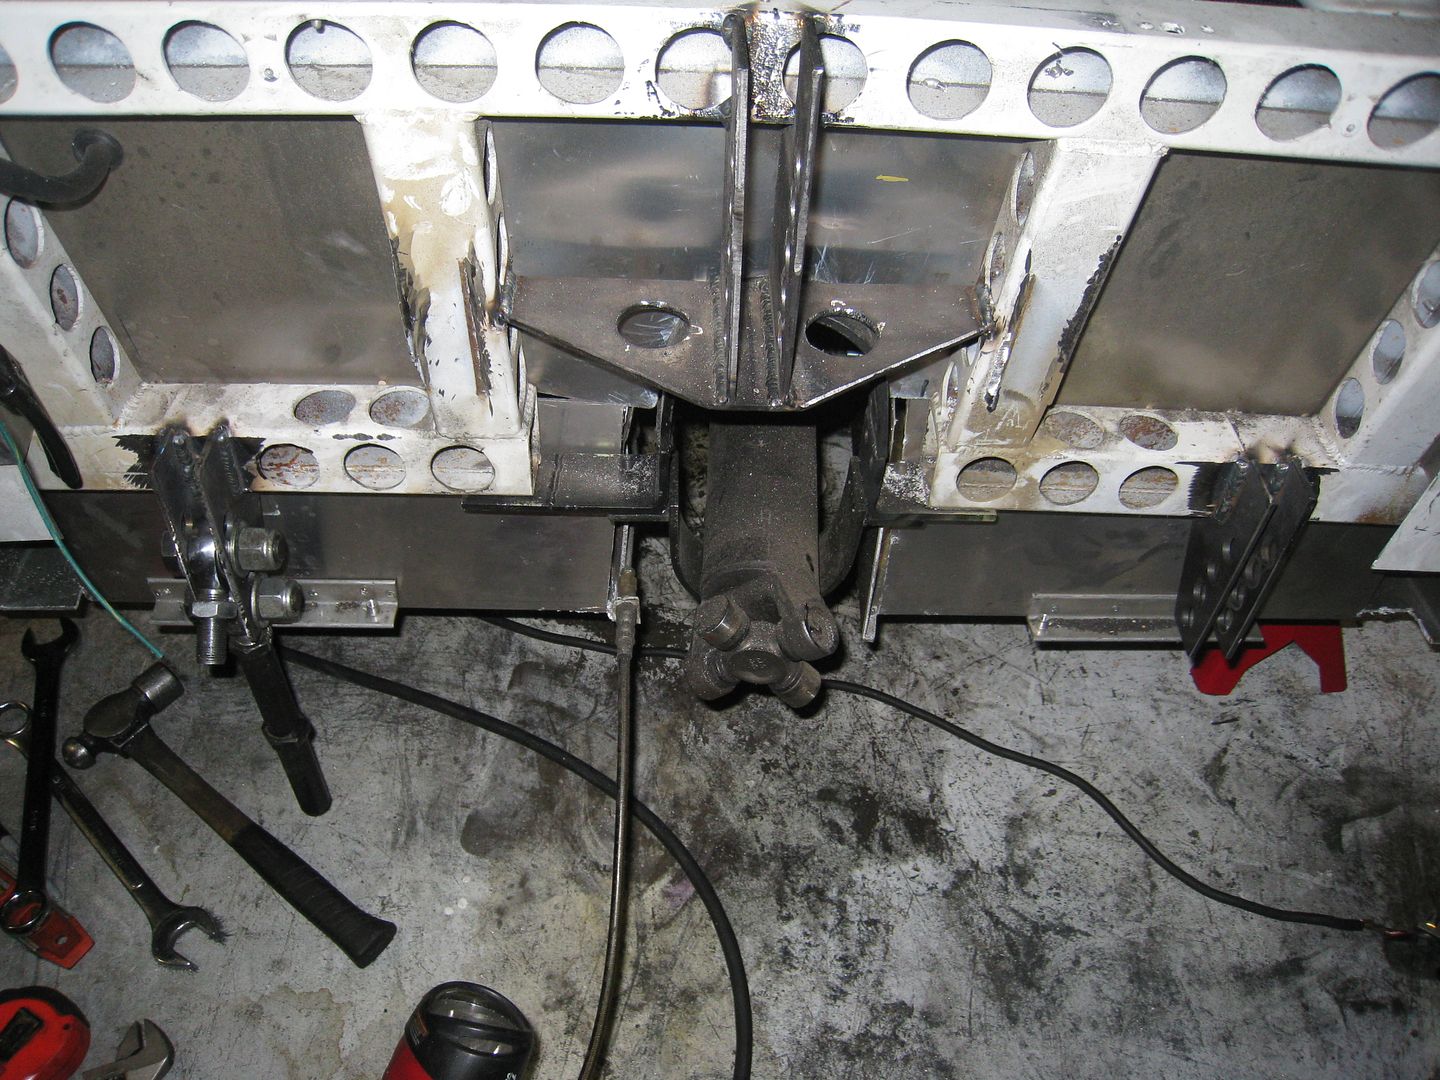
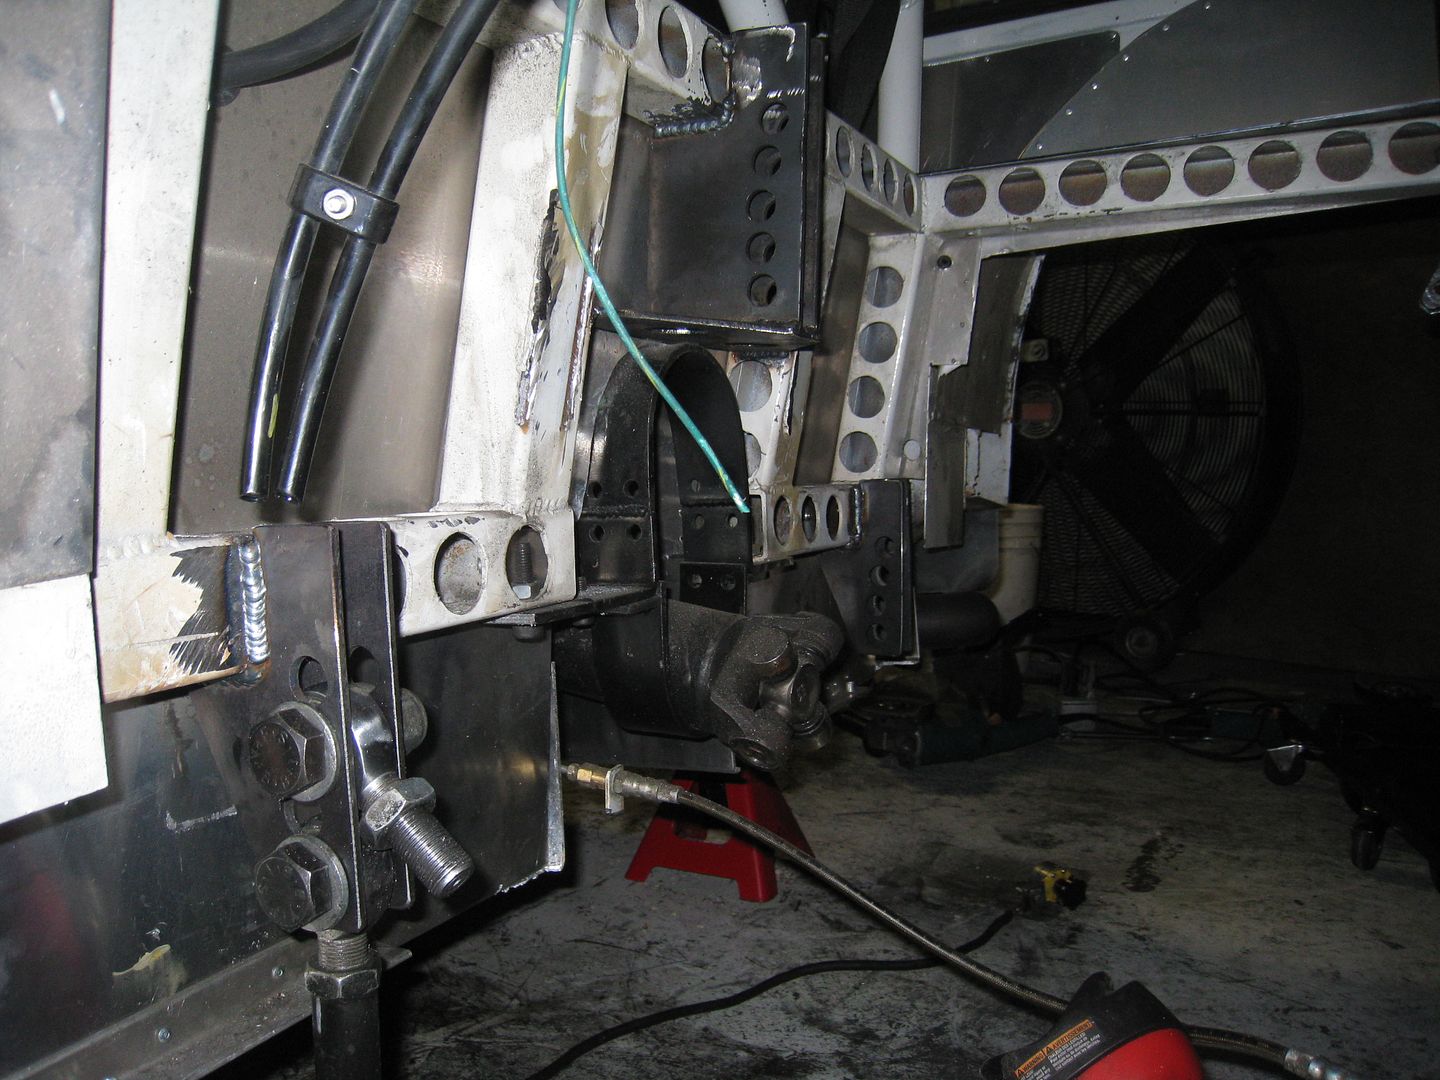
It turns out that a Watts link will only get my rear roll center down to 6" or 7" and I want to at least match my front roll center which is 3". There is a suspension system called a Mumford link but it's overly complicated so I decided to go with a Woblink. I built a Woblink and it's not complete yet but here's a sneak peak at it. I know it's weird looking with the two links going off to one side but it works. 
I spent all of Christmas Day working on the bracket to hold the Woblink in place, and here it is. I also included a video which helps make sense of how the Woblink works. The bracket is made from 3/16" steel and has some stiffening done to it but because it has to take the entire side to side force of the rear suspension, I added braces that go under the diff and tie into the front suspension mounts 
[www.youtube.com] I welded the new crossmember in and decided that adjusting the roll center was going to be too difficult to do between runs once the diffuser and everything was bolted on. I built a screw jack into the crossmember and now I simply have to turn the rod up or down and it moves the roll center. Since I weighed the car last I added a ram air system, a tach, bigger battery, belly pan and the new rear suspension but removed both sway bars-this stuff added 108 lbs, which is disappointing. Still, I think the benefits of all the changes far offset the extra weight. 
I needed to build some custom tools to use on the car so today I tackled a couple of tools that will make working on the car a whole lot easier. The first thing I needed was a way to jack up the back end of the car, there was simply no place to put a floor jack. I built a folding steel piece that slides into the rear tow hook holes and has a round plate that fits perfectly onto my floor jack. 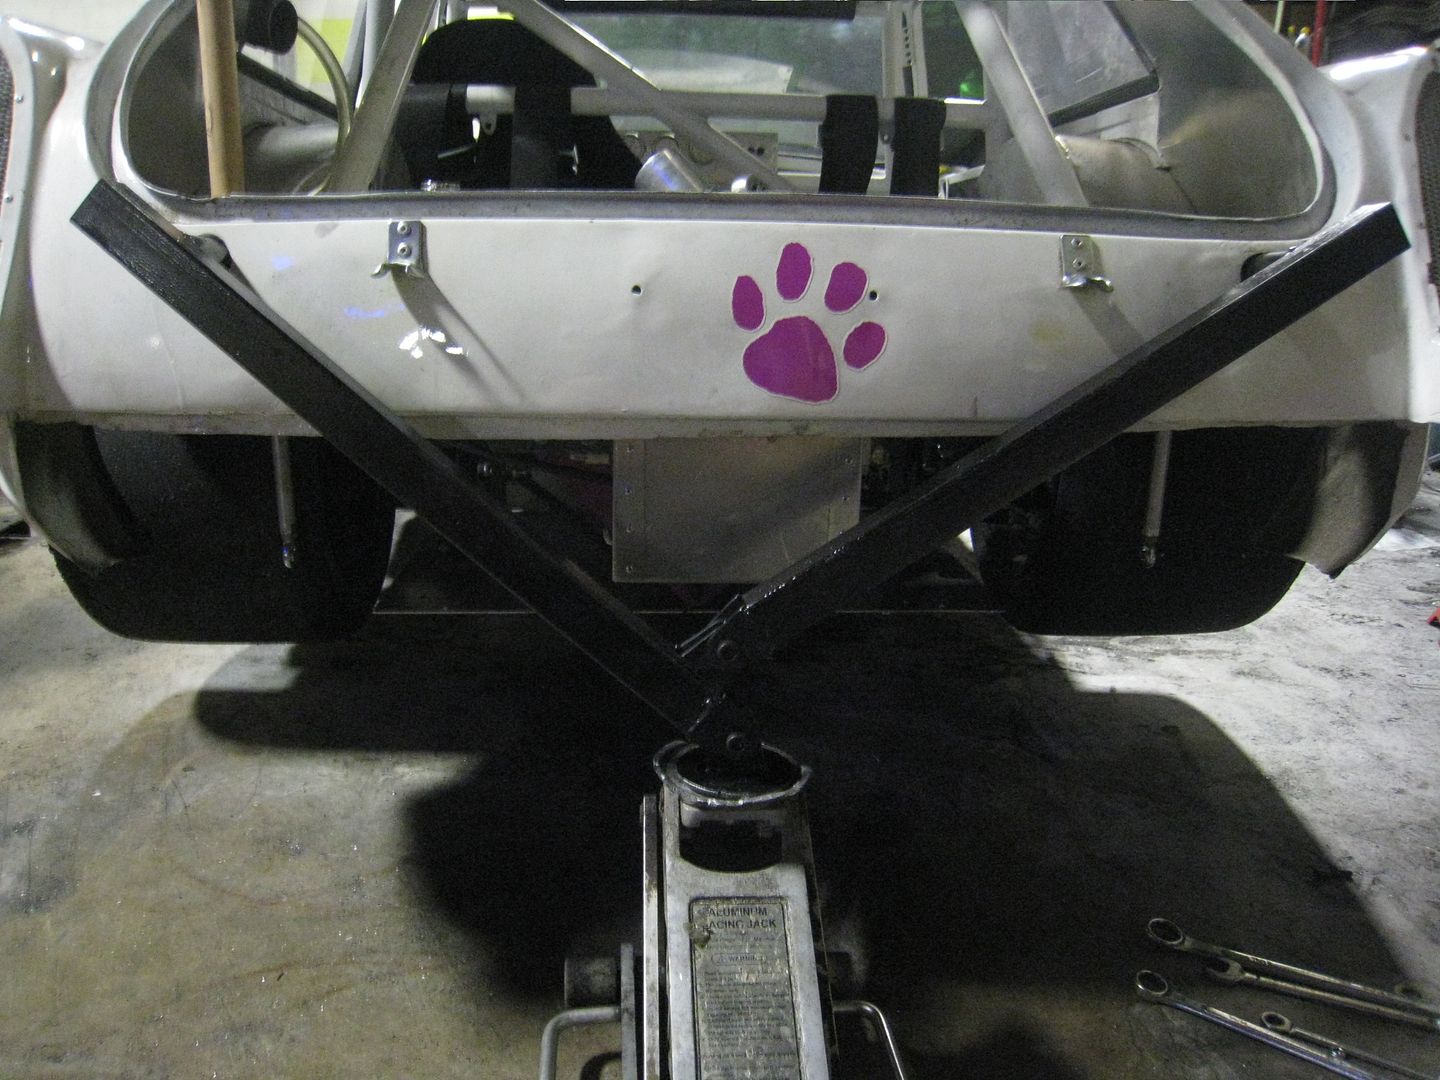
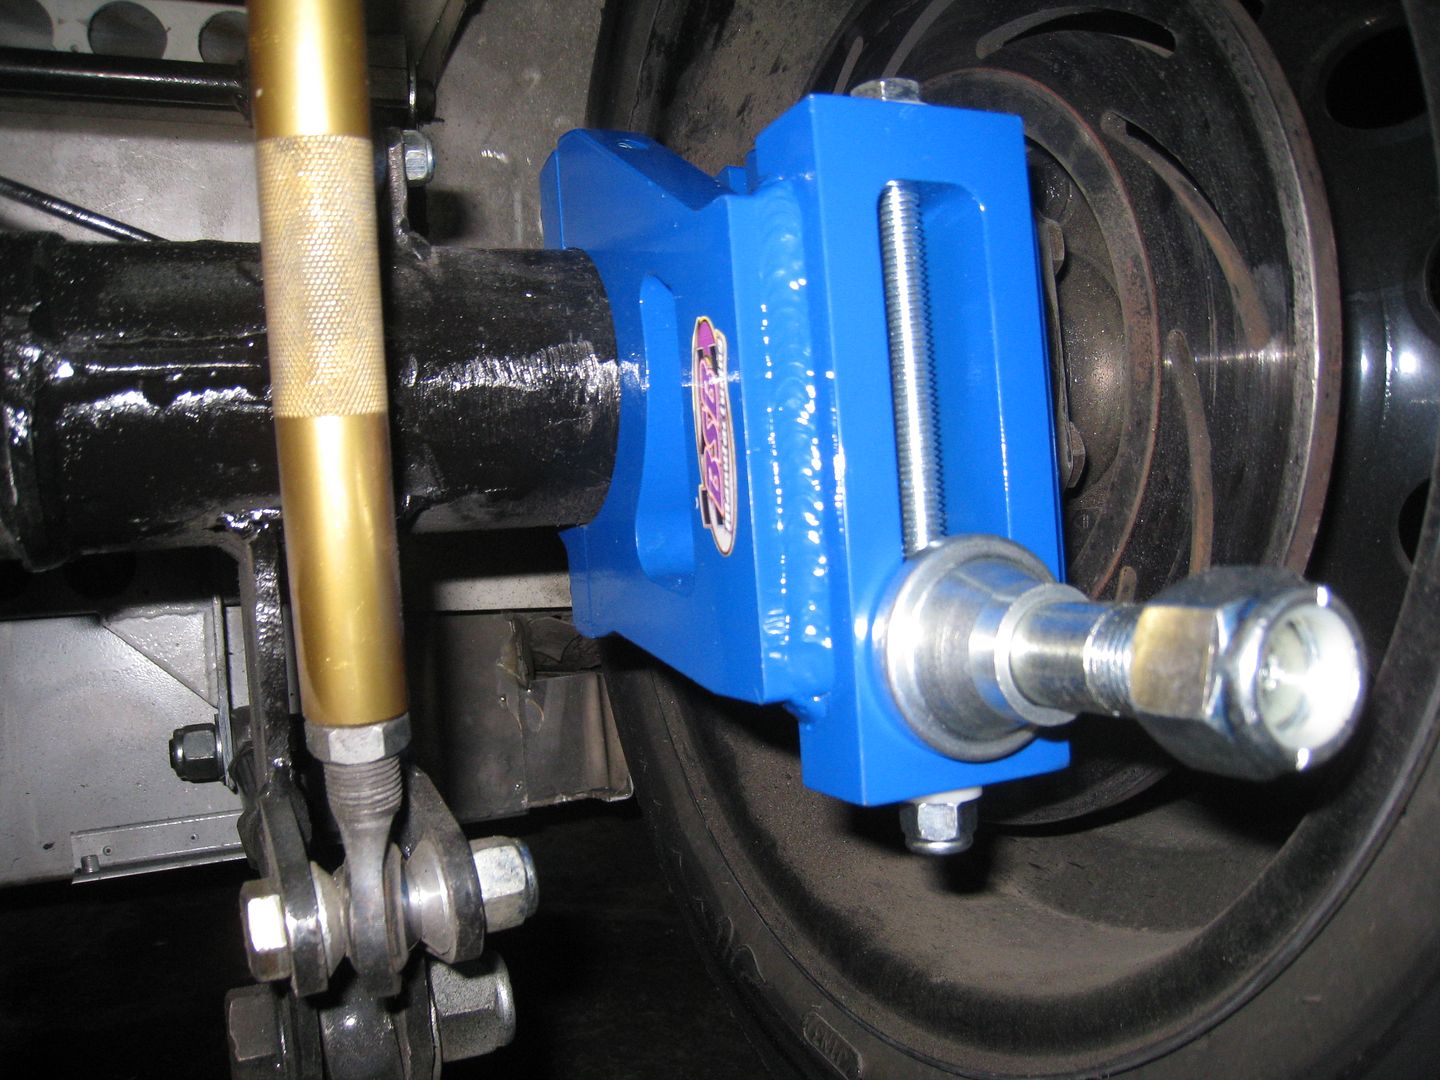
The rear rocker arms have 12 different motion ratio settings and the front have 16 and getting an accurate measurement of how much a given movement of the wheel equates to movement of the shock has been difficult. It's very important for the suspension software I use that I know exactly how much the shocks move for every inch the wheels move up and down. I built this telescoping tool that bolts in the place of a shock and has what's left of a Vernier caliper welded to the side so getting measurements down to half a mm is possible. I just have to note the length of the tool then lift a wheel a known amount and check the tool again, which tells me the motion ratio. 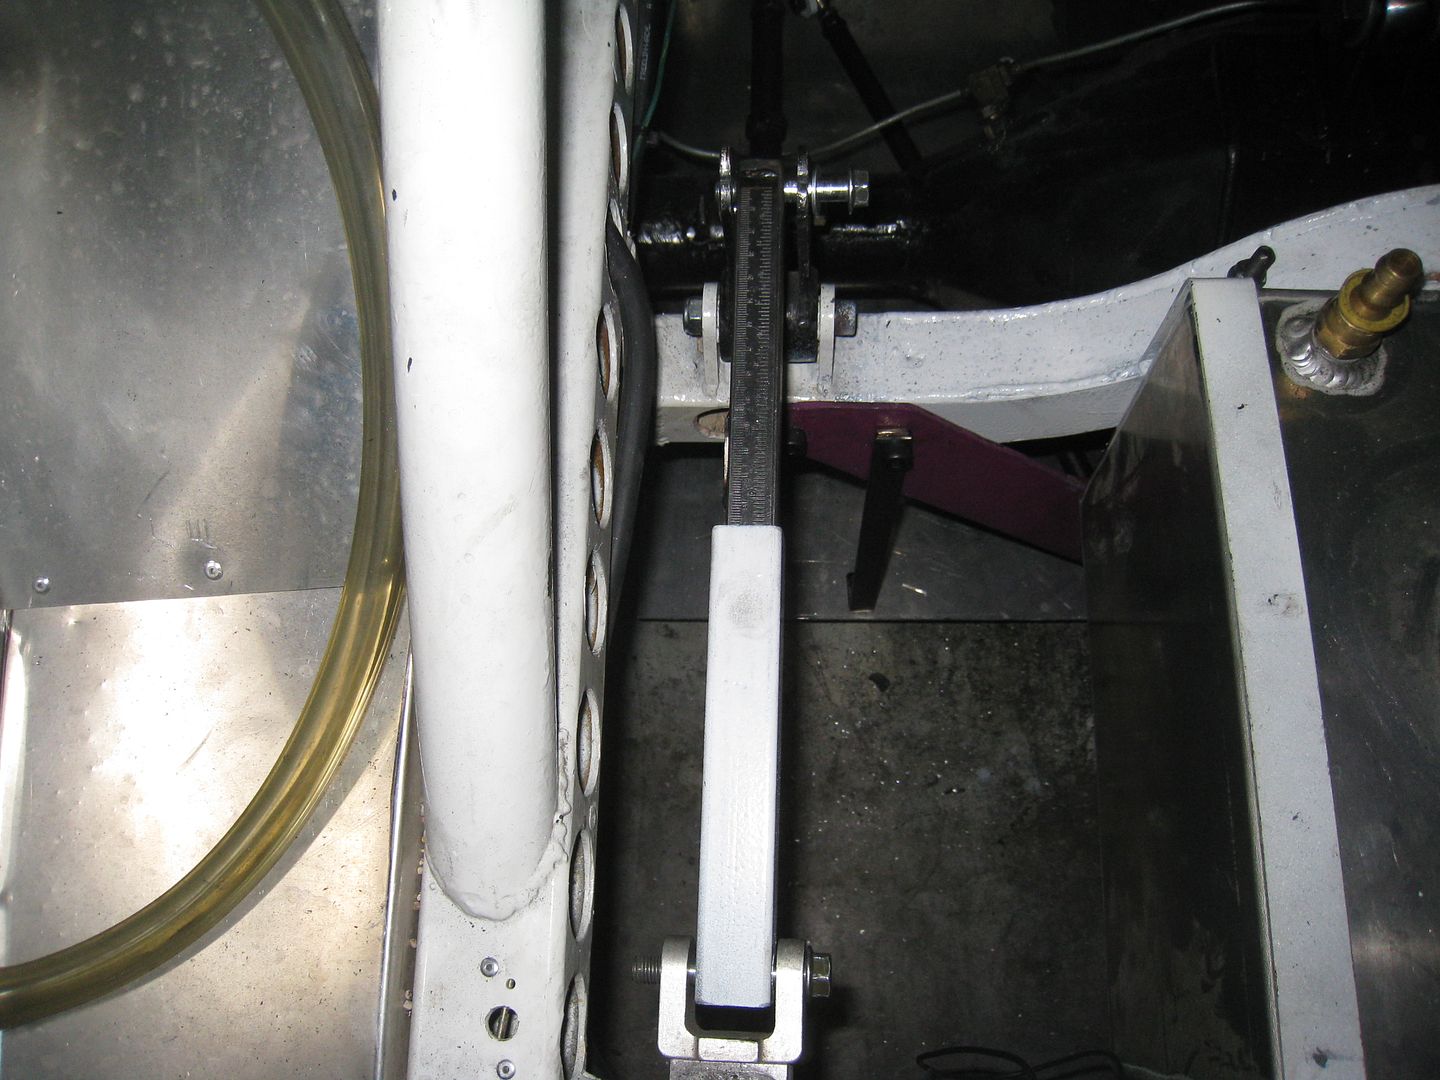
Project update: I drove it for the first time with the new rear suspension and it feels completely different. The terminal understeer of before is completely gone and I no longer have to punch the throttle to get around the tight kart track. Somehow the steering effort is much reduced and I haven't quite figured that out. I will be tinkering with camber, roll center and track width so there is more testing to do. I took a video of the rear suspension while I did some laps and even with two lights on it, the GoPro is still a little dim-I included the video if you want to see it. [www.youtube.com] I needed to find my center of gravity so I followed the directions on Longacres website [www.longacreracing.com] and punched in the numbers. I inflated the tires to 40 psi and put the car on the scales with me in the car. I wrote down what the total weight and front weight was then lifted the rear of the car up exactly 12 inches and checked the front weight again. Once I punched in these numbers as well as front tire circumference and wheelbase, the calculator told me that my center of gravity is 17.35 inches off the ground. 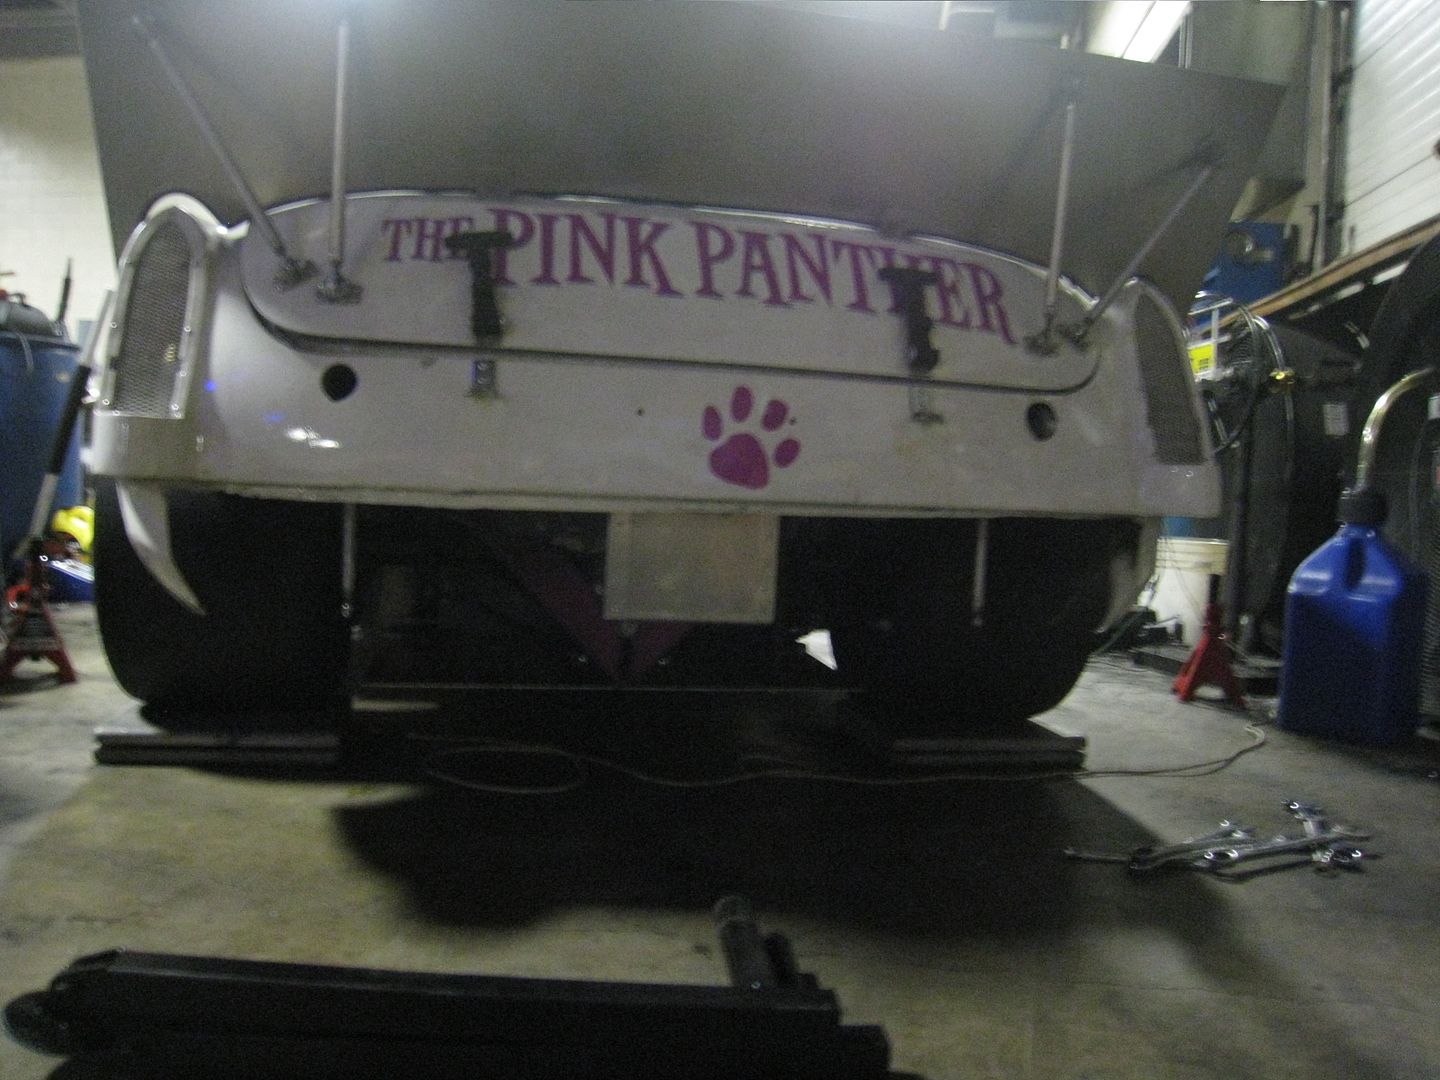
As most of you know, I put 15" wheels on the car because I needed to clear the brakes. Then I found out that the radial slicks I planned on running were actually no good for autocross because the radials don't like rapid turning (such as a slalom) like the bias ply slicks. The only tire company which has 15" bias ply slicks in the right widths is Avon, and they are more expensive than Hoosiers or Goodyears and have no contingency. The price difference between 13's and 15's will pay for a set of new rims so, I broke down and ordered a set of 13" rims from Diamond Racing wheels. I took a chance that I would be able to modify the brakes to fit. The wheels arrived and with some minor tweeking, I got them to fit over the brakes. Then it came time to order tires, and problems arose. The Goodyear or Hoosier tires that are supposed to be the hot ticket in D/EMod are actually designed for Formula Atlantic cars. This means the front tires are 9.5 inches wide and the rear are 13 inches wide. This is not a problem for cars like a certain green Bugeye which has only 41% of it's 1850 lbs on the front tires, but I have 49% of 2250 lbs on my front tires. Now, I can make the car work on these skinny front tires, provided that I don't overload tires designed for a car 650 lbs lighter than my own, but they would be a compromise. I started to look again at the Avons, which to be fair to Avon, cost about the same as Goodyears or Hoosiers as long as you stick to 13 inch wheels. However, the Avon rep advised me that the 13 inch tires are designed for cars up to 1600 lbs and the 15 inch tires would work better for me. So, I decided to go with the Avon 10.7/21.5-15 in front and 11/23.5-15 in back. At some point I may want some rain tires and I can put those on the 13 inch wheels. Despite my best efforts to move the steering rack back more, I couldn't move it enough to get any Ackerman out of it. Ackerman is when the inside front tire turns sharper than the outside front tire which is important in tight turns. The solution was to make the steering arms a little longer, which increases my turn radius (in theory) but will actually make the car turn better and easier (Briget will like that). I started by taking the MGB steering arms off and making a template: 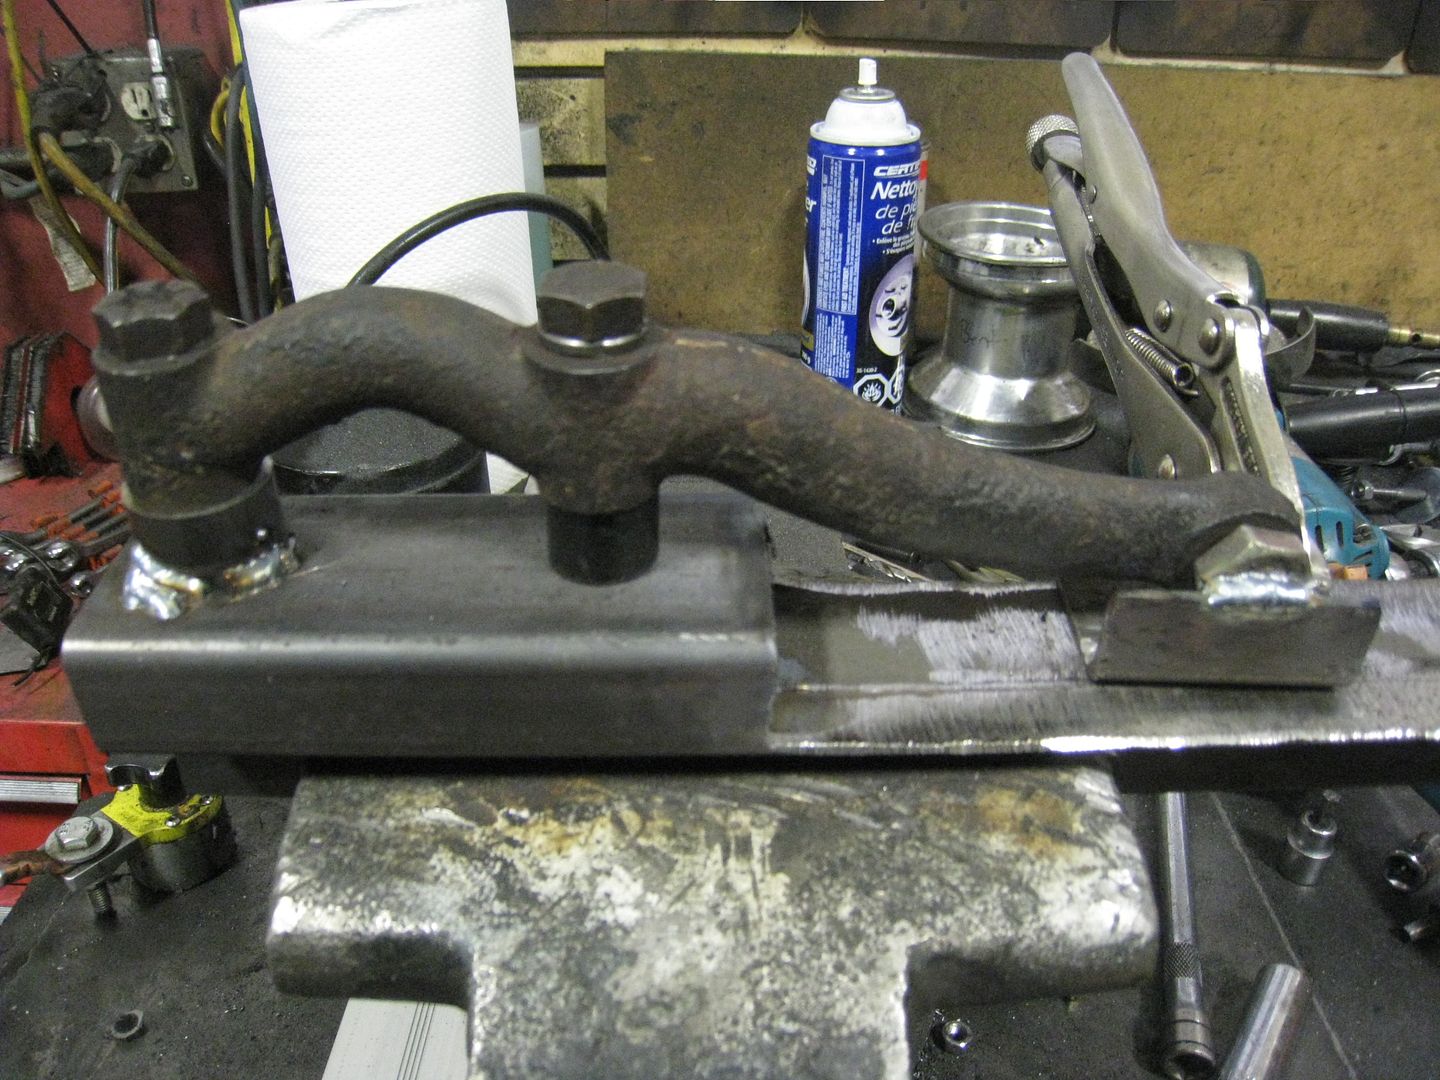
Then I moved the part where the tie rod bolts to over one inch and clamped it in place. I used 1/2 inch wall tubing and flat bar to make the new arm: 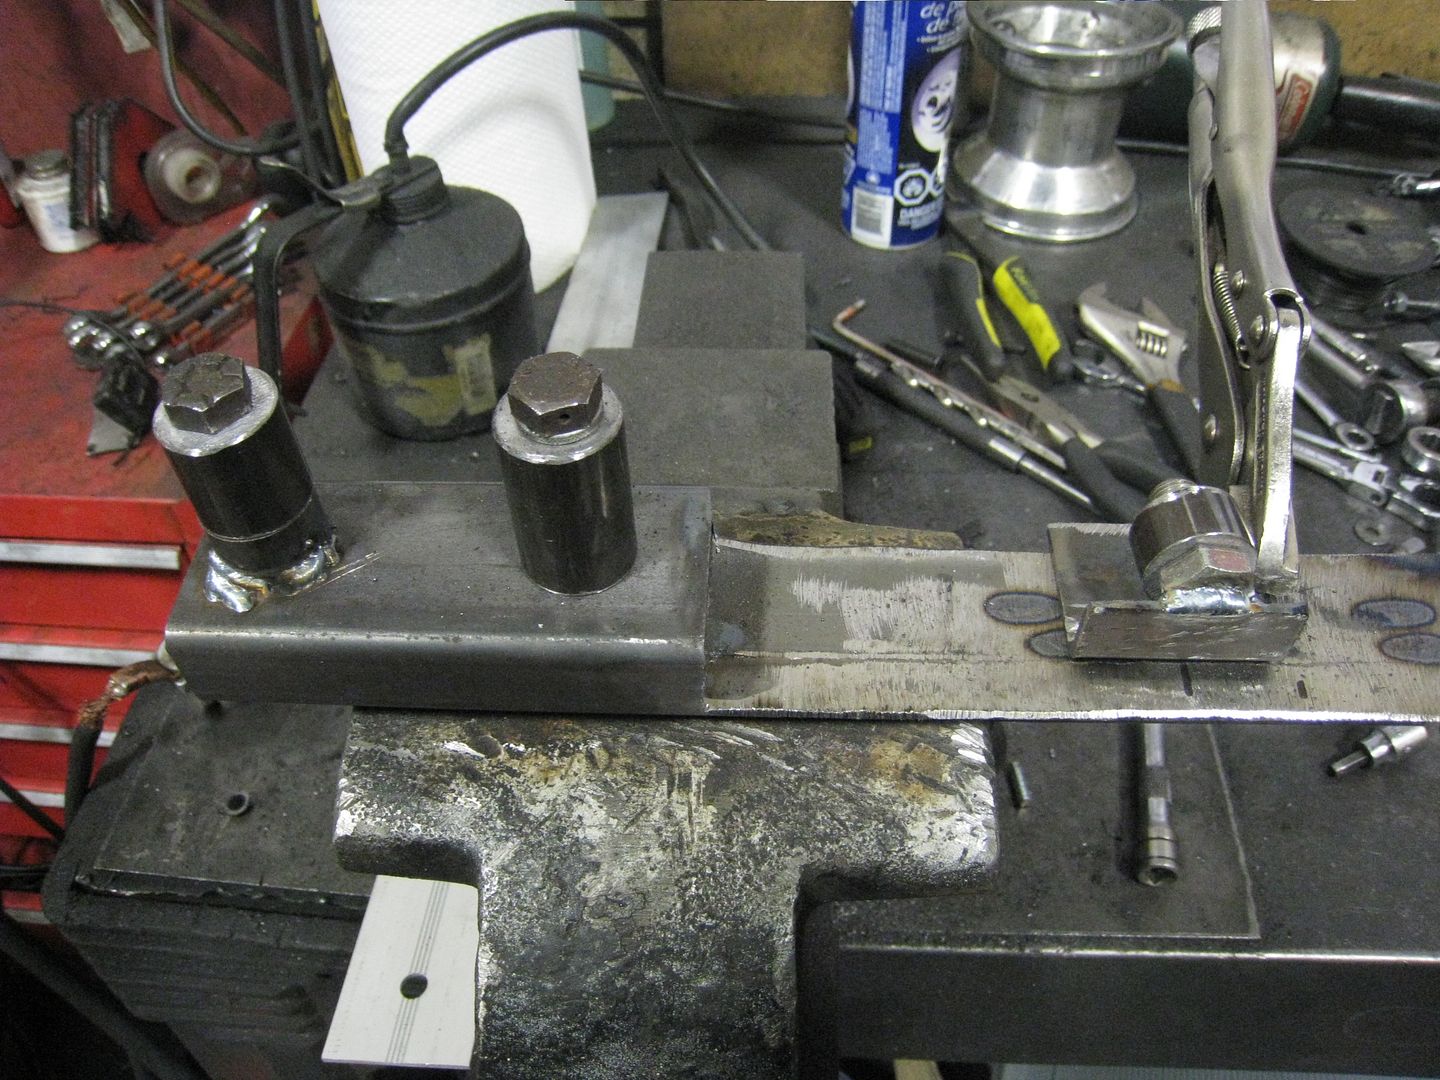
Here are all the pieces, ready for welding: 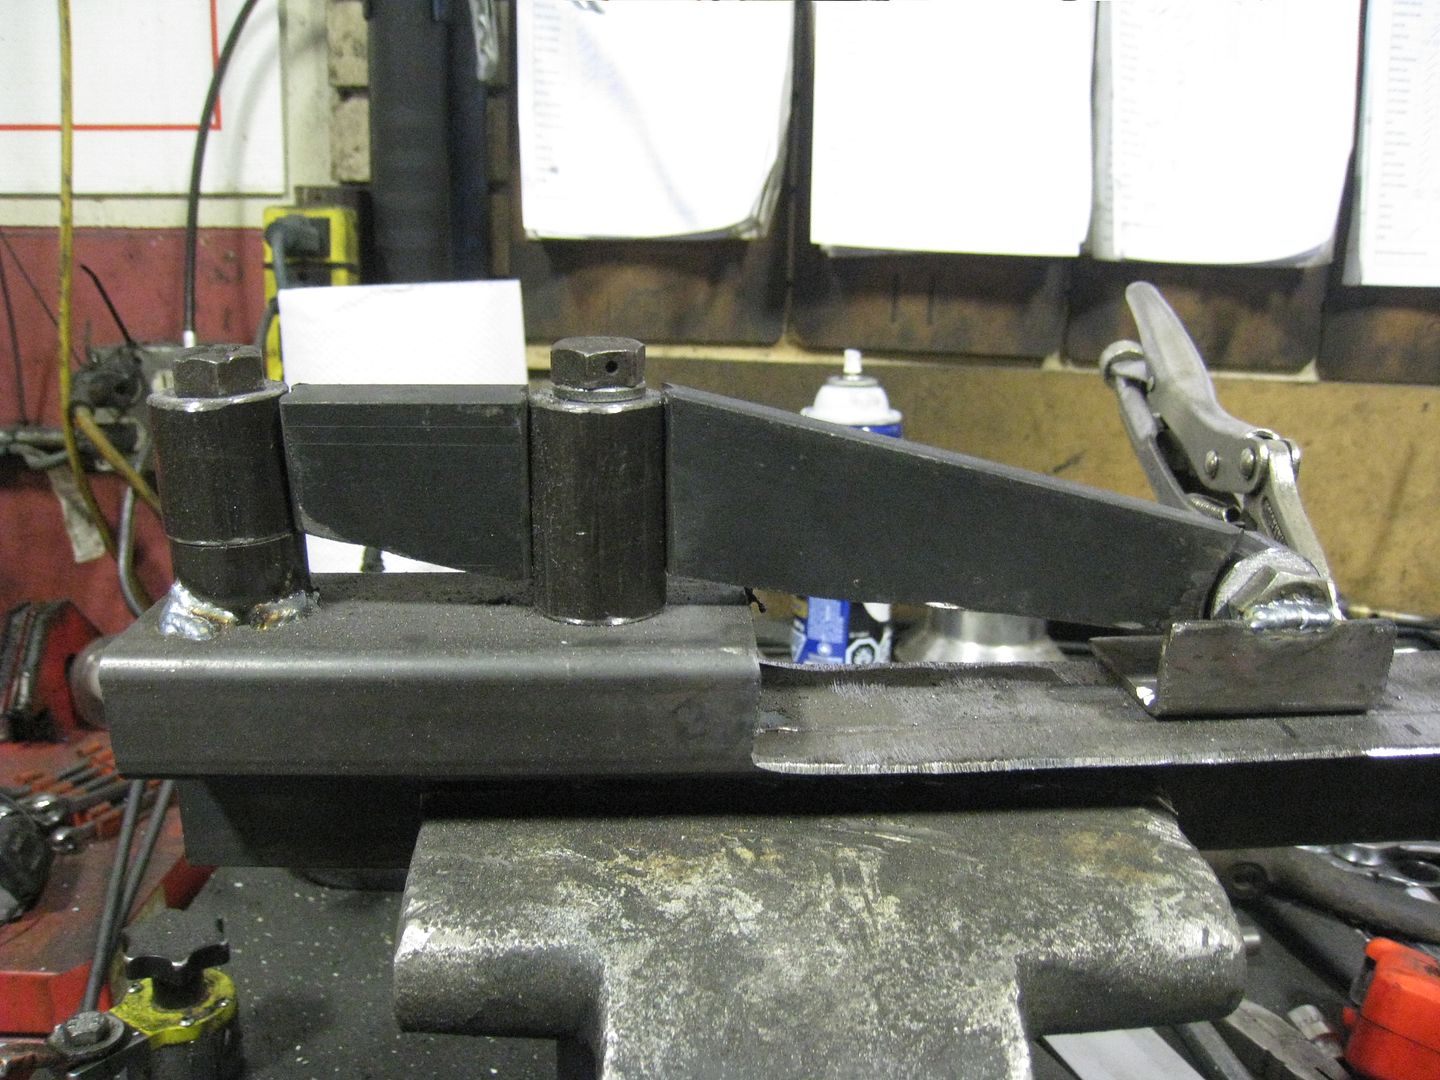
And installed on the car: 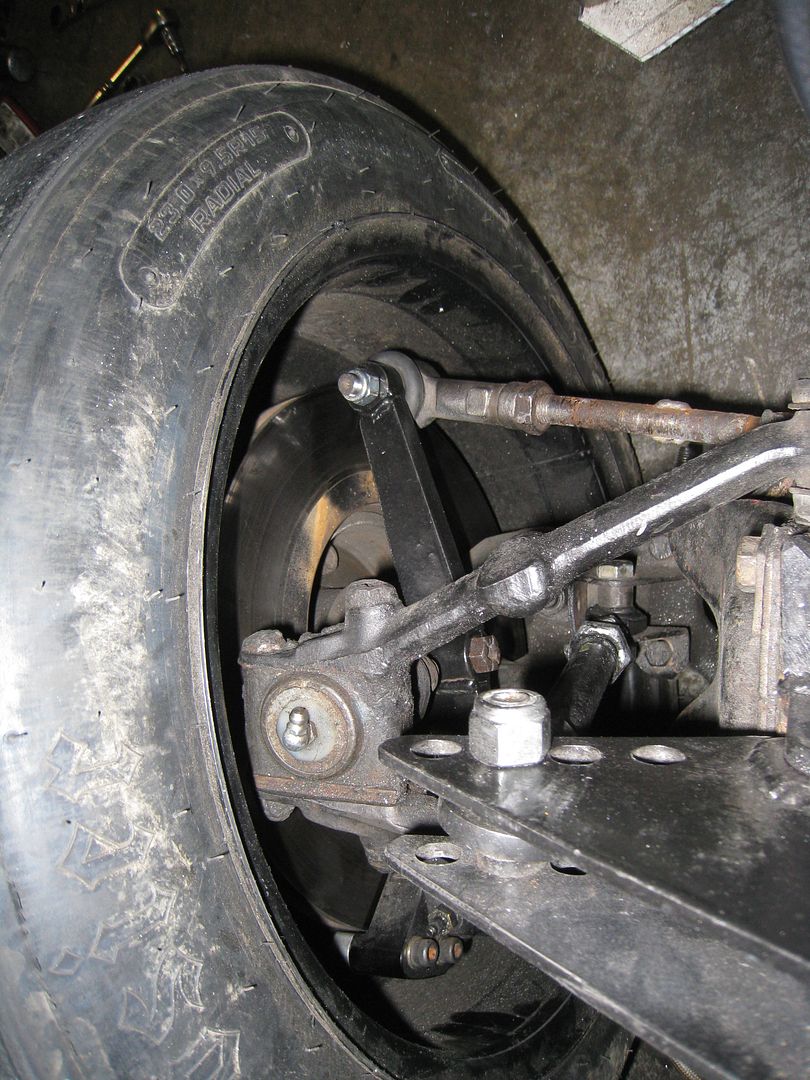
I haven't driven it yet but now I can push the car with one hand when the wheels are cranked. I took the car for a test drive and after doing some rapid sawing back and forth of the steering wheel, I was not convinced that it would be possible to drive through a slalom without moving my hands on the steering wheel. A cheap and easy fix is adding an Afco 2:1 steering quickener between the steering wheel and rack and pinion steering. It is a beautiful little piece and weighs only 1.8 lbs. Here's a pic of the quickener, it's the blue thing in the middle: 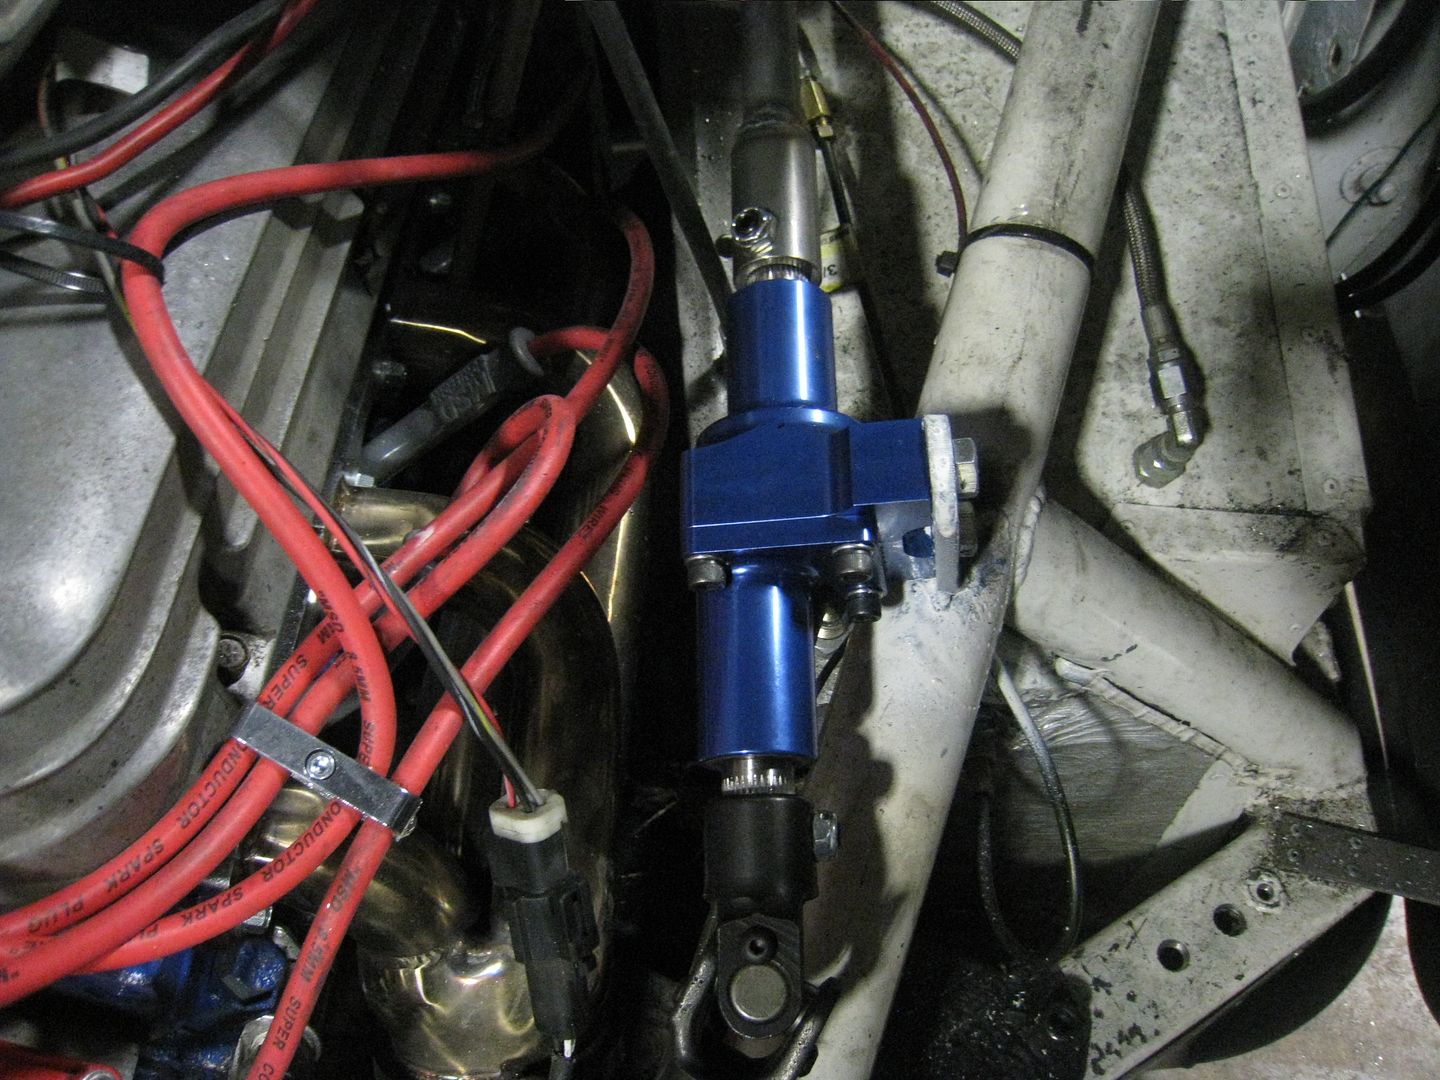
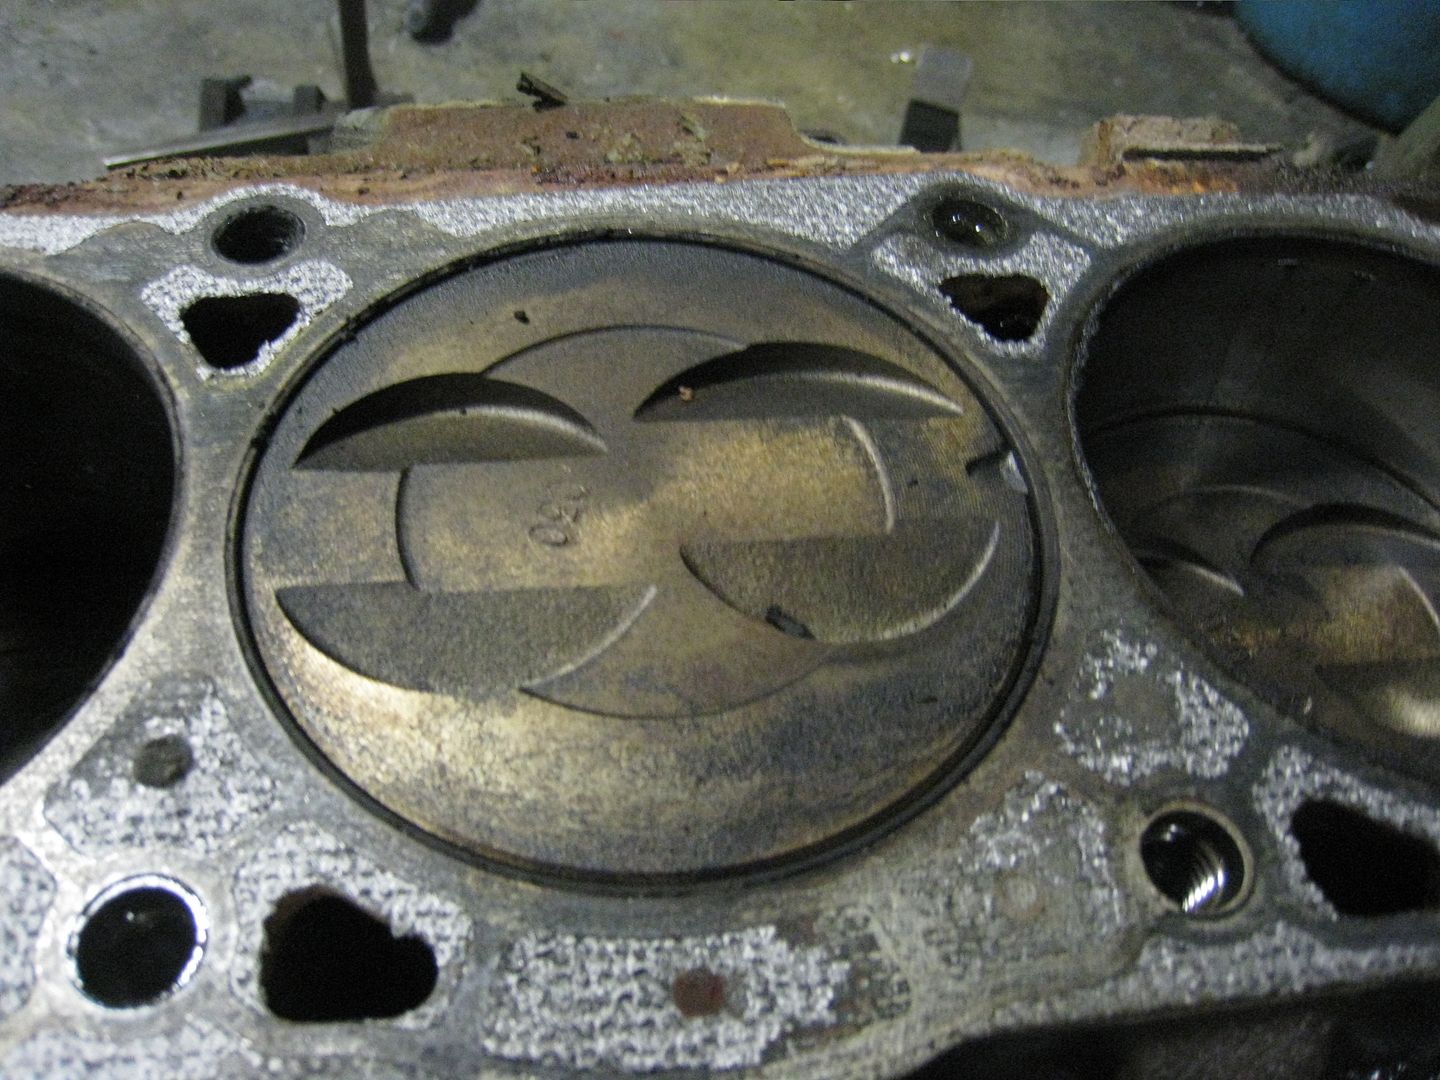
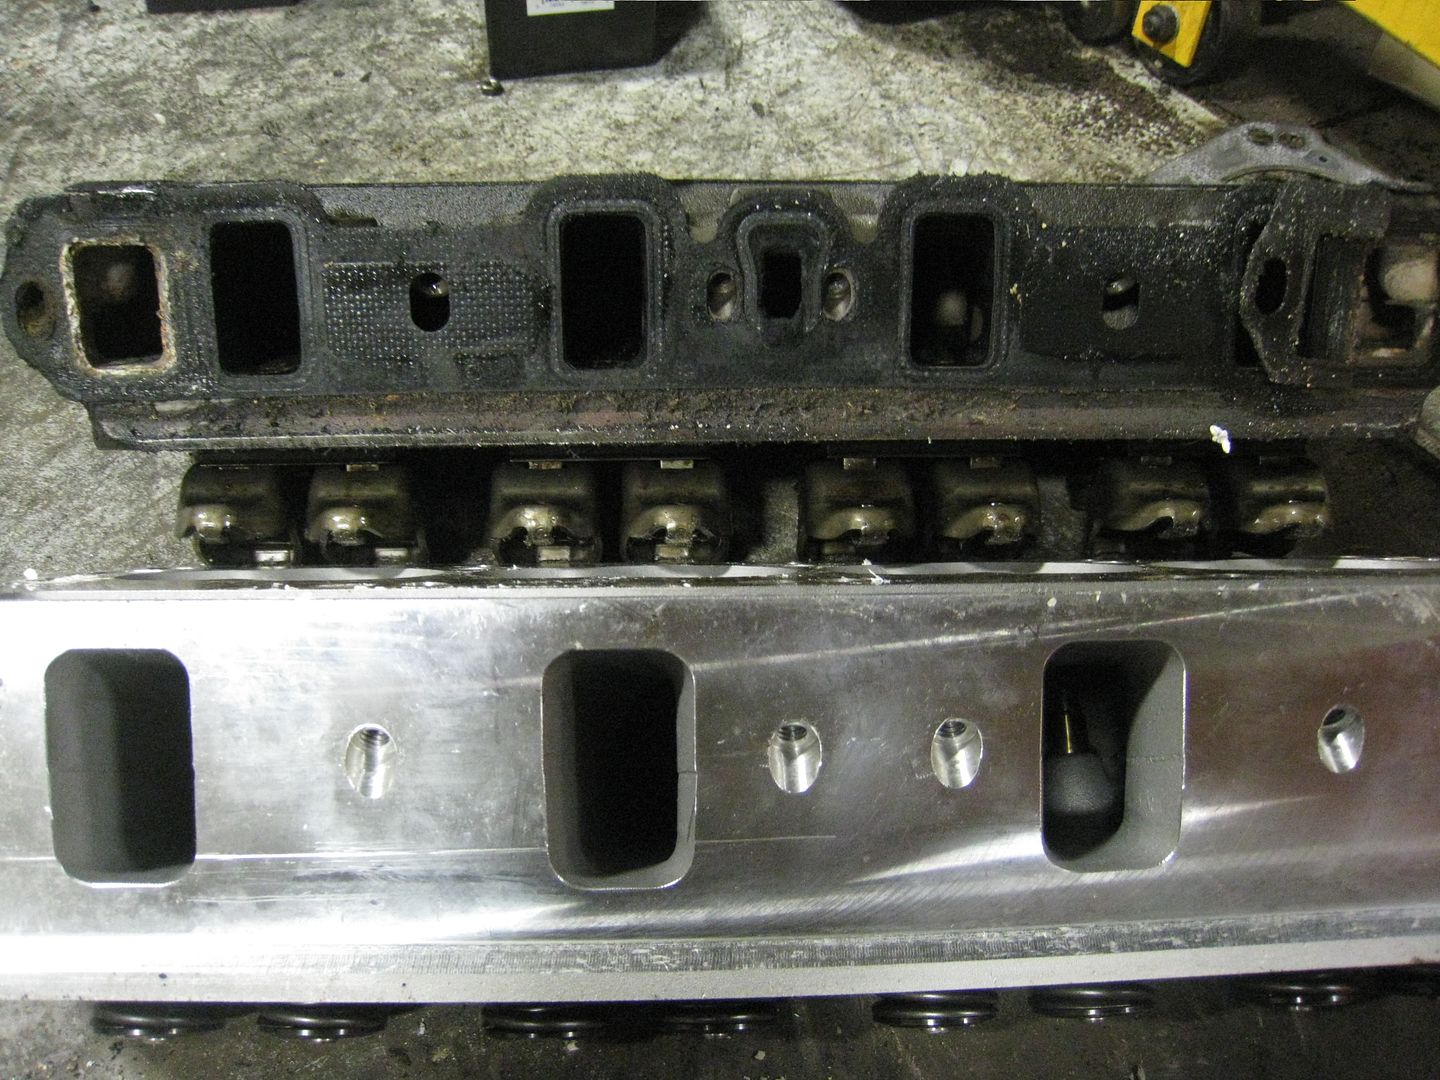
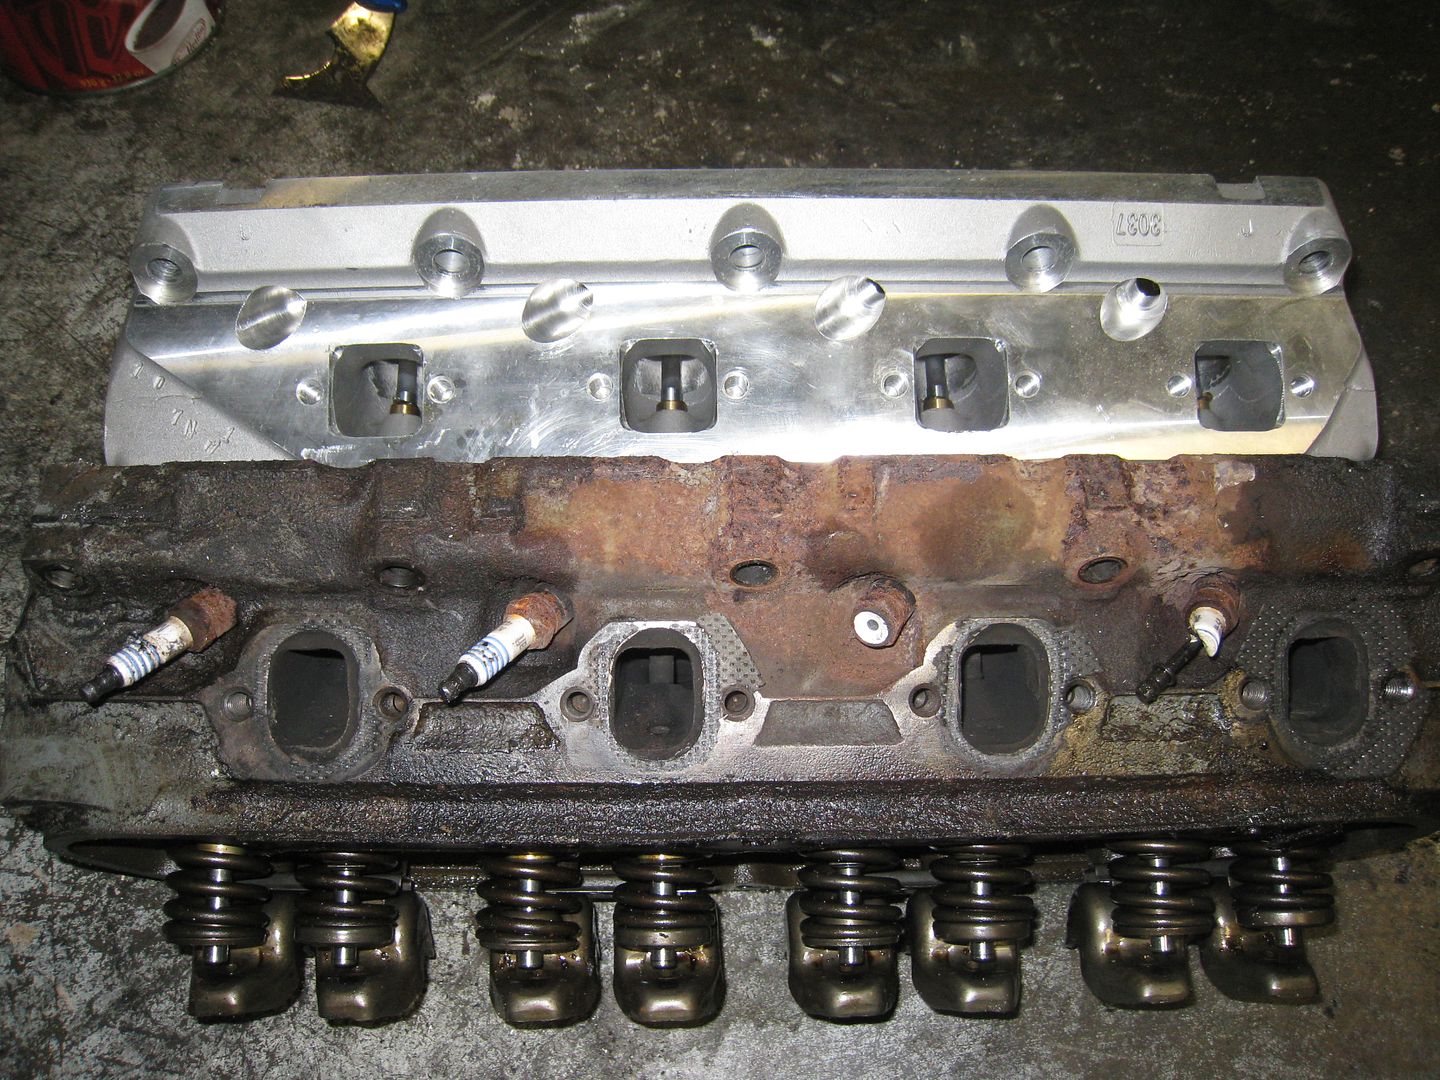
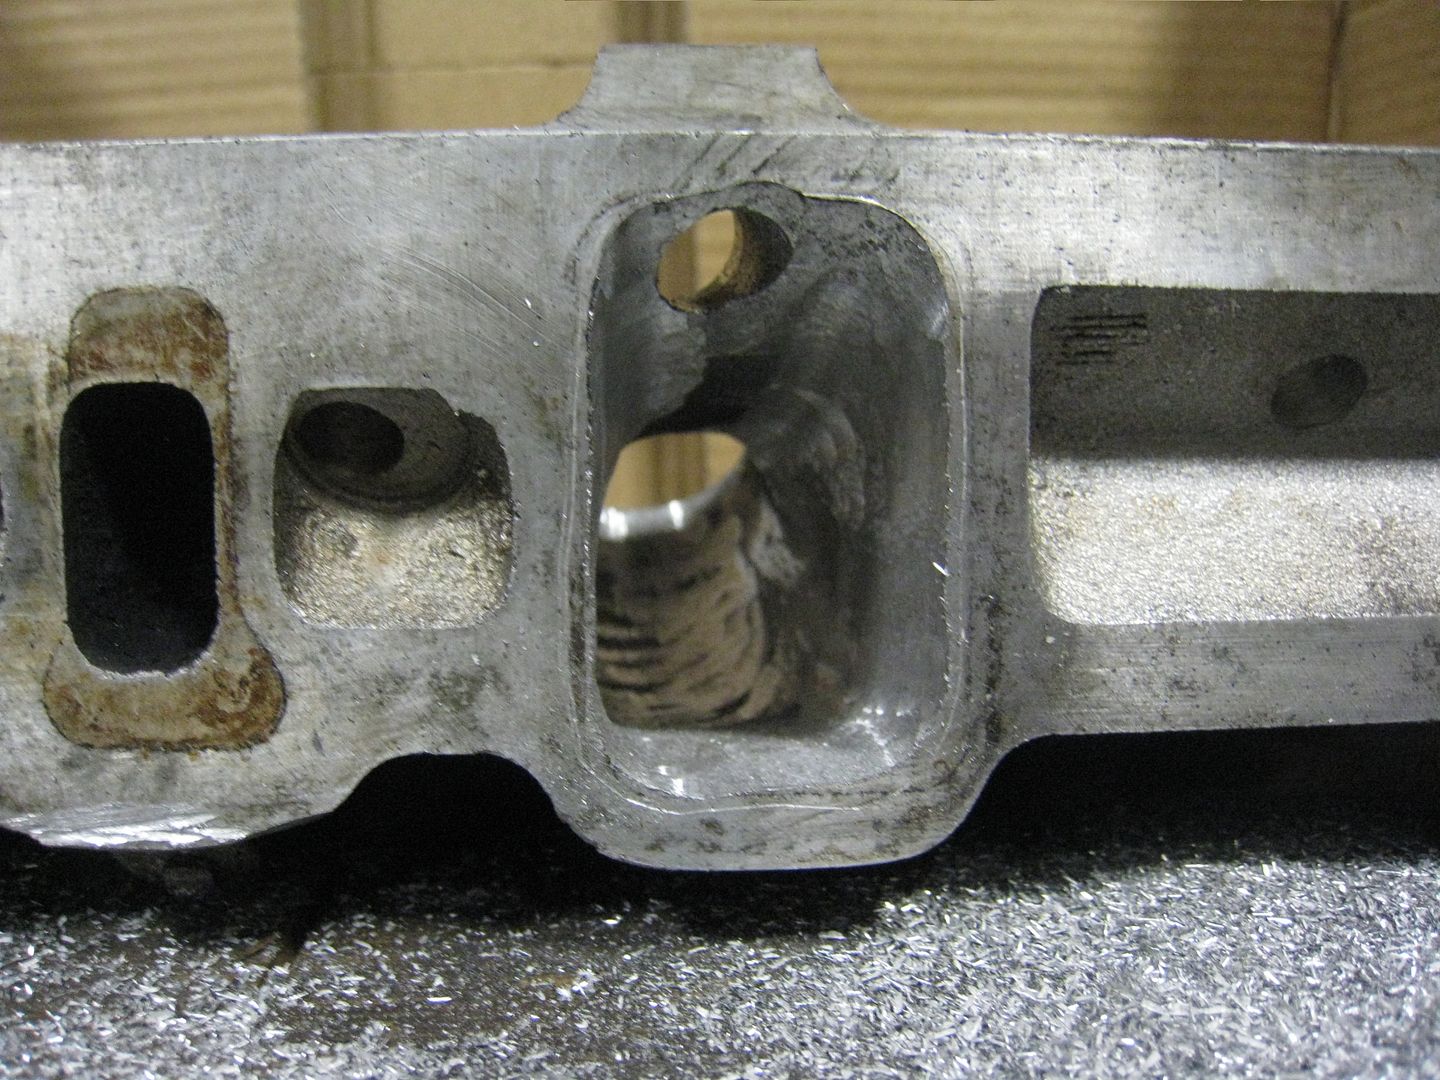
Here's a video of before and after: [www.youtube.com] A bit of background. When the Jag engine let go, a generous friend gave me a recently rebuilt Ford 5.0 that was supposed to have good pistons, cam and ported/polished heads. The problem was that it did not have a roller cam but just an old school flat tappet cam. I found a super cheap but high mileage 1986 5.0 in the paper that had the OEM roller cam in it so I bought that, cleaned it up and stuck it in the car. I had ideas to put a better cam and heads on the 86 5.0 but it turns out to be the one year where Ford used flat top pistons and only 86 heads will work. I decided to pull apart the rebuilt 5.0 out and check out exactly what I have. The bad news is that the heads are a small port, small valve design and reports of being ported/polished were greatly exaggerated. The good news is that the block is set up for a roller cam, the pistons are high quality and have valve reliefs(for big valve heads) and the crosshatch pattern is still in the cylinder walls like it was rebuilt last week. I think I will be hunting for a deal on some good heads and a really aggressive roller cam. Here's some pics of the small ports and the good pistons: 
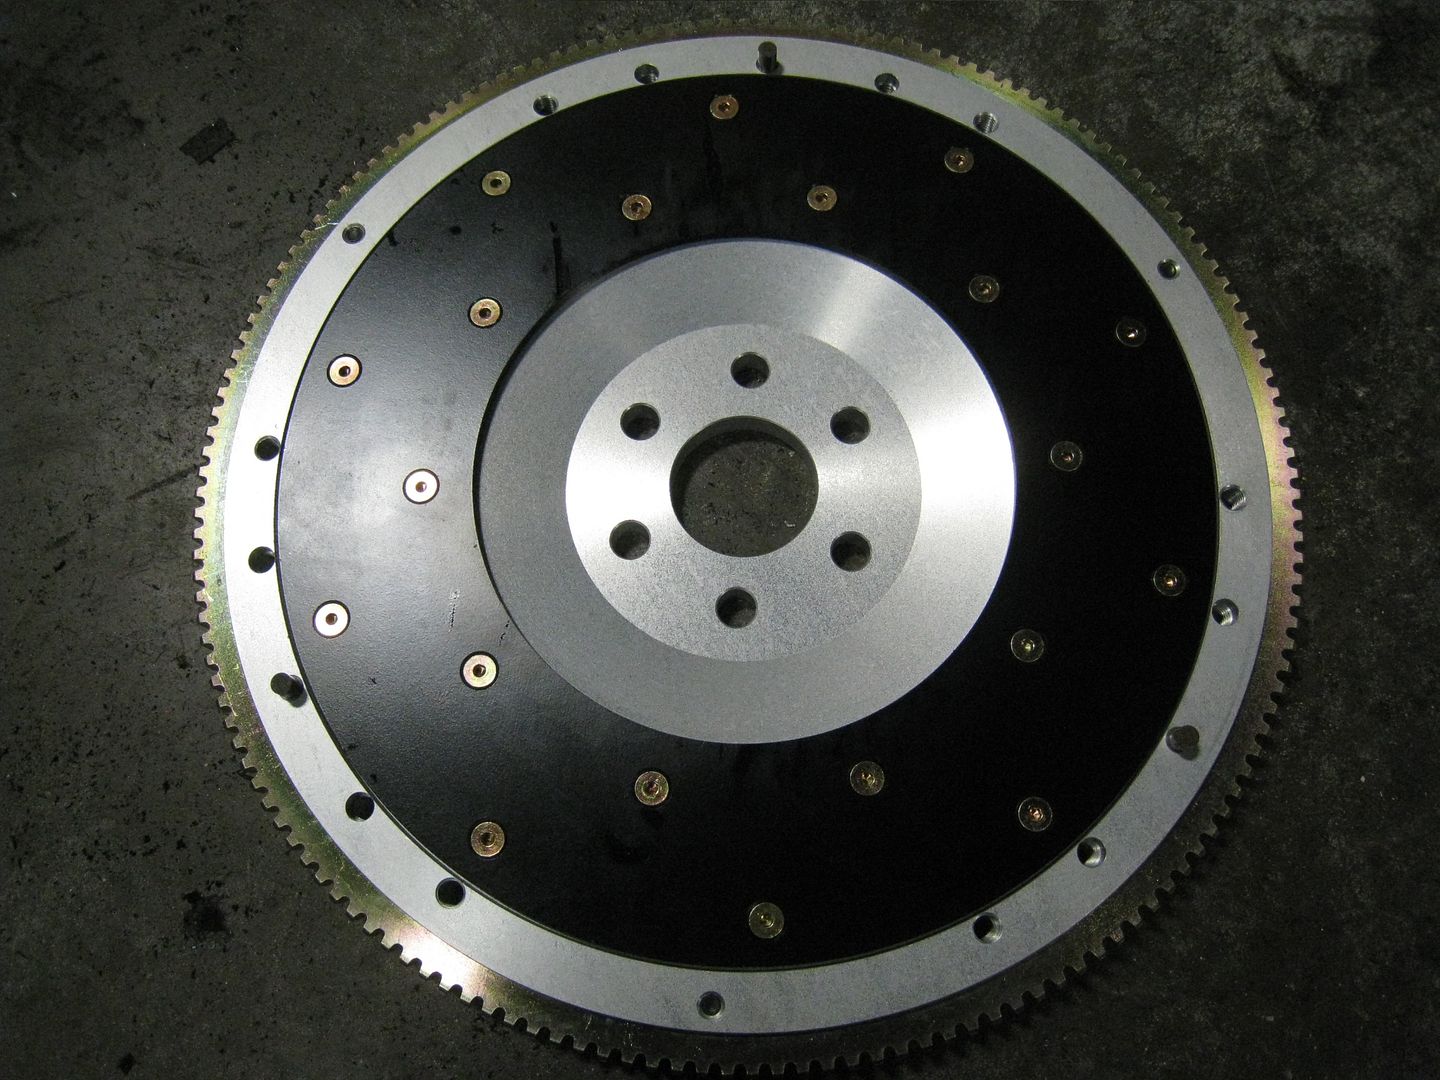
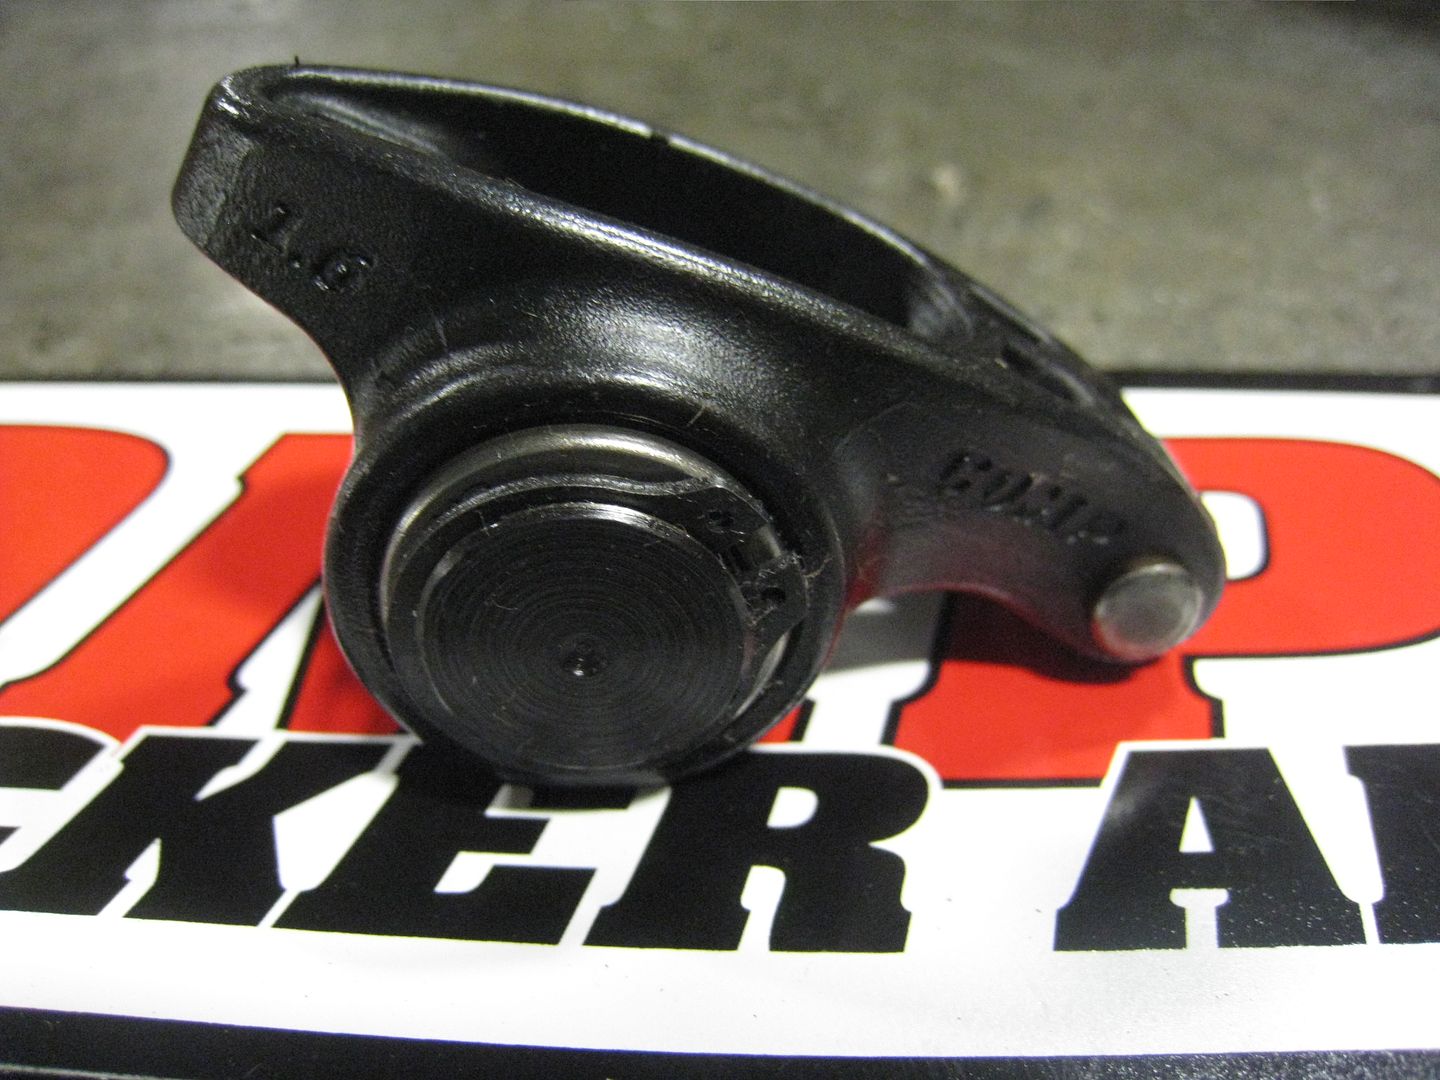
Some new parts arrived! :) The new heads weigh a total of 46lbs less than the iron ones and have much bigger valves and ports. The aluminum flywheel weighs only 12 lbs and the roller rockers are little jewels. 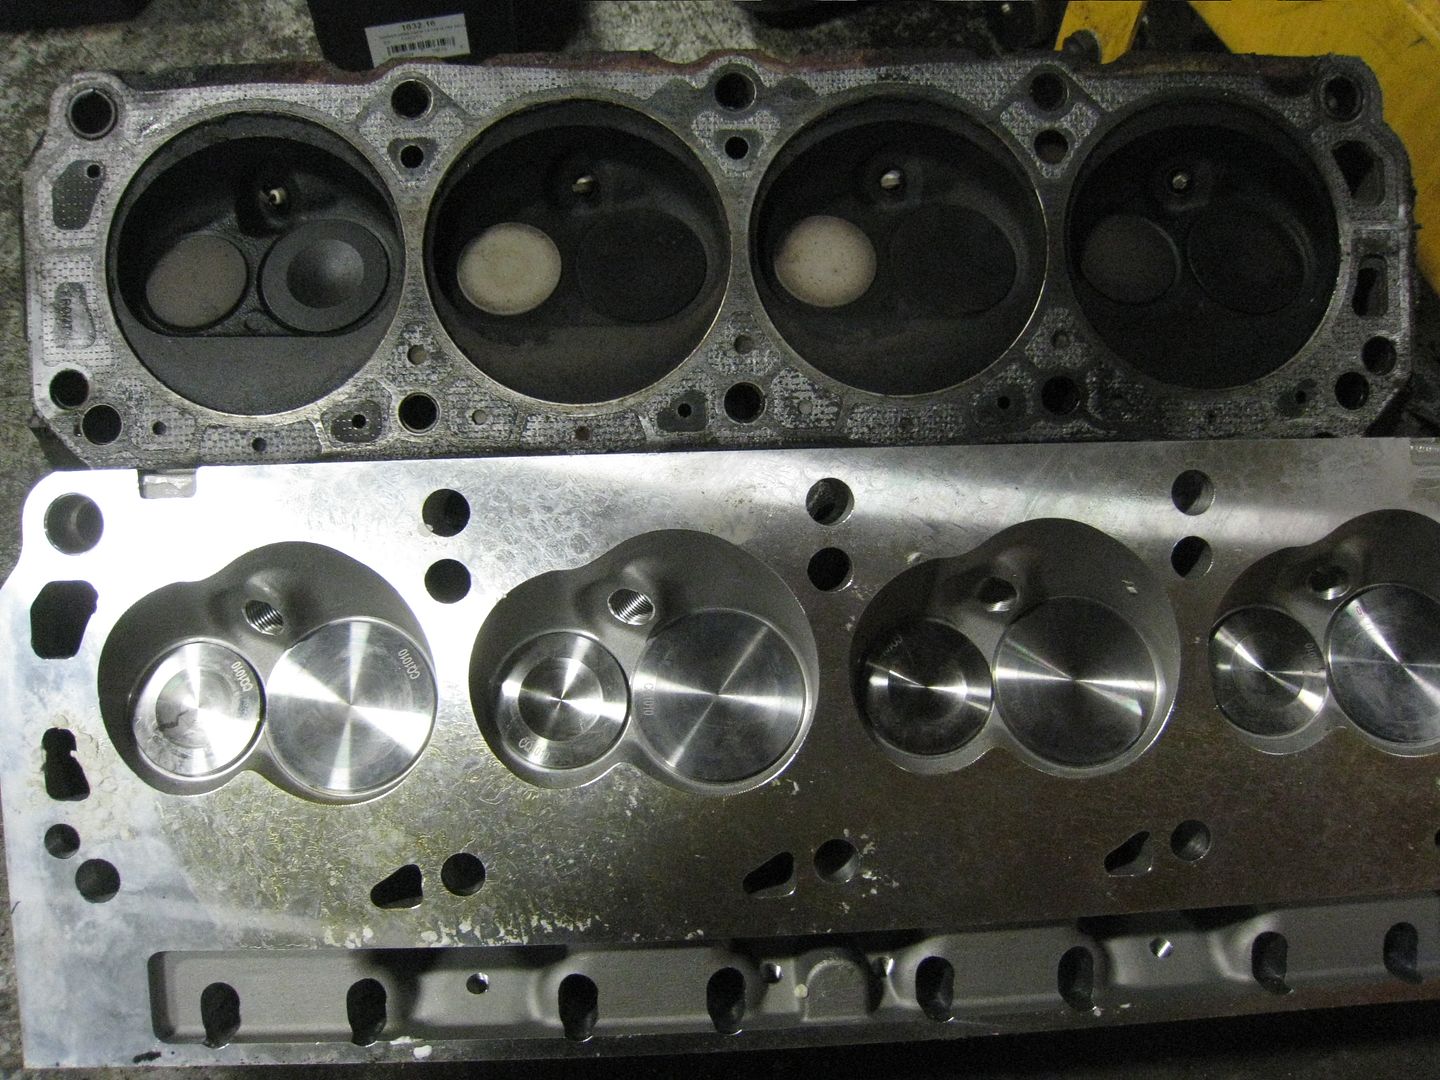
I changed the suspension bushings and balljoints. The shafts holding the lower control arms have been there since 1968 so they needed some rather unfriendly persuasion. The old rubber bushings 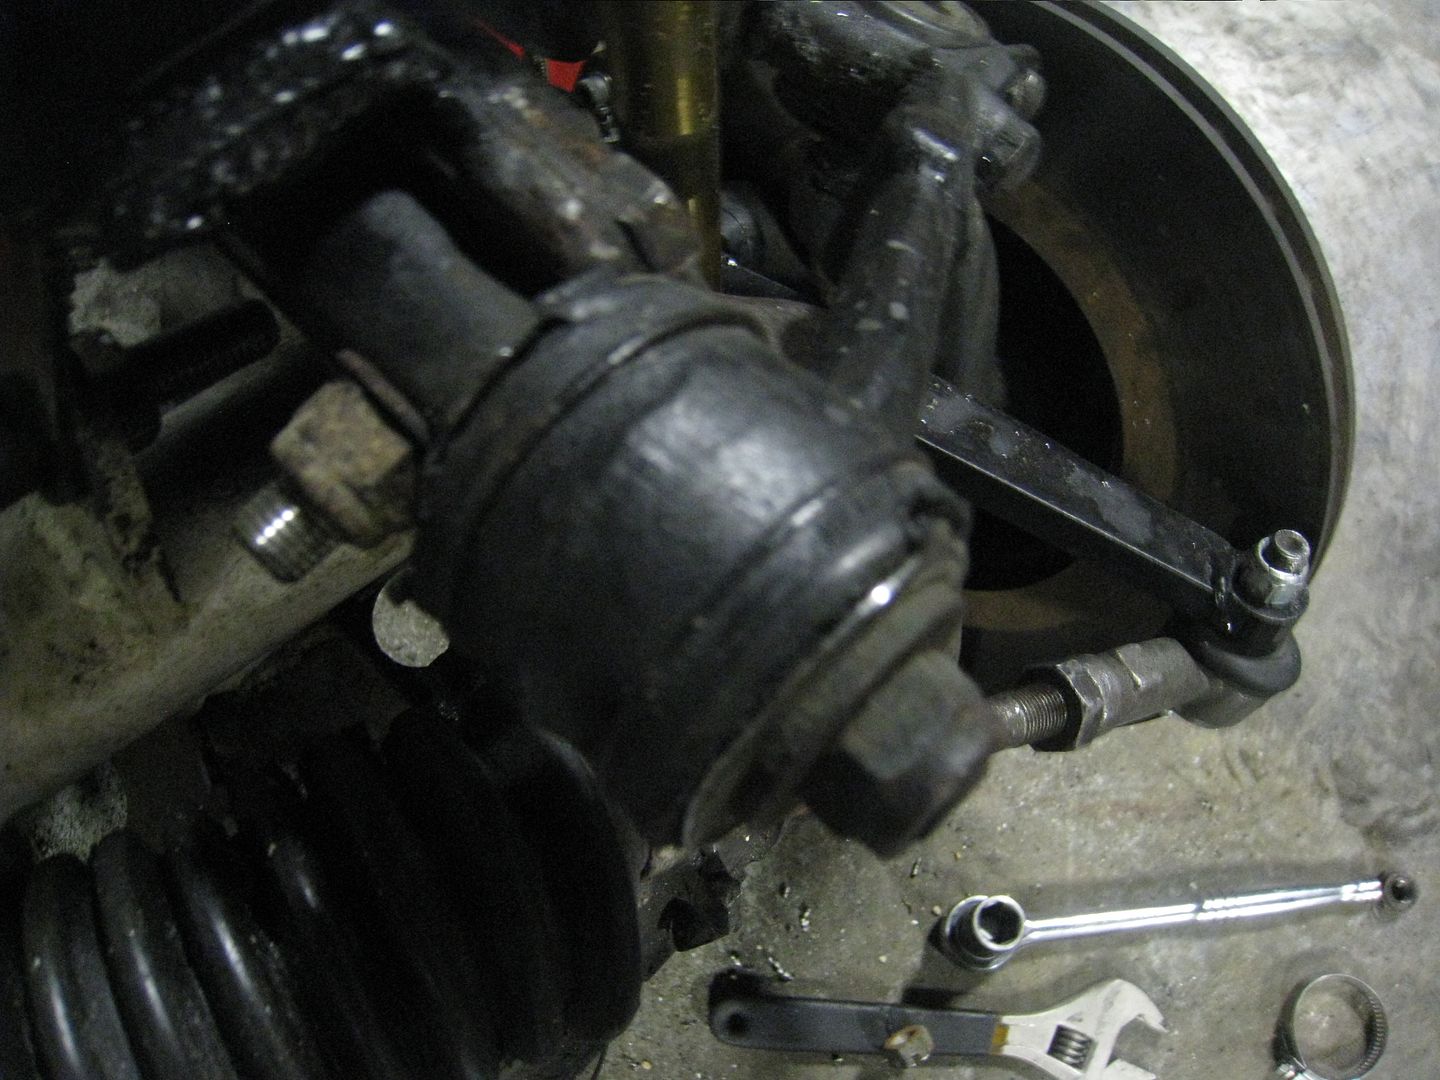
And the new ones: 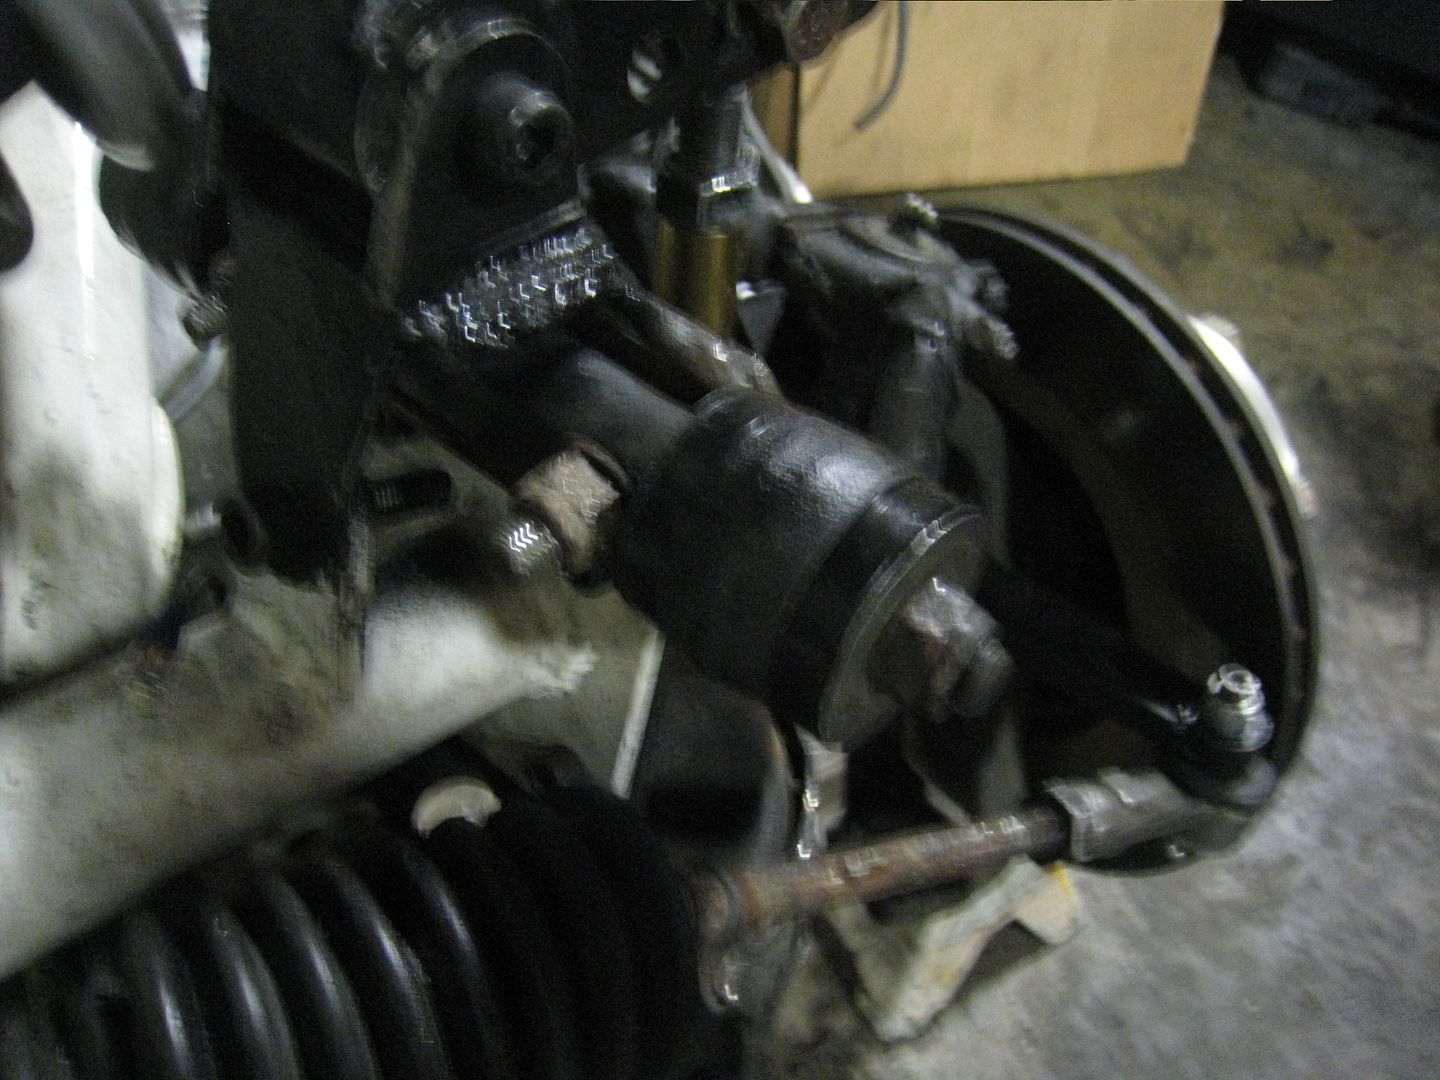
Check out the old school ball joint on the right, with shims for adjusting. 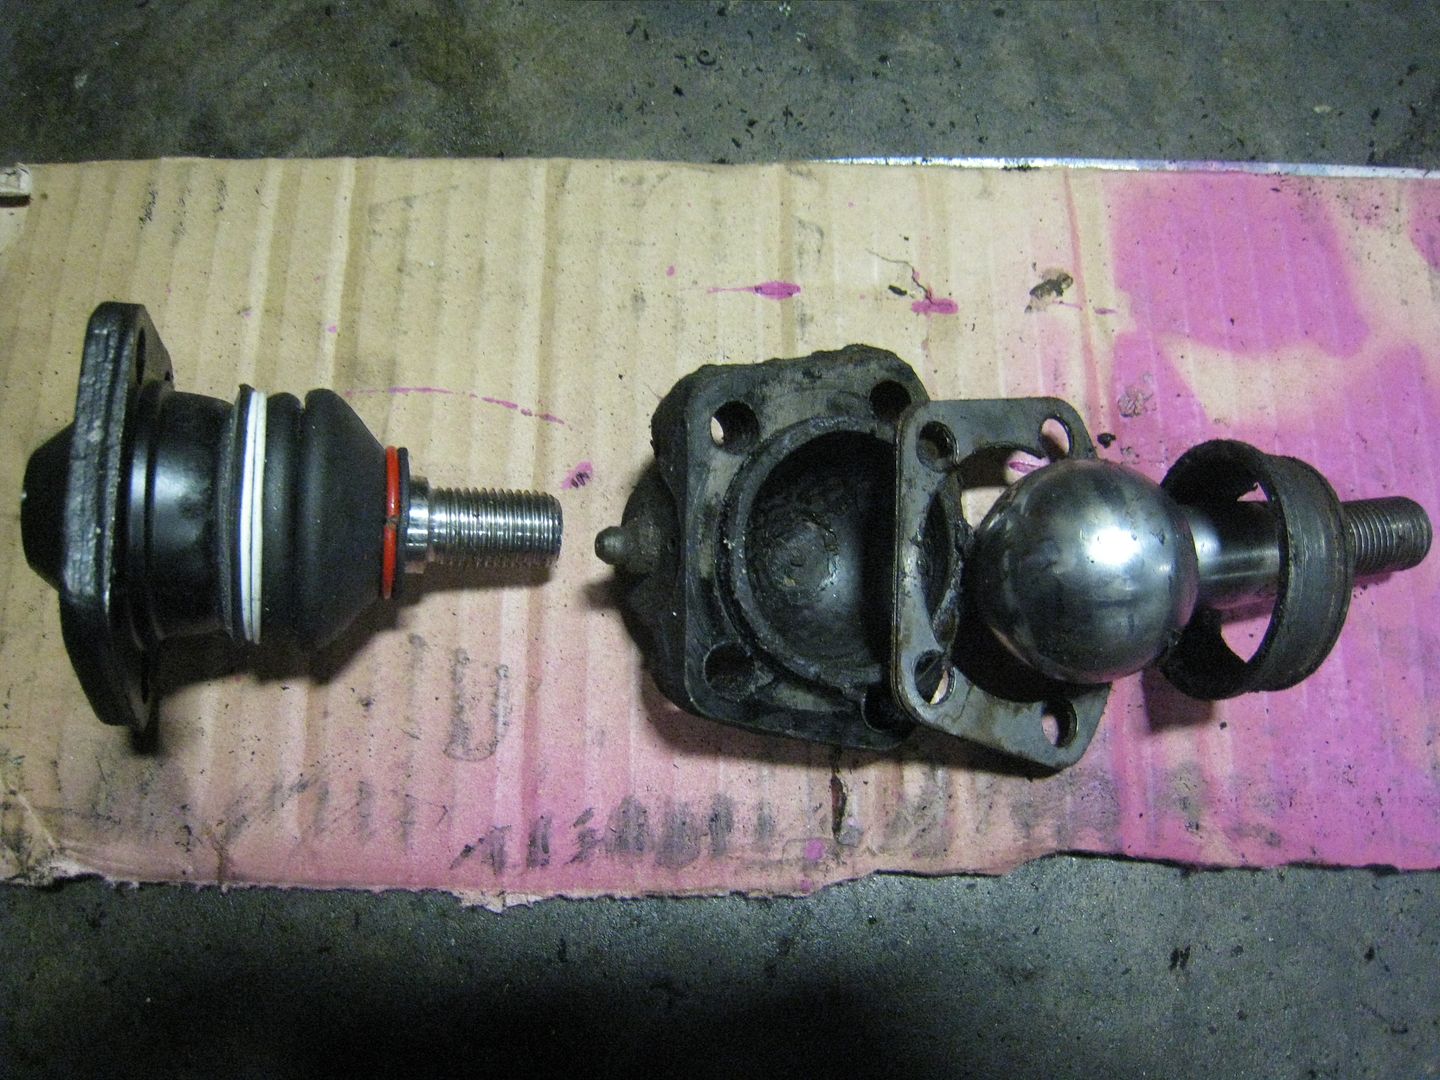
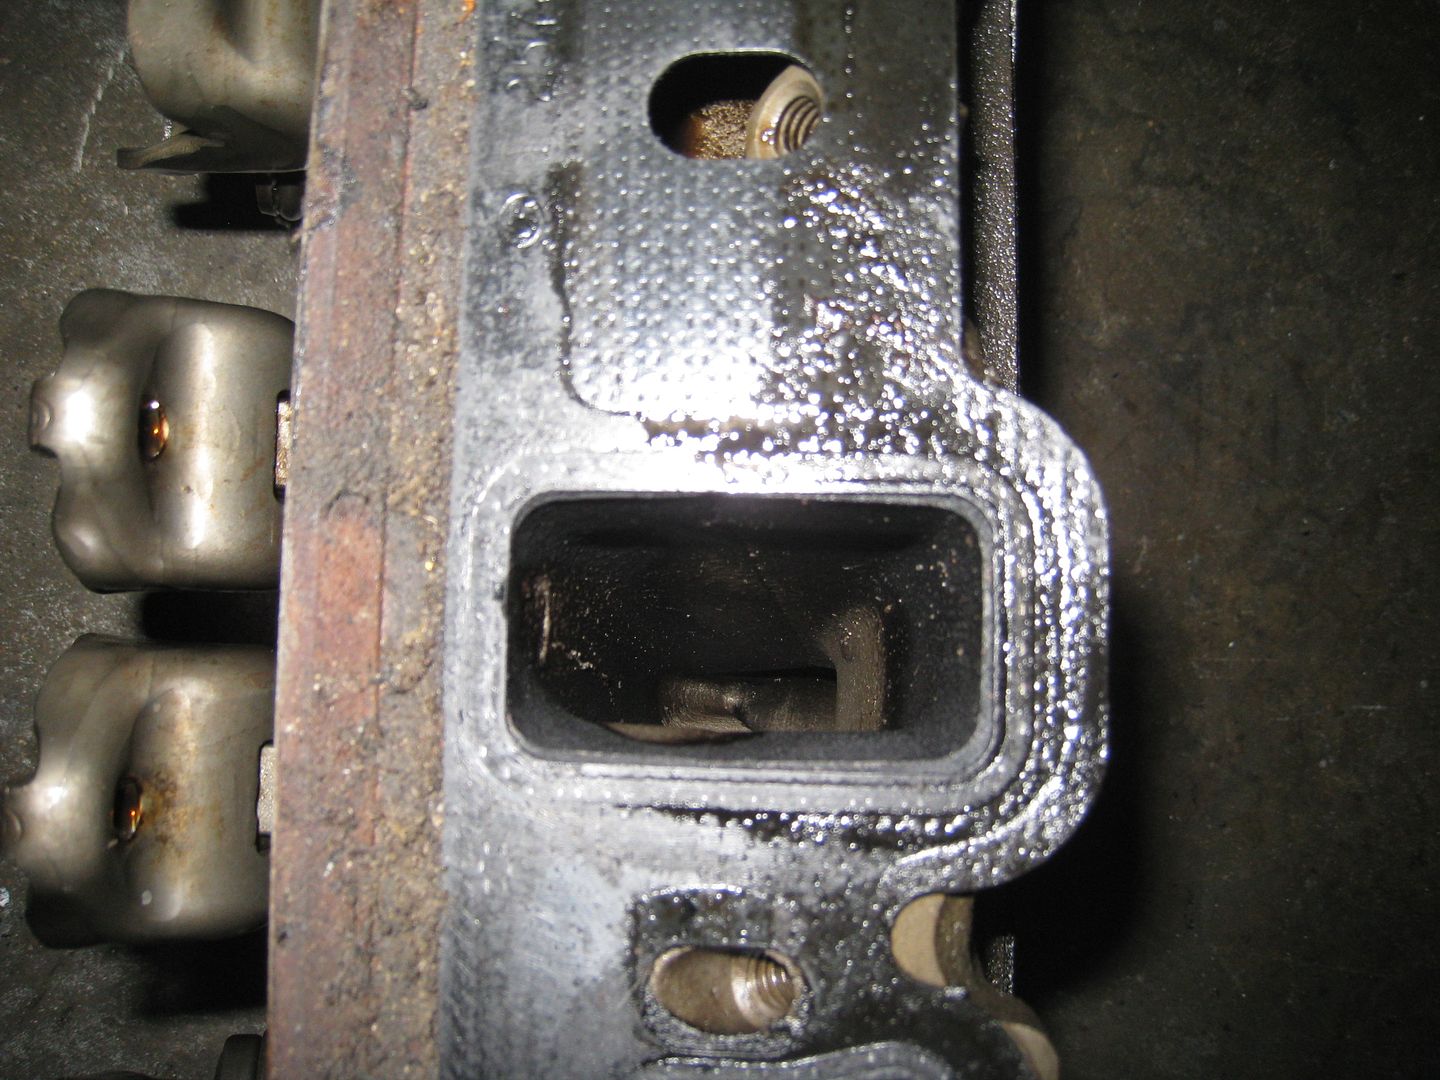
The GT40 intake manifold I have is an improvement over the stock Mustang intake but doesn't flow as well as the aftermarket intakes. That is, unless it's ported and then it makes just as much power as a good aftermarket intake. There is a fella in Texas who has spent a good deal of time figuring out how to port the GT40 and has a whole write up on it, found here: [www.eectuning.org] I followed these steps for my own intake and hope to get it on a dyno soon to confirm results. Here are some before and after pics: 
I had to open up the intake gasket just to match the head and intake ports. I bolted the intake on and took a picture down one of the ports, you can see how it lines up with the port on the head: 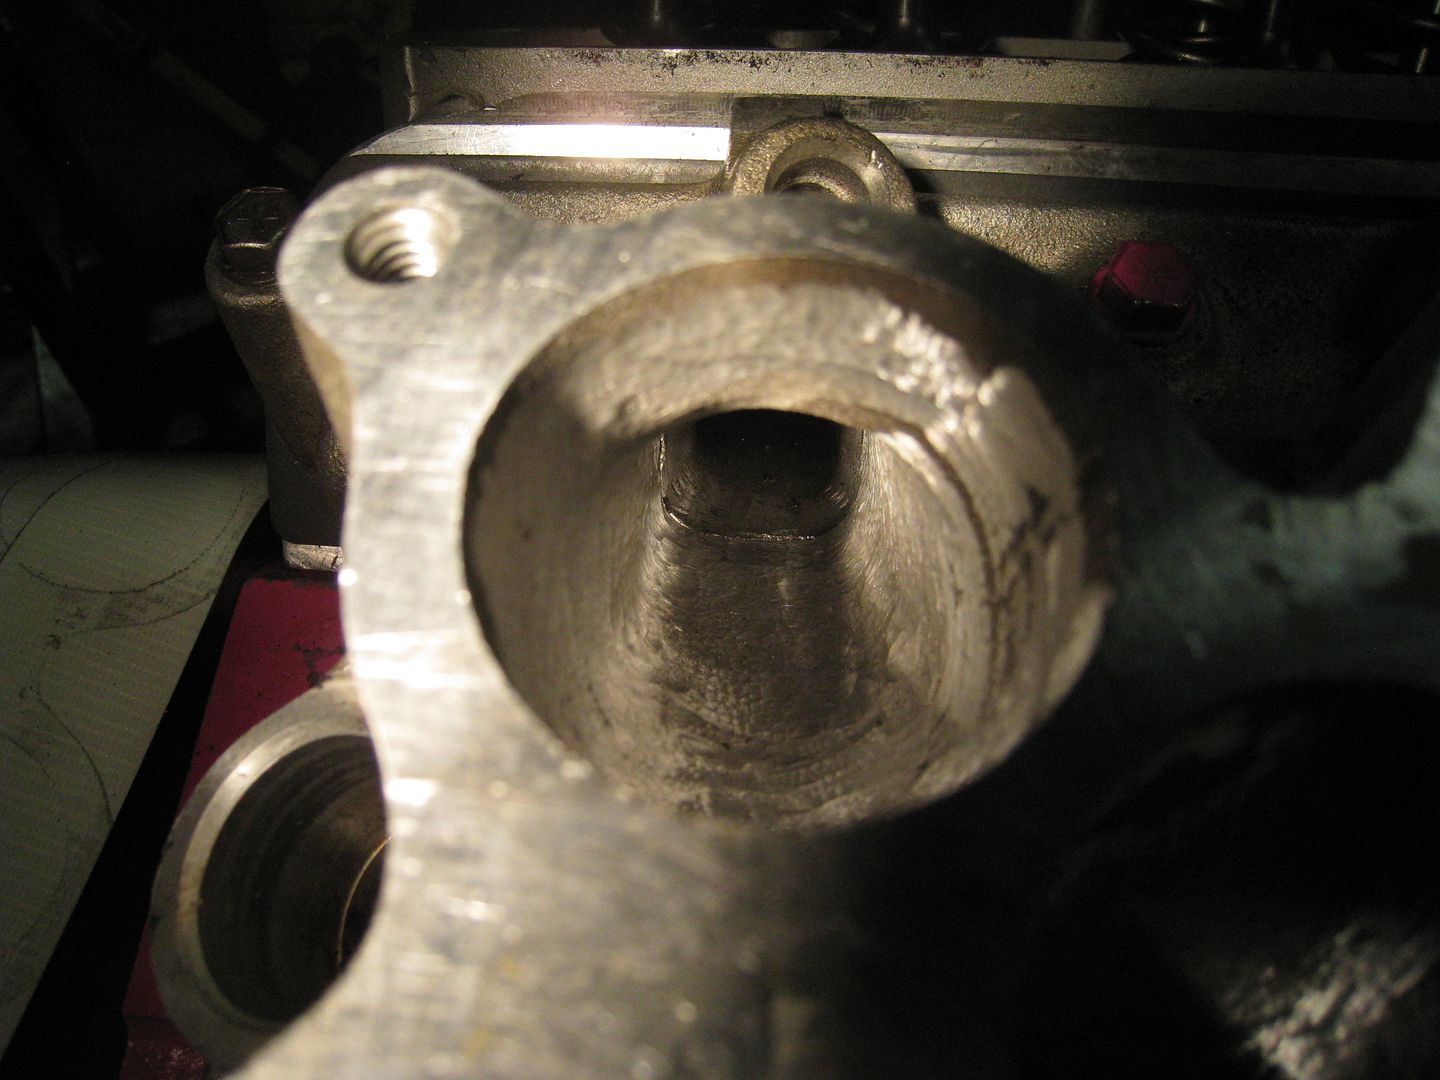
With the new heads, I had to recheck pushrod length to avoid premature valve failure. I did this by disassembling a lifter and putting washers inside it to simulate a fully pumped up lifter. I also cut a stock pushrod in half, threaded the inside of it and added a 6mm threaded rod so it was adjustable for length. Then I took a sharpie to the top of the valve stem and installed the roller tipped rockers as per the Comp Cams directions. After spinning the engine over two full rotations, a line was formed in the sharpie ink across the top of the valve stem. By adjusting the pushrod length, I could change where the line formed on the valve stem and once it was right across the middle of the stem, I measured the pushrod and ordered more just like it. Once they arrived, I installed all the rocker arms and here is a picture: 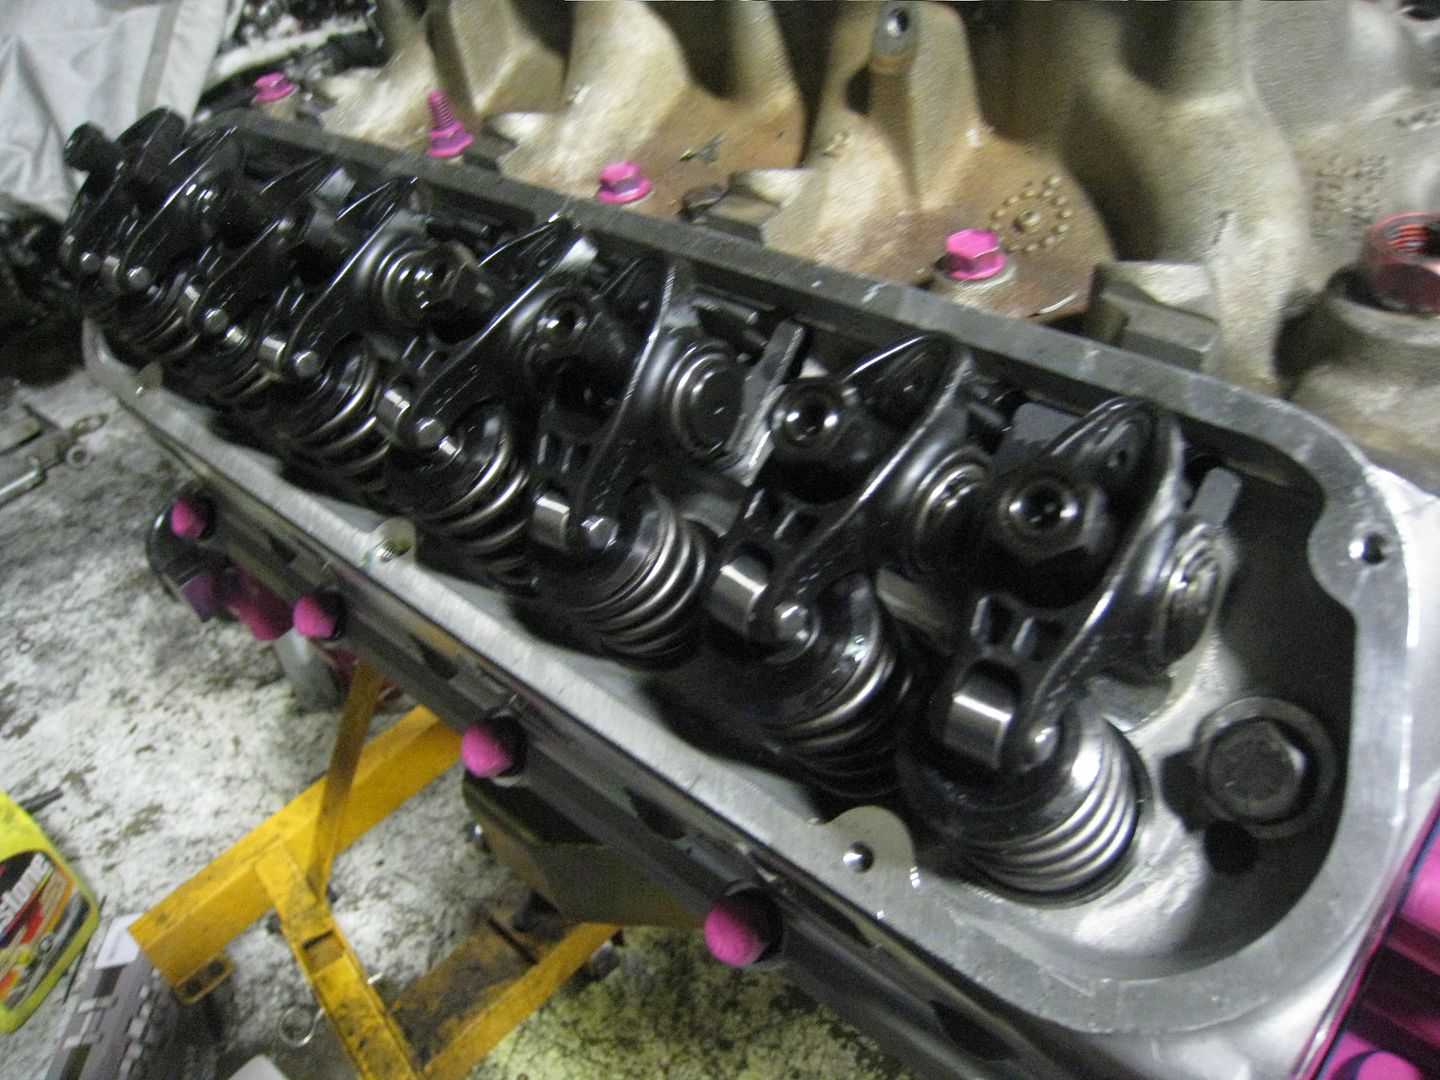
I thought I saw a light at the end of the tunnel but it turned out to be a train coming right at me. I was bolting the upper intake manifold on and the book calls for 34 Nm torque. My 3/8" clicker torque wrench has the gradients etched into the shaft (10,20,30, etc) and smaller gradients (1,2,3 etc) in the part that twists around. The top gradient in the shaft is 29 Nm so I turned the handle up to that, then added 5 more to get 34 Nm, the recommended torque. The wrench definitely clicked but then I felt a different sort of click, the pictures explain the rest. 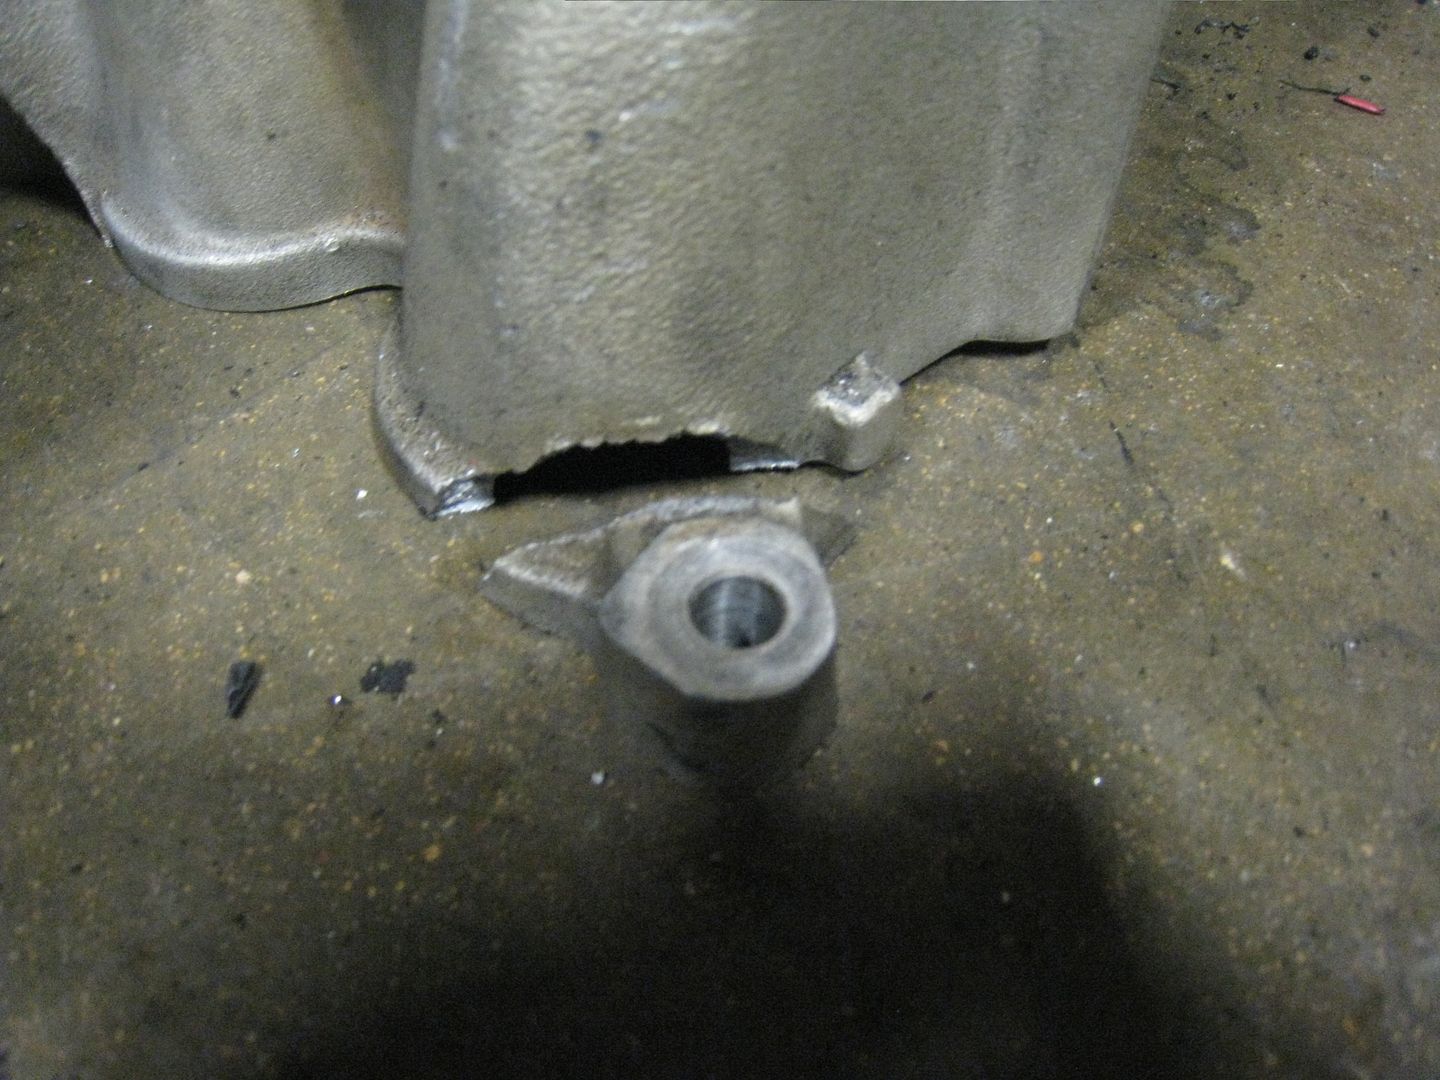
I started it for the first time and took a video. I didn't realize that I could manually turn up the idle so it's pretty lumpy. I don't know if it comes across in the video but it definitely sounds far healthier than the old engine. [www.youtube.com] I checked over all the bolts to make sure they were tight and I replaced some with shorter ones to save a few ounces. I also zip tied any loose wires and hoses while I was in there. Since I do not have an air filter, I added a fine aluminum mesh to the opening of the air box to catch anything big enough to cause damage. 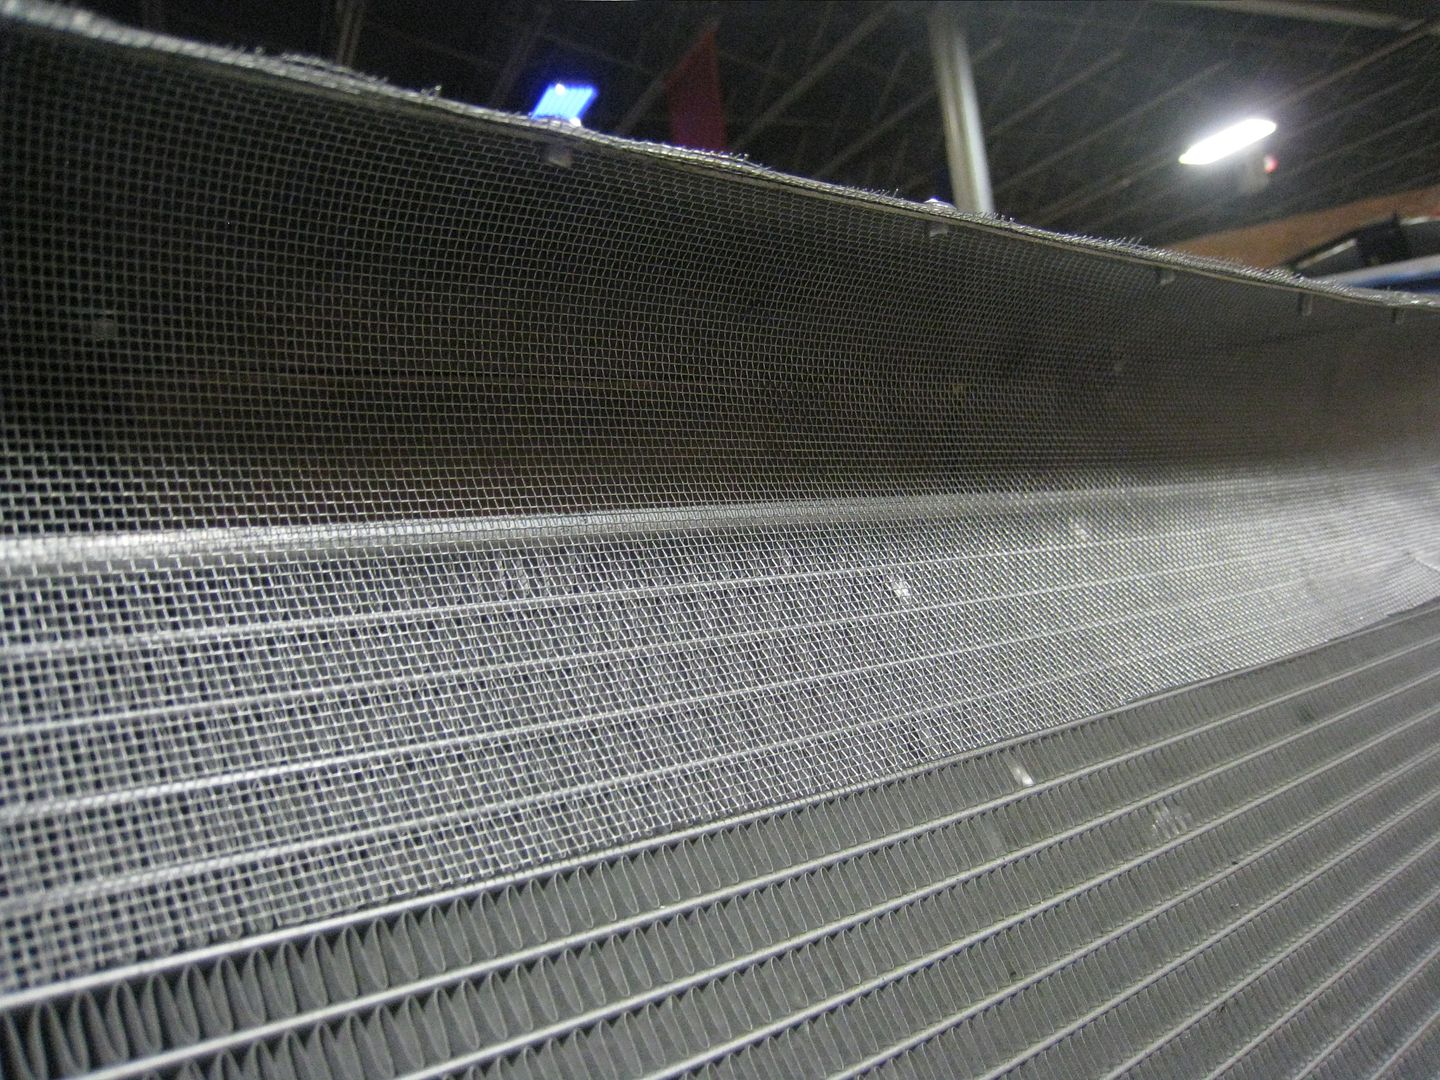
My old alternator tensioner was actually attached to the frame because I had solid engine mounts, but I was worried that if there were any flex in the mounts or frame, my belt would loosen and slip off. So I built a new tensioner that is all attached to the engine: 
And bolted the fenders, spoiler and grille on, so I am essentially good to go. 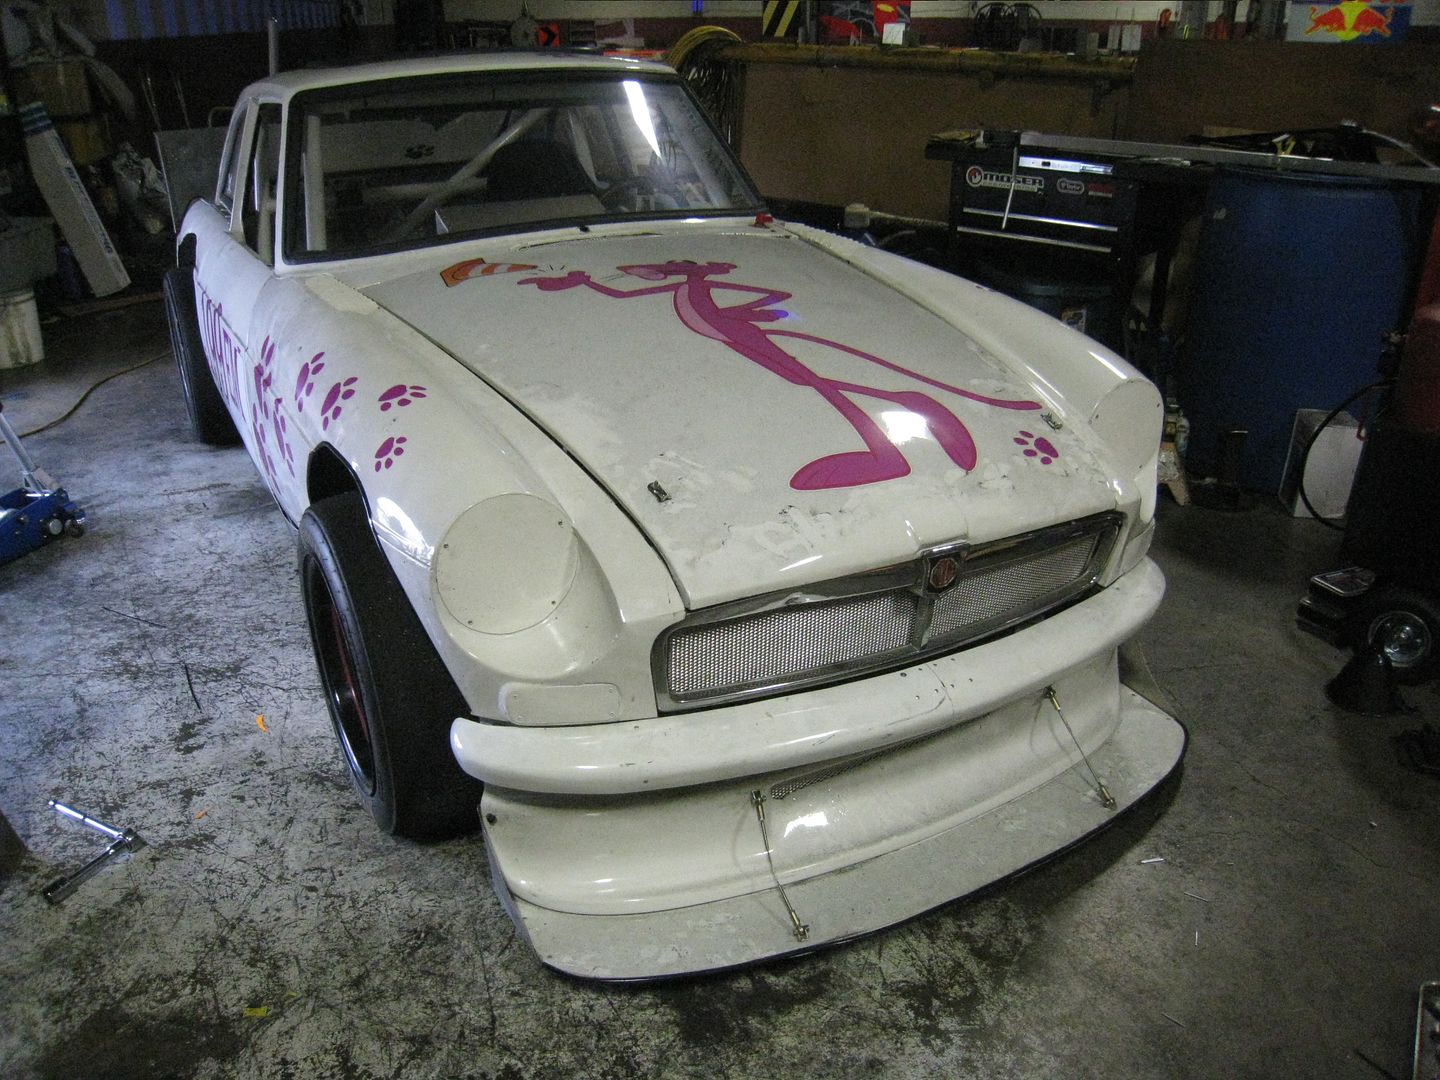
I need to test everything I can before the first event so I backed the car up to the acid etched part of the kart track, revved it to 3000 rpm and dumped the clutch. I did this four times in a row and everything felt great and nothing broke. It also launches HARD. This new T5 trans grinds going into reverse but I discovered later that many T5's do this and the cure is to shift into 5th before going into reverse. And FYI I am running the recommended trans fluid in it and the clutch is adjusted properly. Here's videos from different angles of the launches, check out the sparks coming off the tires, it's from metal shavings stuck in the slicks: [www.youtube.com] [www.youtube.com] [www.youtube.com] [www.youtube.com] I added a heat shield between the muffler and fuel filter, just in case there may be a heat soak issue. 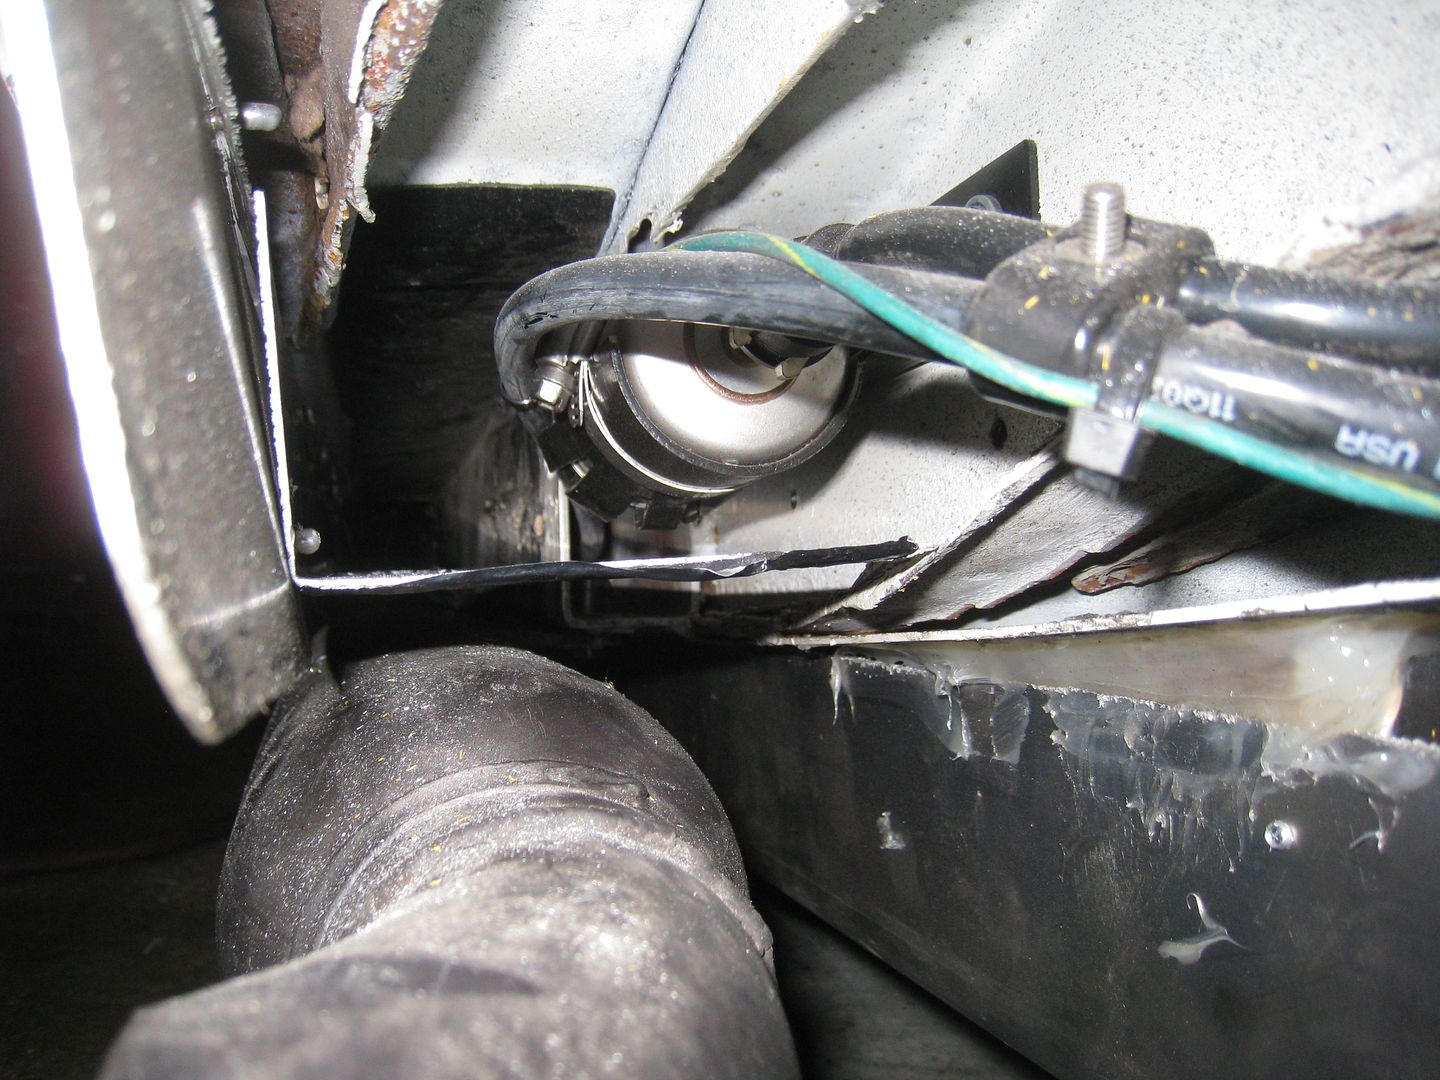
And I was concerned about Briget being strong enough to rapidly turn the steering wheel so I switched from a 2:1 steering quickener to a 1.5:1. I can switch between the two quickeners by just undoing a couple of bolts. 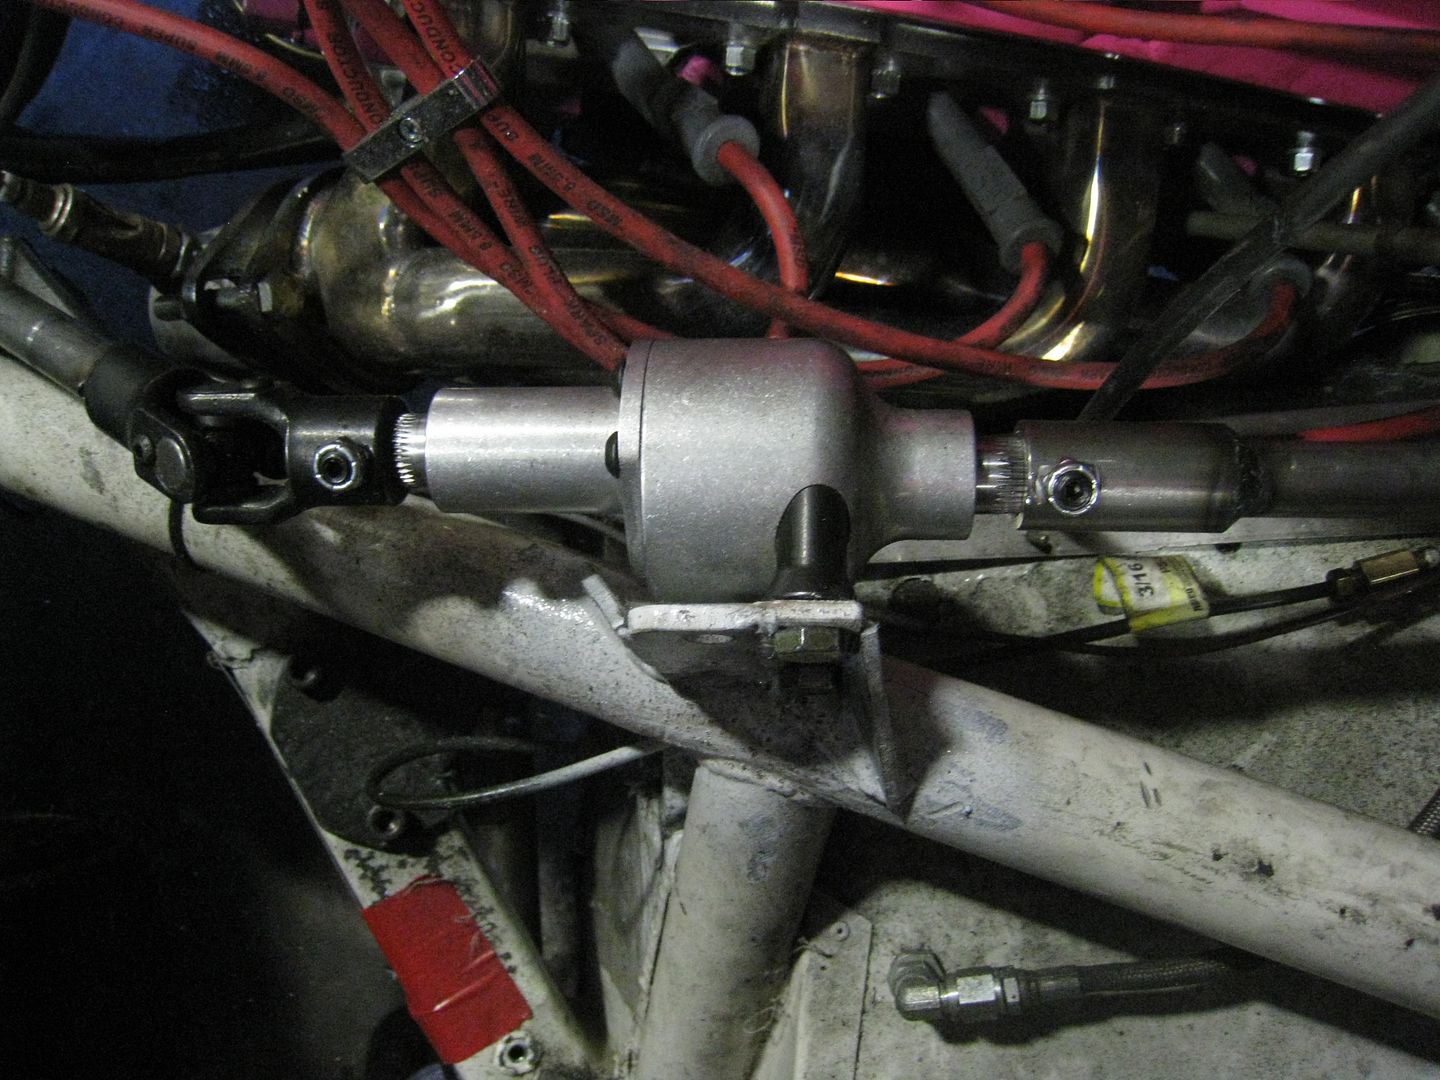
I had my first shakedown test of the Pink Panther on the road course and it went very well. Nothing broke and the car has no strange handling vices but I learned some interesting things, like that the diffuser really works and you can feel the extra grip with it. The ignition would start to break up above 5000 rpm, which prevented me from exceeding 110 mph (175 kmh) on the straight. Up until that point it pulls like a freight train and once the tires are warm, I can stand on the throttle coming out of turns as long as I am in 2nd gear or higher. The rear of the car jumps going over bumps and I will try to tame that with shock tuning. Neither Briget or myself were brave enough to drive the car at even 8/10's. We both felt that the limits of the car are a lot higher than ours but we will be ready to push in Lincoln. The rear tires rub on the inside of the wheel well but a spacer should fix that. The aluminum mesh I used in the grille does not let enough air through but the coolant temp only rose too high after 3 or 4 hard laps, and dropped as soon as I took it easy. Even when I push the car too far, it comes back fairly easily but does get twitchy above 100 mph. I attribute this to the aero on the car, I think it starts to push one end down harder than the other at high speeds. On the way home I called the guy who did my engine tune and he immediately diagnosed my problem: I have the wrong spark plugs in the car. If it clears up the misfire, that car is going to be seriously fun. It was a lot of fun and if we can move our hands fast enough, it should do ok at autocross. However, the pivot cones are going to be a problem but fortunately, that is only a local problem. I only have video of my very first drive of the car and Briget's first 3 drives because the battery in my GoPro crapped out. Briget driving: [www.youtube.com] Me driving: [www.youtube.com] Drive-by: [www.youtube.com] Today was dyno day and things went great. A stock 5.0 makes 165 hp at the wheels so with aluminum heads and new cam I was hoping for 265 at the wheels, and that is also what a computer simulation said I would get. I got 264.8 hp @ 5307 rpm and 271.6 ft/lb @ 4839 rpm and a power curve that rises extremely smooth and linear. It showed no signs of a misfire so either the new plugs fixed it or my ram air system is so effective that it's putting the engine into a lean condition at speed. Here's video of the dyno session and a picture of the power curve. [www.youtube.com] 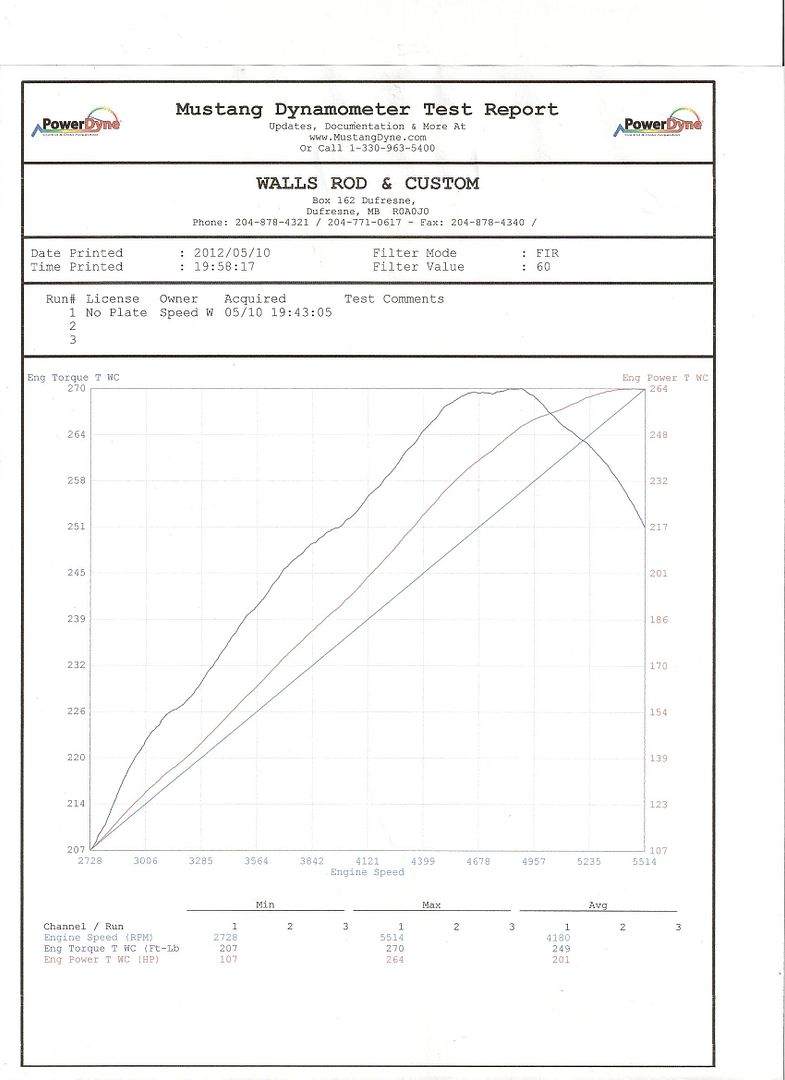
So, even though we actually broke the car today, I think our first autocross was a success. I drove first and the car really, really bounced around on the rough surface we use and understeered everywhere. I didn't know what was going on until I watched Briget drive, and it looked to me like the car was bouncing off the bump stops. I stiffened the rear suspension a couple of steps and went out for my second run. It was a lot better and started to go through slaloms much easier. For my 3rd run I stiffened the rear another step and also stiffened the front by one step. It was even more controlled but the rear still really bounced in a couple of places. The high speed compression was already at full soft so I adjusted it to full hard but left the low speed compression and rebound at full soft and sent Briget out on her run. Going over the first massive bump on the course, the bracket holding the short arm of the Woblink broke, allowing the rear suspension to move around-our day was done. I got the car back to the shop and took a good look at it. There was enough flex right at the end of the bracket that after Friday's track day and todays autocross, the piece failed from constant flexing. I boxed it so flex has been eliminated and we won't have that problem again. Here's a pic of the broken link: 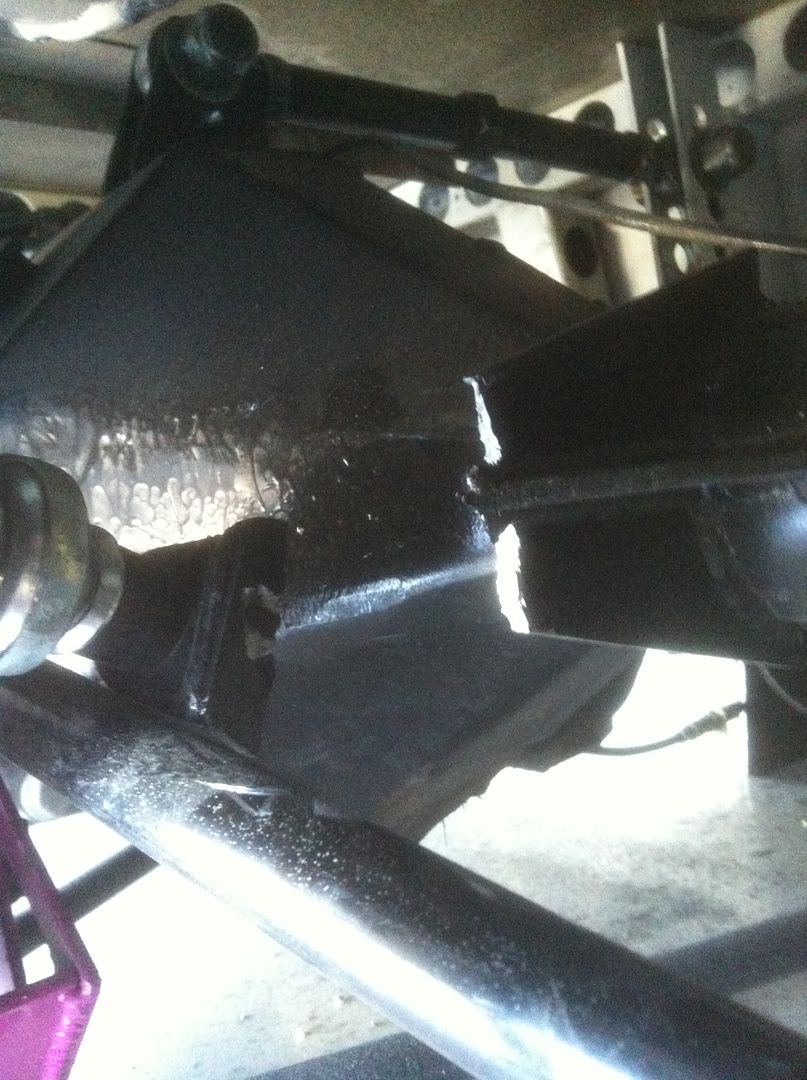
The data from my 3rd run shows that the car was pulling .6 G at 50 mph (the only time I got on the gas in 2nd gear) and was hitting over 1 G in either direction so it has potential but I certainly was not getting the most out of it. I'm confident that it will be a lot better on a smooth surface without pivot cones. Just check out the video and you will get an idea how violent it was inside the car. [www.youtube.com] I was still trying to understand what the rear suspension was doing (other than breaking) so today I put zip ties on the shock shaft to see how much compression they were getting, and I aimed a camera at them. The car was really unstable under braking but was better over the big bumps. When I got back, the zip ties were shoved up against the bump stops. I changed the high and low speed compression settings from full soft to full stiff and sent Briget out. When Briget was on course I could see the axle moving back and forth and for a moment thought that the newly fixed bracket broke again, but that was not it. The zip ties were not up against the bump stops this time so that was positive. Once in the pits I tried to determine how the axle was moving back and forth and couldn't find anything at first but once I had Briget shake the car back and forth really hard, I found a fracture in a different bracket. Obviously the forces on the Woblink are greater than a typical lateral link like a Panhard or Watts because these brackets were pretty robust and were still snapping solid steel plate. I know from trying different roll center heights at the lapping session and autocross that the car likes it set above 8" high, so I am going to remove the troublesome Woblink and install an adjustable Panhard around that height. Here is a very interesting video of the rear suspension during a run, once you stop being mesmerized by the shocks moving around, notice how much the diff is moving back and forth due to the broken Woblink. [www.youtube.com] I cut all the Woblink stuff out and ordered bolt-on Panhard bar mounts. When they arrived I was blown away by their robustness, clearly I had underestimated the forces involved. 
I welded and braced 2" square tubing on the drivers side for the frame mount 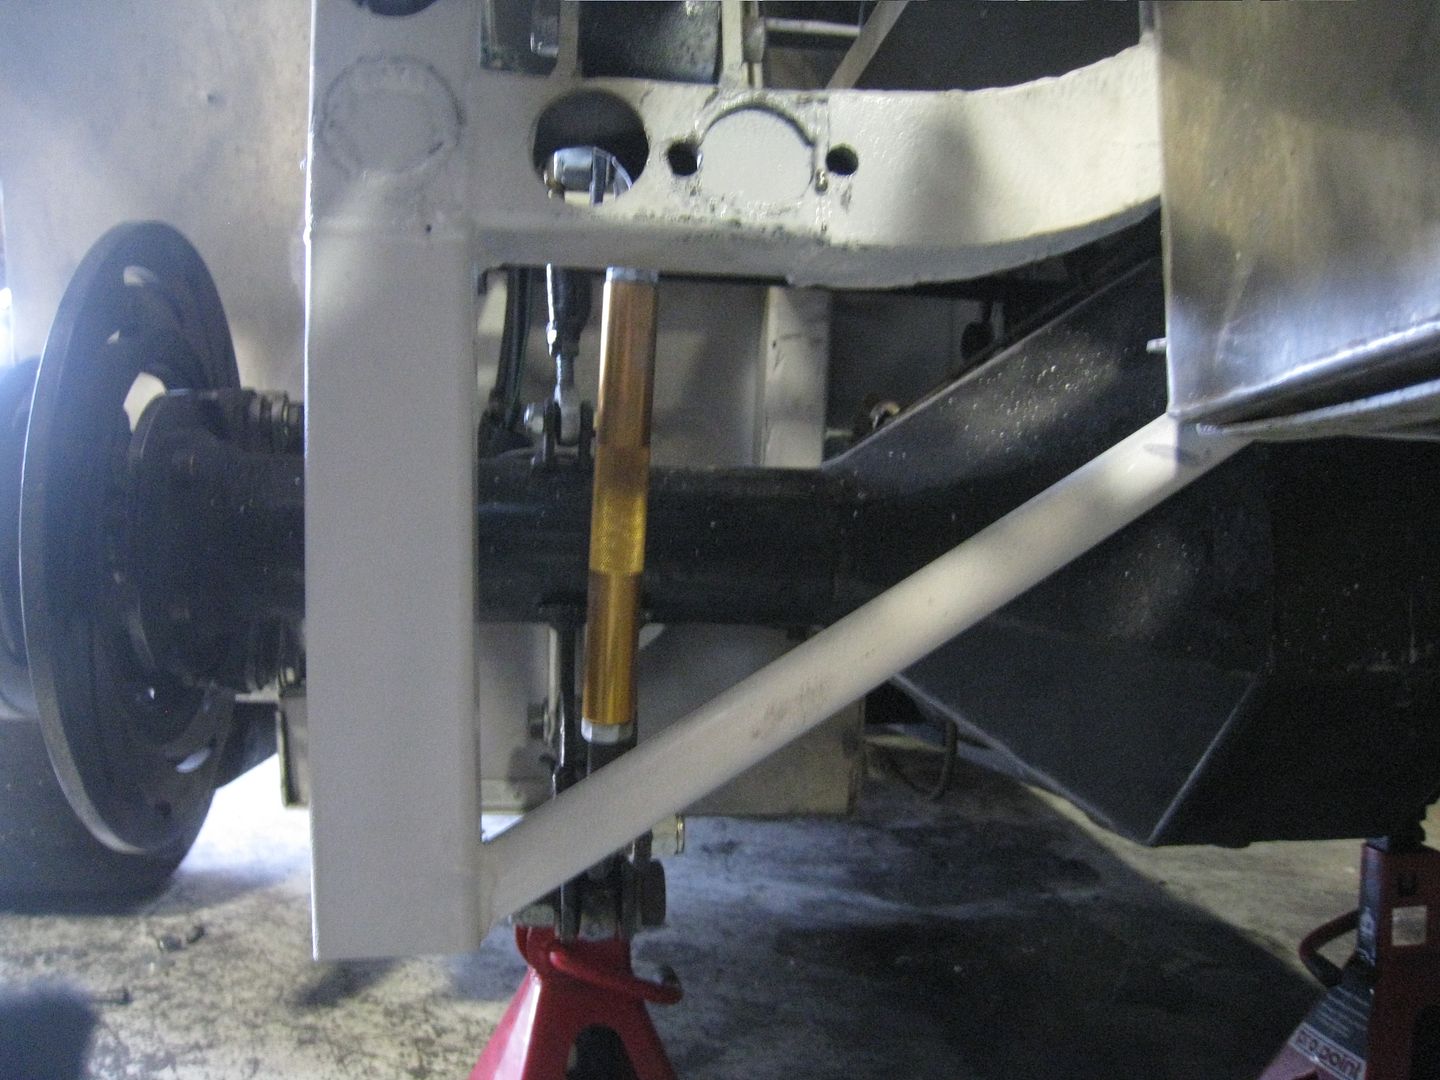
The new mounts use 3/4" rod ends instead of 5/8" rod ends, just look at the difference 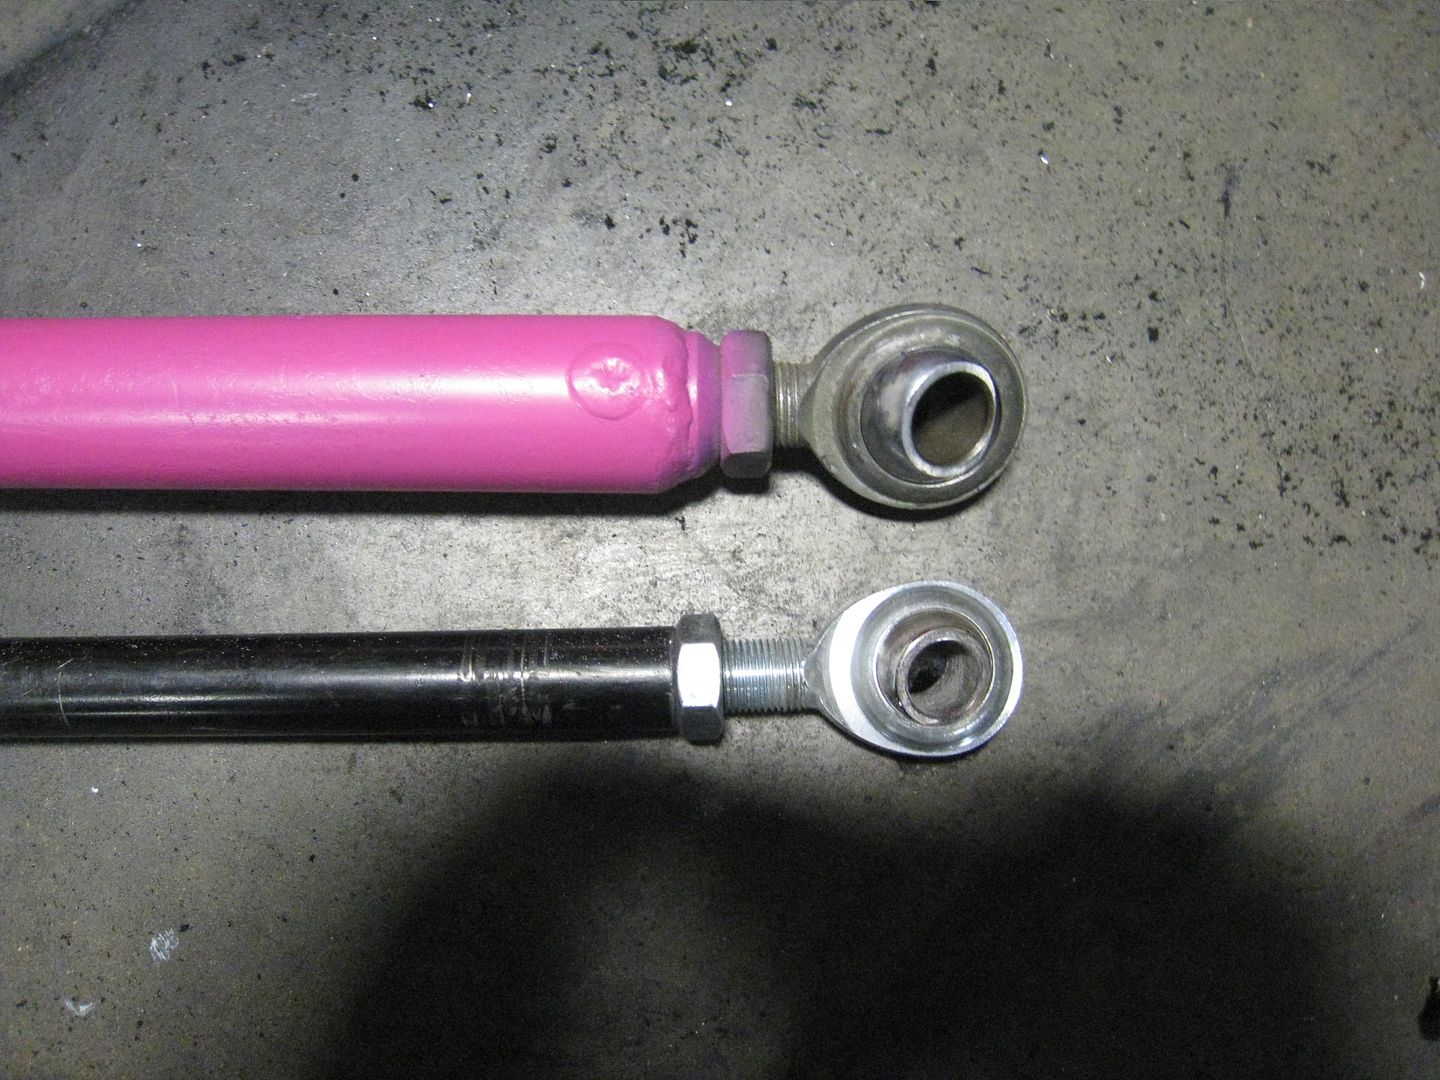
And all bolted in place. the kink in the Panhard bar is because I got it from a local dirt oval racer (Ricky Weiss) and in his application, the bar was bent slightly. 
I wanted to test the car with the Panhard bar so I went out to our site and put down a 75' slalom and some fast back and forths. Initially, I had the Panhard angled slightly upwards from the frame mount. I expected this to make the car a little loose upon initial acceleration and I was so right. Raising it 1 inch made a world of difference and another half inch made it even better. I messed around with shock valving and rear sway bar settings and it all reacted with expected results, which is nice. According to my data, I was doing 58 mph through the slalom, was pulling .76 G @ 58 mph under acceleration and .91 G under braking. I would have expected more under braking but even with bias put full forward, the rears lock up first. Plus the hottest tire temps I saw were 95 F front and 105 F rear, even after 3 minutes of hard driving. The car was huge fun to drive, maybe the most fun car I have ever driven, and I am really looking forward to the Lincoln Tour this weekend. I will be switching from the Hoosier Radials to Avon Bias slicks so hopefully it gets ever better. I hope to get some good video. See part 3 of my build journal Edited 74 time(s). Last edit at 05/31/2012 06:09PM by loosecannon. |
Sorry, you do not have permission to post/reply in this forum.
British V8 Home Page
Photo Gallery
Web Forum
Annual Meetings
Contact Info
Site Map
British Race Car

© 2025 British V8™ All rights reserved. Website & graphic design by:
Curtis Jacobson.
BritishV8 Forum is hosted by
SiteWelder LLC,
and is powered by a
Phorum engine.