

Project Journals
create a diary for your project and show us your progress, with up to 100 photos!
|
loosecannon mark sawatsky (10 posts) Registered: 08/16/2010 02:10PM Main British Car: 1969 MGB Buick 2.0 |
Mark Sawatsky's V12, then V8, now Turbo 4 powered MGB-GT Part 4
I took a Porsche 911 front torsion bar and made an anti-sway bar out of it. It's 18.8 mm with two identical splined ends, is cheap and the Porsche end caps can be welded to pieces of flat bar to form the end bars. Not only that, but if it proves to be not stiff enough, I can simply swap out the bar for any of the aftermarket bars that come in 20mm, 21mm, 22mm or 23mm-and in solid or hollow. Anyways, I welded mounts to the rear frame and now I just have to weld mounts to the differential housing.


I had Taylor-Made laser cut some mounts for the rocker arms and welded those on today. The suspension is pretty cushy when on the outer most holes but stiffens up a lot as I move the pushrod in-perfect. 
I wanted a need a tidy install of the electric power steering and after getting it all positioned, there was a noticeable difference in what the steering wheel was doing and how the wheels were turning left and right. The rate that the wheels would turn would speed up and slow down as I turned the steering wheel and I'm certain this would lead to unpredictable steering feel. I remember seeing a video on this and realized that I needed to make some changes. Here's the video for you to check out [www.youtube.com] I moved the power steering box over so the angles of the shafts is not quite so severe. 
Once all that was in place, I tackled the problem of the car not turning sharp enough. I had no choice but to shorten the steering arms so I got a reaming tool, flat bar and thick wall DOM tubing and fabricated new arms from scratch. Instead of an effective length of 5" long, they are now 3.5" long. It worked great, now at full lock the wheels almost touch the lower control arms and the turning circle is about 15'. Once they are cleaned up, they will look nice. 
All bolted back together, I plugged in the electric power steering and it works! Video below. [youtu.be] I tackled the front sway bar today. It's actually a Porsche 911 torsion bar and works perfectly in this application. I made mounts by taking a block of aluminum, drilling holes in it then cutting it down the middle. 
I welded flat bar mounts on either side of the front framework and bolted the sway bar on. BTW, the splined end caps are actually Porsche adjustable torsion bar ends with a piece of flat bar welded on to make them into arms. They cost $50 and work great. 
Here is a shot of one of the arms. I still have to attach the link to the lower control arm. 
I hate re-doing things but I'm determined to do everything to the best of my abilities on this car, so when it was suggested to me that I could have made the steering arms out of one solid piece of steel, I decided to do it. I purchased some cold rolled steel (it's much stronger than hot rolled) and started drilling, grinding, reaming and sanding until they looked like steering arms. The raw steel 
Almost finished 
Installed but still unpainted 
Started on the bellypan today and got the drivers side done. I have to make a front section, rear section and engine side pan. 

I also completed the sway bar install with mounts on the LCA 
It's not very sexy but I have spent all this week on the body panels. I want the whole front clip and rear fenders to come off and go back on easily and it's been difficult to accomplish. I had to redo how the front clip attaches and add additional braces to the back fenders. It all seems pretty solid now and I expect that it could take a pretty hard thump from a frozen cone and still survive. I got word today that the extraction of the engine from the Buick has begun-yay! 


Some really awesome parts arrived today. First up is the Quick-Time SFI approved bellhousing. It's designed to allow many Borg-Warner, Muncie, Richmond or Jerico transmissions to be bolted to an Ecotec. It is also strong enough that I do not need a scattershield. 
And this is a South Bend stage 4 pressure plate, good for 400 ft/lbs or torque, which I hope to achieve with this motor 
And the beautifully machined Fidanza flywheel. Only 12.5 lbs because the whole backside is machined 
I got the motor today and test fitted it in the car. Even if I had the engine before I built the frame, I couldn't have done a better job. Everything fits, there's room to get at all the important parts and there's so much room between engine and diff that I can use a normal transmission and driveshaft. 


I spent two days on motor mounts. I moved the engine as far back and as close to the centerline of the car as possible because wise elders believe that rear weight bias and keeping that weight centralized makes for a faster car. I just hope I left enough room for a driveshaft. For the bolts that hold them to the frame, I threaded some DOM tubing pieces and welded them to the frame rails, top and bottom. I'm still not positive that the 3 M10 bolts per side on the aluminum engine is going to be strong enough. 


I just wasn't confident enough in the two motor mounts so I used some DOM roll bar tubing to go between the stock motor mount location and the front hoop. This should eliminate any potential movement of the engine. The mount is just tack welded in the pictures. Front view: 
Top view 
The gas pedal is installed and spaced perfectly for heal-toe. 
And seatbelts are installed 
I had to make a harness guide bar to make sure the belts were at the right angle 
And I placed a 160 lb driver in the seat and weighed the whole car. It is 1380 lbs and almost exactly 50% weight balance left-right and front-rear. I still have to add a trans, driveshaft, fuel cell, diffuser, intercooler, wiring harness and coolant but I'm confident in being under the minimum weight for the class (1750 lbs). Added the MGB grille and cowl vent so the car is now 10% more MGB (by square inch) 
I can't believe how things work out sometimes but I pulled the fuel tank from the old car off the shelf and looked at places it would fit. It fits perfectly behind the drivers compartment, right on the floor and beside the driveshaft. The driveshaft will have a protective hoop around it and I'm running 1350 U-joints, which are good for double the HP I have so I'm not worried about it. 
I also mounted the Lexan windshield and it looks marvelous. Now, I know it's lousy for aerodynamics so let me share my plan with you. Getting the aero elements of the car right is going to take a lot of work for relatively little advantage in lap time. I am going to ignore aero stuff until I have the suspension settings, tires and engine stuff nearly perfected. Once I have little to gain with those things, I'll work on the splitter, spoiler and diffuser. The windshield will spoil air going to the spoiler so it will likely need to be removed. Although, if I do some testing with tufts of yarn, I may find that the windshield isn't that bad. 
The Borg-Warner Super T-10 arrived today. I chose it because it is supposed to be strong, light weight, short(ish) and has external shift rods so moving the shifter around should be easier. There is 10" between trans and diff yoke. 
I also installed the front bellypan but think maybe I chose aluminum that is a touch too thin (16 gauge) because it is wavy. 
I am so stoked over how the shifter worked out. The first picture is the stock shifter position, obviously out of reach of the driver. The 2nd and 3rd pictures are the new position. What I did was move the shifter to the front of the transmission and flipped the shifter 180 degrees. Now the rods that were formerly pushing on the shifter arms are pulling on them. By itself, this would have flipped the shift pattern,too but all I did was change the rods and now it has a normal H shifting pattern with 1st through 4th in the right places. The only strange thing is that reverse is now top right instead of bottom left, but the red handle is a reverse lockout so no issues there. The trans shifts with positive and easy action, at least sitting still. Ignore the shift knob, it's incorrect.


Mounted the intercooler today. In case anybody wants to know, the core is 12" x 18" x 3.5". I started with bolt-on lower supports made of thin wall rectangular tube. 
Then sliced off the old top engine mount (good thing it was only tack welded) and made a new one that incorporates the top intercooler mount 
Right where the intercooler outlet is, was the mounting location for the power steering pump. I sliced that off in the band saw and now it's a straight shot from intercooler to throttle body. 
I now have the world's shortest windshield, at least it doesn't impair my sight lines to the cones 

The transmission mount was a huge P in the A. I wanted it removable and I also wanted to use the original bracket but both these things landed up making for a lot of extra work. I bought some thick wall tube that I could thread, then I welded the threaded tube into the frame where the bracket is going to bolt to. Getting them situated perfectly was sooooo much trouble but anyways, here's a pic of the final product. 
Inspired by how my old 911 was jacked up, I welded in a tube on either side of the car at the approximate balance point and can jack up the car to swap tires 

The whole car as it sits is up to 1425 lbs (w/o driver) so by the time the coolant and aero bits are bolted on, we will be at minimum weight The driveshaft arrived today. 

I wasn't happy with the trans mount so in order to make it lighter, I needed to make the right side engine mount stronger. Here's the way it was originally: 
And how it is now (still not fully welded) 
Stripped of the bodywork, it looks kinda like an Ariel Atom 
4 hours...that's how long it took me to build this new transmission mount. I never liked the old one and since I will likely be racing this car for many years to come, I may as well take the time to build one I like. It's made entirely of sheet metal and flat bar and I wish I had the money to get someone to laser cut the holes but all I have is a plasma cutter and a die grinder to do them myself. Also, the old mount weighed 8 lbs and the new one is only 4 lbs-and that makes me happy. Here it is tack welded 
and installed 
I built a driveshaft safety hoop and fortunately, it will keep the front and the rear of the shaft from doing damage in the event of failure 
I also moved the power steering motor over so I could lower the intercooler and improve my center of gravity 
The modern engine needs a vehicle speed sensor (VSS) and Dakota Digital makes this slick little adapter that screws right into the speedometer drive of the early 80's transmission and sends the right signal to the computer-amazing! 
The electric steering motor moves around a little when I'm cranking on the wheel so I added these two aluminum braces 
Walk around of the race car: [www.youtube.com] Made the engine side floor today, I'm definitely running out of things to do until I get more parts 
The wiring harness and intercooler pipes/connectors arrived so I got started on the electrical. I got some aircraft quality waterproof switches and keyed switch and put them in the dash. However, the keyed switch has a wiring harness from the space shuttle so I'll be swapping it out for something simpler. 
That black piece of plastic at the top of this picture is the ECM holder, and beside it is the fuse box (not wired up yet) and the relays for fans and fuel pump 
I rebuilt the intercooler mount so it can also hold the fan in place also. Simplify and add lightness 
Another part from the old car is recycled. I bolted the old battery box just behind the passenger compartment and ahead of the rear tire. I also bolted on the master kill switch and started on the wiring. The engine is drive-by-wire but it's more like 10 little wires that had to be soldered and heat shrinked. The intercooler fan is now hooked to a switch and works great. I'm not a fan of the wiring, it just seems to look like a rats nest no matter what I do. 
The fuel system uses all Aeromotive aluminum fittings with alcohol resistant hose. It's all plumbed up except for the return line from the engine. You can see the electric Holley Black series (alcohol compatible) fuel pump,surge tank and gas tank in this picture. The electric pump only supplies low pressure fuel to the surge tank, where the manual pump on the engine grabs it and pressurizes it to 2500 psi (not a misprint, the pump is making 800 psi at idle). The purpose of the surge tank is to ensure a good supply of fuel no matter how many G forces the car is generating. 
I also double checked the motion ratio of the front suspension by measuring the distance between the shock mount on the rocker arm and the shock mount on the frame, then lifting up a front wheel exactly 1 inch and re-measuring the distance from shock mount to shock mount. 1 inch of wheel movement equals a minimum of 3/8" movement of the shock all the way up to 3/4" movement, and about everything in between. This may not seem like much but it's the difference between a wheel frequency of 93.7 CPM (typical for production sports car) to 187.2 CPM (Formula Ford) so surely I can find something in there that works. I included a picture of the rocker arm for reference, but it's an old picture with the old upper control arm in place. 
That blue knob is for adjusting brake bias and to the right of the steering column you can see two diagnostic ports. I got two so that one can be used for a digital dash and the other for programming or diagnostics. My HP Tuner box arrived today, I have no idea what to do with it but I understand that it's integral to the engine running. 
The floor and the diffuser are are complete and installed. 

But the better news is that I installed everything on the car (except rear spoiler and front splitter) and placed a 5 gallon bucket of water at the back to simulate the coolant and fuel, plus a 170 lb driver in the drivers seat then weighed the car and it was only 1450 lbs!!! It is also 50/50 left/right, surprising considering the engine is on the right. If I can add 300 lbs of ballast low down and at the back, my weight balance will be 59% on the back tires and that is amazing. I mounted the fuel filler today. It was the only spot that looked good and didn't interfere with anything else. 

I am bringing this build into 2015 by creating a YouTube channel for it and will be doing video updates instead of the usual pictures and text. The channel already has over 60 videos of the build and early testing plus some videos that have never been seen. Just go to the channel and subscribe and you will be notified of updates. They won't be Top Gear of even Might Car Mods quality but I will try to be informative and interesting. [www.youtube.com] The car weighed 1410 lbs with driver and that is far below the 1750 lb minimum weight for the class. I debated how and where to add the weight because the current weight balance is 48% front, 52% rear and I would really like 56% rear weight. The floor was 14 gauge aluminum which was fine as long as you didn't stand on it so I decided to build a new floor out of 3/16 steel all the way from the front bulkhead to the diffuser. This would account for almost 200 lbs and I would use steel plates between the rear wheels to bring me up to the 56% weight balance I want. I bolted the plate on and reweighed the car with a driver and it is 1650 lbs with 53% in the rear. I did not take pictures of it this time but the video is here: [youtu.be] The club seems reluctant to lend the digital scales to members so I got a Deco Wheel Load checker from Speedway Motors (it's only $189). Here's a video of how it works [www.youtube.com] I checked to see if I had bump steer today by attaching a straight piece of steel to the brake disc and moving it through it's normal range of travel. You can see how I did it and the results in this short video [www.youtube.com] My rear roll center was 7.5" at it's lowest setting and I could make the suspension work with this but I would rather have a little more adjustment. The axle side mount needed to be re-made so here's what it looks like now and a video of how I did it: 
[www.youtube.com] 

I have spent many hours building the firewall, and ran out of material so it's not done yet. The packaging is pretty tight on one side and complicated by the shifter being right there, plus I have to make it in such a way as to be easily removable to gain access to important bits. Here's a sneak peak picture and the video will come when it's all done. 
Firewall is done, here is the video [www.youtube.com] 
With the engine still not running ;( I am left with little jobs like mounting the battery in a battery box. It's just in front of the rear tire and I have a connector coming off of it for a charger to plug into. 
Running out of things to do, I painted the front suspension: 

[www.youtube.com] Finally some progress with the engine. I have been trying to get the engine running since the middle of December and nothing worked. Theories were thrown around, VATS, sensor problem, missing pieces, etc but in the end, it was simply a tiny wire in the middle of the wiring harness that had broken. Video here: [www.youtube.com] Bonus quickie content, in the future these will be for subscribers only: [www.youtube.com] I drove it today! I'm thrilled with how light and tossable the car feels. The electric power steering seems to have some trouble keeping up in really rapid direction changes but it's really minor. Also, the coolant temp was only good when I kept rpm up but got hot at idle so I must have an air pocket in there still. Looking at the data logger, the MAF is getting confused and only allowed throttle to open 37% so that explains why it felt a little less zippy than the 5.0 V8. The brake bias knob works perfectly, a few clicks changed from locking up rears only to locking up all four. The shifting is pretty easy,too. I linked to the edited video but I will be uploading the raw, unedited video and you will need to be a subscriber to see those. [youtu.be] That electric power steering problem I was having? It was actually an Ackerman problem. The suspension program I use shows Ackerman error and such and I wasn't reading it correctly so I had anti-Ackerman. Watch the video, see how I solved it [youtu.be] Had some tricky cooling system problems, and I solved them with a coolant surge tank. Video: [www.youtube.com] I did not have a shrouded fan on the radiator, until now. And in keeping with the theme of the car, too much is just right. 
Video here: [www.youtube.com] I installed boot lid pins today and they should work pretty well 
[youtu.be] I needed to improve the doors so I tried fiberglass and I tried aluminum, one worked and one did not. 

[www.youtube.com] The engine problem is fixed! After a lot of brainstorming and research, Bad News Racing sent me a tune to try and it worked! The speedometer works and the the engine is no longer cutting power. The indoor kart track is far too small to really test it but it seems that I have enough power to overwhelm the brakes so it's a good start. The disassembly has begun 

The car is fully pulled apart now, took 6 hours 

The video of all this happening [youtu.be] This is about 12 hours of work boiled down to a 5 minute video 

[youtu.be] The frame is painted: 
[www.youtube.com] I have started to put it all back together. Some bolts get thread lock, others get anti-seize but everything has to go slowly and carefully so I don't scratch the surprisingly fragile paint. 
[youtu.be] I am about 14 hours into putting the car back together, here is where I am at 
Part 2: [www.youtube.com] Part 3: [youtu.be] A few more bits and pieces are on, it's getting close to running again 
[www.youtube.com] The car is together and running. The floor was tricky to get lined up properly and I am still having some odd problems with a fuel pressure sensor but it is running a I'll be driving it soon. Check out my custom brake lines 
Part 5 of assembly [youtu.be] Yesterday was hours and hours of tracing wires, re-doing ground cables and testing....all for nothing. I still had the same fuel status fault and the engine would make no more than 7 psi of boost. Today started out the same except I loaded an old tune and it worked, the fuel sensor problem cleared up! It wasn't all sunshine and rainbows, check out the video: [youtu.be] The first time I competed with the Pink Panther in Lincoln, I was told that I couldn't come back until I made the car quieter. The turbo is a remarkable muffler but to play it safe, I added something extra. I have always liked Flowmaster mufflers so I looked through their catalog and chose the DBX, which is supposed to be quiet, high flow and light. I forgot my camera so I didn't capture any of the process of welding it up but here it is, and I can't believe how quiet it is. 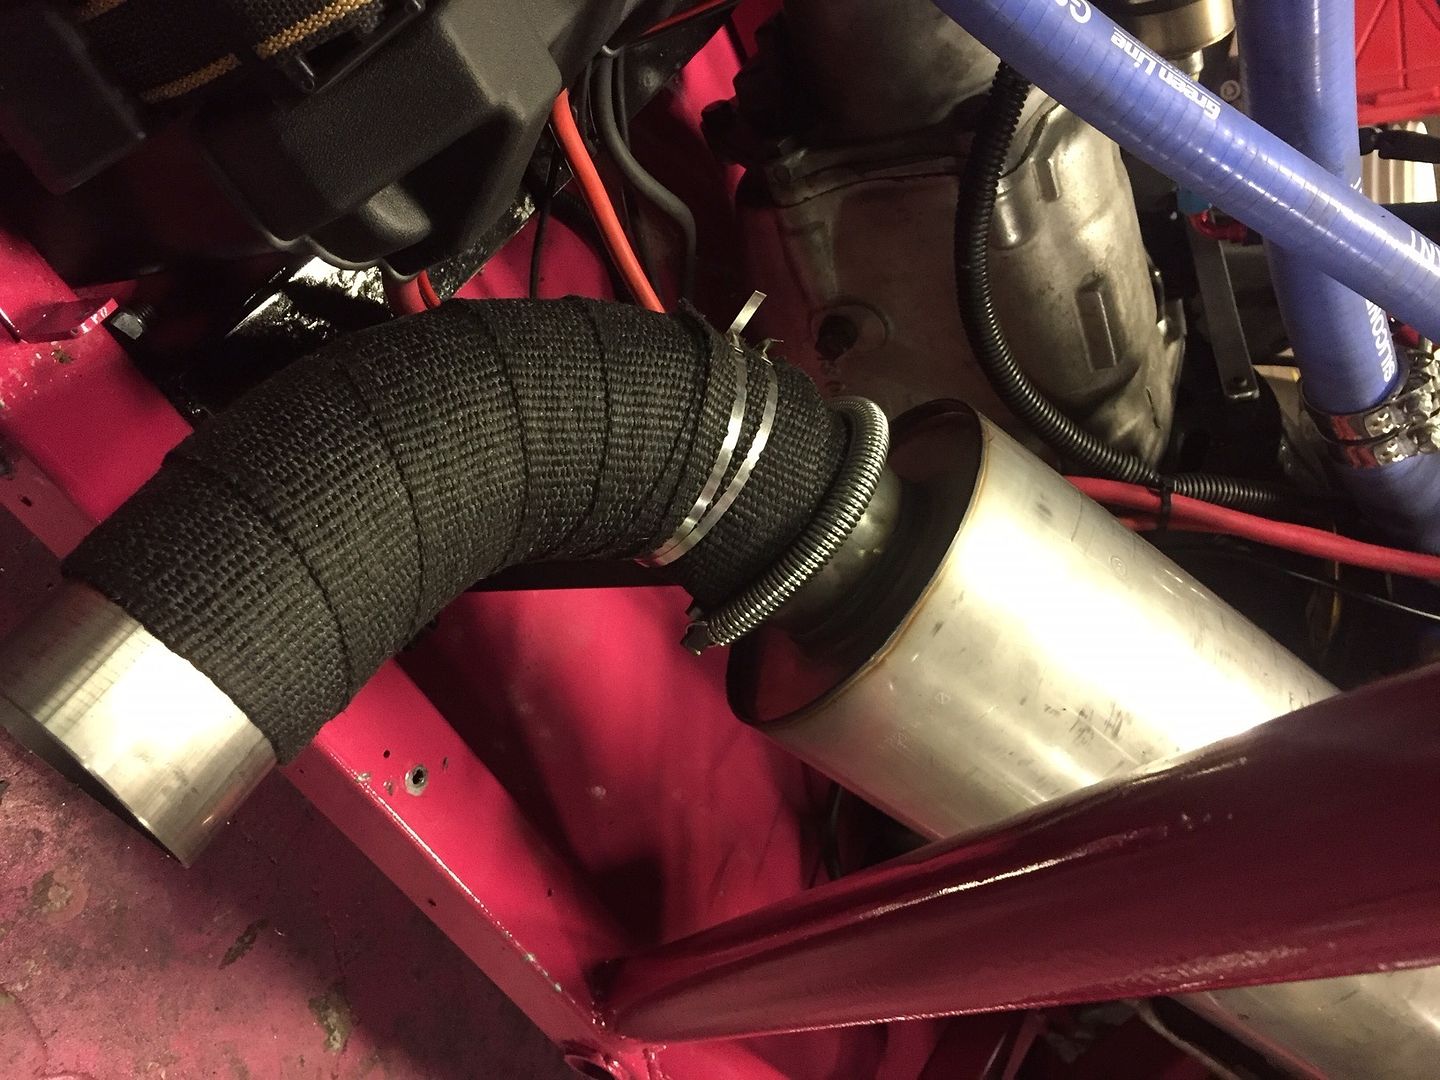

[www.youtube.com] Bad News Racing sent me a tune to try so I loaded it into the ECM and fired it up. I got it up to temperature and put it in 2nd gear then mashed the brake and gas at the same time. It quickly became clear that something was very different, the boost hit 20 psi and the brake discs started to glow red from me trying to hold the engine back. I waited until customers left the kart track then I took the car for a little drive. I have done many laps with the V12 and the V8 and the track never felt really small, until now. The boost comes up and suddenly I'm going way too fast inside a building. It's not enough time to see if the engine was going to go into some kind of limp mode or reduce power so I did donuts with the loud pedal to the floor. It bounced against the rev limiter but didn't seem to fall off. I need to study the data logs and put it on a dyno but it definitely took a step in e right direction today. 
[www.youtube.com] I was measuring motion ratio of the different rocker holes and noticed that I may have a conflict between the lower bar mounts and the floor. I used my suspension program to check anti-squat at the various holes and realized that I didn't need that bottom hole anyways, so it had to go. [www.youtube.com] I installed the painted panels on the car. There is dust in the paint but I'm afraid I don't have the money to get a professional to paint them in a booth so I'll just have to put up with it. I really dig how the pink and grey go together. Photobucket is having problems 

Front clip and boot lid are painted so I took car into sunshine to look at it. I had to remove front clip to get off of tiltdeck truck. 

[www.youtube.com] I put the car on the dyno today and everything went as smooth as glass. It made 282 HP before even touching the tune. Jerry from Bad News Racing used TeamViewer program to make the changes remotely on my laptop and I just loaded the tune and made another run. After a few runs it was making really good power and I didn't have to stress the engine at all. We didn't run it to risky RPM or even close to lean. We didn't run the big cooling fans on the car and it's temp stayed at a steady 185. I also took it for a drive and it really goes and feels amazing. My rear brakes are bigger than the fronts and even with full front bias, it tended to lock up rears. I have already solved this but milling away 1/3 of the rear brake pads. It's crude but it works. I'm going to source some higher octane fuel and will try again another time. 
[www.youtube.com] I have been tinkering with little things here and there, just tying up loose ends. There was a small coolant leak and there was a gap on the drivers side between fender and frame that I had to block to keep debris from getting kicked up on me. Both of those things are solved and the drivers side door is on. I need to come up with a plan for graphics but the car looks pretty good as is. 

I got some of the stickers from the printer and put them on, can you guess what the symbols stand for? I also put the passenger side door on but it was difficult, I hope I don't have to put that on again anytime soon. 


I have been taking care of little details, like adding a front tow hook, a heat shield around the exhaust outlet and a rear valance. When the valance and diffuser are on, hot air from the rad needs a place to go so that's why I left the taillight locations open. I also ordered 13" aluminum wheels and they weigh only 9 lbs each! 


As far as I could tell, the car is ready for it's racing debut. Loading it into my trailer for the dyno was a huge problem so I sold that trailer and bought another one that has a 9" lower load height. Despite that, it was still hard to get into and out of the trailer. I thought maybe raising the ride height would solve this but it only put my rear tires directly in conflict with the floor-ugh! I brought it over to the graphics guys and got the vinyl applied but am not thrilled with how it turned out. I will be autocrossing it for the first time this Saturday and am nervous about all the things that could go wrong but am excited to finally drive it the way it was meant to be driven 


Race Report: I was pretty nervous about racing it today because it's been such a long road to get to this point and any number of things could go wrong. I didn't know how well it would go, turn or stop but I needed a test before making the long trip to Lincoln so I raced today. Getting it out of the trailer was the hardest part and it took 3 of us to do it. I was in the first run group on a very dusty, gravel covered track so I really didn't know what to expect. On my first run, the car shot off the line really well and but was pretty twitchy when changing direction. It stopped well enough but a lot of time was lost catching sudden oversteer. I adjusted the front sway bar one hole stiffer and went out again. This time the engine didn't start making power until I was several hundred feet into the course and that is a setting in the computer that will need adjusting. I spun it at the one pivot cone because it was very dusty and the car is still slightly rear brake biased. It was not nearly as twitchy but something still wasn't right so I checked toe setting and found that it was toe-in, so I corrected that and went another hole stiffer on the front sway bar. The 3rd run still had that delay in making power but I got a re-run so it doesn't matter. The re-run was smooth, fast and good enough for quickest time of the day. On the 4th run, I put the speed sensor into test mode so the engine would think it's always moving and it made a lot of power and spun the tires off the line. I was really flying on that run but at the half way point I couldn't turn quick enough to make a cone and center punched it. Getting it back into the trailer took 3 of us an hour to sort out so I think some mods are necessary. I really couldn't have asked for a better first event and my goal is to get top PAX but I will take FTD for now. I edited the multiple runs with multiple camera angles into one video. [youtu.be] 
Today the car came loose in the trailer when a strap snapped and did a number on the the front spoiler and rear end when the car pinballed inside. I did some quick bodywork and paint and fixed it but was too traumatized to take any pictures. I doubled up on the strap strength, added some tie down locations in the trailer and am having a friend fab up some aluminum pieces that will make fastening the car down much easier. I also weighed the whole truck, trailer and car at the truck scales then went back with just the truck and trailer and weighed again. I was pretty worried when the numbers showed that the car is hundreds of pounds over weight but then I went back with the truck,trailer and car again and the numbers were nearly 400 lbs different than the first time, so the scales just aren't accurate. I also put the car on the dyno again to do some final tuning and checks before going to Lincoln and it's running pretty healthy. Check out how flat that powerband is: 

[youtu.be] Lots has happened in 2 days. We headed for Lincoln, Nebraska for the Spring Nationals. There are 350 competitors and it takes place at the same location as Nationals and is a good test. I ordered Keizer wheels A1 model of spun aluminum wheel. It's the cheapest wheel that Keizer makes and I can't afford their Verbrand or Full House 3 piece wheels. I arranged to pick them up on the way to Lincoln and Wade, the owner of Keizer wheels called me and said that they were putting the finishing touches on the wheels when he saw something on them that he didn't like. Since he couldn't re-manufacture a new set in time, he was going to assemble a set of their Full House model 3 piece wheels at no extra cost. I was pretty excited because these were the wheels I really wanted. Video Here: [www.youtube.com] I also took a tour of the Keizer factory, video here: [www.youtube.com] We got to Lincoln and since nobody was on the the Test course, we took full advantage and made 21 runs with no troubles at all. Briget made 9 runs back to back just to get familiar with the car and it didn't overheat or miss a beat, it just roasted tires run after run. Then I went out and made a run, came back, made one suspension adjustment then went out again. I landed up stiffening all the shock settings (hi and lo compression and rebound) and raising the roll centers front and rear and in the end was 3 seconds quicker (36 seconds vs 39 seconds) on the course. Then I handed it back to Briget and she immediately chopped 1.5 seconds off her best and reported that it handles a lot better. We logged some runs and sent the data off to Jerry at Bad News Racing to see if anything can be improved. Oh yeh, we finally got an official weight on the car and it's too heavy. Fortunately, once I replace the heavy steel floor I made with an aluminum one, the car should be at the minimum weight for the class. [youtu.be] So much has happened. Jeff Kiesel was running the test course and he was many seconds quicker than we were, so I did the logical thing and asked him to drive my car. He has 9 National Championships in EMod and I expected that there would be some constructive feedback and he had some. Peppered in with comments like "Something is broken" and "Your car scares me" were things like "The inside rear tire is coming off the ground, that needs to be fixed" and "change your pinion angle". We studied the rear suspension and pondered solutions and it was decided that I should try to reduce spring pre-load to hopefully increase droop. I wish I took video of what I had to do but I disassembled the rear shocks using ratchet straps and eliminated an adjuster ring to remove the considerable amount of spring pre-load. Once assembled and back on the car, rear suspension droop went from 3/4" to 2"-victory! There was no time to test last night so Briget went out on her run with all these changes and not having any idea what the car would do. She came back and said the car was better and I felt it was better, too but we are way off the pace of the leaders and are holding the final two positions in the class. After competition was over, I took the sway bar arms off the rear bar and put them on the front bar because they had a lot more adjustment in them and increased roll stiffness in the front. I took the car on the test course and immediately took a whole second off my best time because I could actually accelerate around turns, and felt far more stable. The reason is that by stiffening the front, it plants the back tires better and keeps them on the ground. Briget took it out and took 1.5 seconds off her previous best. We are hoping for better results tomorrow. Obviously, last place and second last place are not what we wanted or expected but on the plus side, the car now has 56 runs on it without anything breaking, coming loose or acting weird. Here is a video: [youtu.be] 

On day 1 I was 5 seconds slower than Jeff Kiesel and I have already described the changes I made after my poor showing. Today we ran the exact same course as Day 1 but it was in the opposite direction and I could tell right away that this was not the same car I drove yesterday. I was able to accelerate around turns and the car felt very stable, but was still plagued with the rear tires locking up under braking. I had to do all my heavy braking in a straight line and you can hear the tires locking up in the video. I cut the gap to Jeff's lap time to 2.6 seconds and moved up 2 places to 5th in class. I couldn't be happier. The car has done 60 runs (many of them back to back) without a blip and is genuinely fast and fun to drive. I still have plenty of sorting to do and came across the scales at 2100 lbs when the class minimum is 1750 lbs and have to sort out the braking. I think I will be in the trophies at some point. Many people who have been following the build online came and talked to me and I really appreciated it. If you see me at an event, please come and say hello and ask all the questions you want. If I'm not in the middle of wrenching on something, I'll talk your ear off about the car. Watch the video: [youtu.be] After the car broke loose in the trailer, I had a buddy take a wheel spacer and weld a tube to it. They bolt onto the car and I hook ratchet straps going forward and back from them, holding the car solidly in place. 
And here are the Keizer Full House wheels I picked up at the factory. They weigh nothing and are beautifully machined. I can't wait to put them on the car but their debut will be later in the season. 
I got the car back into Speedworld and began doing all the little things that it needed. I started converting the rear brakes from the Strange Engineering 4 piston calipers to the Wilwood 2 piston calipers. The Keizer wheels fit over the Strange calipers (because they were heavily trimmed) but don't fit over the Wilwood calipers so instead of trimming them, I am having a little bit trimmed off the rotors. I have to make new caliper brackets anyways so it was the better option. The Keizer wheels clear the front brakes but not the balljoints so watch the video and see how I fixed that problem. [youtu.be] More work happened today. I riveted (yes, riveted) the new aluminum floor in and hope the rivets will prove durable enough. I also built steering stops because when I changed the alignment, suddenly the wheels were contacting the lower control arms. I expect the 13" wheels will also have this problem so I made the stops adjustable. 

[youtu.be] My rear calipers were too big and even moderate pedal application resulted in locked up rear tires, so I changed the rear calipers to exactly the same Wilwood Dynalite calipers I have in front. Watch the video to see how I did that. 
[youtu.be] At SpringNationals the car kept getting better as I stiffened front sway bar but I quickly ran out of adjustment. According to the online sway bar effectiveness calculator, the stiffness of my bar ranged from 200 lb/in to 1600 lb/in depending on which hole the link was bolted to. This didn't make sense to me, 1600 lb/in seemed wildly too stiff and the car was still quite compliant. Then it occurred to me that the link bolted to the lower control arm only about 1/3 of the way out so 1" of wheel travel resulted in only 1/3" of sway bar movement. So, today I moved the mounting point almost to the ball joint and this will result in a much stiffer sway bar (but still not 1600 in/lb). Attached are pictures of the original and updated mount 

I wasn't going to do any aero stuff this year but I figured that a good splitter will also protect my bodywork from cone strikes so I built this. I used Alumalite, it's a layer of Coreplast sandwiched between two layers of thin aluminum and is fairly light and strong. 

During SpringNationals, the car never overheated but when sitting on grid with the radiator fans going, the hot air would swirl around and make the very hot driver even hotter. This would go away if I removed the rear valance panel but then I leave myself open to protest because air can travel over and under the diffuser. The answer is to leave panel in place but cut holes in it and cover with aluminum mesh. 
I made a video with one dyno pull with the V12, one with the V8 and one with the Turbo 4, and I list the HP and torque numbers of each. And I found a home for some stickers. 
[www.youtube.com] I put a smaller master cylinder in for the front brakes to increase pressure and did a string alignment of the car 

Video here: [youtu.be] Edited 88 time(s). Last edit at 08/26/2016 10:31PM by MGBV8. |
Sorry, you do not have permission to post/reply in this forum.
British V8 Home Page
Photo Gallery
Web Forum
Annual Meetings
Contact Info
Site Map
British Race Car

© 2025 British V8™ All rights reserved. Website & graphic design by:
Curtis Jacobson.
BritishV8 Forum is hosted by
SiteWelder LLC,
and is powered by a
Phorum engine.