

Project Journals
create a diary for your project and show us your progress, with up to 100 photos!
|
gtownchoppers Richard Dearinger Greenfield, Indiana (11 posts) Registered: 02/19/2009 03:51PM Main British Car: 1977 Triumph Spitfire 1996 Ford 2.3 liter |
2.3 liter Ford/Spitfire
Owner: Richard Dearinger
City:Greenfield, In. Car Model: 1977 Triumph Spitfire 1500 Engine: 1996 Ford 2.3 liter 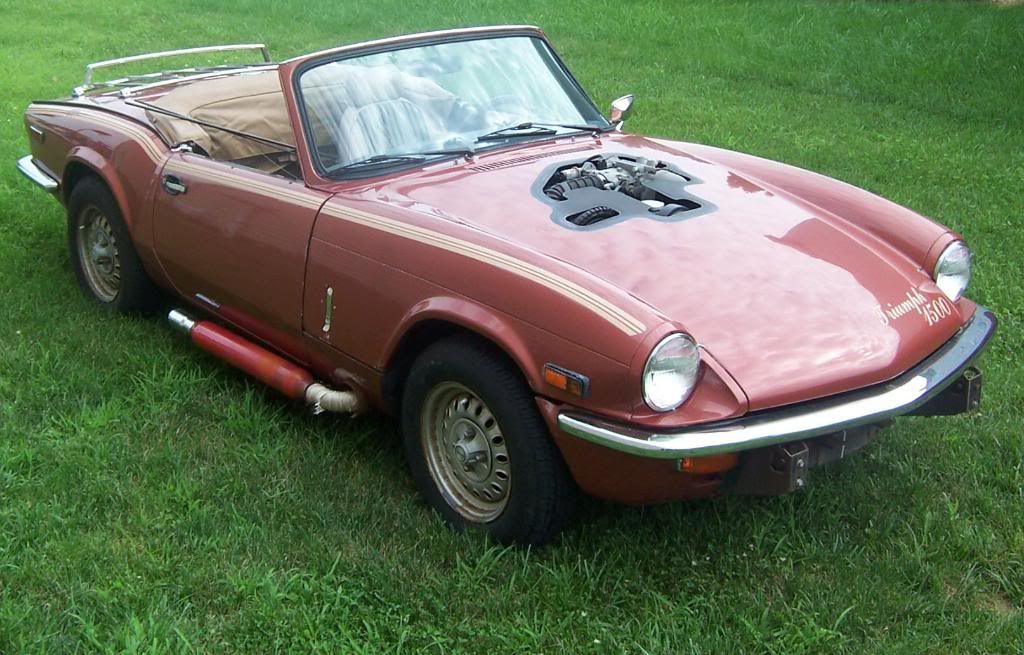
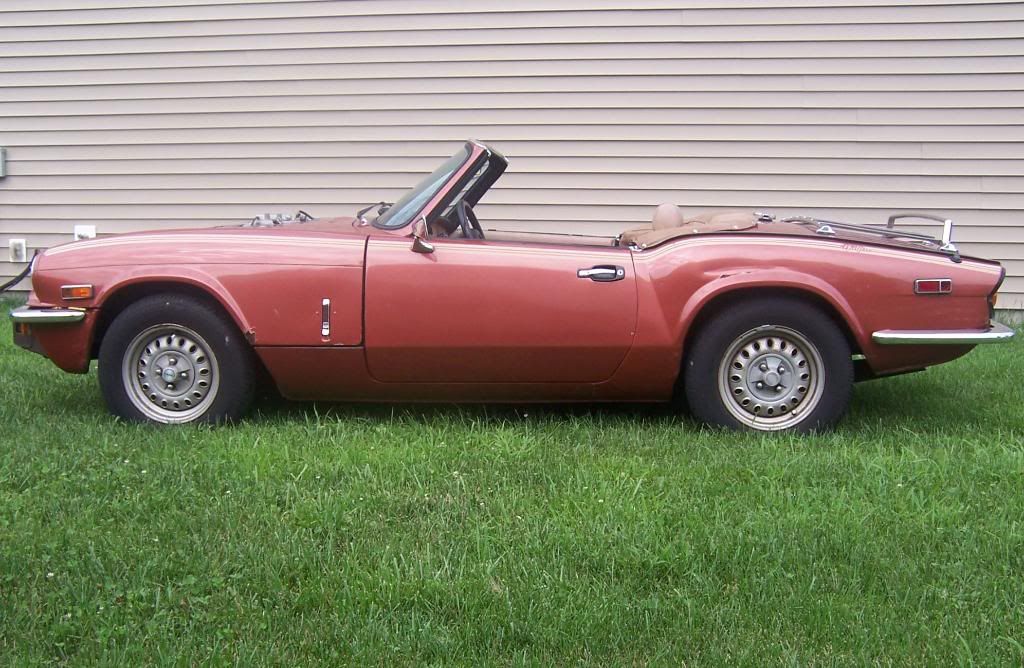
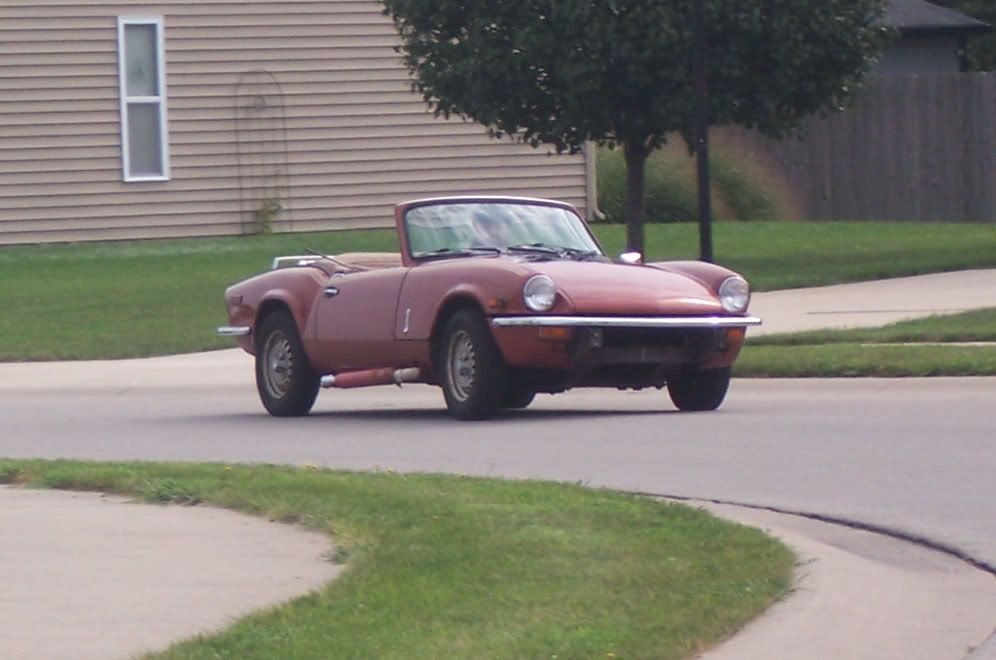
I got to start driving this in May of 2009, it runs and handles great but there is still a lot to be done. I have been driving it back and forth to work as a daily driver with only a few problems-belt tensioner from some ford(belt eater), freebee supertrapp with no baffle plates( I leave for work at 5am and live in town), alt. will not charge if you don't hook up the IDIOT light, all oversights on my part. Now the good-it starts great every time! To worm it up in the morning I open the pass. door, lean in, put in neutral, insert key and turn! no more get in pump the gas 2.5 times, pray...repeat. Twice the power! So, What have I done lately? 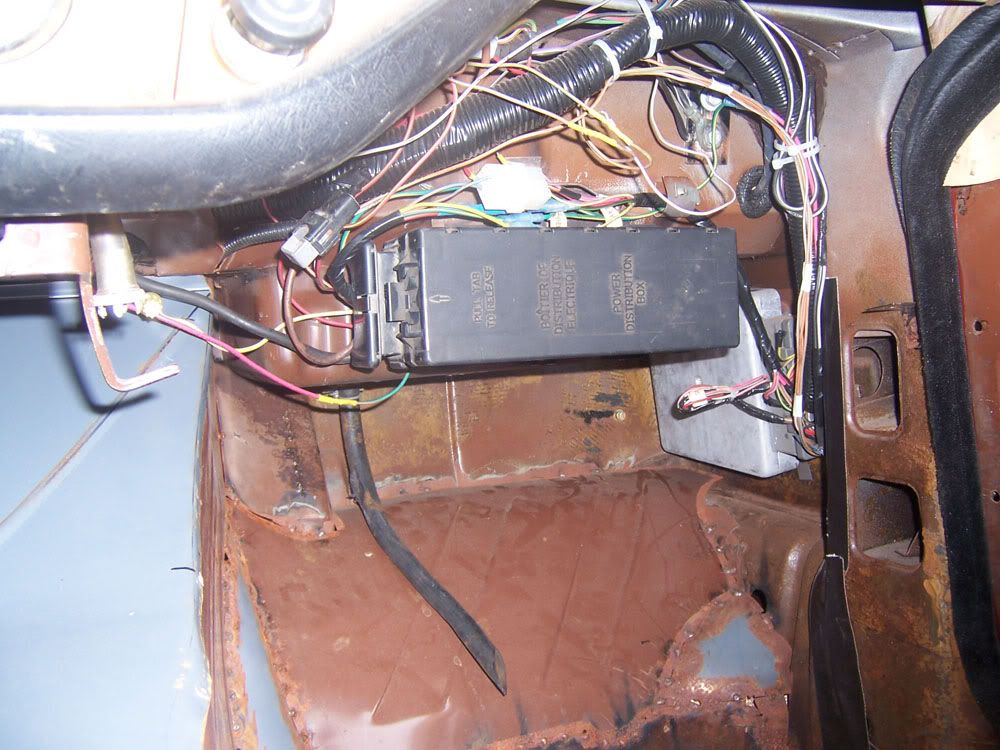
I used the ford ecu, silver box in kick panel area, and the Ford Ranger under hood relay/fuse box, black box. When I get to putting the glovebox in, I'll be able to access the box but not see it from the seat. I'll make kick panels to cover the ecu and finish the footwells. 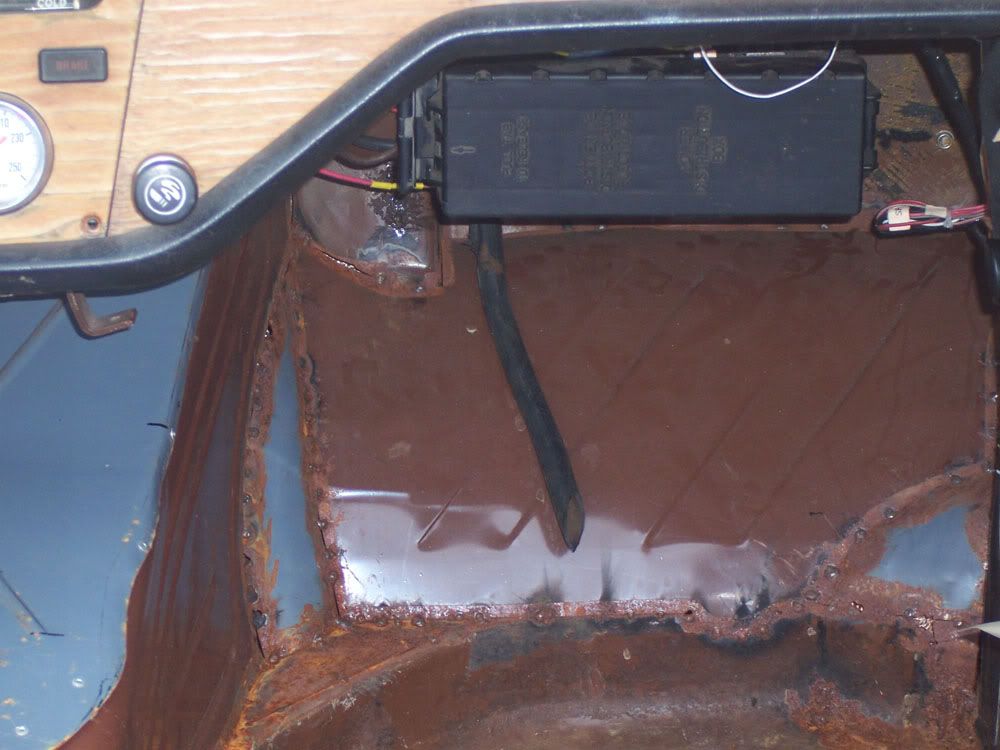
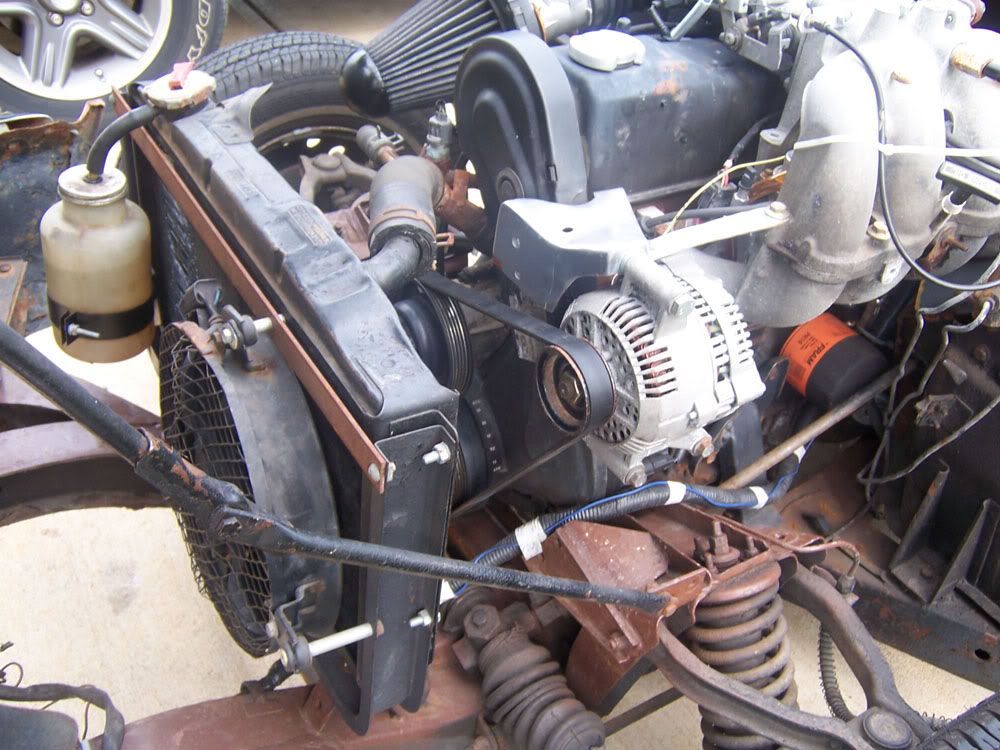
Changed the fan from a pull to a push. I am planning to make aluminum front air shields that will incorporate the radiator mountings, fan mounts and house the air filter. 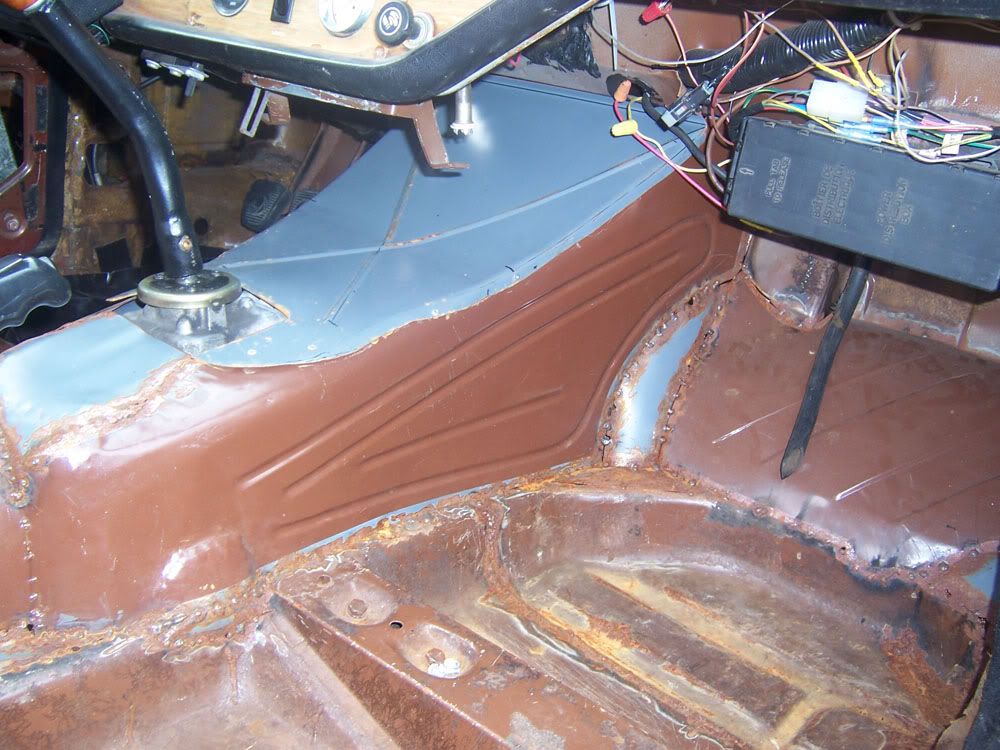
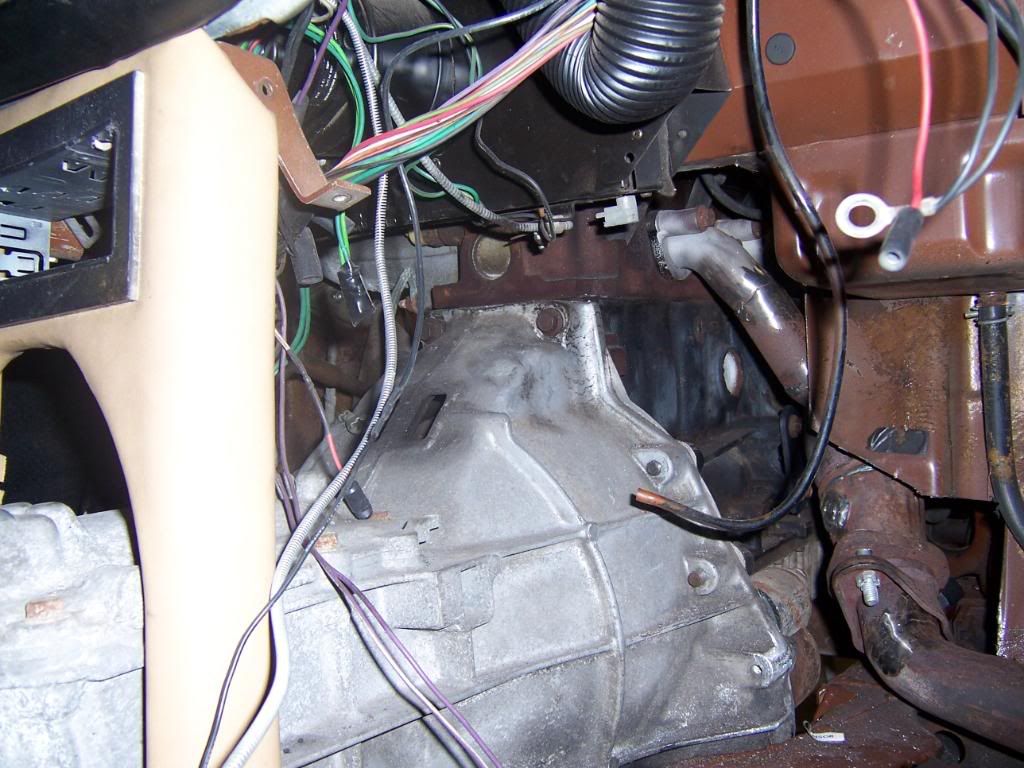
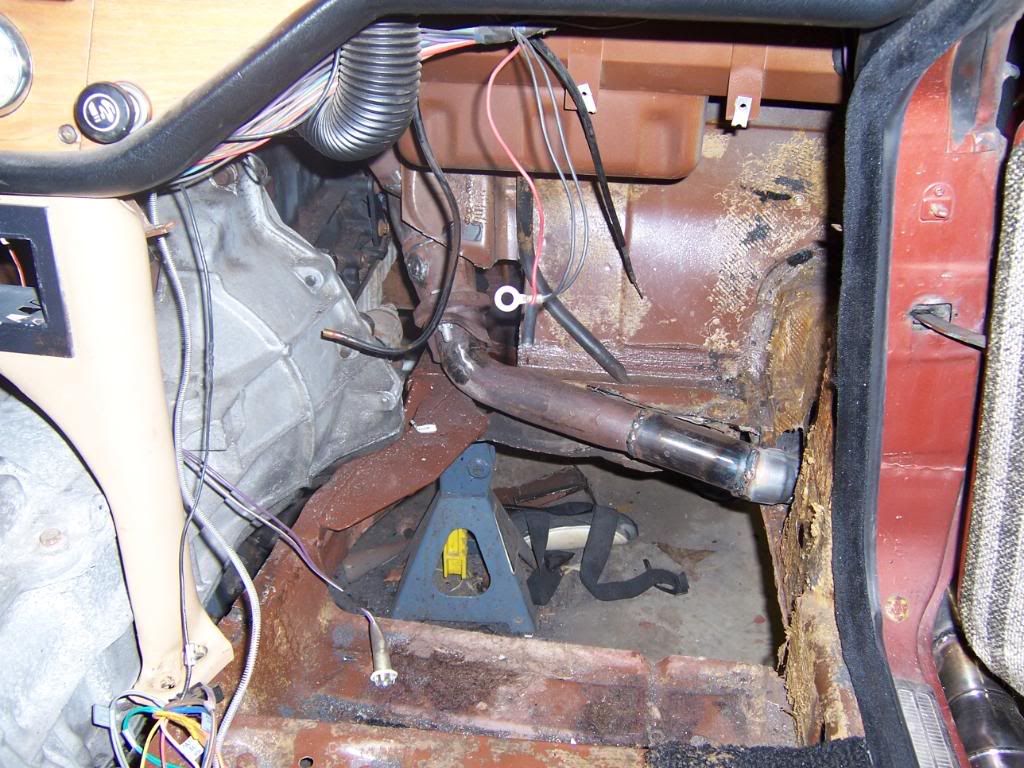
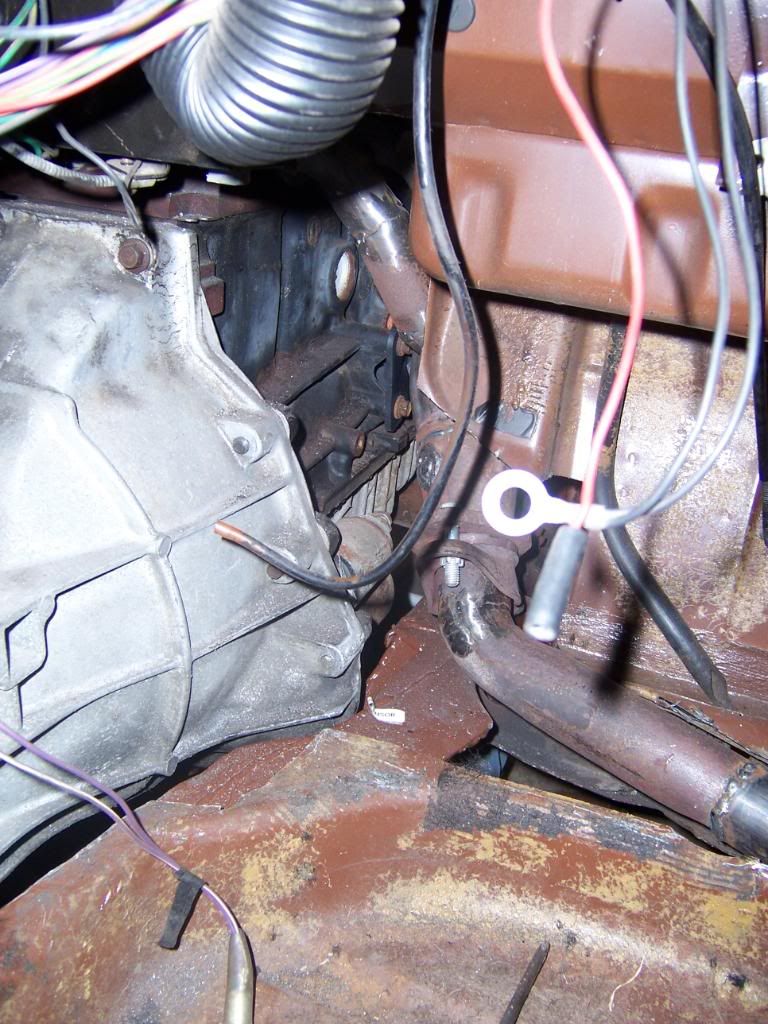
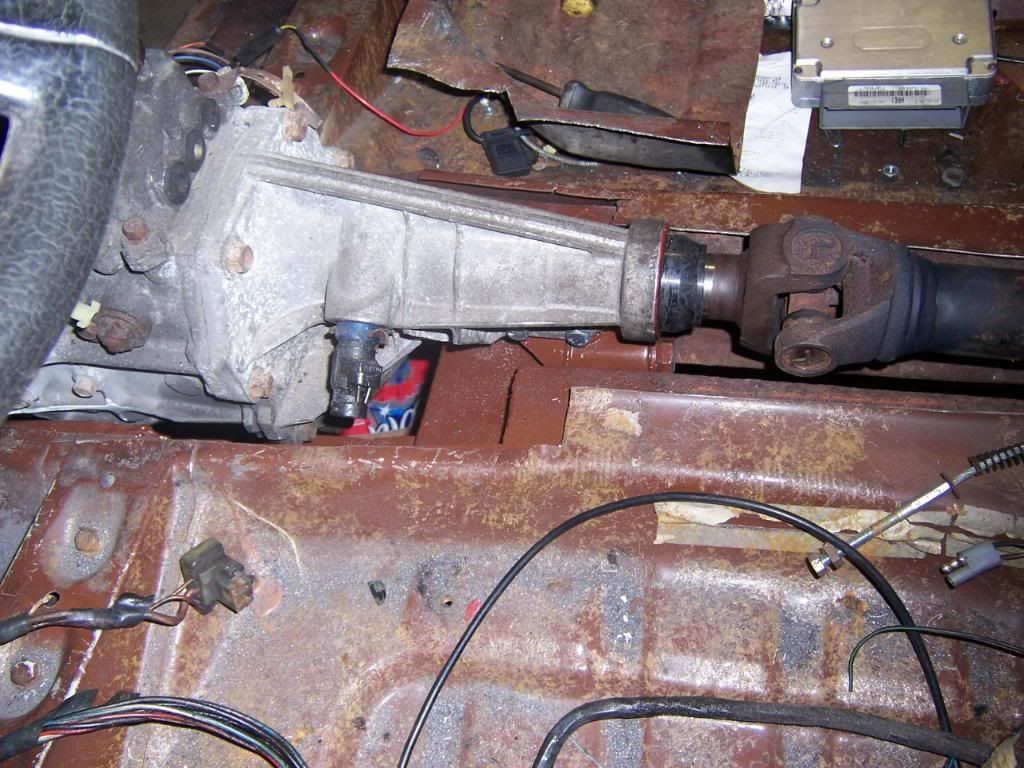
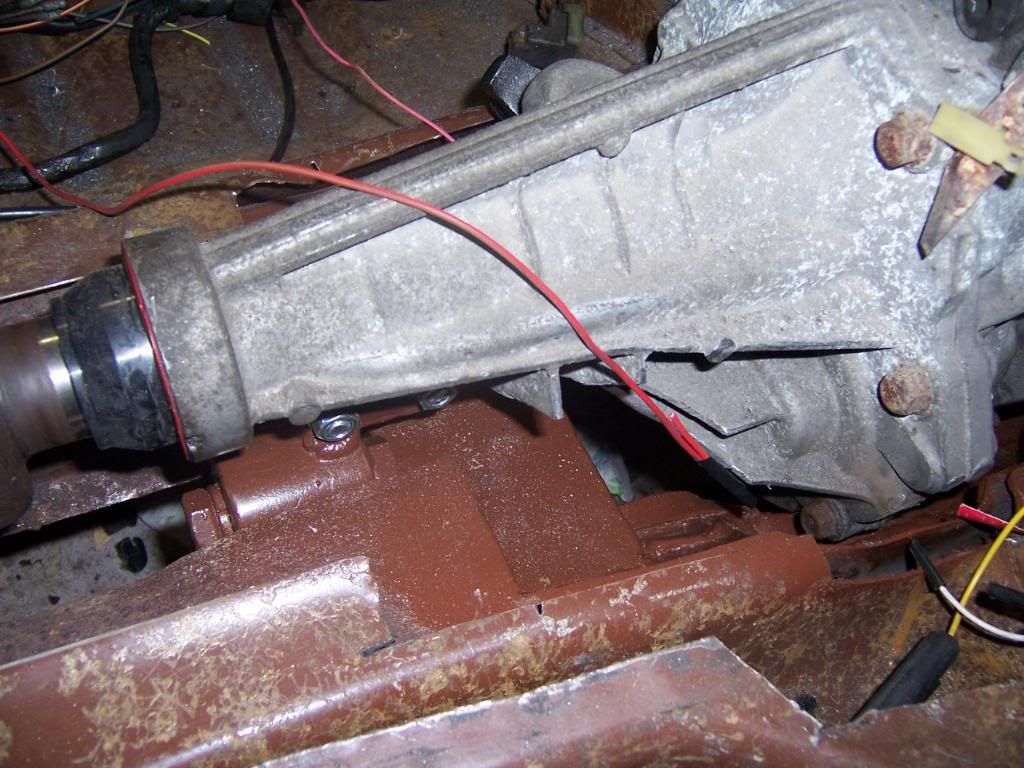
I moved the front of the passenger footwell back about six inches to accomadate the side exhaust. The sides of the trans. cover are fixed with a removable top, the top still needs some work. Every weld will be finished when the tub comes off, for now they hold things together and help keep the wind out. 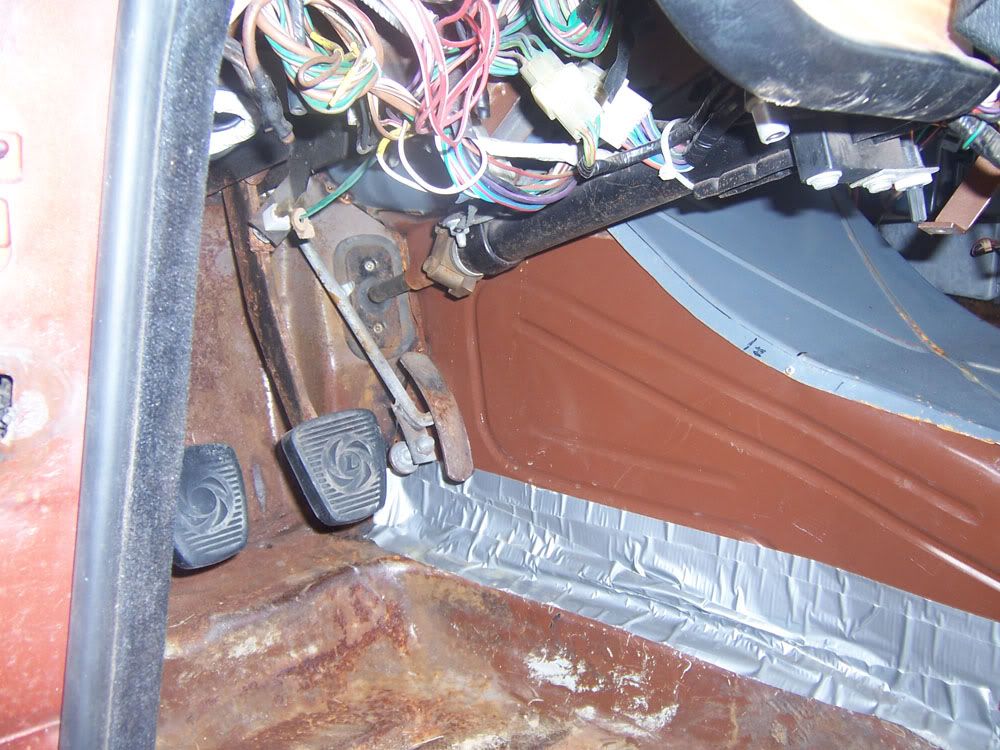
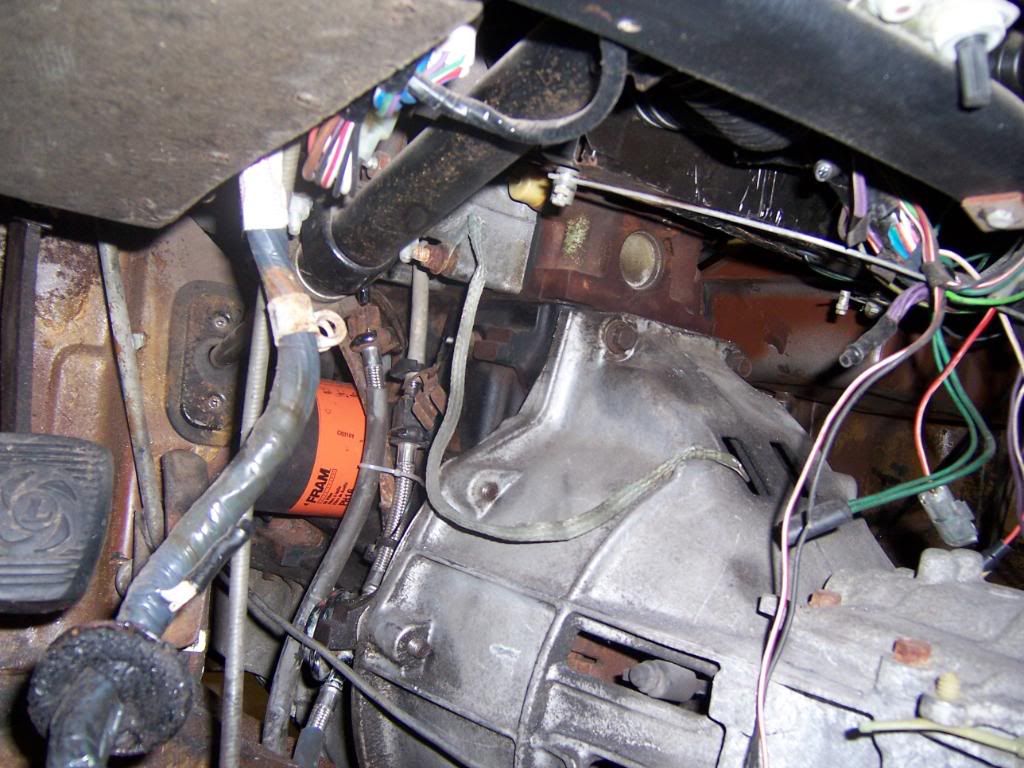
The duct tape is covering the access hole for the clutch line, as long as it keeps the winter wind off my leg, it'll be here soon, I'll put off making the cover. 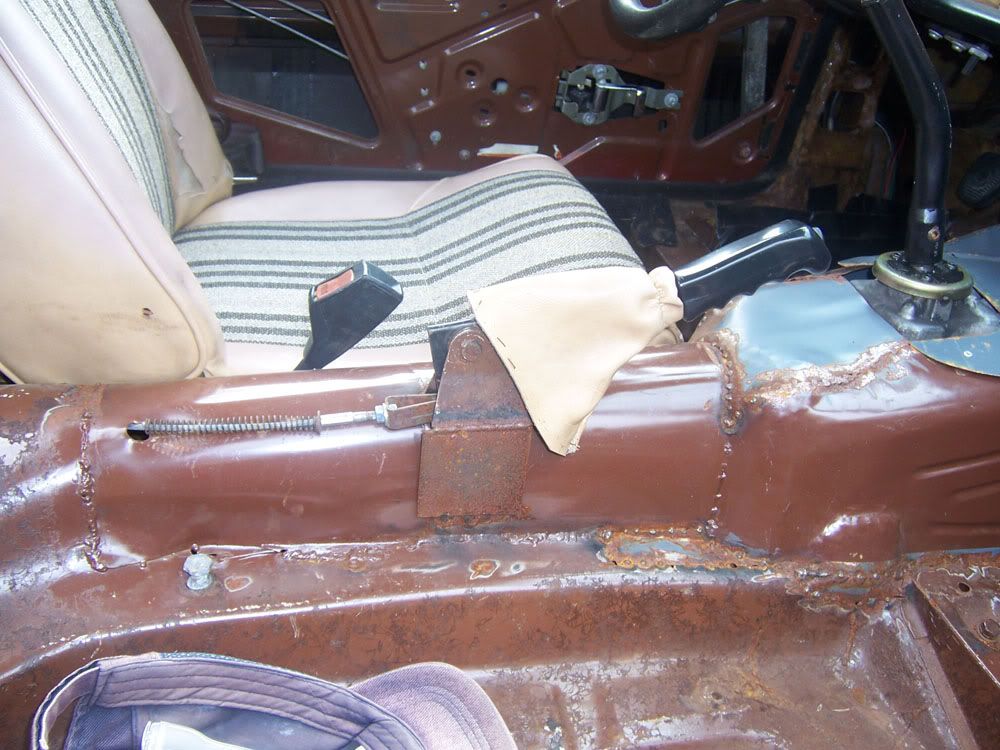
I had to replace the drveshaft tunnel to fit the larger driveshaft joints, so moved the handbrake to the correct side, I'll need to move it forward and down to get it right with the planned center console. 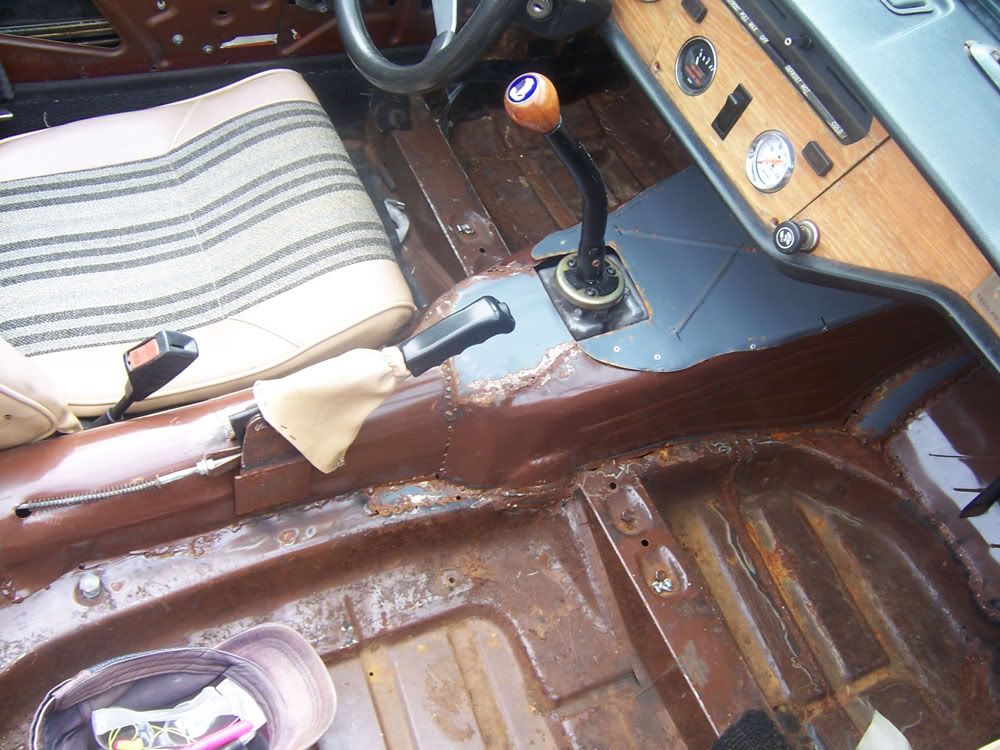
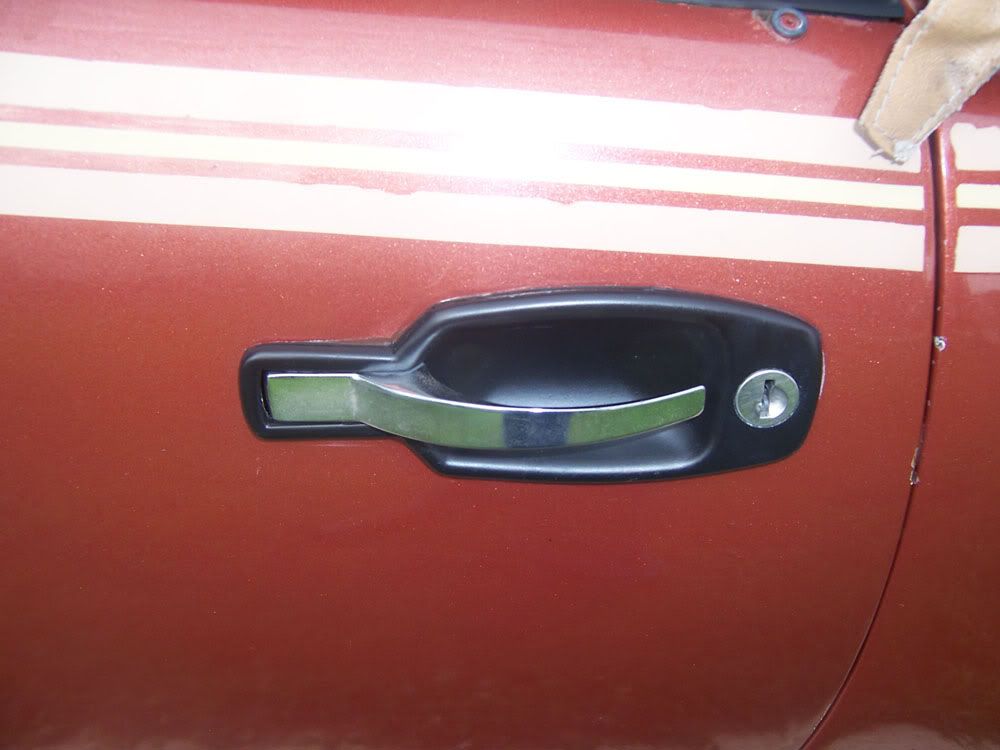
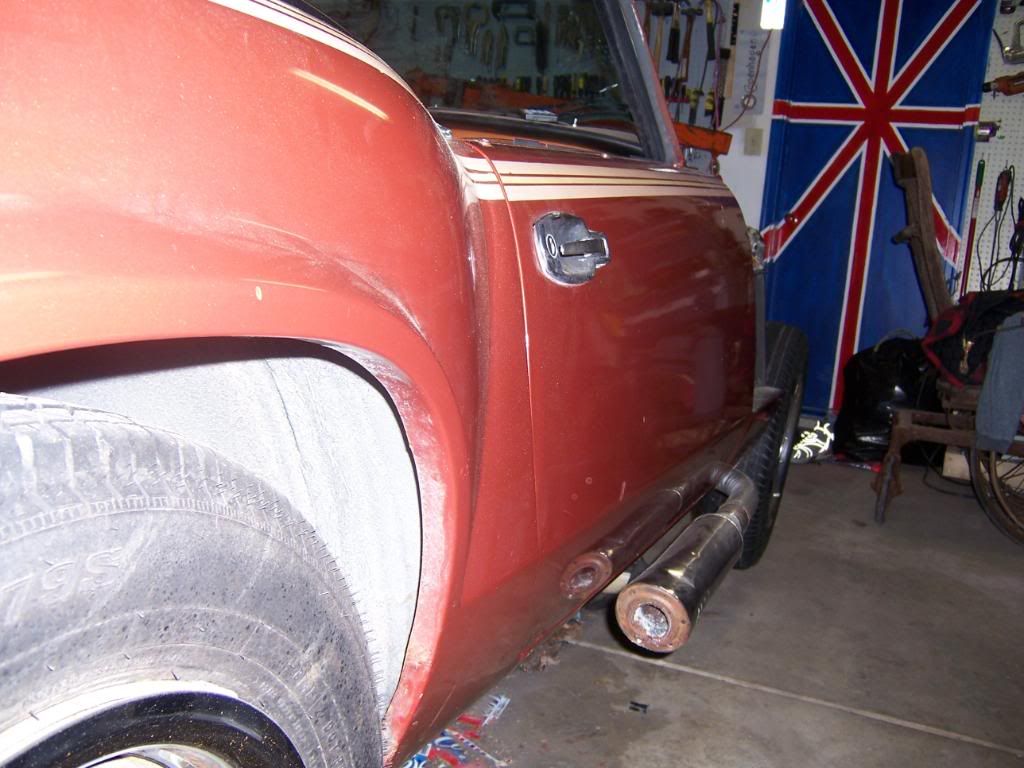
Removed and refinished the door handles, they were looking pretty rough, now, nobody notices them----------but me. 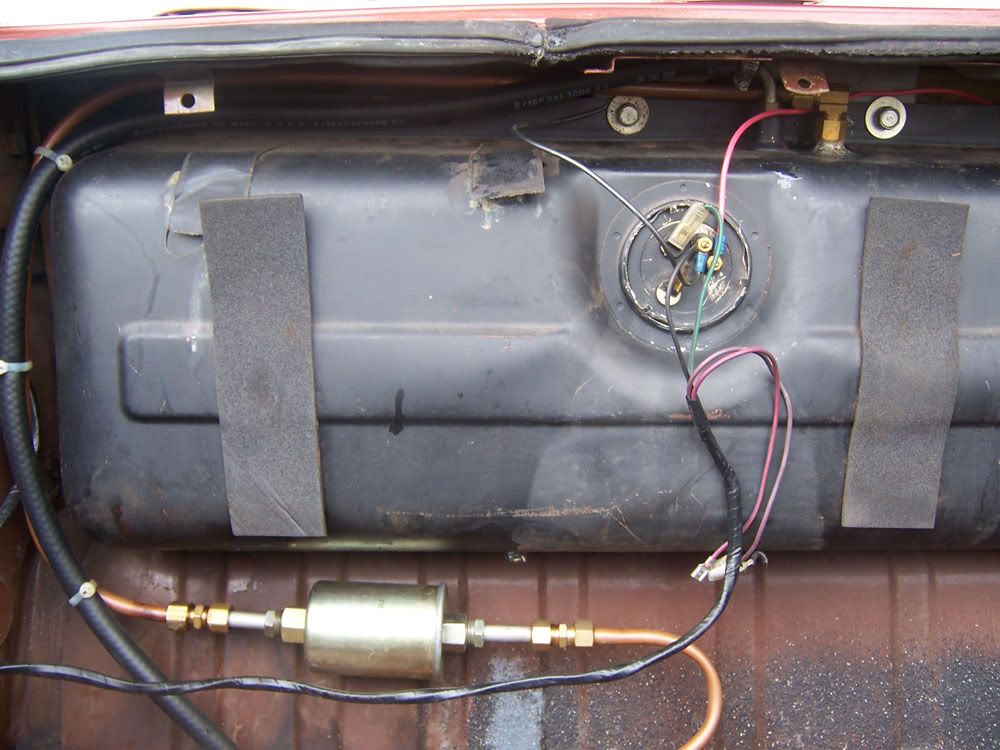
I'm thinking I might make a aluminum tank to replace this one. A little bigger and with all the holes in the top. 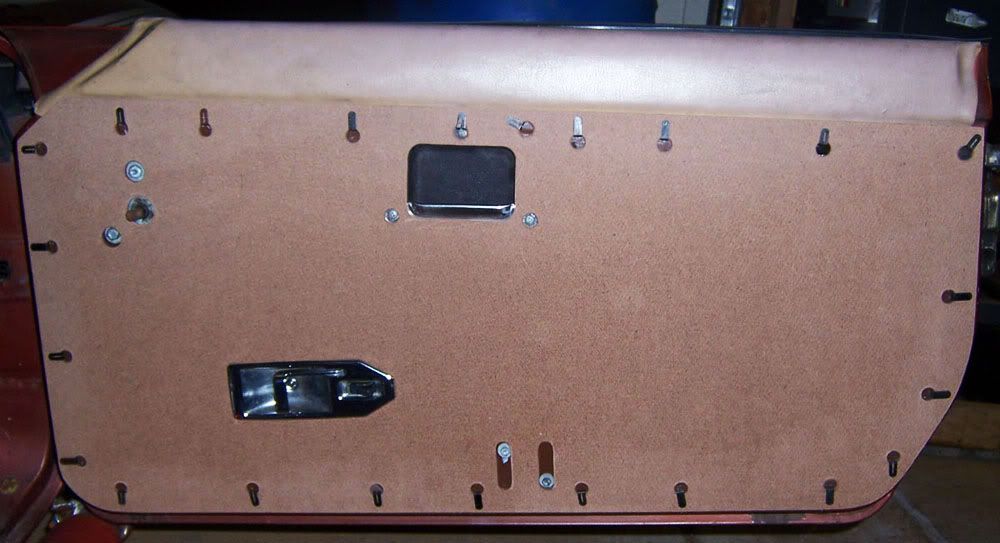
I spent a couple weeks working on new door cards, the ones in the car were awful, a bent and twisted mess covered in 1980's bad sofa fabric. I made a template to cut these and put an ad for them in the classified section. PICTURES FROM EARLY IN BUILD (OLD PICS) passenger side-the fan pictured has been replaced with a pusher, the belt tensioner has been removed, tension is provided by shims. 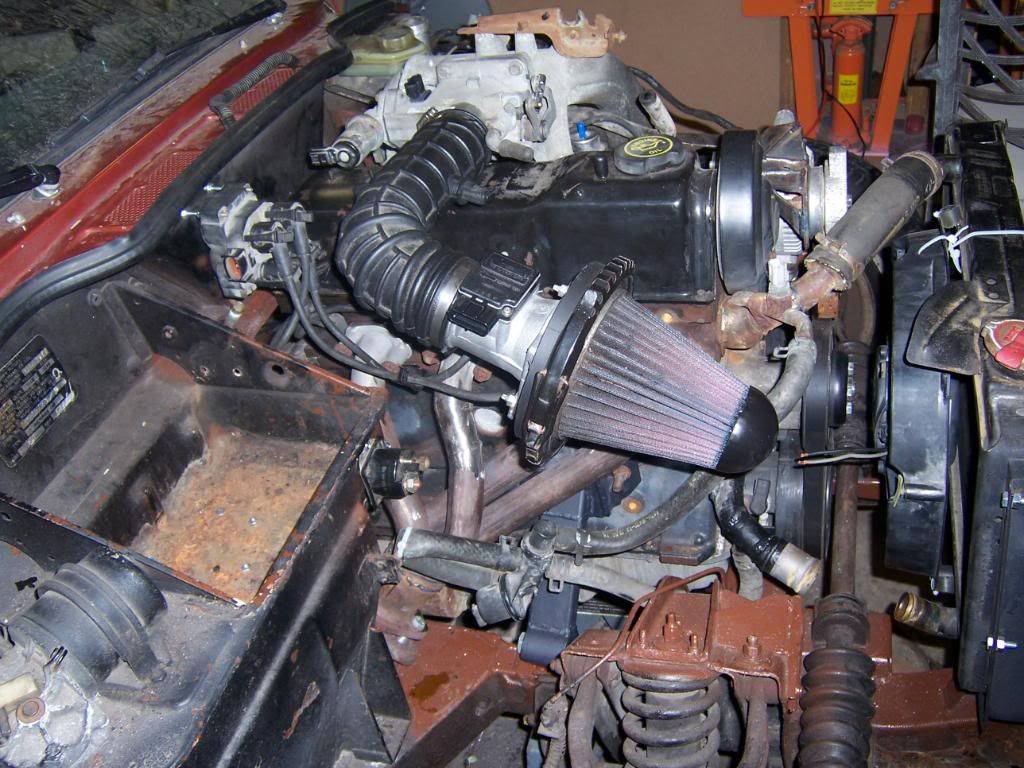
driver side-Yes it sticks out the hood but a volvo twin-cam head should get it all under the hood. 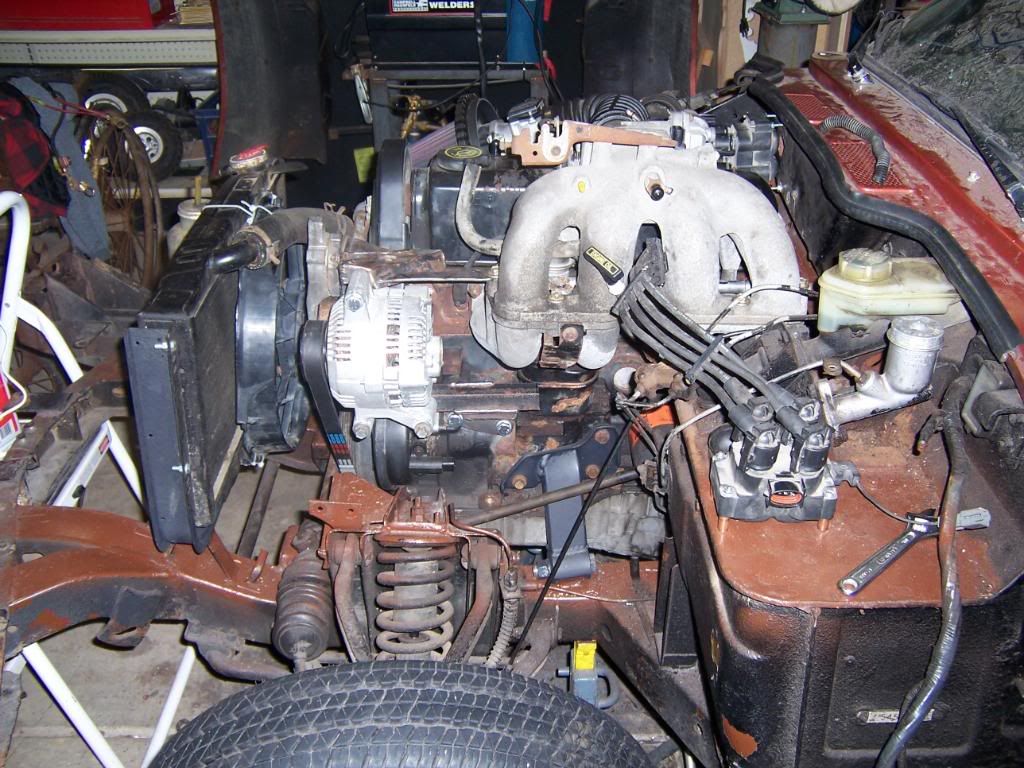
driver side motor mount 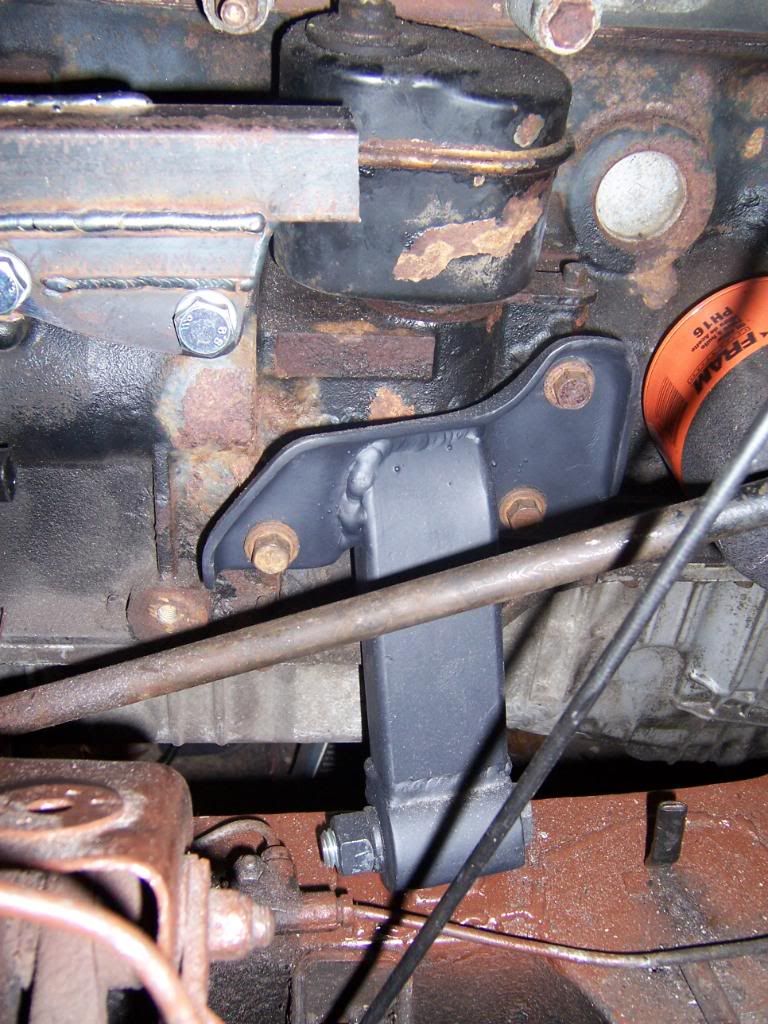
steering rack from driver side 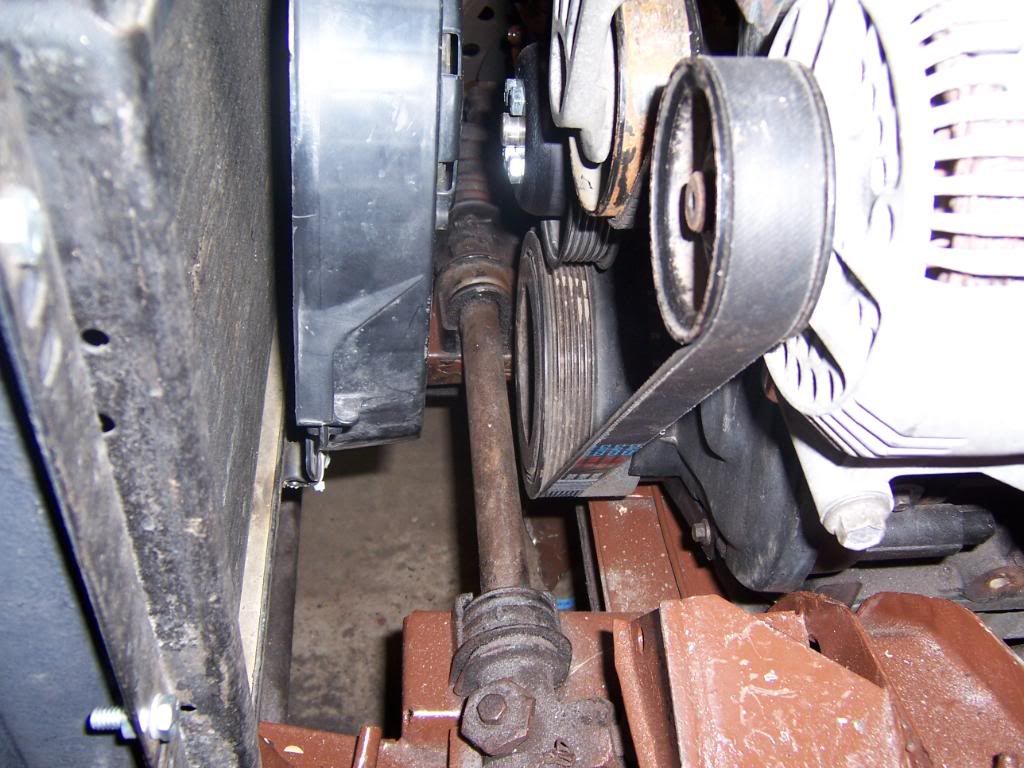
steering rack from passenger side- just enough room to get the belt through. 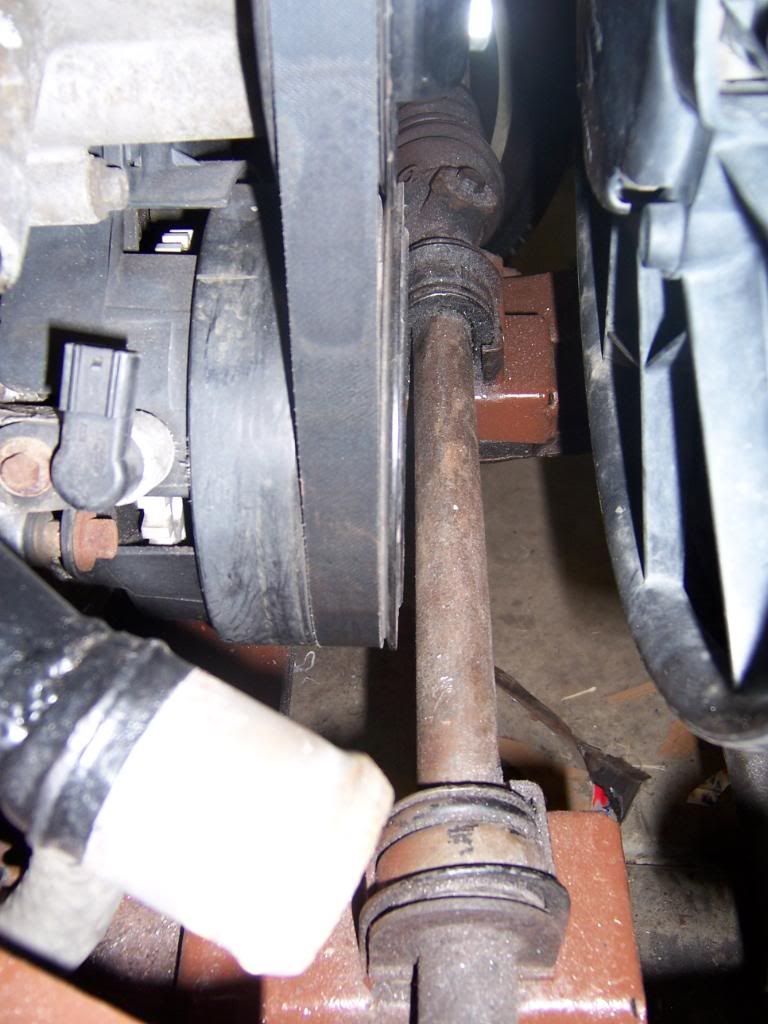
fuel tank with internal fuel pump-I used the stock ford ranger pump(with the ford mount cut off), the original spitfire delivery line is now used for return, I cut the vapor return line fitting off and enlarged the hole so the pipe fitted to the ranger pump would fit through.The wires in the tank run to the two screws in the spitfire tanks sinding unit cover, the sending unit still works. 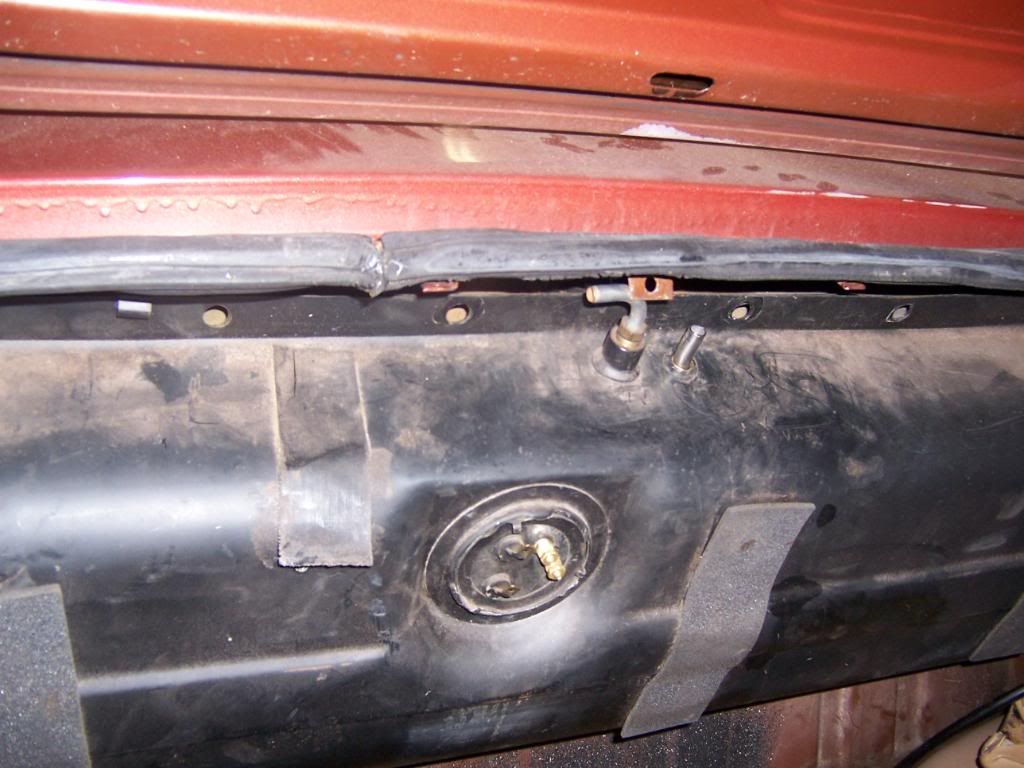
motor mounts-I used the engine side of the ford mounts, I cut them to down to the part that bolted flat to the motor, on the pass. side this left me with two pieces I bolted them ontothe block and joined them with 3/16" plate. After much hunting I found rubber bushings at a john deere dealer in town, I turned the frame side mounts(pipe) I.D. to match the O.D. of the bushing and cut it about 1/4" shorter than the bushing then welded the pipe to a small plate that could be welded to the frame. I made discs(two each side) a 1/4" larger than the pipe with a hole in the center that is the same size as the bushing I.D. I then cut a flat on the discs(the discs now look like a fat "D") I put the bushing in the pipe and bolted a disc to each end of the bushing then welded a pipe, that had been cut to the length of the bushing and then cut in half to the discs. I now have two parts that can be bolted together through a rubber bushing. I bolted the plates to the block, positioned the engine and trans. where I wanted them and set the bushing assembles on the frame rails. I tried to center the bushing assembles on the bolt patterns of the plates. I turned the bushing assembles slightly away from straight, clockwise on the right counter clockwise on the left, to prevent the engine from moving forward or back, and then tack welded them in place. I then used 1"x2" tubing to connect the plates to the bushing assembles. checked engine position, welded it all up. 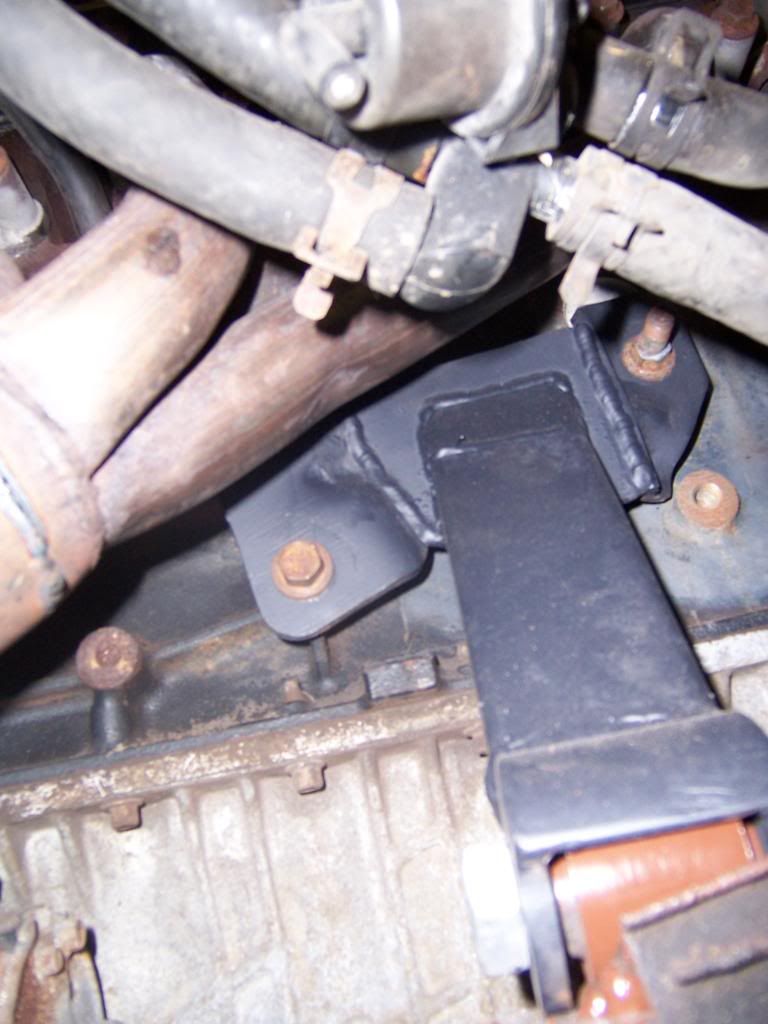
passenger side motor mount 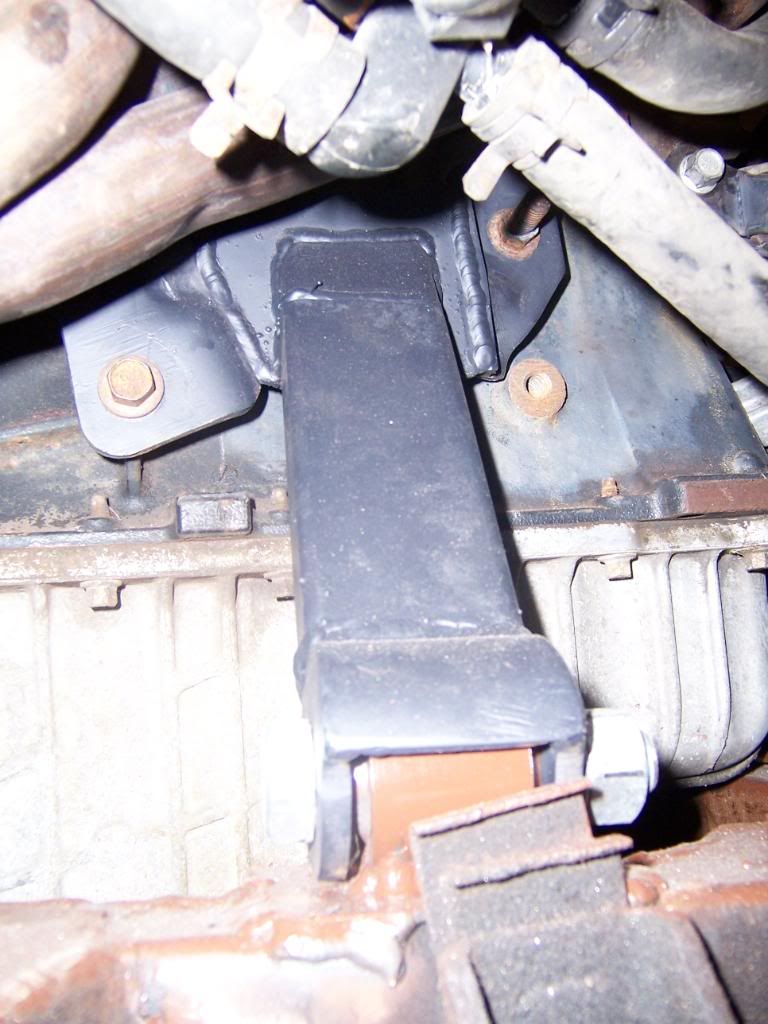
driver side motor mount 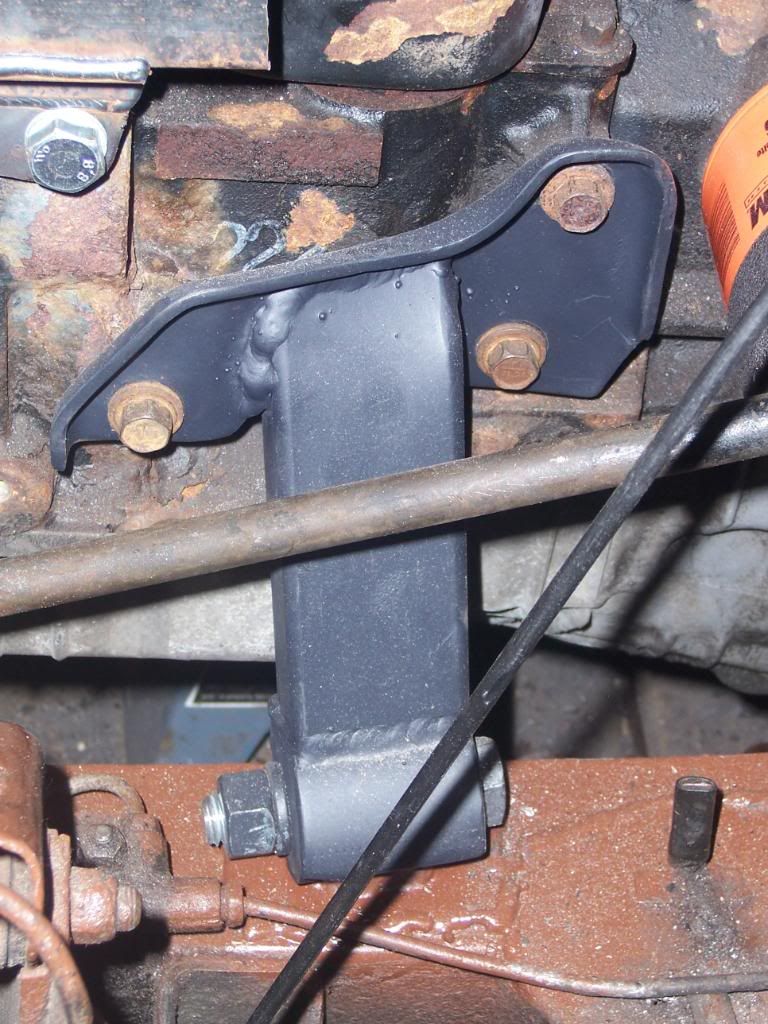
oil filter-this filter is shorter than the stock unit 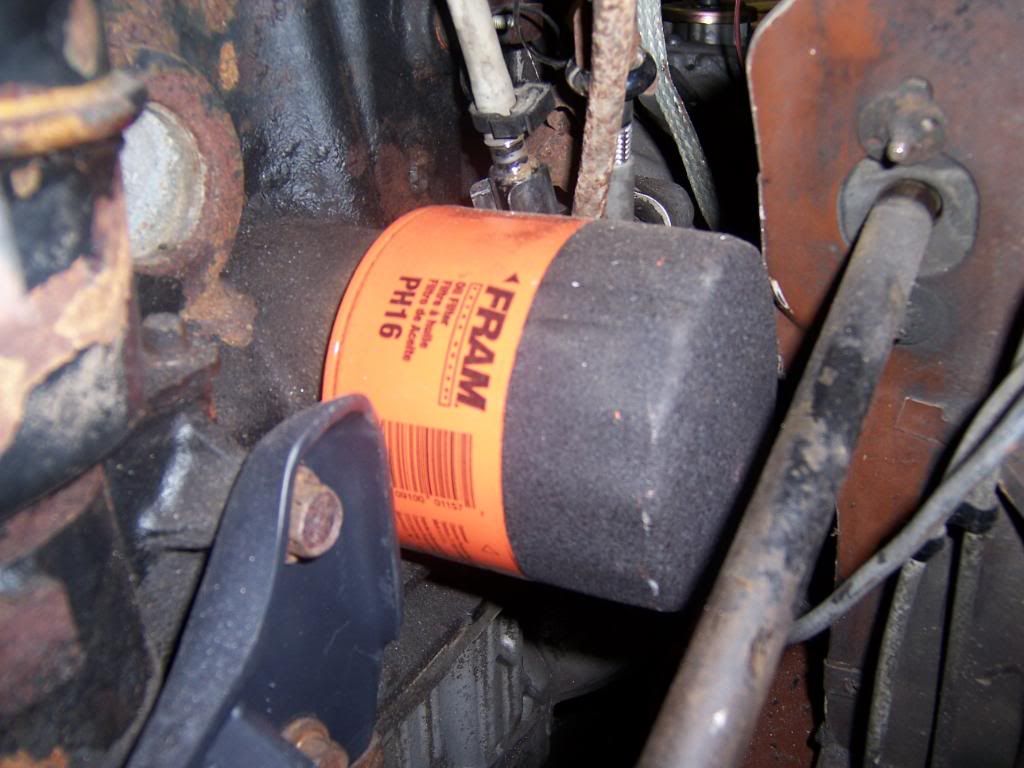
Cooling: Triumph Spitfire radiator/the fan has been changed to a pusher Exhaust:I modified the stock Ford Ranger header-I cut all 4 runners about 1 1/2" from the head, posisioned the collector where I wanted it then fitted pipe to each runner, welded up the egr port wraped it all in heat wrap. the supertrapp has been replaced with a muffler made from two vw bug mufflers. Its still loud but the neabors lights dont come on when I start it. 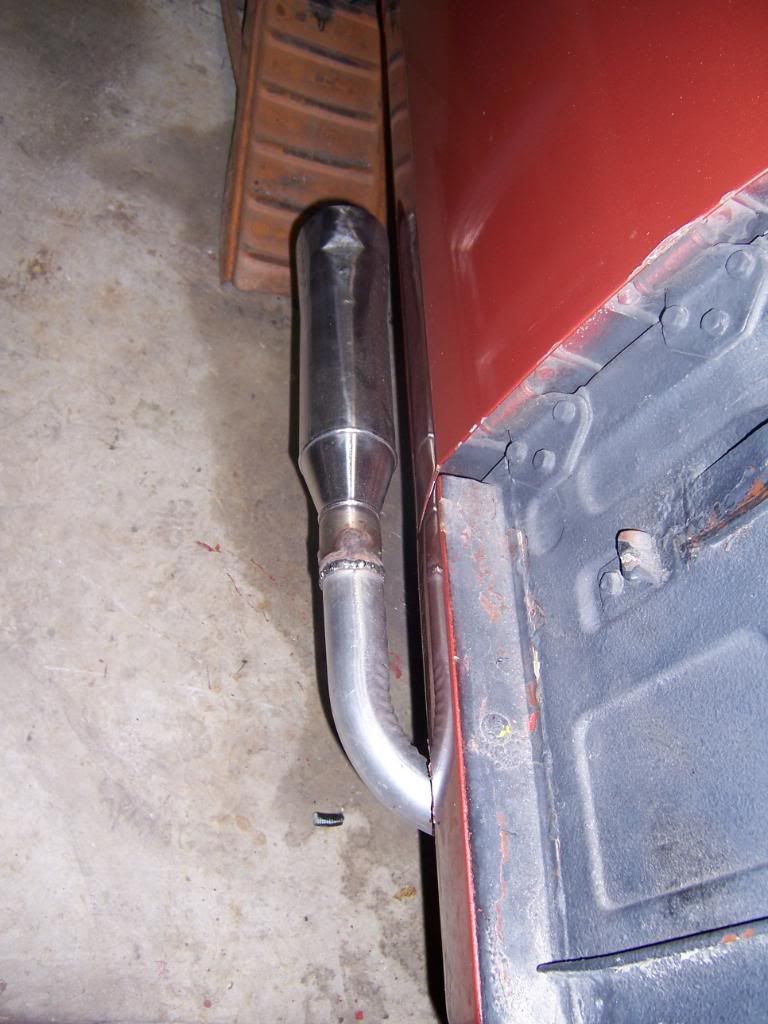
Transmission:M5od 5 speed 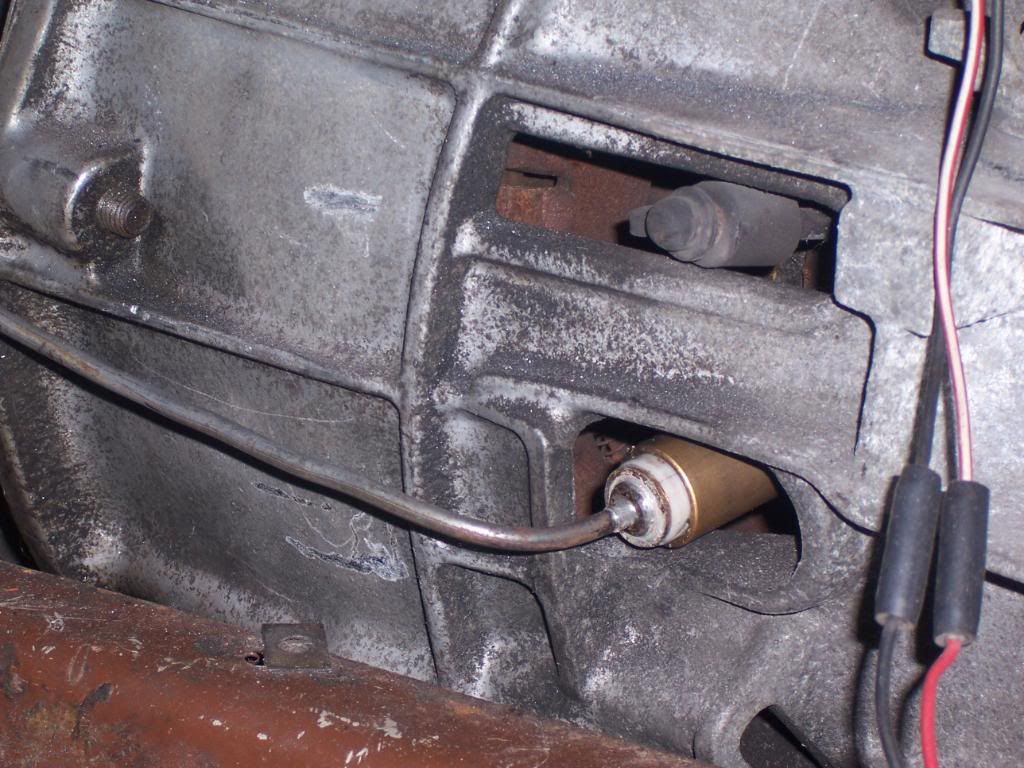

Rear Axle: stock Front Susp.: stock Rear Susp.: stock Brakes: stock (master) (front) (rear) Wheels/Tires: stock Body Mods: hole for exhaust 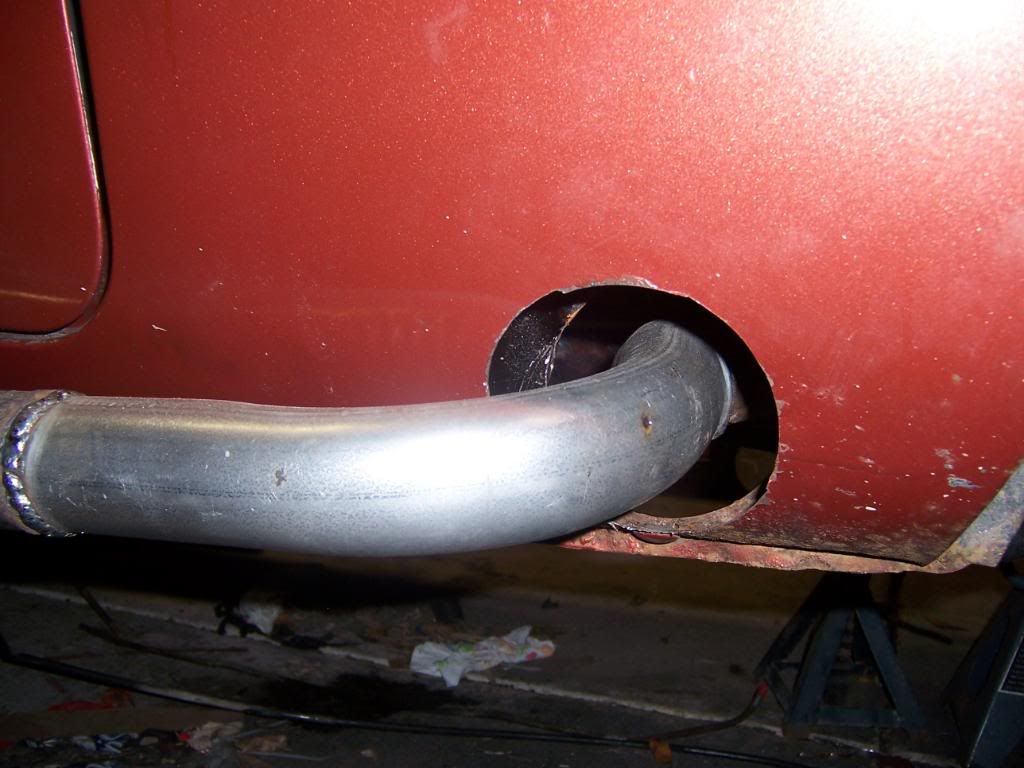
Interior: stock Electrical: Ford eec-v pcm, stock Edited 8 time(s). Last edit at 09/03/2010 02:37PM by gtownchoppers. |
Sorry, you do not have permission to post/reply in this forum.
British V8 Home Page
Photo Gallery
Web Forum
Annual Meetings
Contact Info
Site Map
British Race Car

© 2025 British V8™ All rights reserved. Website & graphic design by:
Curtis Jacobson.
BritishV8 Forum is hosted by
SiteWelder LLC,
and is powered by a
Phorum engine.