Triumph Sports Cars
engine swaps and other performance upgrades, plus "factory" V8s (Stag and TR8)
|
tbo Tim Body St Thomas Ontario (221 posts) Registered: 01/27/2013 06:47PM Main British Car: 1954 Triumph TR2 stock 2 litre |
Re: 74 TR6 upgrade
I've been running regular high test gas for years in my steel gas tank in my TR with no problem. Sounds like a question for a chemist or Fred.
|
|
Phil Crawford Philip crawford Bogalusa, La (80 posts) Registered: 02/01/2013 10:38PM Main British Car: 74 TR6 07 4.8L |
Re: 74 TR6 upgrade
Tim
I have never had a problem either and with the tank already in the car it is not likely to get much thought. TKS Phil |
|
jdevries john devries grand rapids mi (18 posts) Registered: 05/08/2011 06:06PM Main British Car: 1963tr4 chevrolet destroked 400 to 358cu in |
Re: 74 TR6 upgrade
Most factory OEM fuel tanks are galvanized inside and out. You could always use some kind of gas tank sealer like the motorcylce guys do. Just a thought but you know how water gets into gasoline storage tanks and condensation always rears its ugly head and causes rust to form. Not a pretty thought. Ounce of prevention.
|
|
Phil Crawford Philip crawford Bogalusa, La (80 posts) Registered: 02/01/2013 10:38PM Main British Car: 74 TR6 07 4.8L |
Re: 74 TR6 upgrade
John
Thanks for the info. I will consider the info. Phil |
|
Re: 74 TR6 upgrade
Phil here is a possible solution to prevent corrosion in your gas tank. Check out the following link for a POR-15 product speciffically designed for gas tanks: [www.por15.com]
You could buy some of this and pour it in your tank and slosh it around and then let the excess drain out. You probably would have to leave the tank in a drain position to prevent the POR_15 from accumalating and plugging your pick up line. Cheers Byron |
|
DiDueColpi Fred Key West coast - Canada (1365 posts) Registered: 05/14/2010 03:06AM Main British Car: I really thought that I'd be an action figure by now! |
Re: 74 TR6 upgrade
Hi Phil,
the problem isn't with the Ethanol corroding the fuel tank. The issue is that Ethanol is hygroscopic. It draws moisture out of the air. So when the moisture in the Ethanol contacts the raw steel tank, or fuel lines or aluminum parts for that matter, it corrodes (rusts) them. The best fix is to get the tank and lines etc. plated or galvanized. The second as mentioned is a coating. But make sure that the coating is compatible with your fuel. Some aren't. The simplest and easiest is to just keep the tank full when the car is parked. No air space means no moisture. Cheers Fred By the way nice work on the car Phil! |
|
Phil Crawford Philip crawford Bogalusa, La (80 posts) Registered: 02/01/2013 10:38PM Main British Car: 74 TR6 07 4.8L |
Re: 74 TR6 upgrade
Fred
Thanks for the info. Most of the time I will be using non ethanol gas so it shouldn't be a problem. But a full tank is a sure bet. Thanks again By the way the wild hogs around here could give a race horse a good run for it's money. One tore up my yard last night. Have to bait the cage. |
|
|
|
Phil Crawford Philip crawford Bogalusa, La (80 posts) Registered: 02/01/2013 10:38PM Main British Car: 74 TR6 07 4.8L |
Re: 74 TR6 upgrade
Calvin,
Haven't had time to think about just got some miata seats and got side tracked. I might take the ball out of the hiem joint and drill it out and insert a 5/8" bronze bushing. This should tighten it up some what. Thanks Phil |
|
Phil Crawford Philip crawford Bogalusa, La (80 posts) Registered: 02/01/2013 10:38PM Main British Car: 74 TR6 07 4.8L |
Re: 74 TR6 upgrade
No new photos but have been working steadily. Had some start up problems with the motor. When i started it up it ran really fast all the time with no control from the throttle pedal. After chasing rainbows for 2 days I found the throttle body was being held open by a piece of plastic in the servo body. This throttle was slightly damaged when the tree fell on the truck and a piece of the broken plastic got up in the gears. It ran great after that. When you chase wires for a while you get real well aquainted with the wiring.
I took the car down the road yesterday for short ride on a back road and it ran well. It will definitely tack out quickly. Did a little paint repair and it turned into bear. If I had used a dark primer it would have saved a lot of time in the repair. Should have some more photos soon. Phil |
|
74ls1tr6 Calvin Grannis Elk Grove,CA (1151 posts) Registered: 11/10/2007 10:05AM Main British Car: 74 TR6 / 71 MGB GT TR6/Ls1 71 MGB GT/Ls1 |
Re: 74 TR6 upgrade
Hi Phil,
Congrats on the first drive out on the back roads!! Must have been fun. I remember mine with no seats installed around the block. |
|
Phil Crawford Philip crawford Bogalusa, La (80 posts) Registered: 02/01/2013 10:38PM Main British Car: 74 TR6 07 4.8L |
Re: 74 TR6 upgrade
Hey Calvin
Good to here from you. It was fun.. I had seats but not bolted down and no hood. I am sure it didn't take long for you realize these cars are fasts with these big engines. But not too fast.. I believe the bugs I have left will be taken care with some computer work when I get it dino tuned. How is your car running? I saw your autocross it looked like fun. Never done that. Are you going to make any changes in the car in the future?There is always something you can do to improve the car. Do you have a in tank fuel pump? Mine is not and it is really noisy. Will try a little sound proofing to see if that helps. One day I may have to put it into the tank if I can't quite it down. See you later Phil Edited 1 time(s). Last edit at 05/02/2013 09:10PM by Phil Crawford. |
|
Phil Crawford Philip crawford Bogalusa, La (80 posts) Registered: 02/01/2013 10:38PM Main British Car: 74 TR6 07 4.8L |
Re: 74 TR6 upgrade
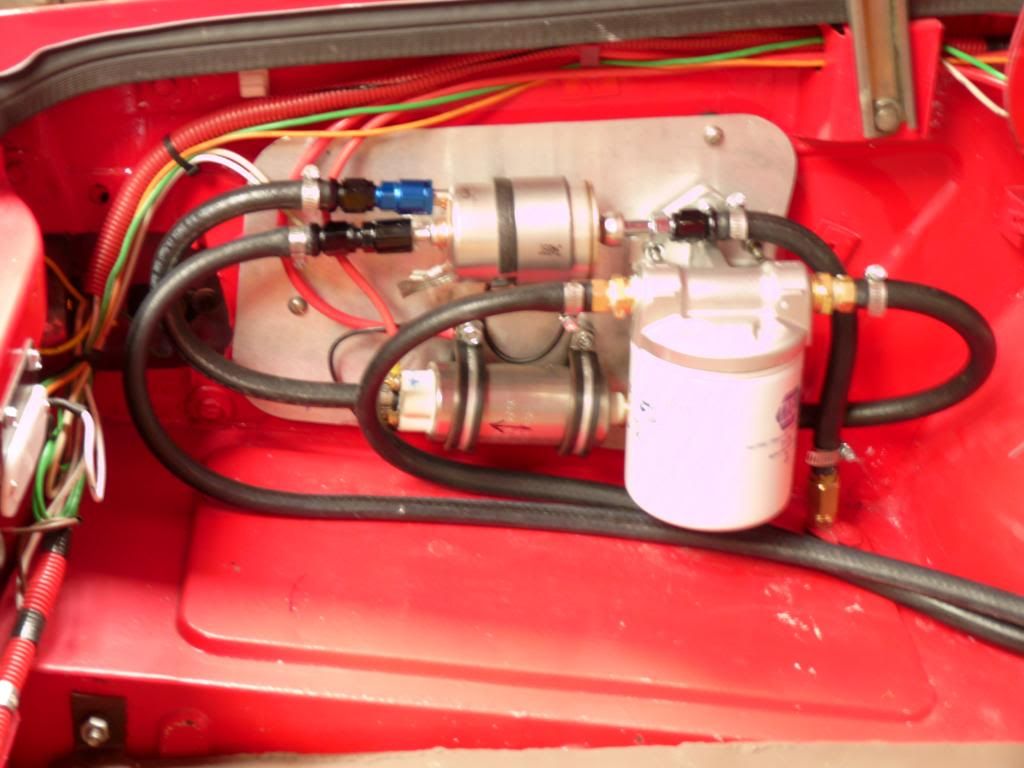
This is the fuel pump, filter regulator and the suction filter(this is a marine filter and water trap easy to change and inexpensive). 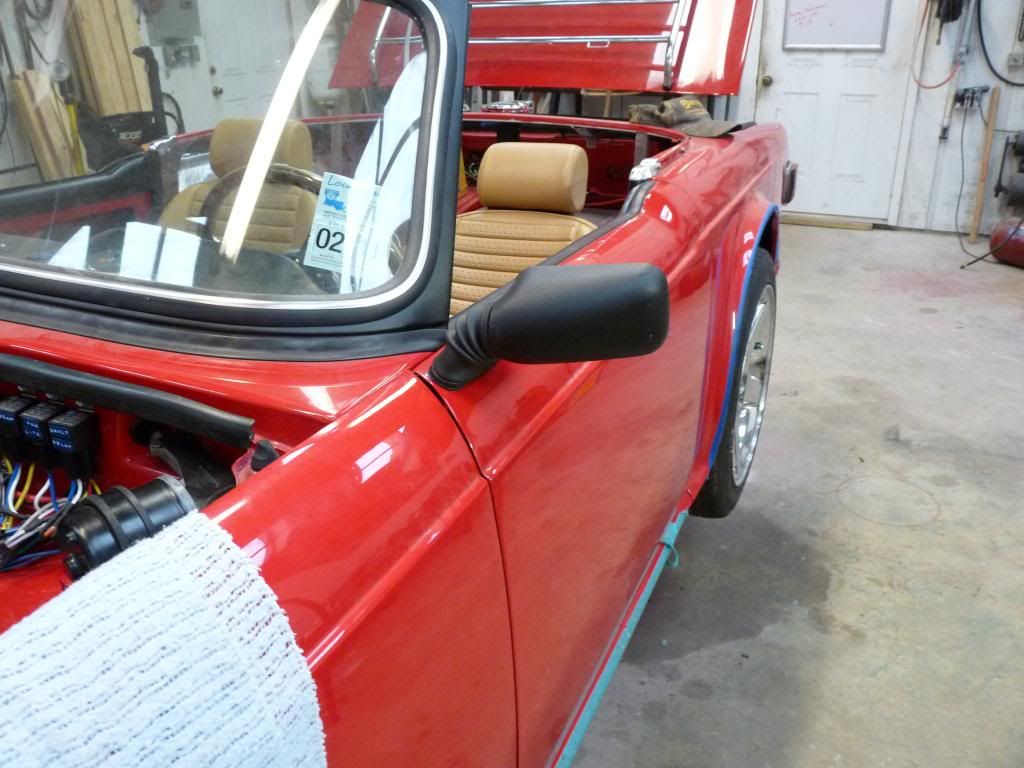
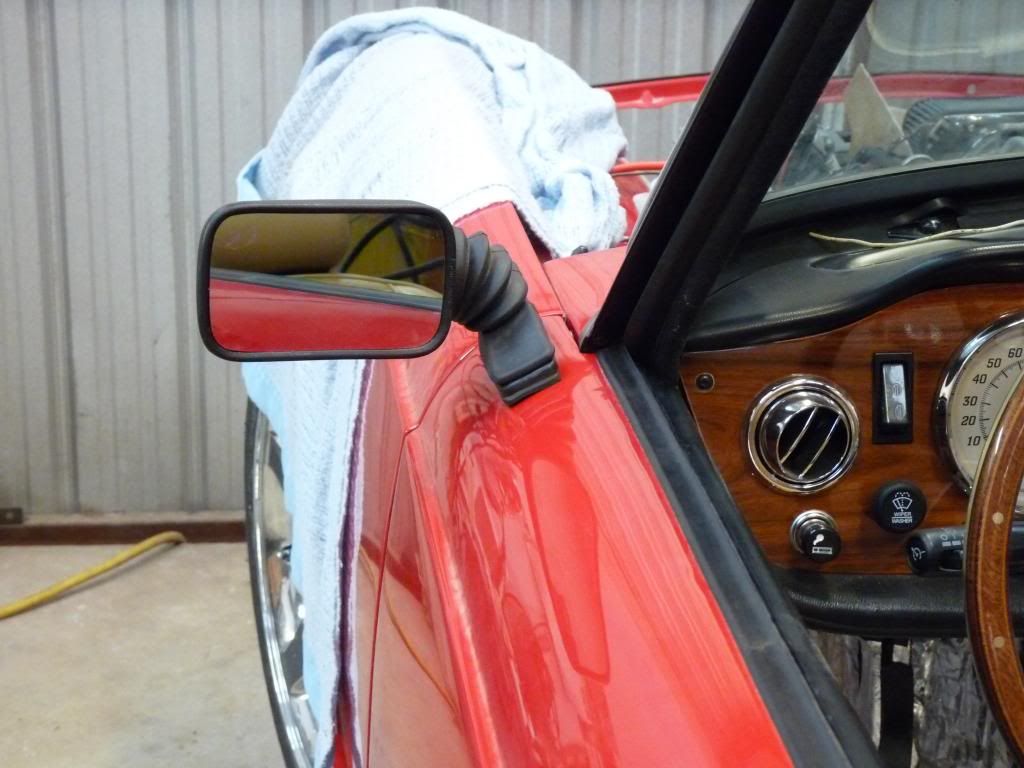
Vitaloni baby turbo mirrors. Got them from a moped dealer on ebay at 1/4 the cost new and they are new. 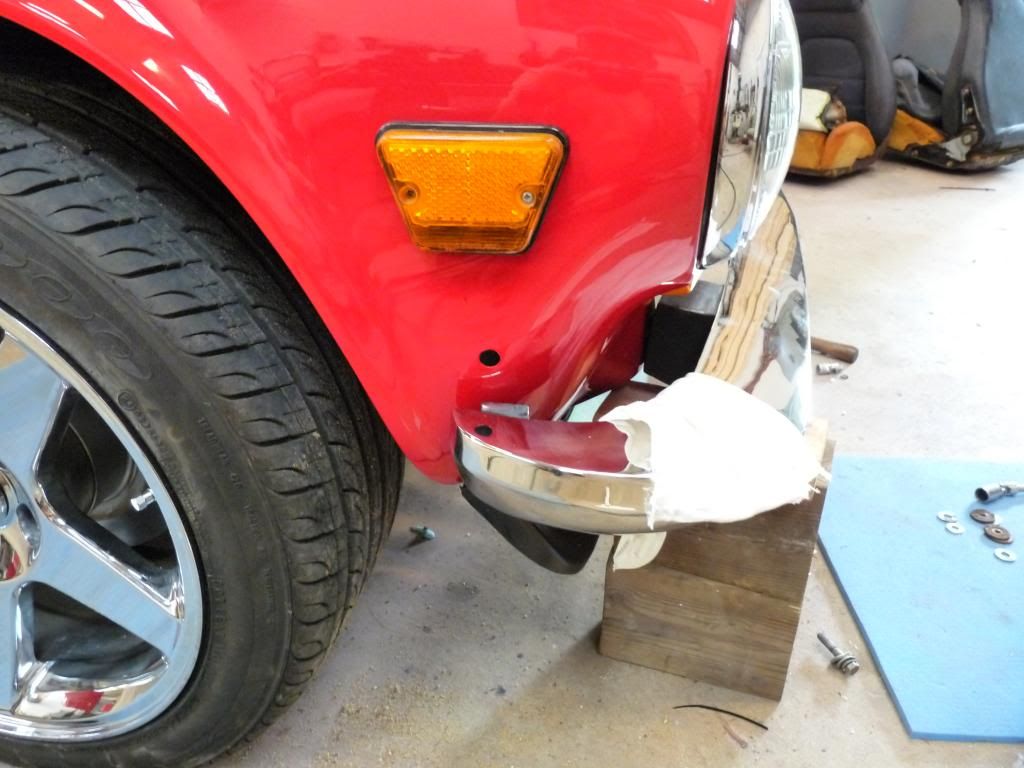
When I started to install the front bumper this hole appeared and the one that was supposed to be there was not. This is not an original fender and I guess it is for a late 74 instead of an early one. So I got the grinder out and cut down to the metal and welded the hole up and reprimmed, painted, cleared, color sanded and buffed. What a hassel. 
The almost finished product. 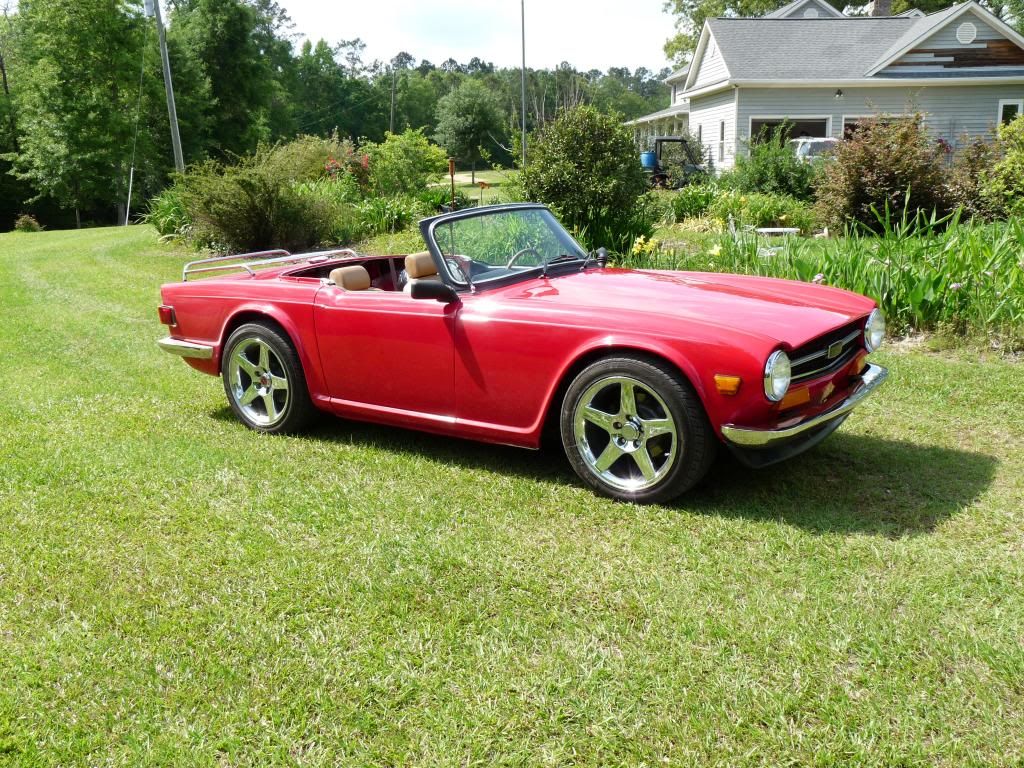
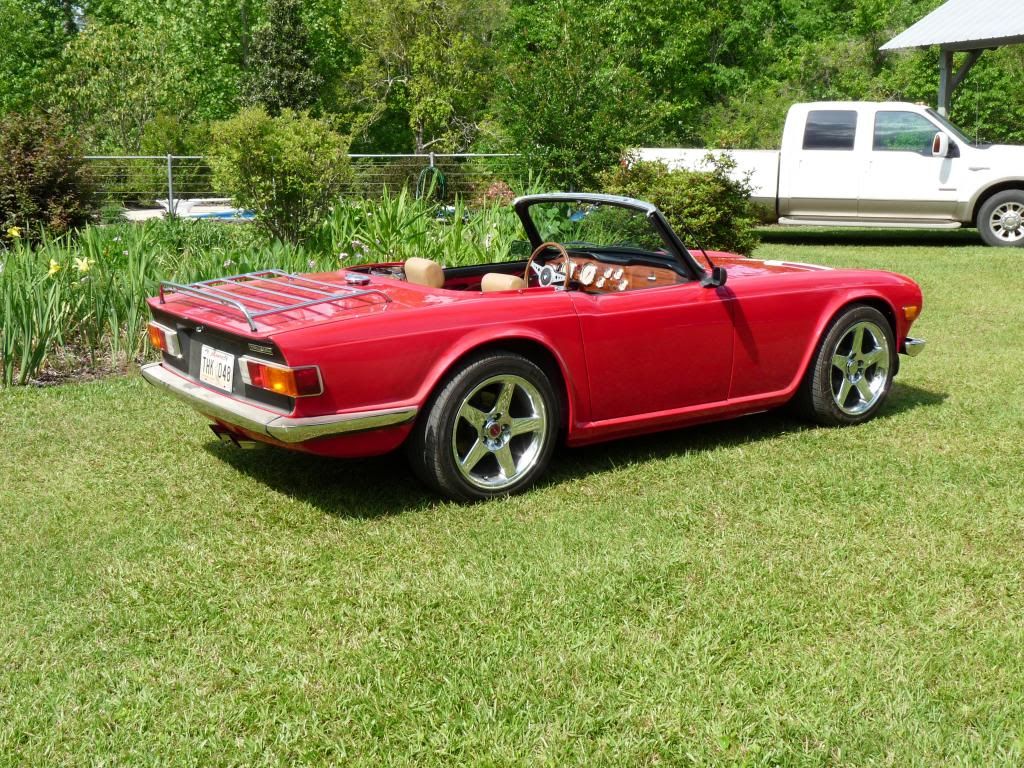
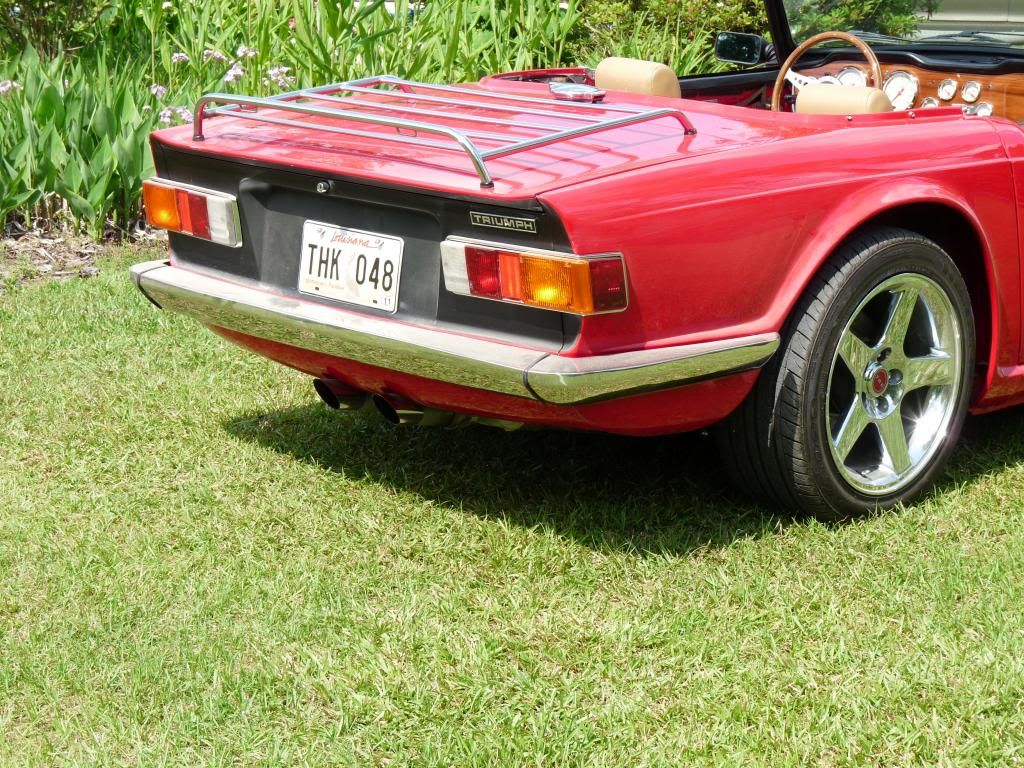
You can tell I live on a gravel road. 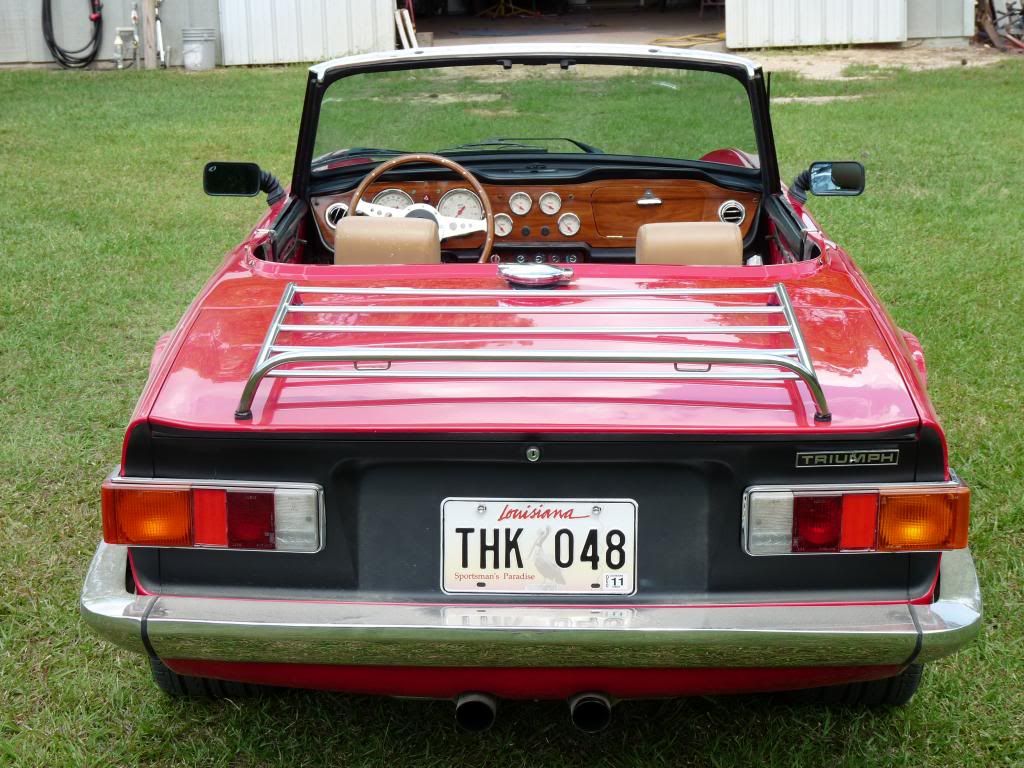
The only thing left is the interior. Been driving it around and it has been fun to finally drive it after almost 3 years. |
|
tbo Tim Body St Thomas Ontario (221 posts) Registered: 01/27/2013 06:47PM Main British Car: 1954 Triumph TR2 stock 2 litre |
Re: 74 TR6 upgrade
Hi Phil. She's a real beauty.Looks Great.Do you think that fuel pump is noisy because its so small and has to work hard all the time, I mean they pump a lot of gallons per minute for a small pump.I'm putting one on my TR3 and I'm wondering about the noise too.
|
|
Phil Crawford Philip crawford Bogalusa, La (80 posts) Registered: 02/01/2013 10:38PM Main British Car: 74 TR6 07 4.8L |
Re: 74 TR6 upgrade
Tim
I believe the right way to do it is put it in the tank which solves a lot of problems. They are always pumping a lot more than you need with the recirculation and this is what keeps them cool with the fuel going around the motor. I already had the pump when I decided to build my tank so I went with it. If it is still noisy after the back is closed up I may pull the tank and install the pump in the tank. I hope not.....Thanks for the compliment I too like the way it looks. Thanks Phil |
|
|
|
Phil Crawford Philip crawford Bogalusa, La (80 posts) Registered: 02/01/2013 10:38PM Main British Car: 74 TR6 07 4.8L |
Re: 74 TR6 upgrade
Had a bit of a set back picked up a whining noise in the diff and had to pull the chunk. When I replaced the pinion bearings and crush sleeve I didn't torque the bearings correctly and ruined them in about 50 miles. Replaced the bearings and crush sleeve today and torqued to 25 inch pounds. Should finish the alighnment tomorrow. It took me 7 hours to pull the third member and had to cut a crossmember in front of the diff. Will replace with a bolt in unit in case I have to do this job again. I had never set up a diff. before and I was always uneasy so I guess I was not totally supprised when I heard the noise. The life of a hot rodder.
Wish me luck. Phil |
|
88v8 Ivor Duarte Gloucestershire UK (1041 posts) Registered: 02/11/2010 04:29AM Main British Car: 1974 Land Rover Lightweight V8 |
Re: 74 TR6 upgrade
Setting up a diff is one job I would never do. Needs special tools and gauges, a lot of hassle.
The fuel pump setup looks like the one in my injection car. Yes, one hears it whining away, but it's just part of the car's soundtrack. Would never put it in the tank, more hassle when it goes wrong. Having to cut the x-member illustrates a problem of one-off builds - maintenace access. Car makers have whole teams of people working on that sort of thing, you just have you. Must say it's an amazing acheivement to fit all that modification into the car and have it still look externally standard. Are you going to put a soft-top on it? That's another lot of fun, getting the screen, soft-top and windows to line up. Ivor |
|
BlownMGB-V8 Jim Blackwood 9406 Gunpowder Rd., Florence, KY 41042 (6469 posts) Registered: 10/23/2007 12:59PM Main British Car: 1971 MGB Blown,Injected,Intercooled Buick 340/AA80E/JagIRS |
Re: 74 TR6 upgrade
Differentials are not so bad, if you don't mind tedious. Worst part is doing the same thing over and over and over and over and...................
Don't much care for crush sleeves though, I'd much rather use a solid spacer and shims on the pinion. Jim |
|
Phil Crawford Philip crawford Bogalusa, La (80 posts) Registered: 02/01/2013 10:38PM Main British Car: 74 TR6 07 4.8L |
Re: 74 TR6 upgrade
Ivor
Thanks for the support and looking at my project. Had to replace the pinion bearings and crush sleeve because they were too loose. Just didn't do them right the first time. I believe I have it correct this time and hope fully never have to do this job again. Ken the (poolman) came by and helped me put that heavy ^%$#%&&%## in the hole. Thanks Ken!!!! Should finish it up tomorrow and be back on the road this week. I do have a soft top and put a new top on before I started the project. I don't think it is perfect but it is OK and it was a bear to do. Jim I have never done a diff with shims but I can see where it could be better. You need to be a young man to crush that sleeve. I used a 4' cheater to turn that bad boy. You set the pinion to 25 inches Lbs of rotational torque with new bearings. I used a 1 lbs. bag of red beans on the end of a 25" stick.. Worked great and you could move the beans the weight along the stick until you got to the 25". Phil |
|
Phil Crawford Philip crawford Bogalusa, La (80 posts) Registered: 02/01/2013 10:38PM Main British Car: 74 TR6 07 4.8L |
Re: 74 TR6 upgrade
Installed the diff. a couple days ago and had to get Ken (poolman) to help me push it into the hole. Just wasn't enough push in this old body. Everything is back in place and hopefully correct this time. I had mentioned my concern about the slack in the oversize heim joints. I replace them with 3/4" heim joints and reinforced the mounting bracket (someone suggested this but I don't remember who.Thanks) and this made a lot of difference. The slack is barely noticeable now. Also replaced the steering column bushings while I had everything out.
Before I pulled the diff. I had a chance to try out the cruise control and it worked beautifully just like a gm car. Phil |
Sorry, only registered users may post in this forum.


