

Triumph Sports Cars
engine swaps and other performance upgrades, plus "factory" V8s (Stag and TR8)
|
Phil Crawford Philip crawford Bogalusa, La (80 posts) Registered: 02/01/2013 10:38PM Main British Car: 74 TR6 07 4.8L |
Re: 74 TR6 upgrade
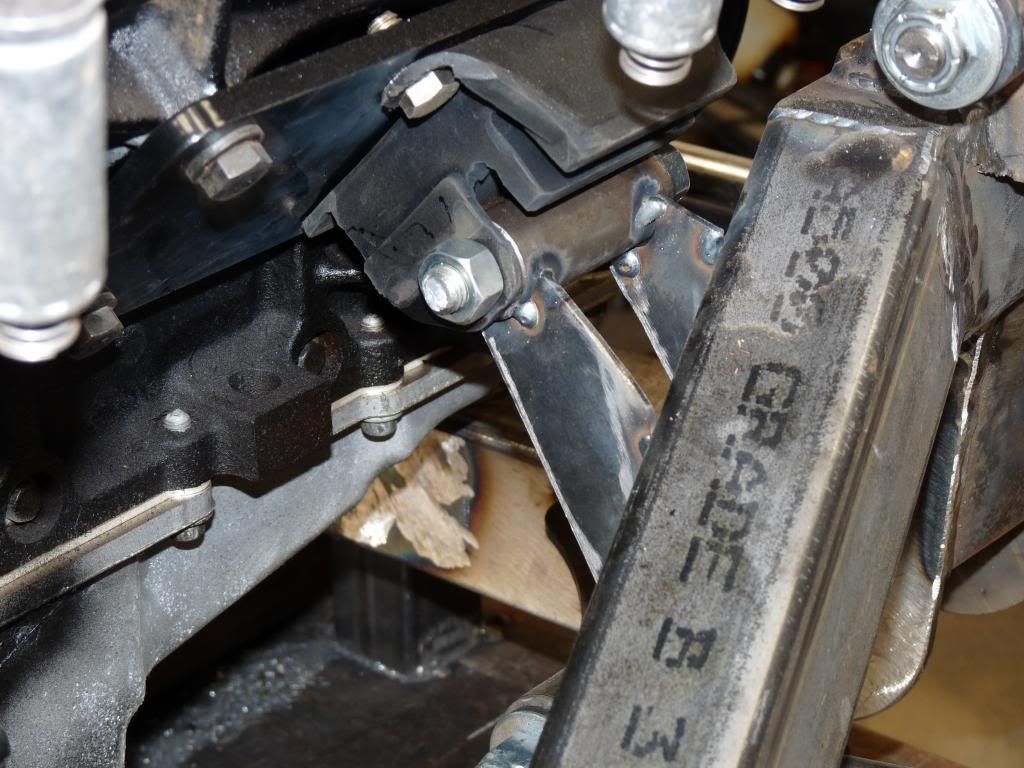
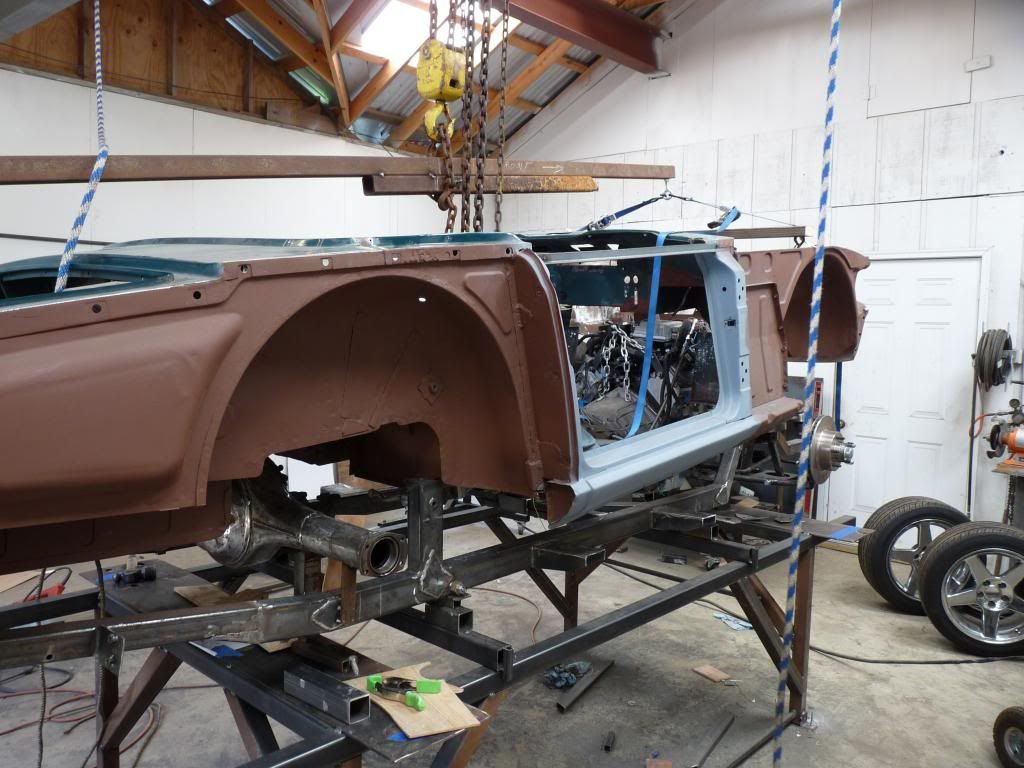
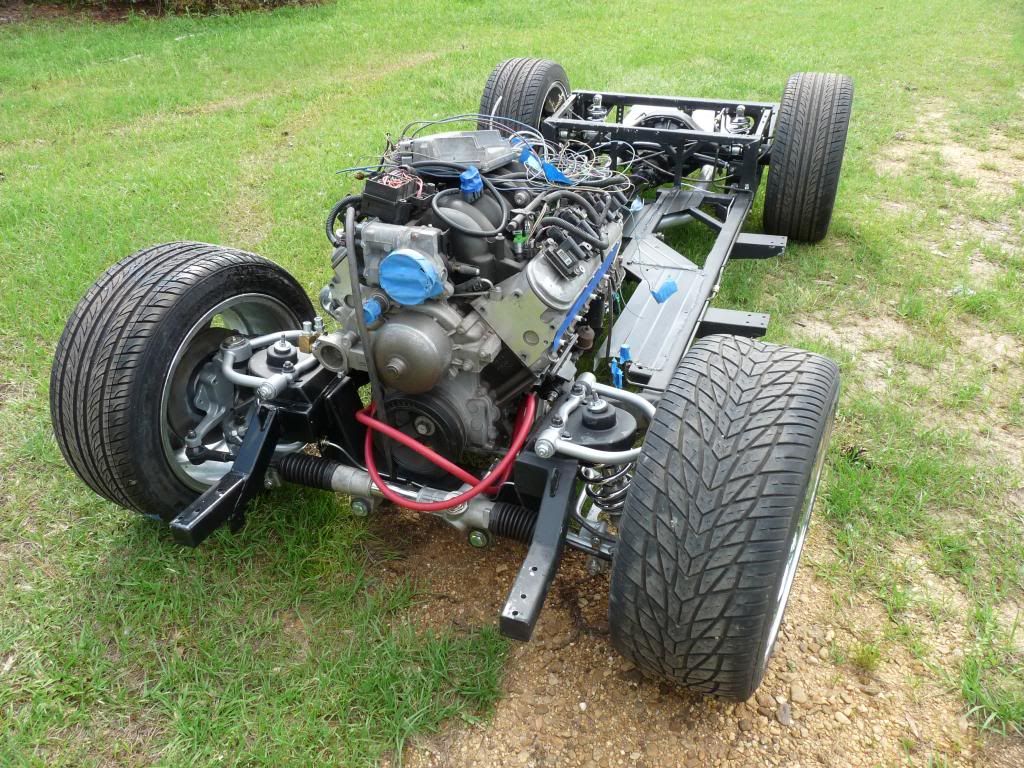
Started making the motor mounts. 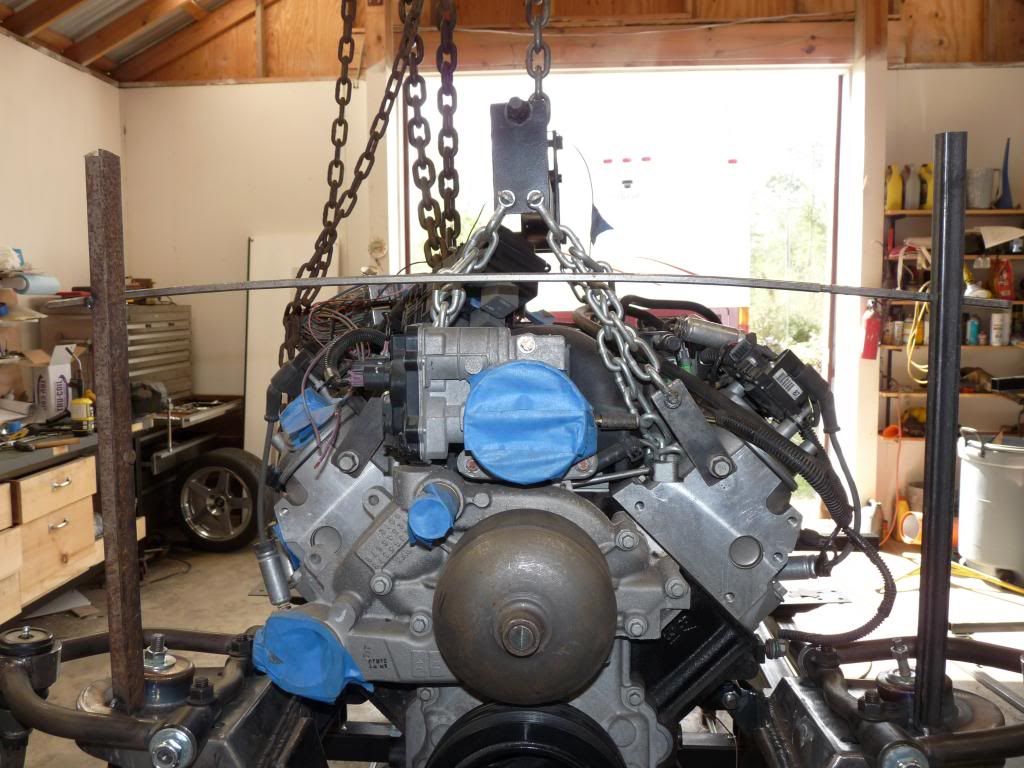
Before the body was lifted off of the old frame I cut a piece of wood that would fit the shape of the underside of the hood along with a lot of dimensions which allowed me to make a pattern and weld it to the spring support. I knew everything had to be under the piece of steel. 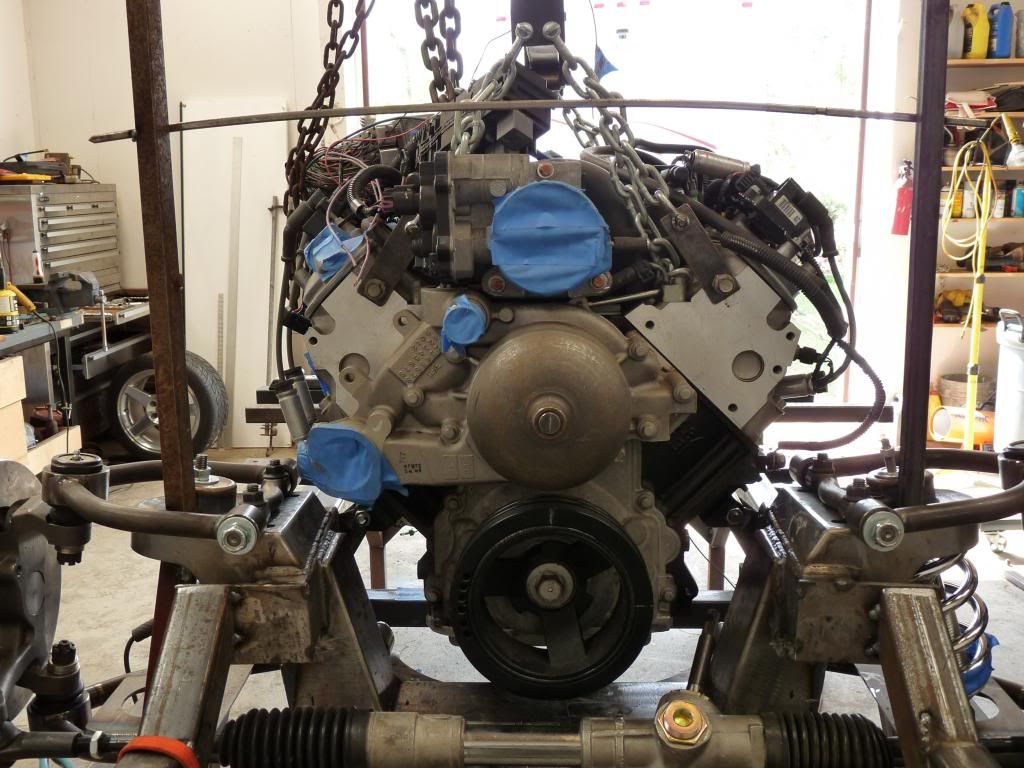
This saved lots of time and second guessing what will fit. The motor could have gone lower but the oil pan would have been hanging below the frame. 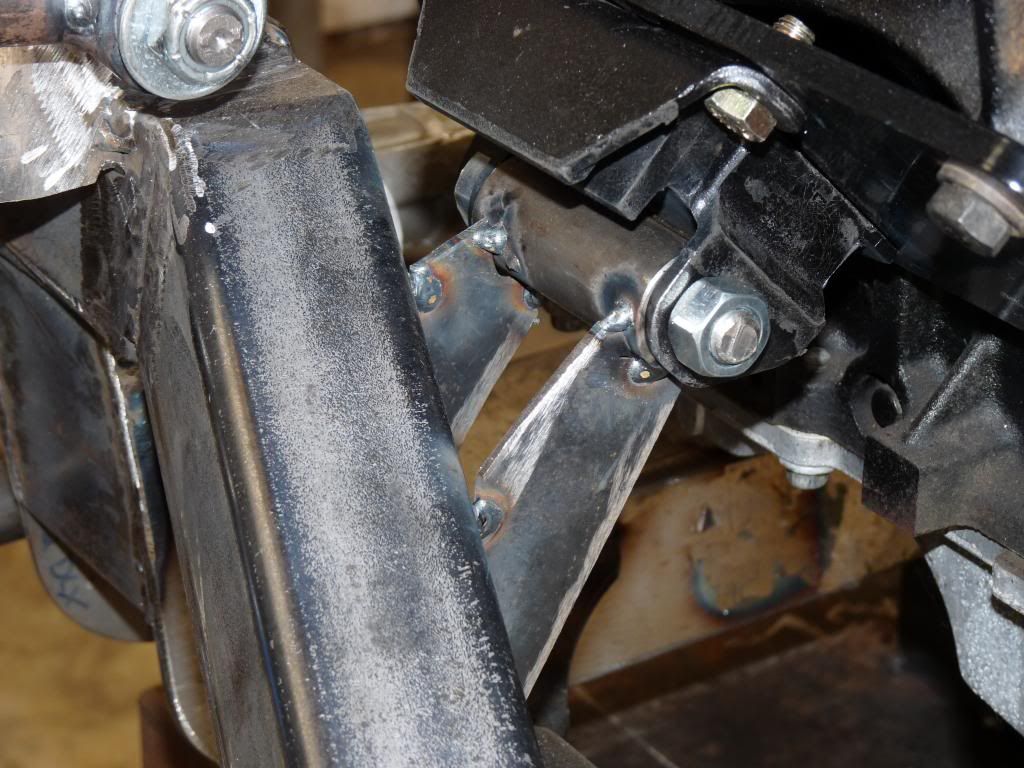
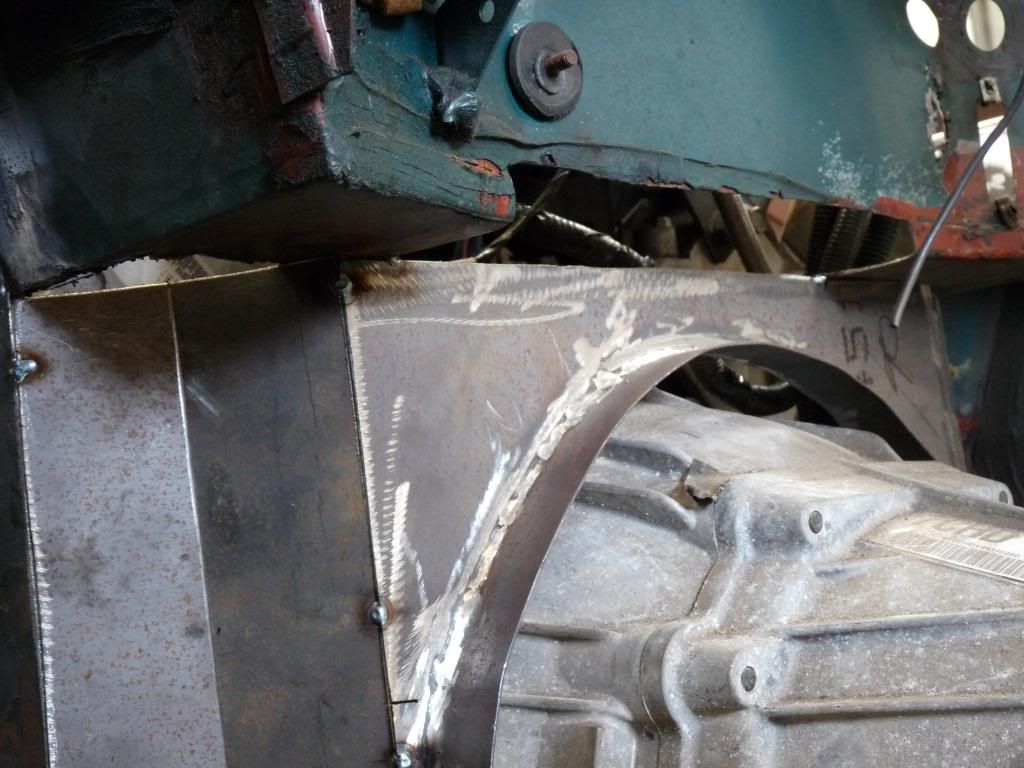
Left side motor mounts. A lot of welding and grinding. |
|
Phil Crawford Philip crawford Bogalusa, La (80 posts) Registered: 02/01/2013 10:38PM Main British Car: 74 TR6 07 4.8L |
Re: 74 TR6 upgrade
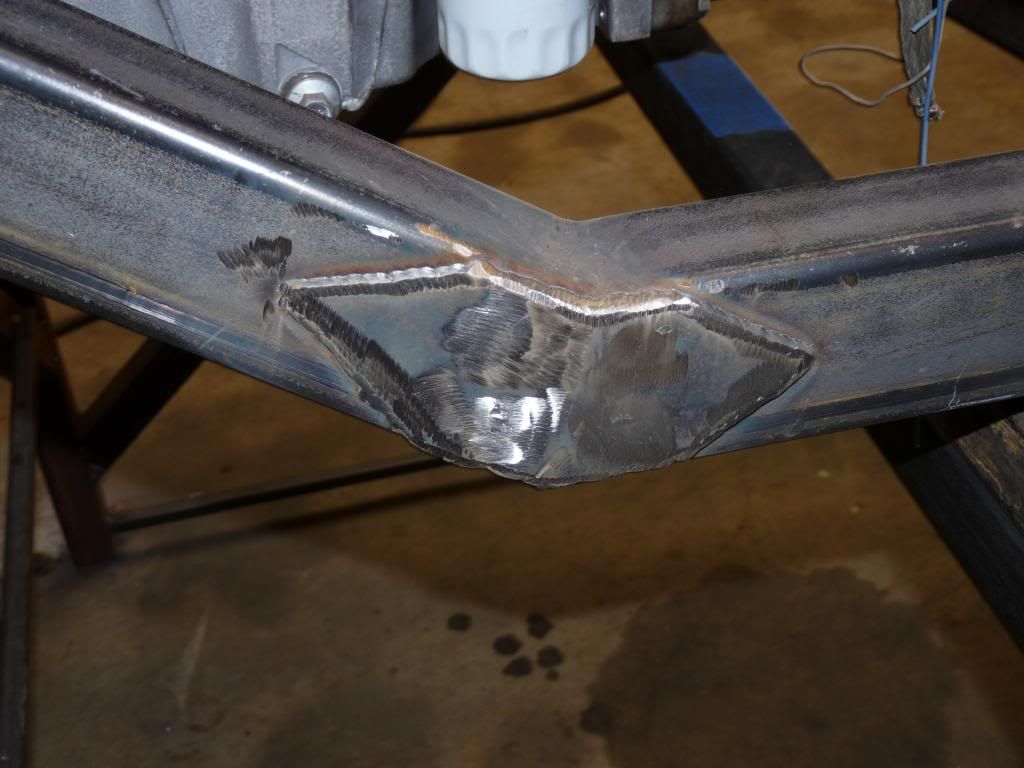
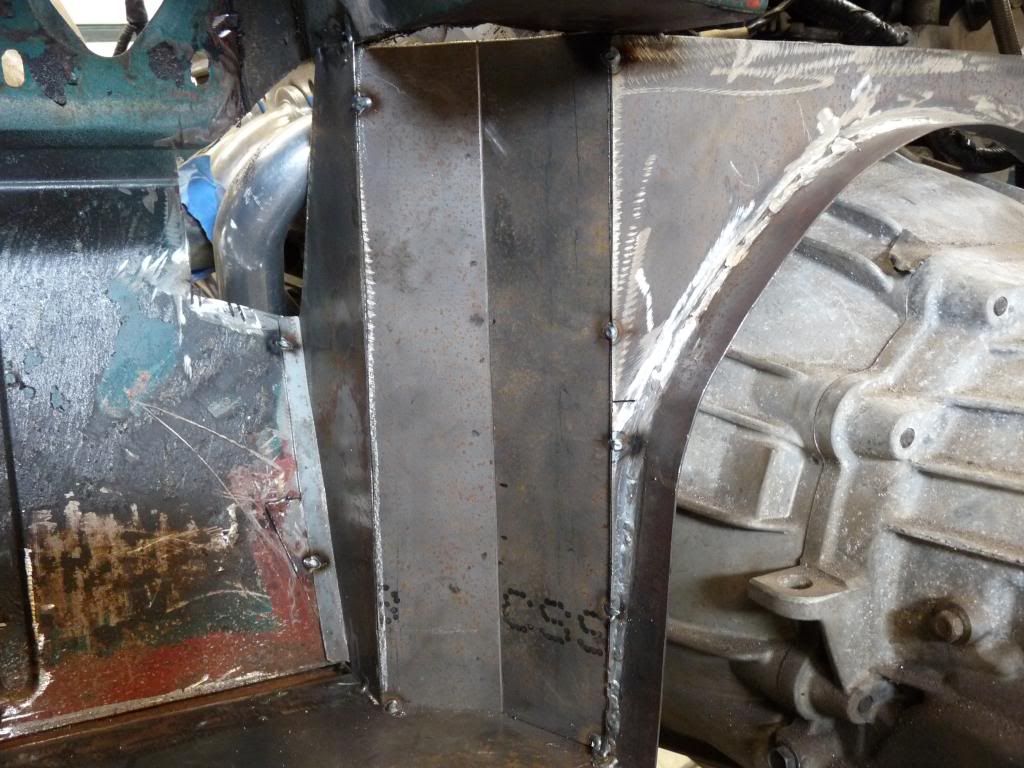
When ever I but welded I always weld a gusset on both sides of the but weld. I am not the best welder in the world so better safe than sorry or worse dead. 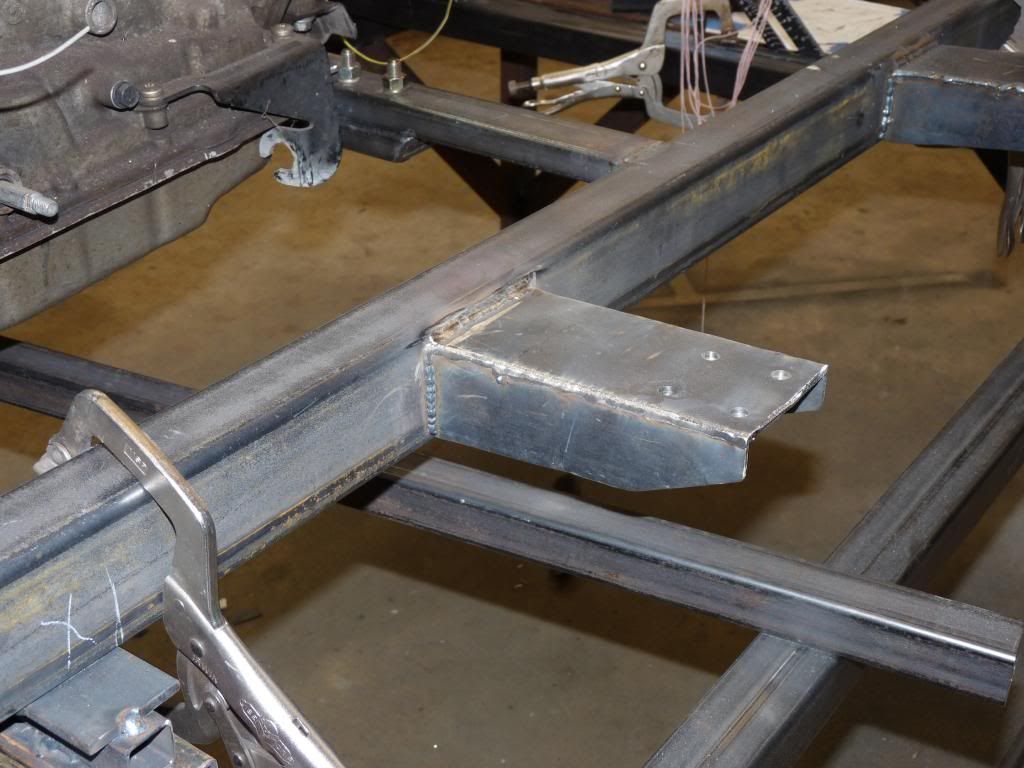
Welding the body mounts to the frame. I had tacked them when the body was last on the car. I made them out of 1/8" flat bar. 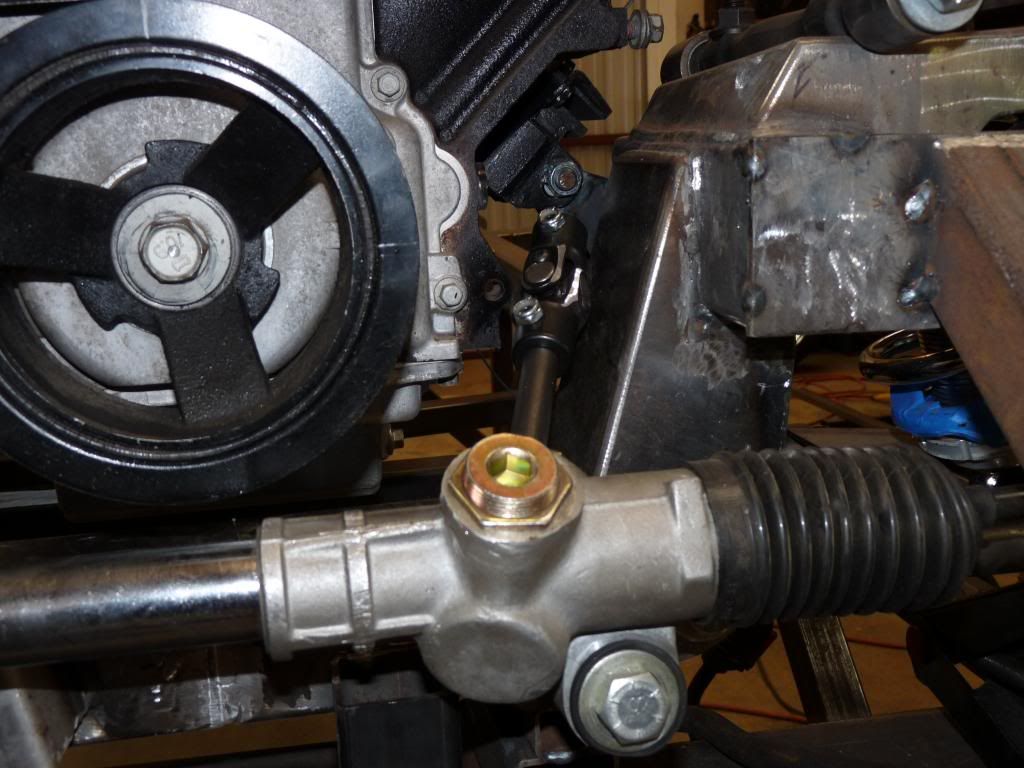
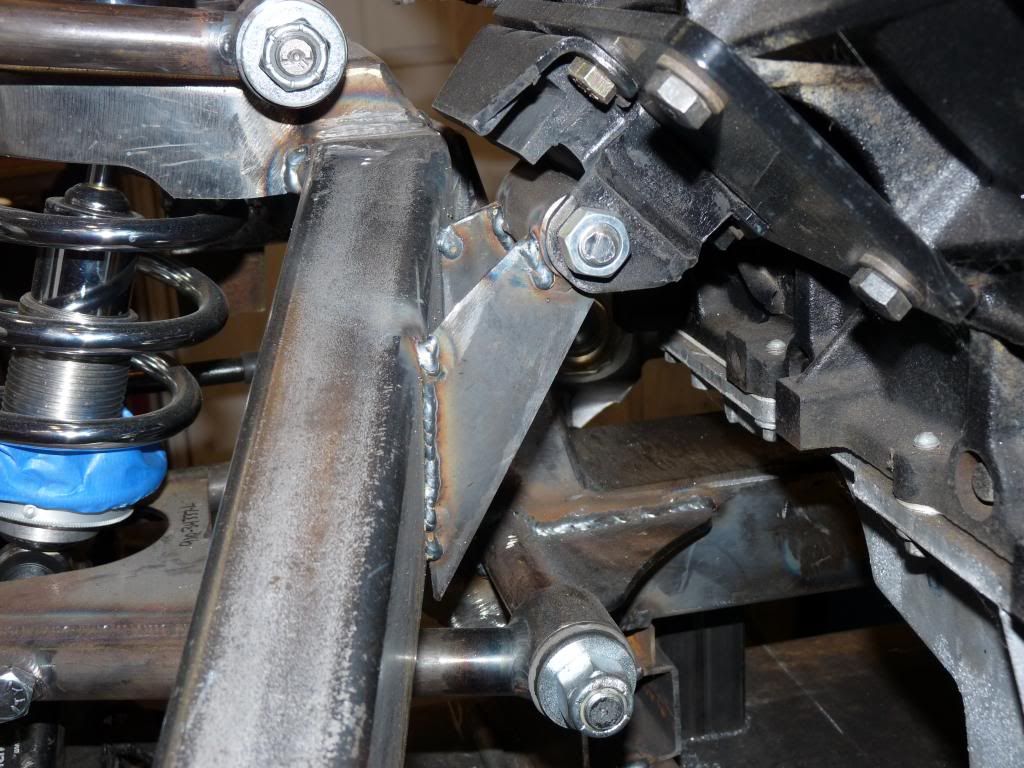
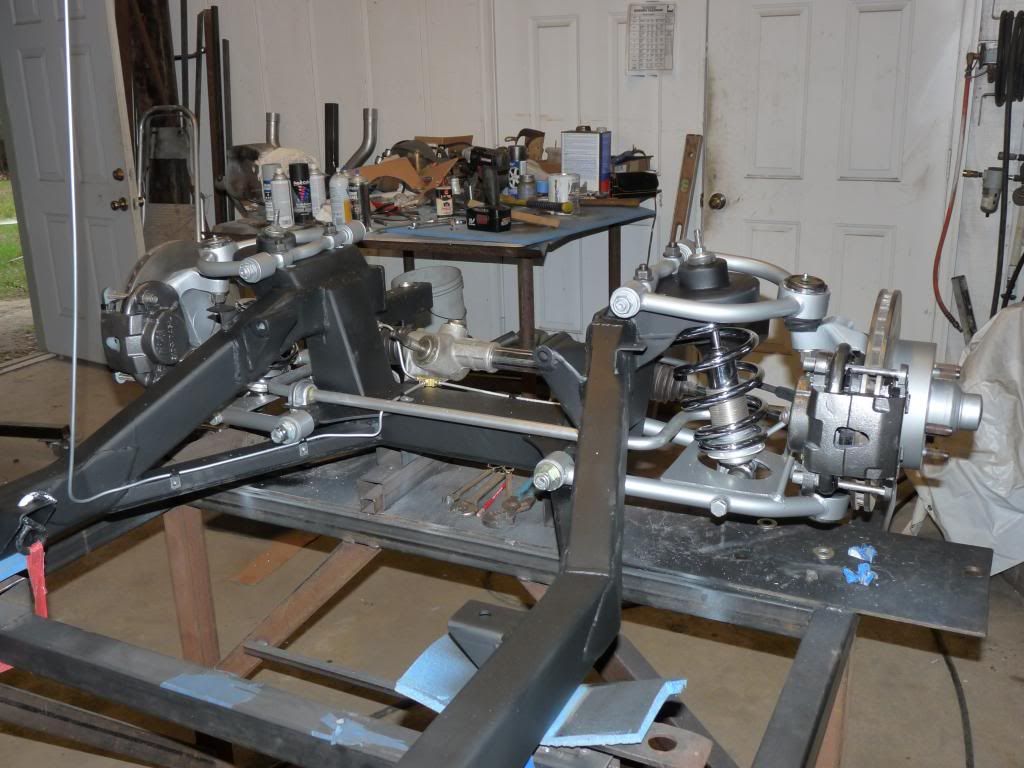
Looking at the steering and where to run it. I did it 3 separate times with the lost one after the body was on and everything bolted down. What a night mare. 
More steering. The ear with the hole was removed and relocated. Had to cut the ear off of the motor to make the steering work. Had to go between the 1 and3 cylinder header. Tight fit. 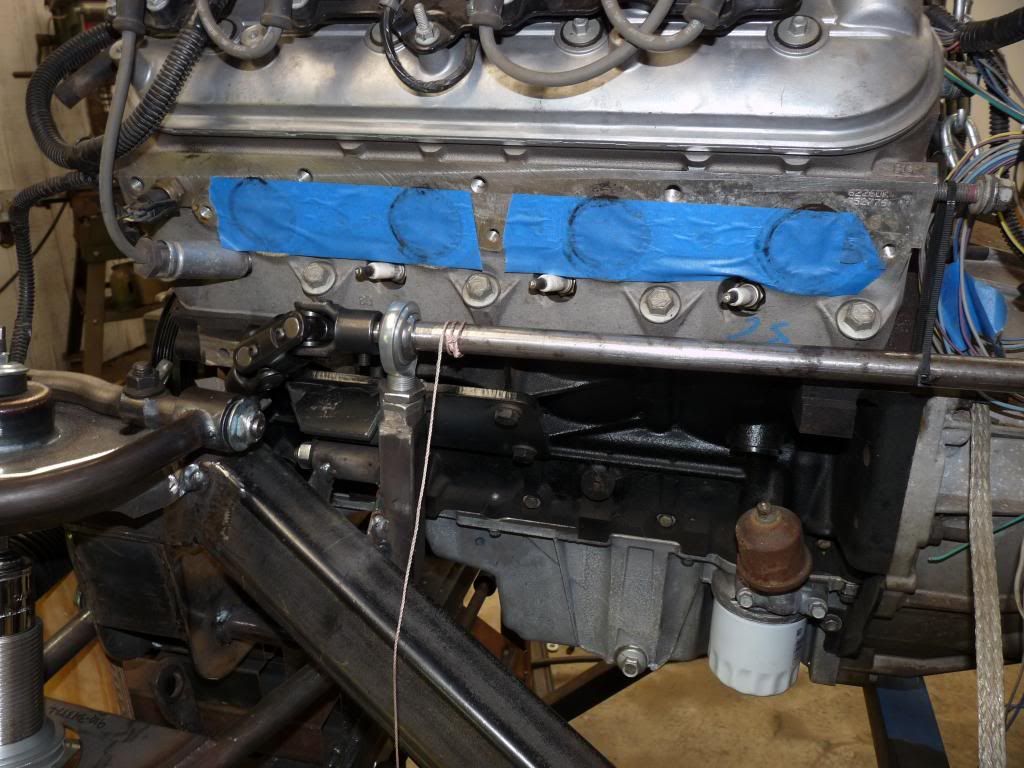
This steering mount didn't work either. 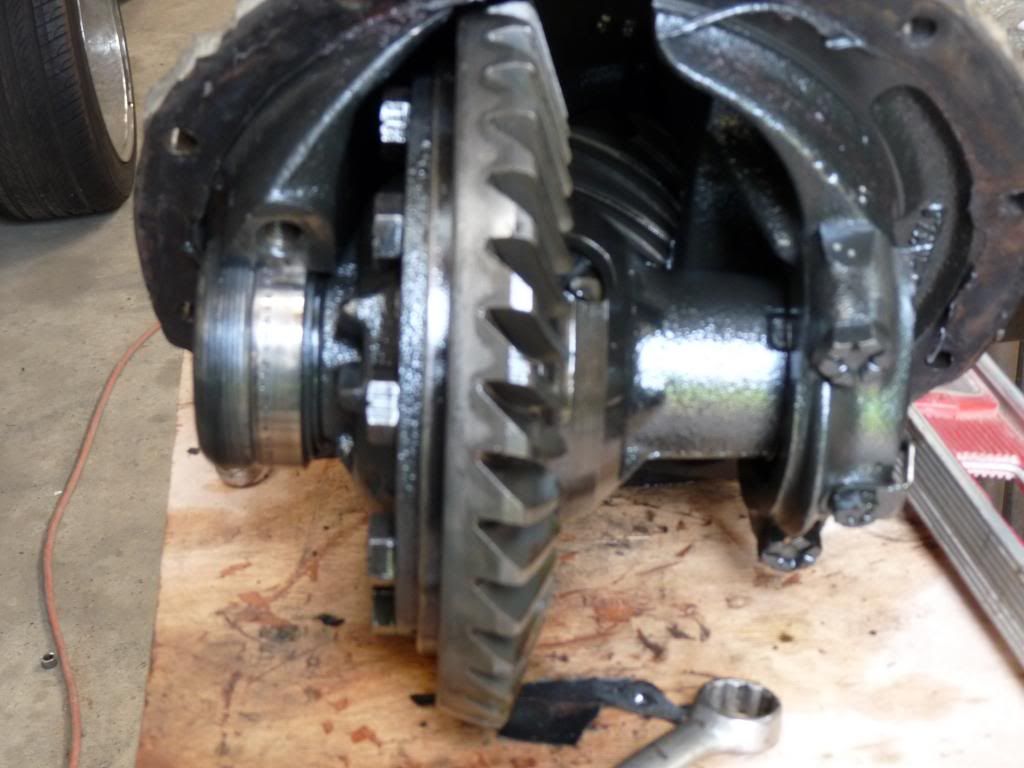
I am installing a 9" ford diff. and this is the third member out of it. Getting ready to narrow the axel. |
|
Phil Crawford Philip crawford Bogalusa, La (80 posts) Registered: 02/01/2013 10:38PM Main British Car: 74 TR6 07 4.8L |
Re: 74 TR6 upgrade
I narrowed the axel about 6". Cut the old bearing end off cleaned it up on the lathe and welded it back on the tube. There is a bit more to it than that but that is another story. 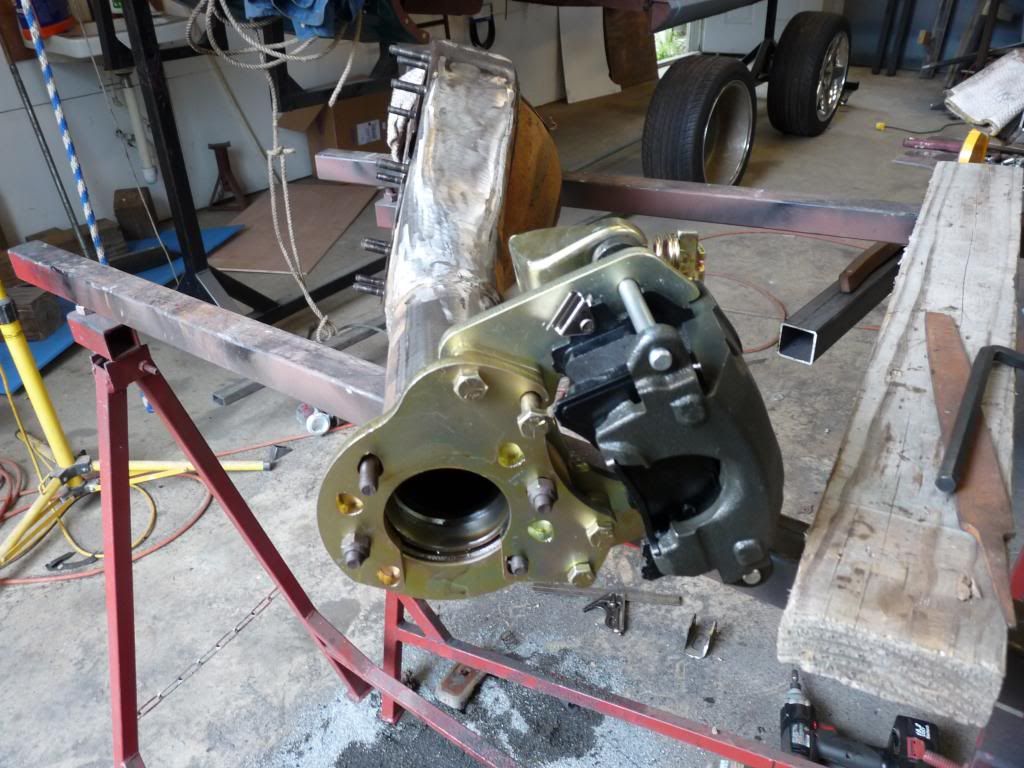
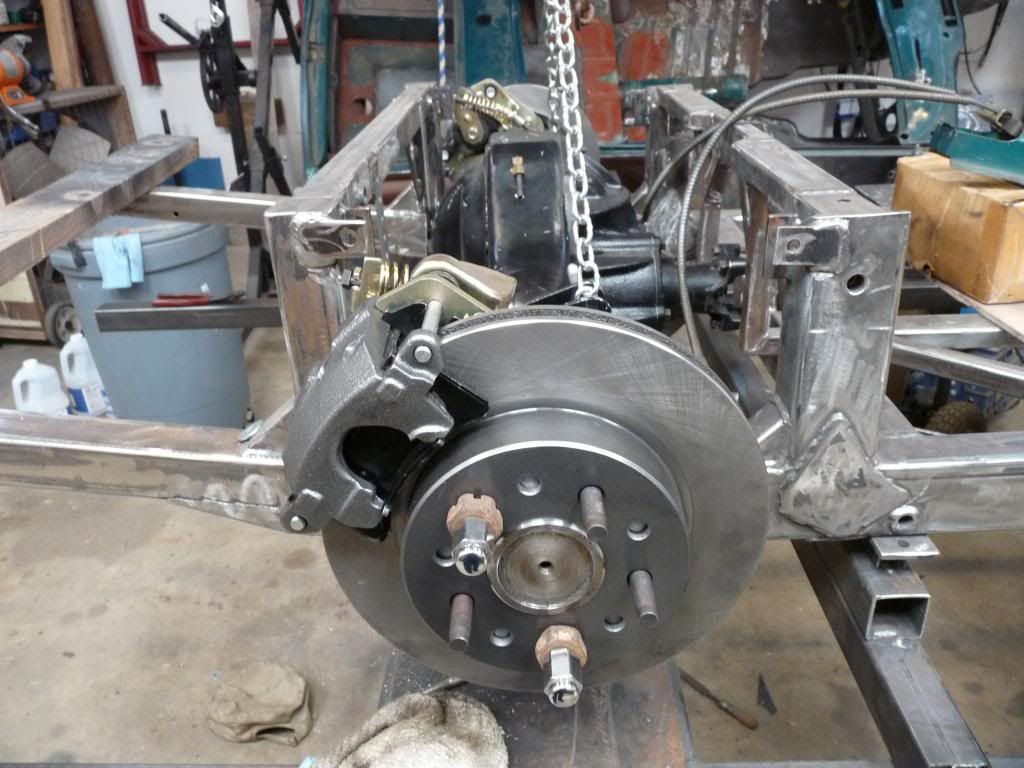
Test fitted the brakes. They are supposed to bolt right on but ended up welding them because of clearance problems. These are 11.5" gm metric brakes. 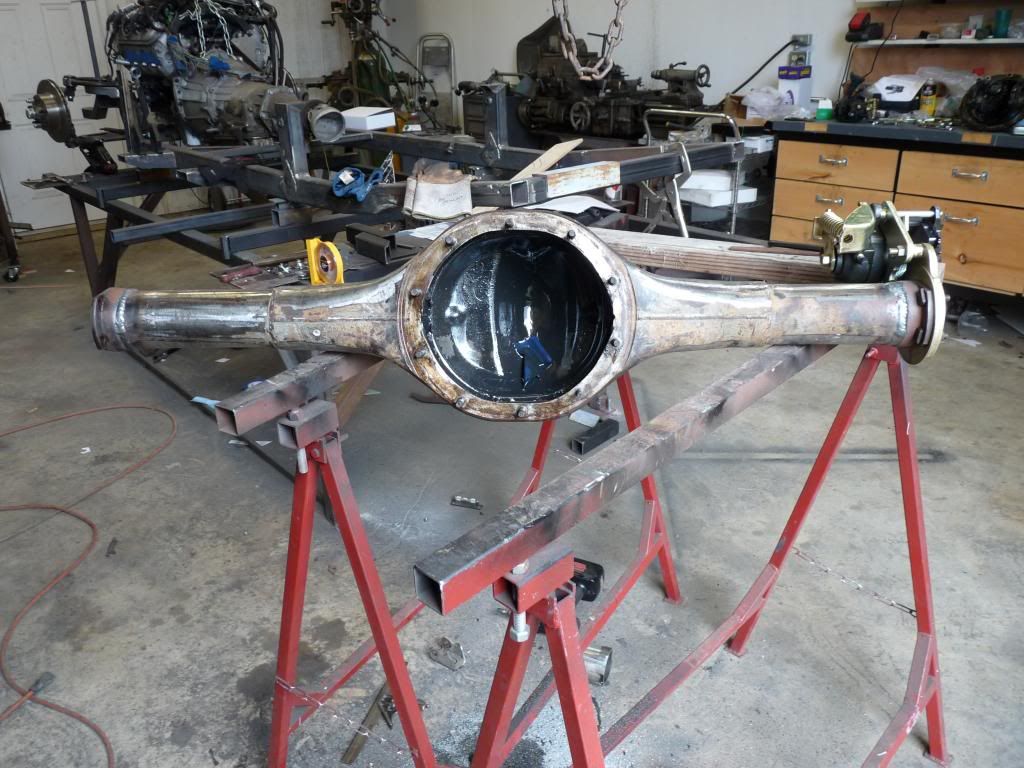
Another look at the narrowed diff. housing. 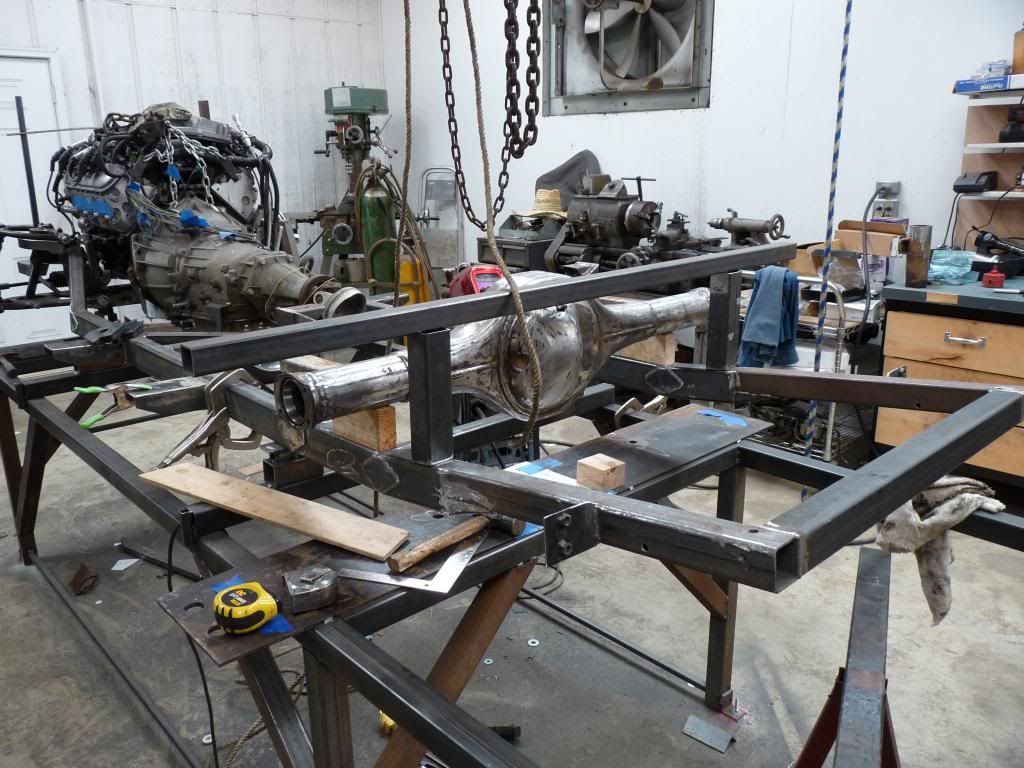
Test fitting the diff. The horz. bar behind the diff. will be the top coil overs mounting. 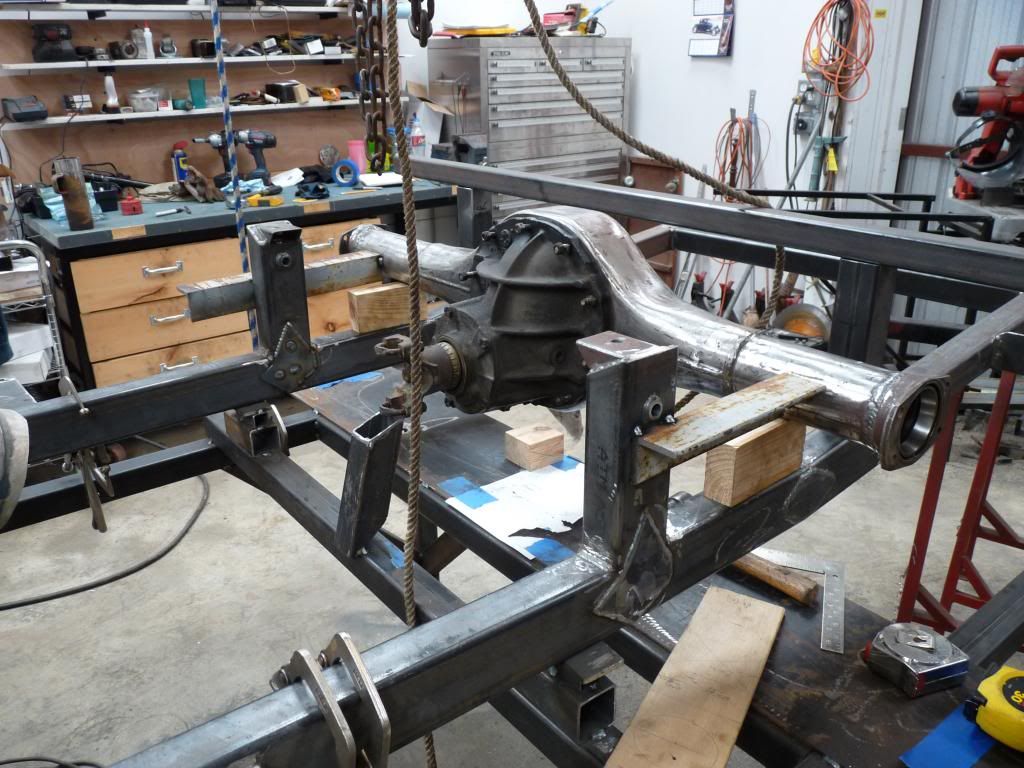
Once the diff is in the correct position I tack it into place and it will stay there until everything is attached to it. 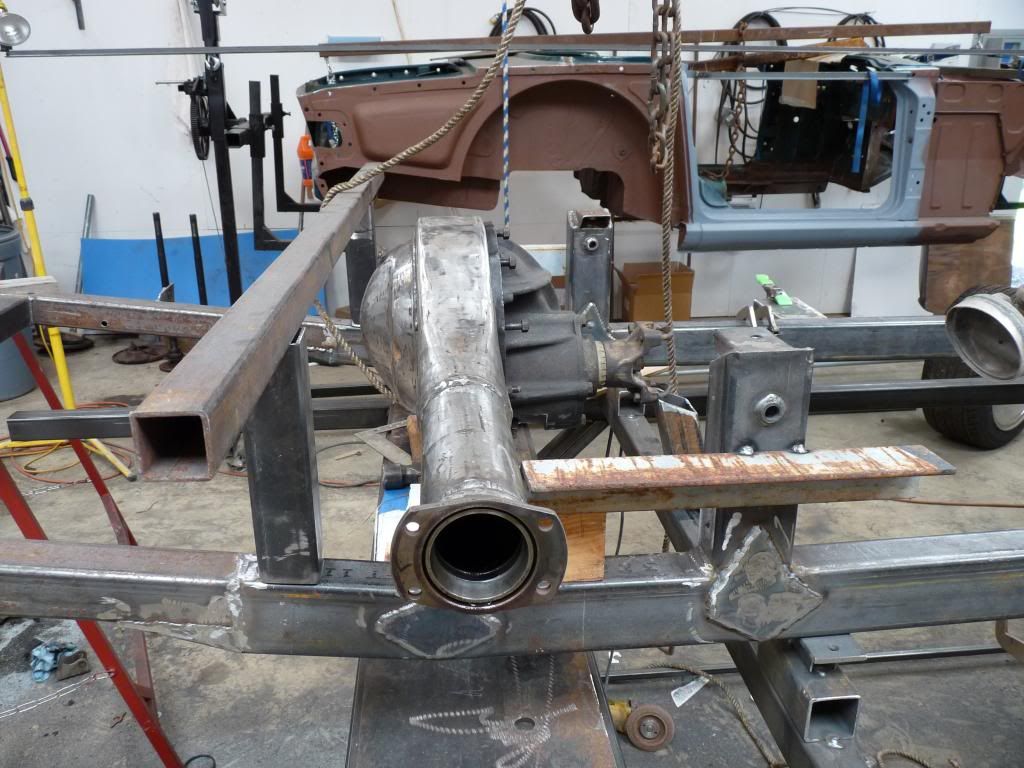
Another look at diff. |

|
|
Phil Crawford Philip crawford Bogalusa, La (80 posts) Registered: 02/01/2013 10:38PM Main British Car: 74 TR6 07 4.8L |
Re: 74 TR6 upgrade
Test fitting the body over the diff. Had to make the hump bigger in the car for the diff. 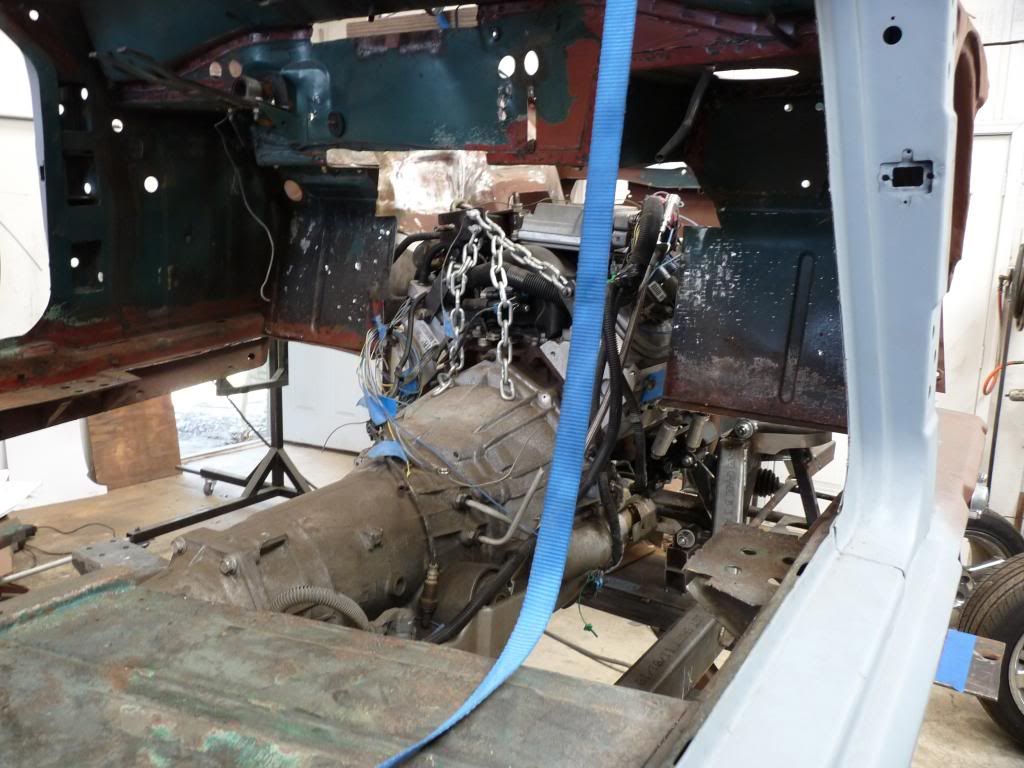
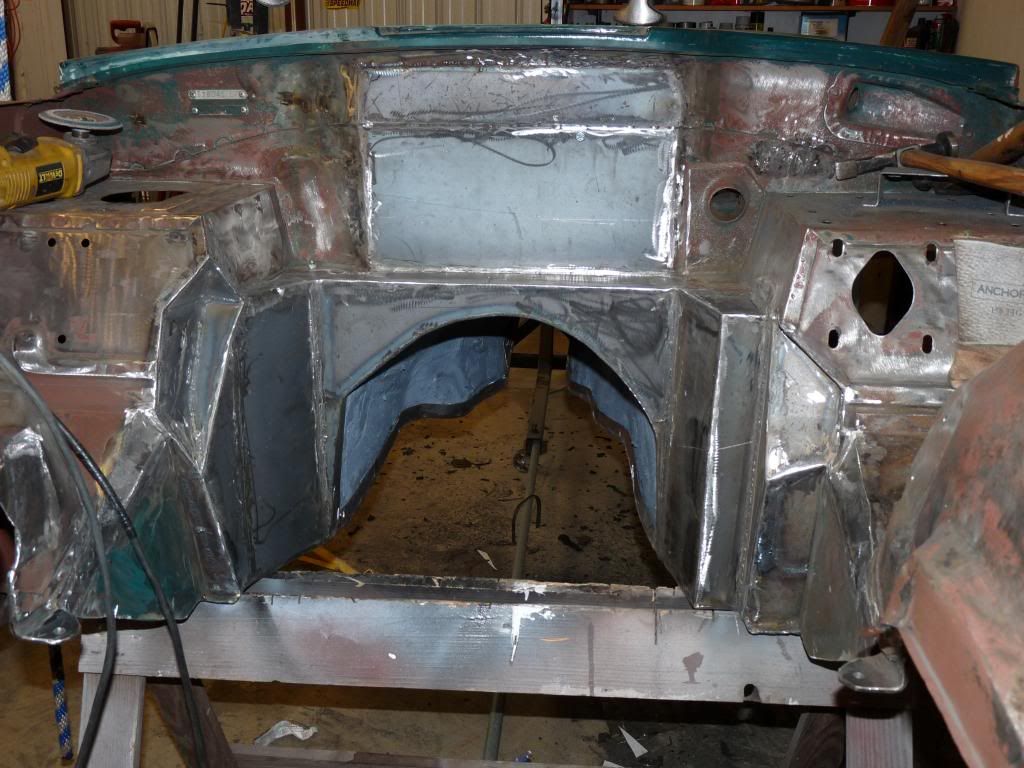
Replacing some rusty areas and making room for the engine and trans. 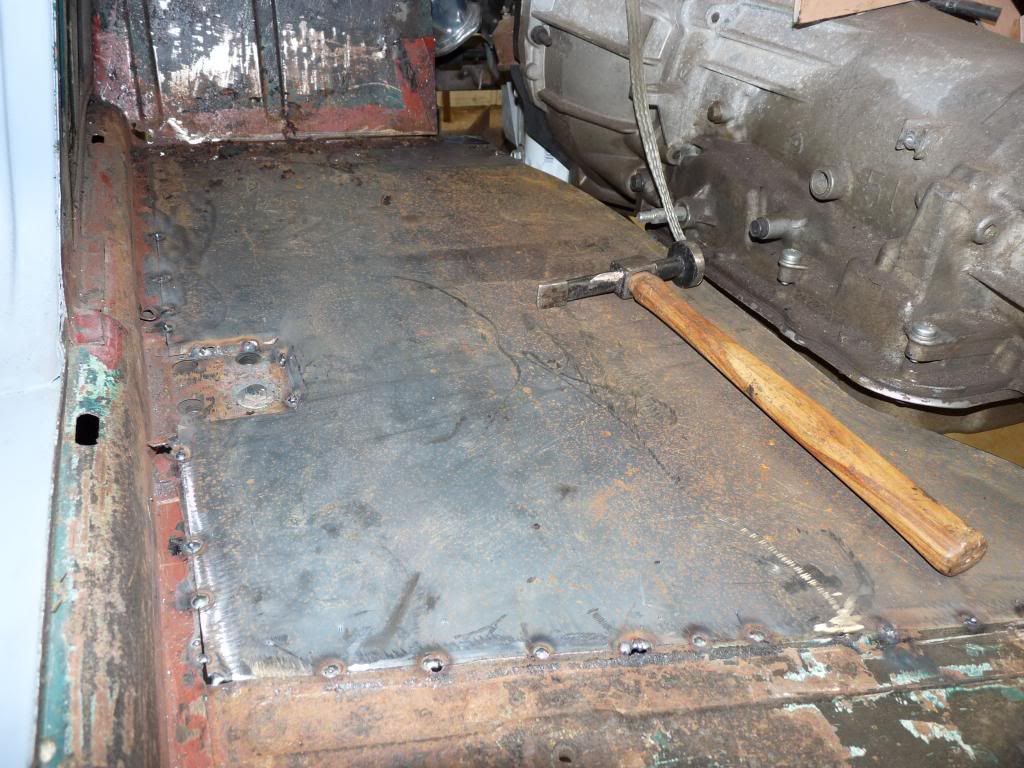
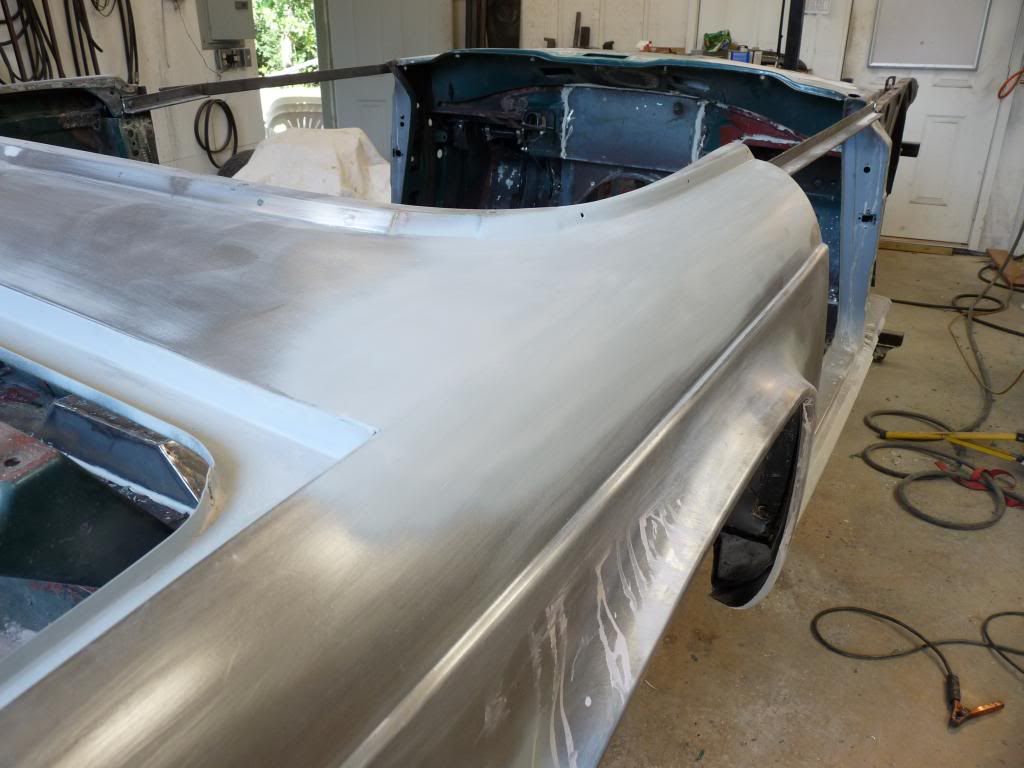
One floor board tacked into place. Really didn't loose much room by the pedals but more to the rear and even more on the passenger side. The shift lever on the side of the trans had to be shortened. 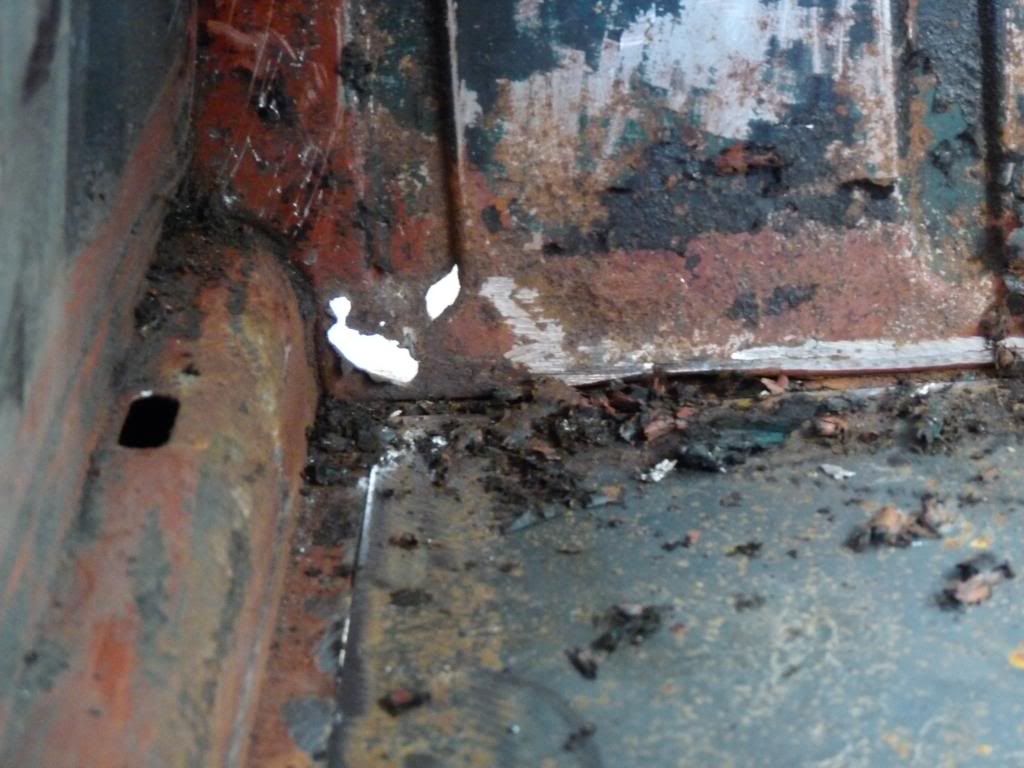
Wasn''t much metal left down here had to replace it. I used 16 gauge for the floors and other stuff. I had a 4' x 8' piece and used all of it. 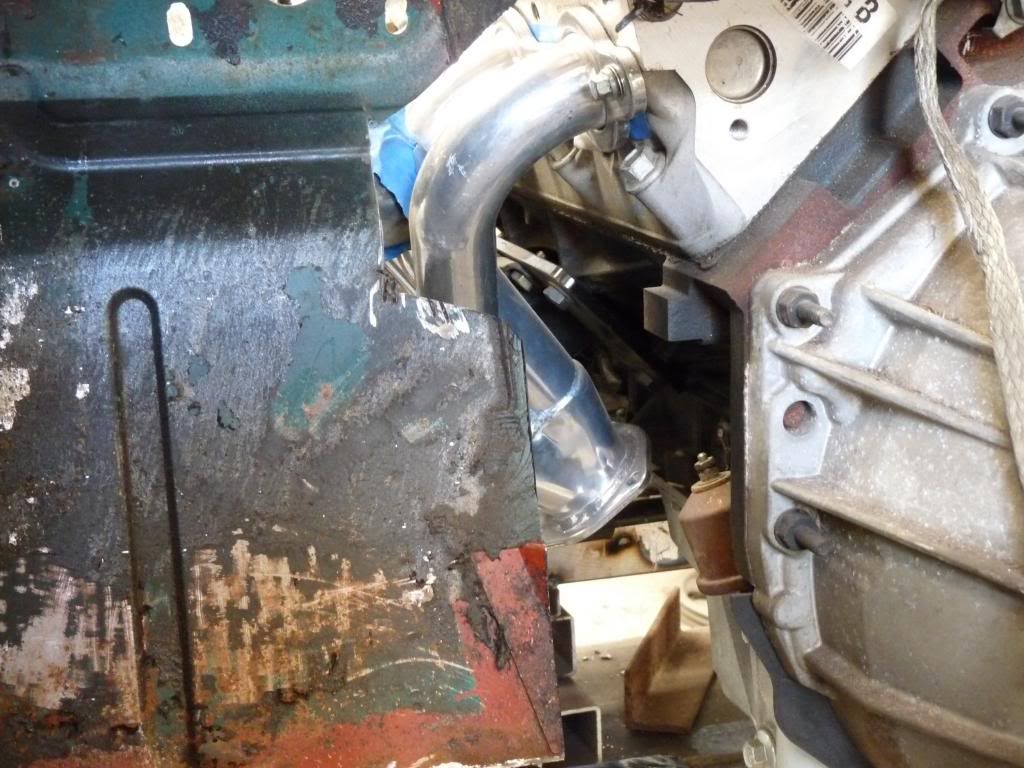
Had to make room for the header on both sided of the car. 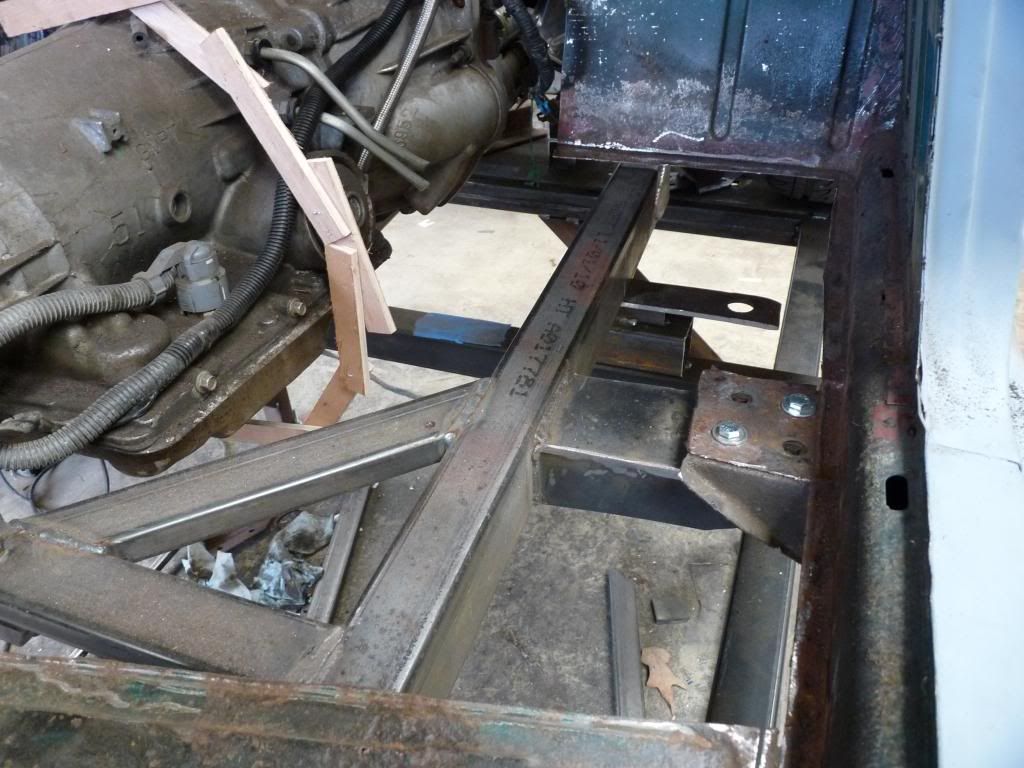
Replacing the right floor board. The wooden arc is my pattern for the trans. cover and transition piece. |
|
Phil Crawford Philip crawford Bogalusa, La (80 posts) Registered: 02/01/2013 10:38PM Main British Car: 74 TR6 07 4.8L |
Re: 74 TR6 upgrade
Different views of the firewall and replacement of the metal where the battery used to sit. You can bend this metal easily by scoring it with a cutoff wheel on a side grinder then bending it over an edge. 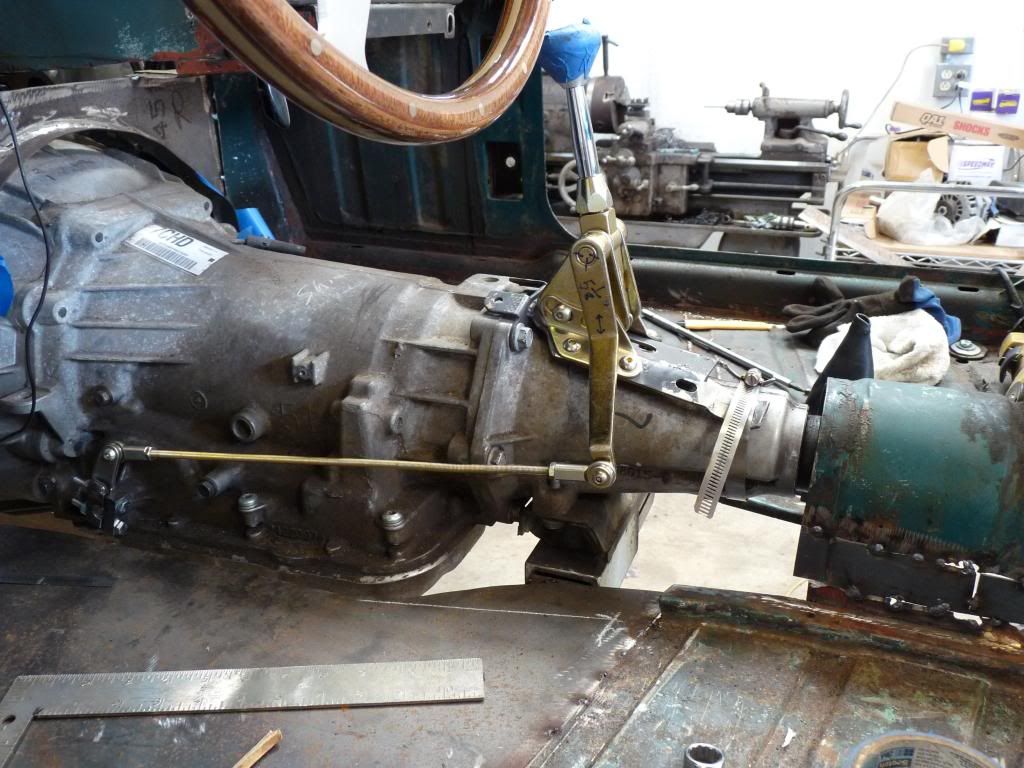
The lokar shifter is supposed to sit on top of the trans in front of where it is now. Had to modify the existing bracket and arms. 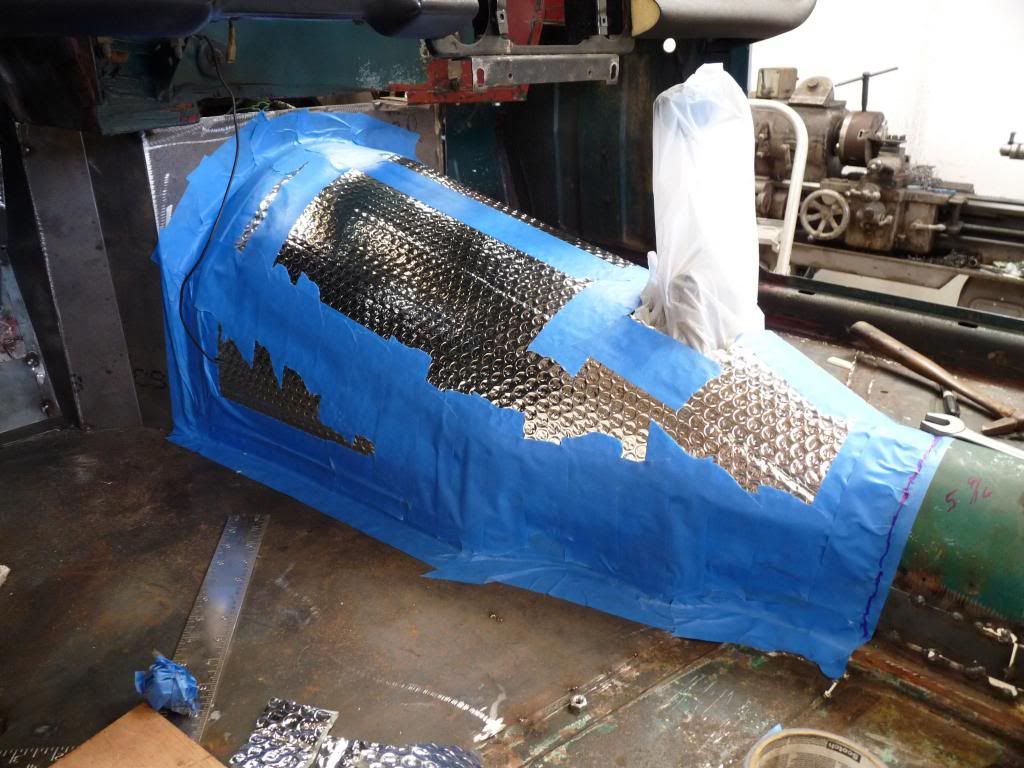
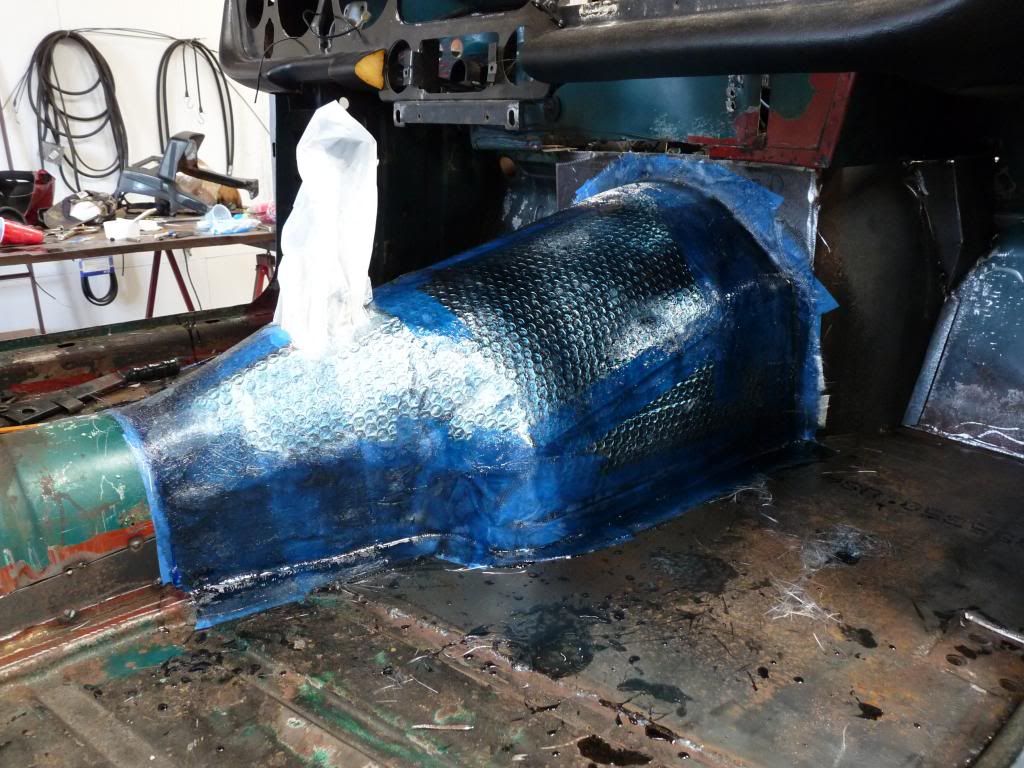
Had to make a new trans. tunnel cover. Used bubble wrap that is used for insulation in campers as the mold. Laid it over the trans. and taped it into place and tapped everything I didn't want the resin to stick to and sprayed everything with furniture polish. Laid 2 coats of fiber glass cloth and saturated it with resin. Allowed to harden and then I pried it up and trimmed it. Like magic a trans. tunnel cover. It's a pretty blue and translucent. 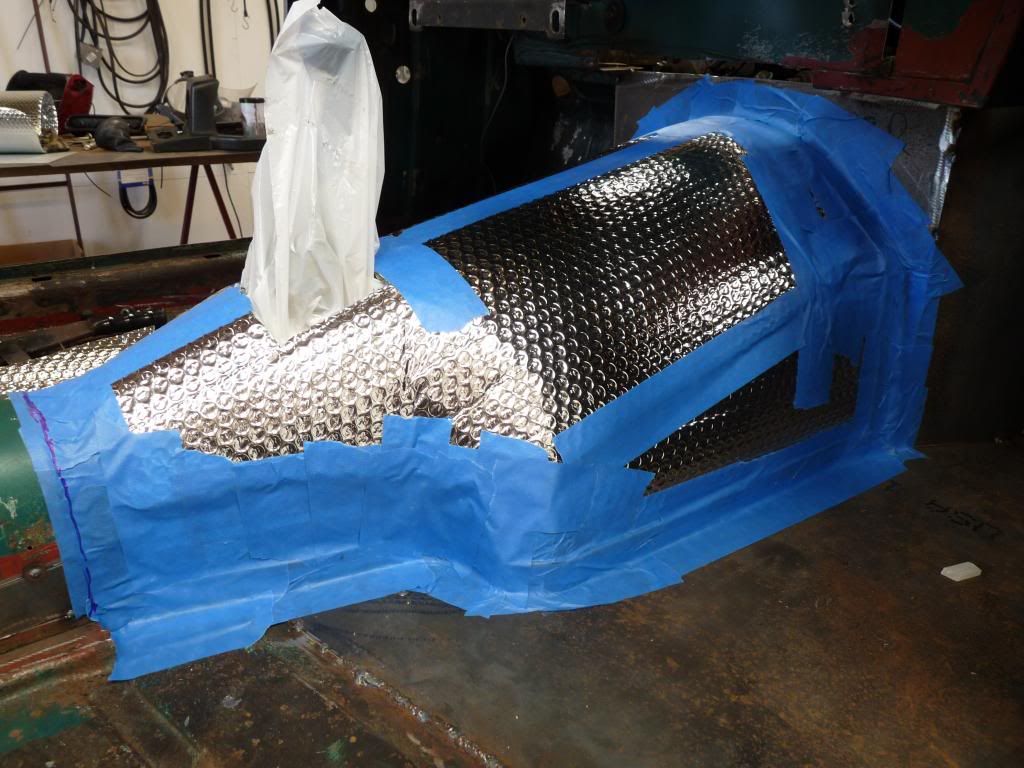
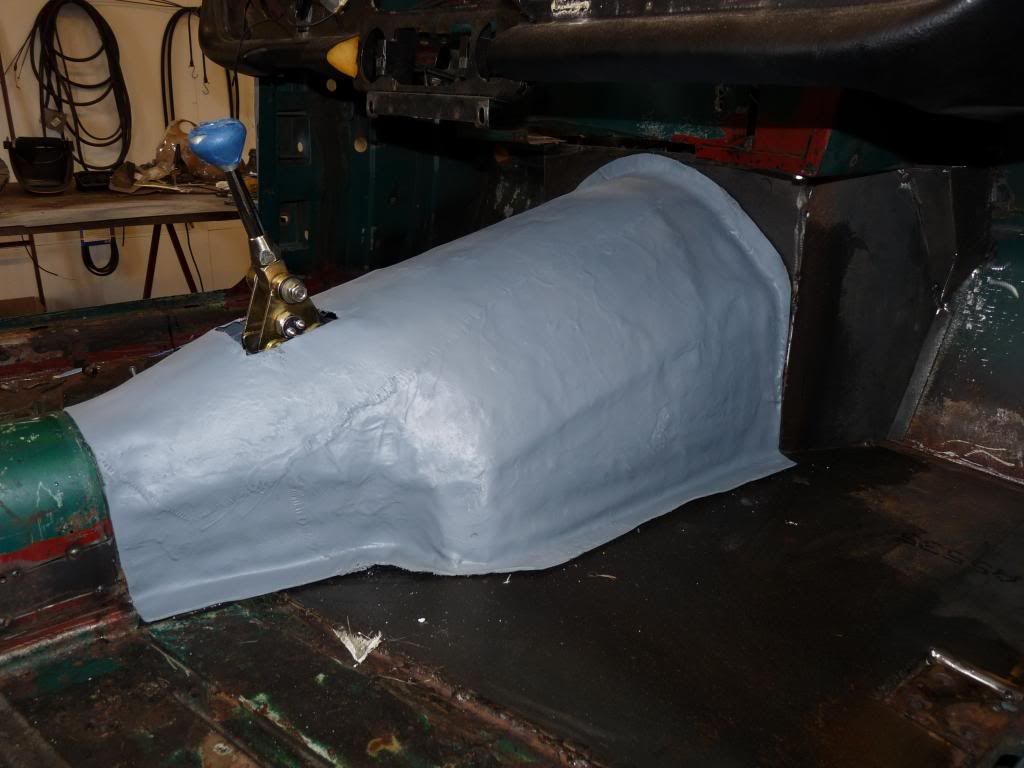
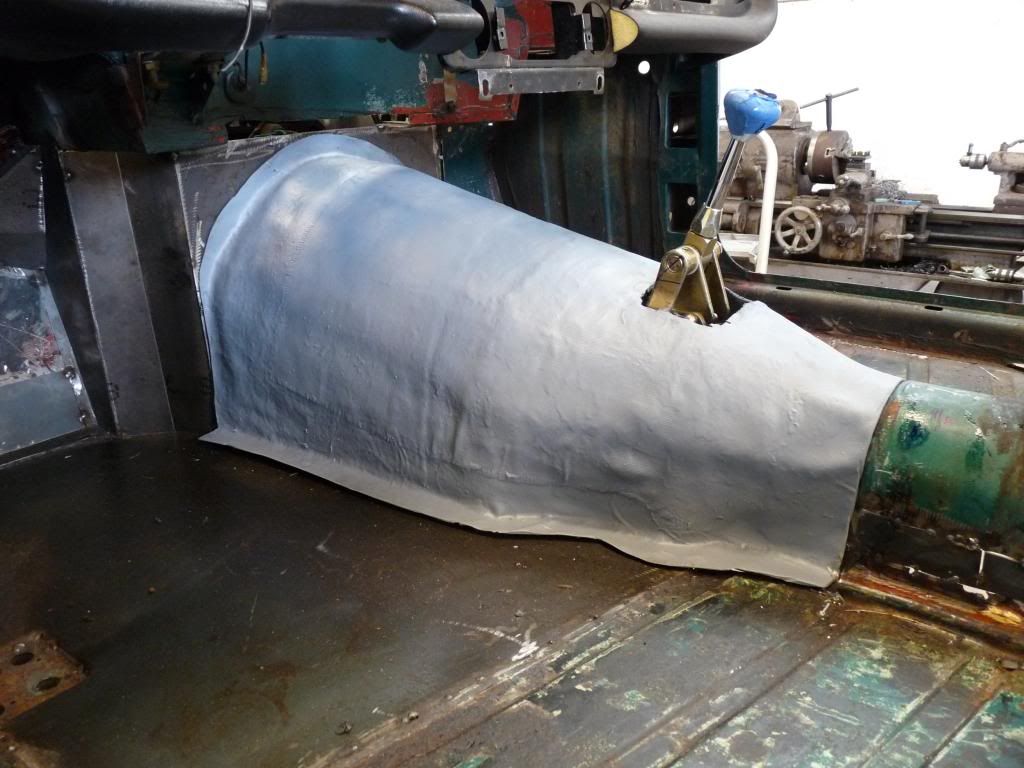
A little primer and it looks great. Light and strong. |
|
Phil Crawford Philip crawford Bogalusa, La (80 posts) Registered: 02/01/2013 10:38PM Main British Car: 74 TR6 07 4.8L |
Re: 74 TR6 upgrade
This is the second attempt at the steering but didn't work. Would have had to remove the steering to change plugs. AS you can see it is tight. Will see the finished steering later on when the car goes back together. 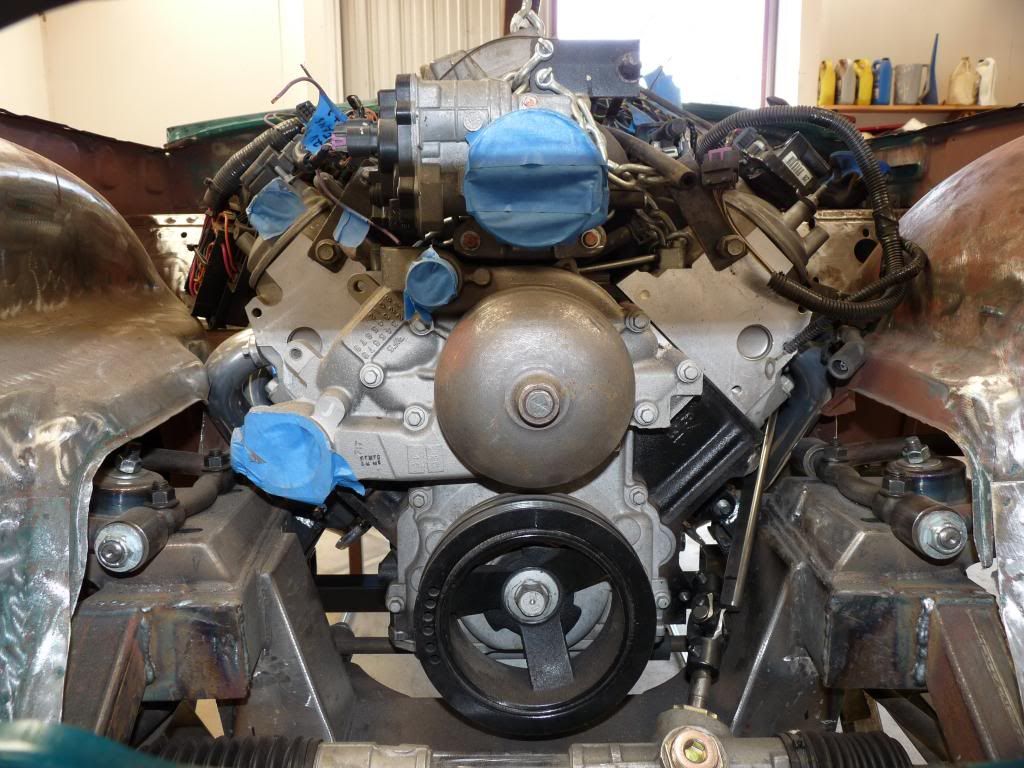
Had to remove more of the ear on the block where I have been grinding for shaft clearance. This was the hardest job on this car. 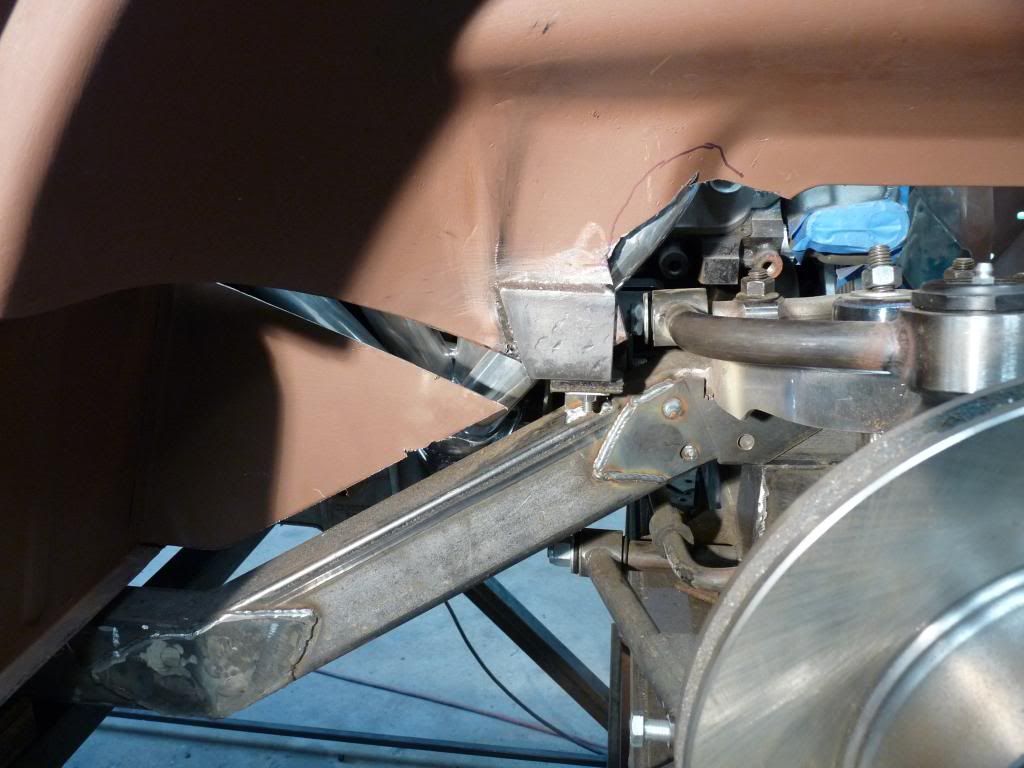
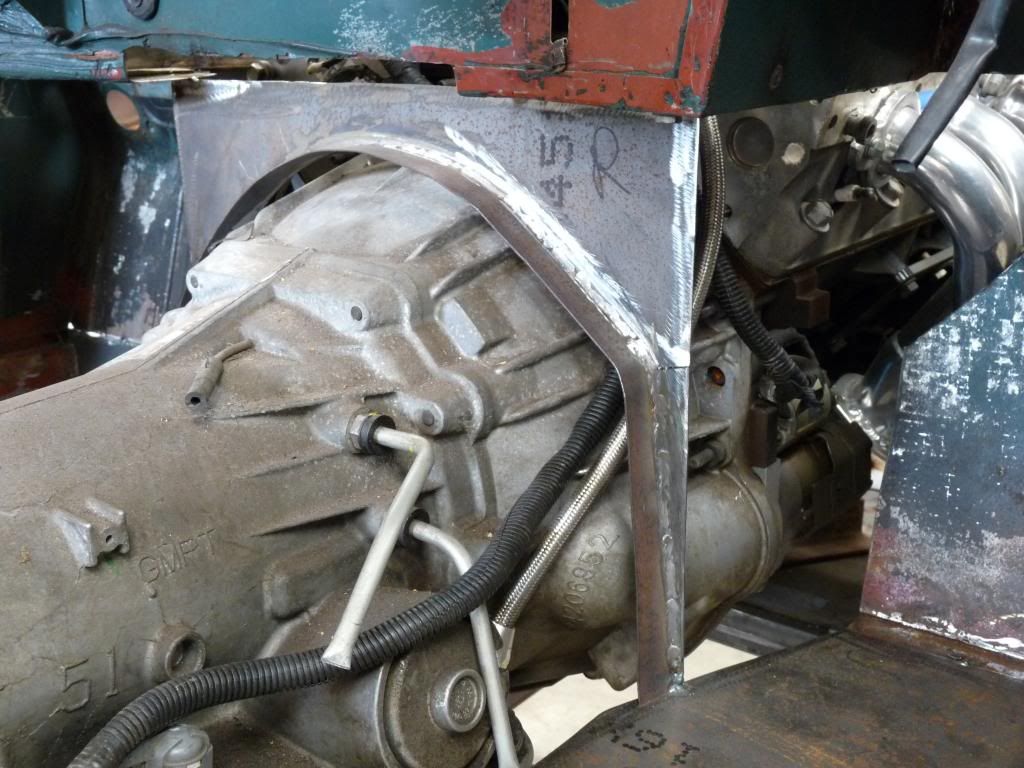
Fabbed the fender body mount. Have a little metal to replace and the gusset on the upper but joint needs to be welded. 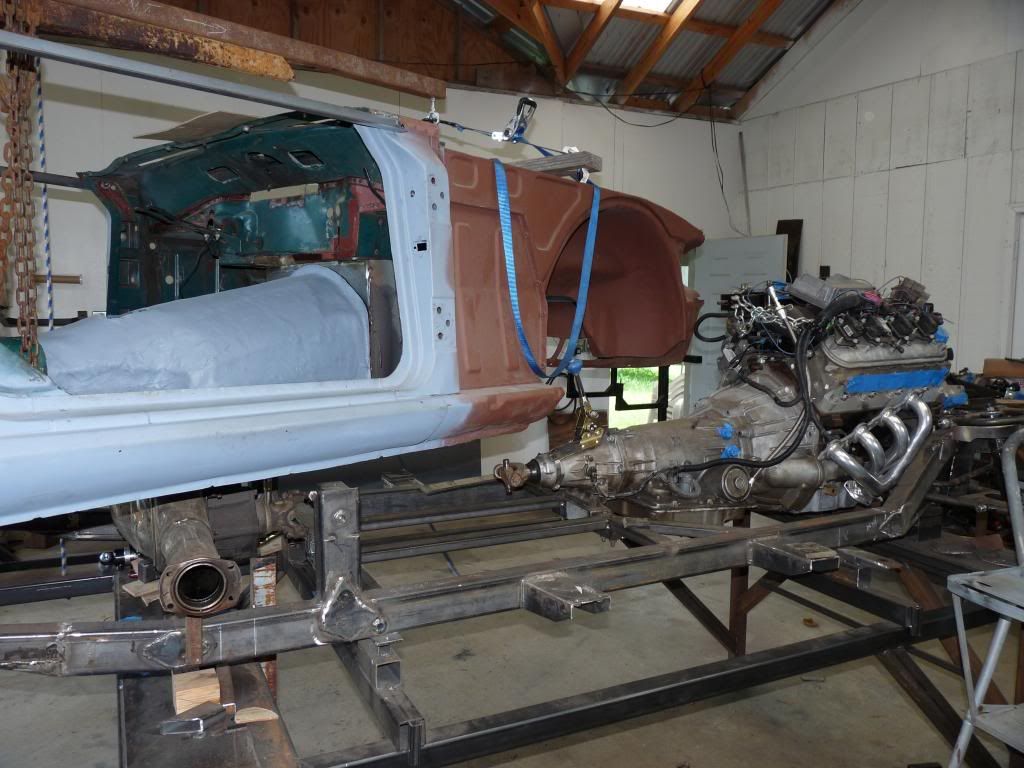
Taking the body off again. 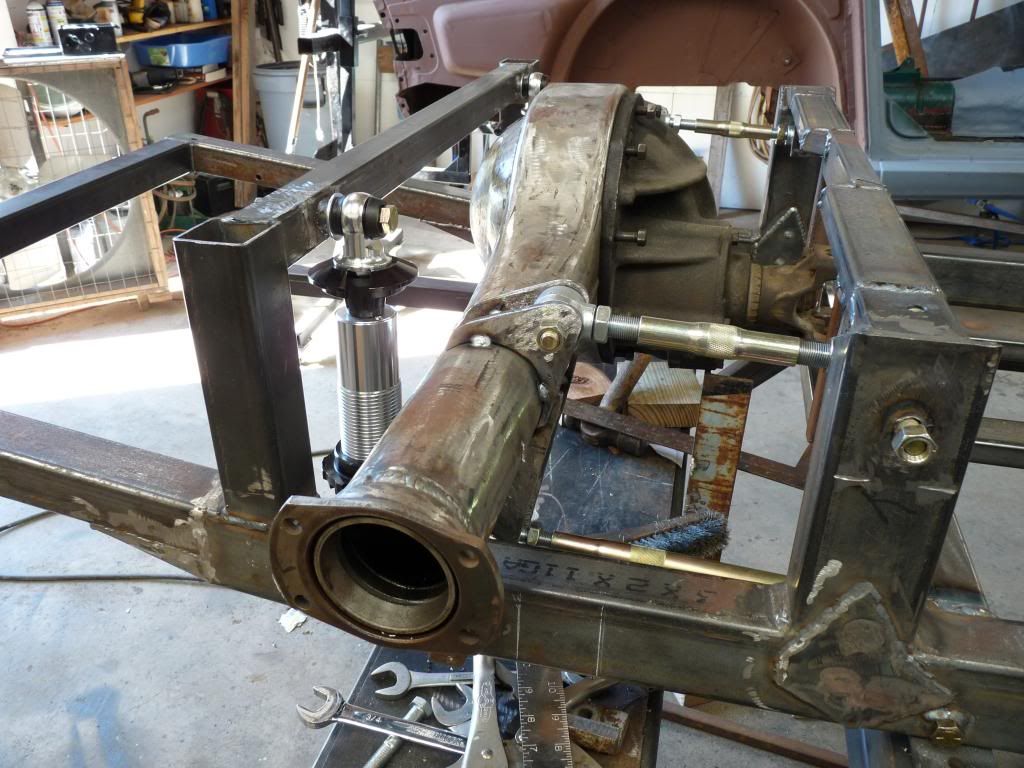
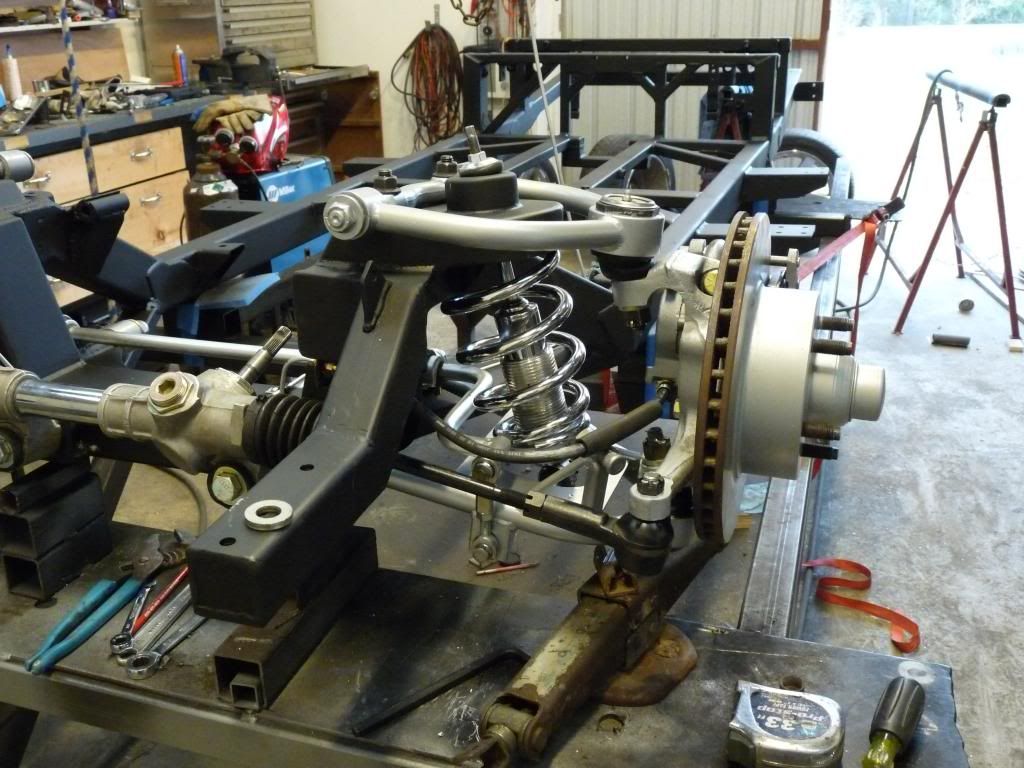
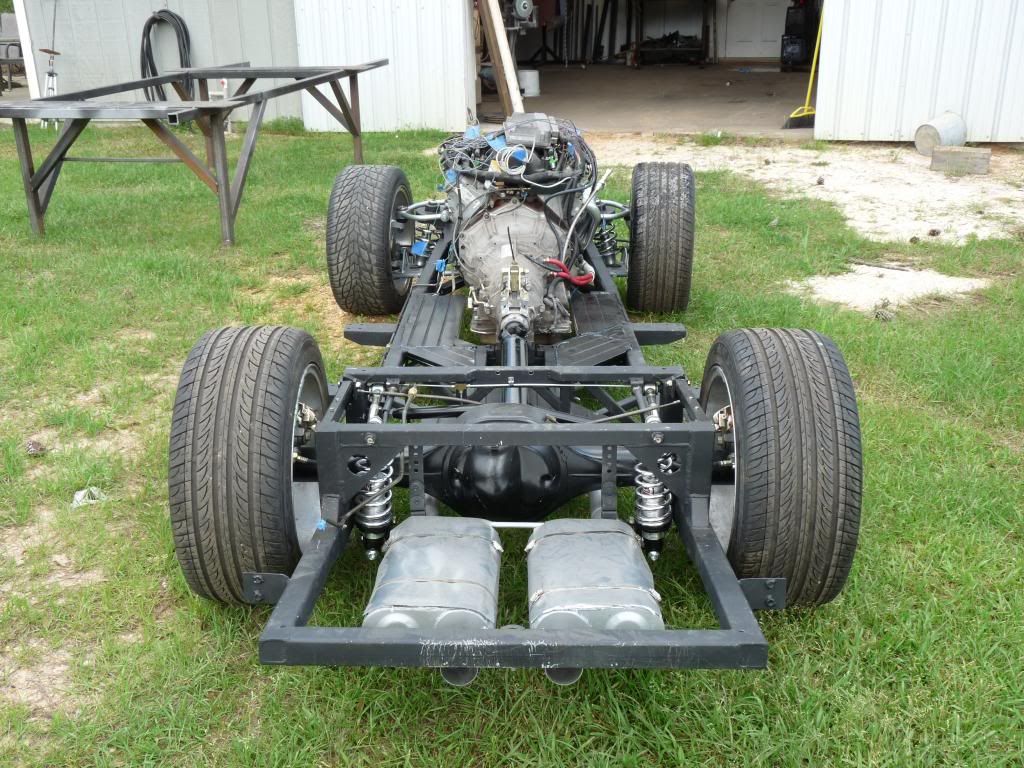
Got the four links in pace and the shocks mounted. Notice the bottom link is longer than the top one. The top one needs to be longer but there is no room for it. All the brackets on the trans. tube home made out of 1/4" plate. 
Things are coming together. This took a lot of time and trial and error. I laid the four links out on plywood with movable arms and found what works best for this car. |
|
Phil Crawford Philip crawford Bogalusa, La (80 posts) Registered: 02/01/2013 10:38PM Main British Car: 74 TR6 07 4.8L |
Re: 74 TR6 upgrade
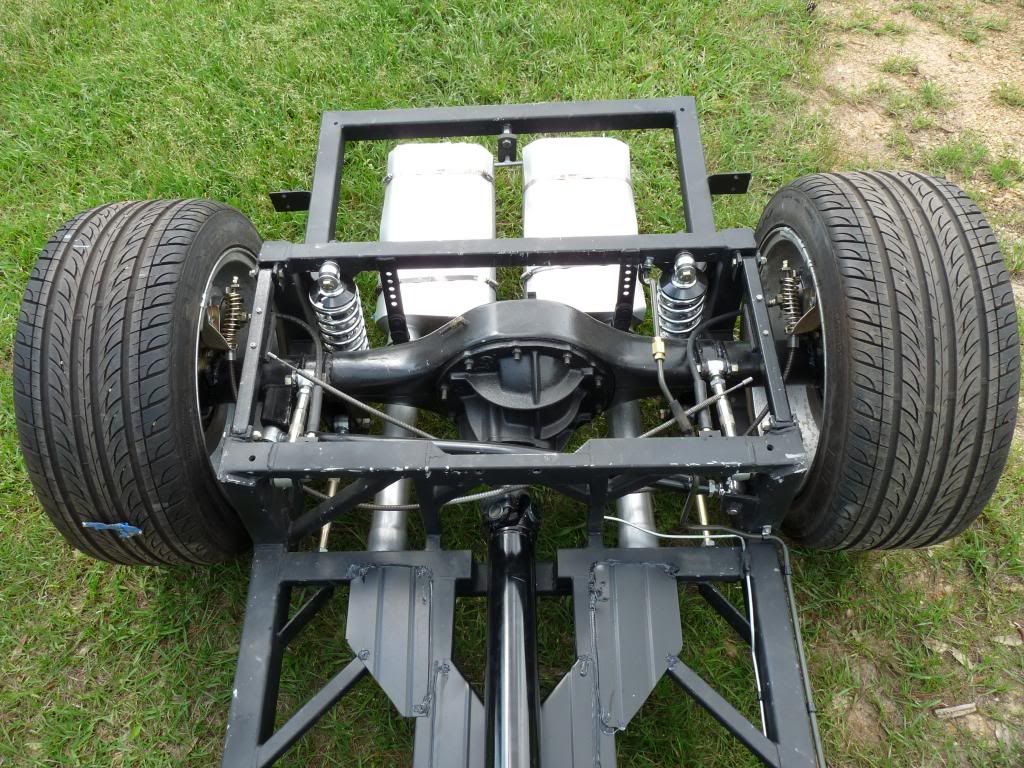
Another look at the rear end suspension. 
This is a big rear end. Wish I had used an 8". Hind sight Ha Ha 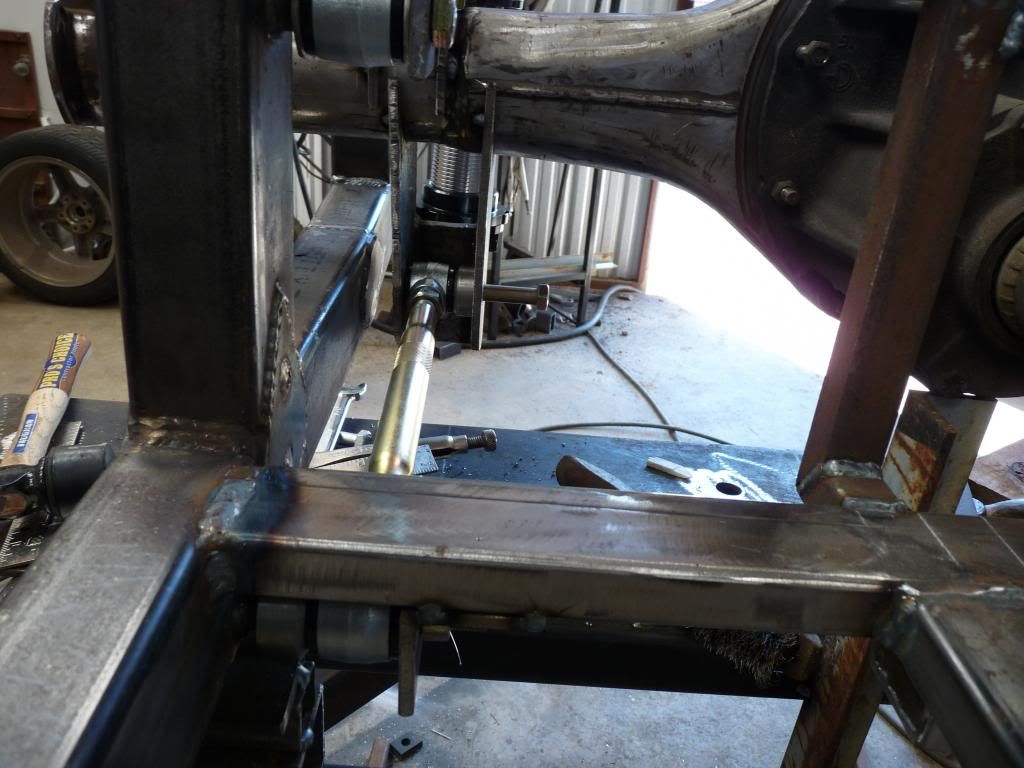
Looking at the lay out. It's hard to see everything with one photo. If you have questions please ash and I will try to answer them. 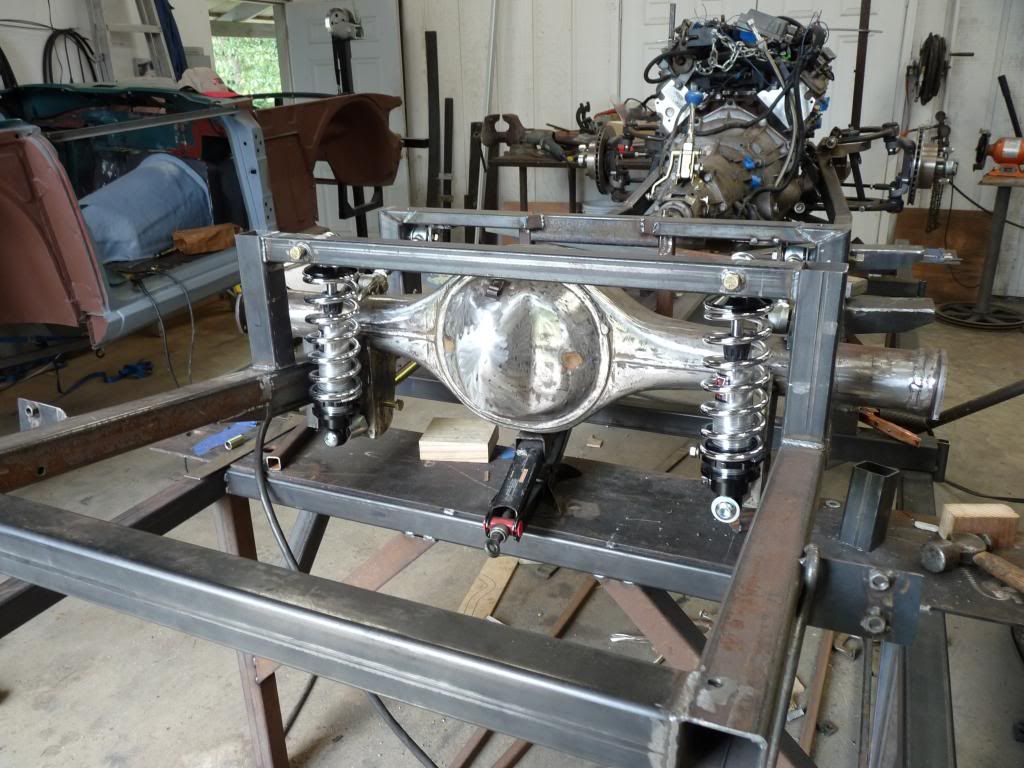

This is the diff. mount for the panhard bar. It is 1 1/8" DOM steel and it was a bear to bend even after it was white hot. It goes over the top of the diff. 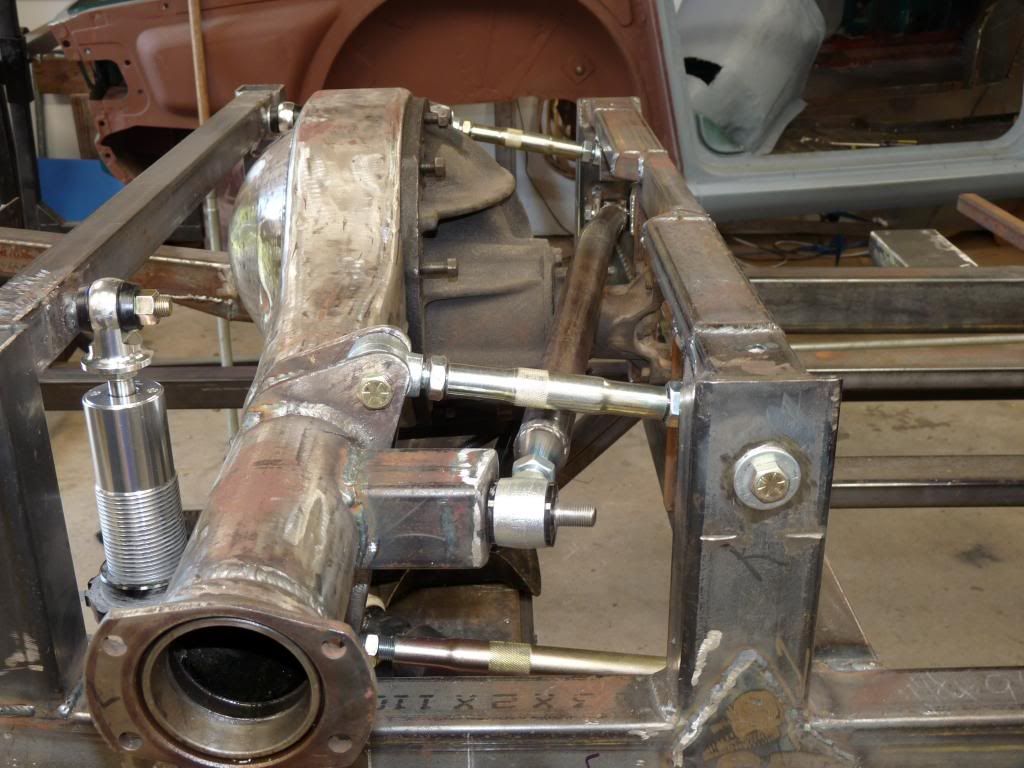
You can see I have the diff. jacked up to check the clearance of the panhard bar over the diff. 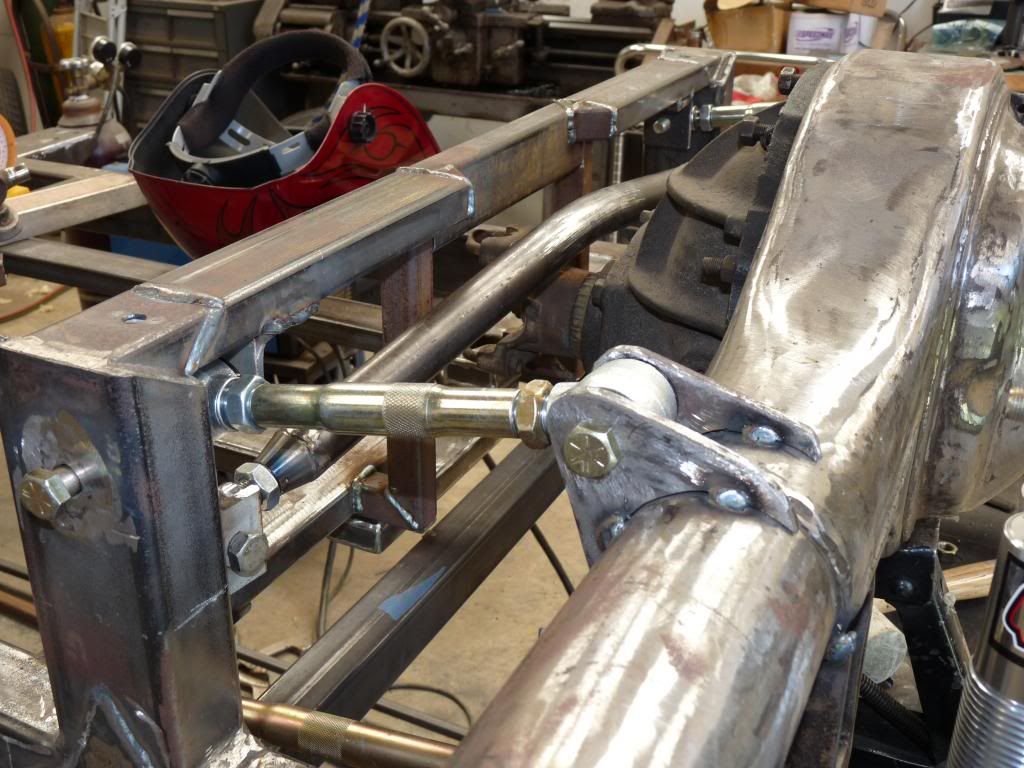
The panhard bar really worked out well and sits horizontal at normal ride height. This whole area became really tight. 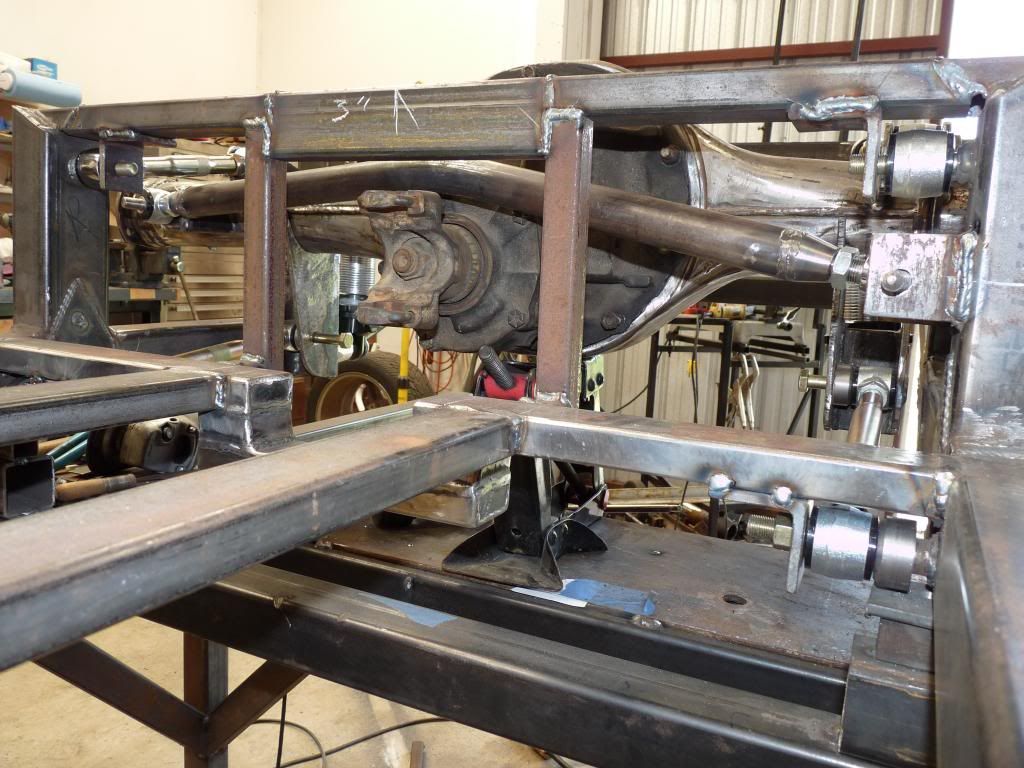
I installed 325 gears with an auburn limited slip diff. in the rear end. |
|
|
|
tbo Tim Body St Thomas Ontario (221 posts) Registered: 01/27/2013 06:47PM Main British Car: 1954 Triumph TR2 stock 2 litre |
Re: 74 TR6 upgrade
Wow . What a great build, beautiful work.You mentioned foaming your frame. I'm going to fill mine too.The Challenger car is built in Brampton Ontario, close to Toronto. I saw a program on how they were biult and they have some parts of the car foam filled.I'm doing a TR3 and afriend also is restoring a TR3. He knows people at the plant and is going to get info on how it is done. If that happens I will pass on the info to you.Tim ps some upgrade, how bout super tweak?
|
|
Phil Crawford Philip crawford Bogalusa, La (80 posts) Registered: 02/01/2013 10:38PM Main British Car: 74 TR6 07 4.8L |
Re: 74 TR6 upgrade
Tim
Let me know about the foaming the frame and thanks for looking. Phil |
|
Phil Crawford Philip crawford Bogalusa, La (80 posts) Registered: 02/01/2013 10:38PM Main British Car: 74 TR6 07 4.8L |
Re: 74 TR6 upgrade
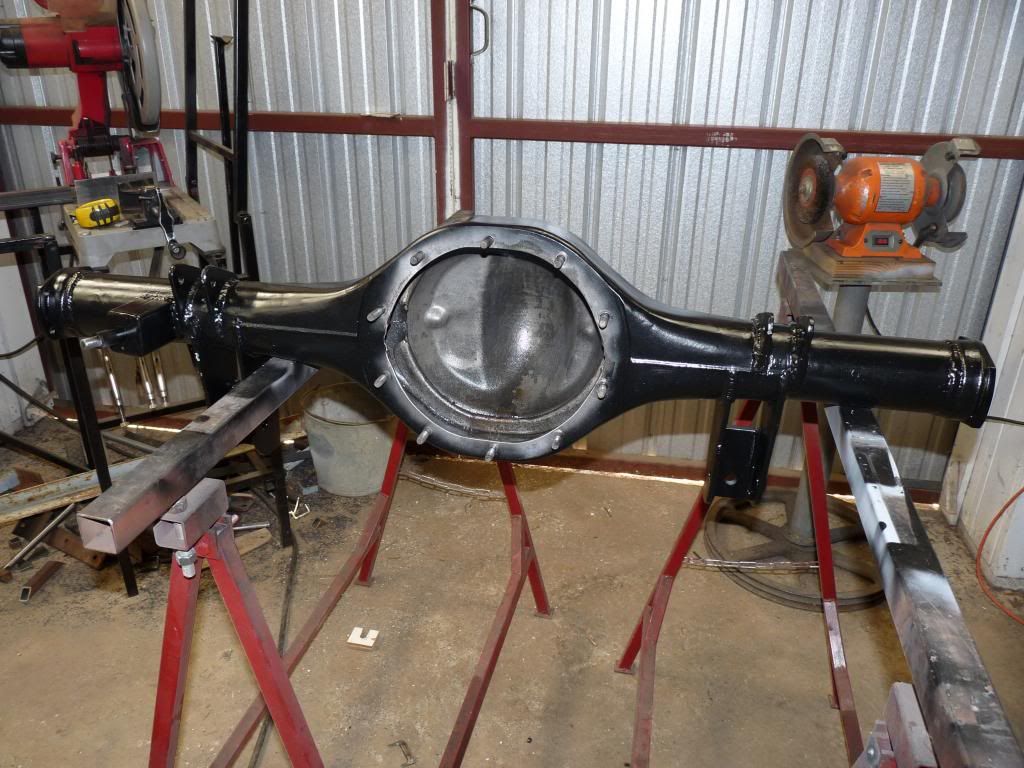
Diff. all painted and ready to put together. 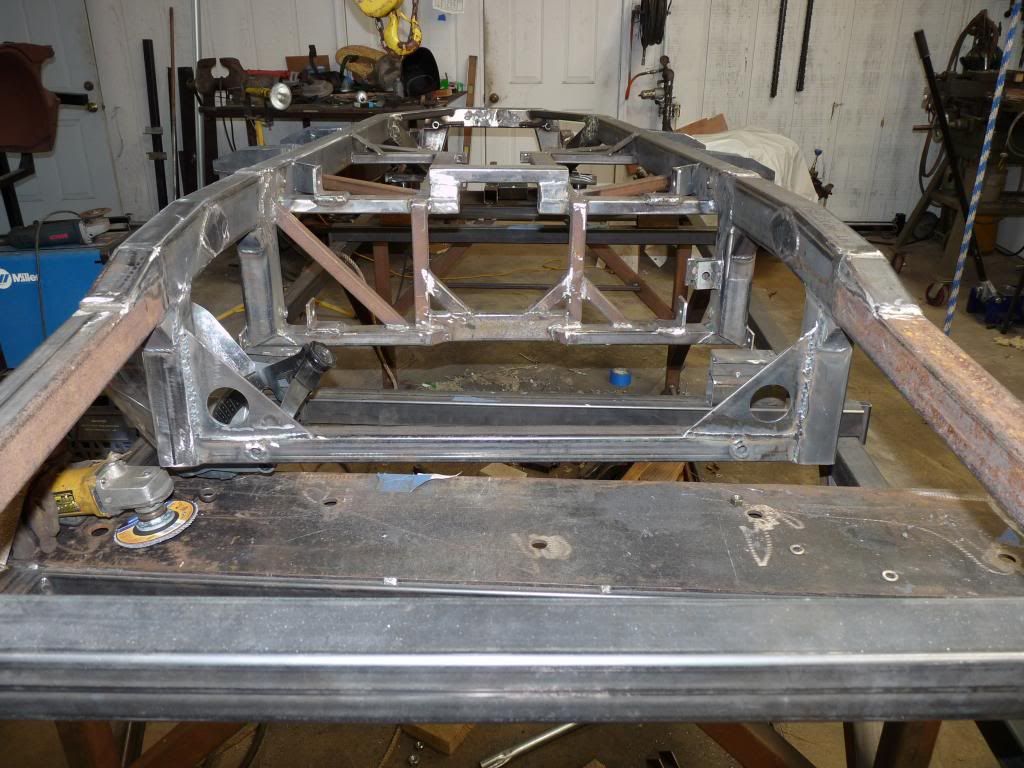
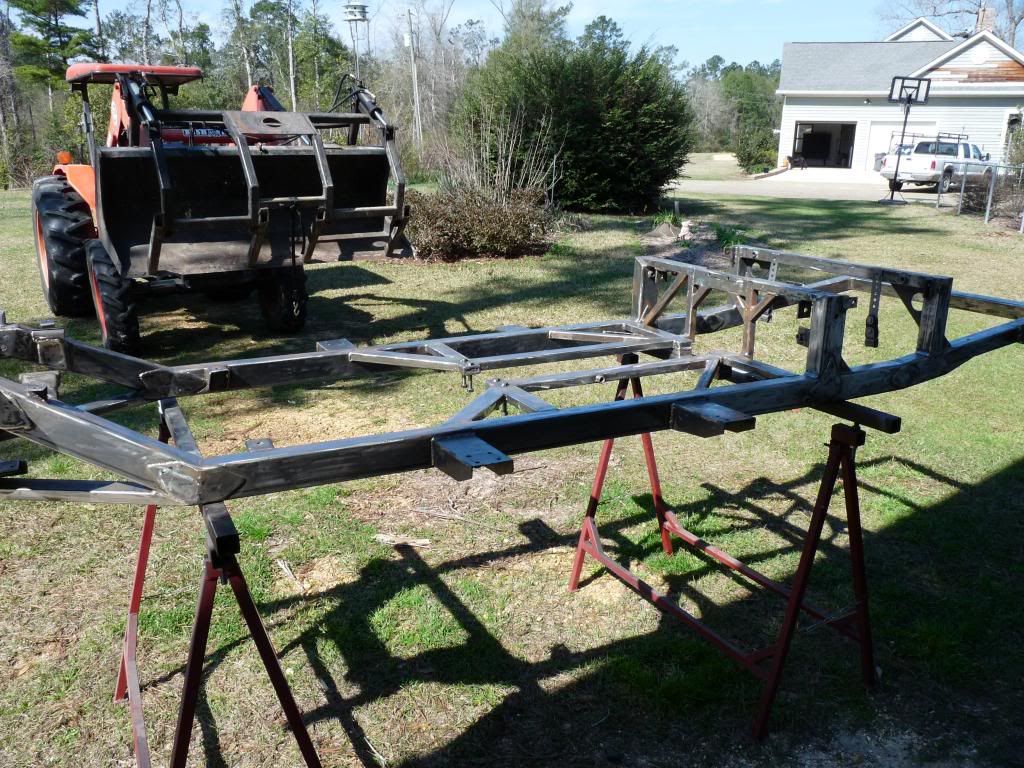
Flipped the frame and welded everything on the bottom that I couldn't get to from the top. I weighed the frame with nothing attached and it weighed 178#, even I was supprised at how little it weighed. 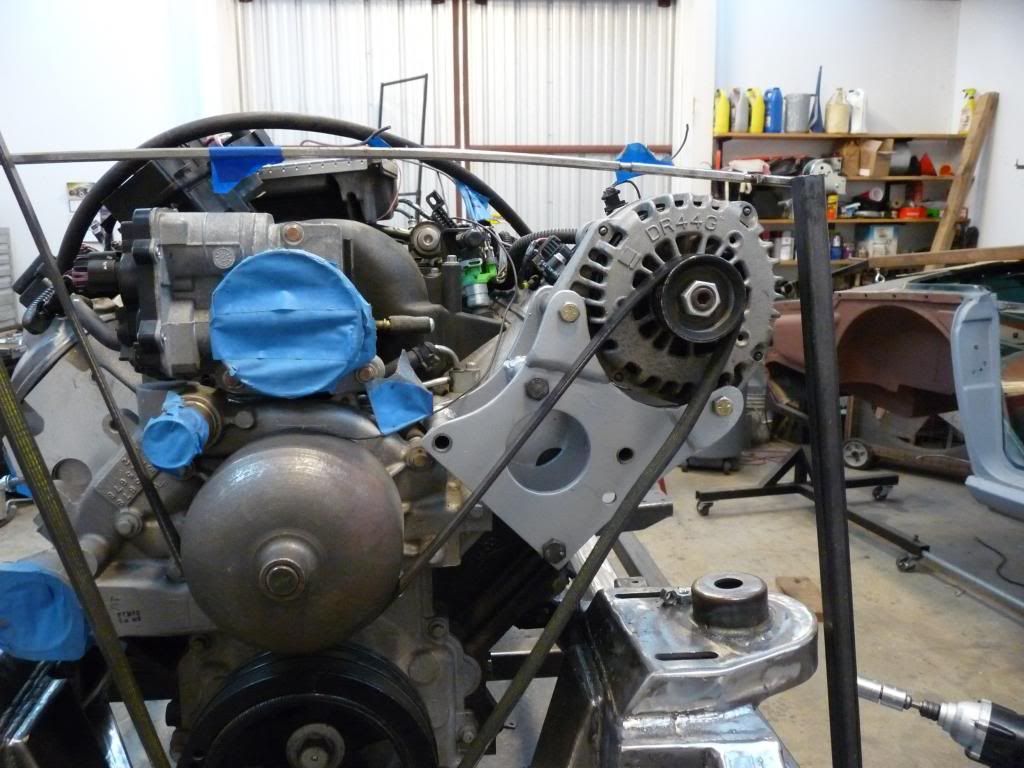
Made the alt. bracket from plate steel. The alt. is 1/8" off of the valve cover. 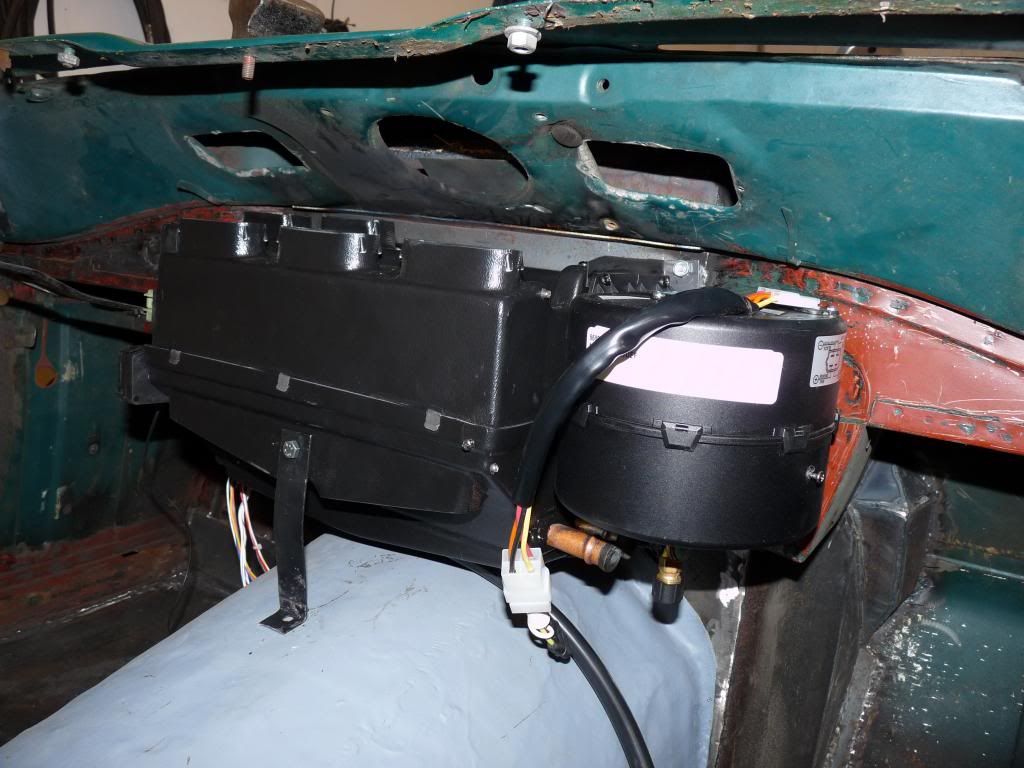
Test fitting the vintage aire. 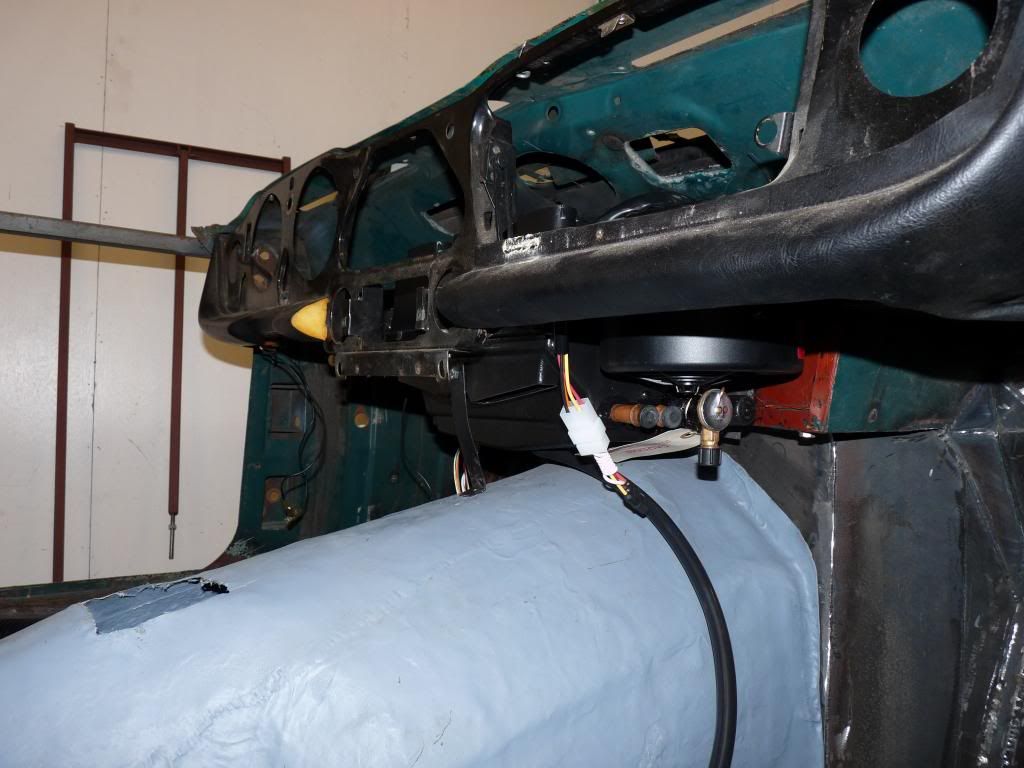
A lot of cutting and welding and fitting and grinding but not a real bad job just took a lot of time. About ready for primer. |
|
Phil Crawford Philip crawford Bogalusa, La (80 posts) Registered: 02/01/2013 10:38PM Main British Car: 74 TR6 07 4.8L |
Re: 74 TR6 upgrade
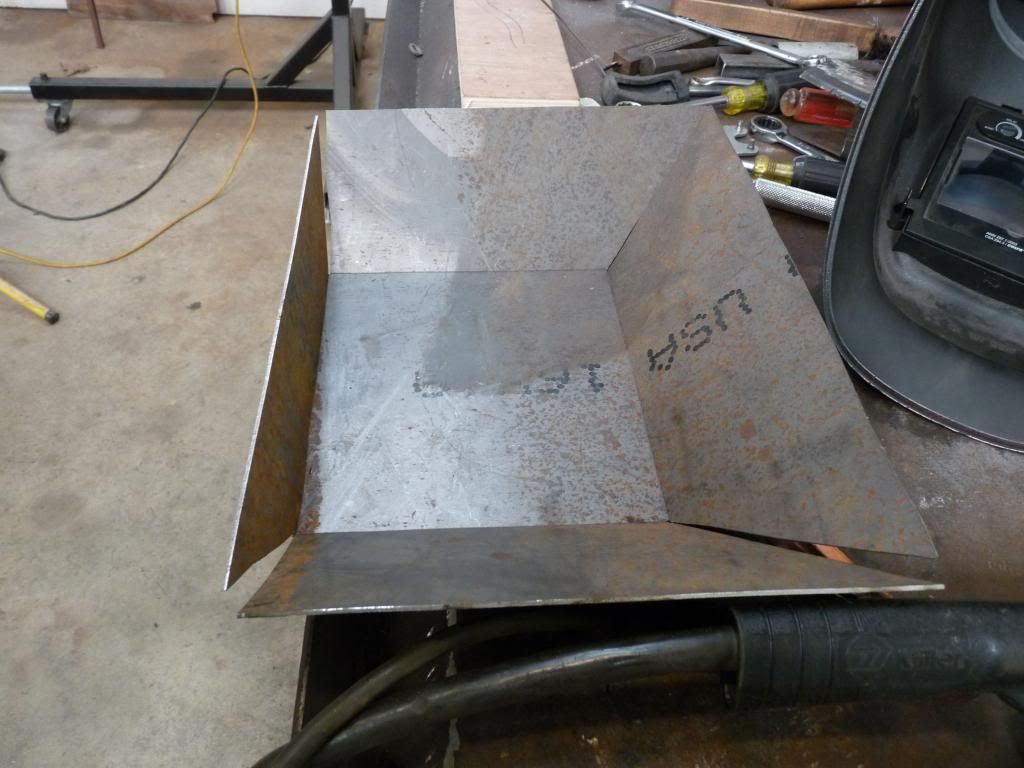
Making the diff. cover out of 16 gauger steel. 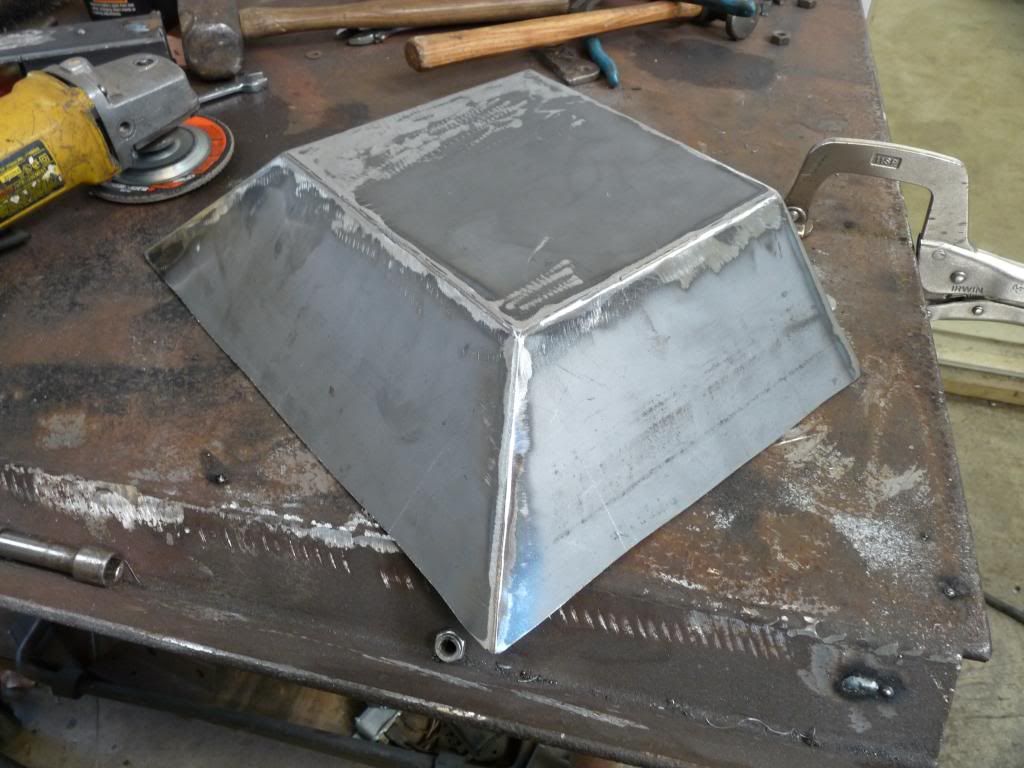
Ready to install. 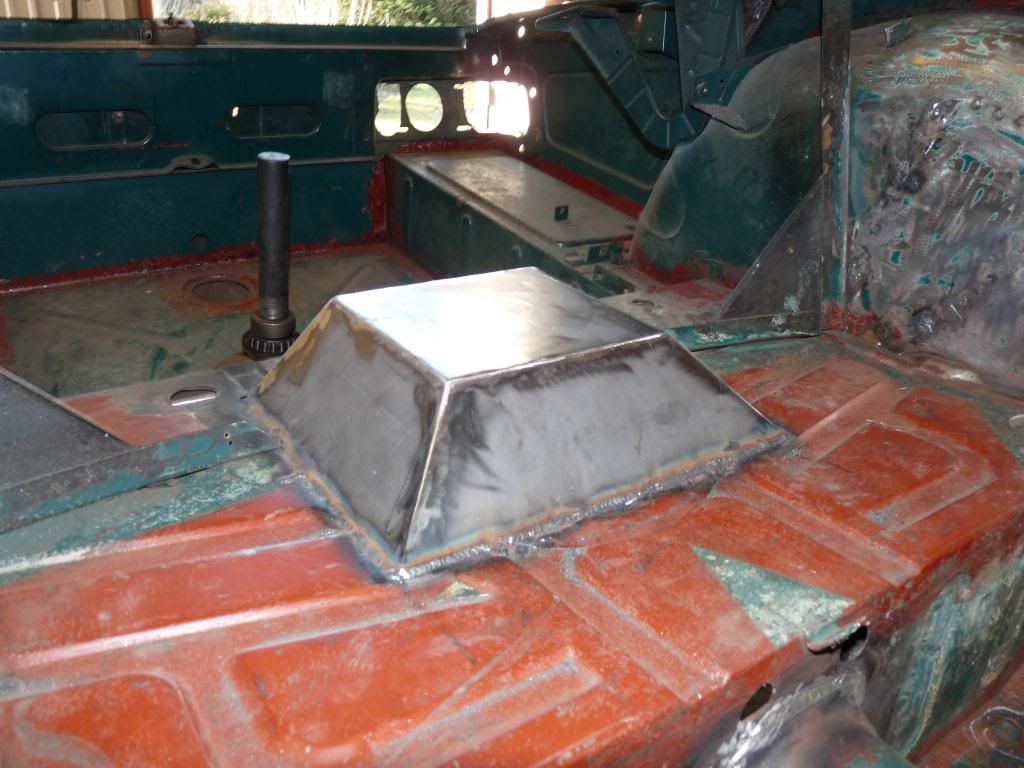
Finished diff. cover. 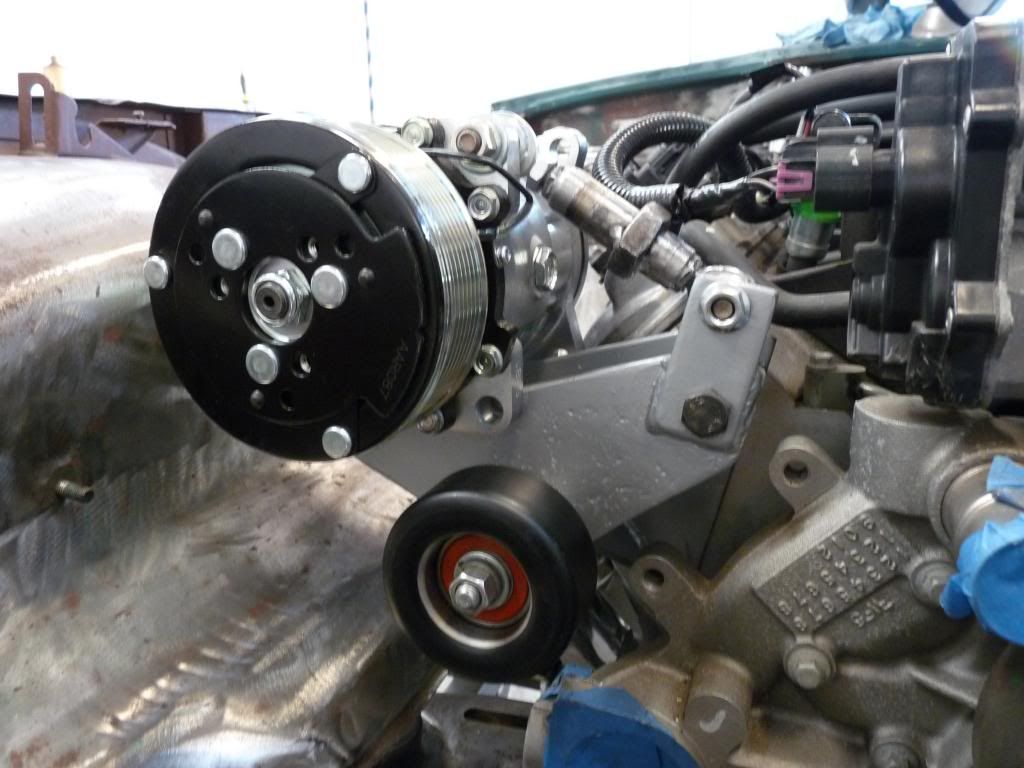
Made the AC bracket adjustable and later added a belt tensioner. 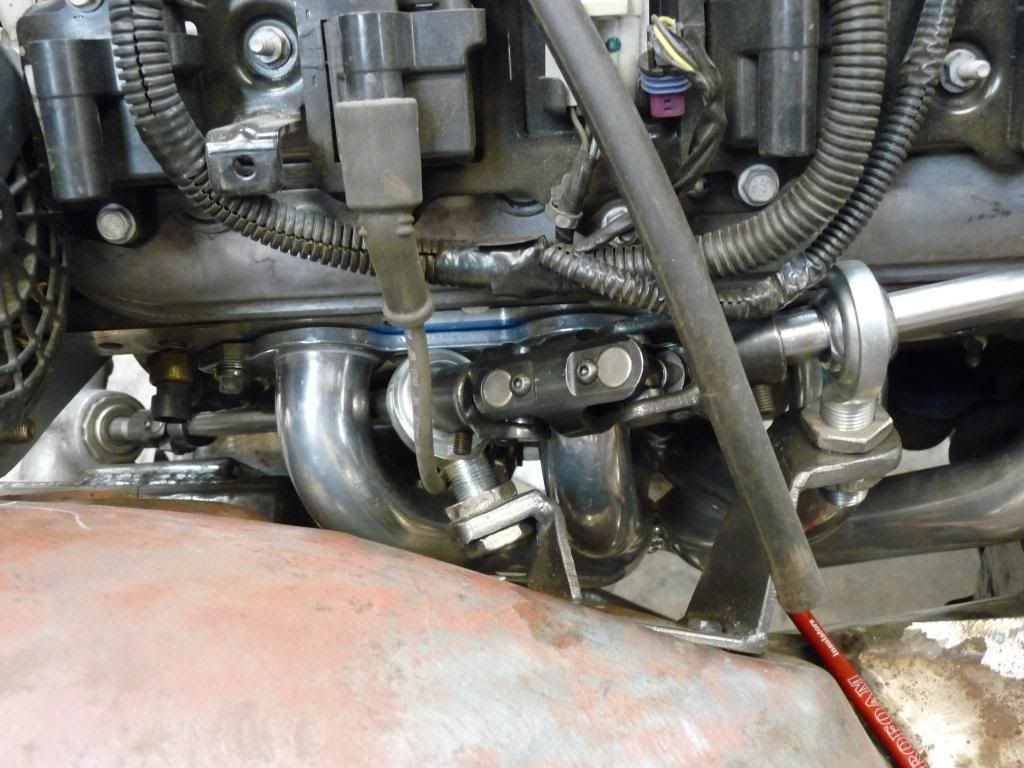
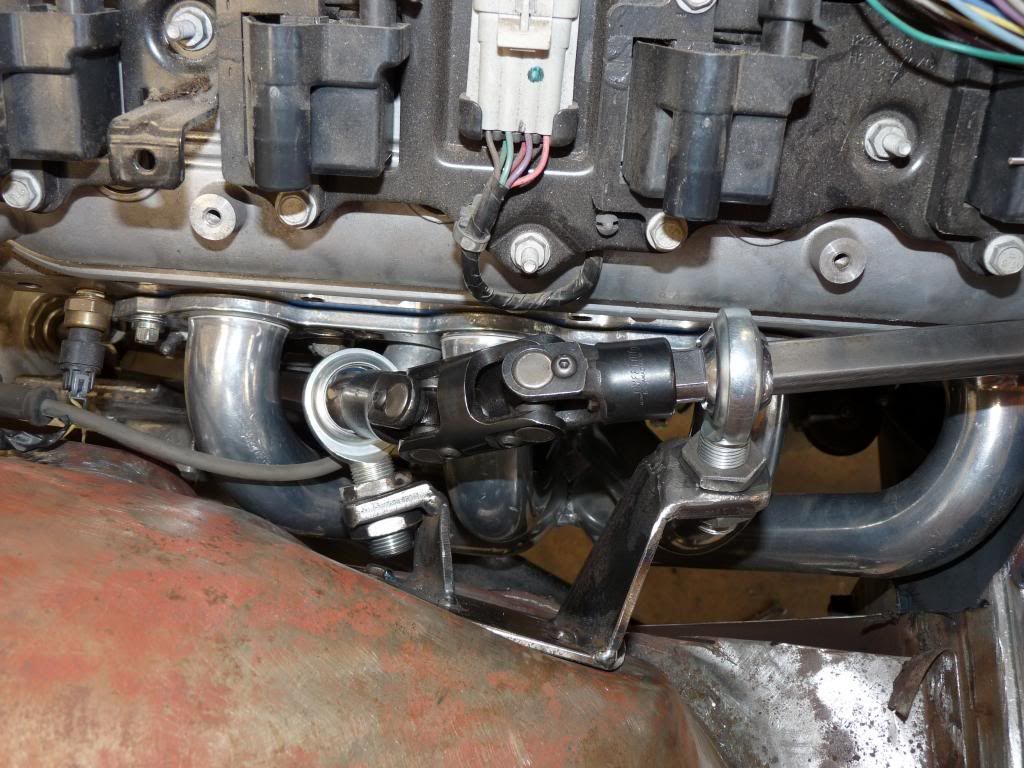
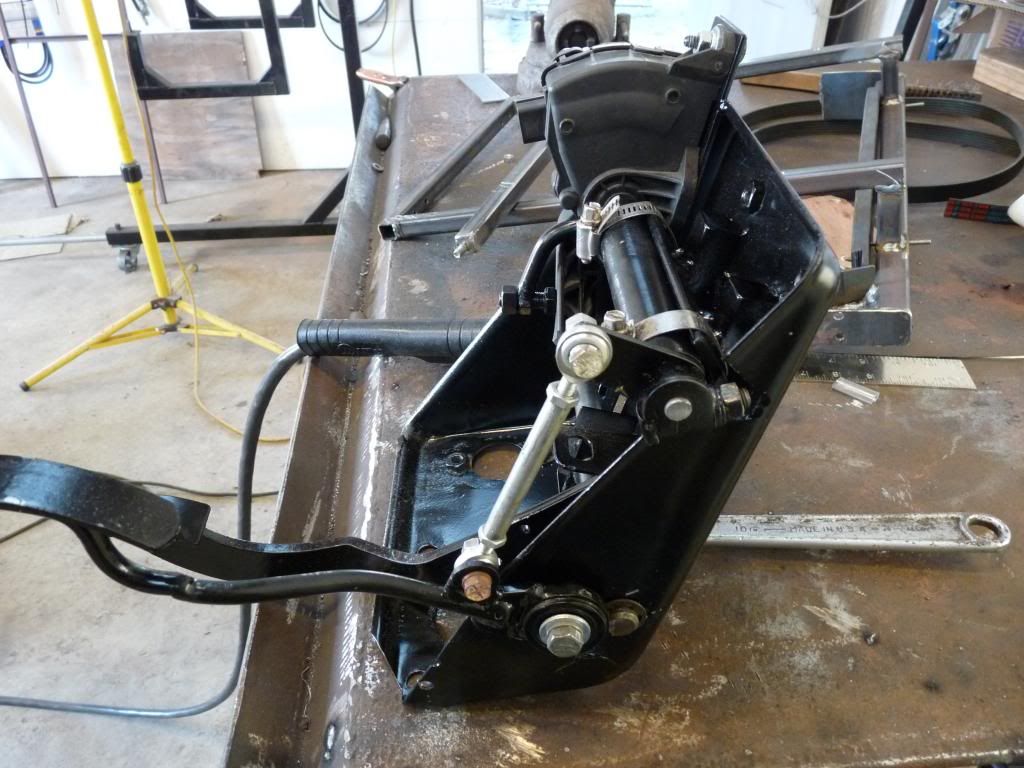
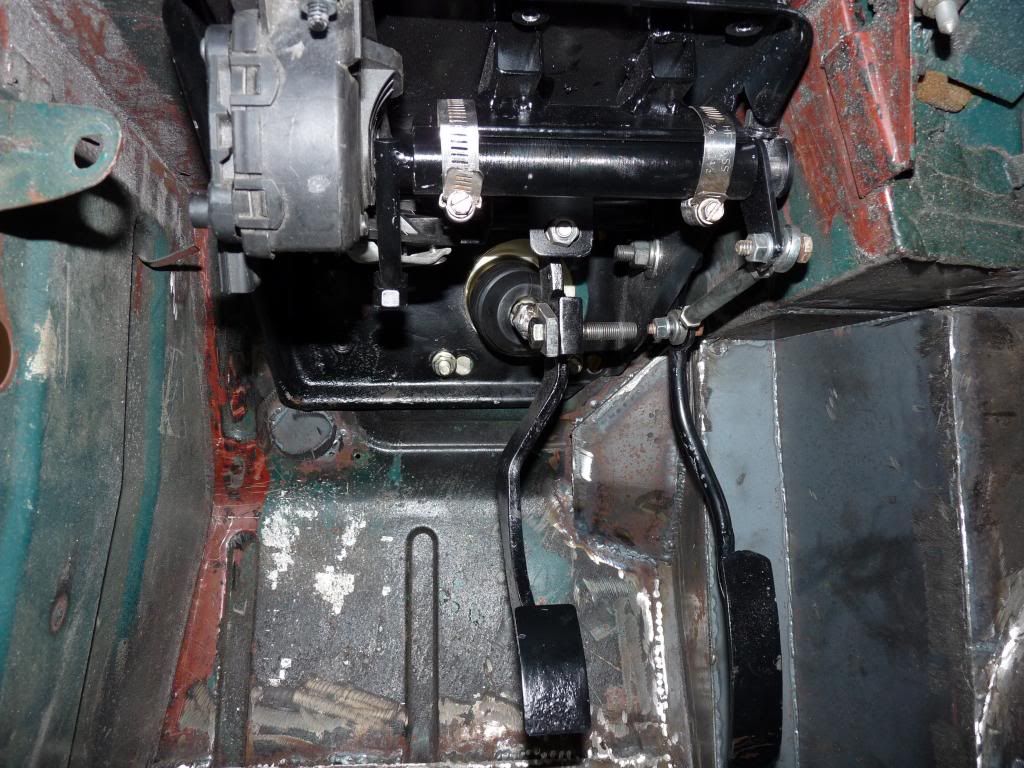
Still looking at steering. You can see how tight it is through the header. I changed this set up later. 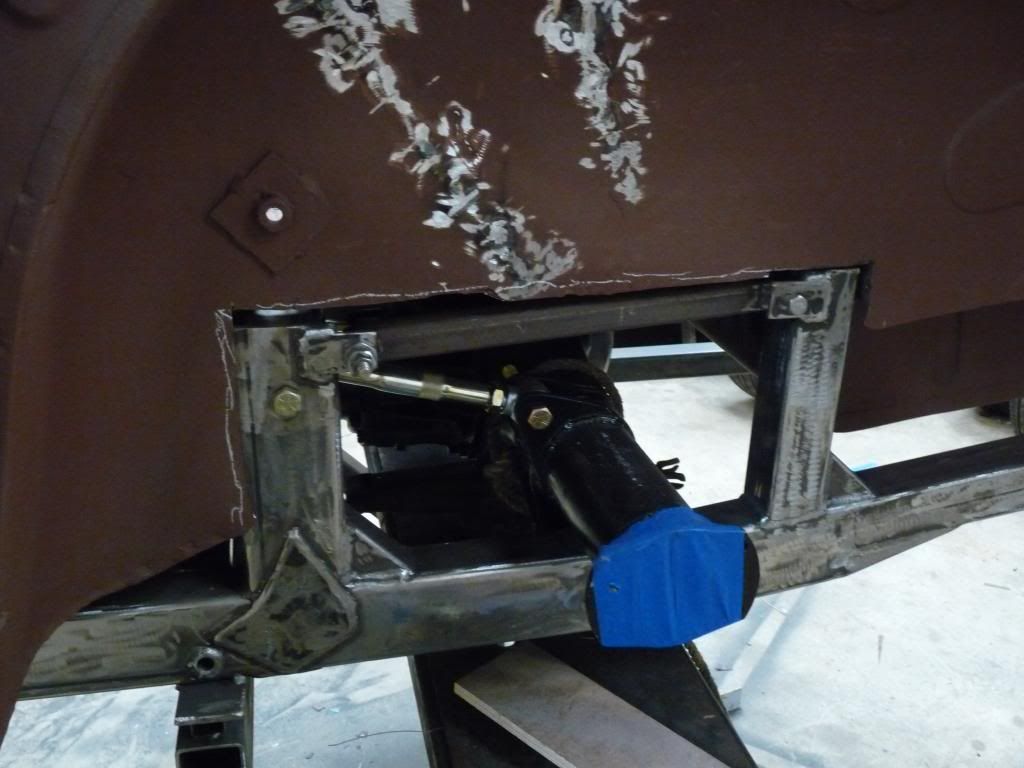
Had to clean up some sheet metal for the frame not to touch. 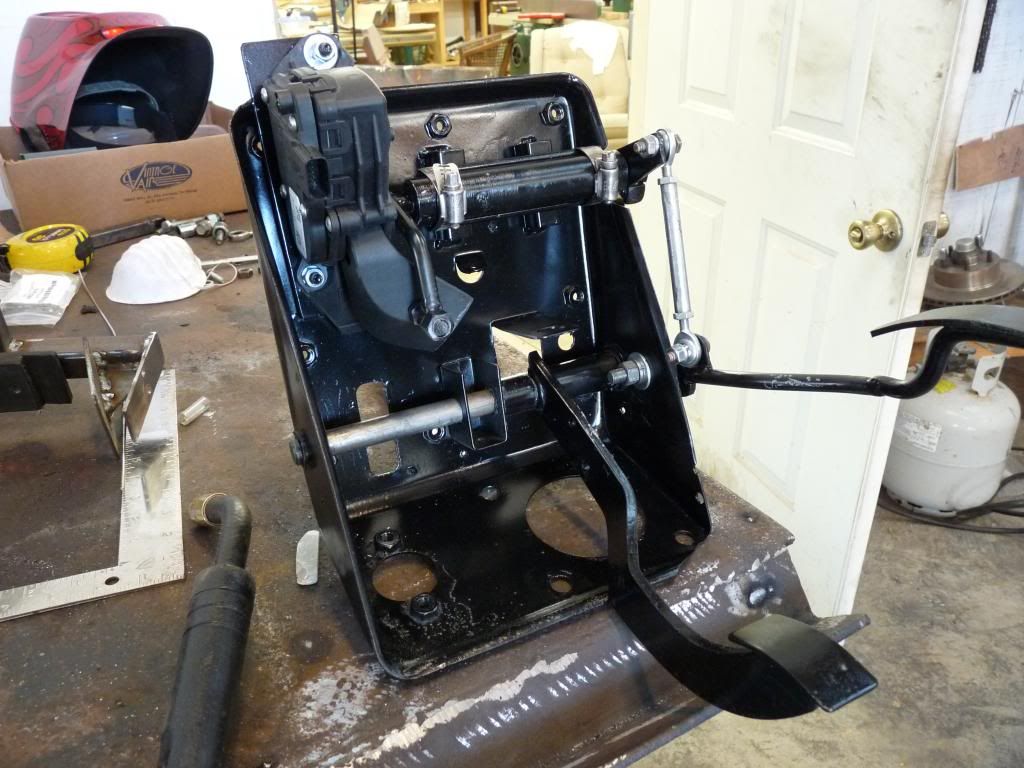
Eliminated the clutch pedal and adapted the drive by wire module to a new accelerator pedal. Made the jack shaft housing out of water pipe with skate board bearings. I saved the bearings when my kids were young and have had them for over 30 years. I am a true junk collector. |
|
|
|
Phil Crawford Philip crawford Bogalusa, La (80 posts) Registered: 02/01/2013 10:38PM Main British Car: 74 TR6 07 4.8L |
Re: 74 TR6 upgrade
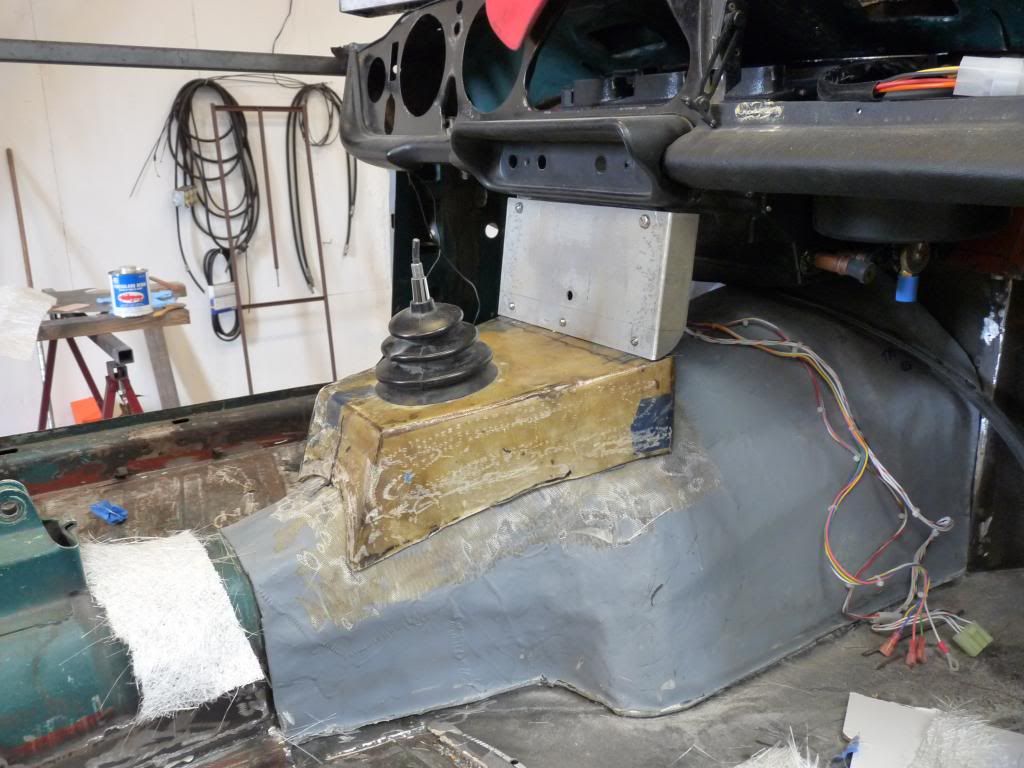
Added to the trans. cover making a console. Made out of card board and fiber glass. 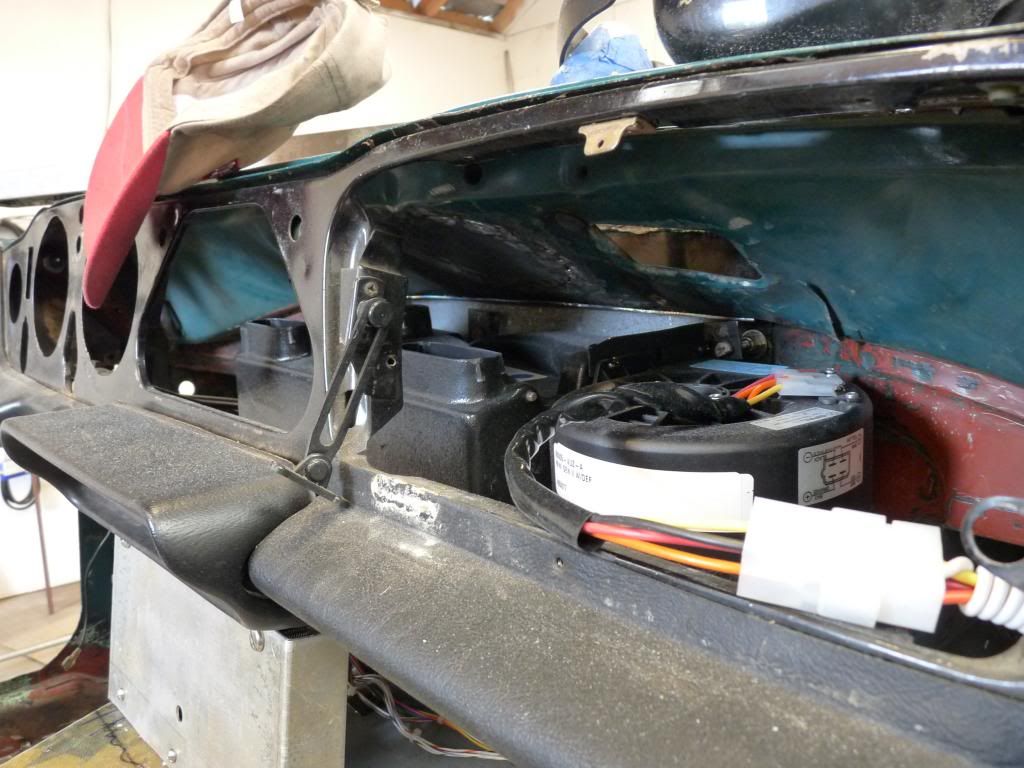
Another look at the room behind the dash with the vintage aire installed. 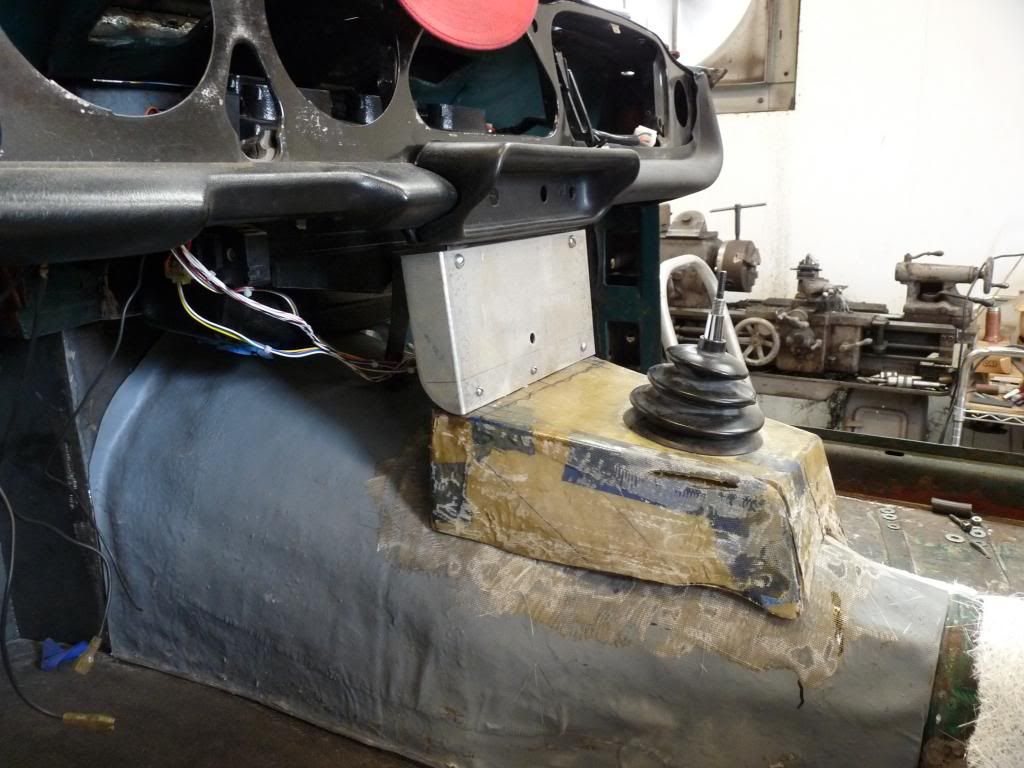
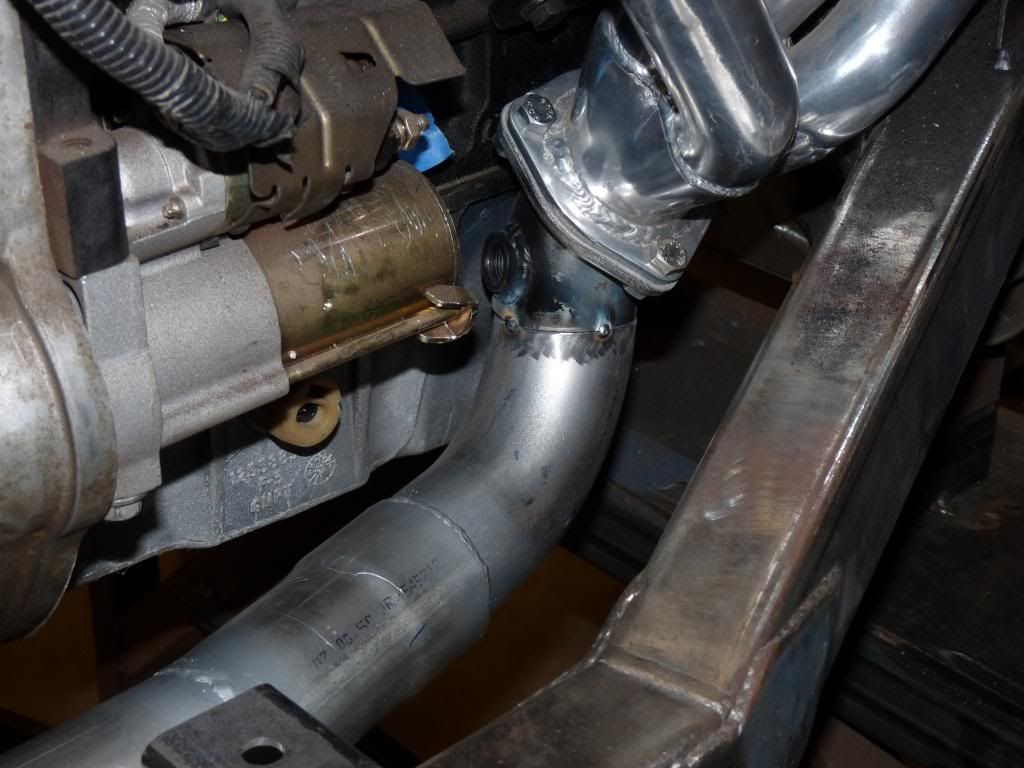
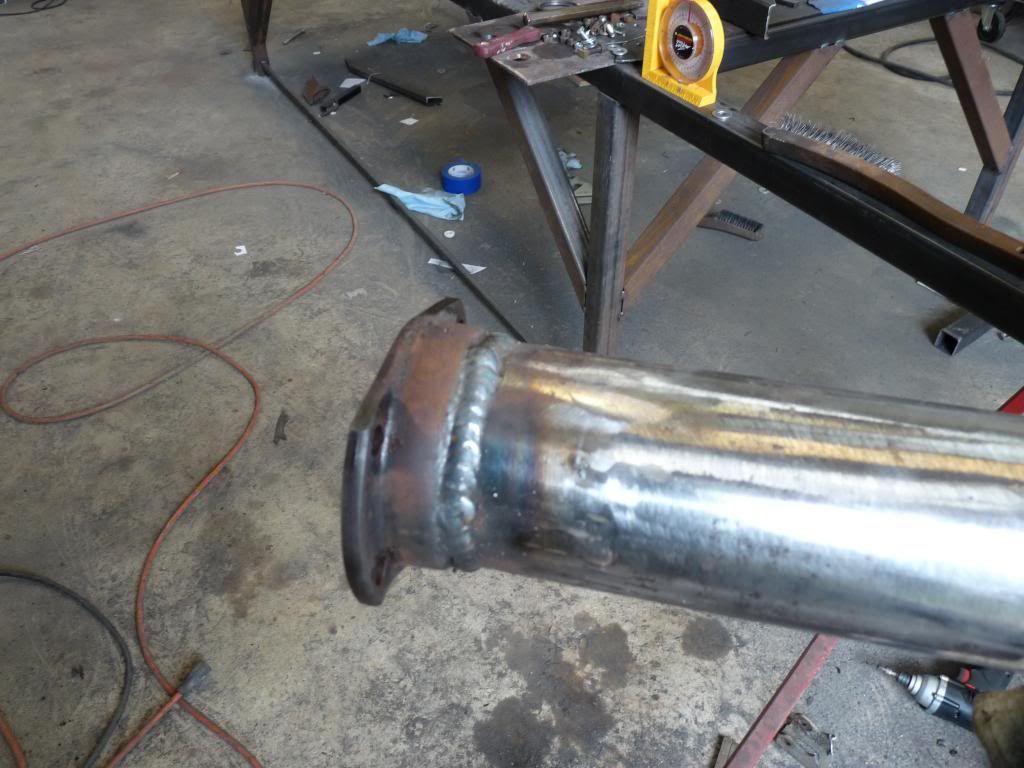
Fitting the 2 1/2" exhaust tacking as I go. The exhaust came out perfect only hanging 1/2" below frame. You can see the O2 sensor bung below header. 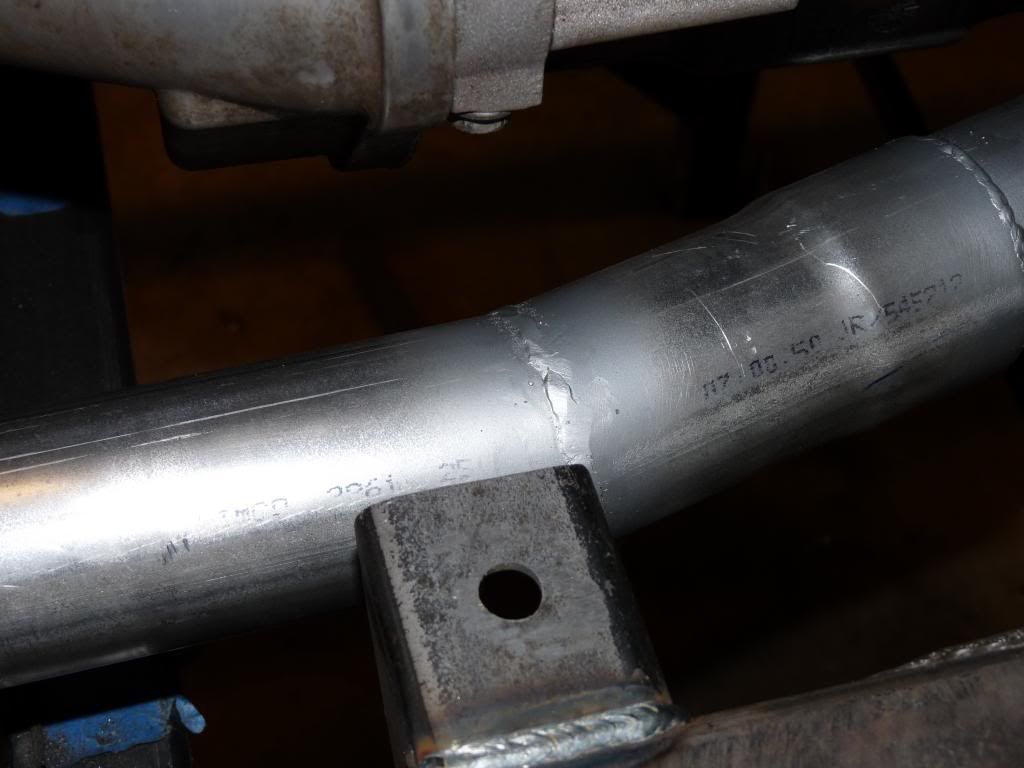
Cut, grind and weld when it is right. 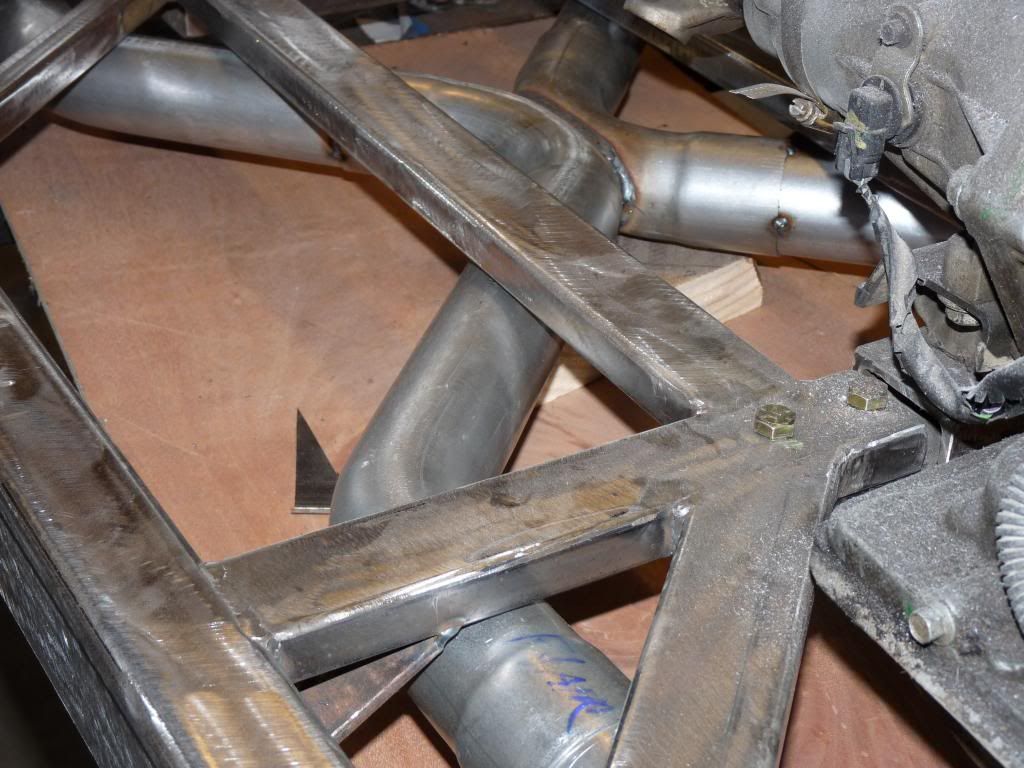
I bought a X pipe kit from summit racing and it worked out well and was easy to use. 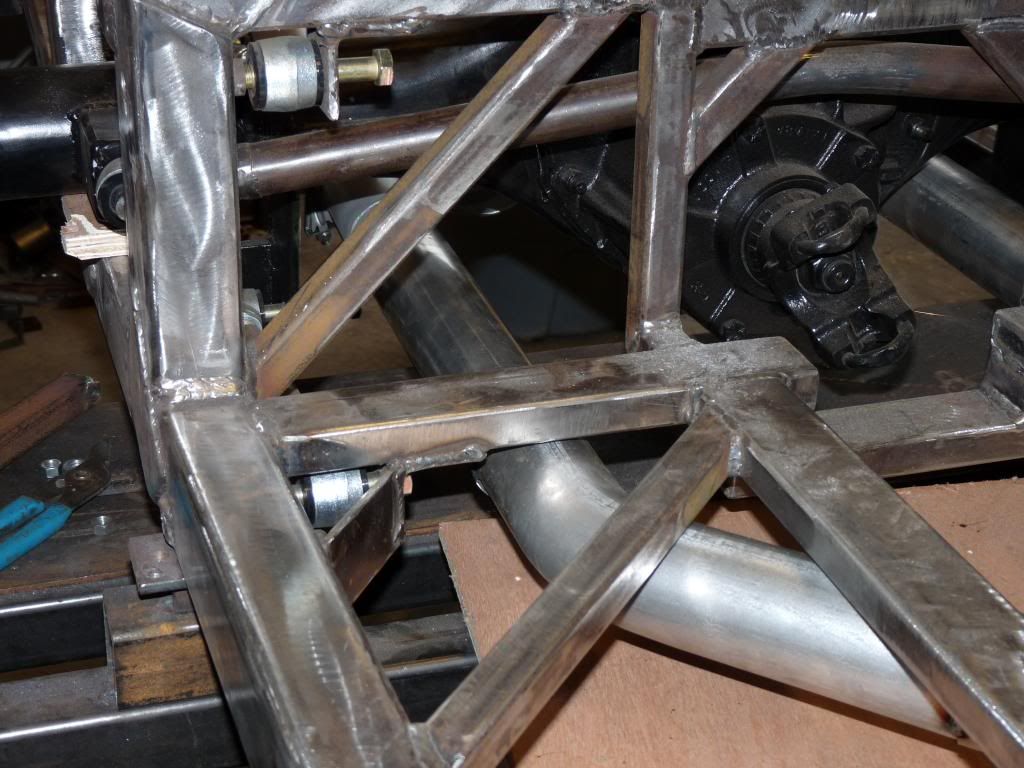
You can see the pipe going under the diff. Edited 1 time(s). Last edit at 02/04/2013 10:41PM by Phil Crawford. |
|
Phil Crawford Philip crawford Bogalusa, La (80 posts) Registered: 02/01/2013 10:38PM Main British Car: 74 TR6 07 4.8L |
Re: 74 TR6 upgrade

I used the flowmaster 50 series muffler because I didn't want it too loud. I have hangers at the front part of the x pipe and on both ends of the mufflers. I welded the mufflers together and they lay flat not like the photo. 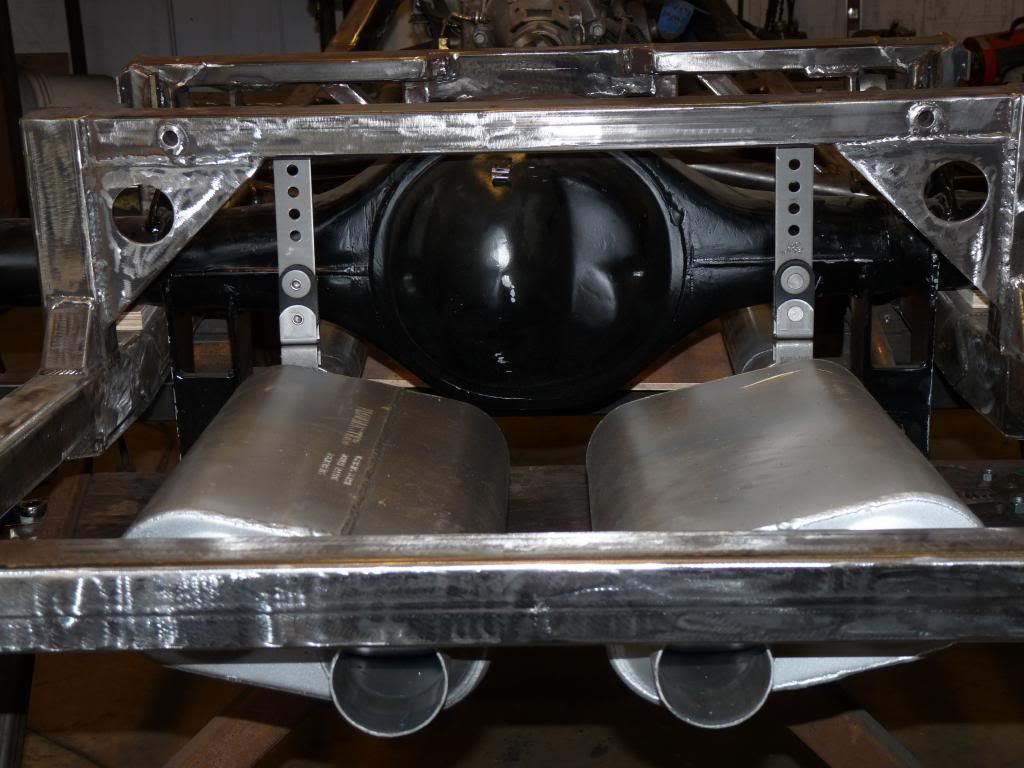
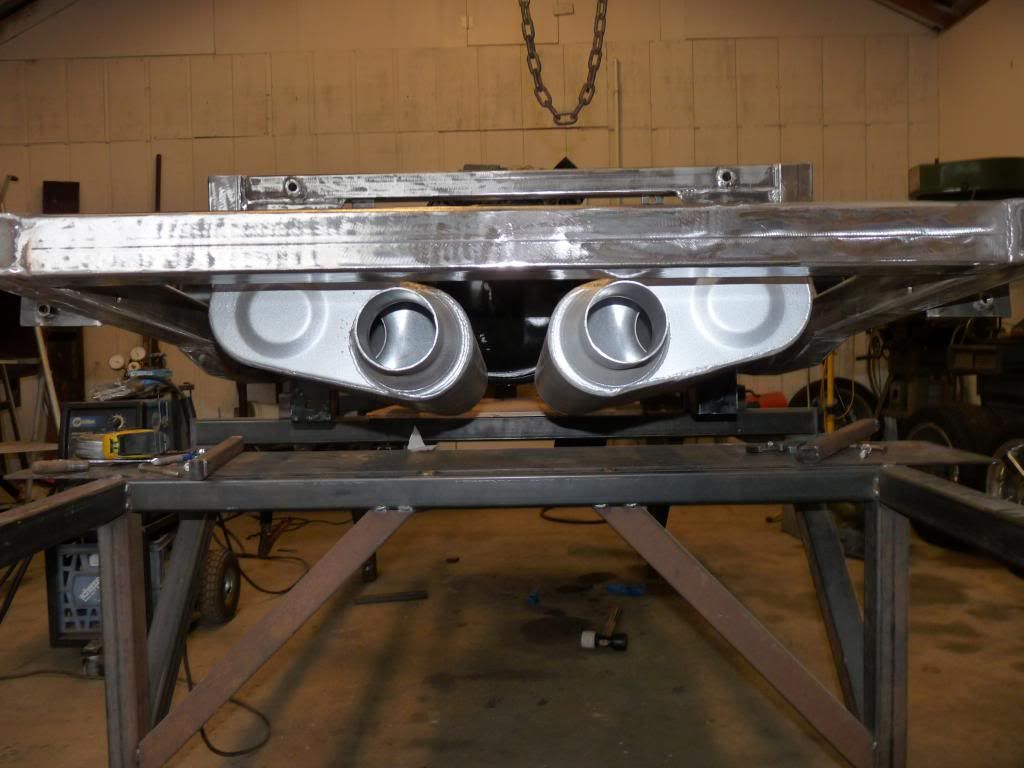
I relocated the exit out of the muffler so the mufflers will lay flat and the exit is below the cross bar of the frame. i don't have a good photo of this. 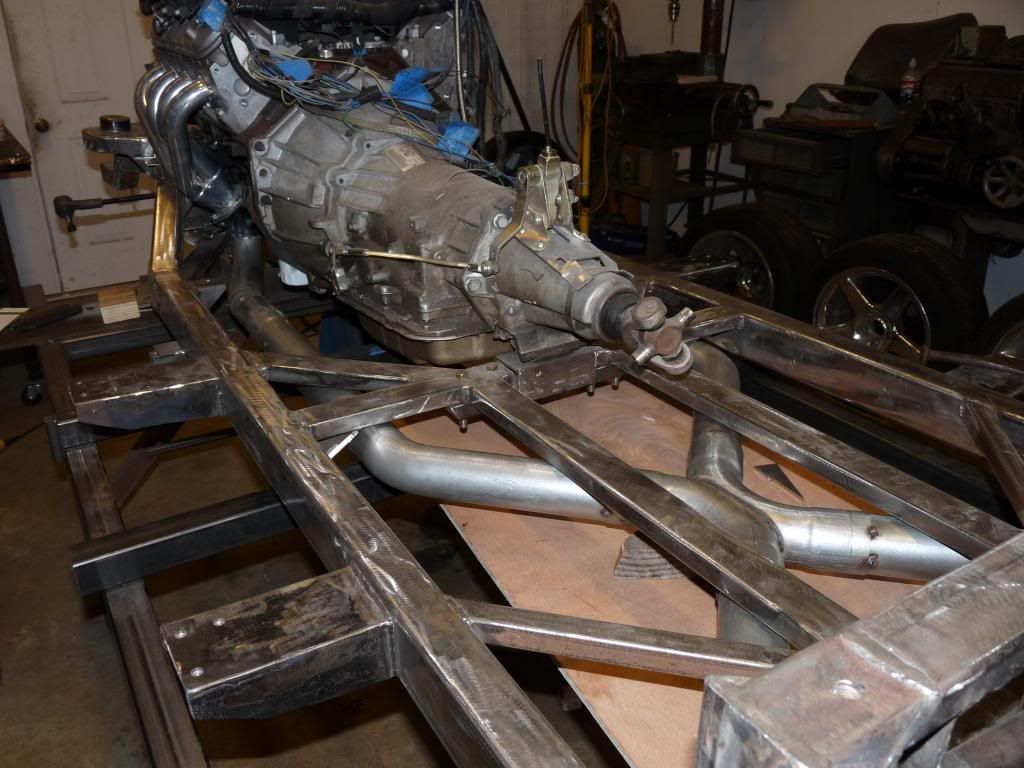
The exhaust is complete.Yea. 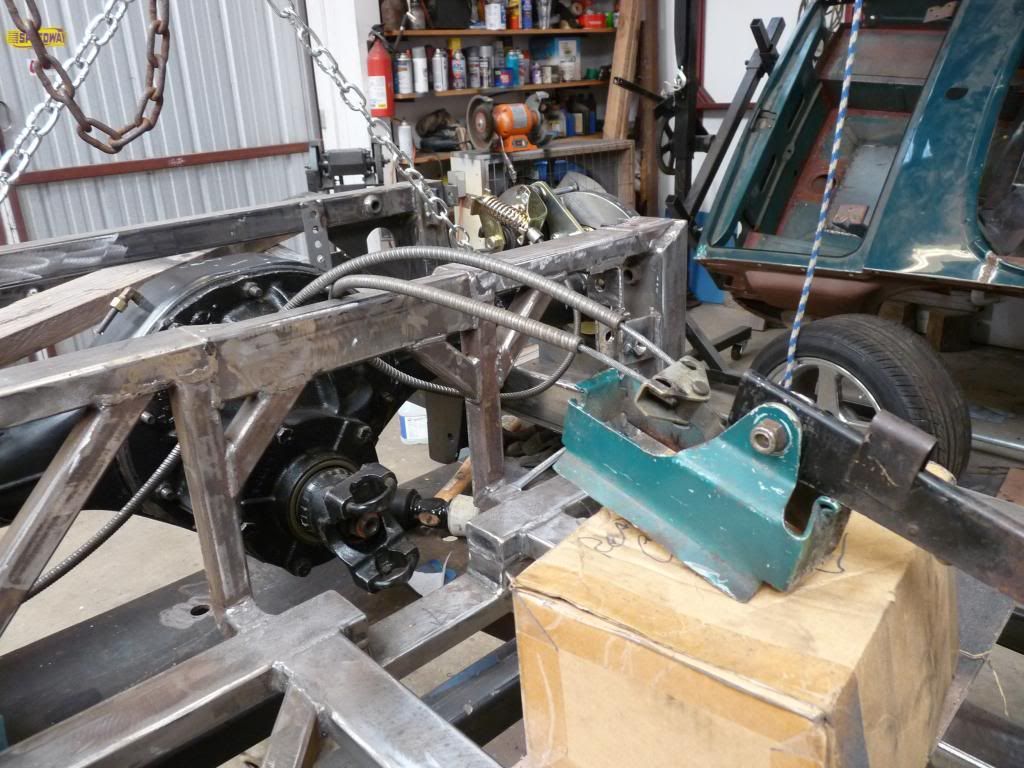
Was able to use the TR emergency brake cables minus a little hardware but had to move the emergency brake back a little. This is the only thing I used off of the old frame. 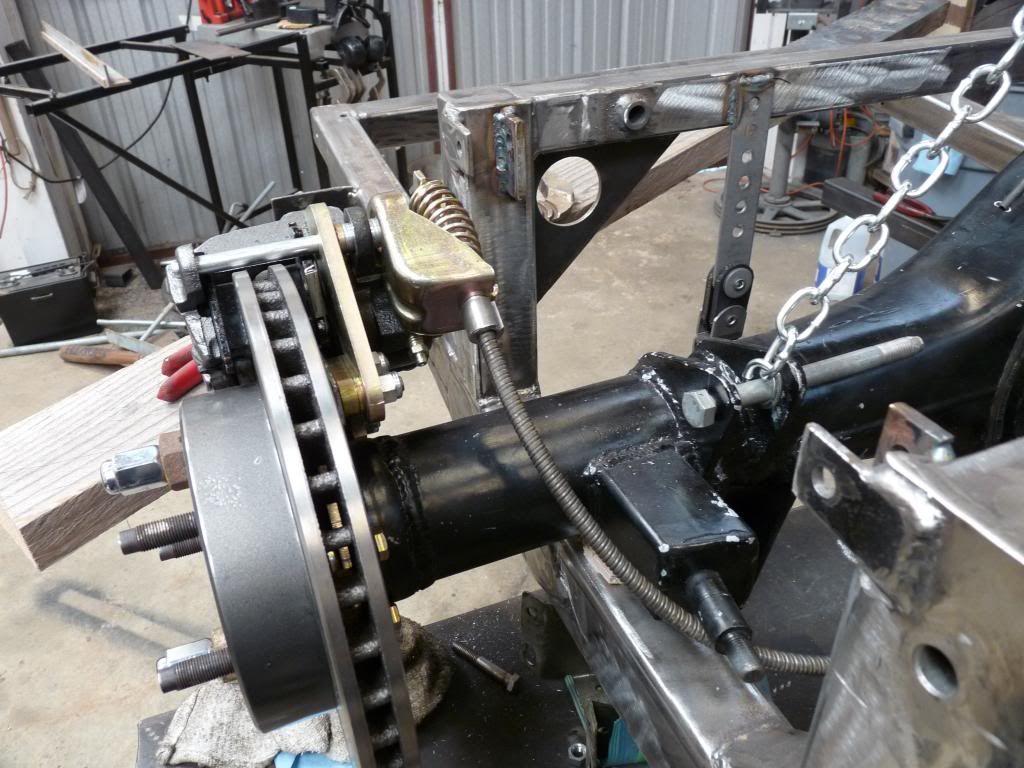
Making sure everything fits and will move ok. 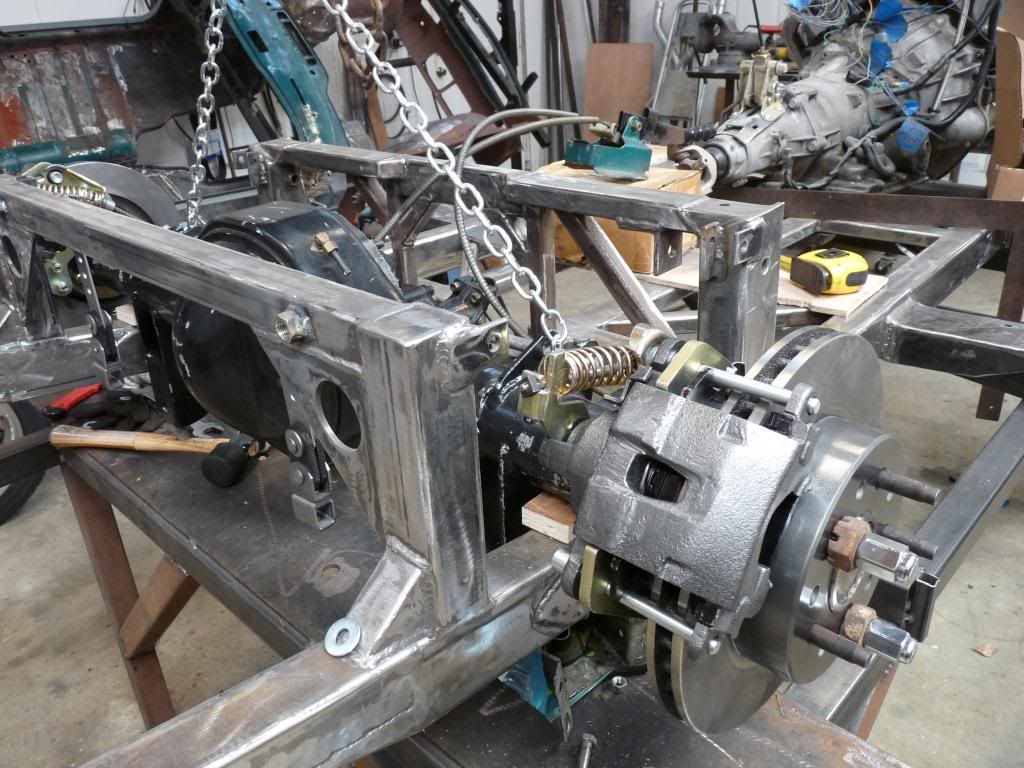
Another view of the diff. |
|
Phil Crawford Philip crawford Bogalusa, La (80 posts) Registered: 02/01/2013 10:38PM Main British Car: 74 TR6 07 4.8L |
Re: 74 TR6 upgrade
Painted it outside with oil base primer and oil base flat black paint. I know there is better stuff to use but didn't feel like driving 2 hours. 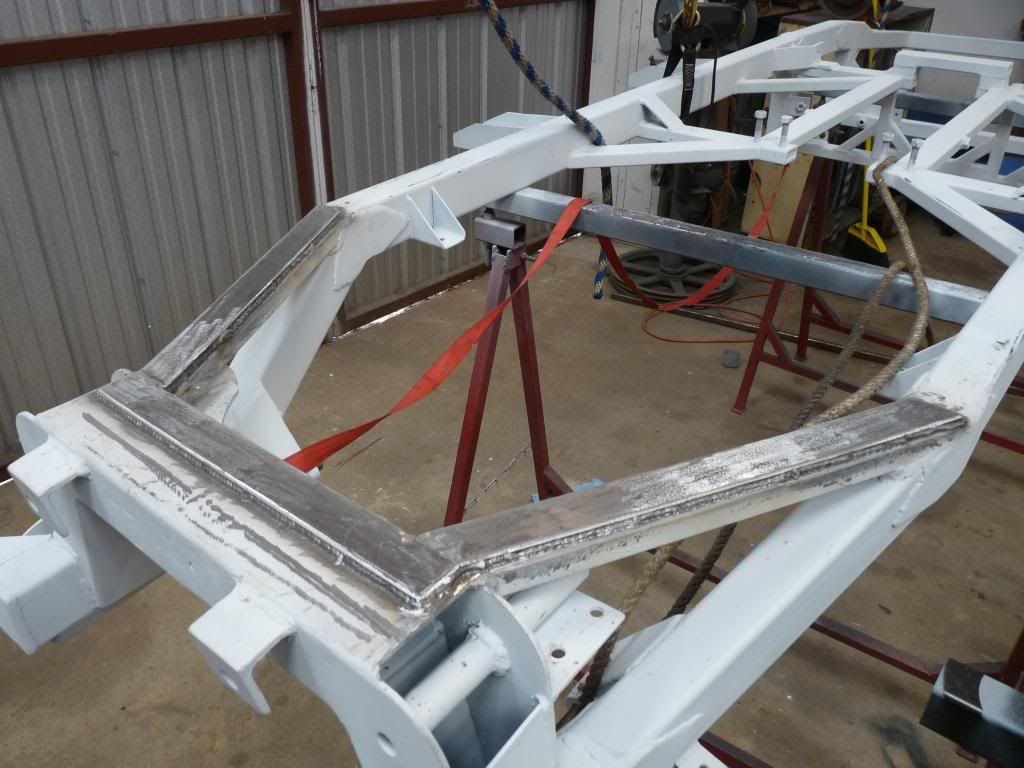
I added the angled arms from the bottom of the crossmember back to the frame. You don't have to do this but I thought it would make it a little stiffer especially when braking. I was also concerned about going over a speed bump and there not being a horz. frame in this location would allow the oil pan to be crushed. 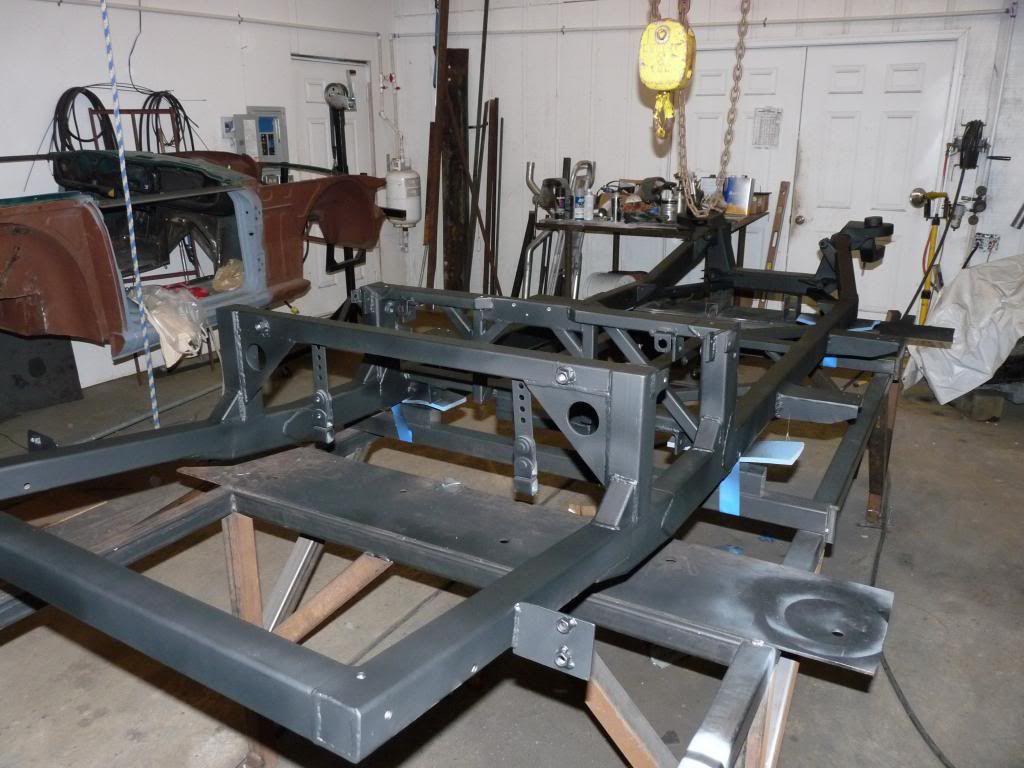
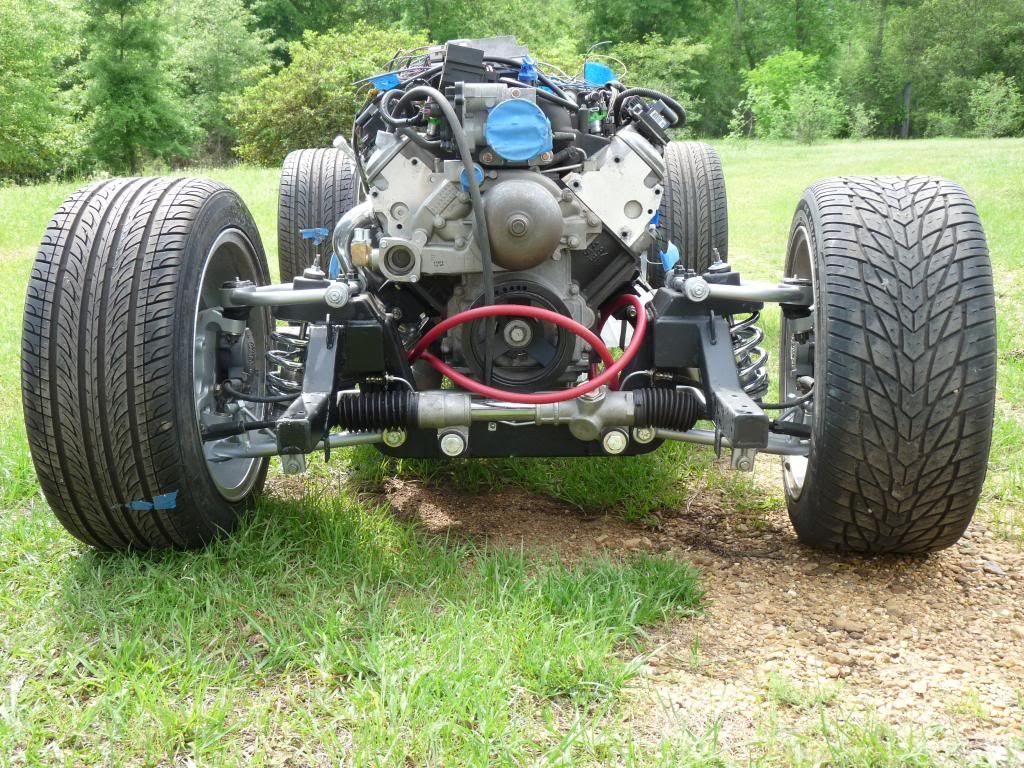
Installing the front end hopefully for the last time. 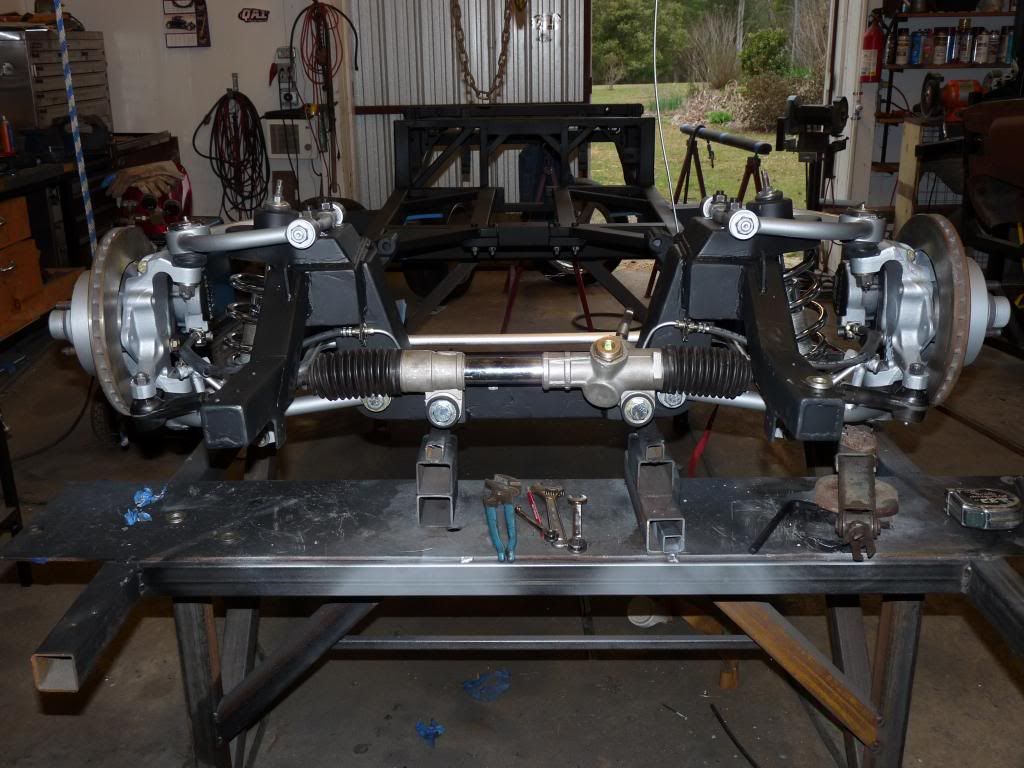
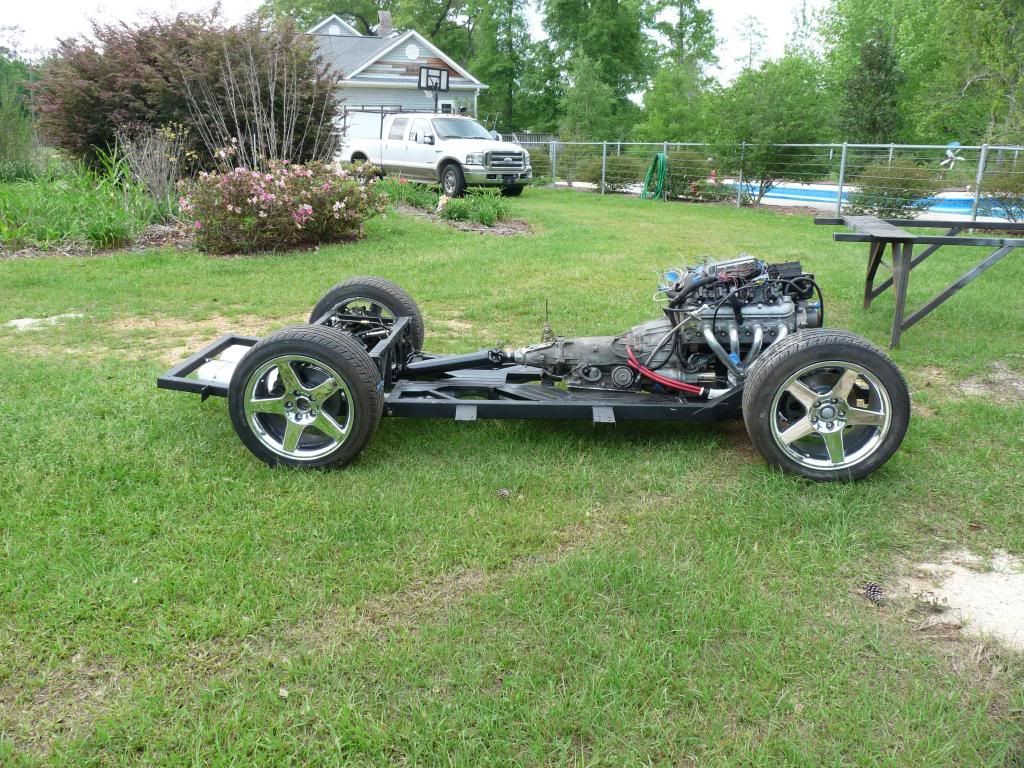
At last a rolling chassis. One person remarked that it looked like a go cart. Here are some more photo's. 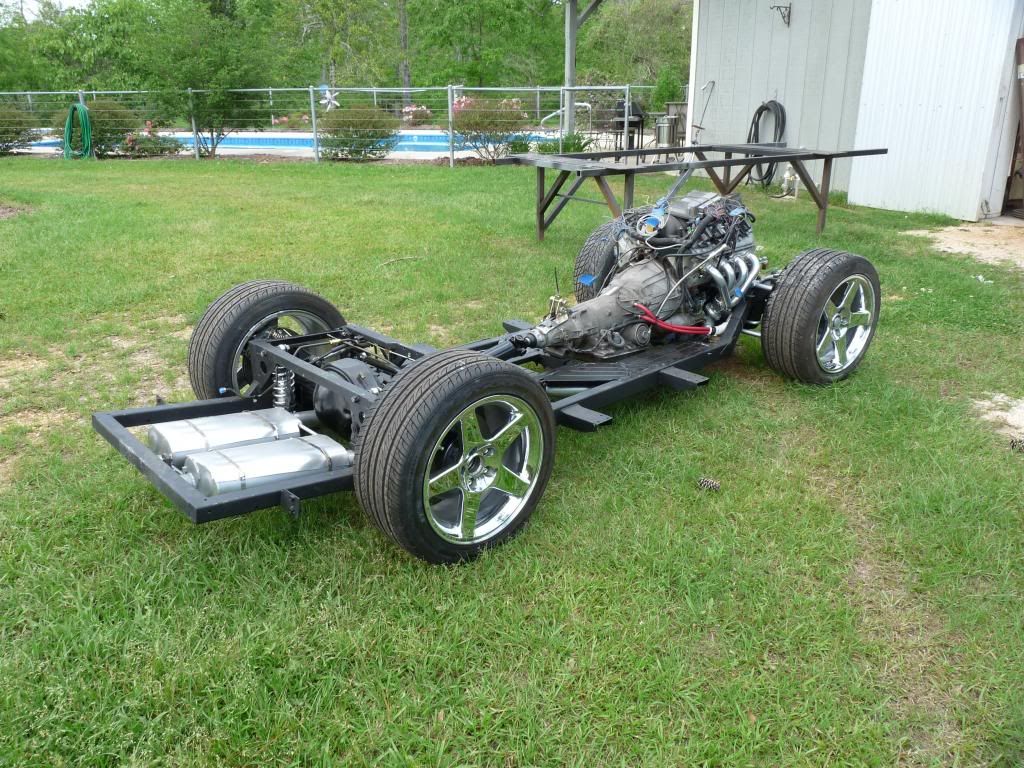
Screwed sheet metal above the exhaust pipe below the body for a heat shield for the body. 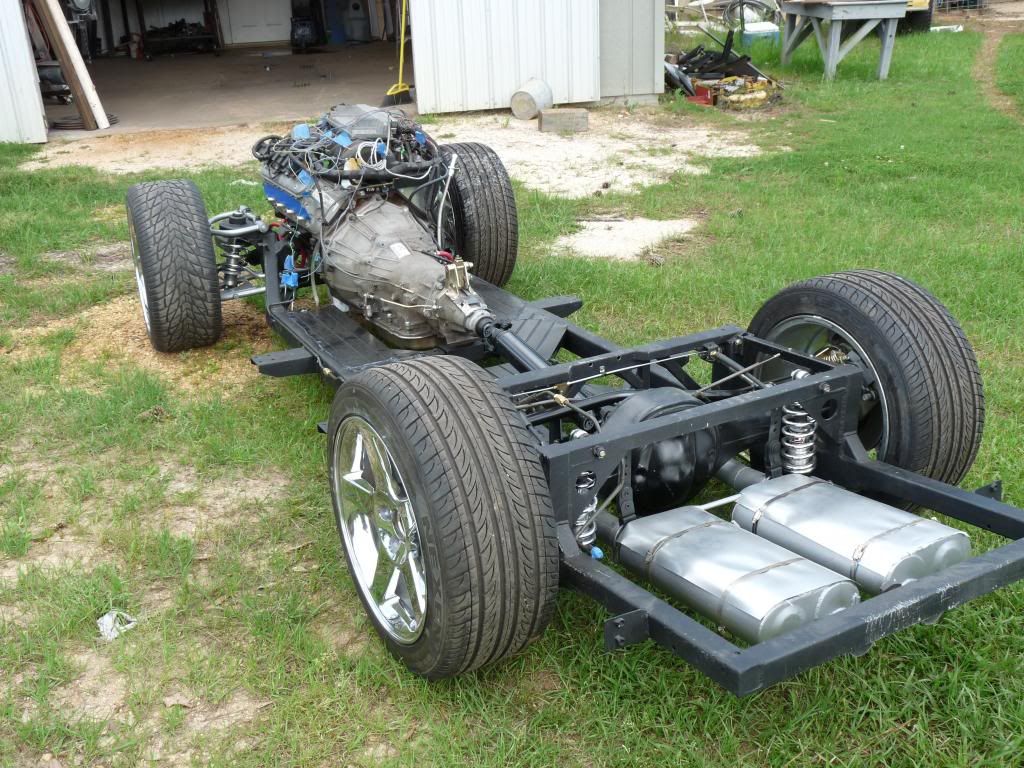
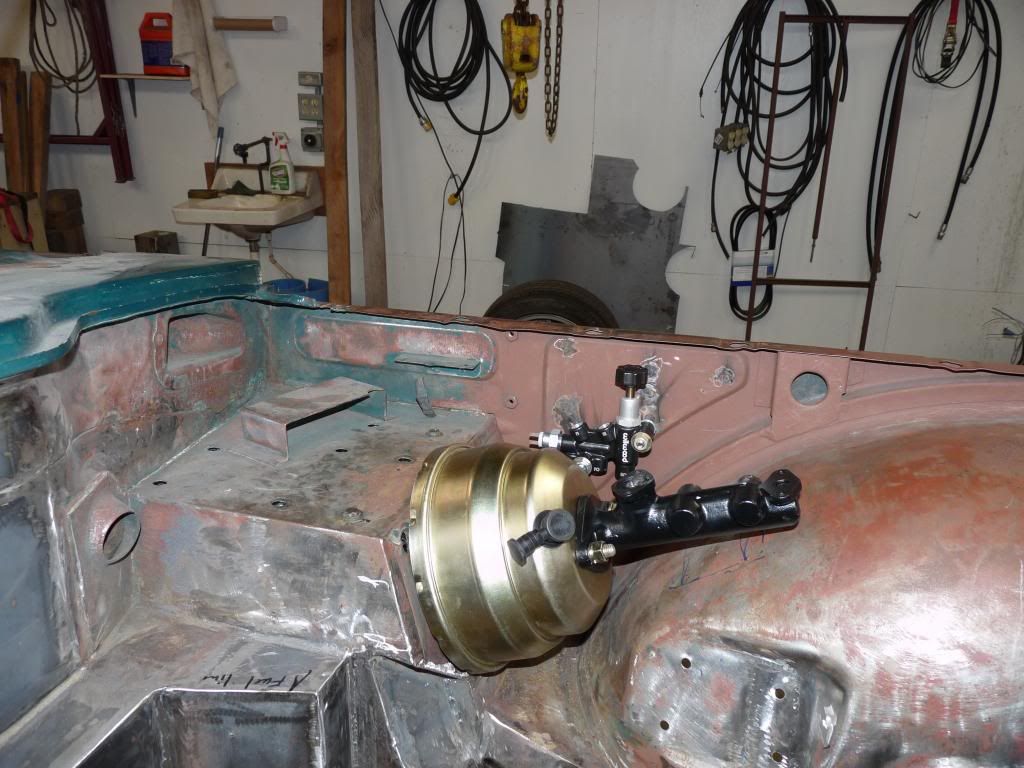
The old booster was a 7" single diaphragm and this one is an 8" dual diaphragm. Had to move it to the right about 3/4" to miss the steering shaft. 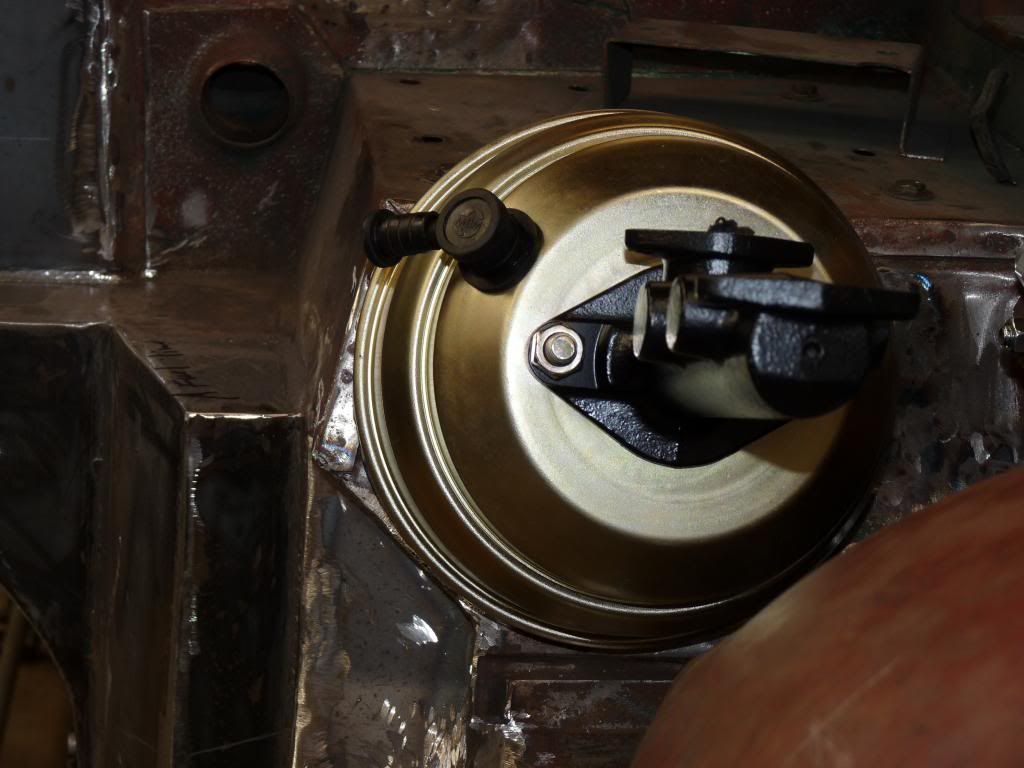
Another look. Edited 1 time(s). Last edit at 02/04/2013 11:12PM by Phil Crawford. |
|
Phil Crawford Philip crawford Bogalusa, La (80 posts) Registered: 02/01/2013 10:38PM Main British Car: 74 TR6 07 4.8L |
Re: 74 TR6 upgrade
Trying to make sure everything fits. 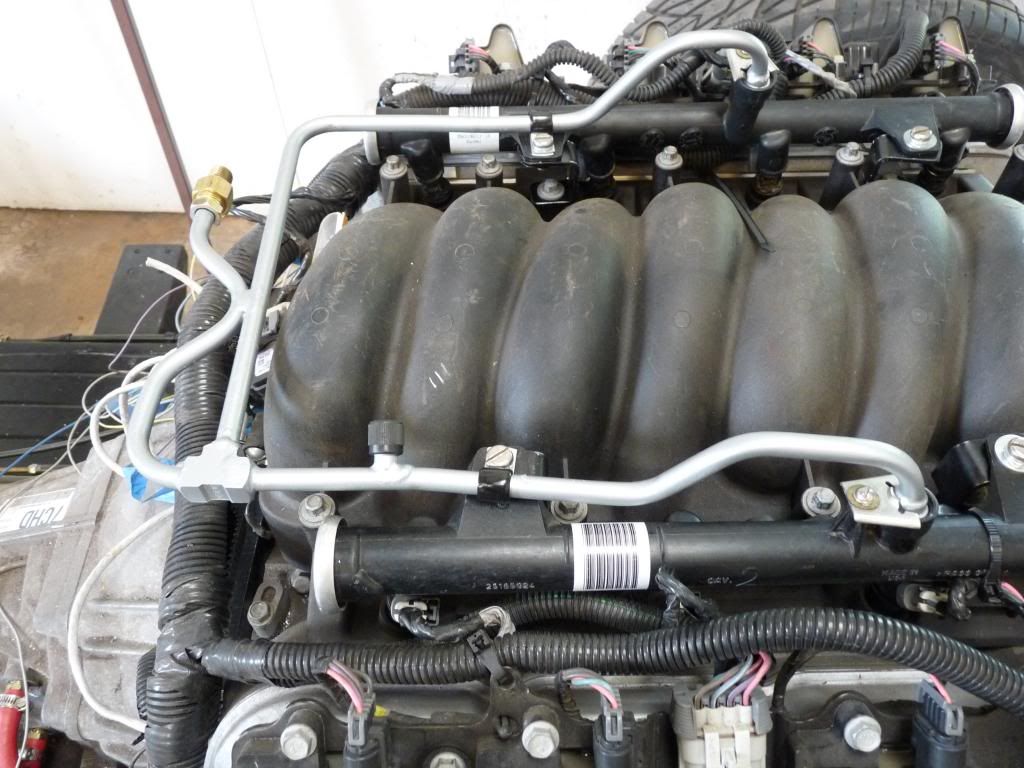
I am using an intake manifold off of a 2002 camaro ls1 but the fuel rail will not work with the lsx enjectors because of the height and because the plugs are different so I used the lsx enjectors and fuel rails and made the fuel lines from 3/8" brake lines and the transition ends of the lsx fuel line. If I had to do it over again I would use a LS1 motor. 
Had to cut scallops out of the back for the exhaust. I used some 3" exhaust pipe for the metal. The muffer no longer hangs down under the car and gets knocked off. At least I hope not. 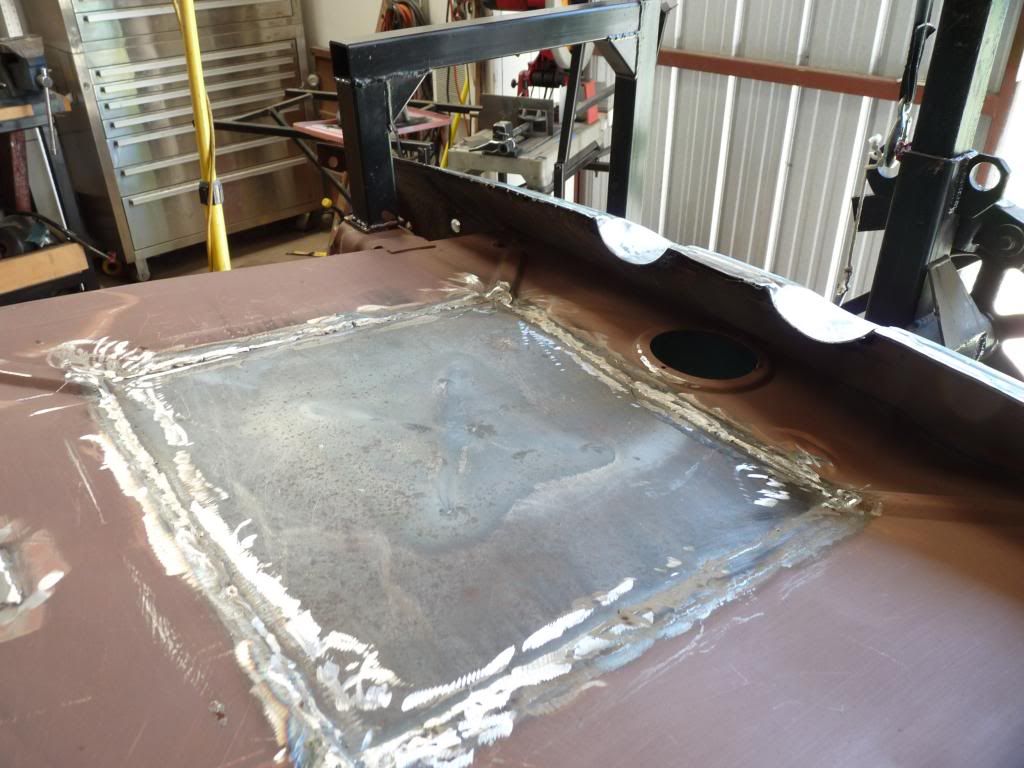
Had to remove the metal that protruded down because of the mufflers. Used 16 gauge metal. 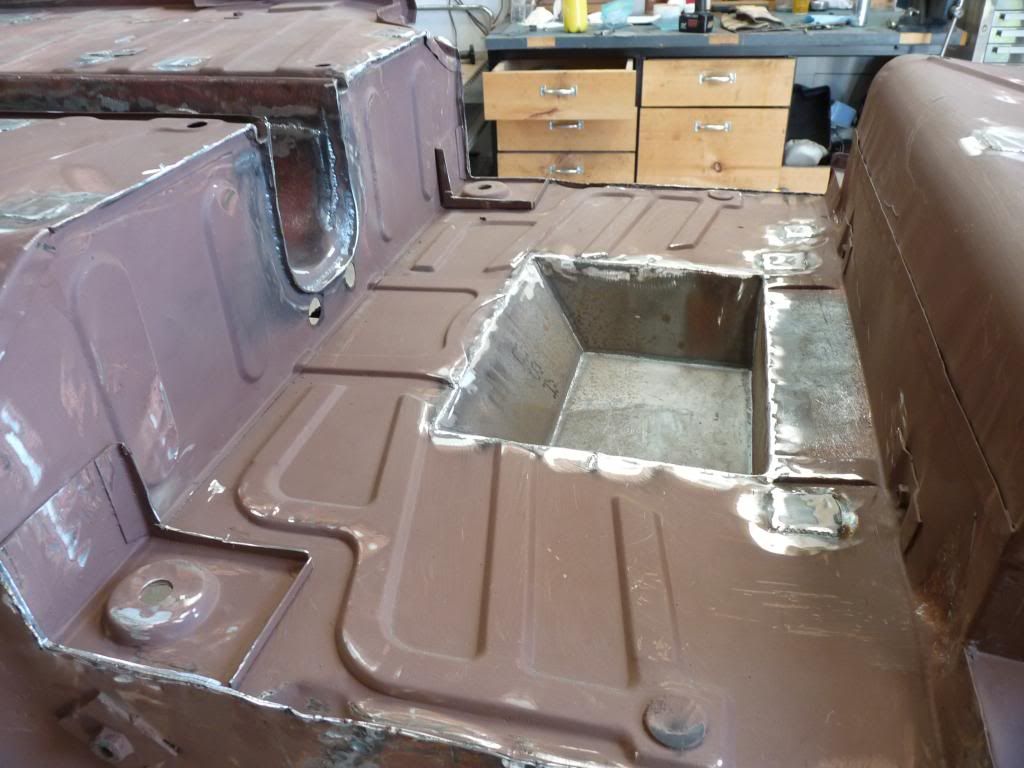
The trans. hump is welded in place and other metal cut away in various places to make room for the frame. 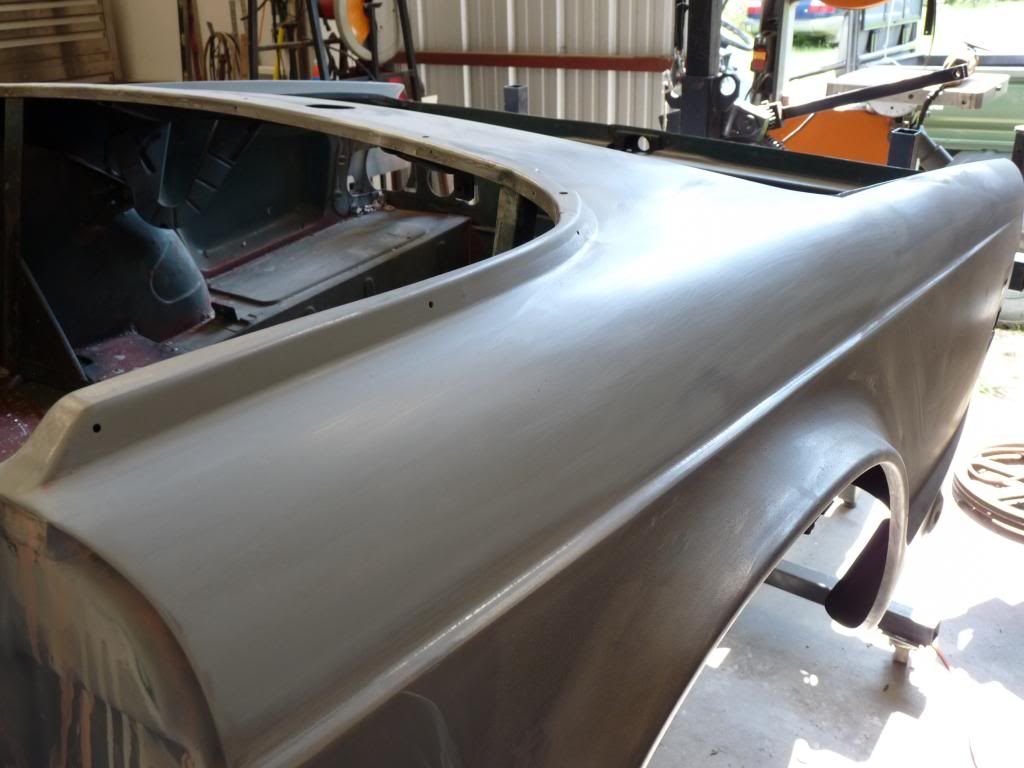
Welded the rear fender and have everything floated and primed. I didn't weld the fender solid but stitched it about 3/8" apart. 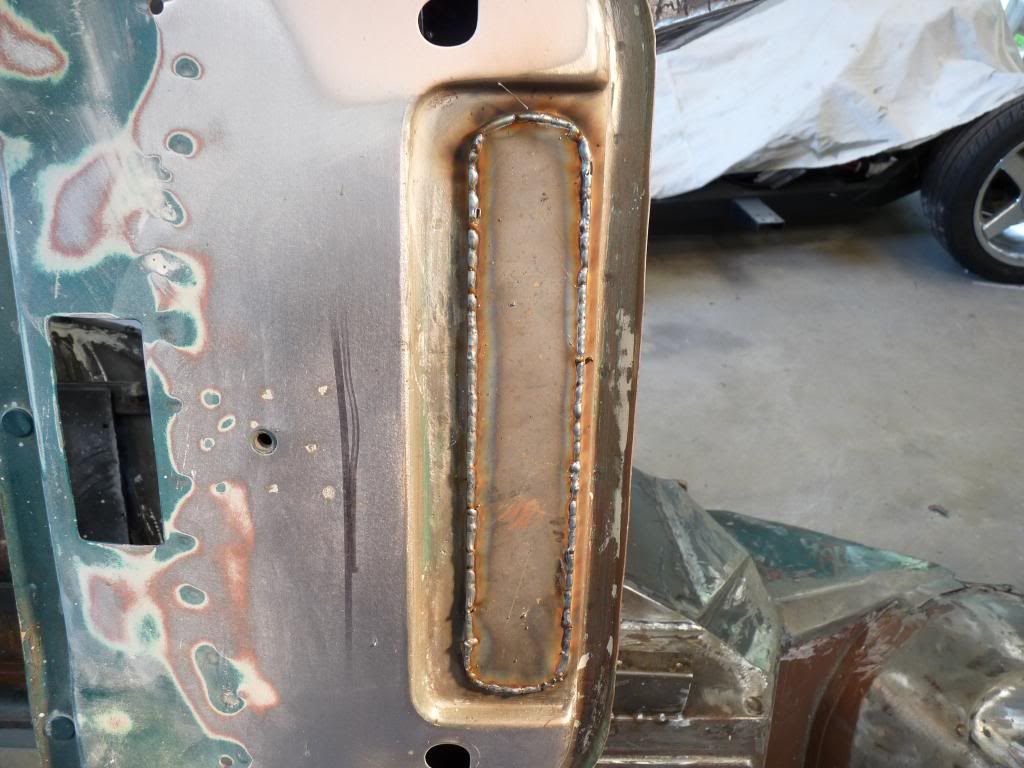
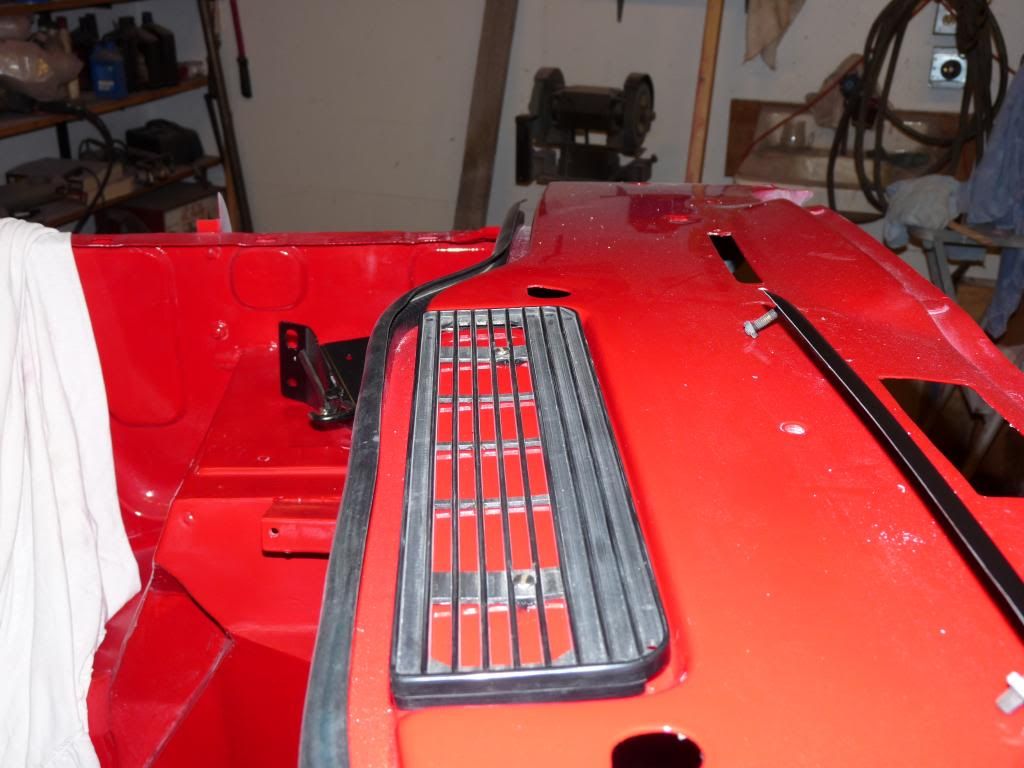
Filed the fresh air vent with metal and welded in place. 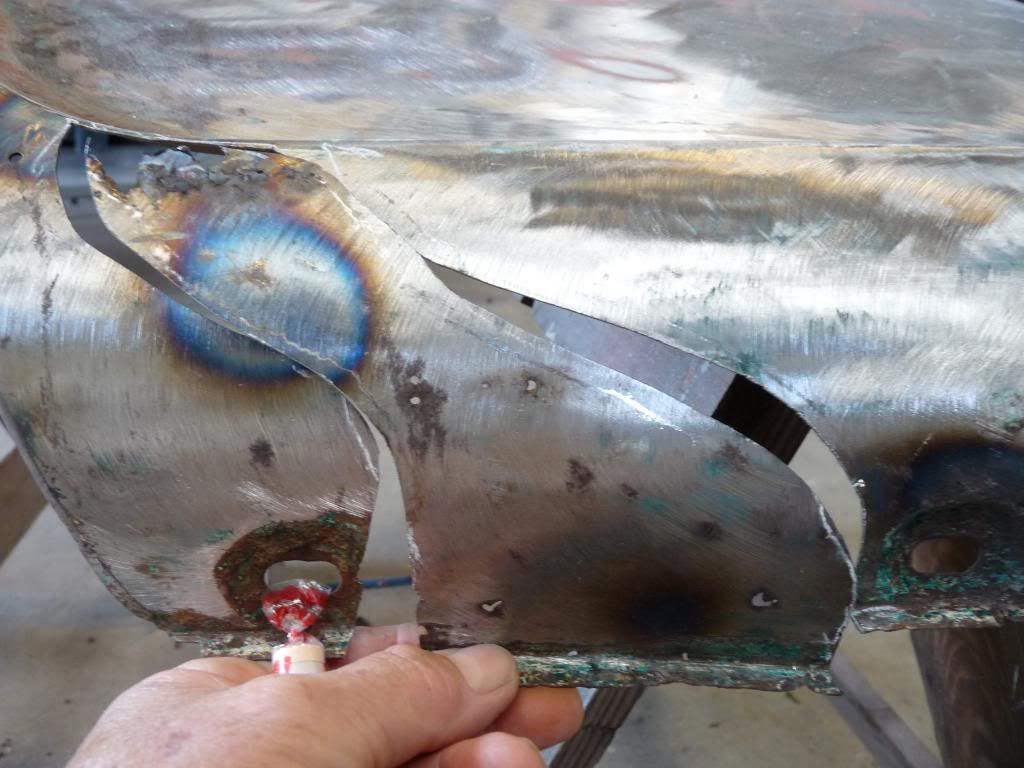
Had to replace some rusty metal. 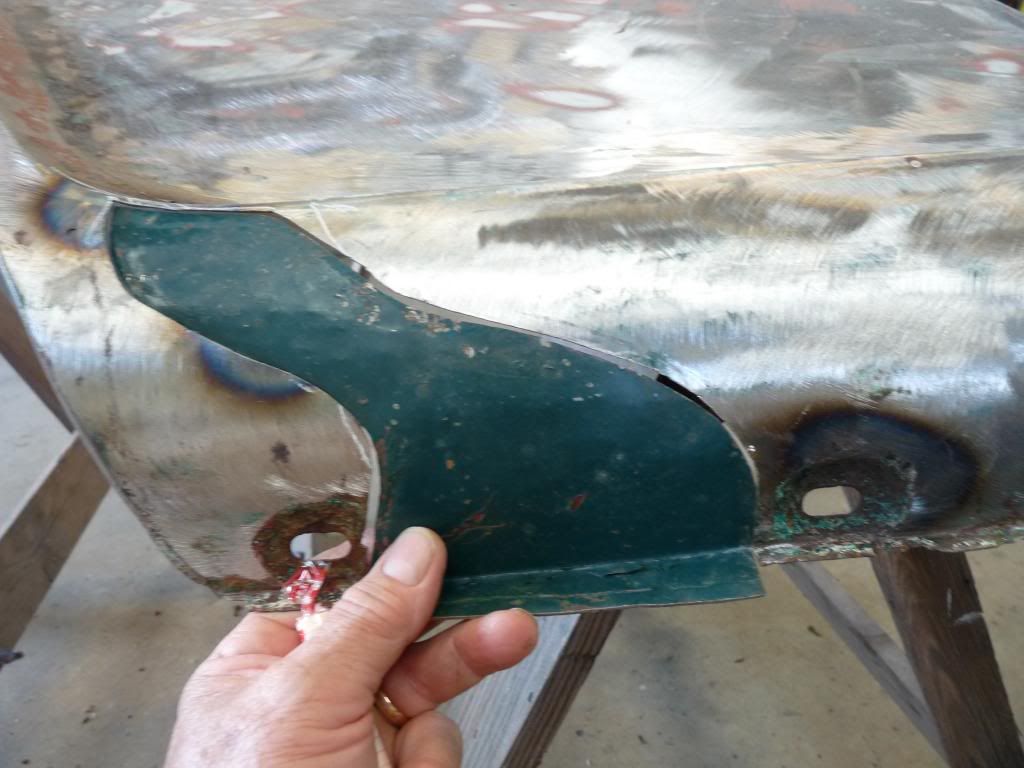
Used the metal I cut out of the trunk for the repair. I beat on it until the shape was right then welded it into place ground it down flush and spread bondo to get the shape right. 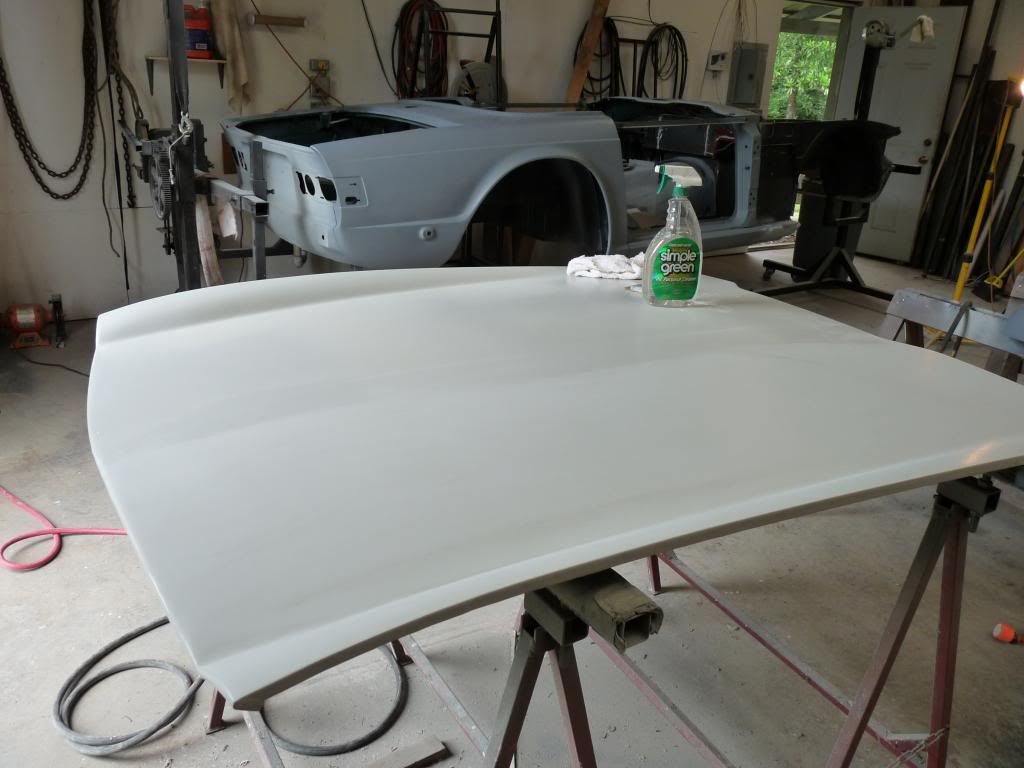
This car had been hit in the front and crushed the hood in the front and back. After I removed all of the bondo the work began. I had to remove some of the stiffners, reshape them and weld them back into place. I had to shrink the metal in the front by heating it. i spent as much time on the hood as I did on the rest of the car. Edited 1 time(s). Last edit at 02/06/2013 10:58PM by Phil Crawford. |
|
|
|
Phil Crawford Philip crawford Bogalusa, La (80 posts) Registered: 02/01/2013 10:38PM Main British Car: 74 TR6 07 4.8L |
Re: 74 TR6 upgrade
This is the mounting bracket for the shaved door opener. I welded it into place. I used the motor driven type because I didn't have room for a solenoid. 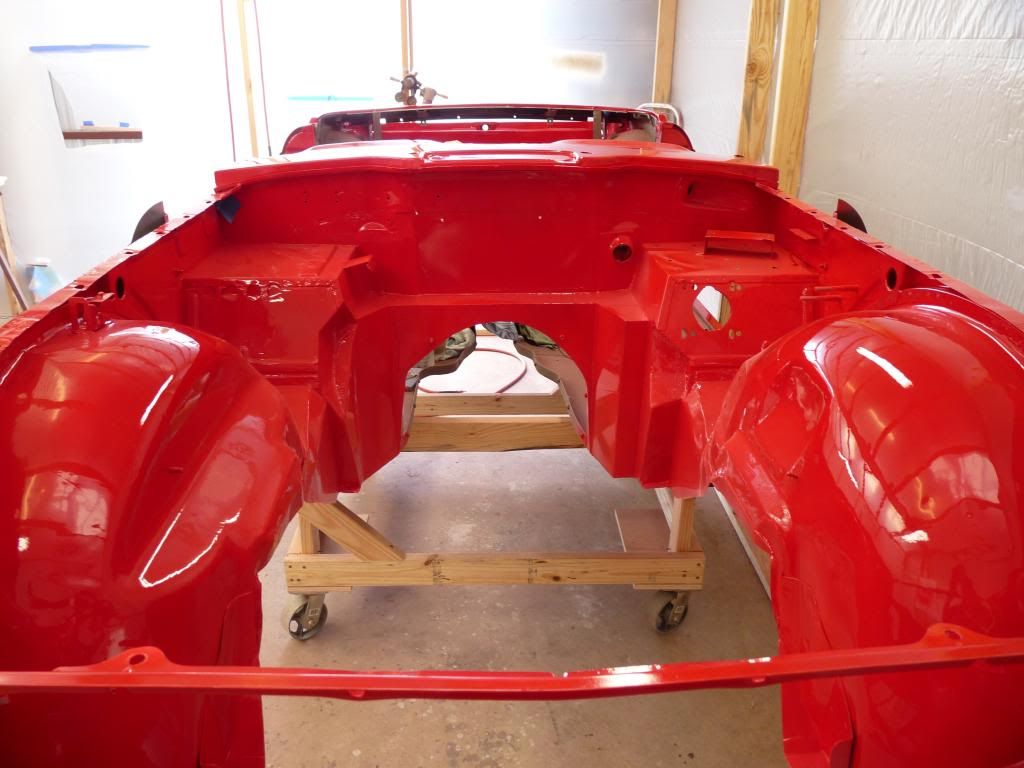
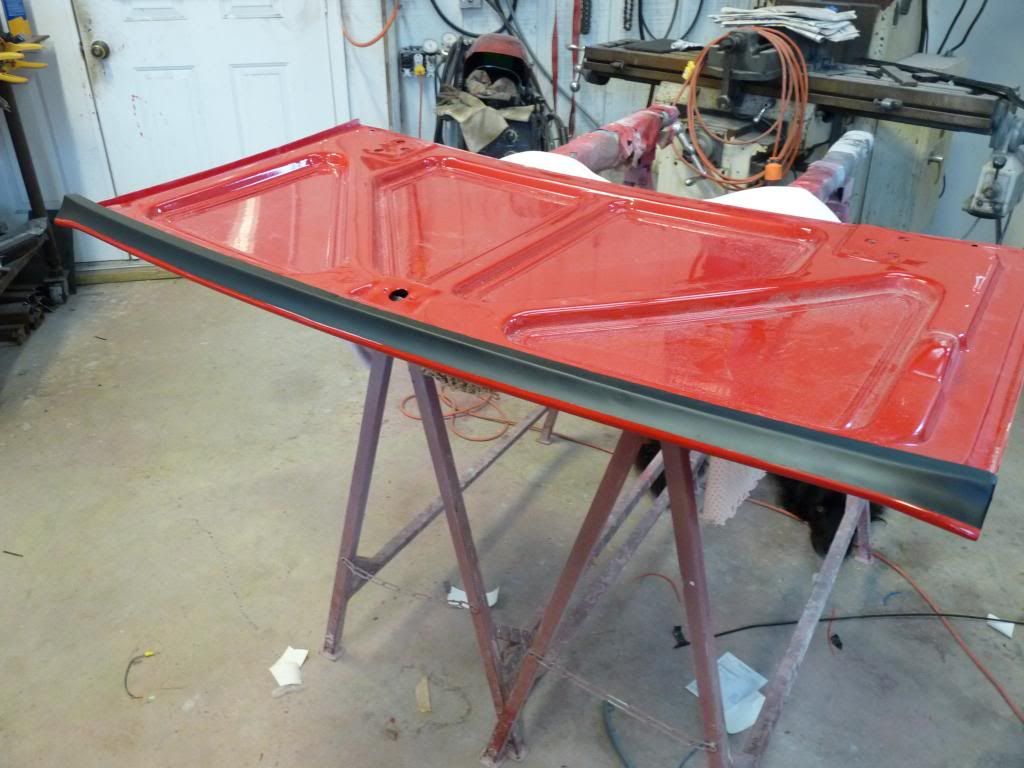
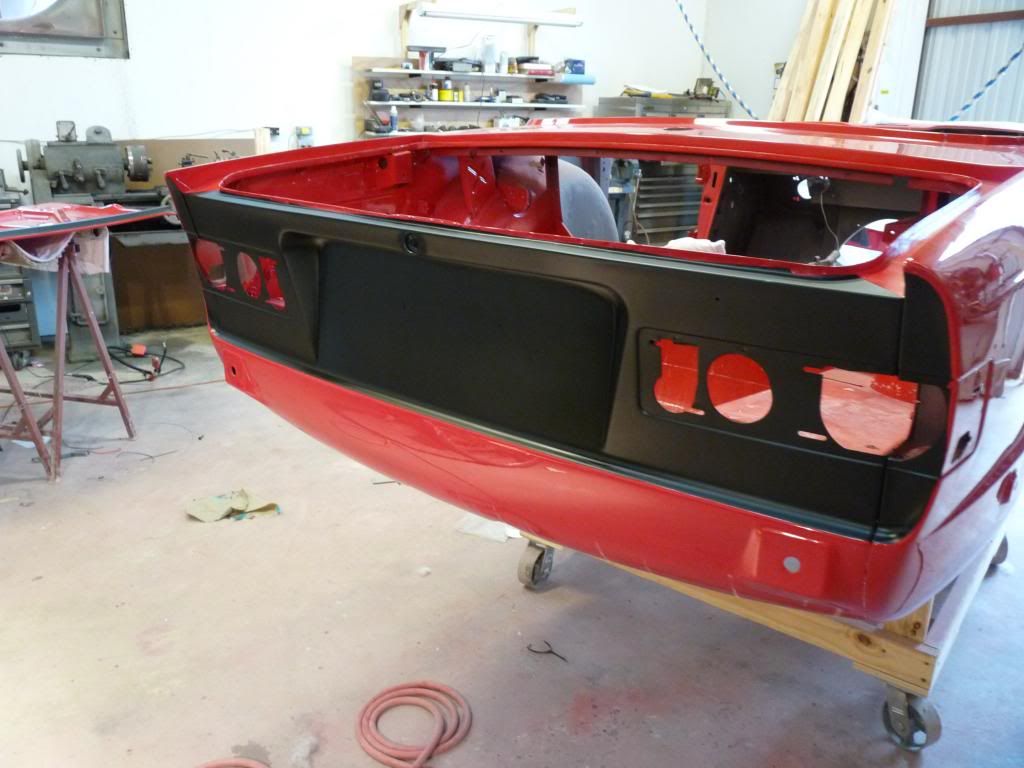
The engine compartment is done. Yea!! I used House of Kolor Kosmos Red over a white primer/sealer. 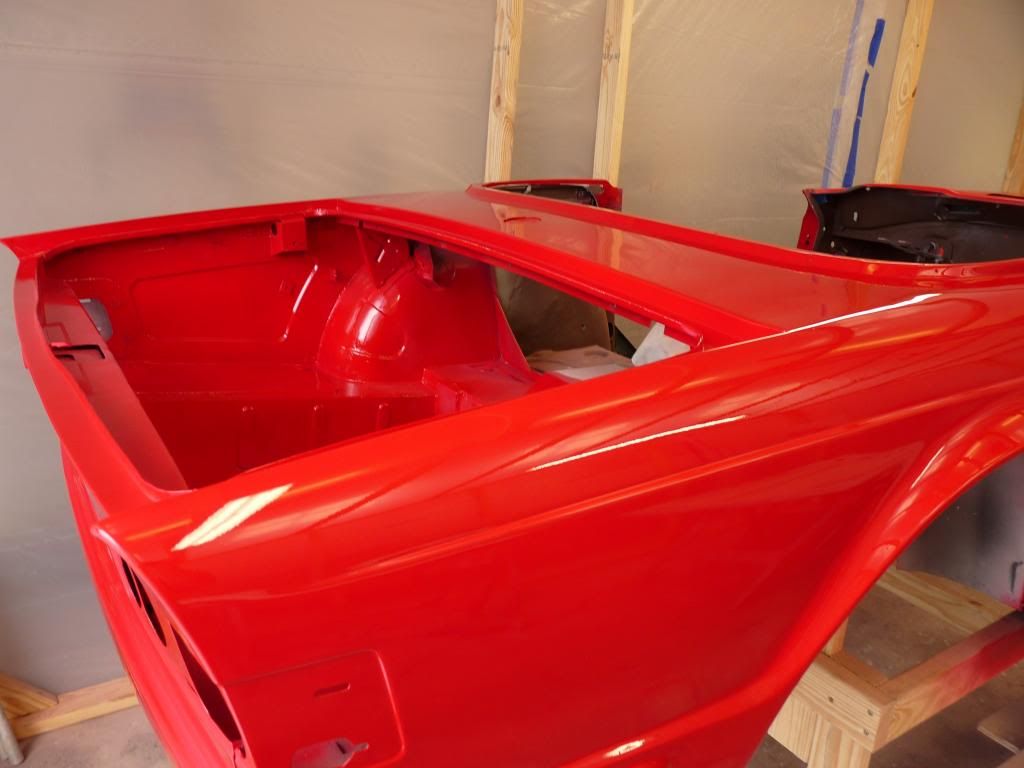
I built a paint booth in my shop and that is were I worked. After the body work was done and everything was primed and wet sanded to 600 grit this is the way I painted. I had not painted a car since I was 16 years old. I sprayed the car with an epoxy primer/sealer followed with 3 coats of color and 3 coats of clear..Color sanded with 600 git until smooth and sprayed 3 more coats of clear. Colored sanded with 1500 grit then 2000 grit. Buffed the car in 3 stages of compound. Then your done. It was a pretty good job but I am glad I did it. A lot of work but saved a lot of money. 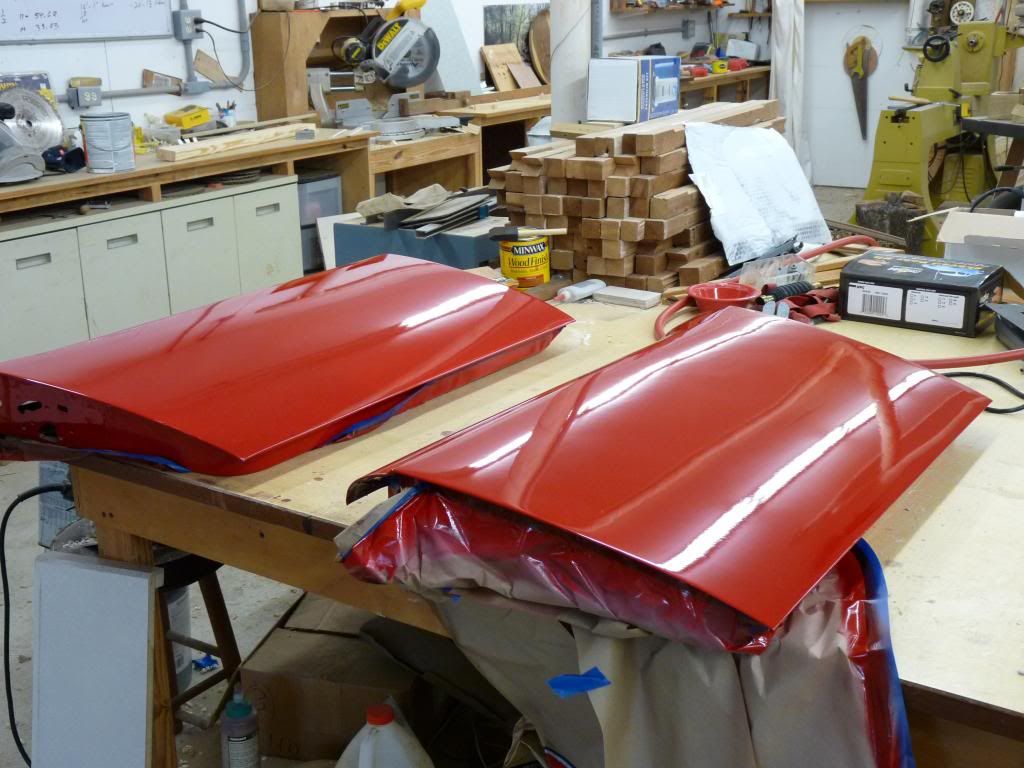
This is before color sanding. 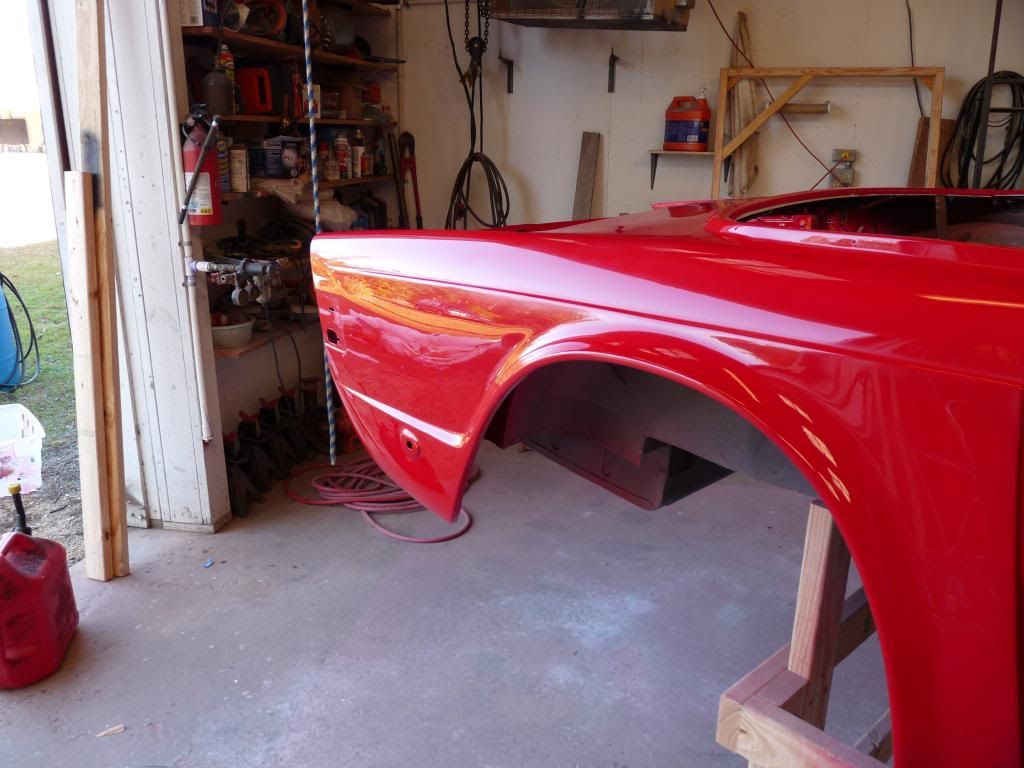
The paint booth came down and the painting is over. 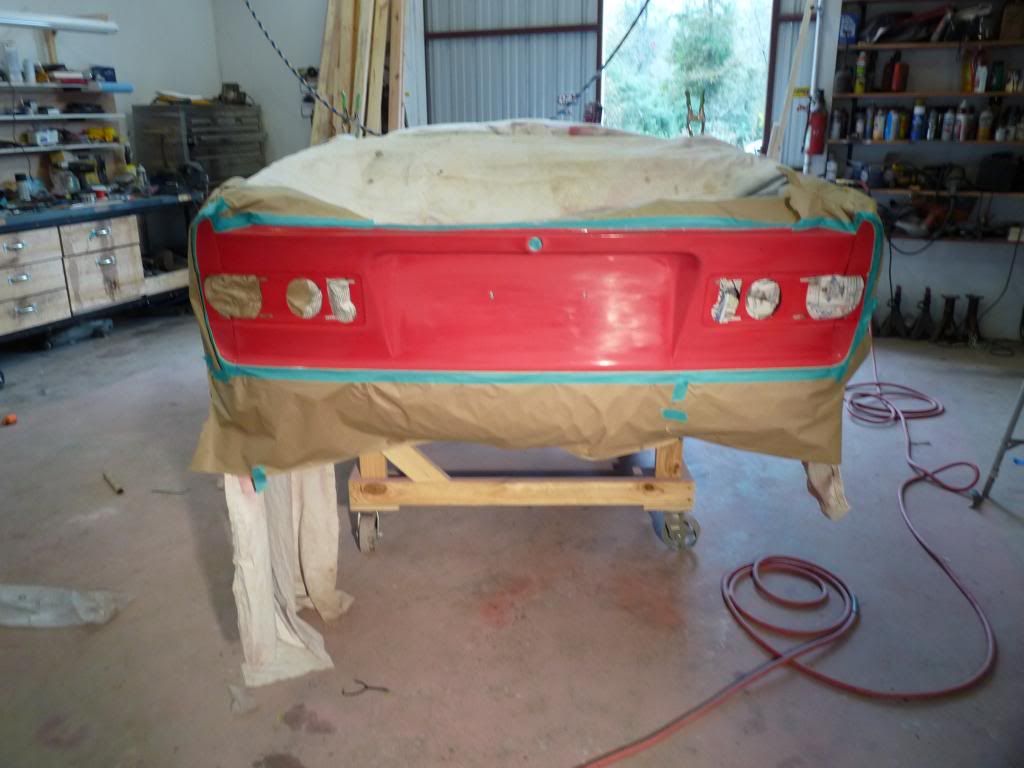
Except for painting the back black. 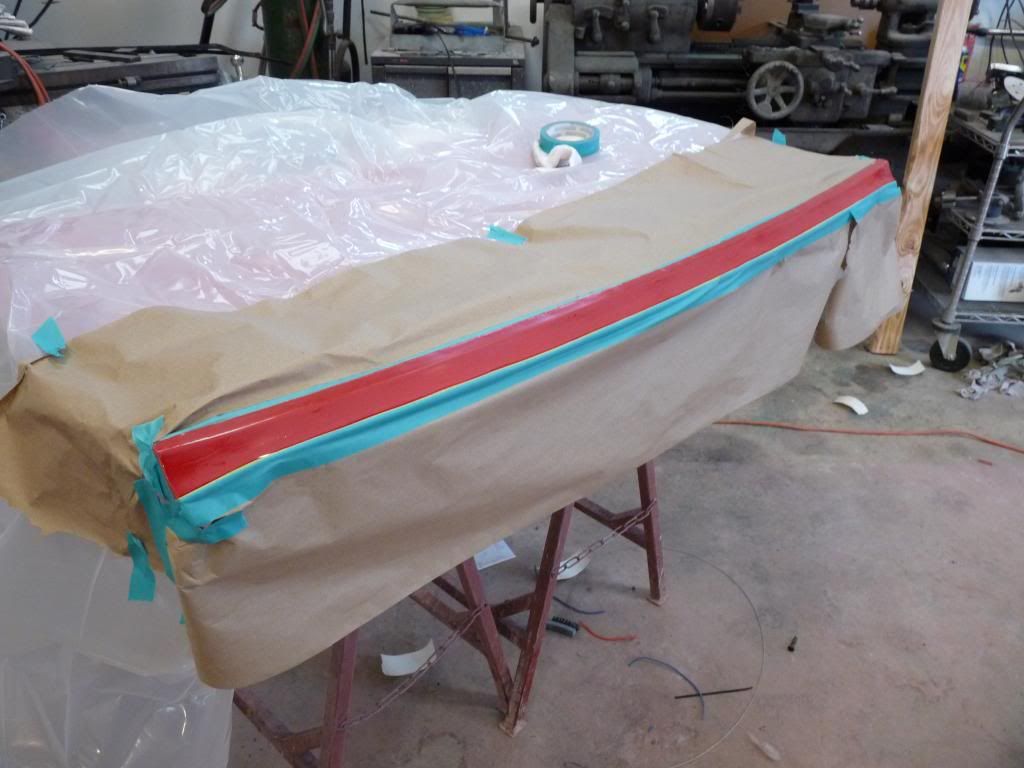
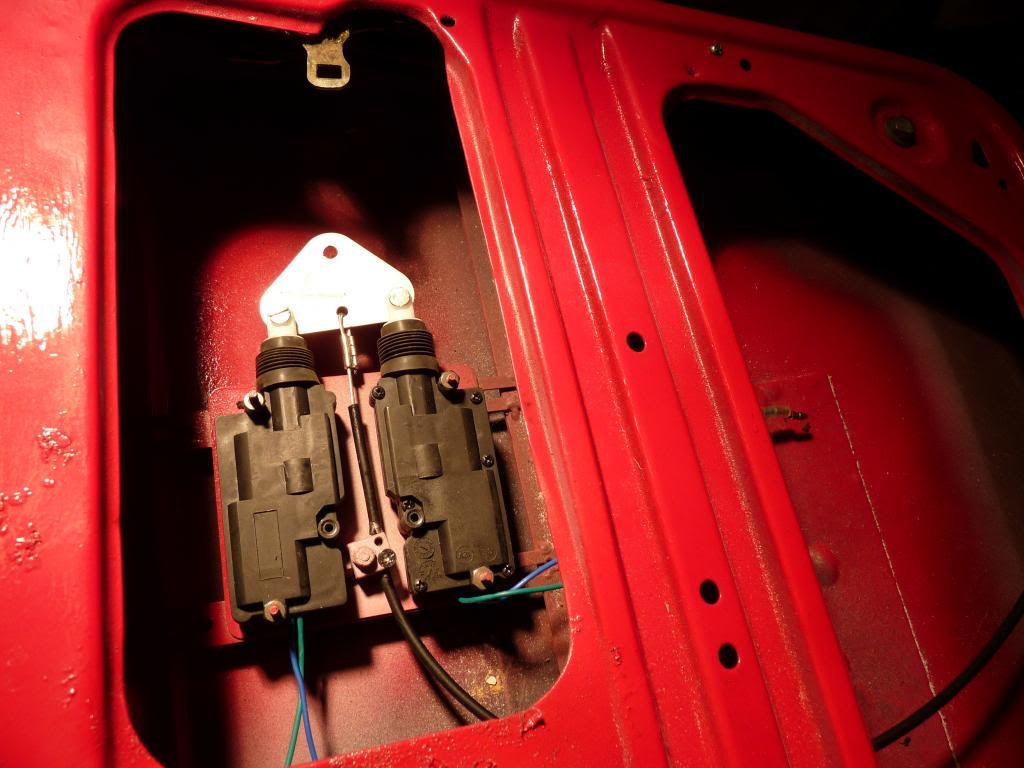
These are the shaved door motors. 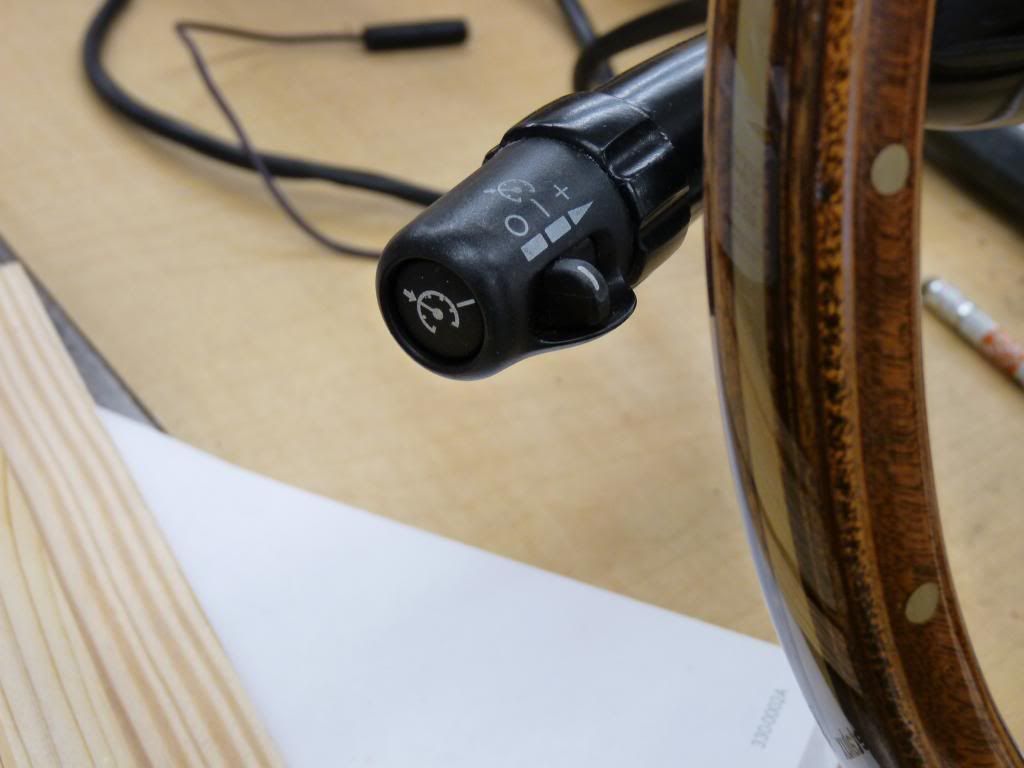
When I purchased my motor I was able to get anything I wanted off of the truck and this is the cruise control off of the column.. I adapted it to the turn signal. 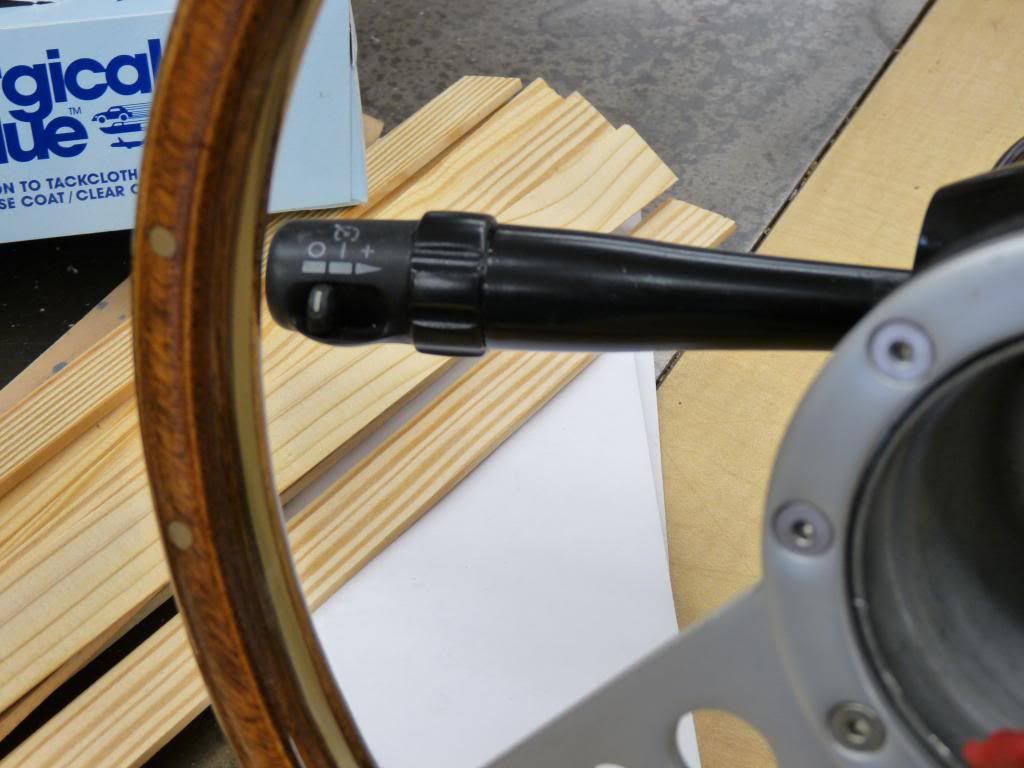
Putting the car back together. 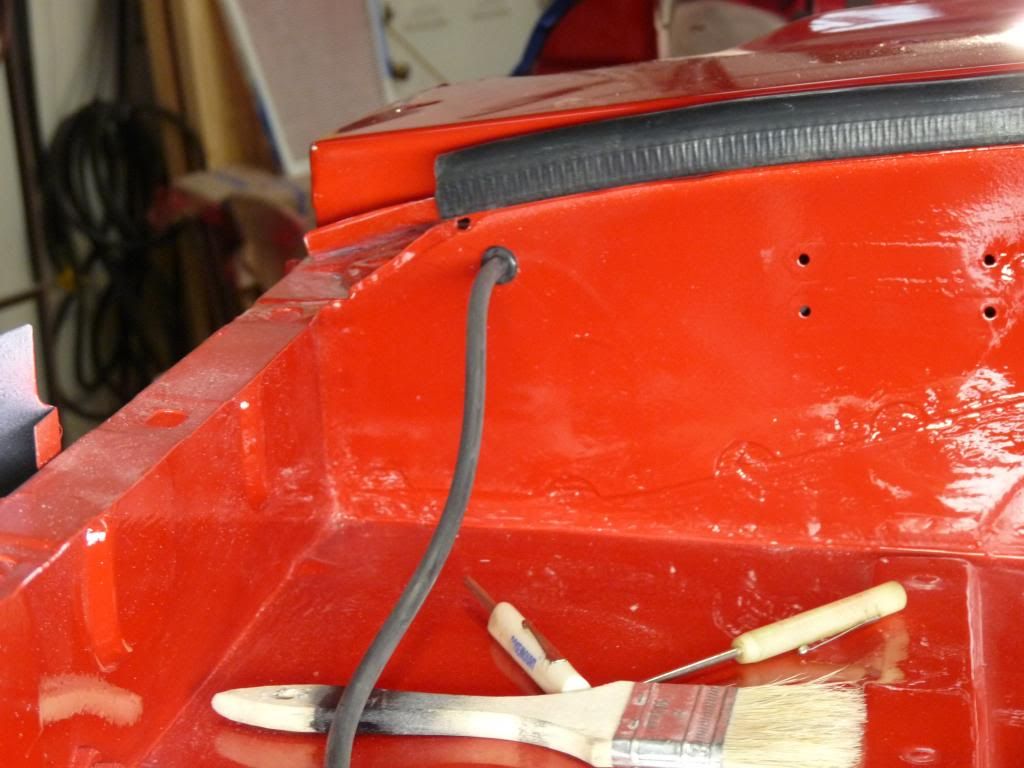
Ran the window washer through the firewall with a groumet. 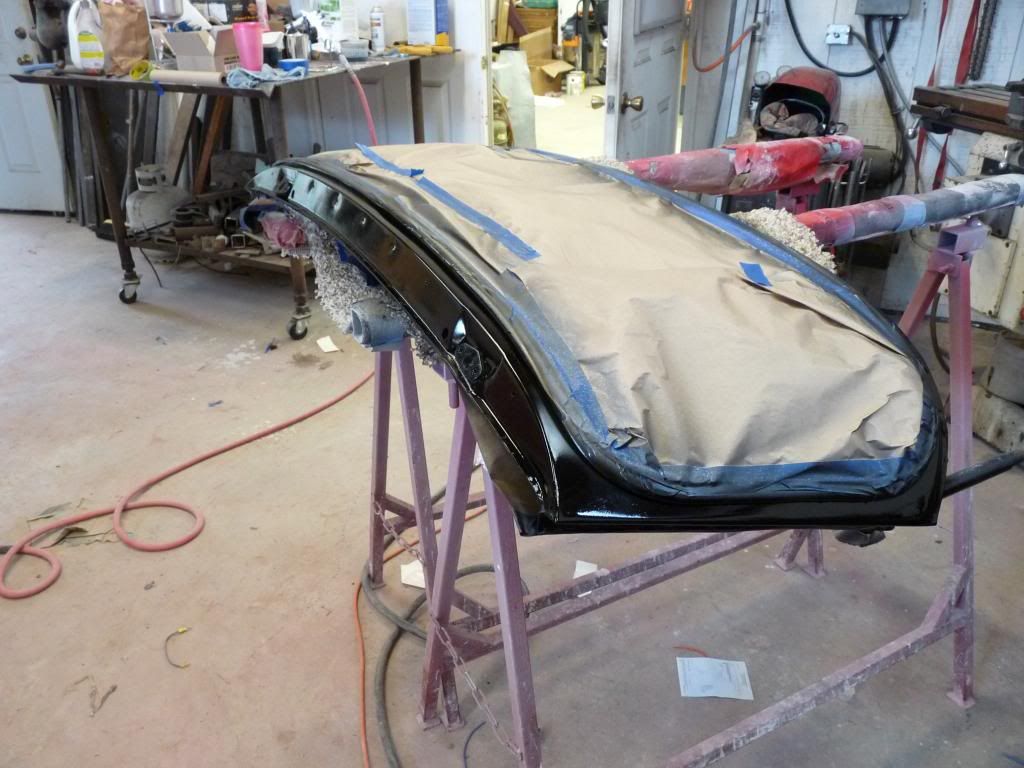
I painted the windshield frame with the same urathane paint with less flatening agent as the back of the car. I lifted the edge of the rubber and pushed tv coaxial cable under it all the way around the frame. This kept the rubber off of the frame and allowed me to sand and repaint. Once finished I pulled the cable out. Worked great. 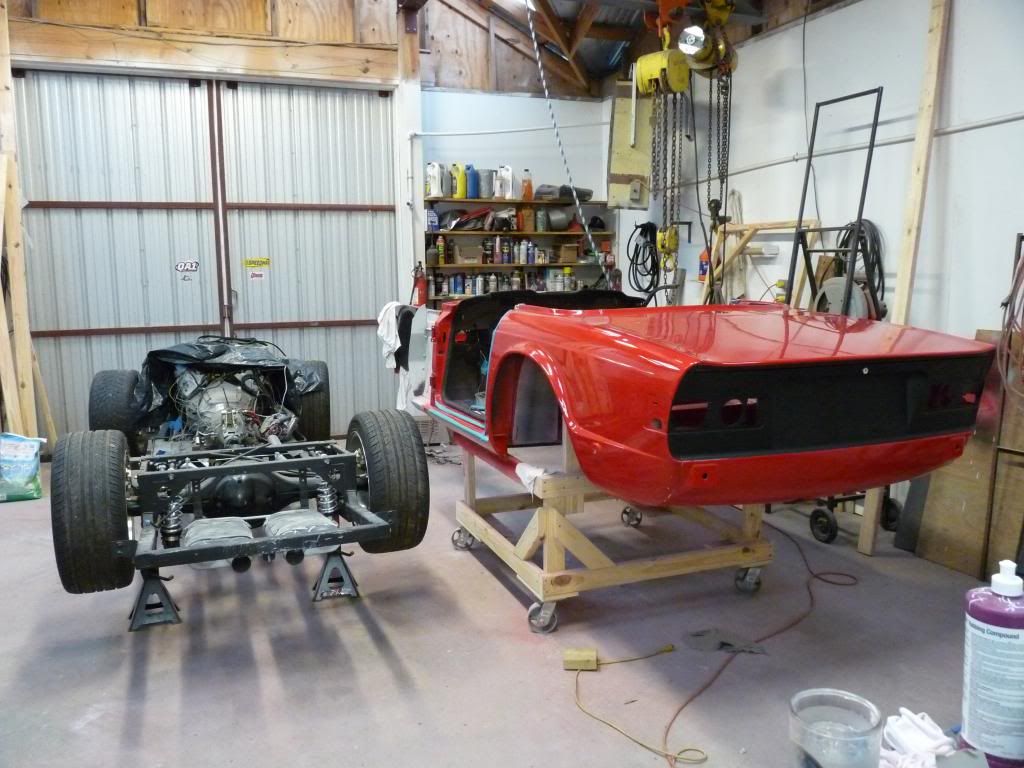
Getting ready to put the body on the frame. |
|
IaTR6 Dennis Costello Central Iowa (192 posts) Registered: 12/29/2007 02:53PM Main British Car: '73 TR 6 '97 Explorer 5.0 |
Re: 74 TR6 upgrade
Really enjoy the pictures and write-up Phil! I think I see "Smarties" candy in your hand? They are my favorite, but they don't work! My daughter got me a big bag for father's day, and I'm still no smarter.
Dennis |
|
Re: 74 TR6 upgrade
So you have spent over 2 years thinking, engineering, cutting and building on a defensless Little British Car ? Awesome job, I like it !
These things are labors of love but having it out on the road will be super, first time I drove mine with a V8 the front fenders were coat hanger wired on and with no rear wheel tubes the thing throw rocks at my head. LOL You have some awesome skills, nicely done, that is one sweet ride, or should I call it a pissed off roller skate ! |
|
Phil Crawford Philip crawford Bogalusa, La (80 posts) Registered: 02/01/2013 10:38PM Main British Car: 74 TR6 07 4.8L |
Re: 74 TR6 upgrade
Dennis,
I guess I got caught. They are one of my favorites but they didn't work for me either. My daughter also loves them. The only thing they do for me is make fatter. Thanks for looking at the progress. I know it is a lot to look at all at one time but I procrastinated for quite awhile. I have no doubt the journey is the destination because I have really enjoyed working thru all of the little issues. Thanks for looking Phil Don't eat all of the smarties./ |
|
|
|
Phil Crawford Philip crawford Bogalusa, La (80 posts) Registered: 02/01/2013 10:38PM Main British Car: 74 TR6 07 4.8L |
Re: 74 TR6 upgrade
Ed
A skate board it is and a labor of love. Thanks for looking I have more to come. Phil |
Sorry, only registered users may post in this forum.
British V8 Home Page
Photo Gallery
Web Forum
Annual Meetings
Contact Info
Site Map
British Race Car

© 2019 British V8™ All rights reserved. Website & graphic design by:
Curtis Jacobson.
BritishV8 Forum is hosted by
SiteWelder LLC,
and is powered by a
Phorum engine.